Managed WordPress Hosting: Adding A New Package

Creating packages for Managed WordPress Hosting is easy, and this step-by-step guide will get the server-side of your new website or app ready in no time!
Step 1
Sign in to My20i using a computer, tablet or phone.
In the Hosting Management section of the main dashboard, you’ll see the Manage Hosting icon. Click the button called ‘Add Package’.

Step 2
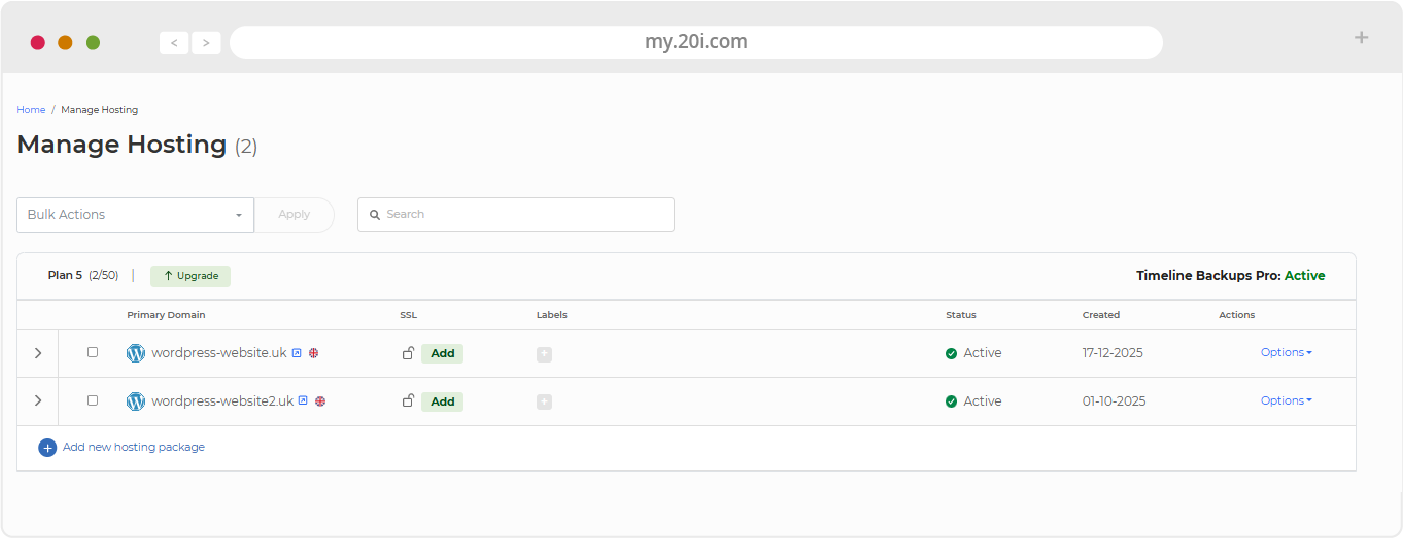
The Manage Hosting interface will load, and you’ll see all your live packages listed.
In the Managed Cloud Hosting section, click the ‘Add new hosting package’ button.
Step 3
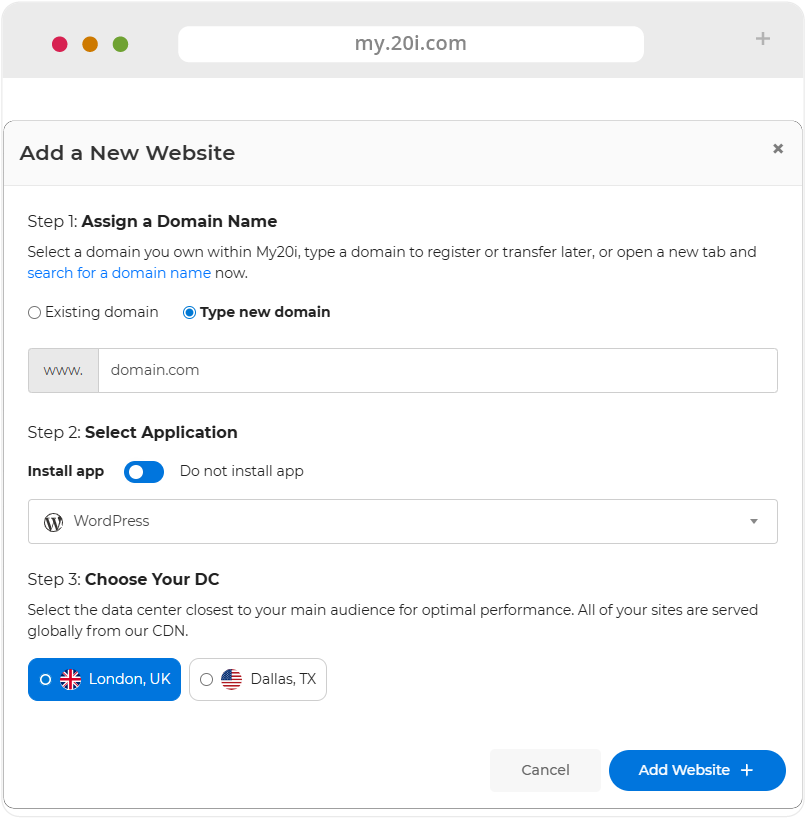
You’ll be presented with options for your new package:
Choose location: Choose the location nearest to your users. This will deploy your new package from the data centre that’ll deliver the optimal, lowest latency experience for your users, while our global CDN and pre-caching technology work together to deliver a blazing-fast performance for your international users.
Profile: Select the WordPress profile.
Enter Domain Name: Add the domain that you want your new package to use into the text box.
Step 4
Double-check that everything is correct with your options and, when you’re ready, click the blue ‘Add Website’ button. Your package will be ready in a few moments.
With your new package created, it’s time to introduce you to the powerful suite of tools in our Control Panel.
>> Next step: My20i Control Panel