Getting Started Guides: Reseller Hosting Questions
In-depth guides to help you get started with 20i Reseller Hosting.
Reseller Hosting: Getting Started
Congratulations! You’ve just signed up for the world’s most advanced Reseller Hosting platform.
Whether you’re integrating hosting services into your existing company or building a bespoke web hosting business from scratch, our Reseller Hosting has everything you need to make your business a success.
Contents in this guide:
- Reseller Hosting: Reseller Control Panel
- Reseller Hosting: Migrating existing hosting packages and domains to 20i
- Reseller Hosting: Registering new domain names
- Reseller Hosting: Creating and attaching a hosting package to a domain
- Reseller Hosting: Giving customers access to domains and hosting
- Reseller Hosting: Your customers’ control panel (StackCP)
- Reseller Hosting: HostShop
- Reseller Hosting: Supporting your customers
- Reseller Hosting: Connecting with your customers
- Reseller Hosting: Branding your business
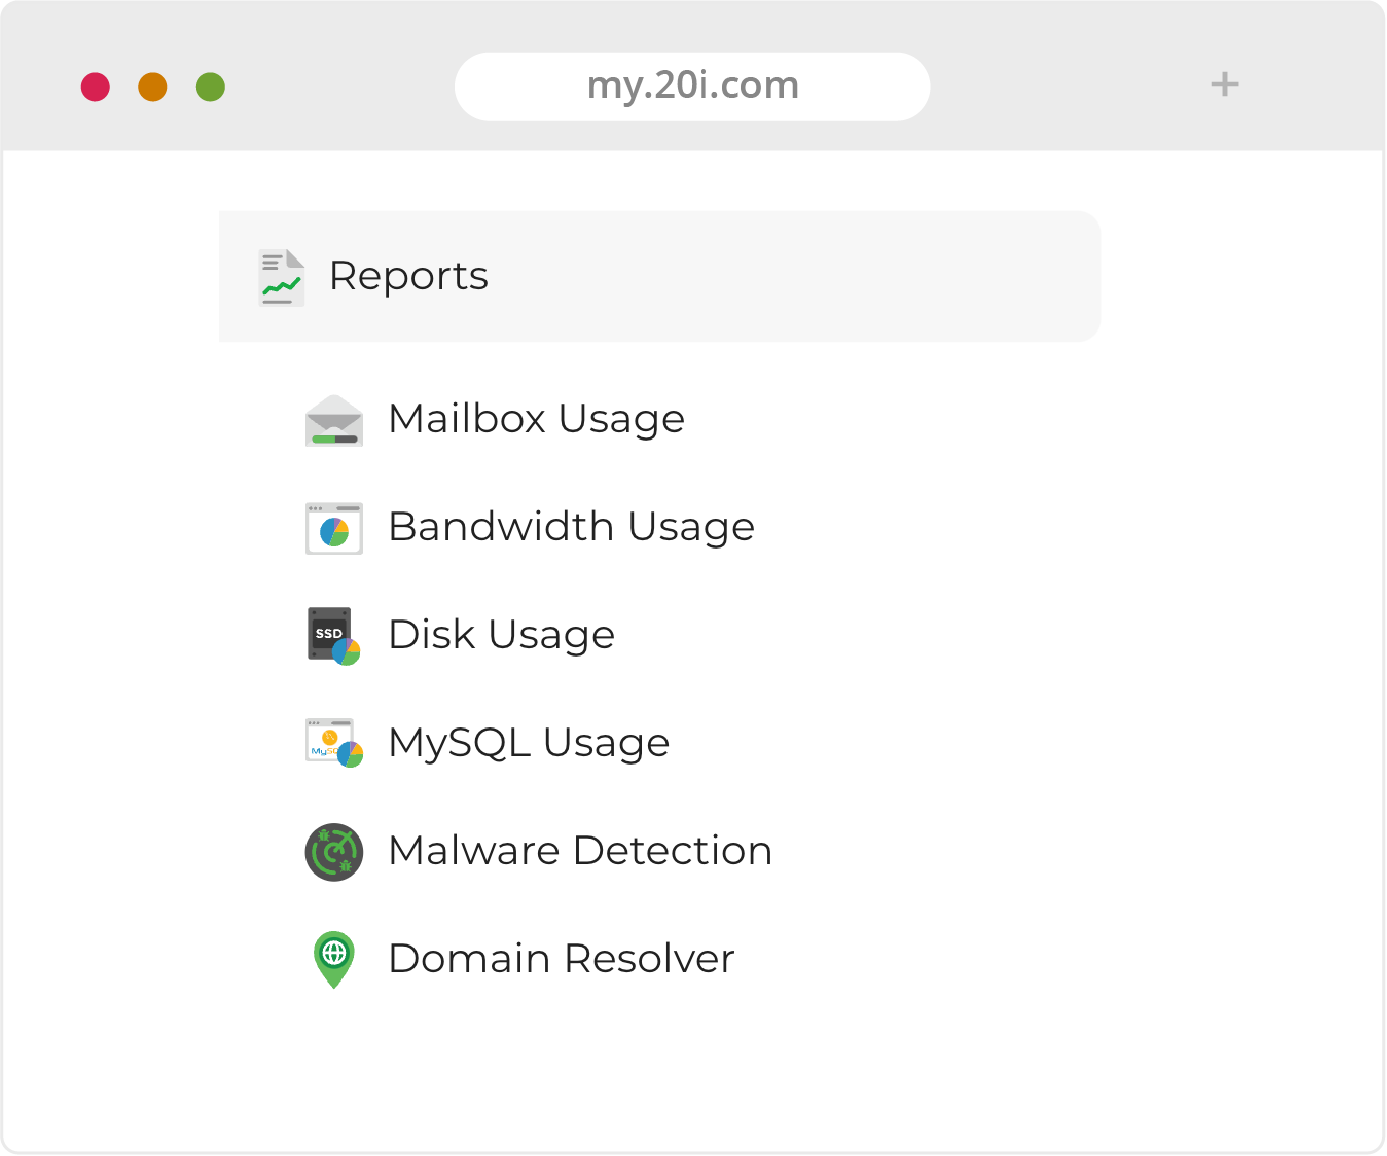
- Reseller Hosting: Reports
- Reseller Hosting: Add-ons
- Reseller Hosting: CDN and Website Acceleration
- Reseller Hosting: Customer Services and Account Settings
- Reseller Hosting: Using Git to develop websites
- Reseller Hosting: Further help
To get started with Reseller Hosting, please log into your 20i account at https://my.20i.com before continuing with this guide.
If you encounter an issue at any point or you’re not sure what to do next, please raise a ticket in My20i and our friendly support team will help you out.
>> Next step: Reseller Control Panel
 Ruth Turner
Reseller Hosting: Reseller Control Panel
After logging into your 20i account, you’ll be presented with your My20i control panel home page.
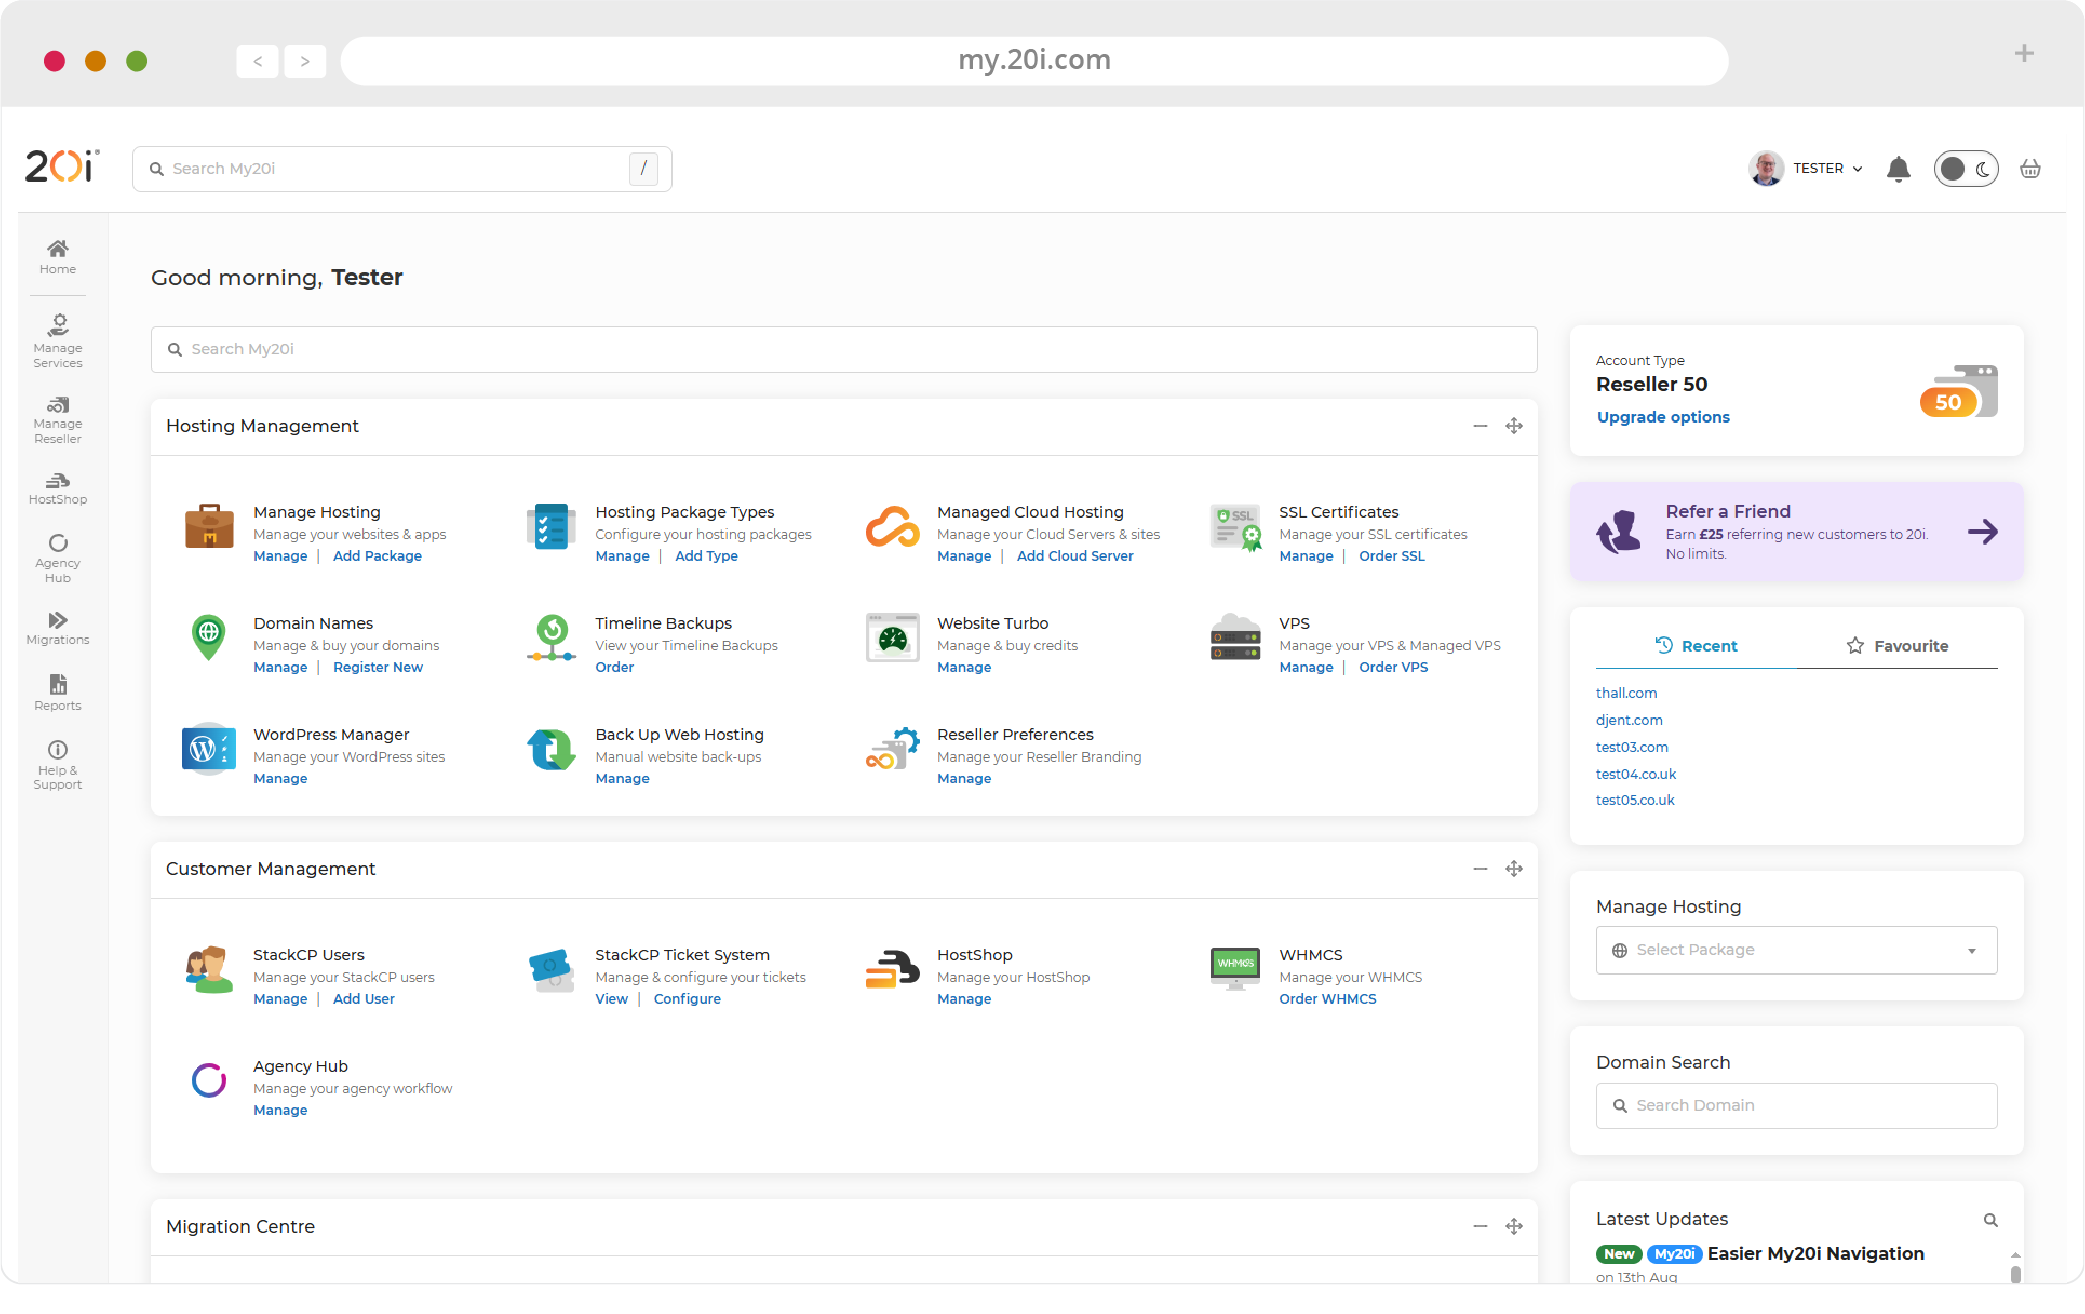
This is the command centre of your Reseller Hosting and gives you control over everything from your contact details to the features of your customers’ hosting packages.
My20i Control Panel Sections
Hosting Management
Here’s where you can manage your hosting. The nerve centre of your business. It’s where you may spend most of your time after you have made your first purchases.
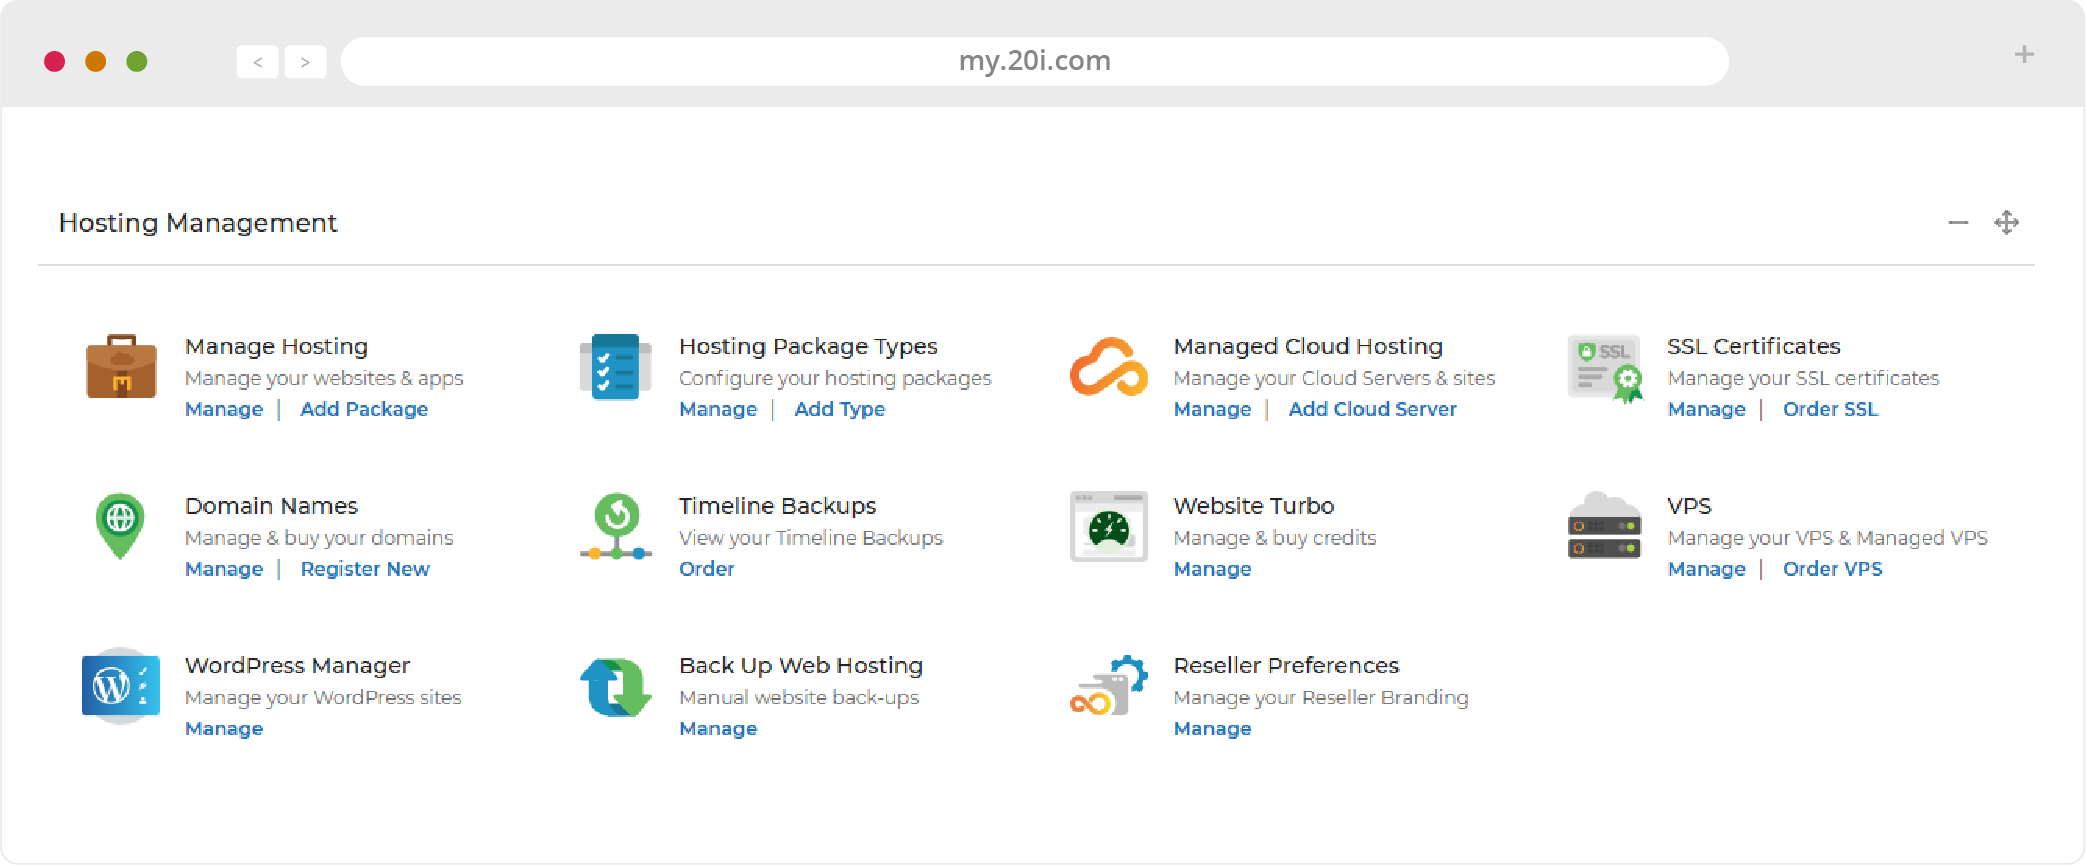
- Manage Hosting - Add, renew, manage and delete hosting packages
- Hosting Package Types - Add, assign, edit, use and remove hosting package types
- Managed Cloud Hosting - Manage your cloud servers and sites
- SSL Certificates - Ensure visitors get an encrypted ‘https’ connection by ordering a free or paid SSL certificate
- Domain Names - Add, renew, manage and delete domain names in bulk
- Timeline Backups - If enabled, manage 30 days of automatically backed up snapshots for your websites and databases. Timeline Backups Pro includes email, email accounts and individual file and folder restoration
- Website Turbo - A cutting-edge upgrade designed to significantly boost the speed and performance of your websites through HF Computation and Pre-Caching
- VPS - Order and manage a self-managed virtual private server at a discounted price for resellers
- WordPress Manager - Manage all your WordPress websites in bulk. This includes themes, plugins, users and more, controlled from a single dashboard
- Back Up Web Hosting - Manually back up individual or multiple packages
- Reseller Preferences - Create and manage hosting packages, customise your service offering and access our API and WHMCS
Customer Management

- StackCP Users - Manage all your StackCP Users (customers)
- StackCP Ticket System - Our support ticketing system, included within My20i.
- HostShop - HostShop automates your hosting business, covering all aspects of ecommerce and billing.
- WHMCS - Here’s where you can buy discounted WHMCS licenses and download our WHMCS module that integrates this web hosting management tool with My20i
- Agency Hub - A powerful interface tailored for web designers and developers to manage billing, cloud servers, clients and projects from a single, intuitive dashboard
Migration Centre

- Migrations Overview - Migrate and manage your customers quickly and automatically with our Migration Centre
- Platform Transfer - Start and manage your platform transfers
- Domain Transfers - Transfer and manage domains from another provider
Support & Customer Services

- Customer Services - Contact 24x7 support and view your tickets
- Support Database - Here’s where you can search our comprehensive support database and get in touch with our team.
- Getting Started - Information about our products, focused on Resellers. You can use these guides for hints and tips on how to explain and sell our different hosting products
- Give Feedback - Here’s where you can tell us what you think and help us improve your user experience
Marketing Resources & Guides

- Product Guides - Information about our products, focused on Resellers. You can use these guides for hints and tips on how to explain and sell our different hosting products
- White-Label Marketing Copy - You can use this promotional copy - which doesn’t mention 20i - as a basis for your website information. This information is free to use as-is, but we’d recommend adapting it to suit your company’s style and tone
- Data Sheets - White-label technical data on our hosting and domain products. These specs will be helpful for you to answer questions, and as they’re unbranded, you send them on to potential customers.
- Free Resources - A selection of copyright-free resources to use on your websites. They include logos, HTML templates, WordPress themes, ‘coming soon’ page templates, stock photos and Christmas Card Templates
- Green Hosting Badges - Branded and unbranded website ‘badges’, which you can download or embed on your website to show your commitment to the environment. As well as PNG and SVG versions, we also include PSD files, making them easy to modify
Time-Saving Homepage Sidebar
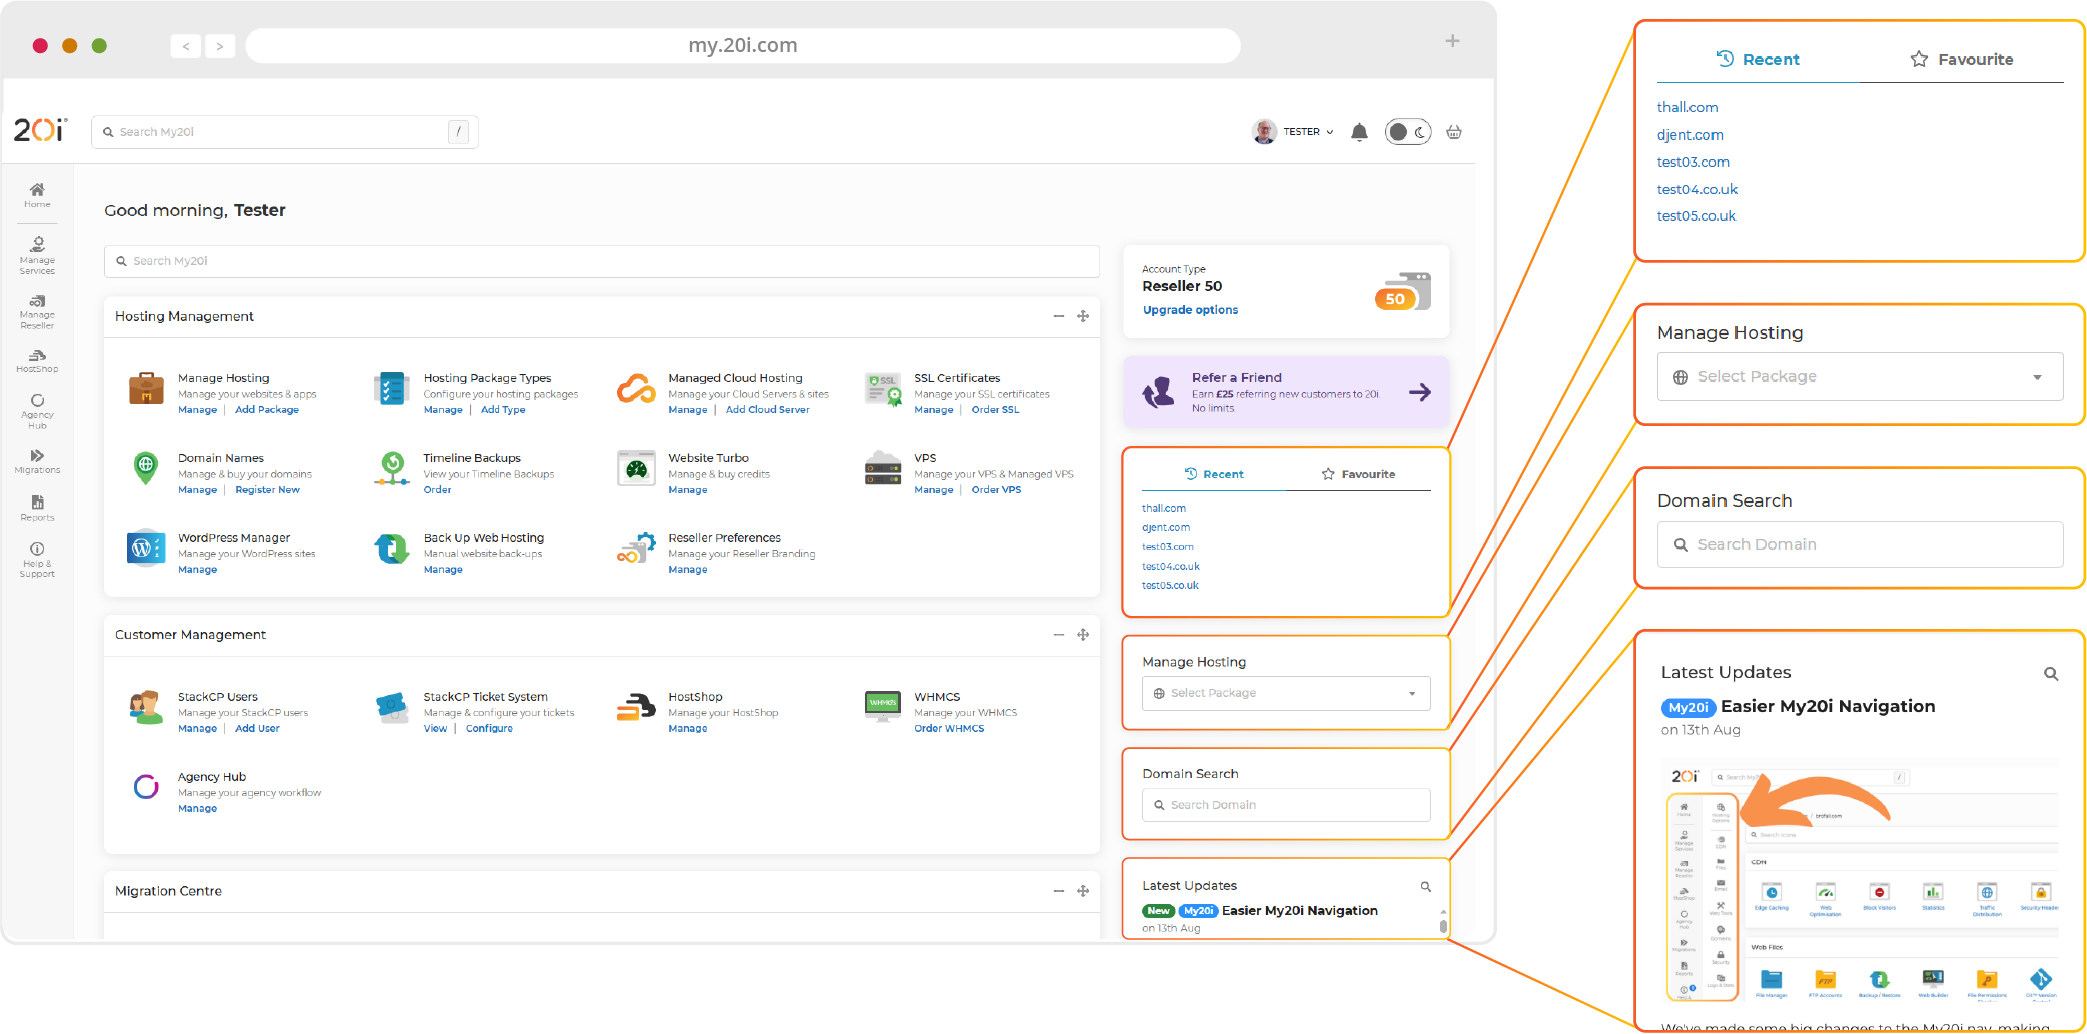
On the right hand side of the My20i homepage, there are a number of features that provide fast and convenient access to hosting packages. The last five hosting packages that you managed are displayed, and you can set packages as ‘favourites’, so they always appear here in the favourites tab.

To set a favourite, select the asterisk on the package’s page after managing it. Other features include notifications about scheduled maintenance, a fast drop-down management selector, a domain search and the latest updates about 20i development.
Next Steps?
Once you’re familiar with the general layout of your Hosting Management area you may want to look at migrating websites in from your previous provider in the next chapter.
If you’re new to Reseller Hosting and you don’t need to migrate hosting packages from your last provider, you can skip to registering new domain names and then assigning them to hosting packages.
>> Next step: Migrating existing hosting packages and domains to 20i
 Ruth Turner
Reseller Hosting: Registering New Domain Names
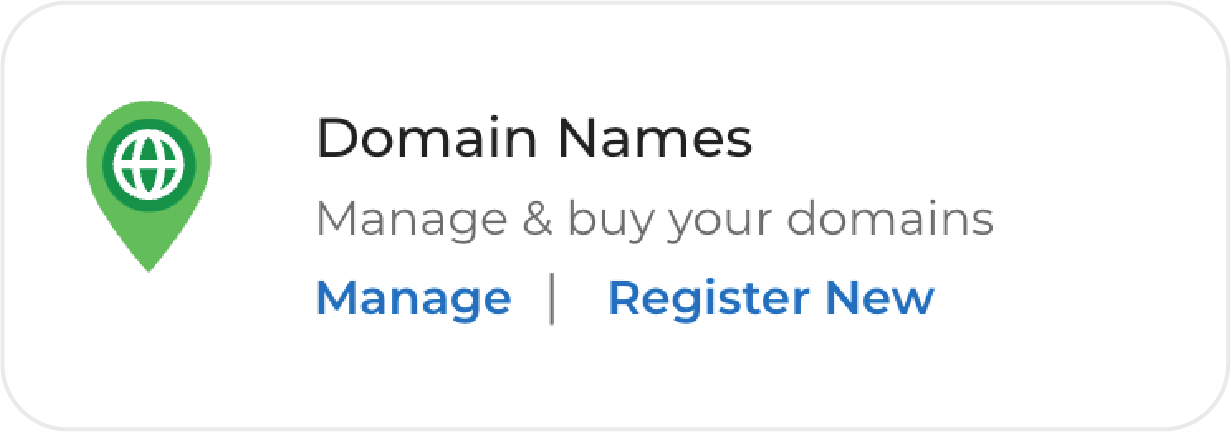
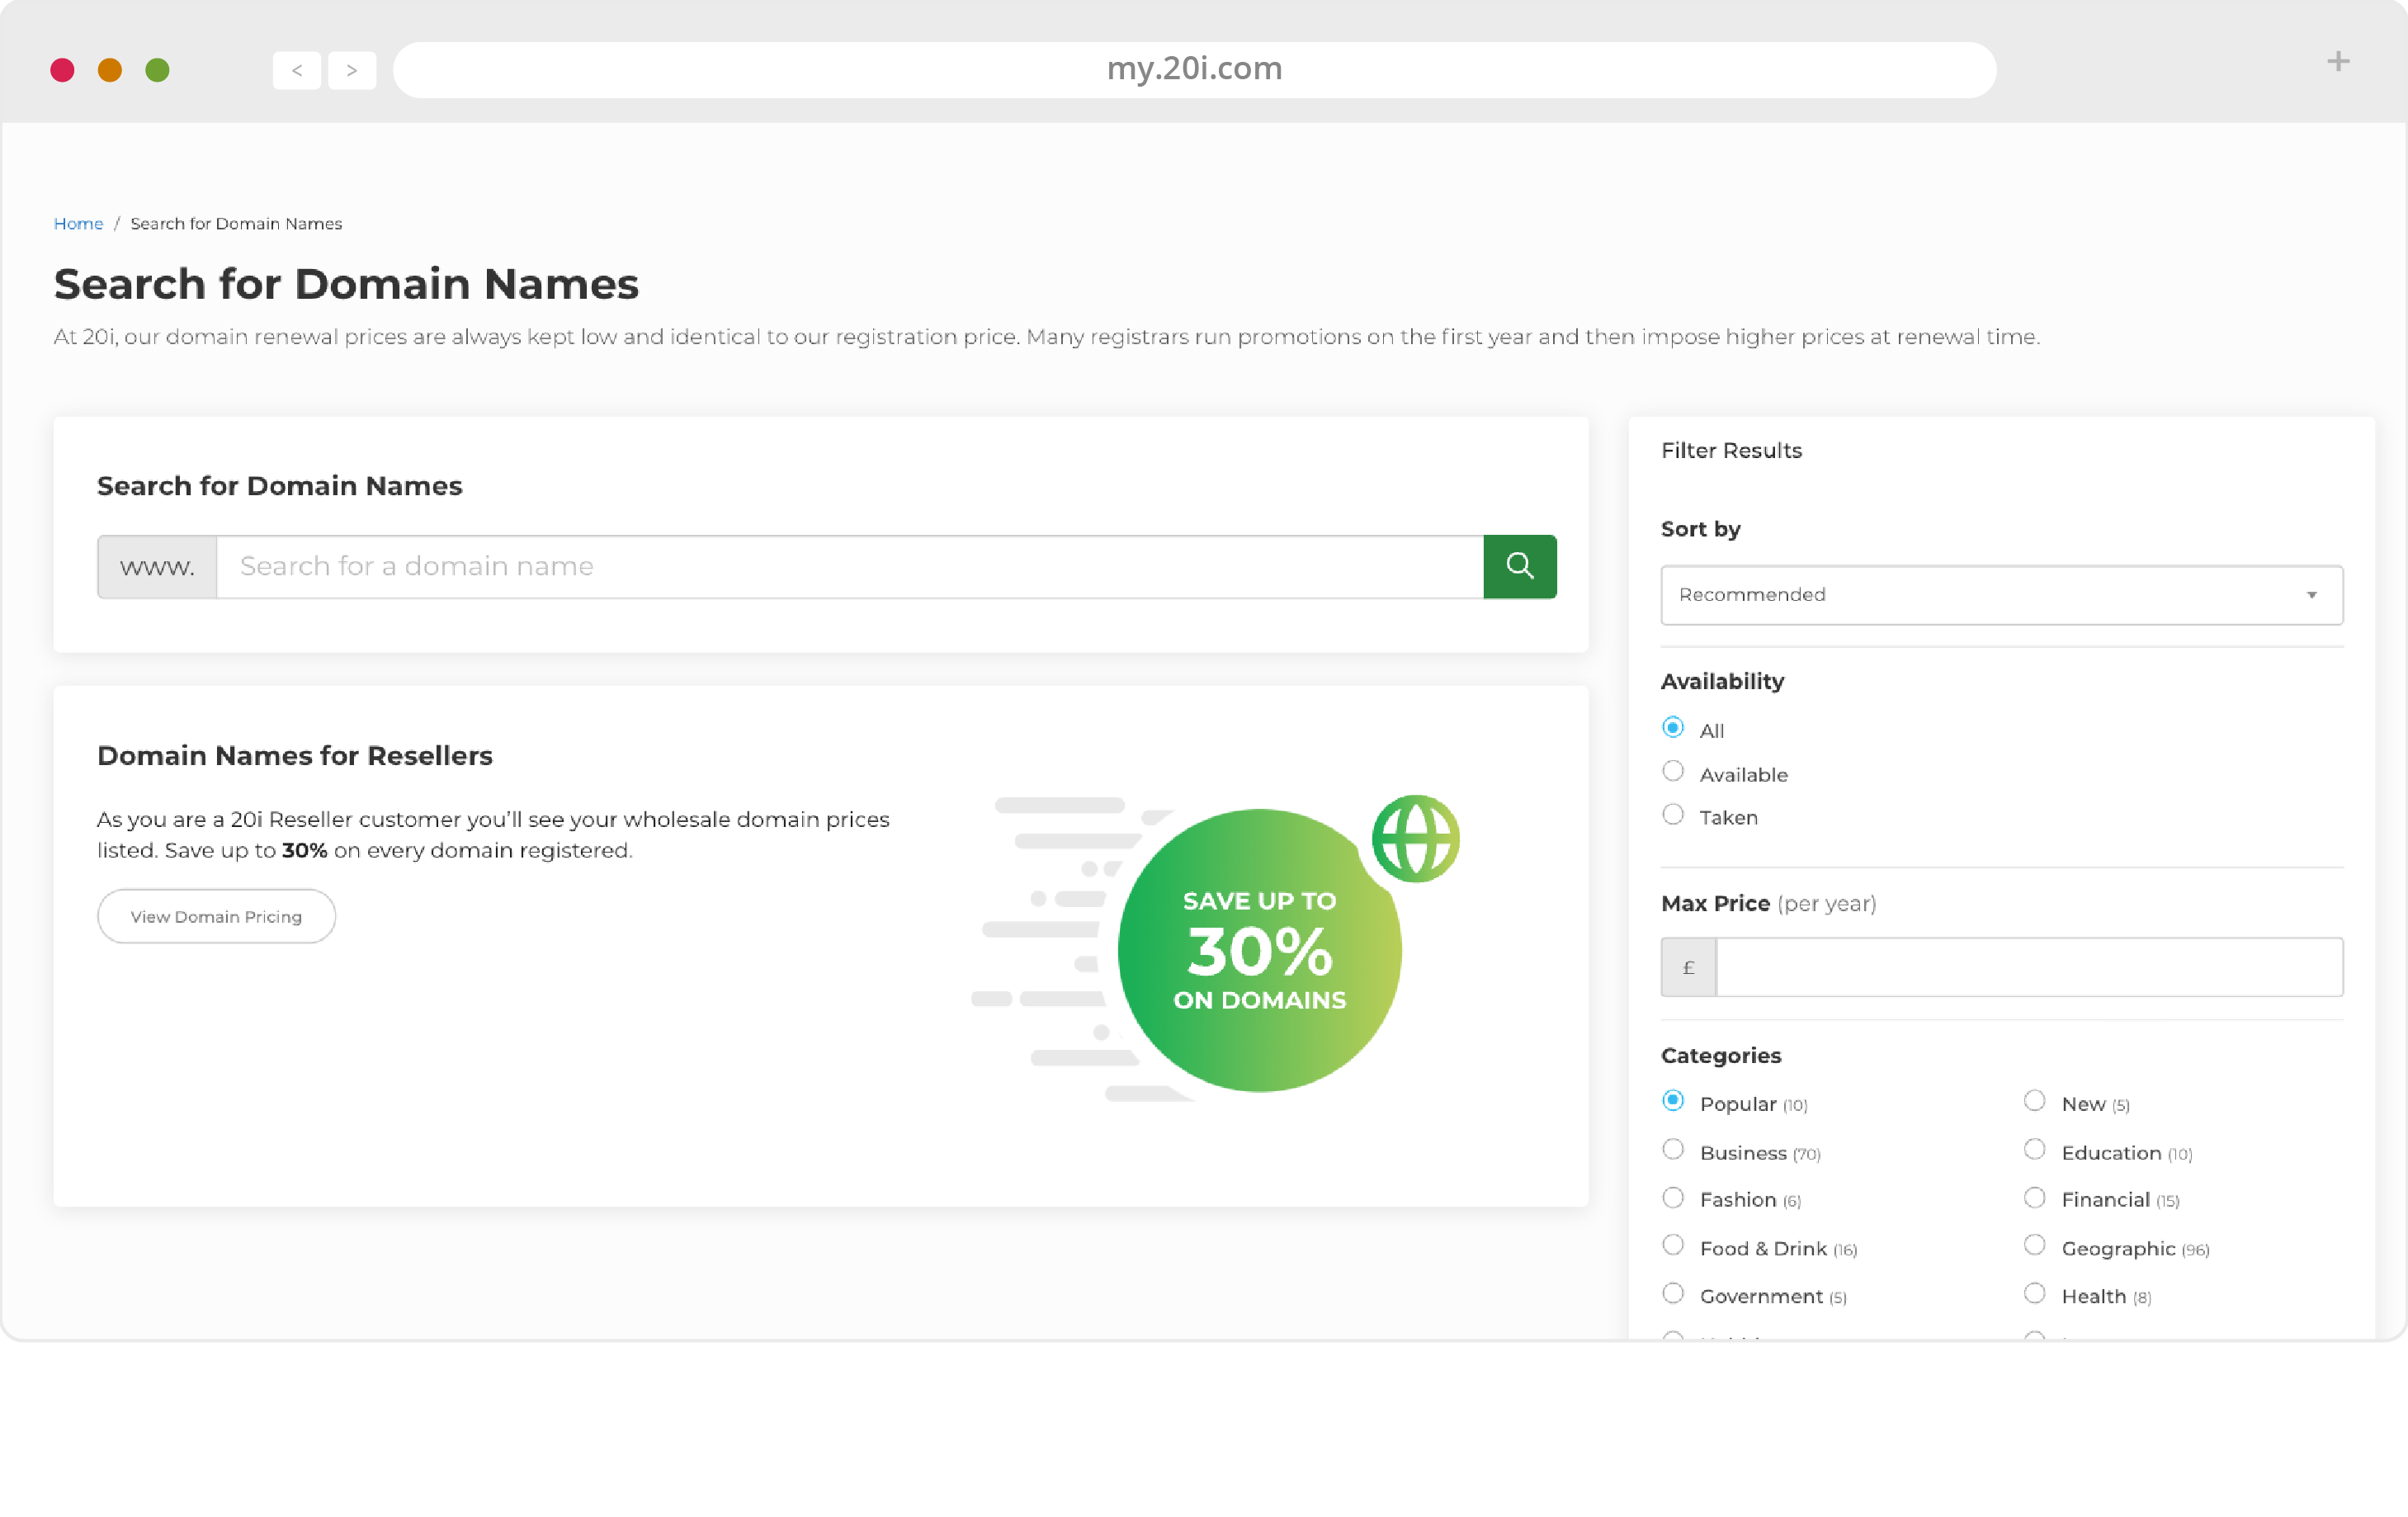
To register a new domain name, head to the Domain Names icon in the ‘Hosting Management’ section of your My20i control panel, and click ‘Register New’.
From here, you can search for available domain names, filter them and check out as normal.
If you’re registering a domain name for a customer or your own website, the next step is to add a hosting package, which is covered in the next section.
>> Next step: Creating and attaching a hosting package to a domain
 Ruth Turner
Reseller Hosting: Creating and Attaching a Hosting Package to a Domain
Now we’ll go through the steps of creating attaching a hosting package to a domain.
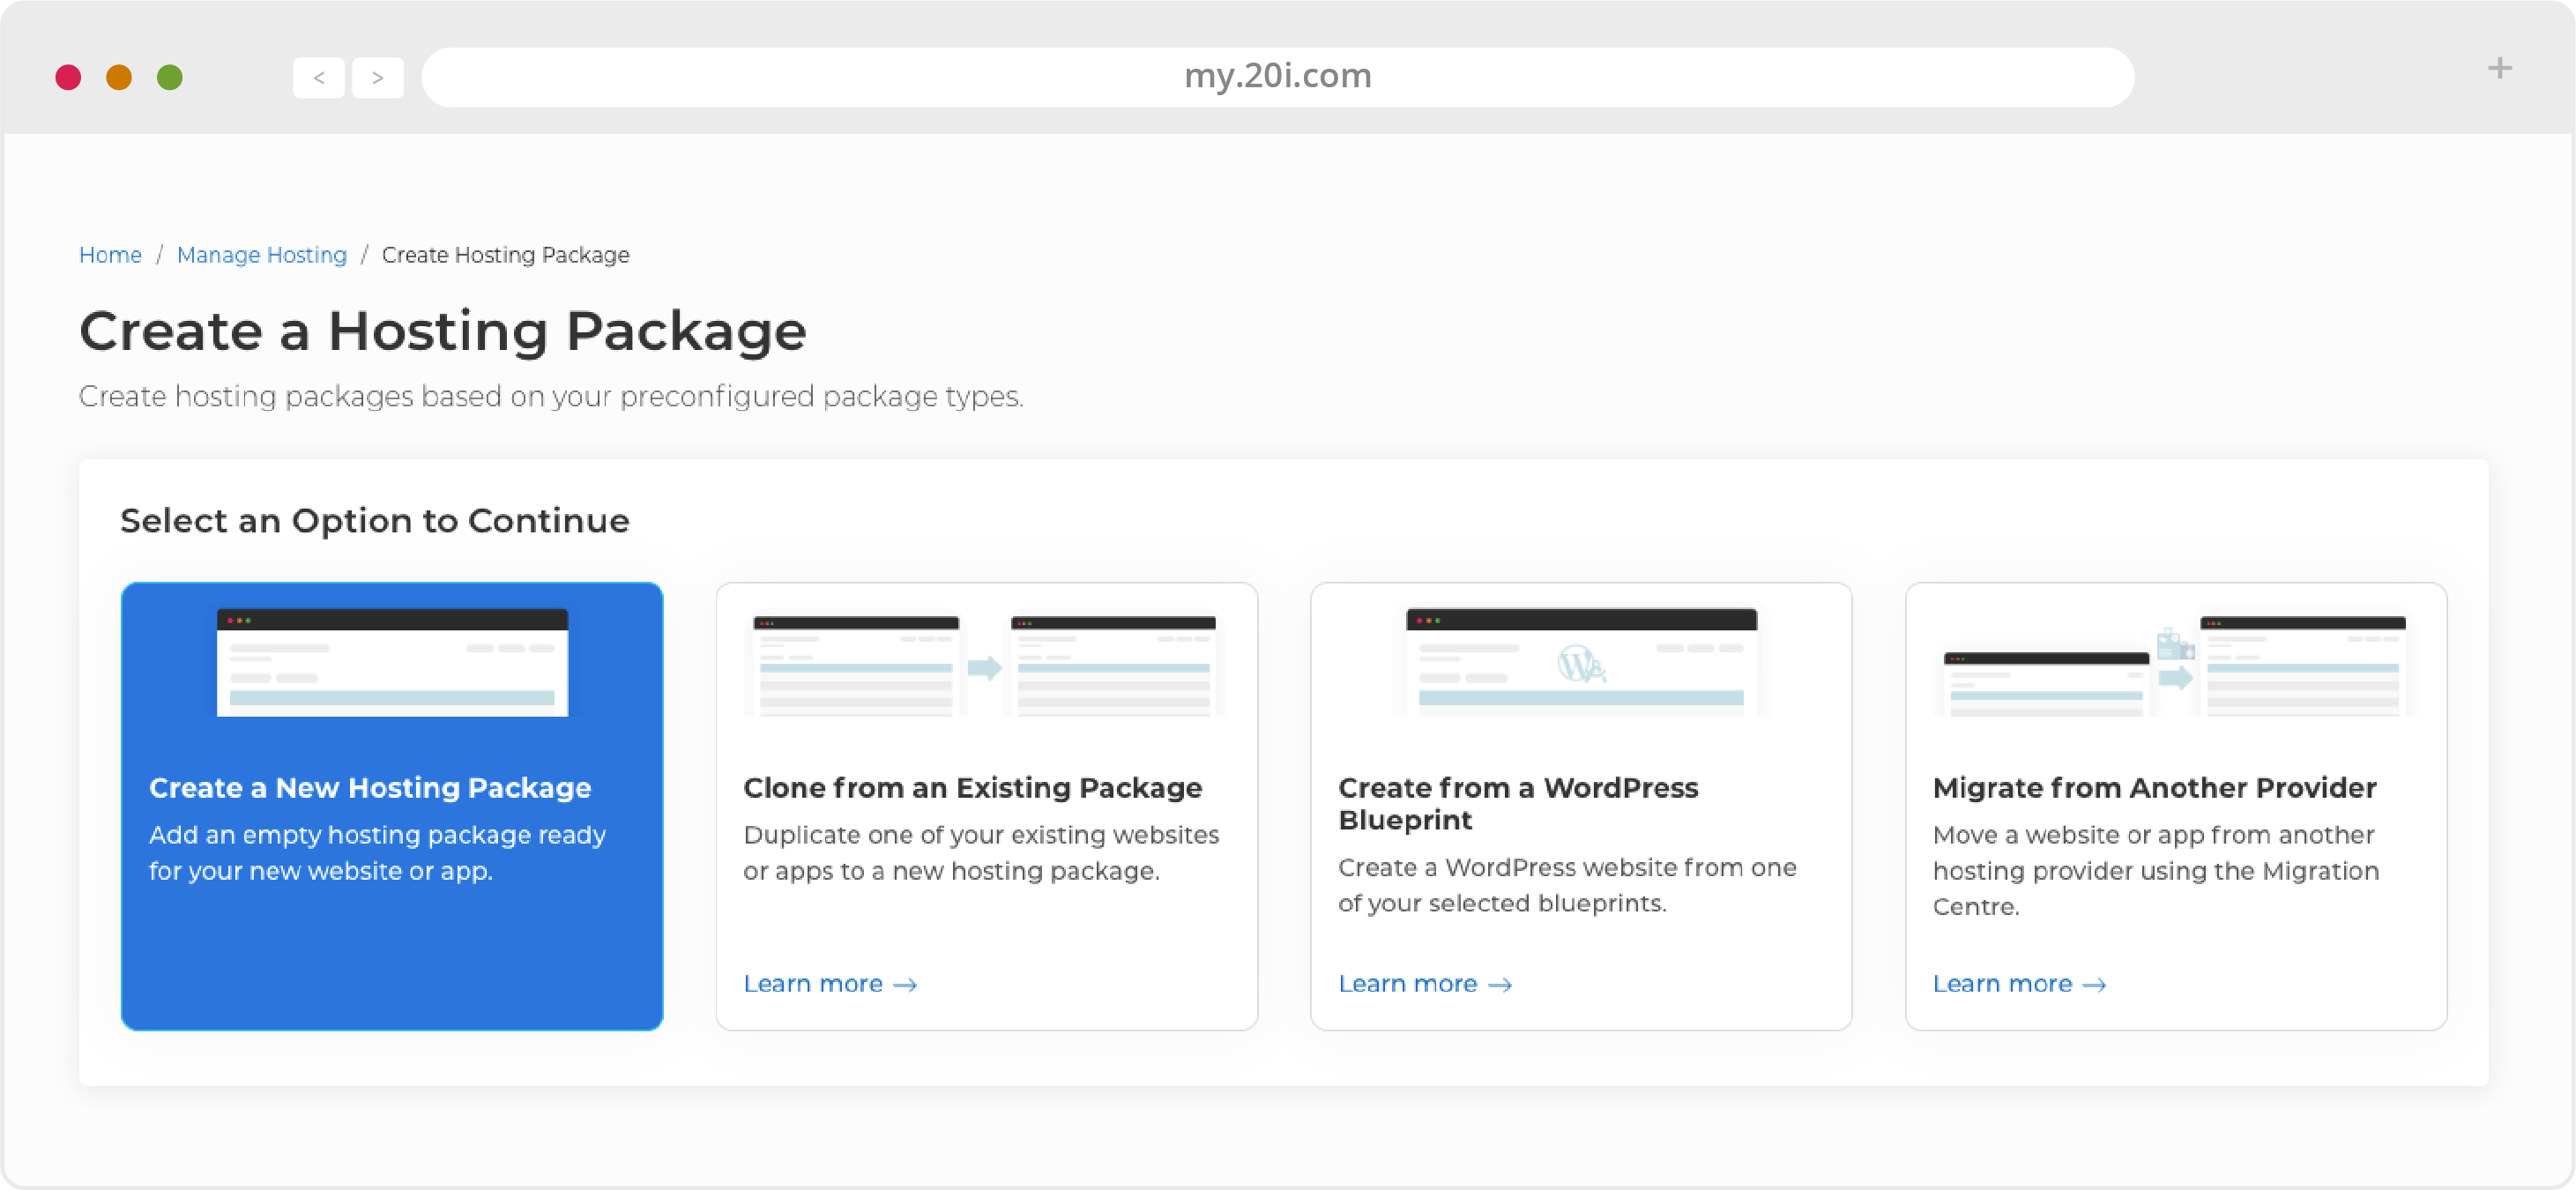
- From the ‘Hosting Management’ icons, choose Manage Hosting and click ‘Add package’

- From the available options choose ‘Create a New Hosting Package’
- Choose the domain you want to use from the drop-down menu or use the toggle to Type Domain name (it can be registered at 20i or with a different provider). You can now choose a hosting package for the domain.

- At 20i you can use a domain reference. This means you can call a hosting package any name you want and it doesn’t have to be linked to a live domain name. We provide a temporary URL for all packages which allow you to visit the site before the domain resolves, so this is a way of building sites before the domain is registered.
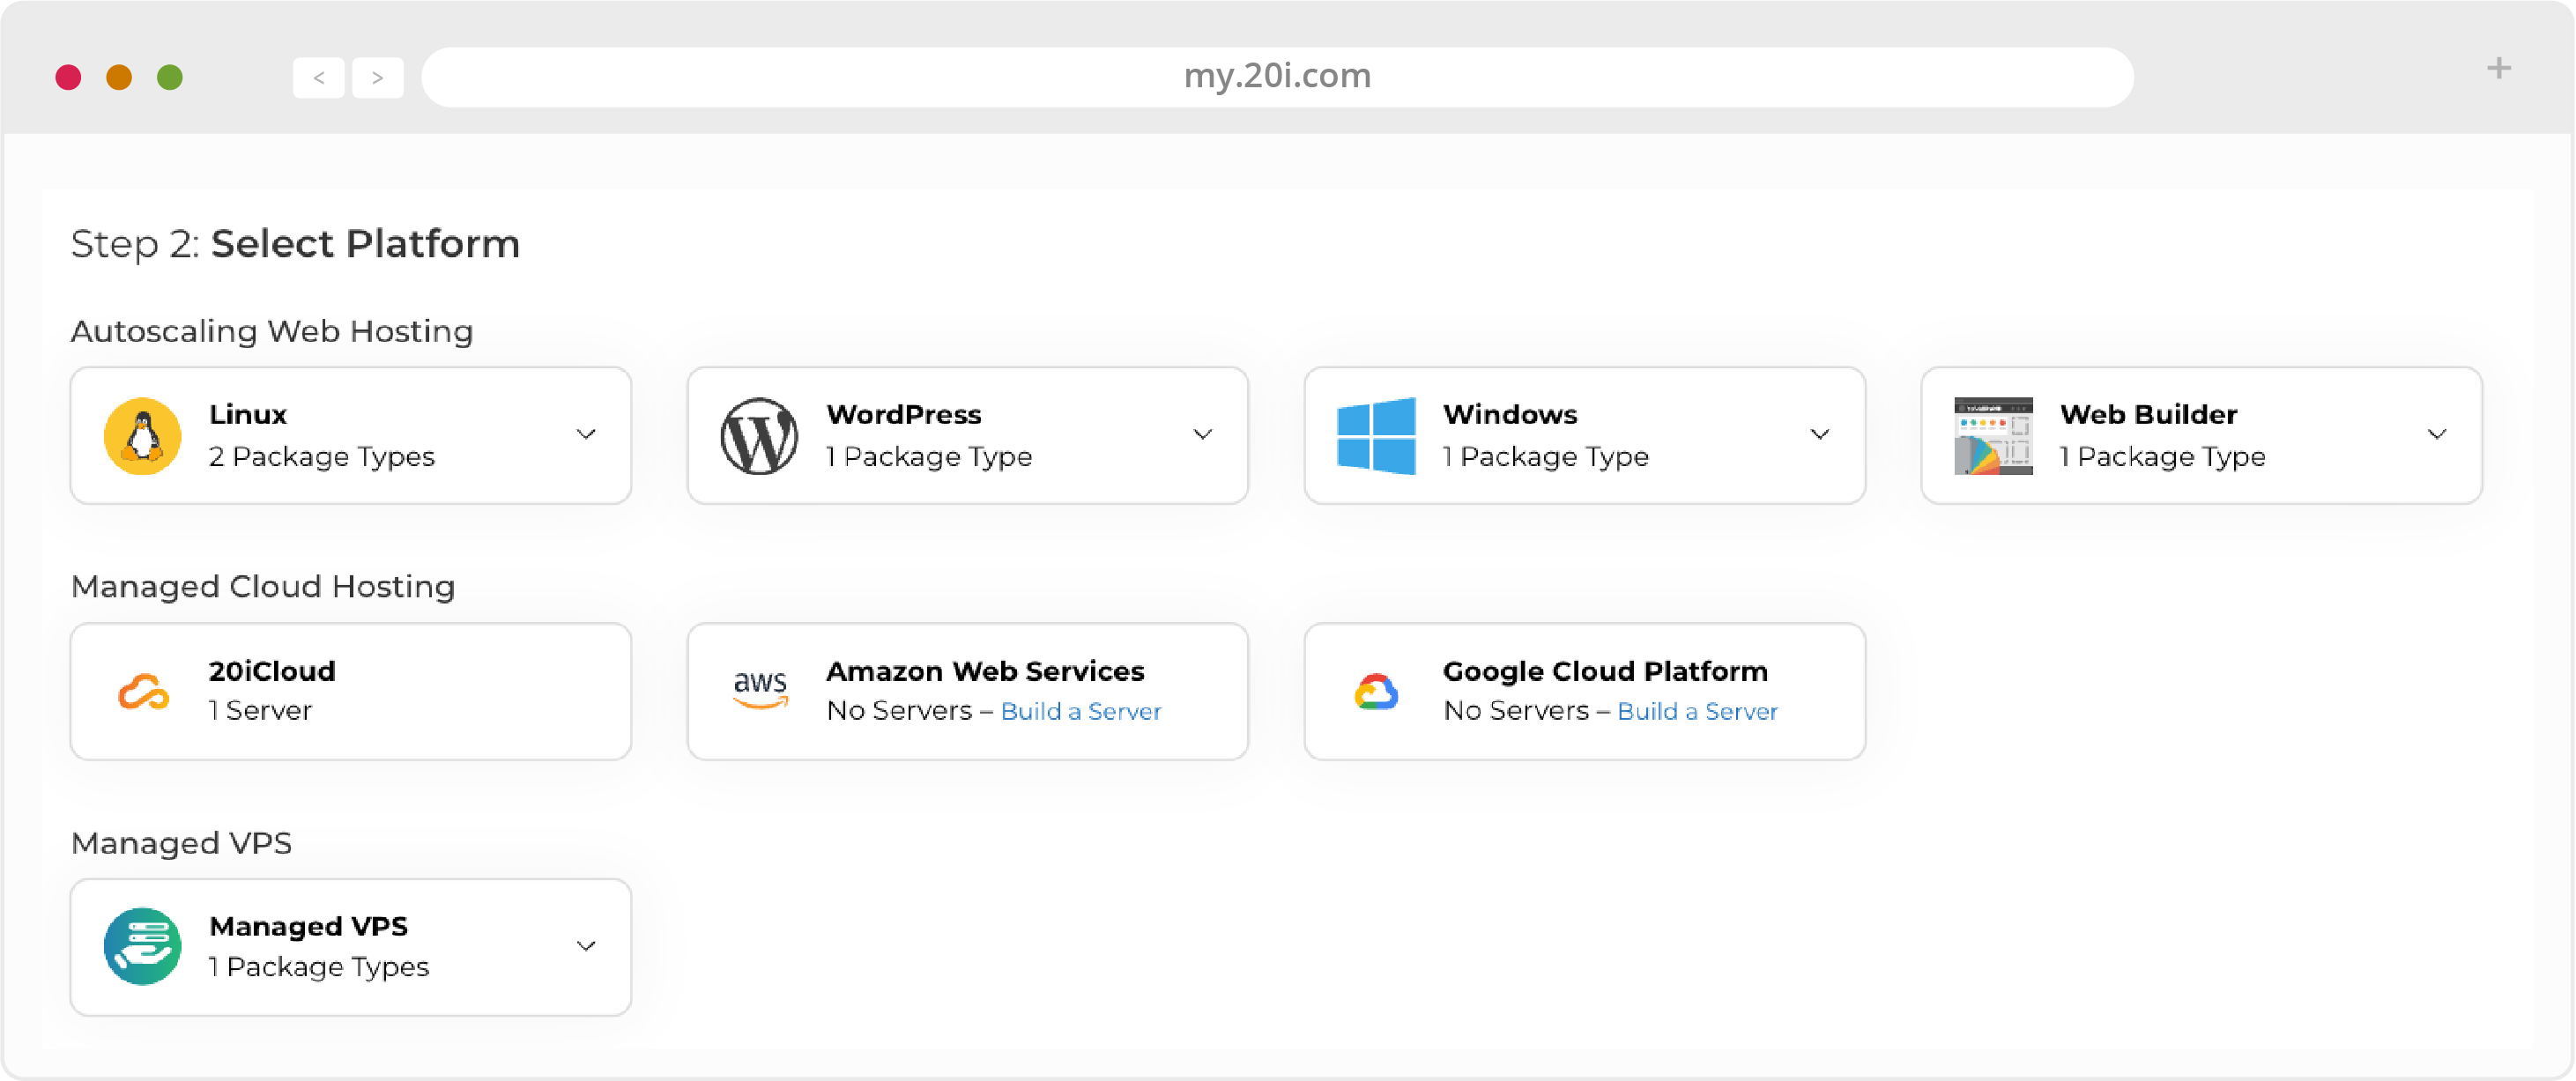
- By default, there are three hosting package options: Linux Unlimited, Windows Unlimited and WordPress Unlimited
- Select the platform you wish to add the package and domain to
- You can also design your own hosting packages by selecting ‘Configure Package Types’ on this page. Then you can build a custom package by choosing features like the operating system, the amount of bandwidth and web space, the number of MySQL databases (for Windows packages, MS SQL databases are available as add-ons), the number of subdomains, email accounts, one-click install apps and more
- Another option is to ‘clone’ an package. If you have a site with a theme, plugins and any code-level customisations - you can make the site the basis of the new package. All files, databases and configurations will be transferred to the package seamlessly.

After choosing the package type, you can choose whether the package will be hosted in the UK or USA. This allows you to take advantage of one of our transatlantic data centres. If you’re a UK-based Reseller, having a data centre in USA will give better performance for US users than our CDN alone, and their data will be kept securely in their home country. The same goes if you’re a US customer, but vice versa. The first package you create will become the default server location for your Reseller account.
- You can choose to host unlimited websites both in the UK and USA. There is an extra monthly charge for this option
- Once you’ve created/selected your hosting package type, save your changes and hosting will be attached to the domain. You or your customer can then start building their website
- To help organise packages, Custom Package Labels can be applied to them. A Label - which can be any string of text - can be applied by ‘managing’ a particular package. Then, from the Hosting Management page, packages can be filtered by Label
>> Next step: Giving customers access to domains and hosting
 Ruth Turner
Reseller Hosting: Giving Customers Access to Domains and Hosting
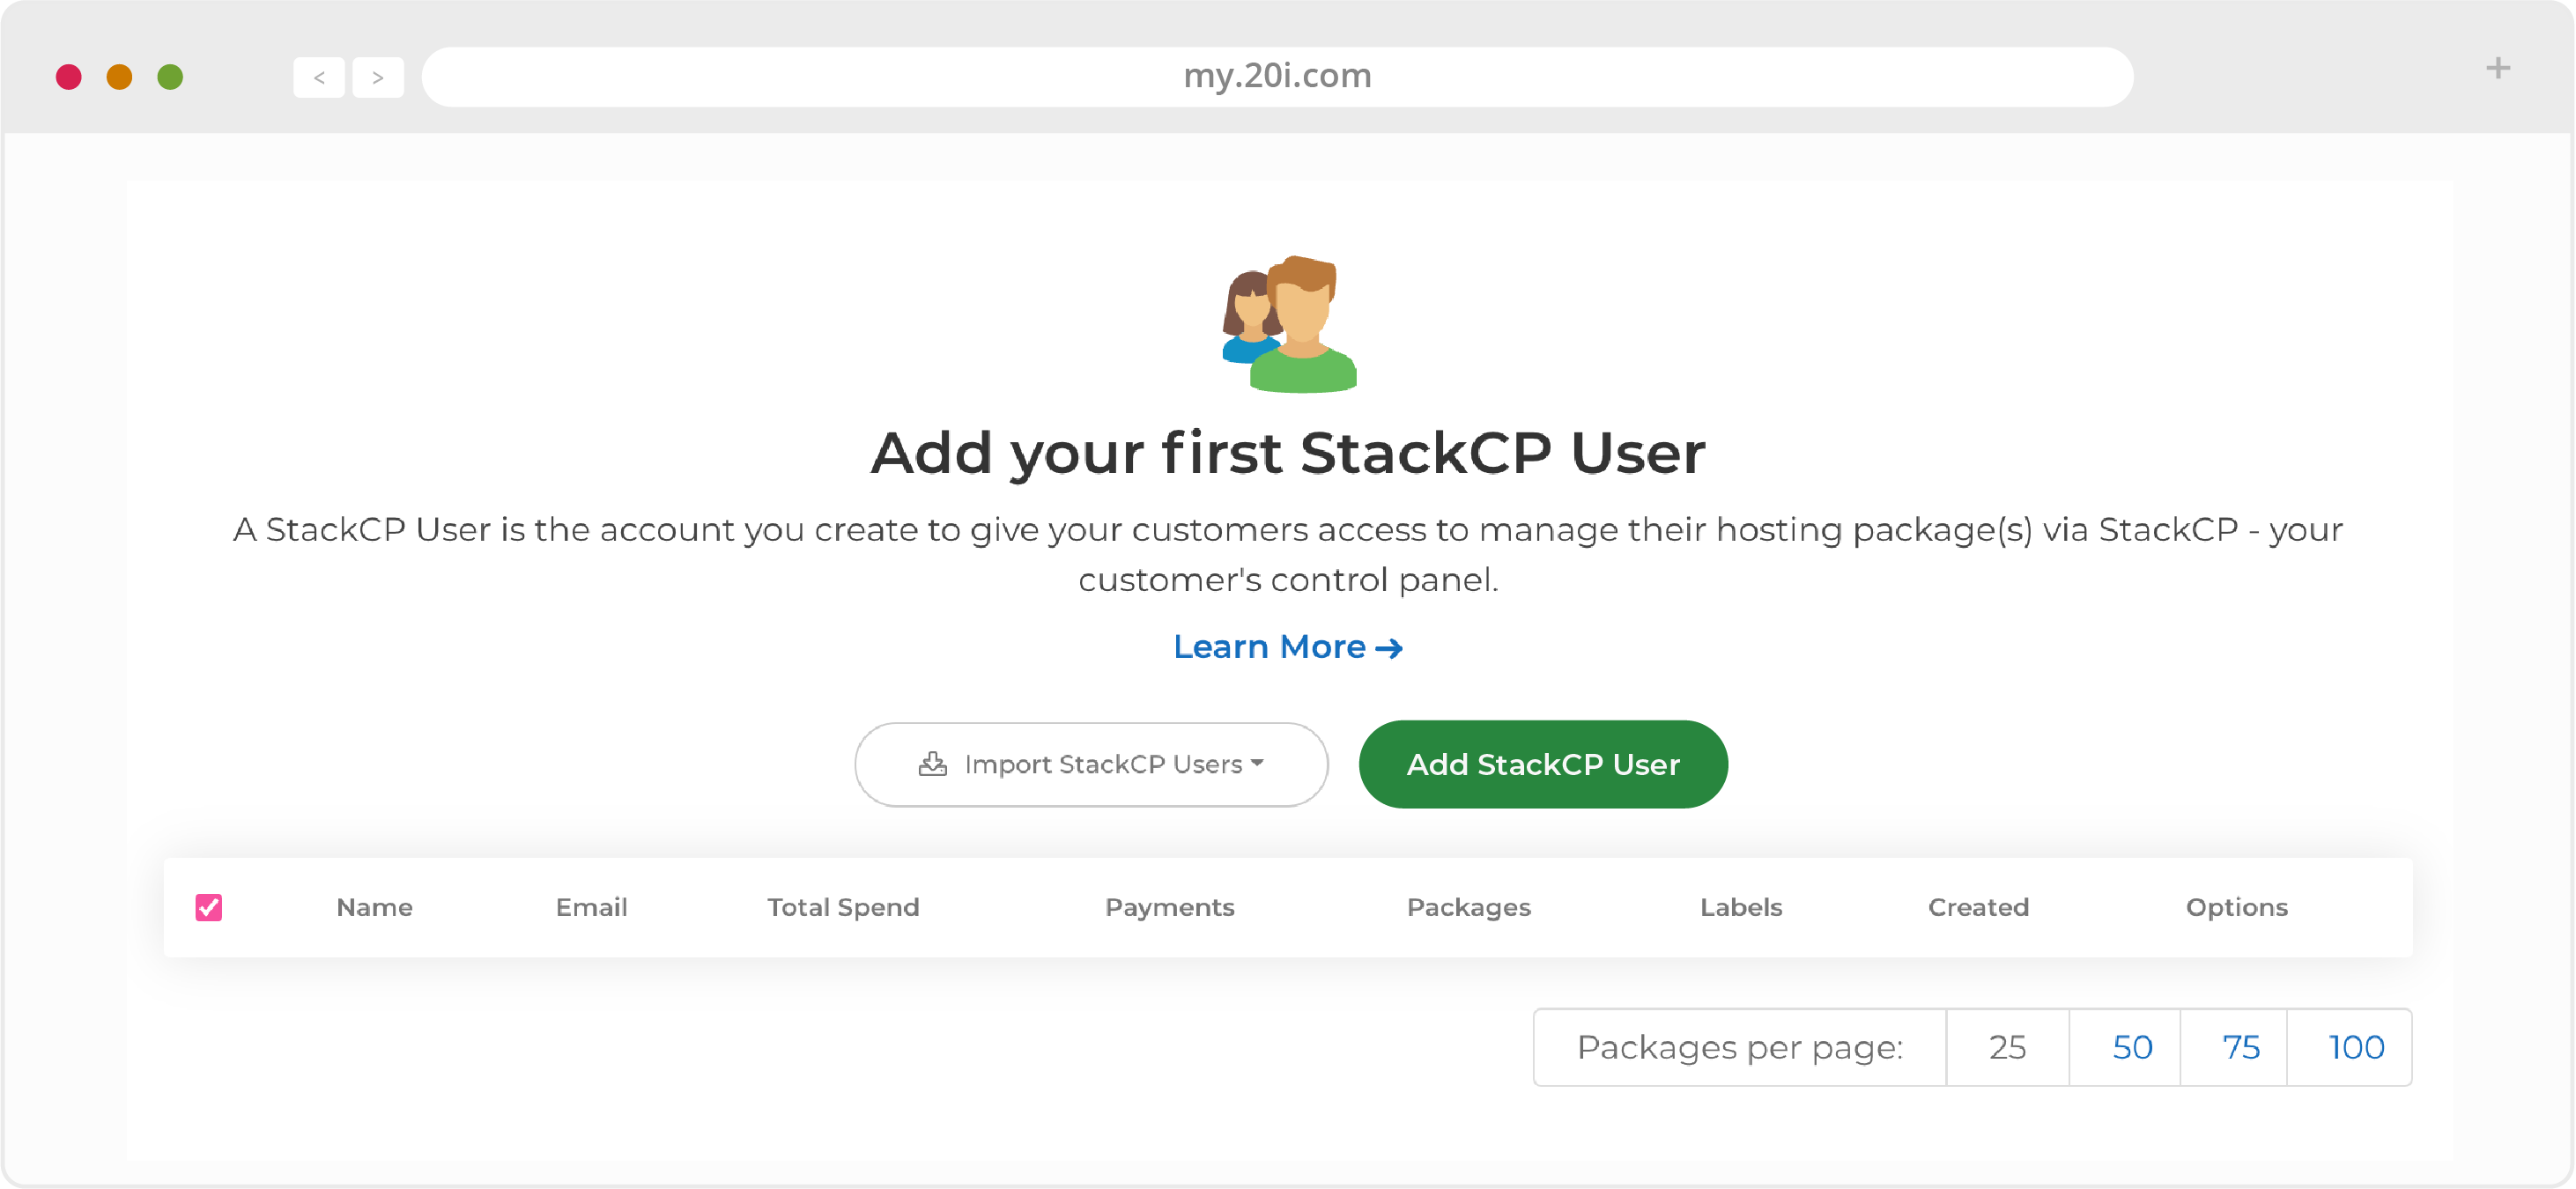
To give your customer access to their domain and hosting, you must create a StackCP User login for them.
A StackCP User is the account you create to give your customers access to manage their hosting package(s) via StackCP - your customer’s control panel. Creating a StackCP User creates a username and password that you can give to your customer which will enable them to login to stackcp.com and access their package(s).
Creating a StackCP User
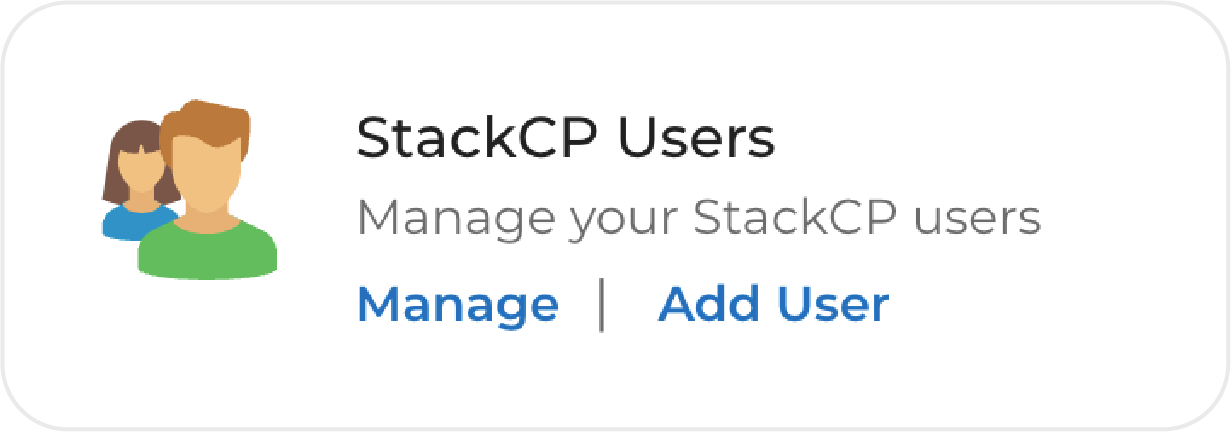
- Visit the StackCP Users area under Customer Management
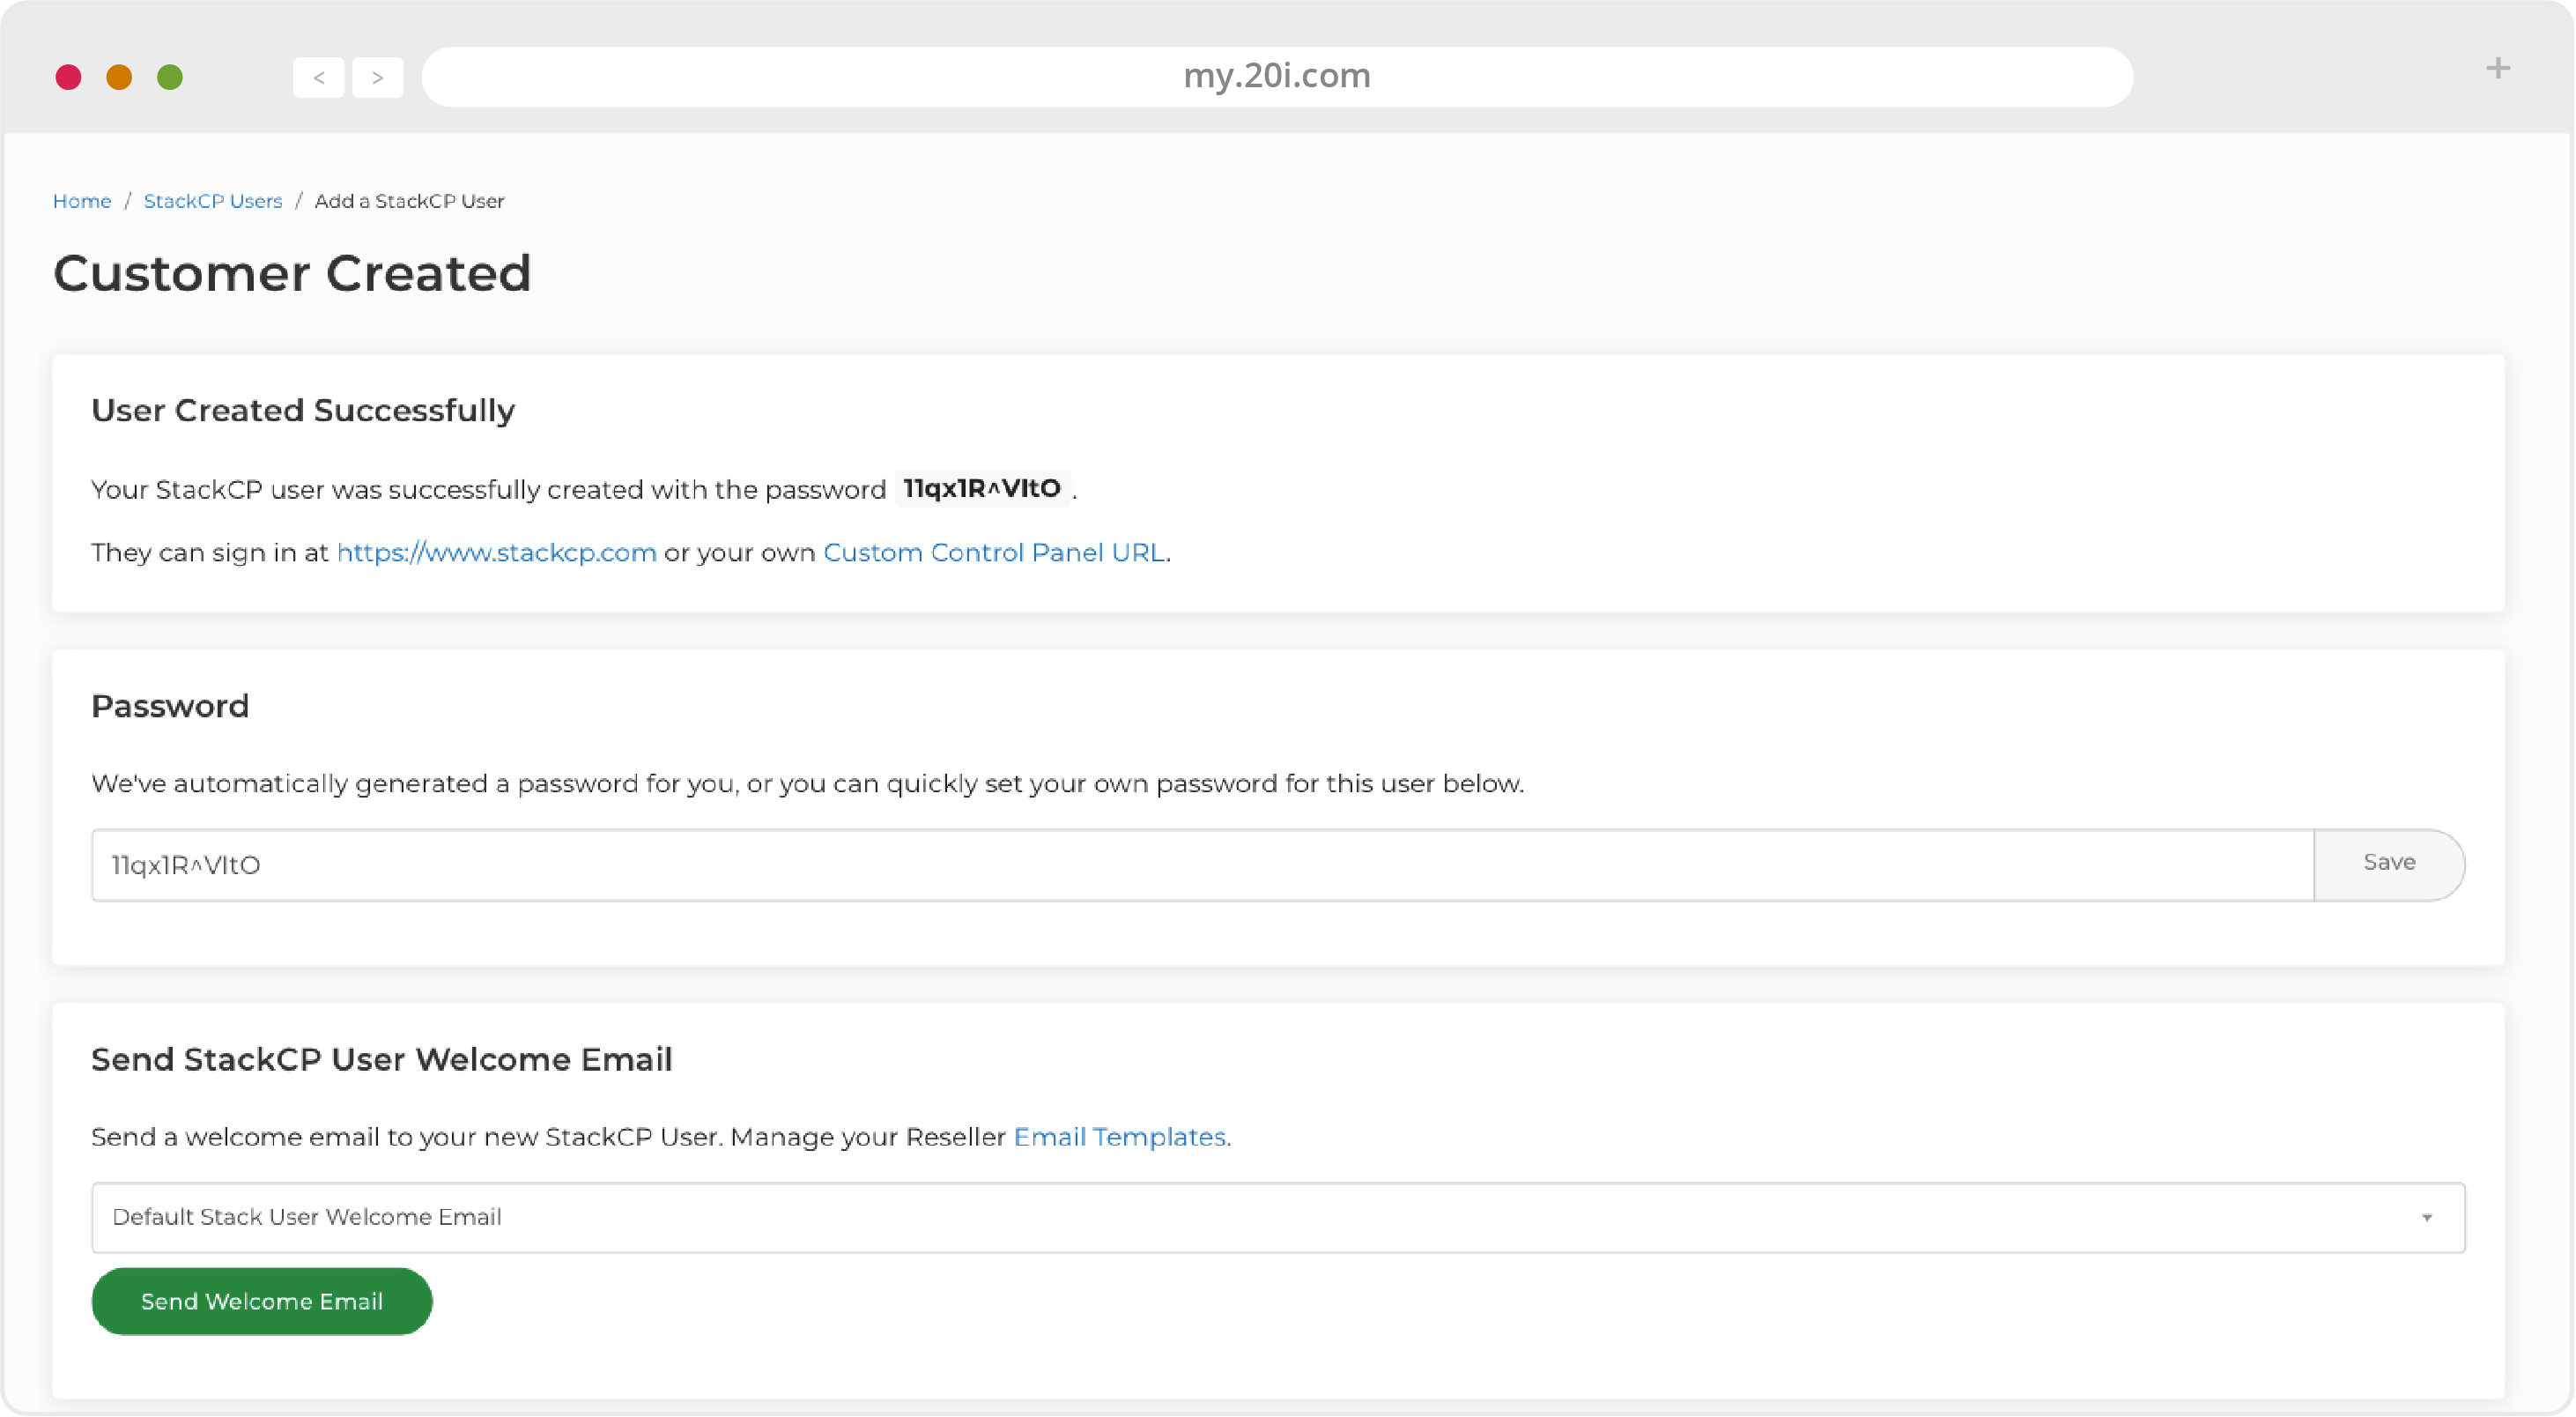
- You’ll be taken to the StackCP Customer Created page, from there you can change the auto-generated password and send a welcome email. (Edit this email in Chapter 9).
- Clicking ‘Assign Services’ in the Next Steps section will take you to your StackCP User’s page, from which you can grant access to Packages, Domains, FTP and configure security settings.
- Packages and features your StackCP Users have access to conform to the limits of each hosting package. Click ‘Manage’ and then Options to make any changes from within Hosting Package Types
- After their contact and security options, under Package Access and Domain Access you can select the packages and domains you wish this user to have access-to. You also have the option of giving them FTP access.
- Your customer can now log in to their StackCP control panel and will have access to the packages you have specified. The features, or icons visible to them inside StackCP will depend on the limits configured on your hosting package. You can control these via your Package Types.
Using FTP Login Details
For compatibility reasons, we create a StackCP User for each of your hosting packages that allows logins to the control panel using the websites FTP details.
However, this access is limited as features like Recover Password and multi-package access are not available using this style of login.
>> Next step: Your customers’ control panel: StackCP
 Ruth Turner
Reseller Hosting: StackCP
Once you’ve set up a User or a hosting package, your customers can start using the StackCP control panel.
It’s accessible by default at https://www.stackcp.com, but this address can be changed (learn more in Chapter 10). StackCP includes everything your customers need to build and manage their website.
If you’re building a website on behalf of a client or company, it’s up to you whether you give them StackCP control panel login details at any point - or just manage it for them if they’re less technically inclined.
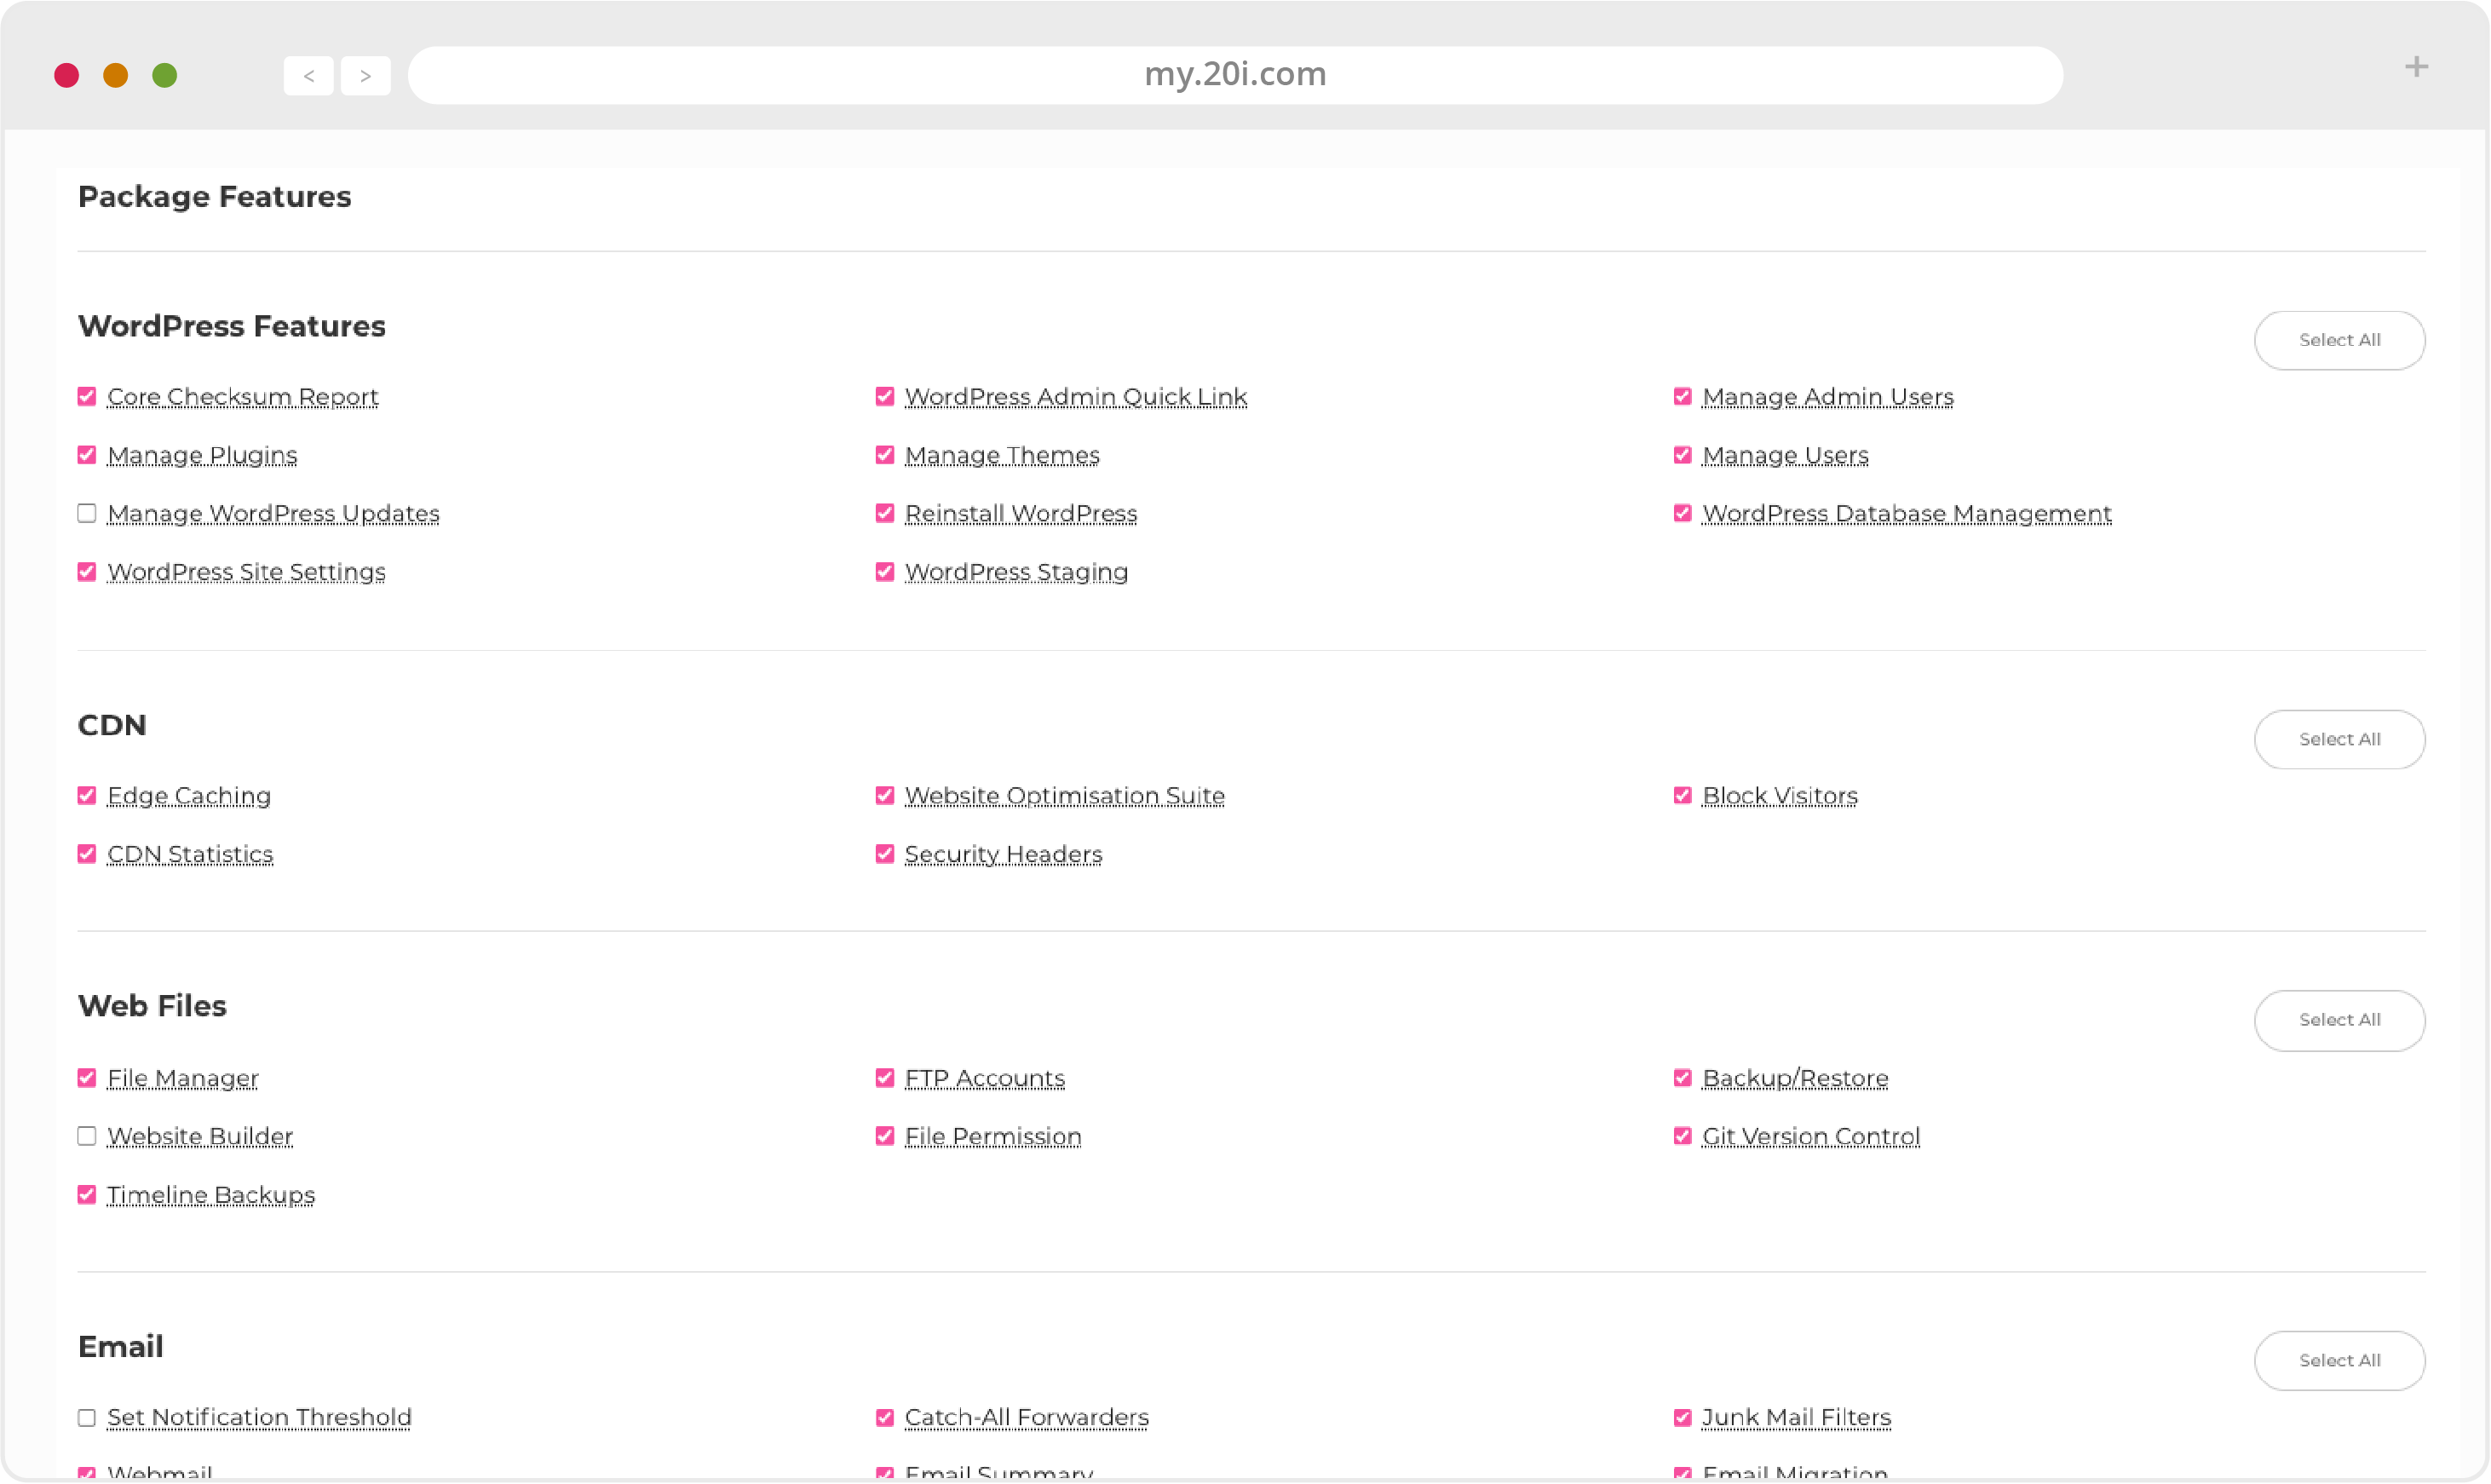
The features and icons displayed in StackCP after you or your customer has logged in will depend on what you’ve enabled at the package level.
StackCP Features
As standard your clients will have access to the following features:
- File Manager
- FTP Accounts
- Backup/Restore
- Snapshot Backups
- phpMyAdmin
- MySQL Databases
- Remote MySQL Database Access
- Manage Domains
- Manage Subdomains
- Change PHP Version
- Scheduled Tasks
- SSH Access
- Block Visitors
- Hotlink Protection
- SSL Certificate
- Password Protection
- Directory Indexing
- Website Log Files/Download
- Website Security
- Website Builder
- Manage VPS
- Two-Factor Authentication
- Sitemap Generator
- Custom Errors
- CDN and Website Optimisation
Email Tools
- Email Accounts
- Email Forwarders
- Autoresponders
- Send-Only Addresses
- Receive-Only Addresses
- Junk Mail Settings
- Catch All E-mail
DNS Tools
- Manage DNS
- Manage Contacts
- Change Nameservers
- Domain Lock
- Transfer Away
- Domain Redirect
One-Click Installs
From here you and your customers can choose to install dozens of free applications, including content management systems (such as WordPress, Drupal and Joomla!), ecommerce systems (such as OpenCart, Magento and PrestaShop), and much more. Our one-click installs are quick and easy to set up, and cover everything from invoicing solutions to project management software.
Controlling Access
There may be options that you don’t want your customers to access. For example, you may want to give them access to manage email accounts, but restrict their access to creating databases.
In order to customise the access of a hosting package:
- Go to Manage Hosting and locate the hosting package you wish to change access for

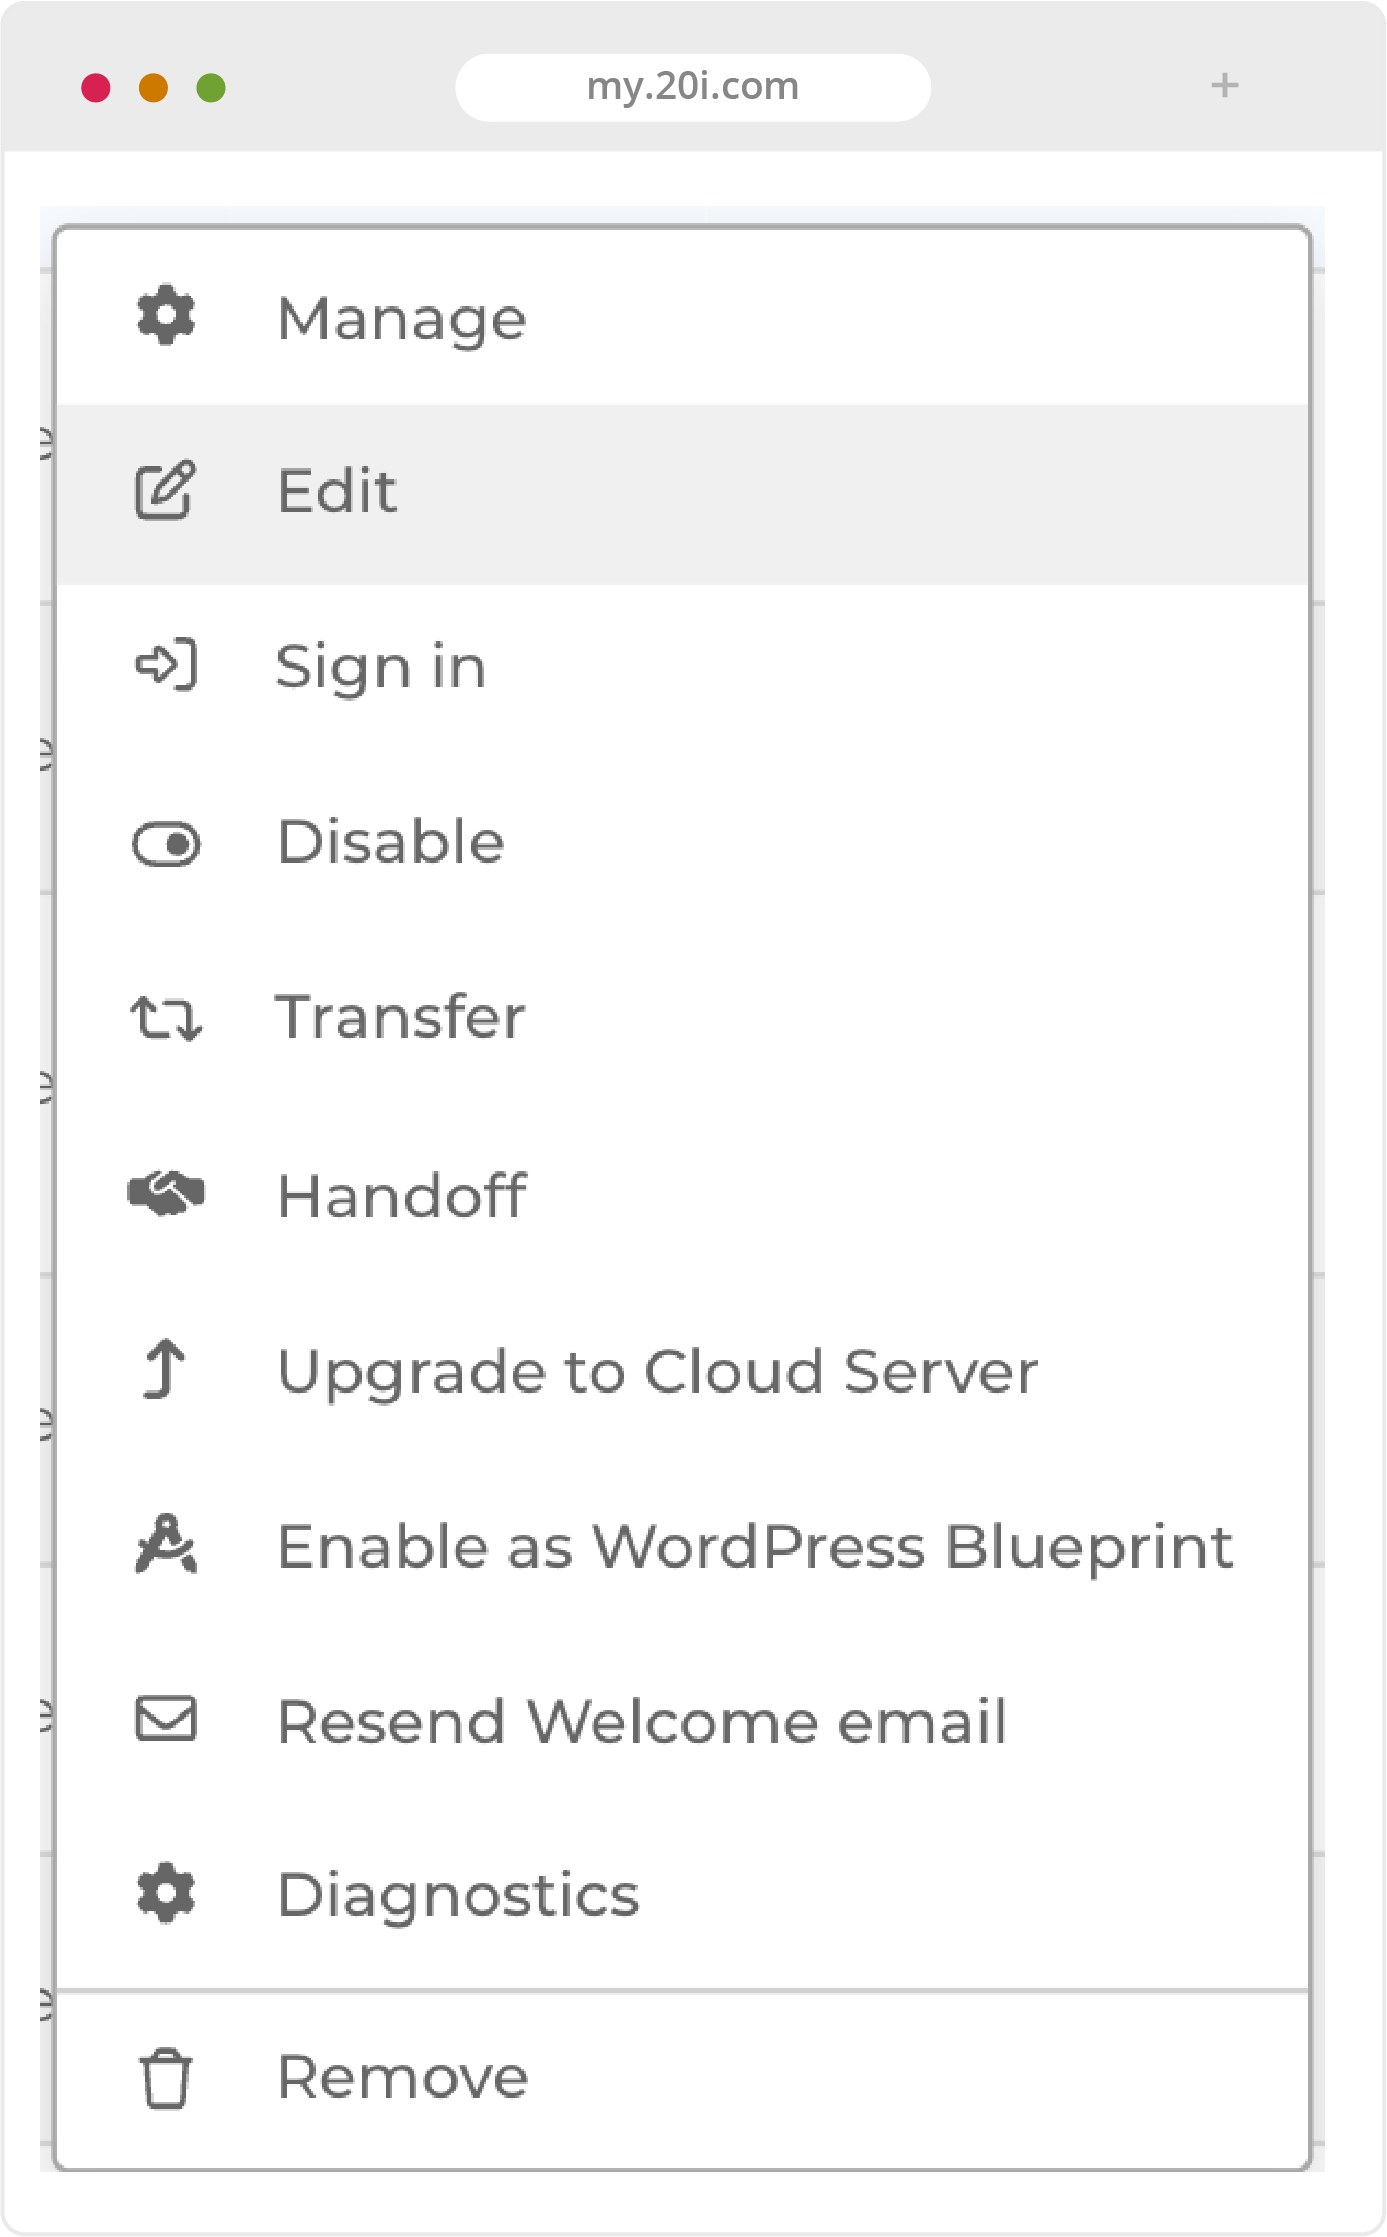
- Select Options > Edit
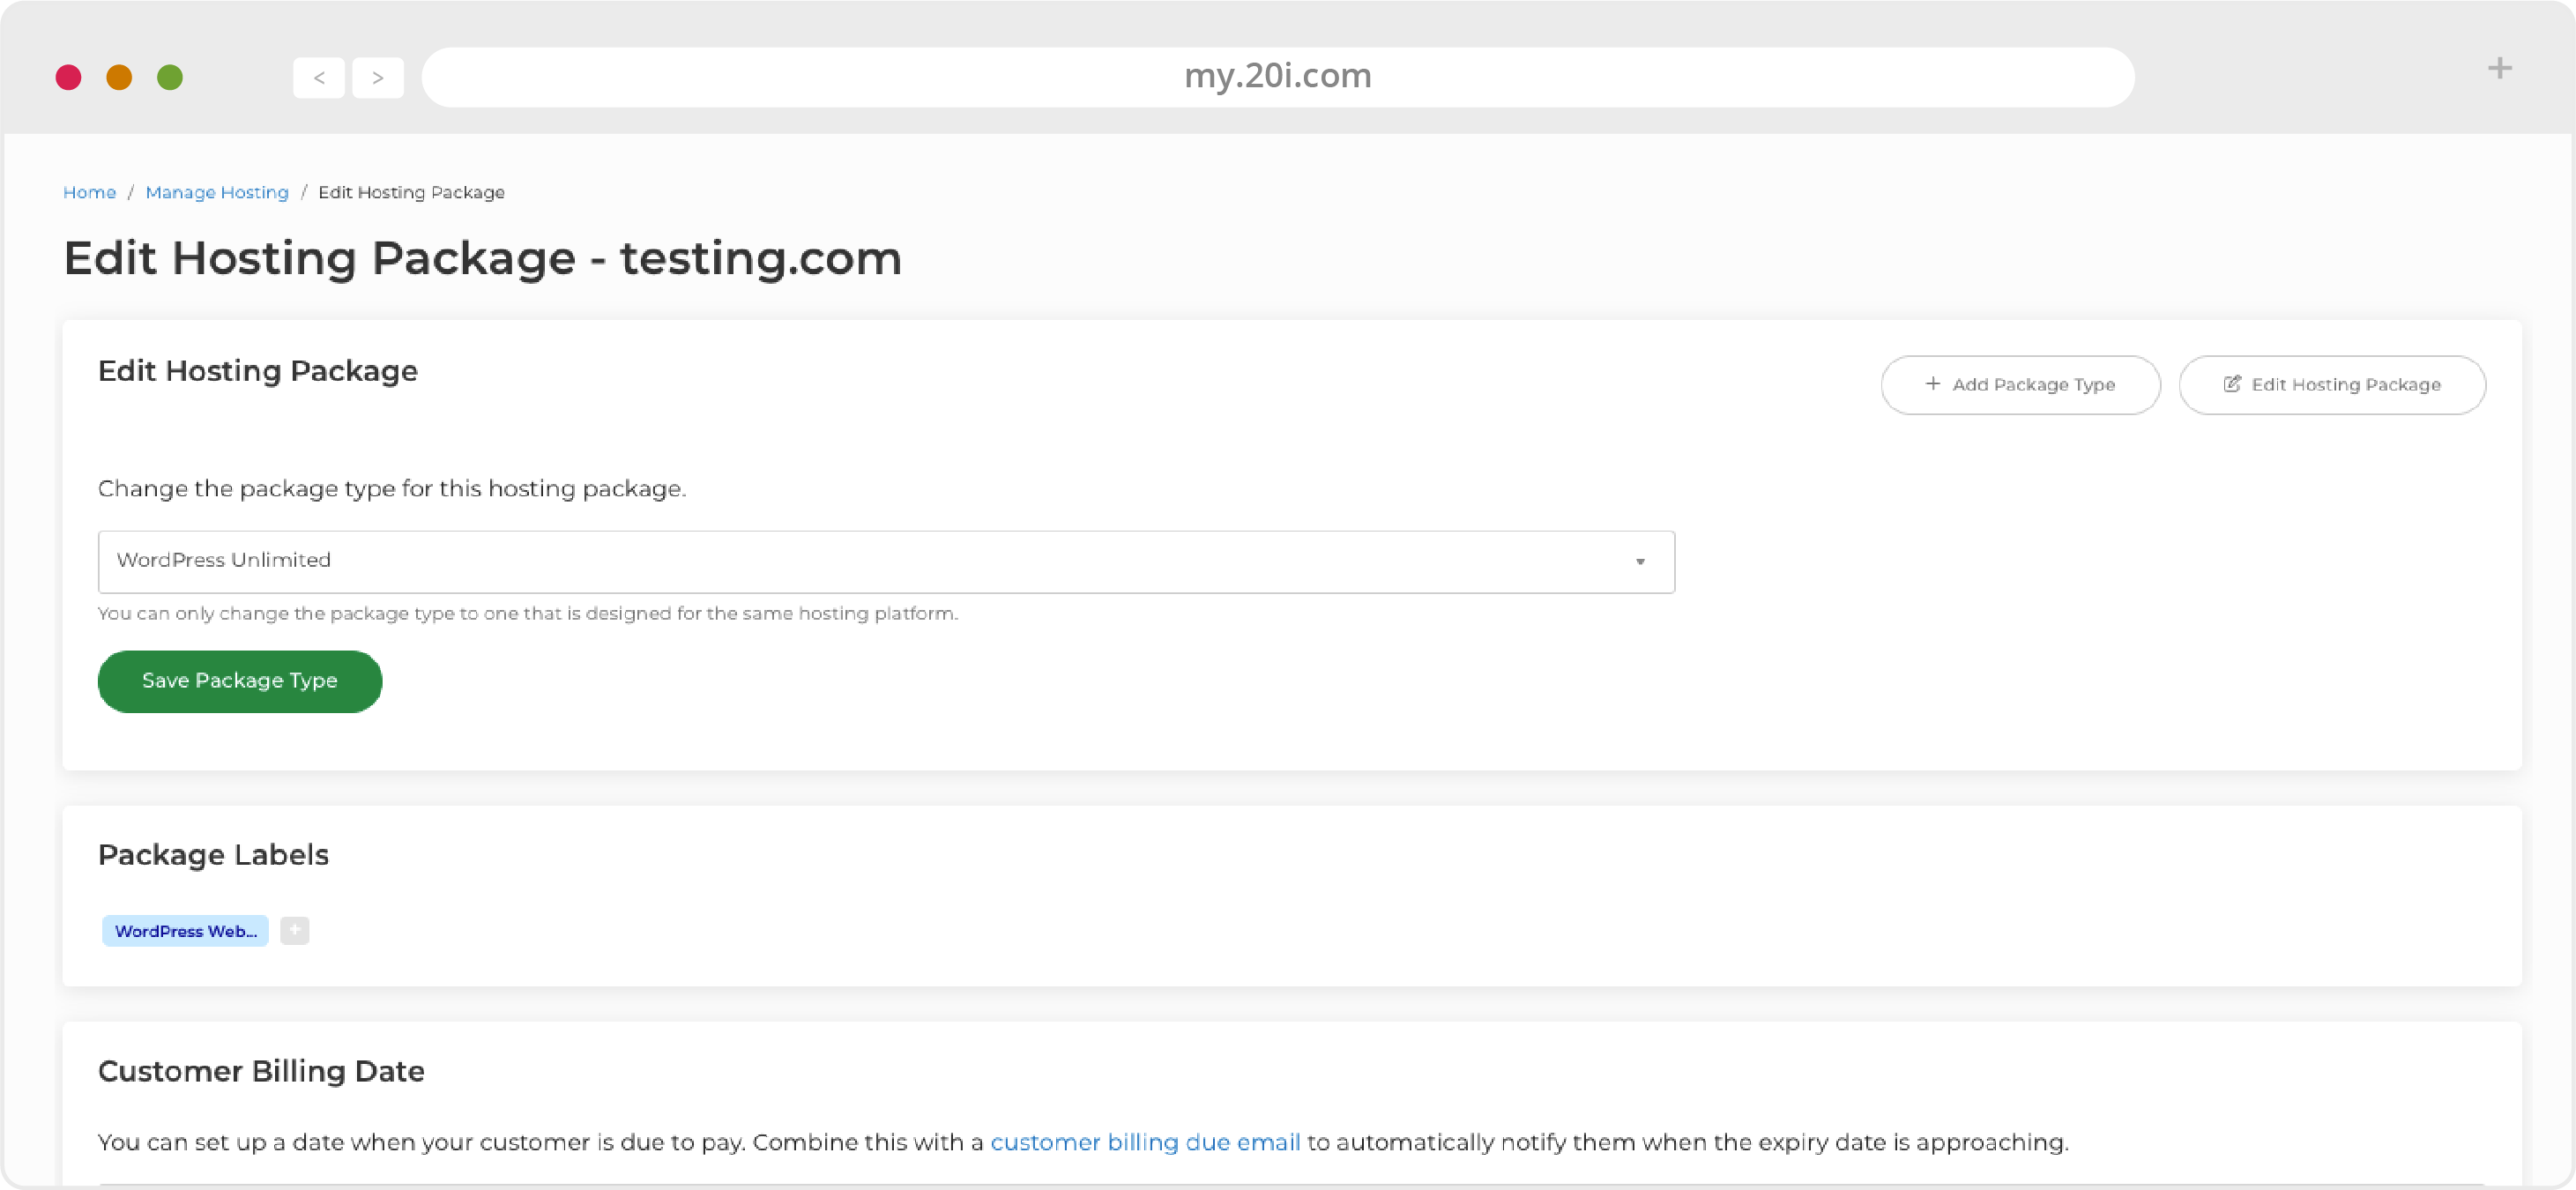
- Then select Edit Hosting Package. Any further changes will only affect the selected customer, not the overall package type
- You can then manage a list of all the options that are available for the customer, presented in the same order that they would appear in StackCP
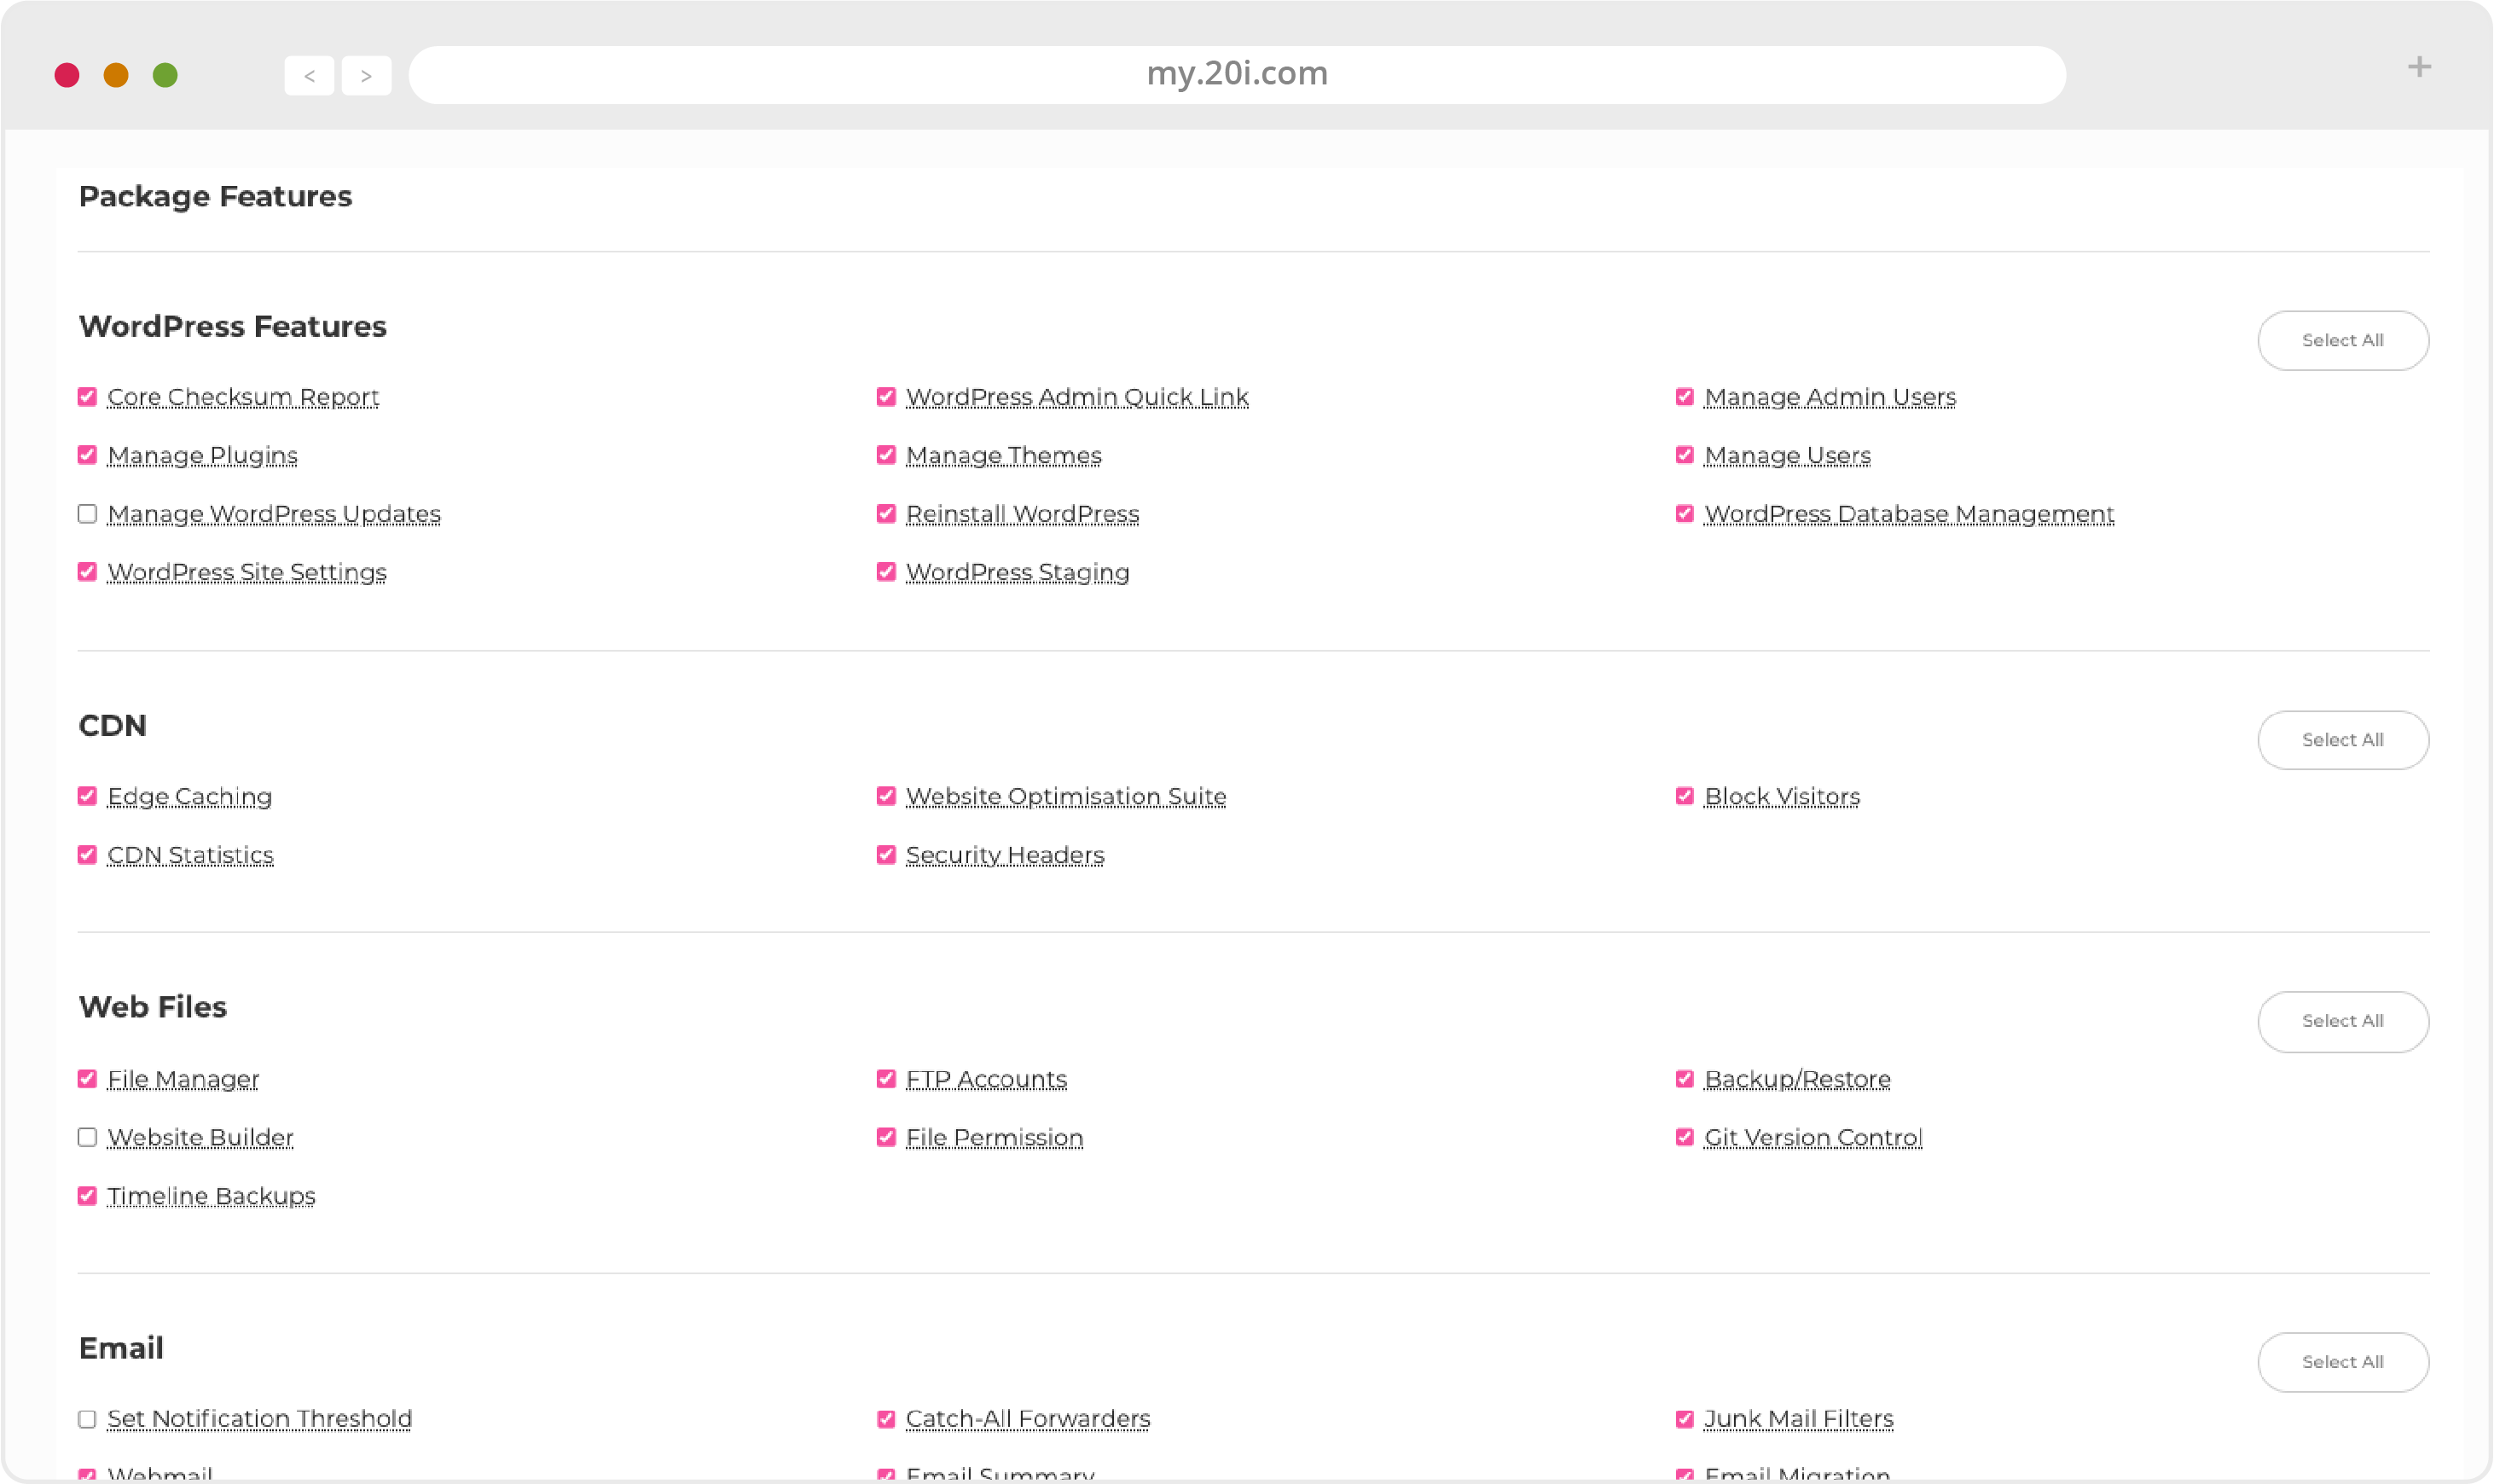
Deselecting options won’t ever remove data.
For example, if you deselected the option for databases to be manageable, databases would not be deleted. You would still be able to manage them via My20i - but your customers could not manage them in StackCP.
If you purchase an add-on such as Timeline Backups, this will become a manageable feature for your customers. If it’s something that you would like to charge your own customers for then you can deselect the service until they’ve successfully made payment.
>> Next step: HostShop
 Ruth Turner
Reseller Hosting: HostShop
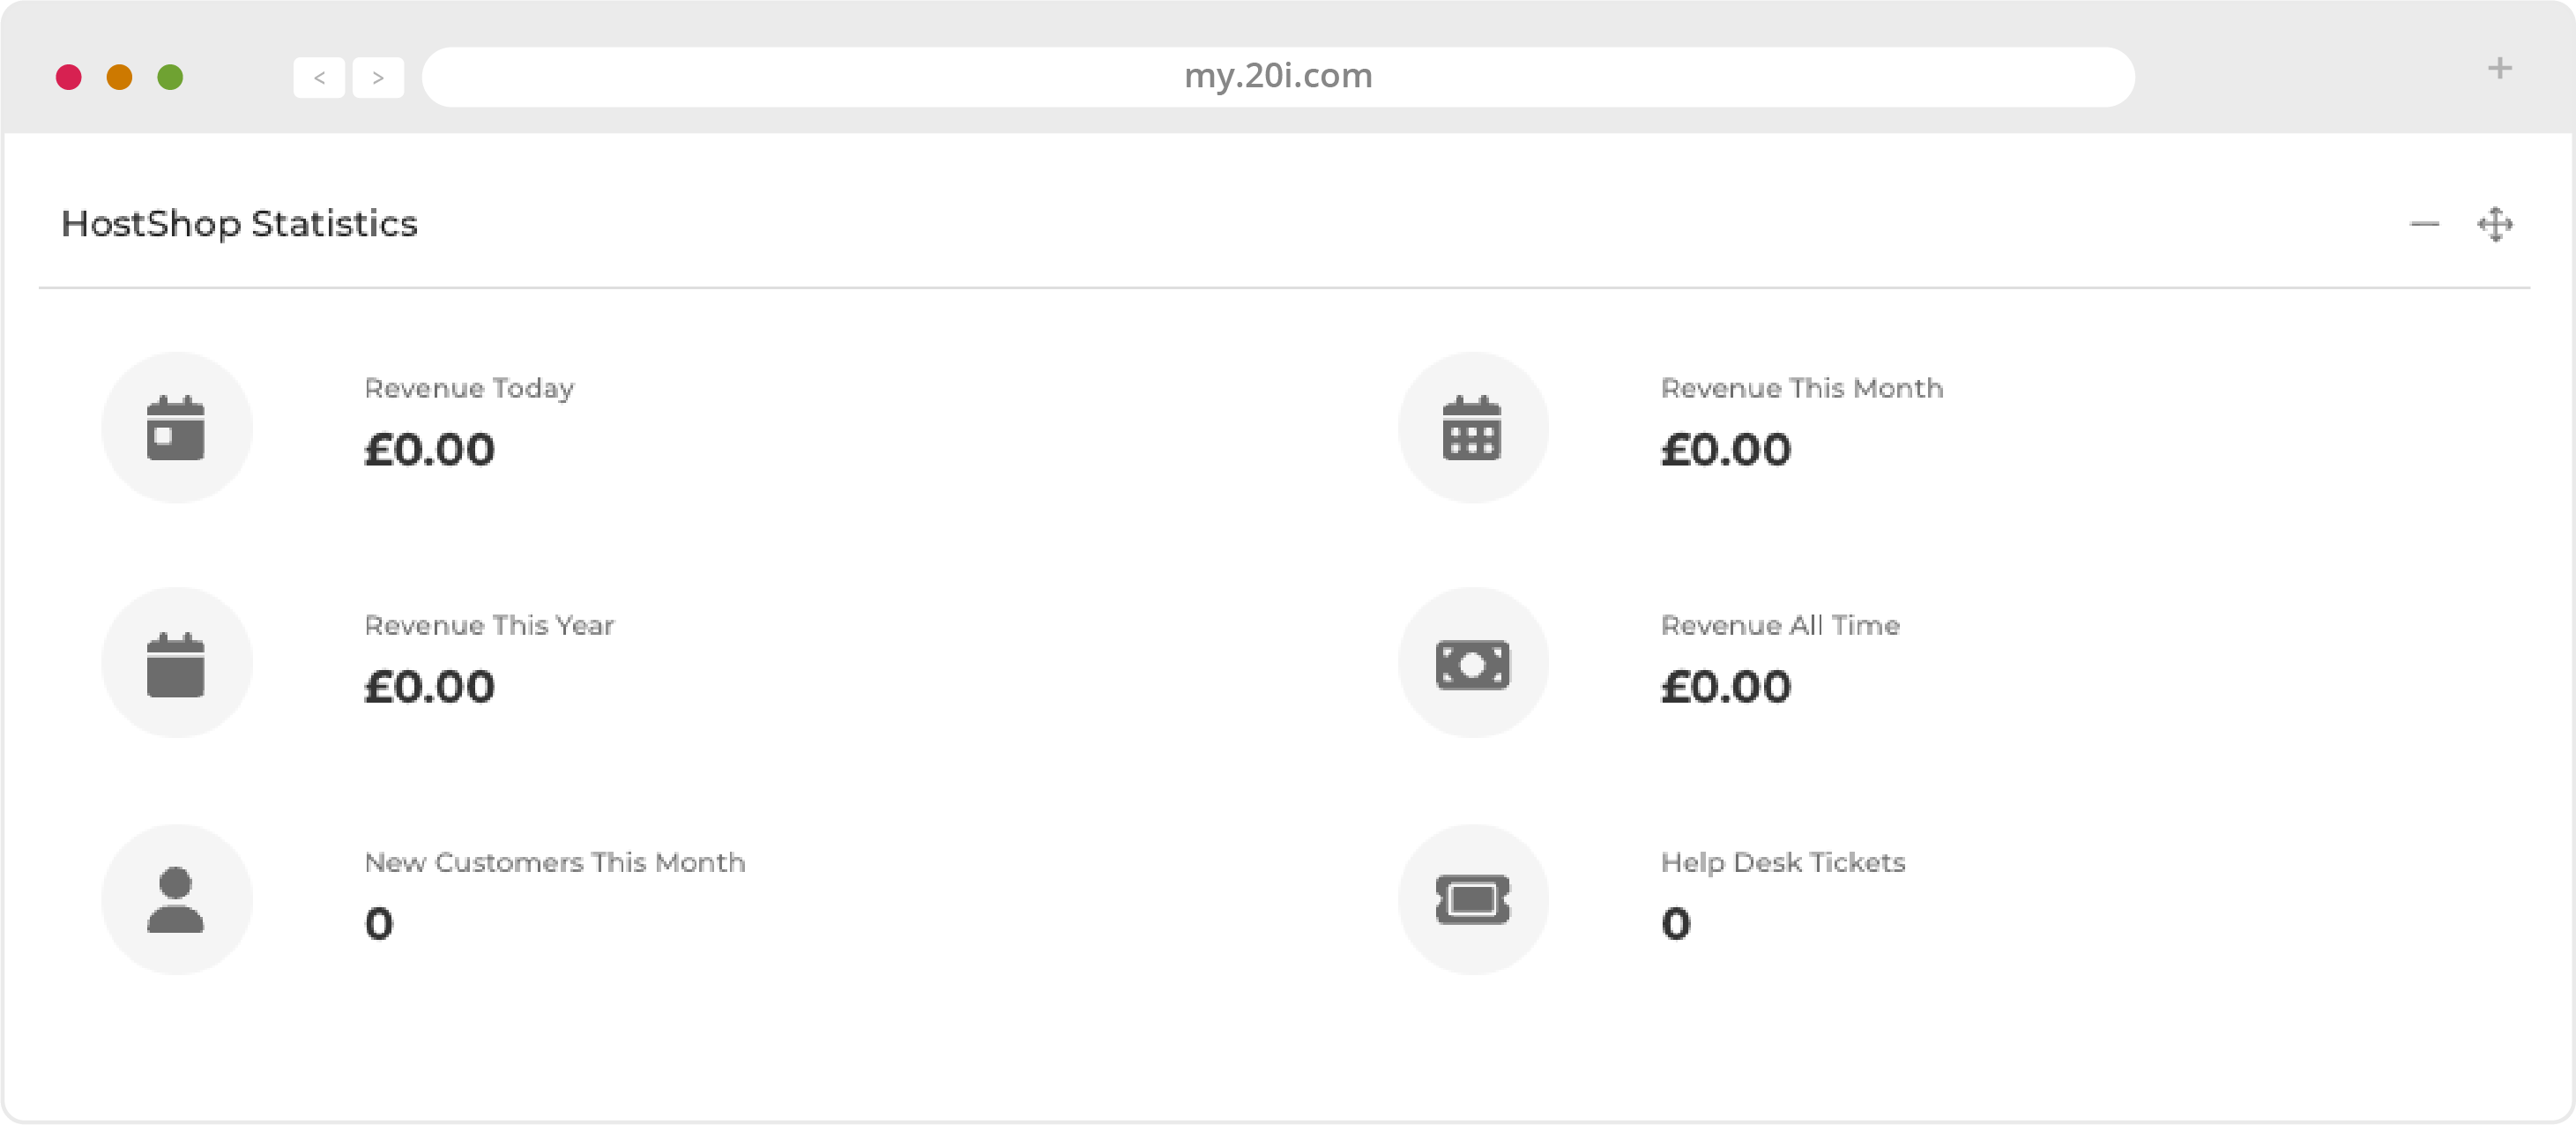
HostShop is an all-in-one automated platform to manage clients, commerce, billing, payments, service provision, communication and support. It includes an online shop that you can integrate with your website, or you can use one of our ready-made hosting website templates.
Getting Started with HostShop
We created HostShop with the aim of a fast and easy setup. To get started quickly, the minimum you need to do is steps 1 and 2 below.
- Prepare the domain names and hosting services you want to sell
- Add and test your payment gateways
- Optionally add 20i account credit
- Customise your shop and branding
- Optionally install HostShop presales template and customise
- Open your shop and start earning from selling hosting and domain services
Your shop can then be opened in HostShop Configuration and you can start taking orders. We recommend reading all of this guide to familiarise yourself with HostShop’s features and functions.
Payment Gateways
Before you can start taking orders through 20i HostShop, you need to set up a payment gateway. Here we’ll use the example of setting-up PayPal, but the process will be similar with all gateways.
- Head to HostShop > Overview
- Select Payment Gateways from the navigation menu on the left-hand side
- From the Add a Payment Gateway section, select PayPal
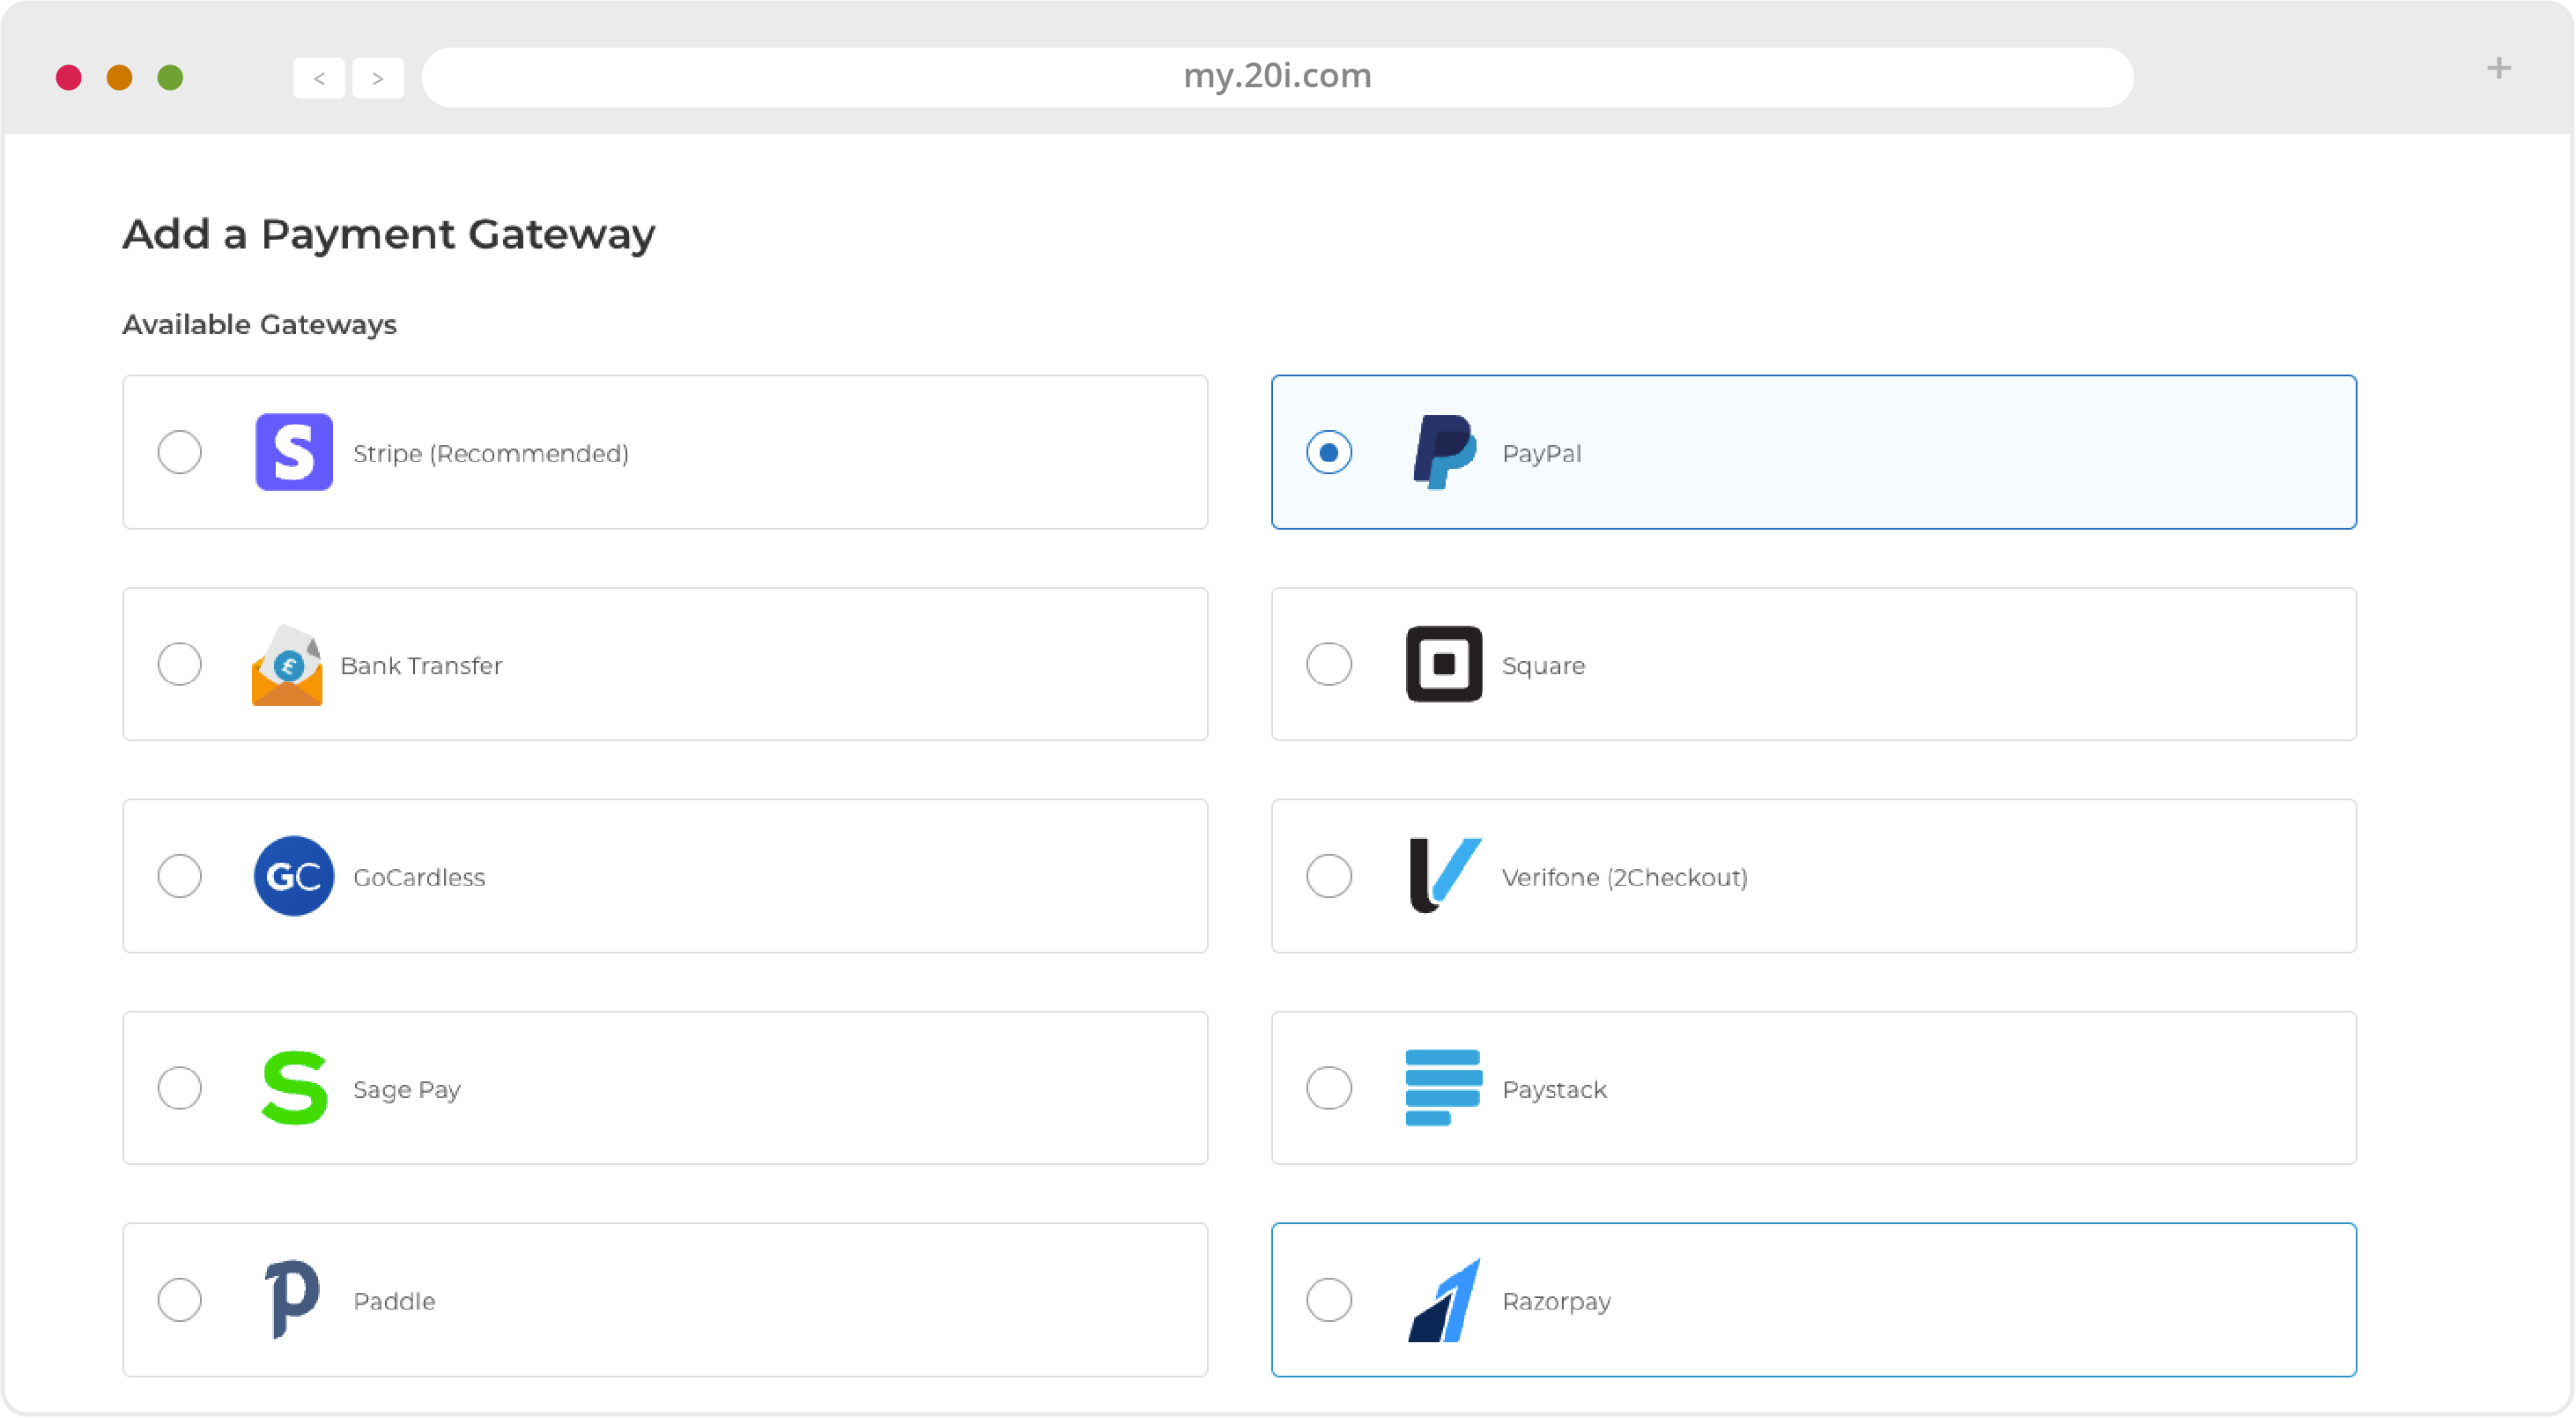
There are two details you need from PayPal, the Client ID and the Secret. You will need to have a PayPal account already setup. To get the Client ID and Secret:
- Login to your PayPal account
- Select Create App
- Give your app a name
- Select Create App
- You’ll now see your Client ID and the Secret required to setup the payment gateway
- Copy the Client ID and Secret into their respective fields within 20i
- Select Add Payment Gateway
Manual Payments
You may want to create a ‘pro forma’ invoice that you can mark as paid ‘manually’ once you have received payment outside of your payment gateway. For example, you could use this for payments made using cheques or bank transfer.
These pro forma invoices are managed on the Pending Orders page. To set this up, use the ‘Mail In Payment/Bank Transfer’ option.

Adding Services and Products
From the Product Catalogue section of HostShop you can choose the products and services that you want to sell from the corresponding tabs, i.e. Hosting Products, Domain Names etc.

You can create and edit the hosting package types from here. Use the drop-down menus to select the options you want to make available, and click the ‘Add Plan’ button.

Select any Add-on Products from the drop down menu to include them in the package you want to sell. You can now start adding your pricing and choosing renewal periods.

With your products and add-ons configured; set your price and click ‘Save’. Monthly renewal and All Payment Types are selected by default. You can change or add a payment periods from here.
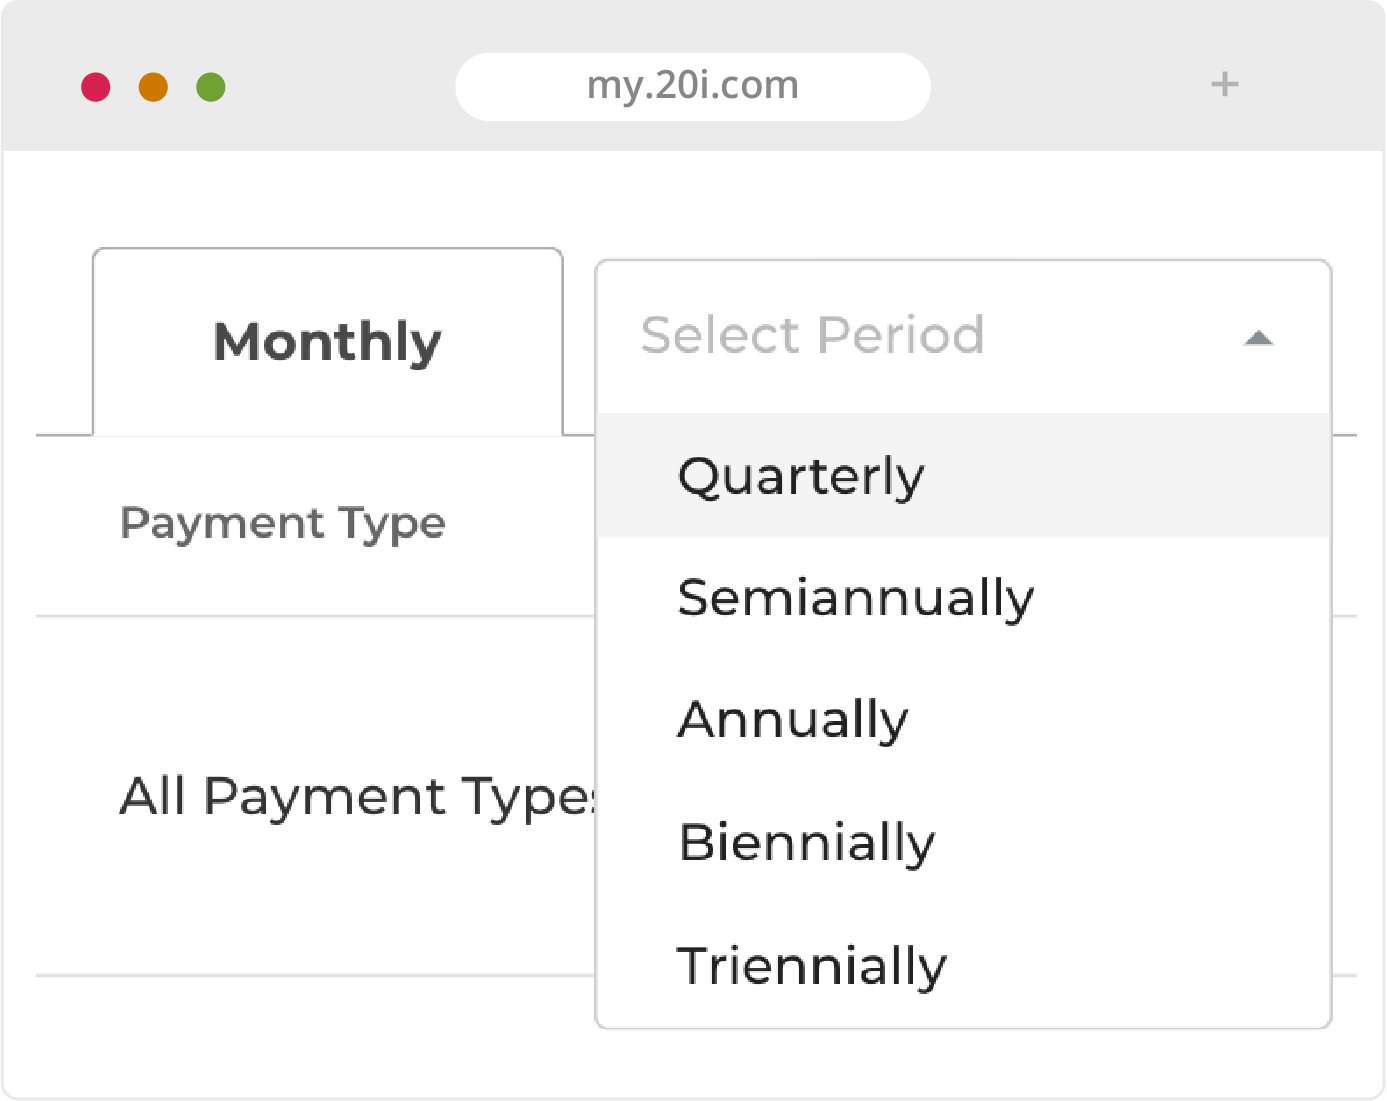
Control which payment types can be used, and any pricing differentials, by using the drop down menu. If the payment type that you wish to select is not visible, head to the Payment Gateways section of HostShop to make sure it is enabled.
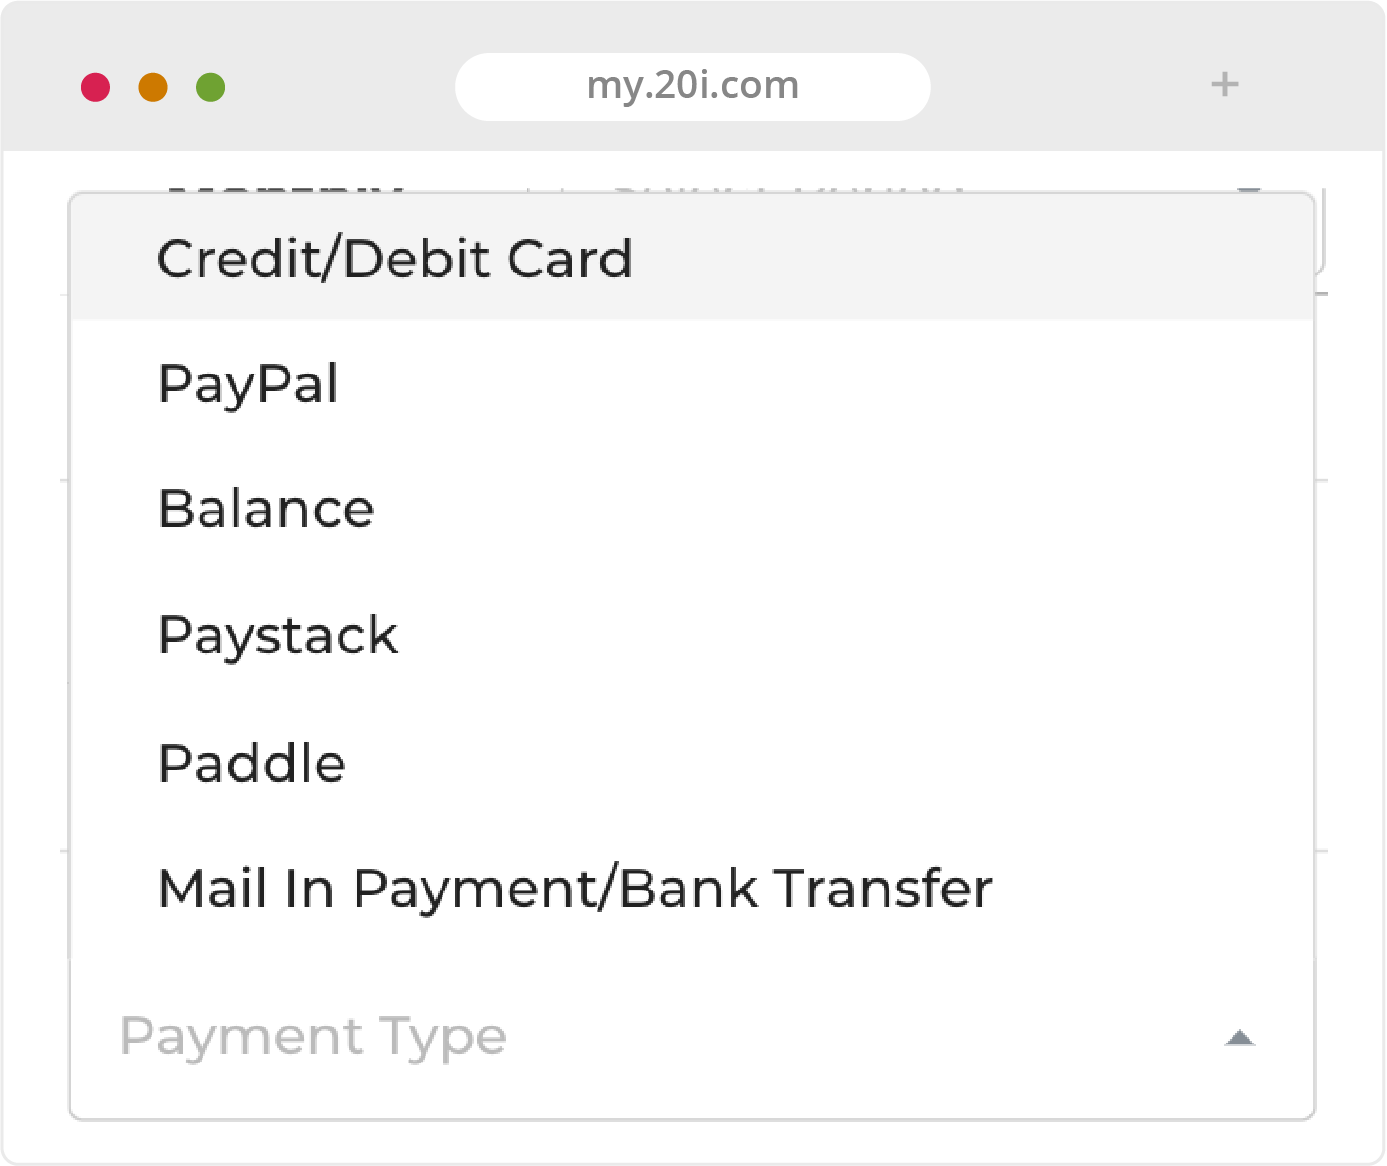
Next, you can set the annual price (and other time intervals, if you want). Select an interval from the drop down choose Add Renewal Period. The Renewal Period will appear in a new tab of the hosting product, and you can set the price here.
The overall process is the same for adding domains, domain privacy, VPS services and backups, SSL certificates, MYSQL databases (if you offer Windows hosting), and malware scanning.
Custom Products
HostShop is flexible: as well as selling 20i’s hosting products and services, you can also add and bill customers for other services, such as web design, themes or advertising. All your services can be bought through one shop interface.
You can follow the same process as above to add custom products, by choosing Other Products & Services tab in the Product Catalogue.

Managing Your Customers
20i HostShop is designed to be self-service for your customers, with services and billing all automated.
After they visit your shop and select a product, they’ll automatically be prompted to either ‘Sign In’ or ‘Create an Account’. When creating a new account, they’ll need to verify their email, then enter their contact details and add security questions.
They’ll then be able to complete their purchase.
Resend Verification Email
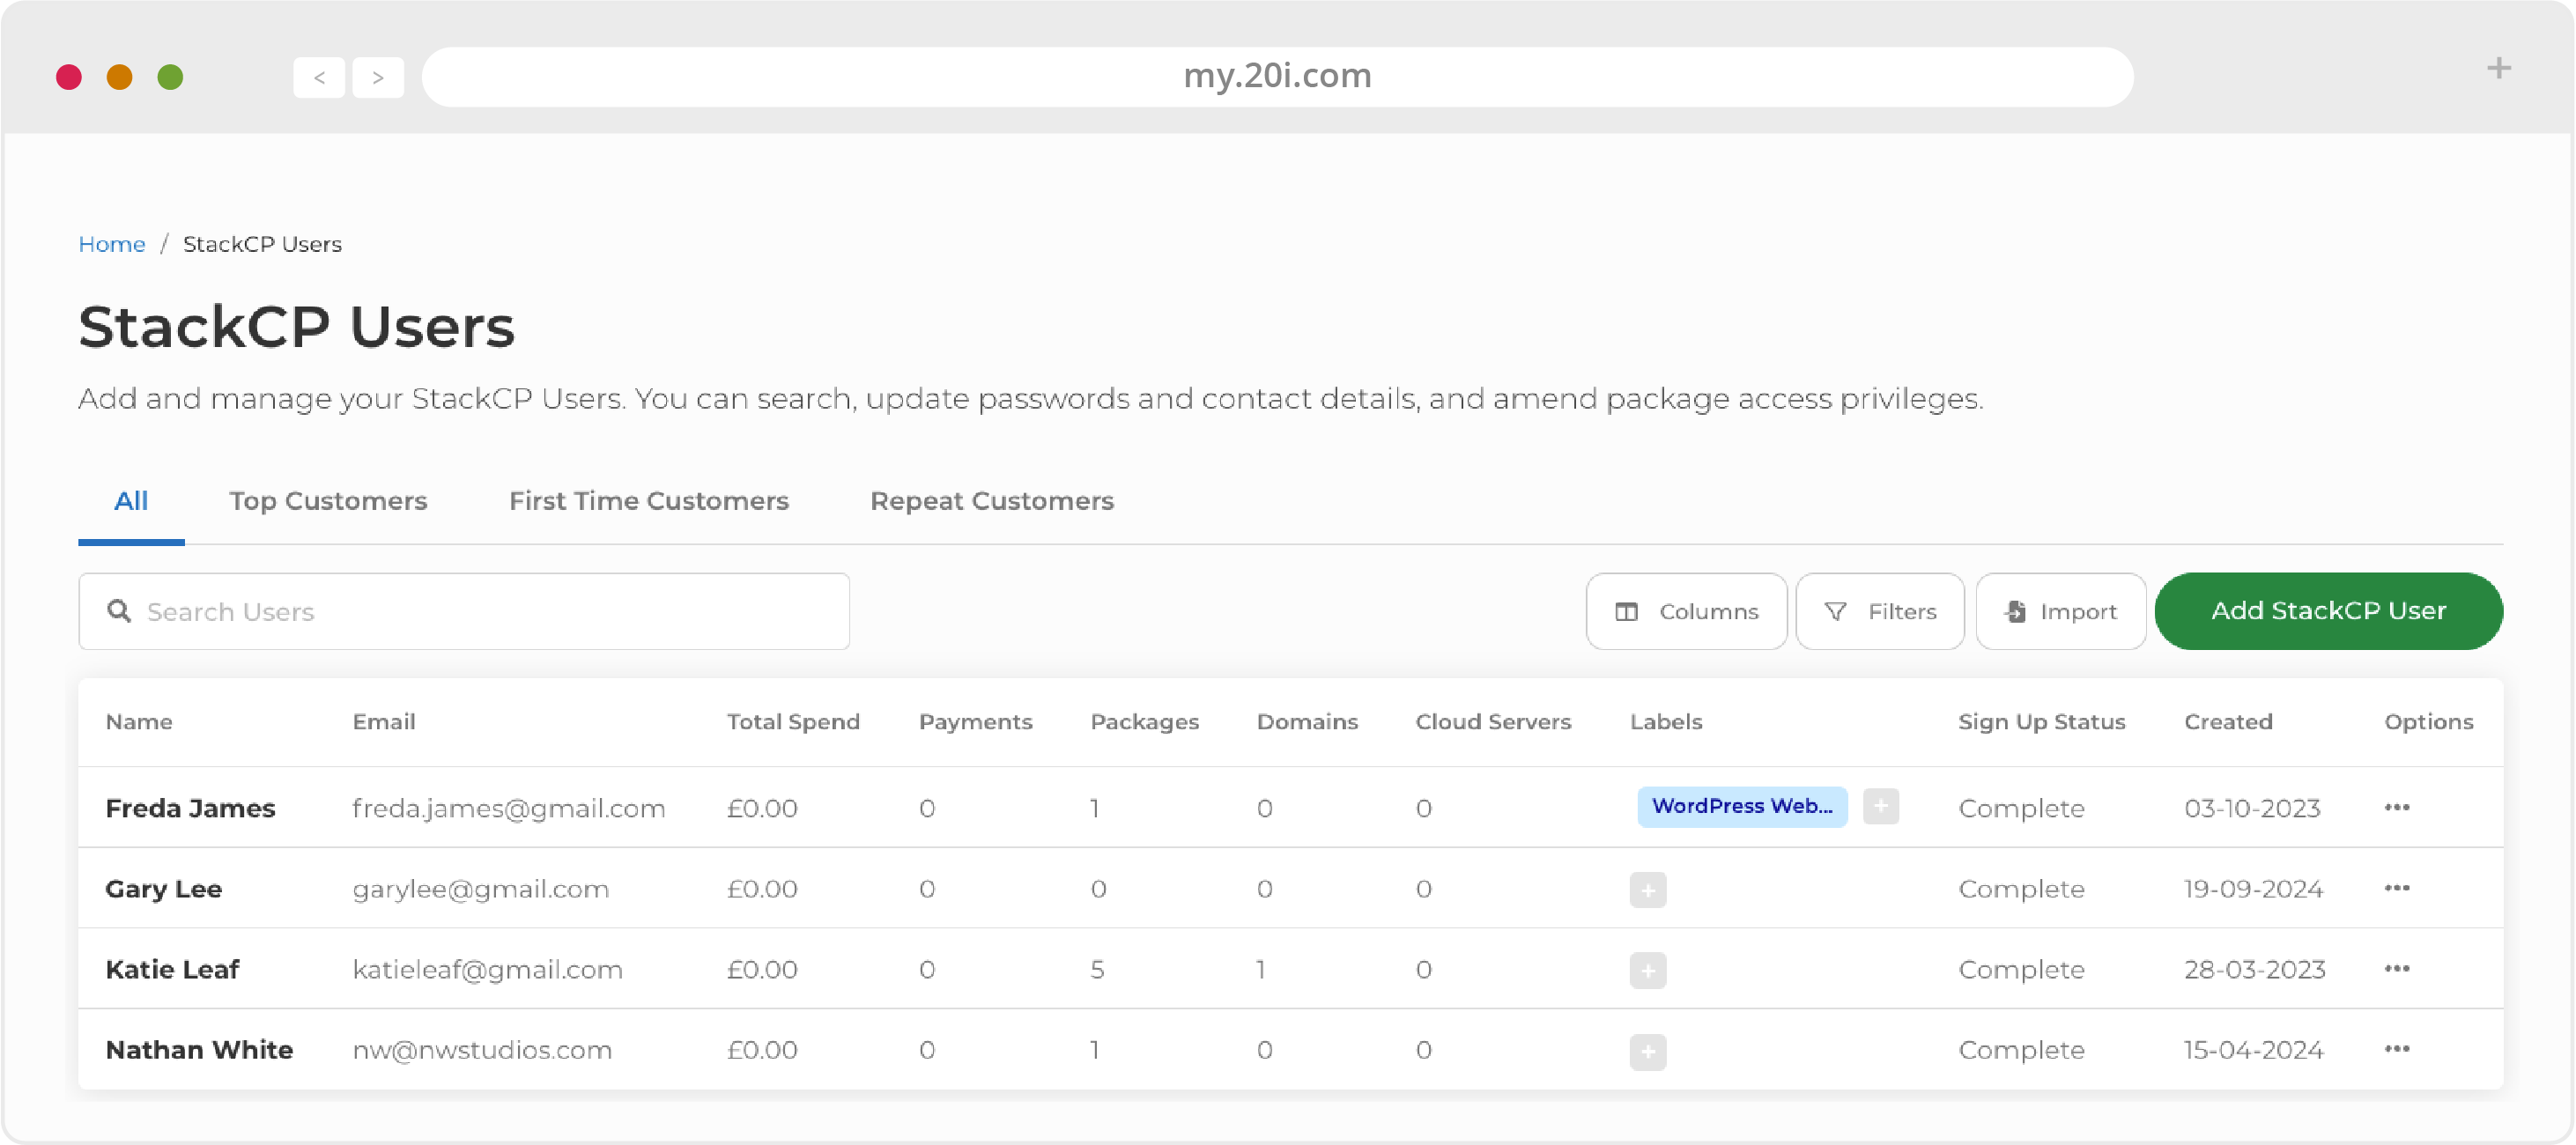
If there’s been a problem with the verification email, you will need to log in as them in the StackCP Users area. Locate them in the list, and go to Options > Sign In.
You’ll then be prompted with ‘Not got the email? Resend’. Select this and the email address verification email will be resent from the address you specified in Reseller Preferences > Email Templates (see the next section).
Pending Orders
Pending Orders are those invoices that need your attention, for two reasons:
- Pro forma invoices: If you’ve created the option of ‘Mail In Payment/Bank Transfer’ as one of your payment types, this will create pro-forma invoices. You can view these orders and download them as PDFs. Once you receive payment for these, you can provision the order and mark it as paid or unpaid (with the latter they’ll be moved to your Unpaid Invoices page). You can also drop the order if the customer is no longer interested
- Potentially fraudulent orders: HostShop includes sophisticated checking for potential fraud. Orders that receive a positive abuse score will be held here for manual review. You can either complete the order and provision the product or drop the order and the invoice will be cancelled. You can also ‘Reject’ the order, which will also cancel the invoice without provisioning but also make future orders by the same customer more likely to be rejected
Invoices and Customer Contracts
Billing Frequency
Billing is handled automatically, and those customers who sign up using HostShop will receive requests for payment dependent on the Service and Contract they’ve signed-up for. For example, those on monthly contracts will receive a bill a month after the date of first purchase.
Previous Customers
If you’re new to HostShop and have customers already, you’ll need to add them as StackCP Users and assign services to them which is covered in the StackCP section.
For them to start on the automated billing system, in StackCP Users you’ll need to go to: Options > Manage. On their StackCP User Card, you will be able to add services, then ‘Manage’ that service to add a Contract. A Contract consists of a price, a payment date, frequency and an expiry date. You will have to have set these up in your Product Catalogue (see above).

Invoices
- Invoices - An overview of all invoices, paid and unpaid
- Unpaid Invoices - Here you can view payments in arrears and download previous invoices
- Failed Orders- Customer orders that have failed the provisioning stage
Renewals
HostShop includes an automated process to handle renewal reminders on our Renewal Sequence page. We have a default sequence set up, but it can be modified here.
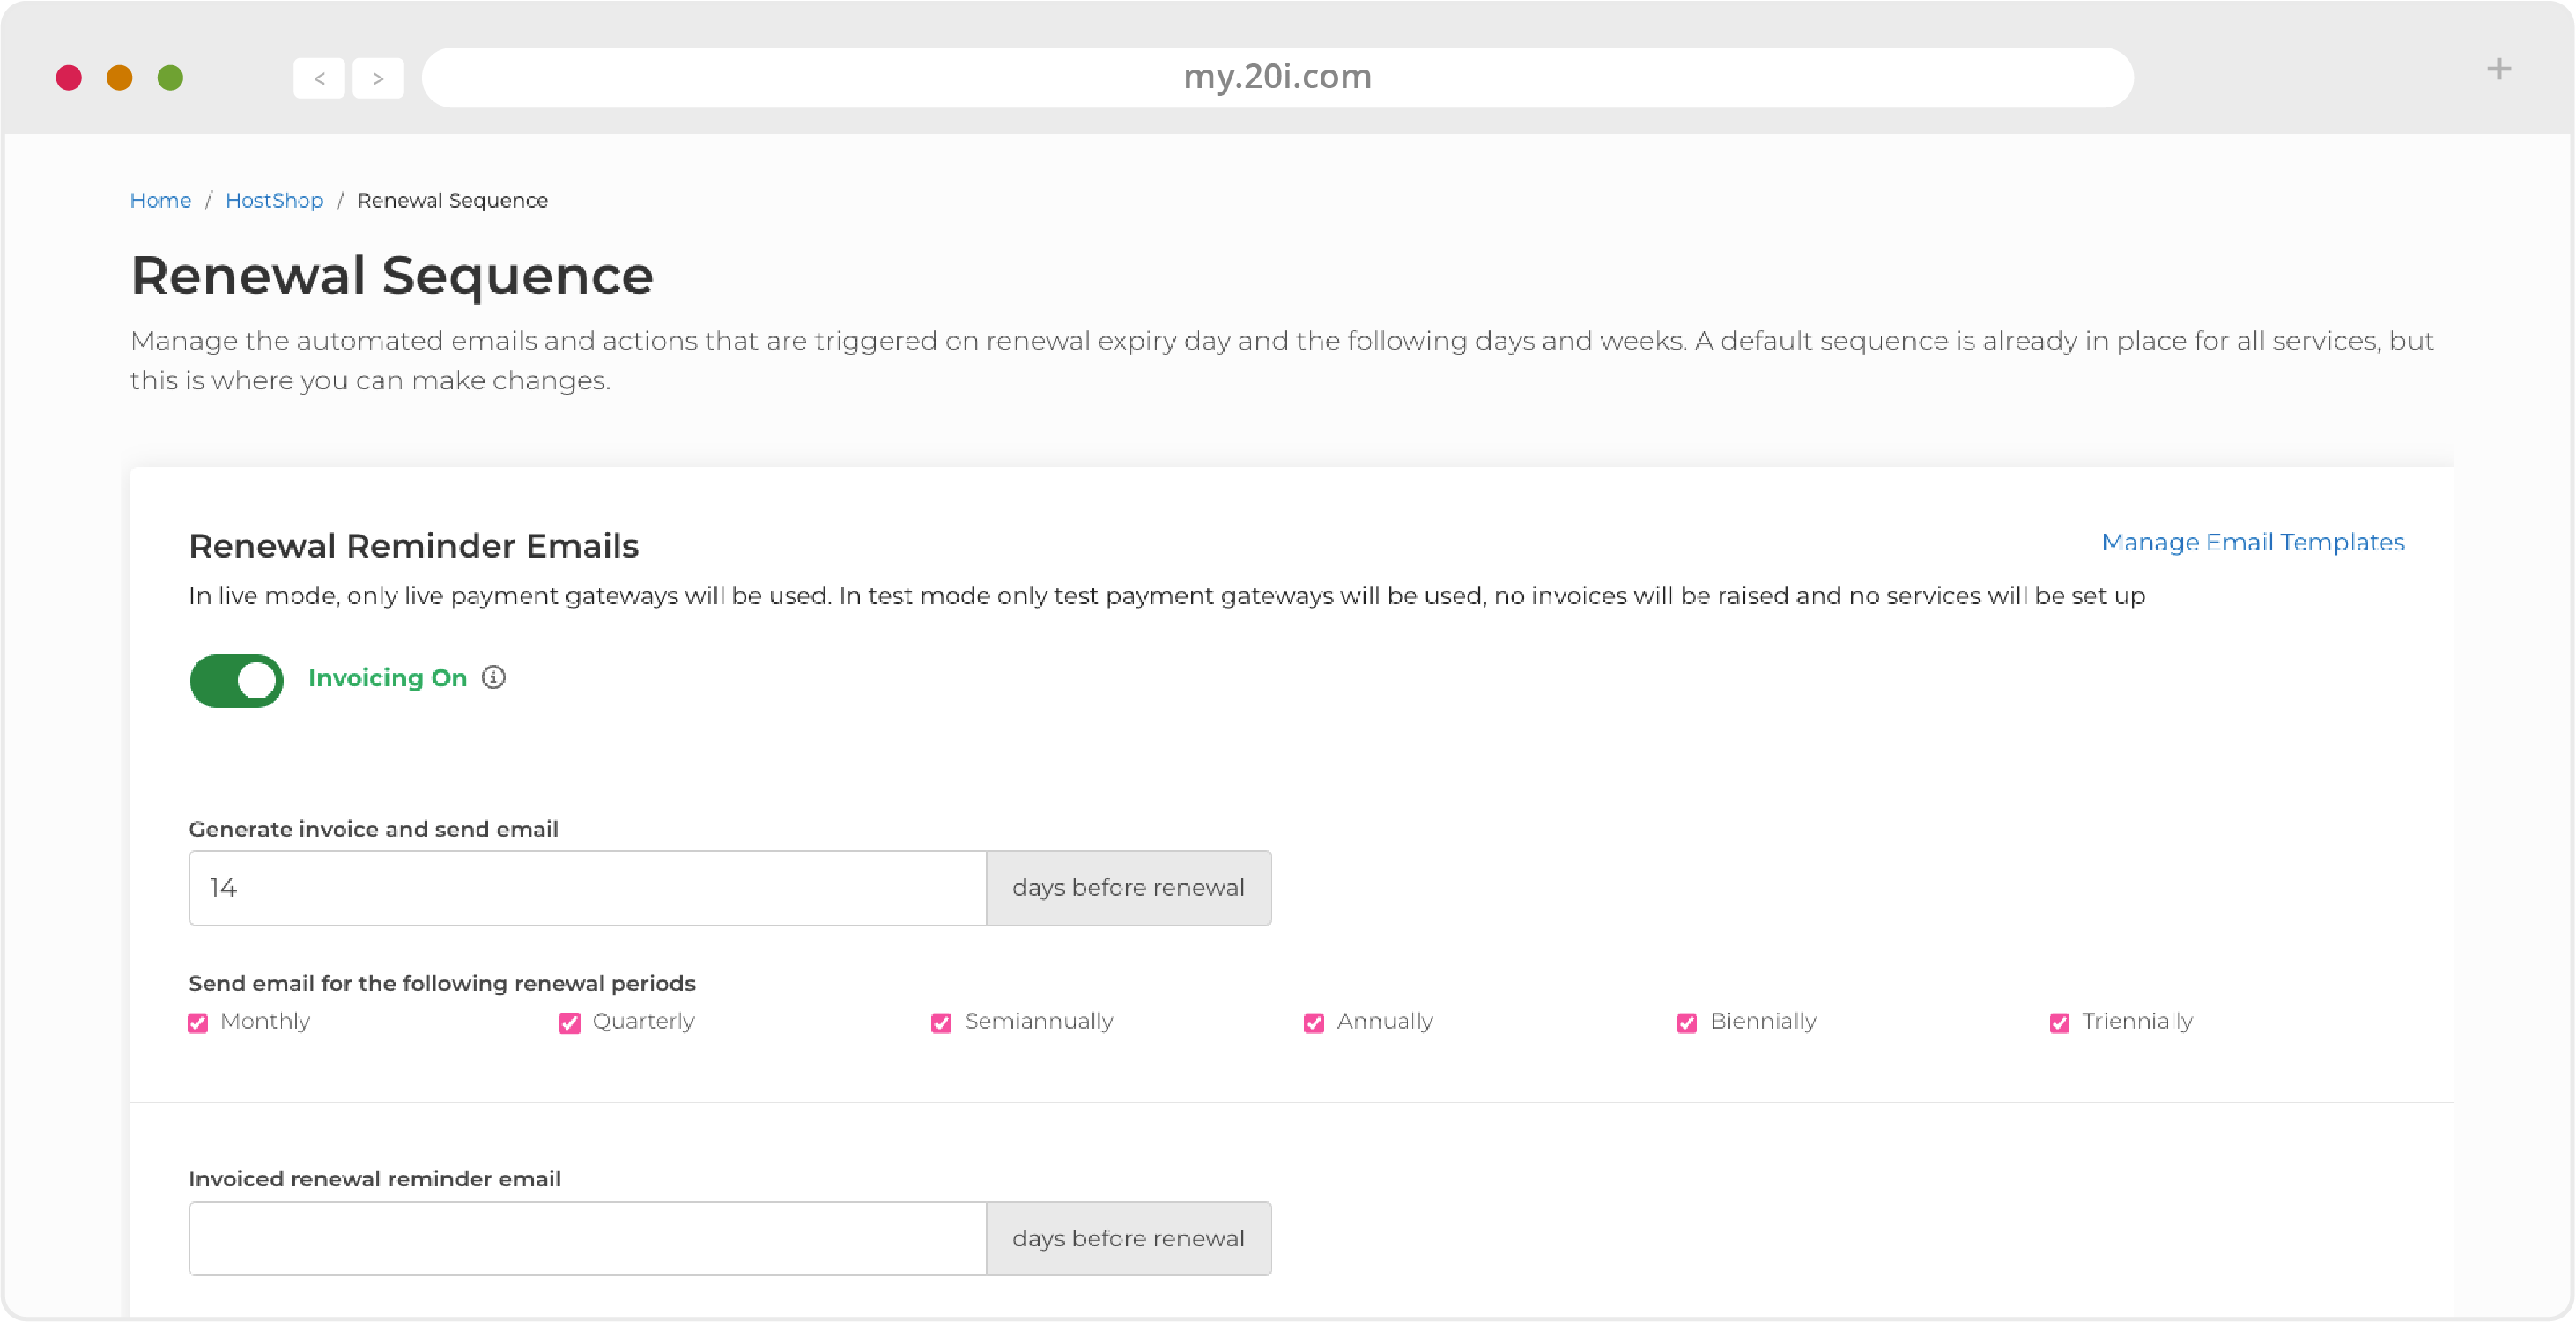
Emails
The first section covers email reminders, with the default being 21 days before, 7 days before and 5 days after the expiry. If you don’t want an email reminder to be sent you can enter ‘0’ in the box.
You can manage the content of the emails using the link to the Email Templates page.
Renewal Sequence
This covers the actions that follow after the expiry day. You can lock out services, disable services or cancel services. Combined with these actions, you can also send different email notifications based on preset templates or those you create yourself on the Email Templates page. These emails are in addition to the ‘renewal email after expiry’ one set above.
HostShop Reports
You can keep track of important business metrics using HostShop Reports. Each report includes a table and a chart showing changes over time.
- New Customers - See your latest signups here
- Revenue by Month - Monitor ongoing overall business performance here
- Top Customers - Your highest-spending customers by month here
- Service Counts - The number of active products/services, by type of product, e.g. hosting, domains, or VPS here
- Income by Product - The funds different products are bringing in to your business here
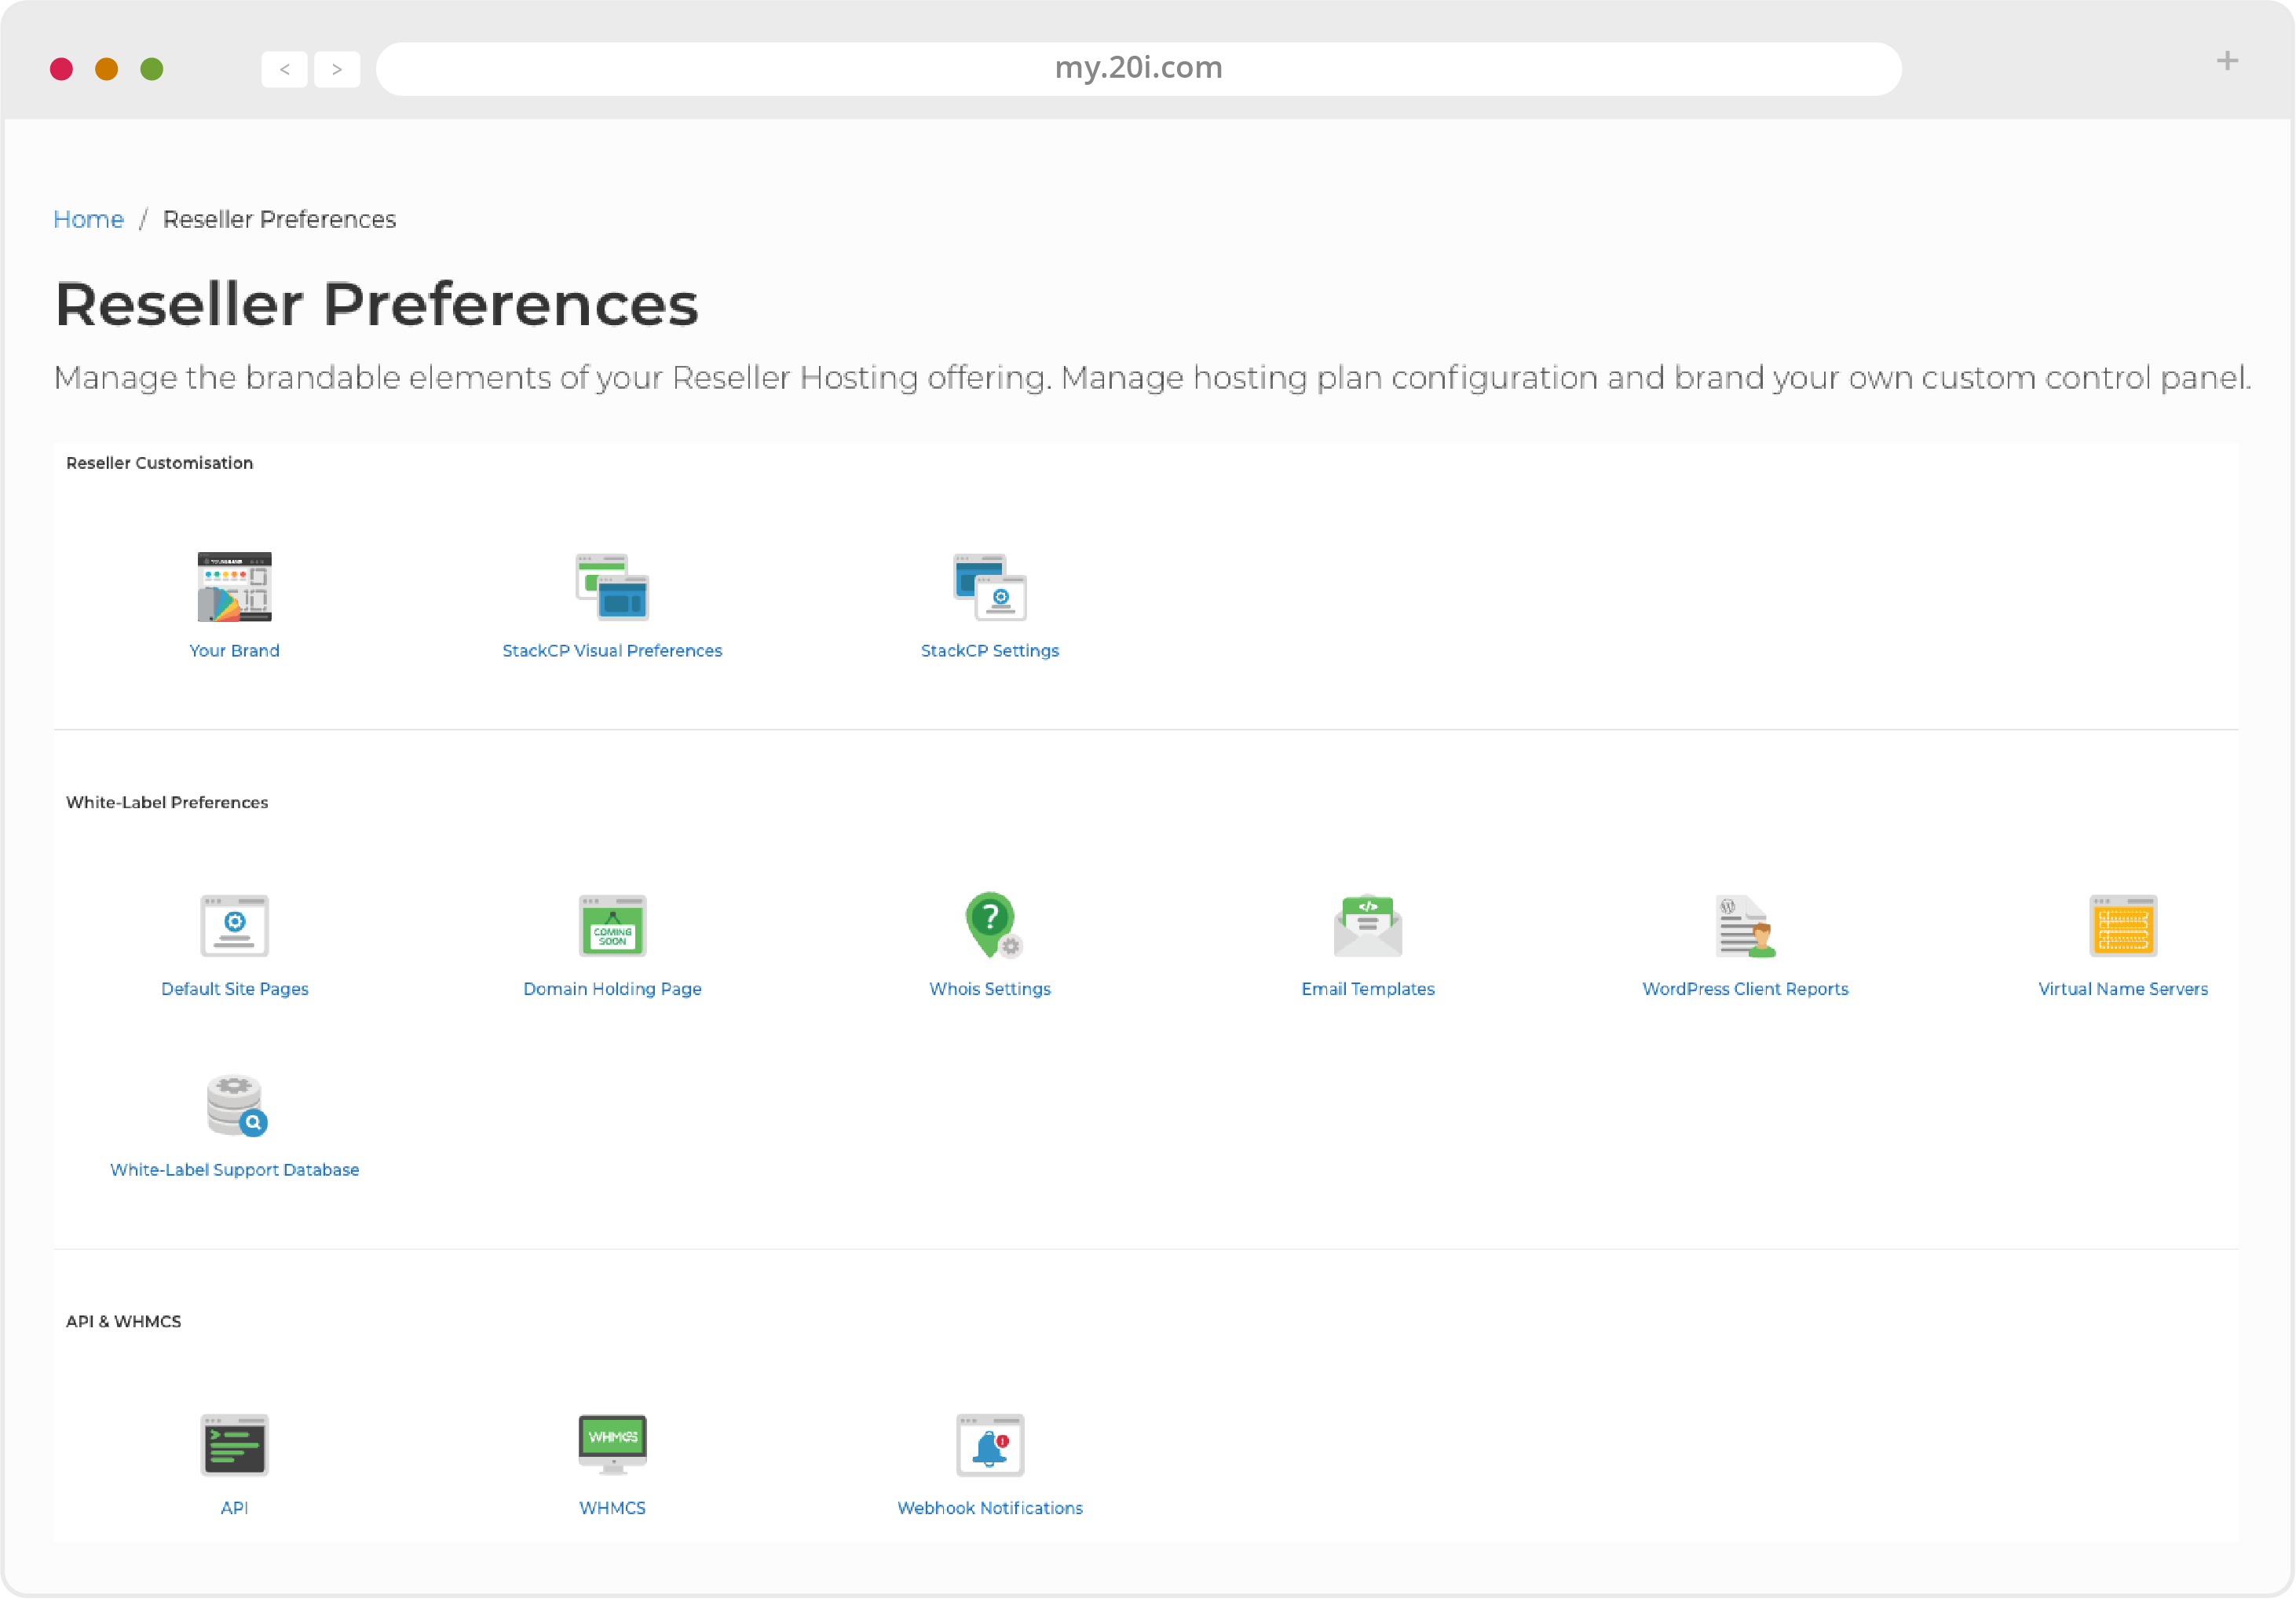
Reseller Customisation
Reseller Customisation is where the branding and design options can be changed. You can preview your changes before making any final decisions.
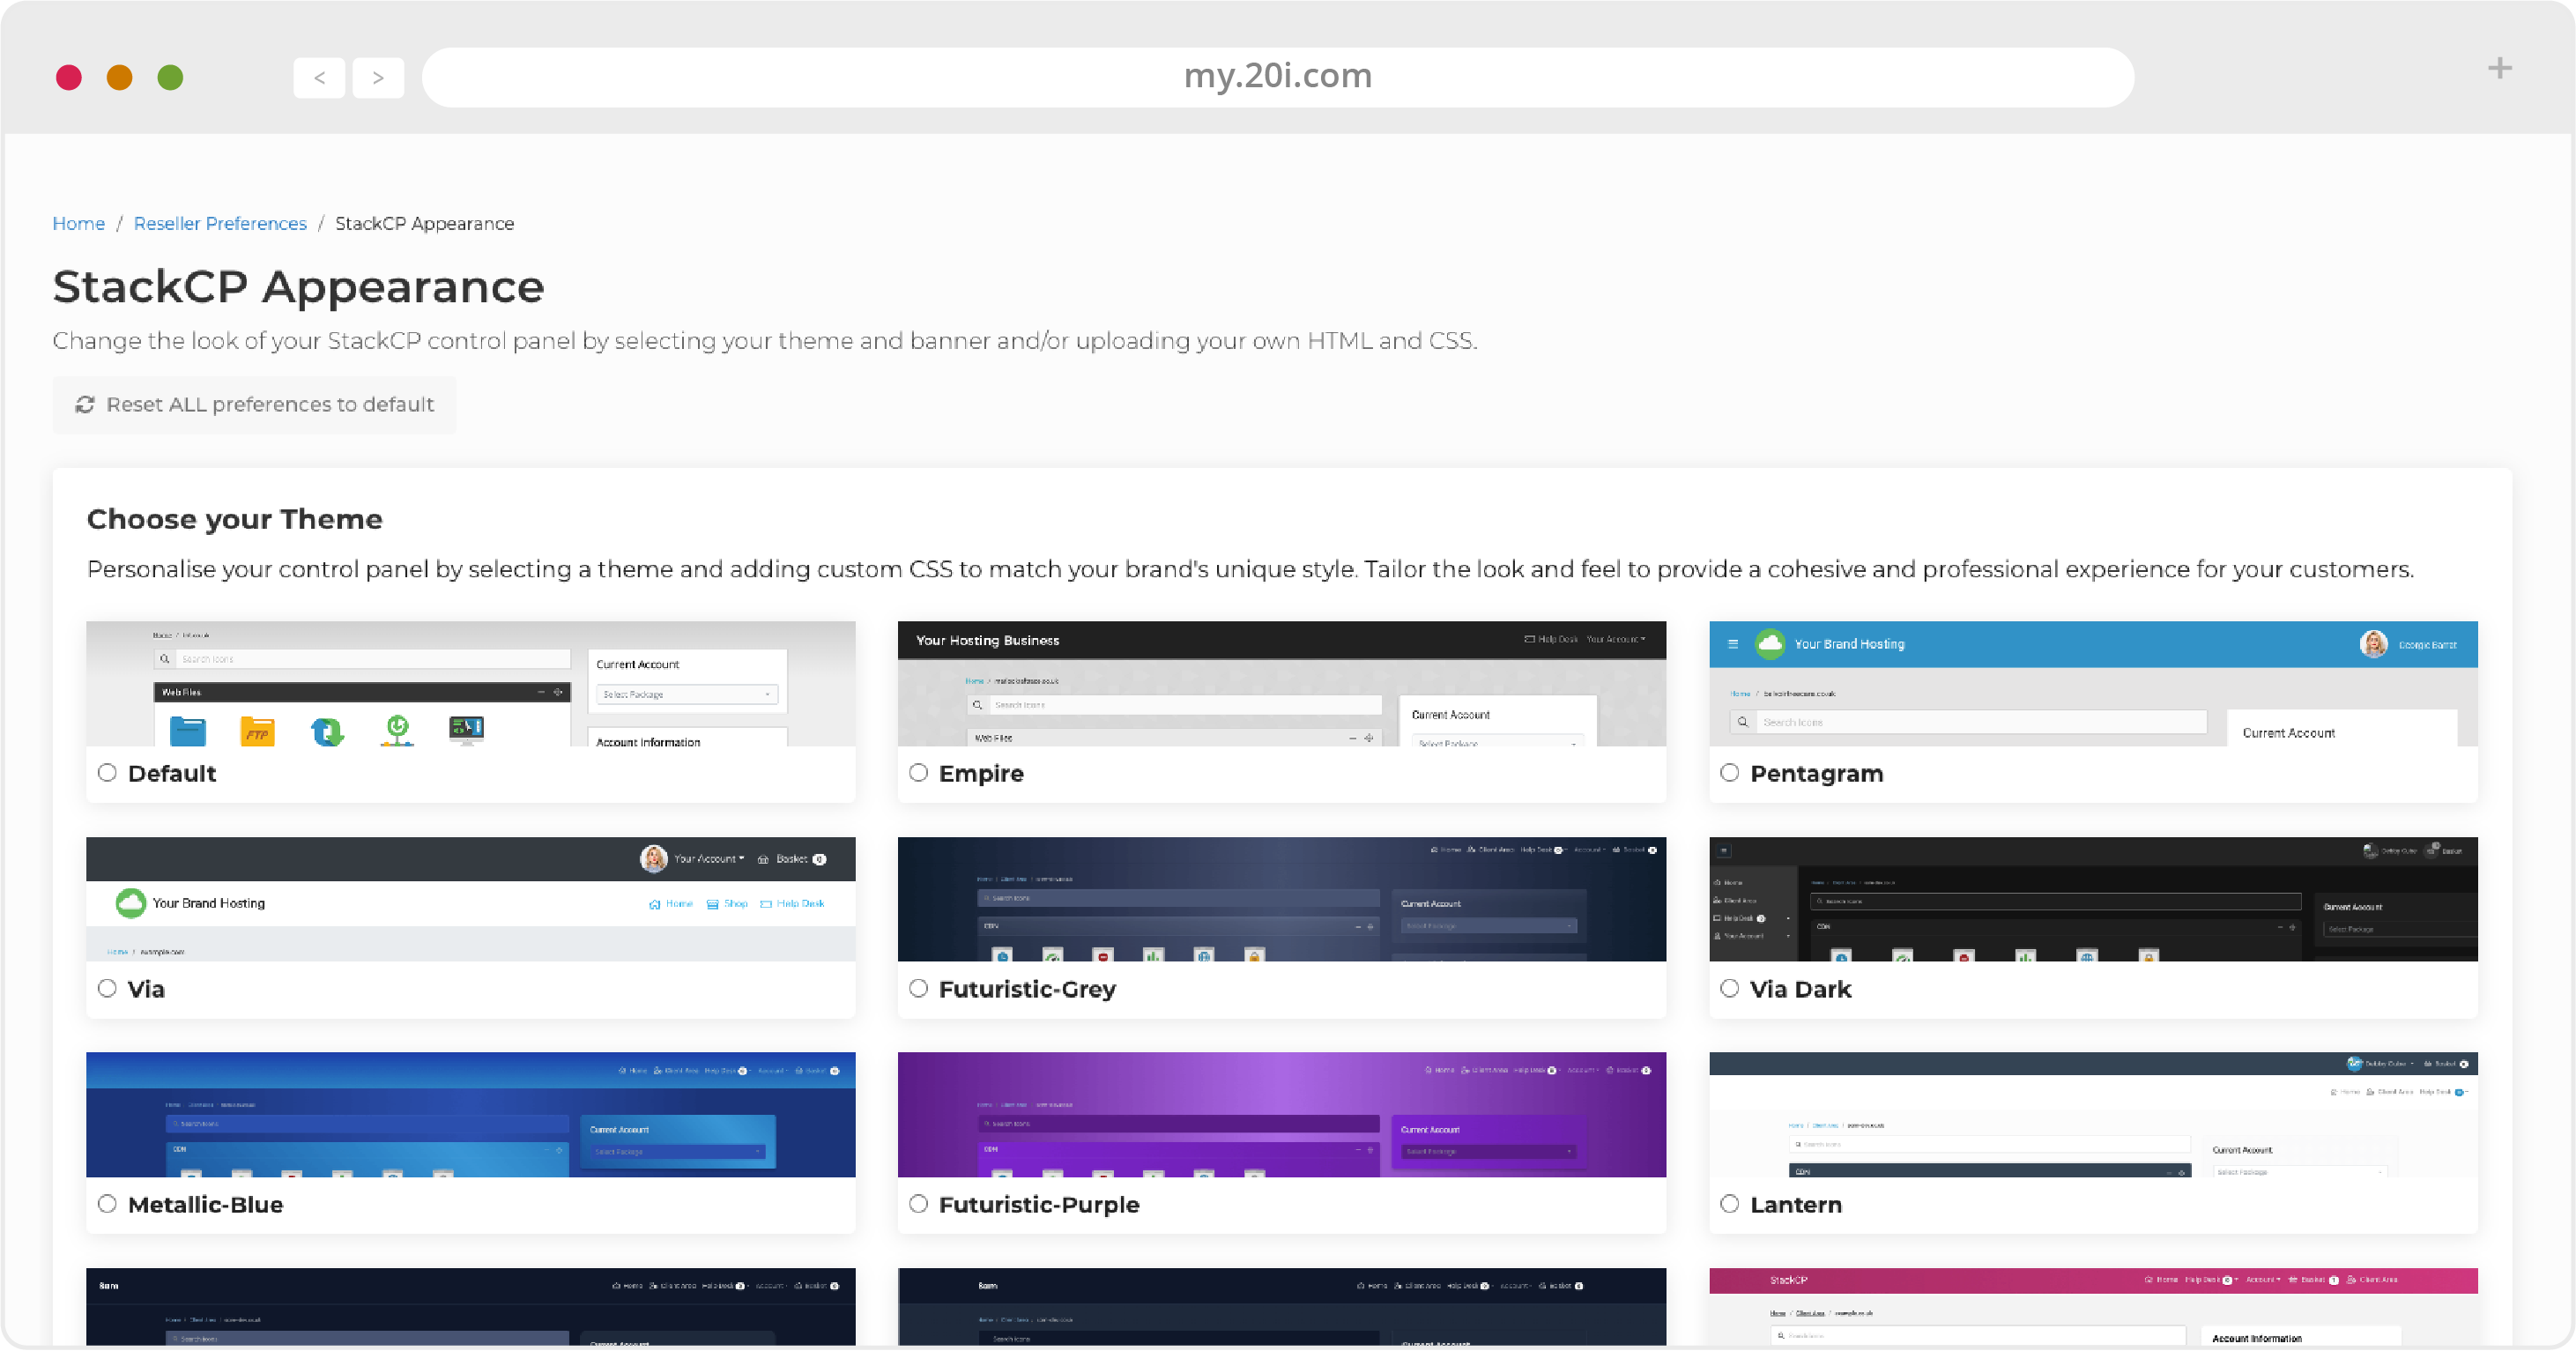
StackCP Visual Preferences
The first section covers the appearance of the StackCP control panel, and links to the StackCP Visual Preferences page, where you can choose one of our themes and add custom code and images to your customers’ control panel.
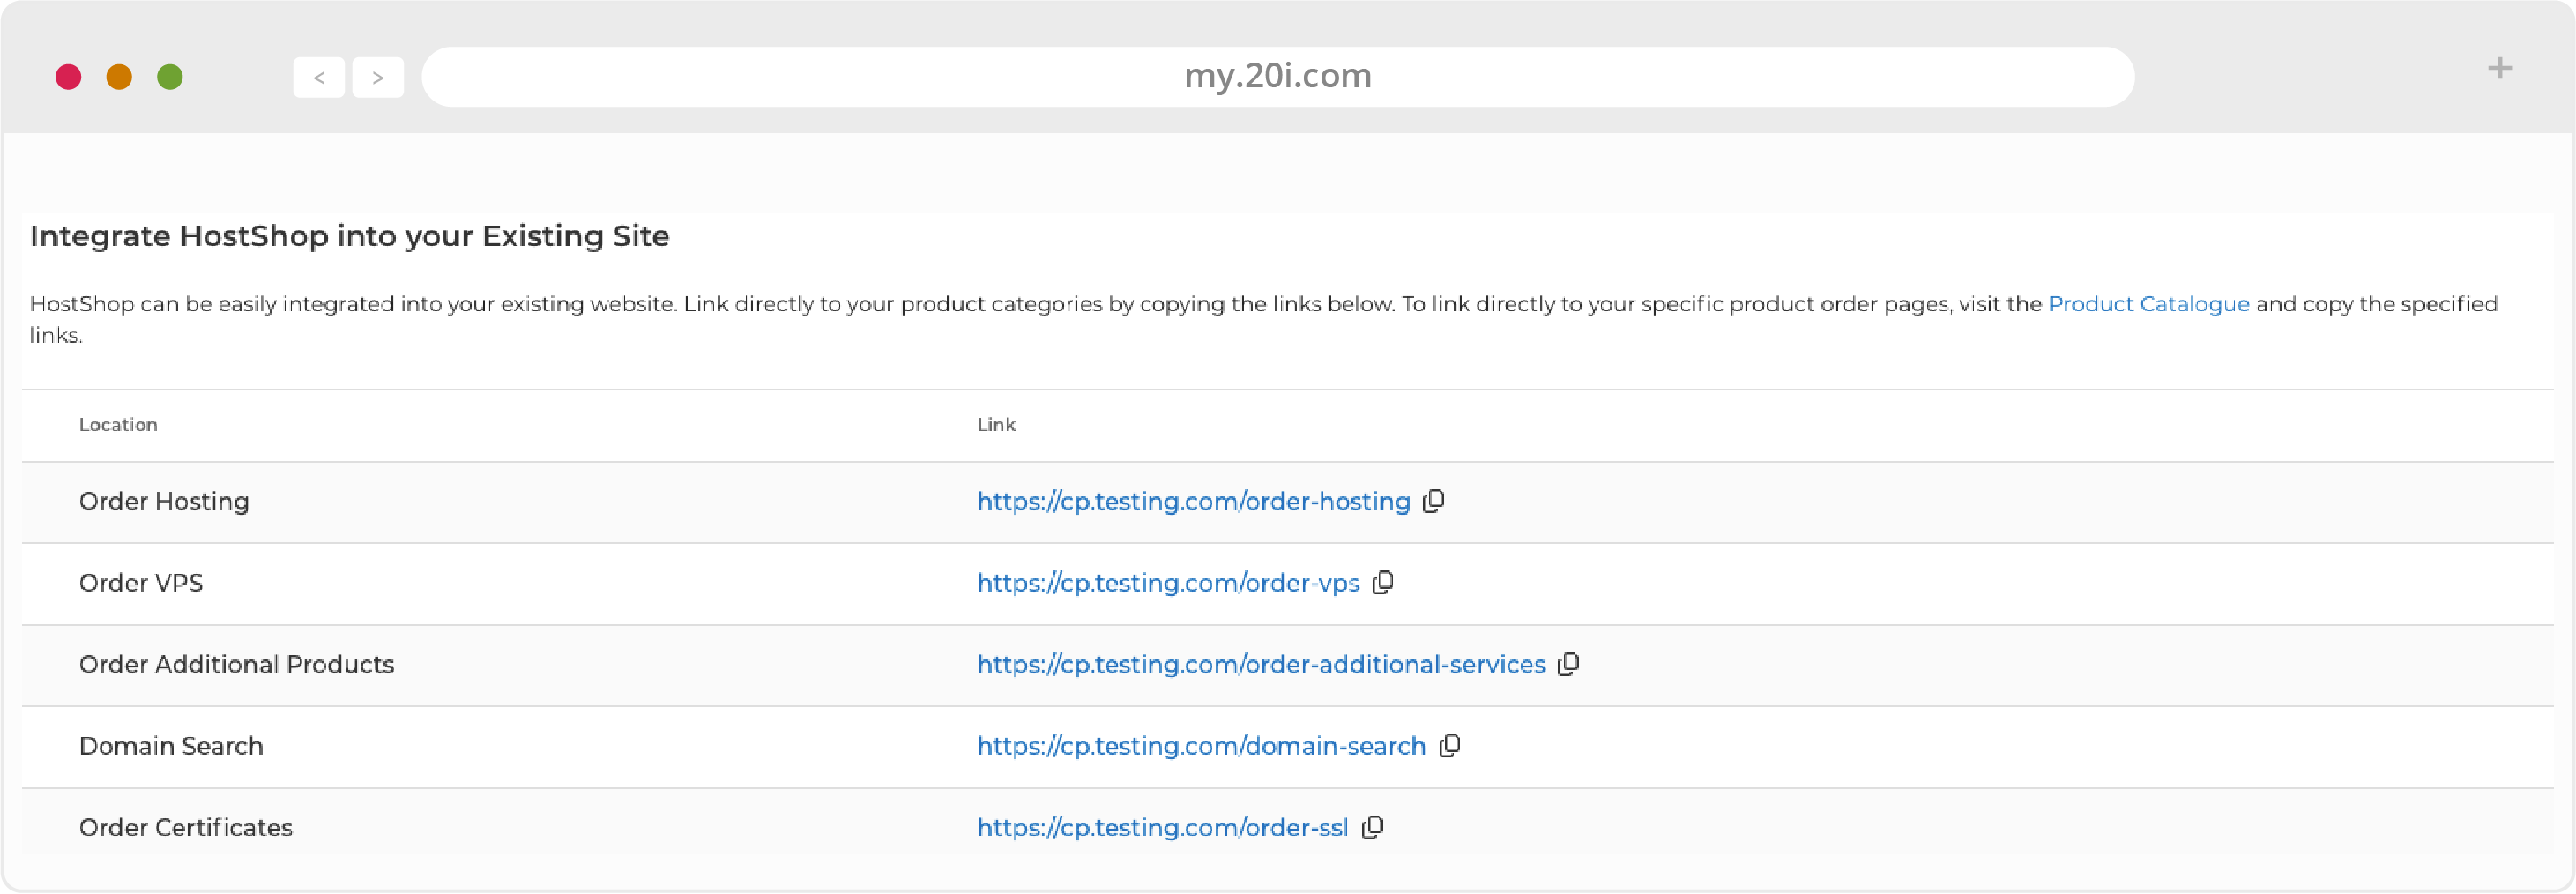
Links to Your Shop Pages
Next - for those who already have a website - there are links you can use to integrate the shop with your site. For example, if you have an ‘Order hosting’ button, you’d use the link provided here.
If you wanted to link to a specific product - like a single hosting plan - you would need to use the direct link to that single product; these links are available in the Configuration.
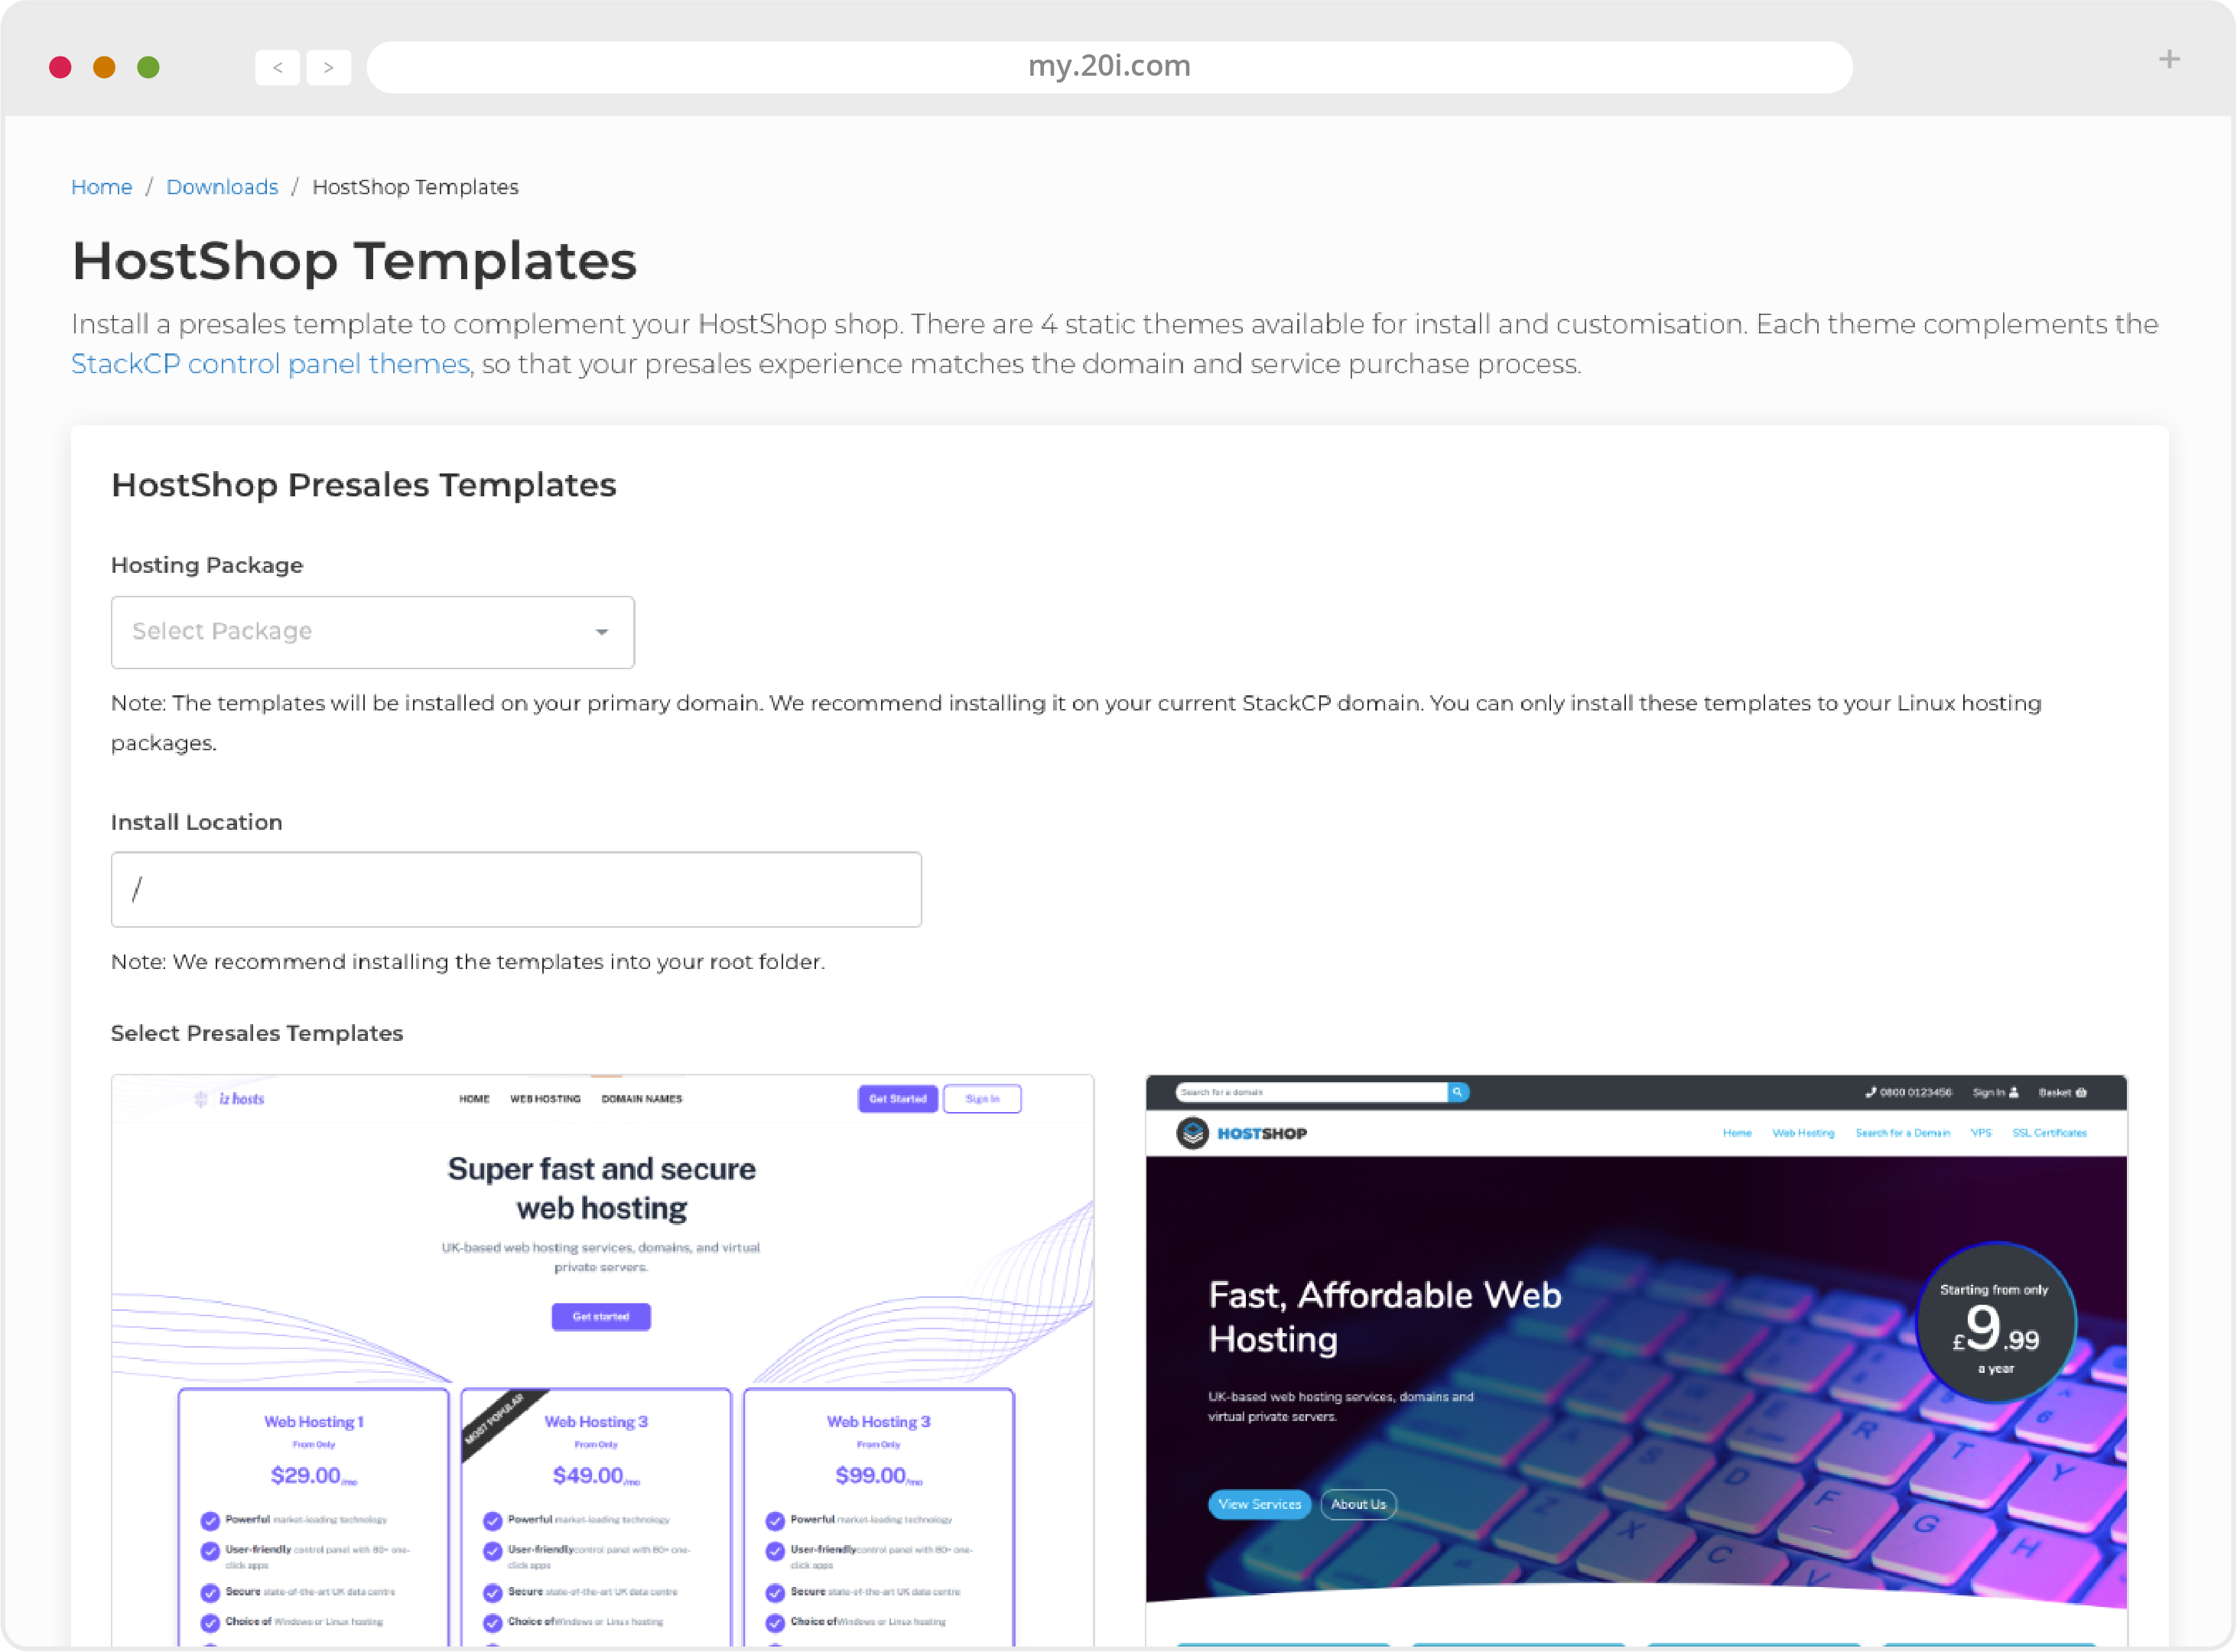
HostShop Presales Templates
There is an ever increasing variety of ready-made website templates that are free for you to use as a basis of your business. They include marketing copy and stock images which you are free to use as you wish.
They are based on the Bootstrap 4 CSS framework so they can be easily modified. We would recommend making changes to the copy - at the very least.
This is so your website looks unique in the market and avoids potential plagiarism penalties from search engines. The themes also include some ’dummy text’ in the blog posts and testimonials, so we recommend replacing or removing this.
They’re designed to compliment StackCP themes, which determine the appearance of the shop and your customer’s control panel after they’ve signed up.
So each StackCP theme has a corresponding presales website template. While you are able to mix StackCP themes and presales website templates, we recommend that you use the corresponding one for the smoothest transition between your presales website and your shop/control panel.
HostShop Homepage Text
HostShop Configuration is where many central functions and settings of HostShop can be managed.
Open/Close Your HostShop
You can’t open your shop until you’ve added payment methods and services/products, but the option is here.
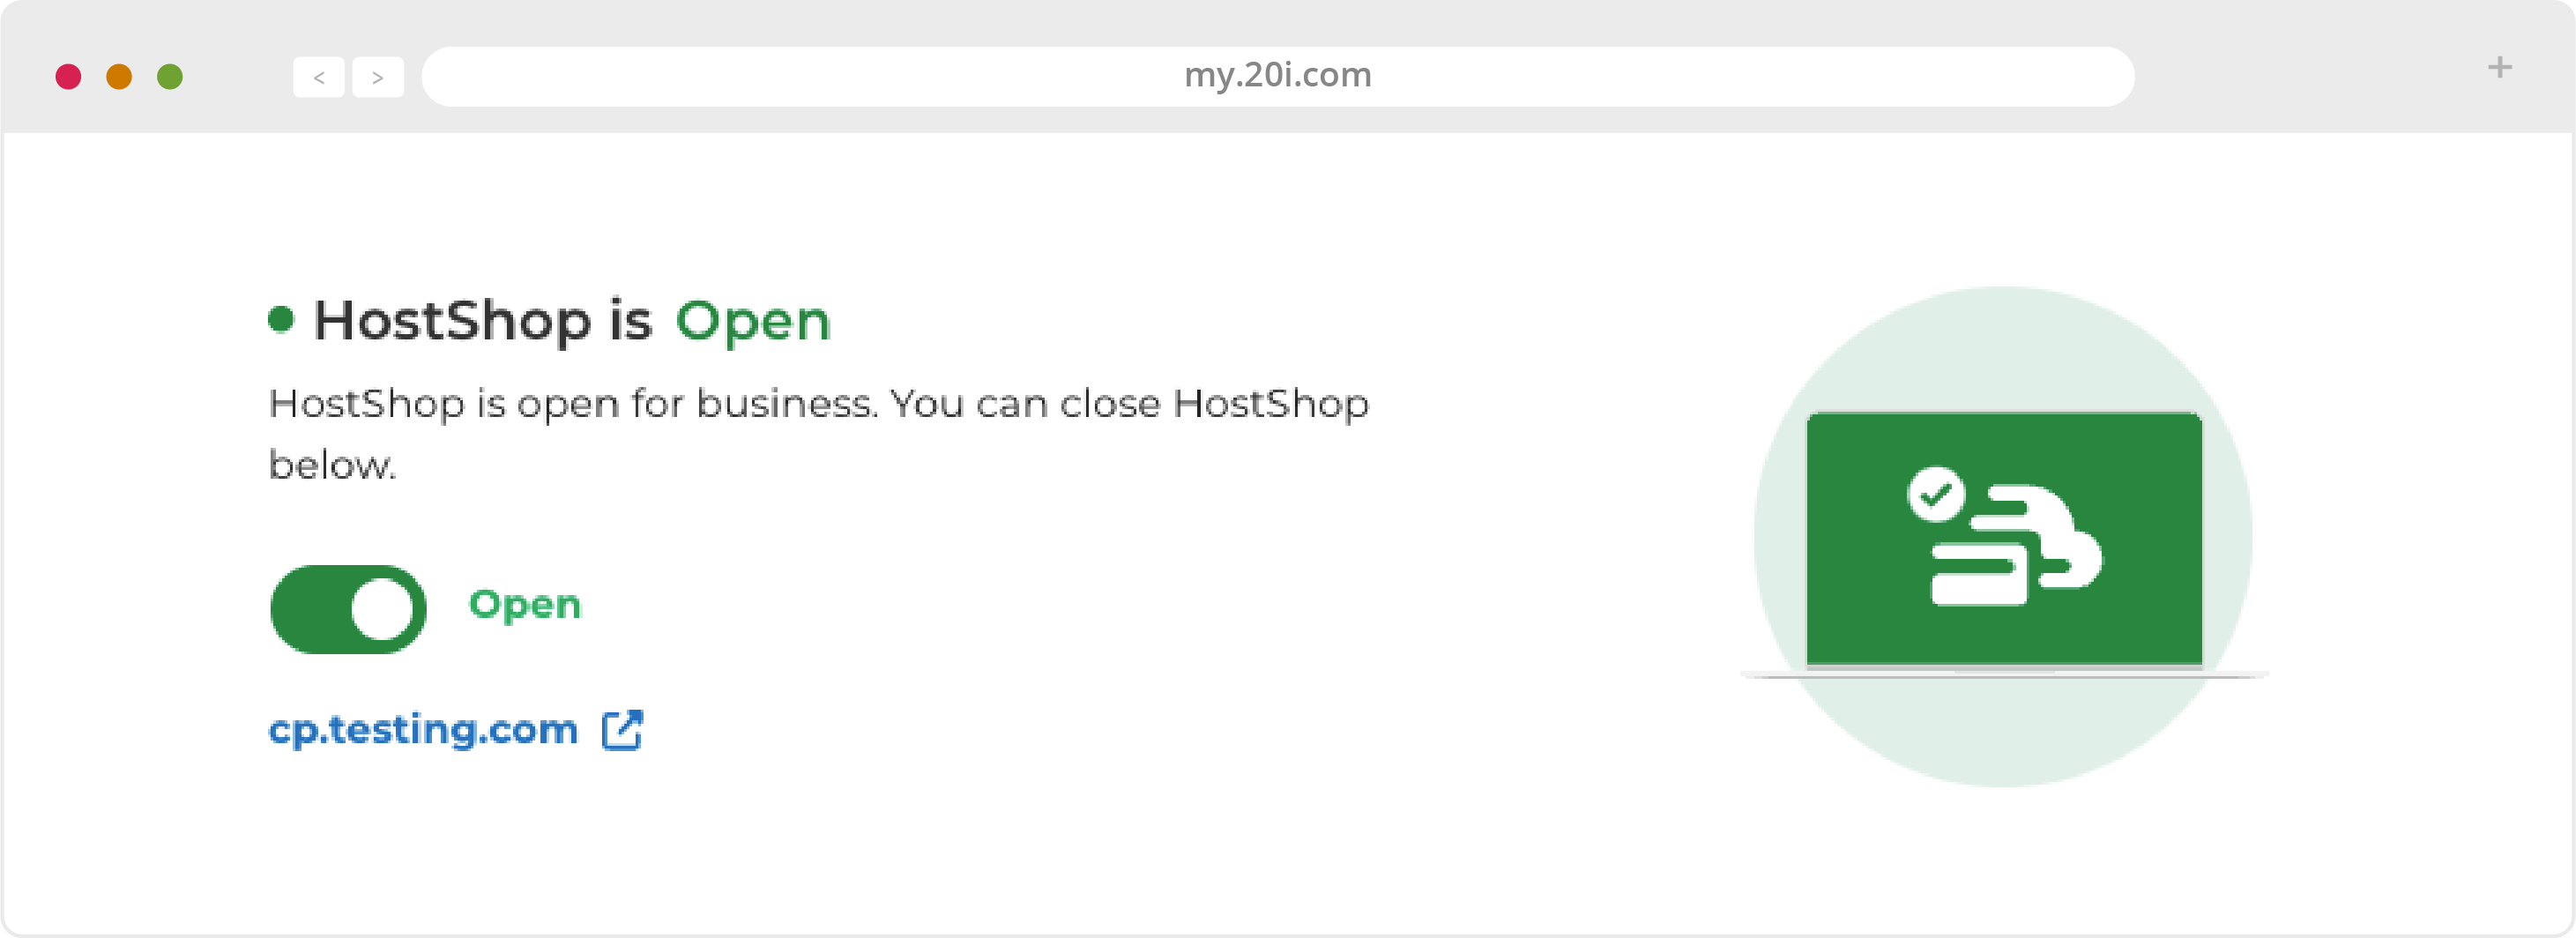
HostShop URL
This confirms the domain and URL where HostShop can be found. It can be updated in Reseller Customisation (see the StackCP section).
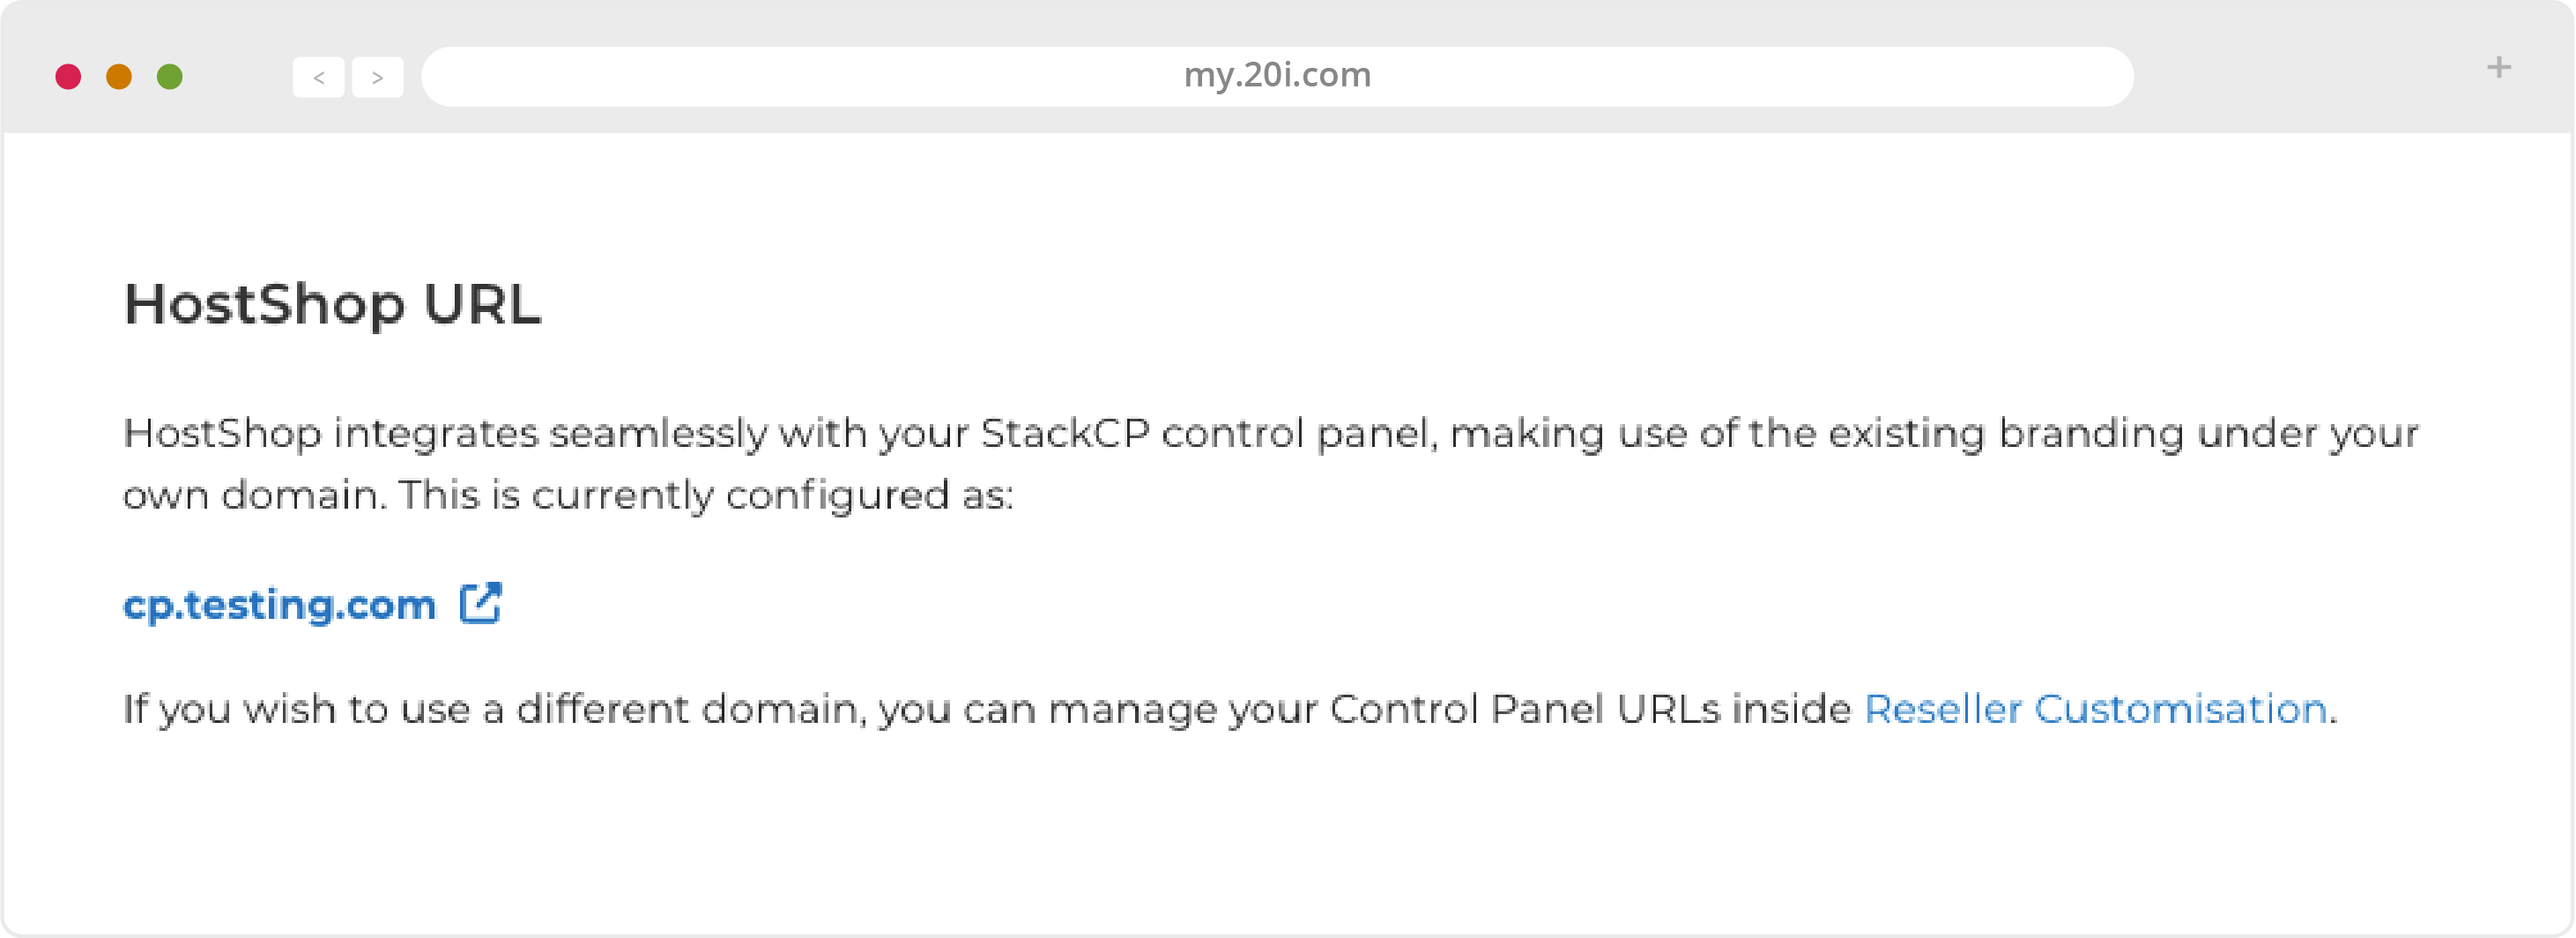
HostShop Homepage Text
From the Configuration section of HostShop you can customise the text content of your shop page(s), add in your brand name and personalise the experience of your StackCP Users via tags.
Currency
Here you can set the currency used in HostShop. Please contact 20i support if you’d like a currency that isn’t included to be added.
Enable/Disable Contact Form
Change text of Enable/Disable Contact Form section to read: “Activate or deactivate the ‘Contact Us’ option for your HostShop from this settings page.
Enable/Disable HostShop
This is to turn the entire HostShop module on or off. Turning it off doesn’t delete any changes you’ve made to the standard setup, so your configuration(s) will still be there if you turn it back on.
If you have renewable contracts present in HostShop, it isn’t possible to disable it from here - you would need to cancel those contracts first.
Tax Settings
You can set your UK company VAT number here and it gives you the option to disable sales to EU countries. Information about the VAT Mini One Stop Shop can be found on the website for the European Union: https://20i.co/3bBw9rc.
>> Next step: Supporting your customers
 Ruth Turner
Reseller Hosting: StackCP Helpdesk
The StackCP Ticket System is a fully-featured customer service & support system for you and your customers. Your customers can raise tickets from StackCP, which you’ll receive via My20i. Emails are sent to both yourself and your StackCP Users (customers) when tickets are opened and updated in order to keep both parties notified of the current status of the ticket.
Quick Start
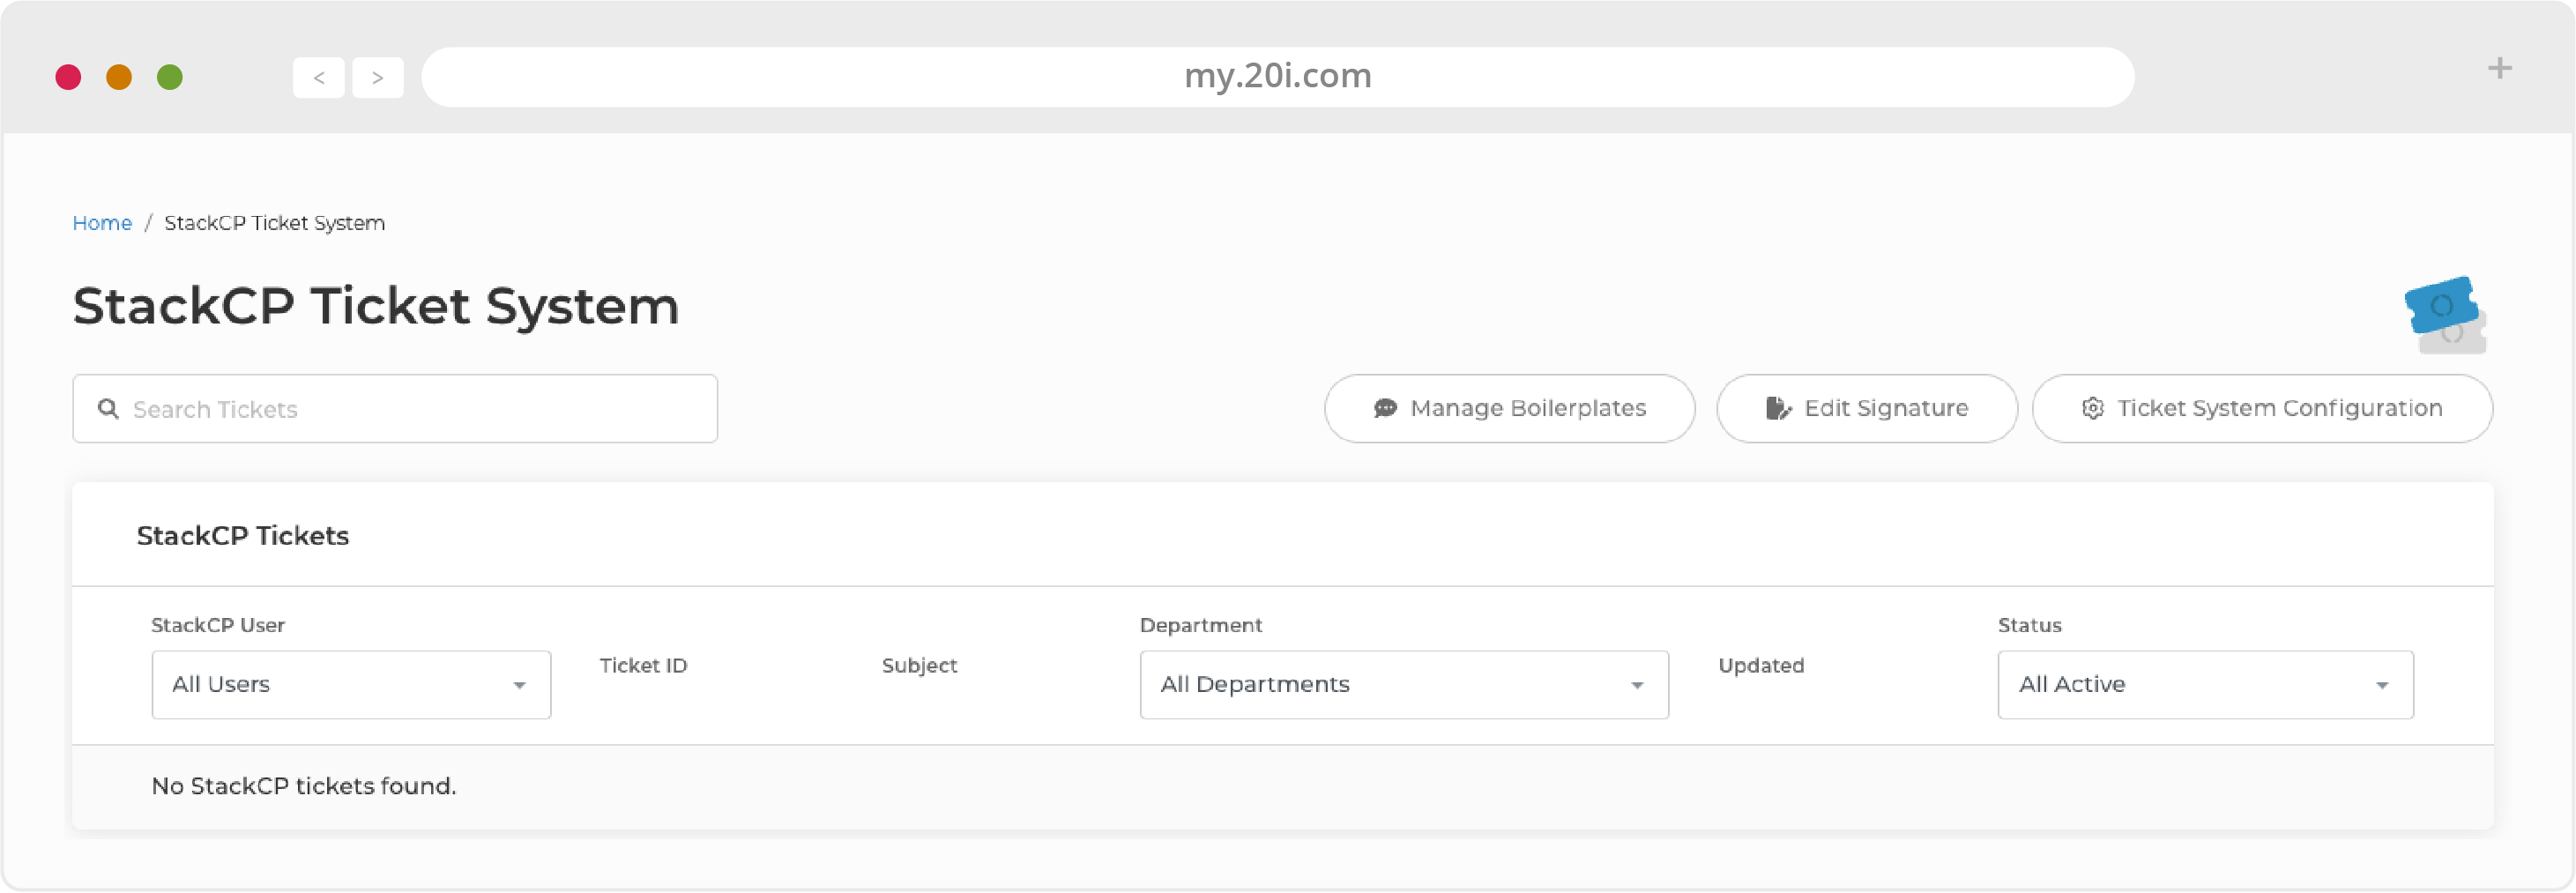
To enable the StackCP Ticket System:
- Select Ticket System Configuration and select Enable StackCP Ticket System
Customers can then raise tickets by logging in to StackCP. They can compose their enquiry there and select Create Support Ticket to send the message. To reply to customer tickets:
- Login to My20i and head to StackCP Ticket System
- You will see the raised ticket in the ticket list view, select Options > View Ticket
- Compose your reply and select Update Ticket.
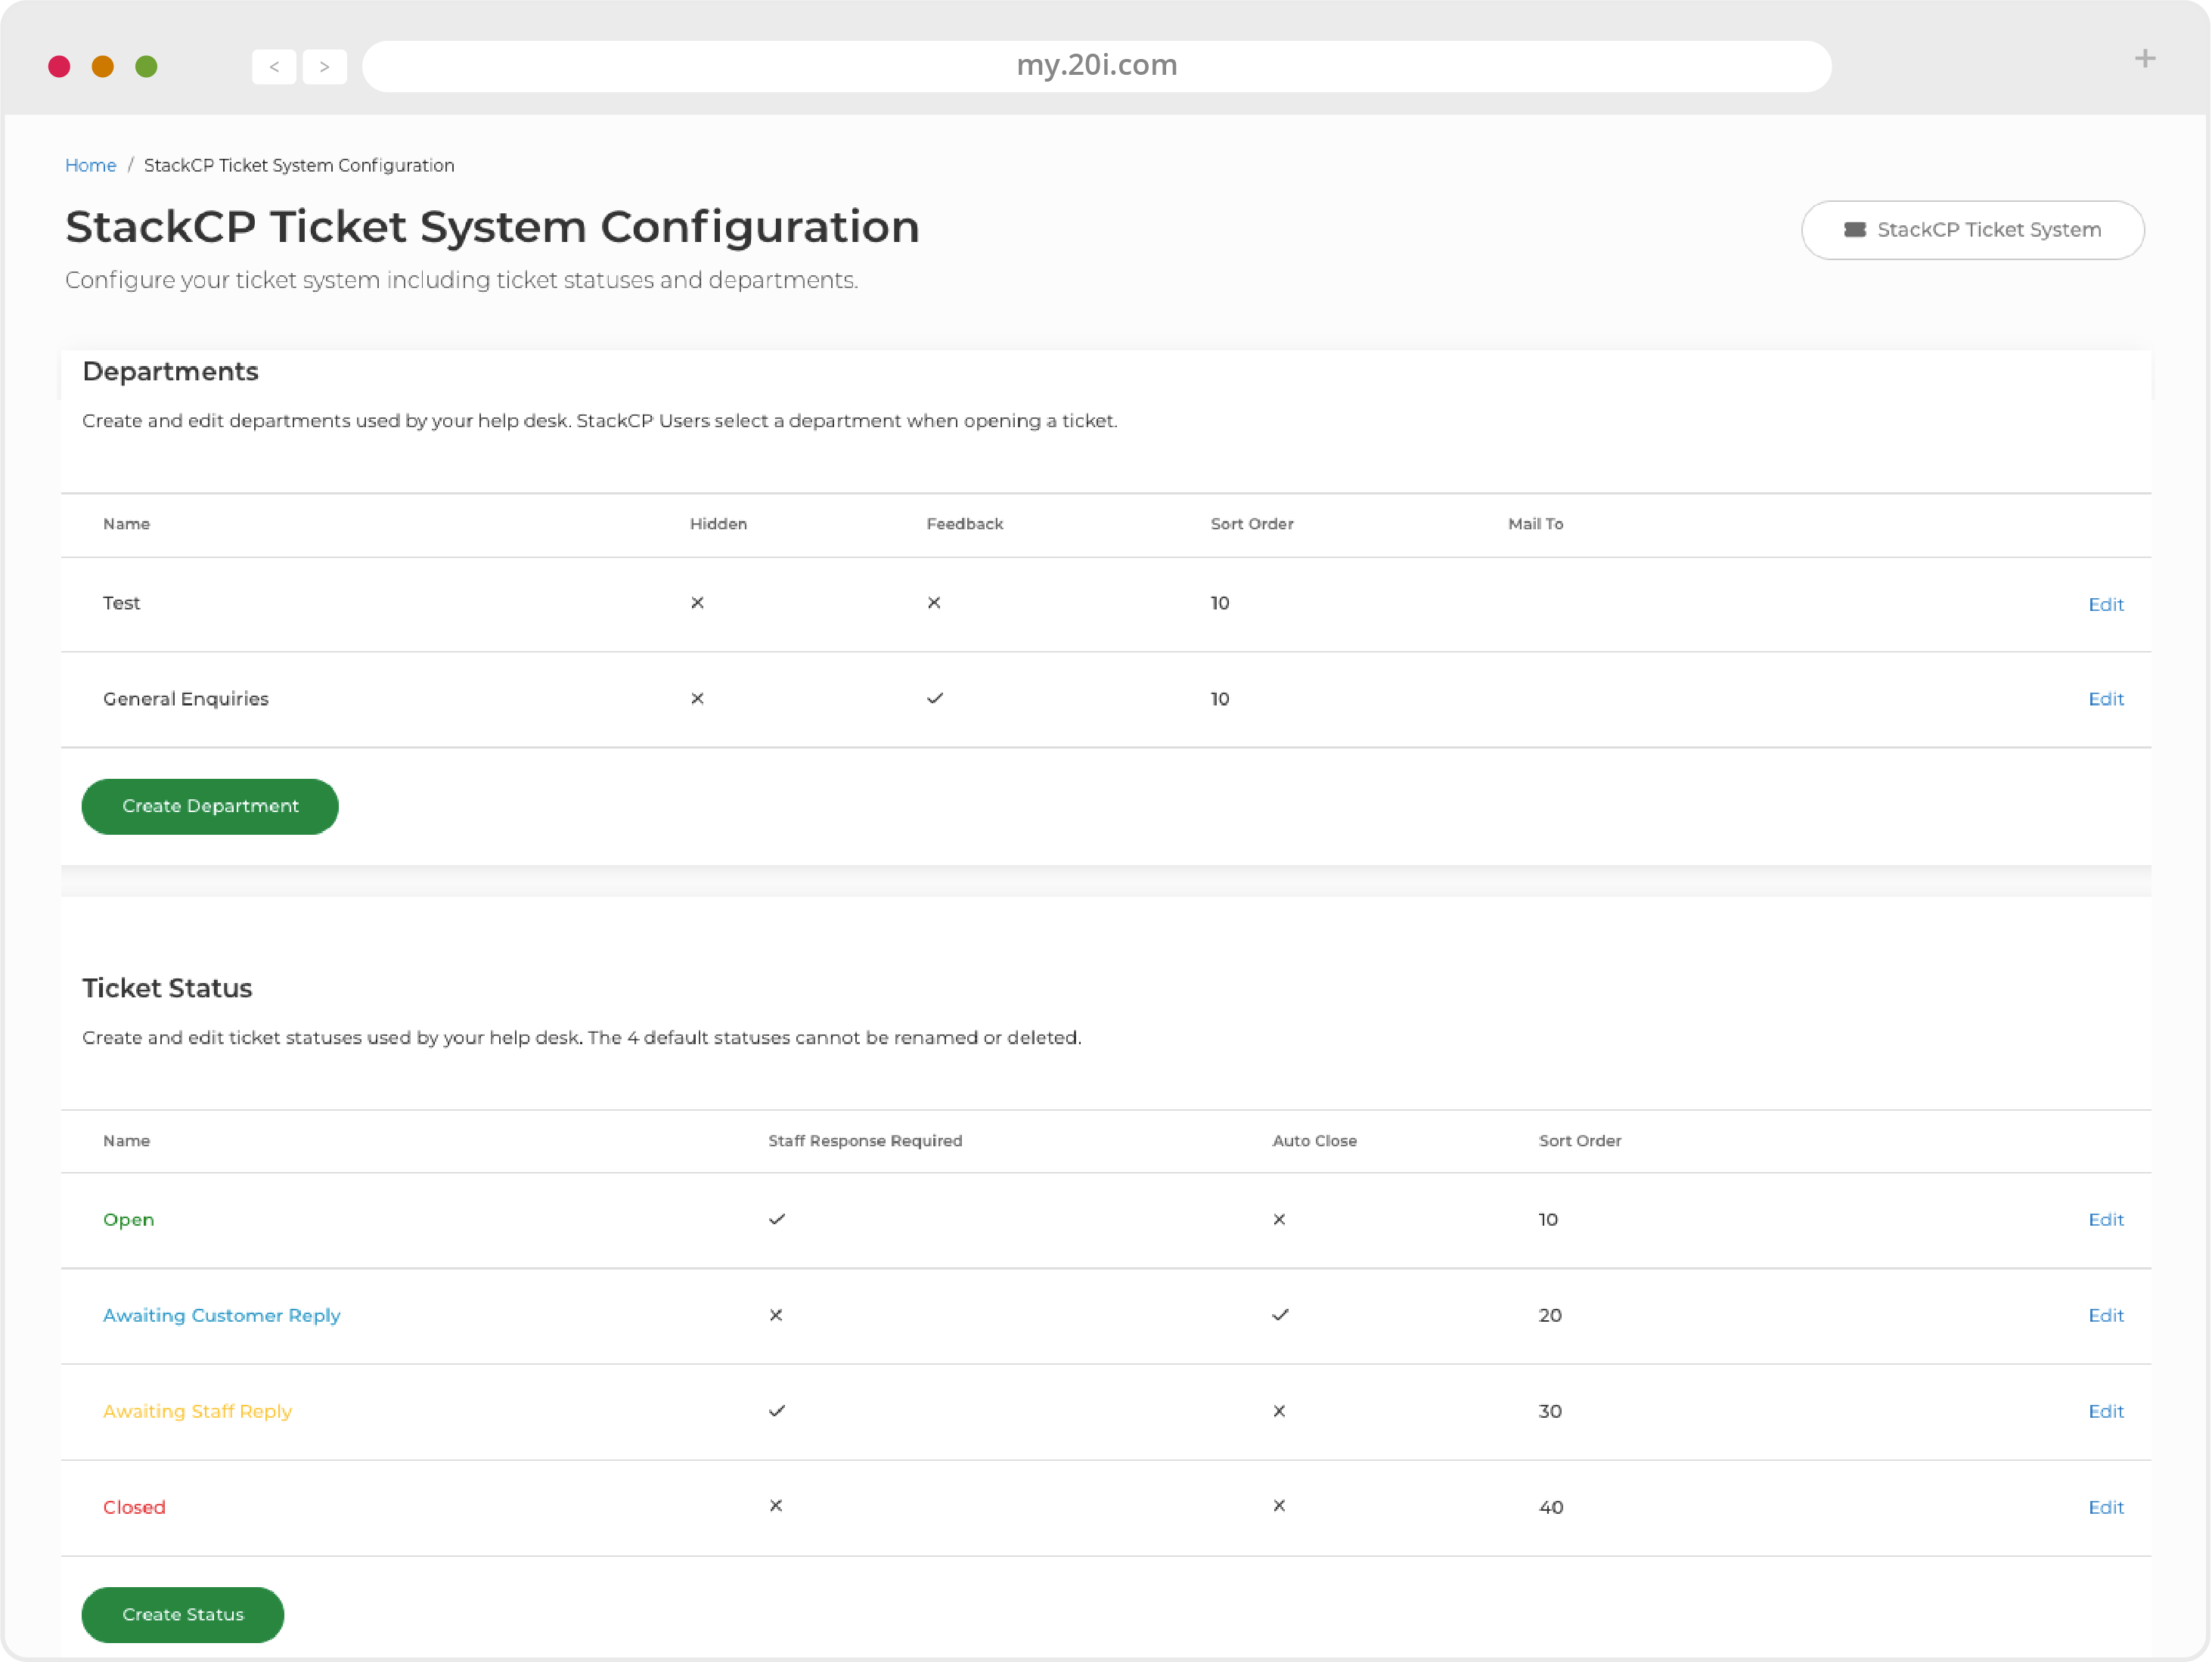
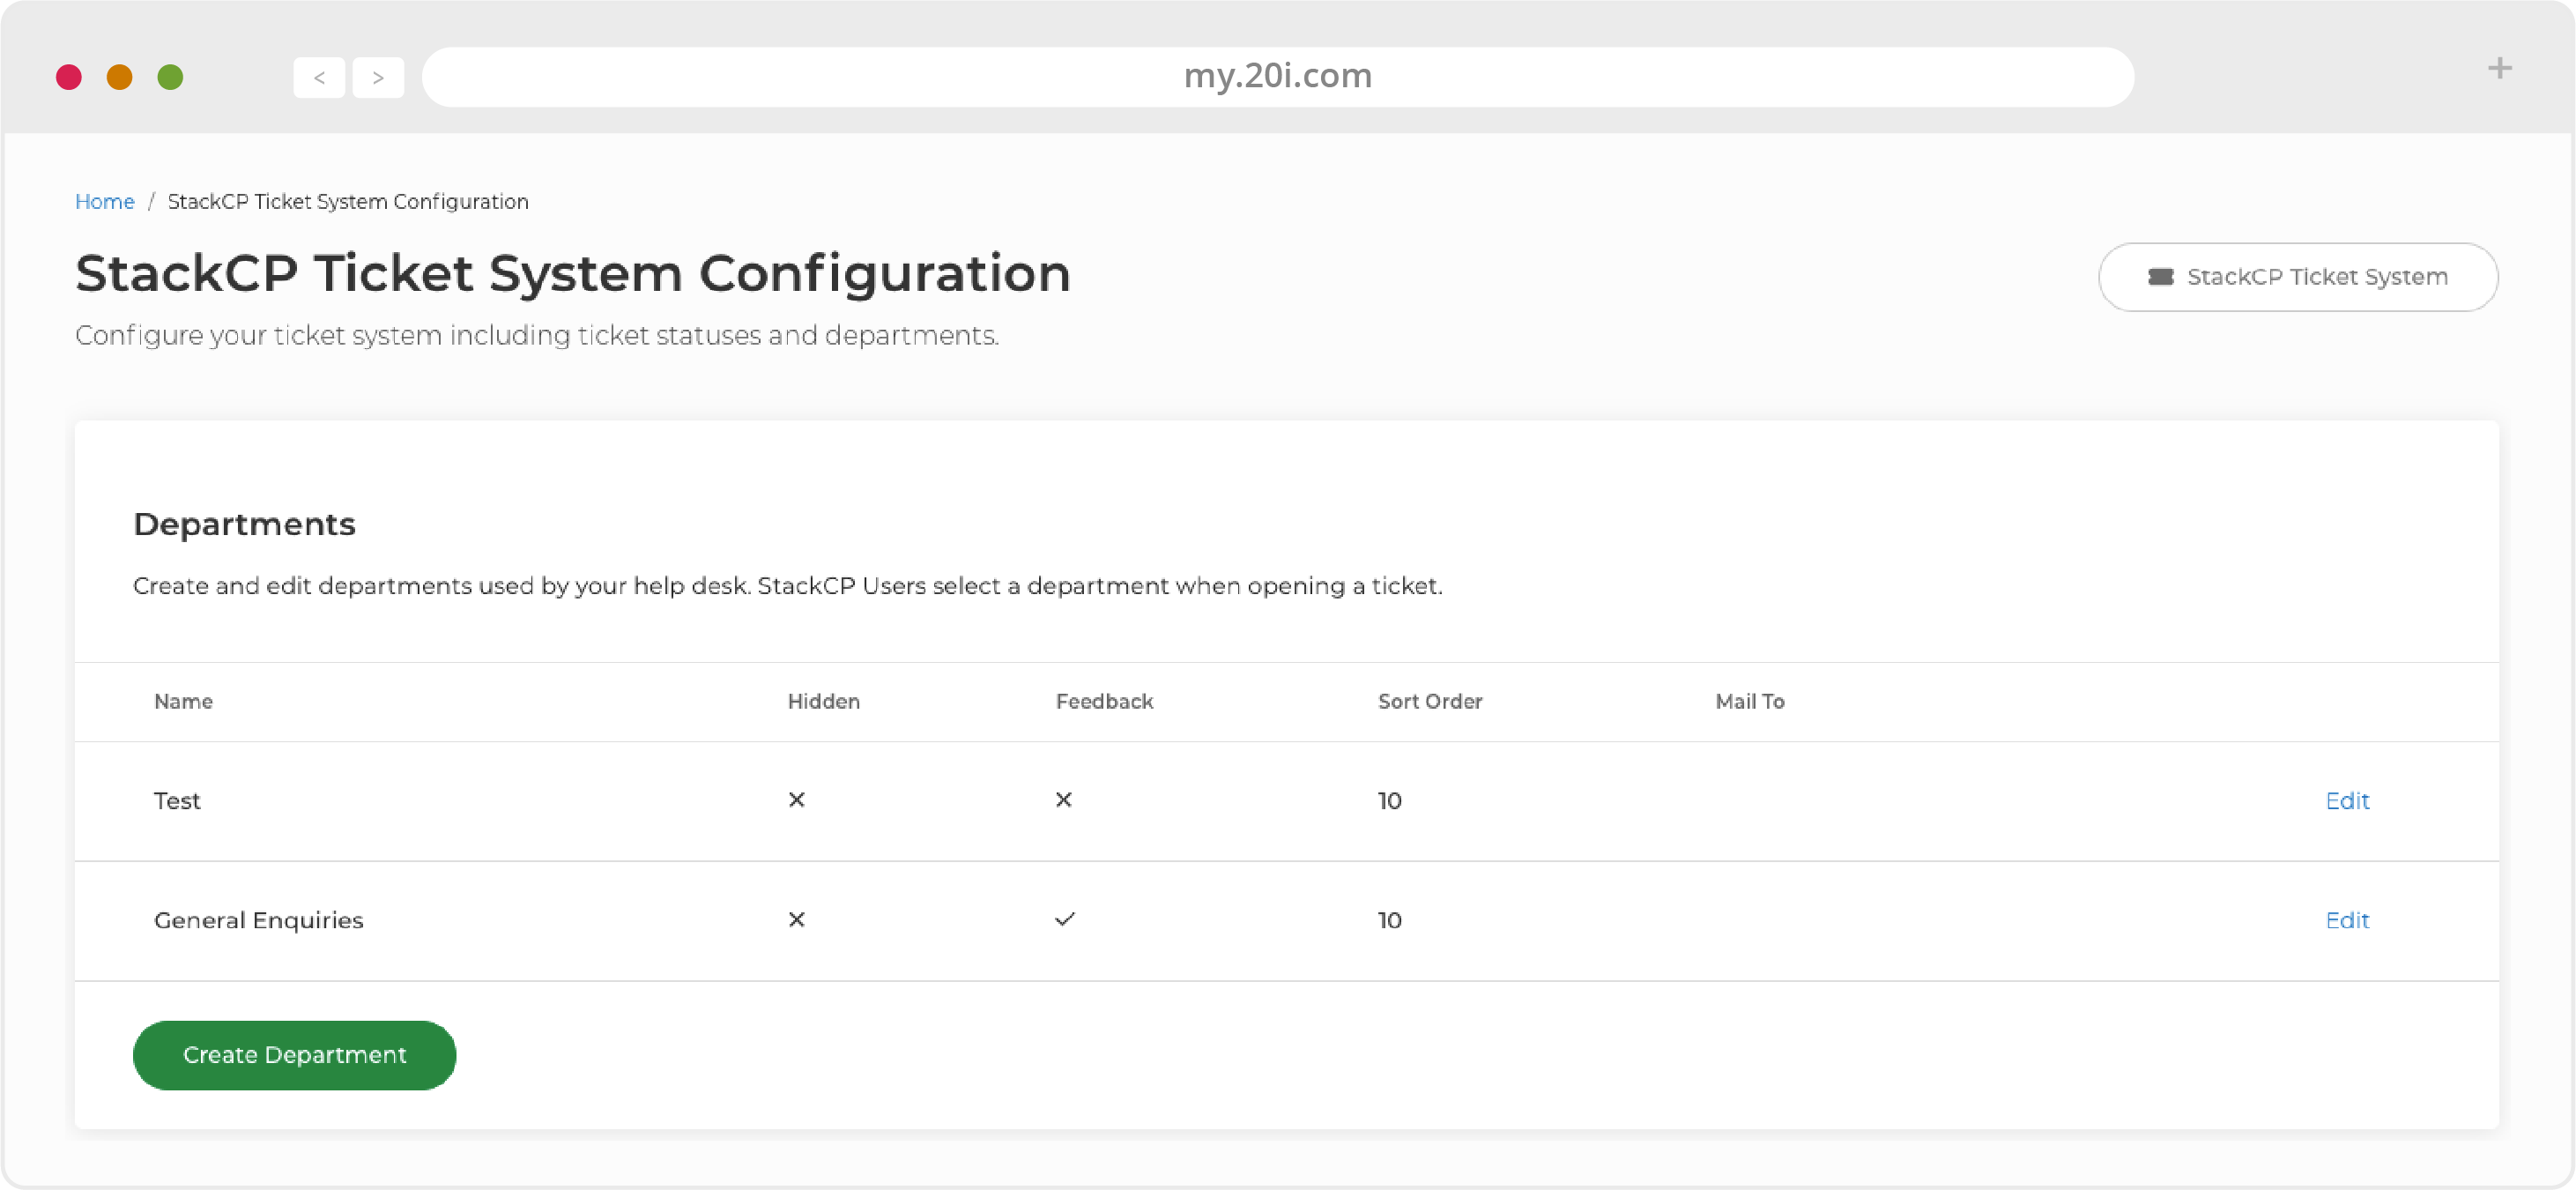
Departments
When your customer creates a ticket, they can select which Department they believe is bestto handle their request. Commonly you’d have General Enquiries, Sales and Support as departments to cover the common interactions with customers.
- To create a department, head to Ticket System Configuration and locate the Departments section

- The General Enquiries Department is there by default
- Add a new Department by selecting Create Department and give the Department a name e.g. Sales. If you want customers to be able to rate responses from this department check Accept Response Ratings. The Sort Order determines where the Department will appear in menus
- Select Save & Close
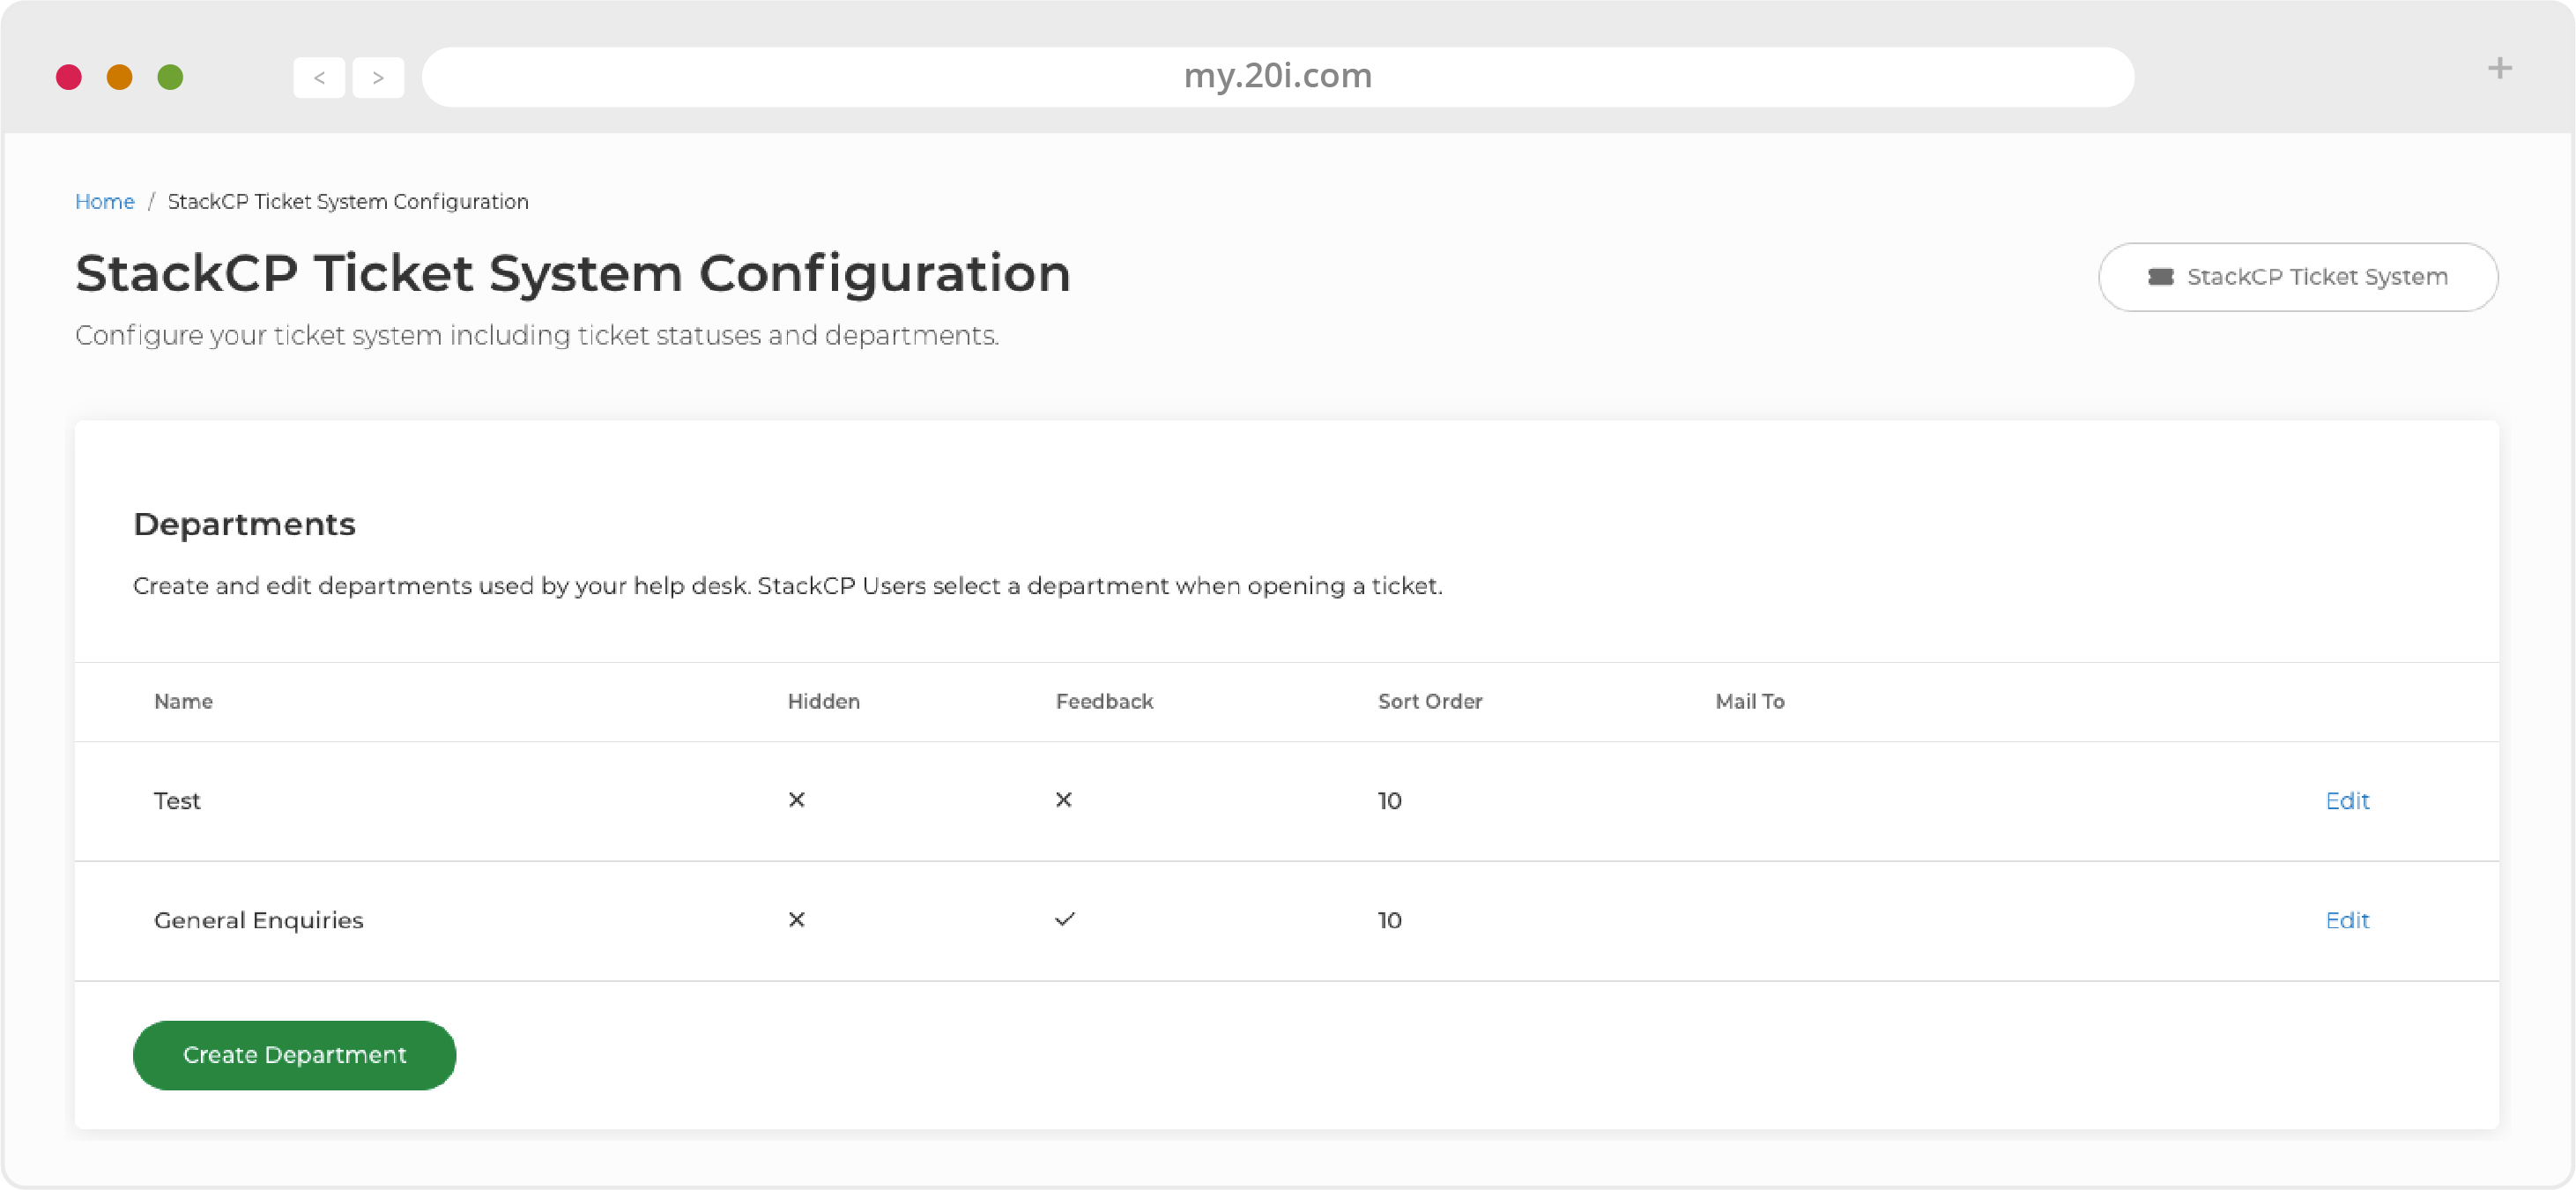
- You’ll now see your new Department in the list and customers can now select to raise tickets to this departments.
Best Practices for Departments
- Keep the number of Departments concise. This is for management purposes and for clarity when your customers are choosing a Department to raise the ticket-to
- Departments are aimed at increasing efficiency, so if you offer a specific service or product that has more specialised support, we would recommend adding a Department for it
- Departments could be used to create an escalation path for tickets, for example: a Department could be created for senior management
Ticket List
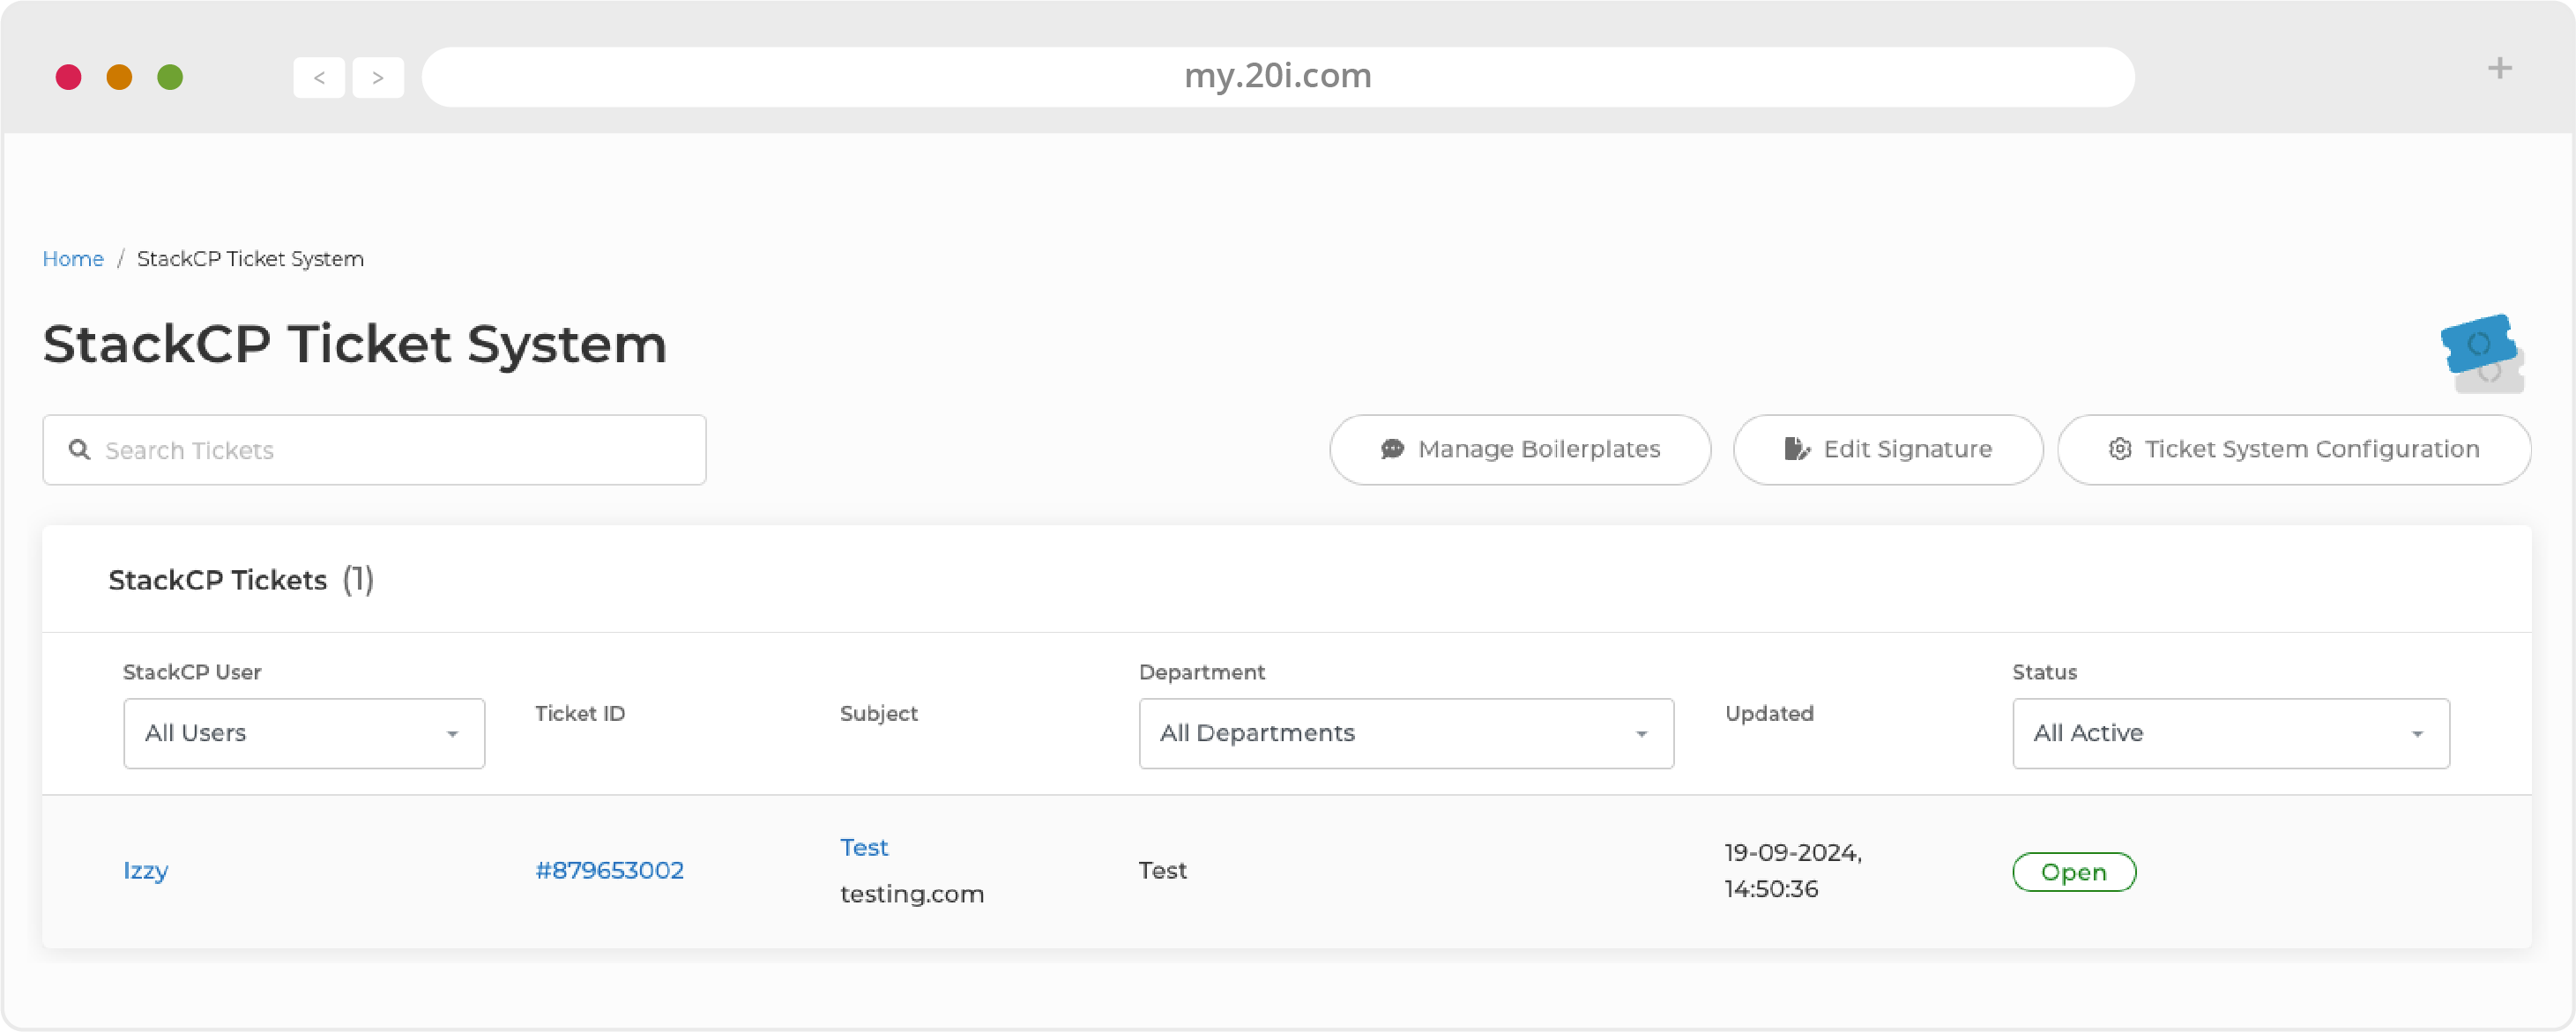
New and existing tickets can be viewed and managed from the StackCP Ticket System page. You can filter the current ticket queue by Status or Department by using the Filter menu. You can also search for a ticket ID or phrase within the ticket itself. Keeping track of the Ticket ID is a great way to jump to a specific ticket. When a customer raises a new ticket, it will automatically appear in the list. There’s no need to refresh the page to check for updates. From the Options menu you can do three things:
- View ticket
- Edit StackCP User
- Log in as StackCP User
The ticket list view gives you a good general idea of the volume of support requests you’re receiving. If you have support departments, it’s the primary location they’d be focused on for providing first line support.
View Tickets
To reply to a ticket, select Options > View Ticket from the ticket list. From here you can reply to the ticket, add internal notes for other staff to see, change the status of the ticket or change the department that the ticket is assigned to.
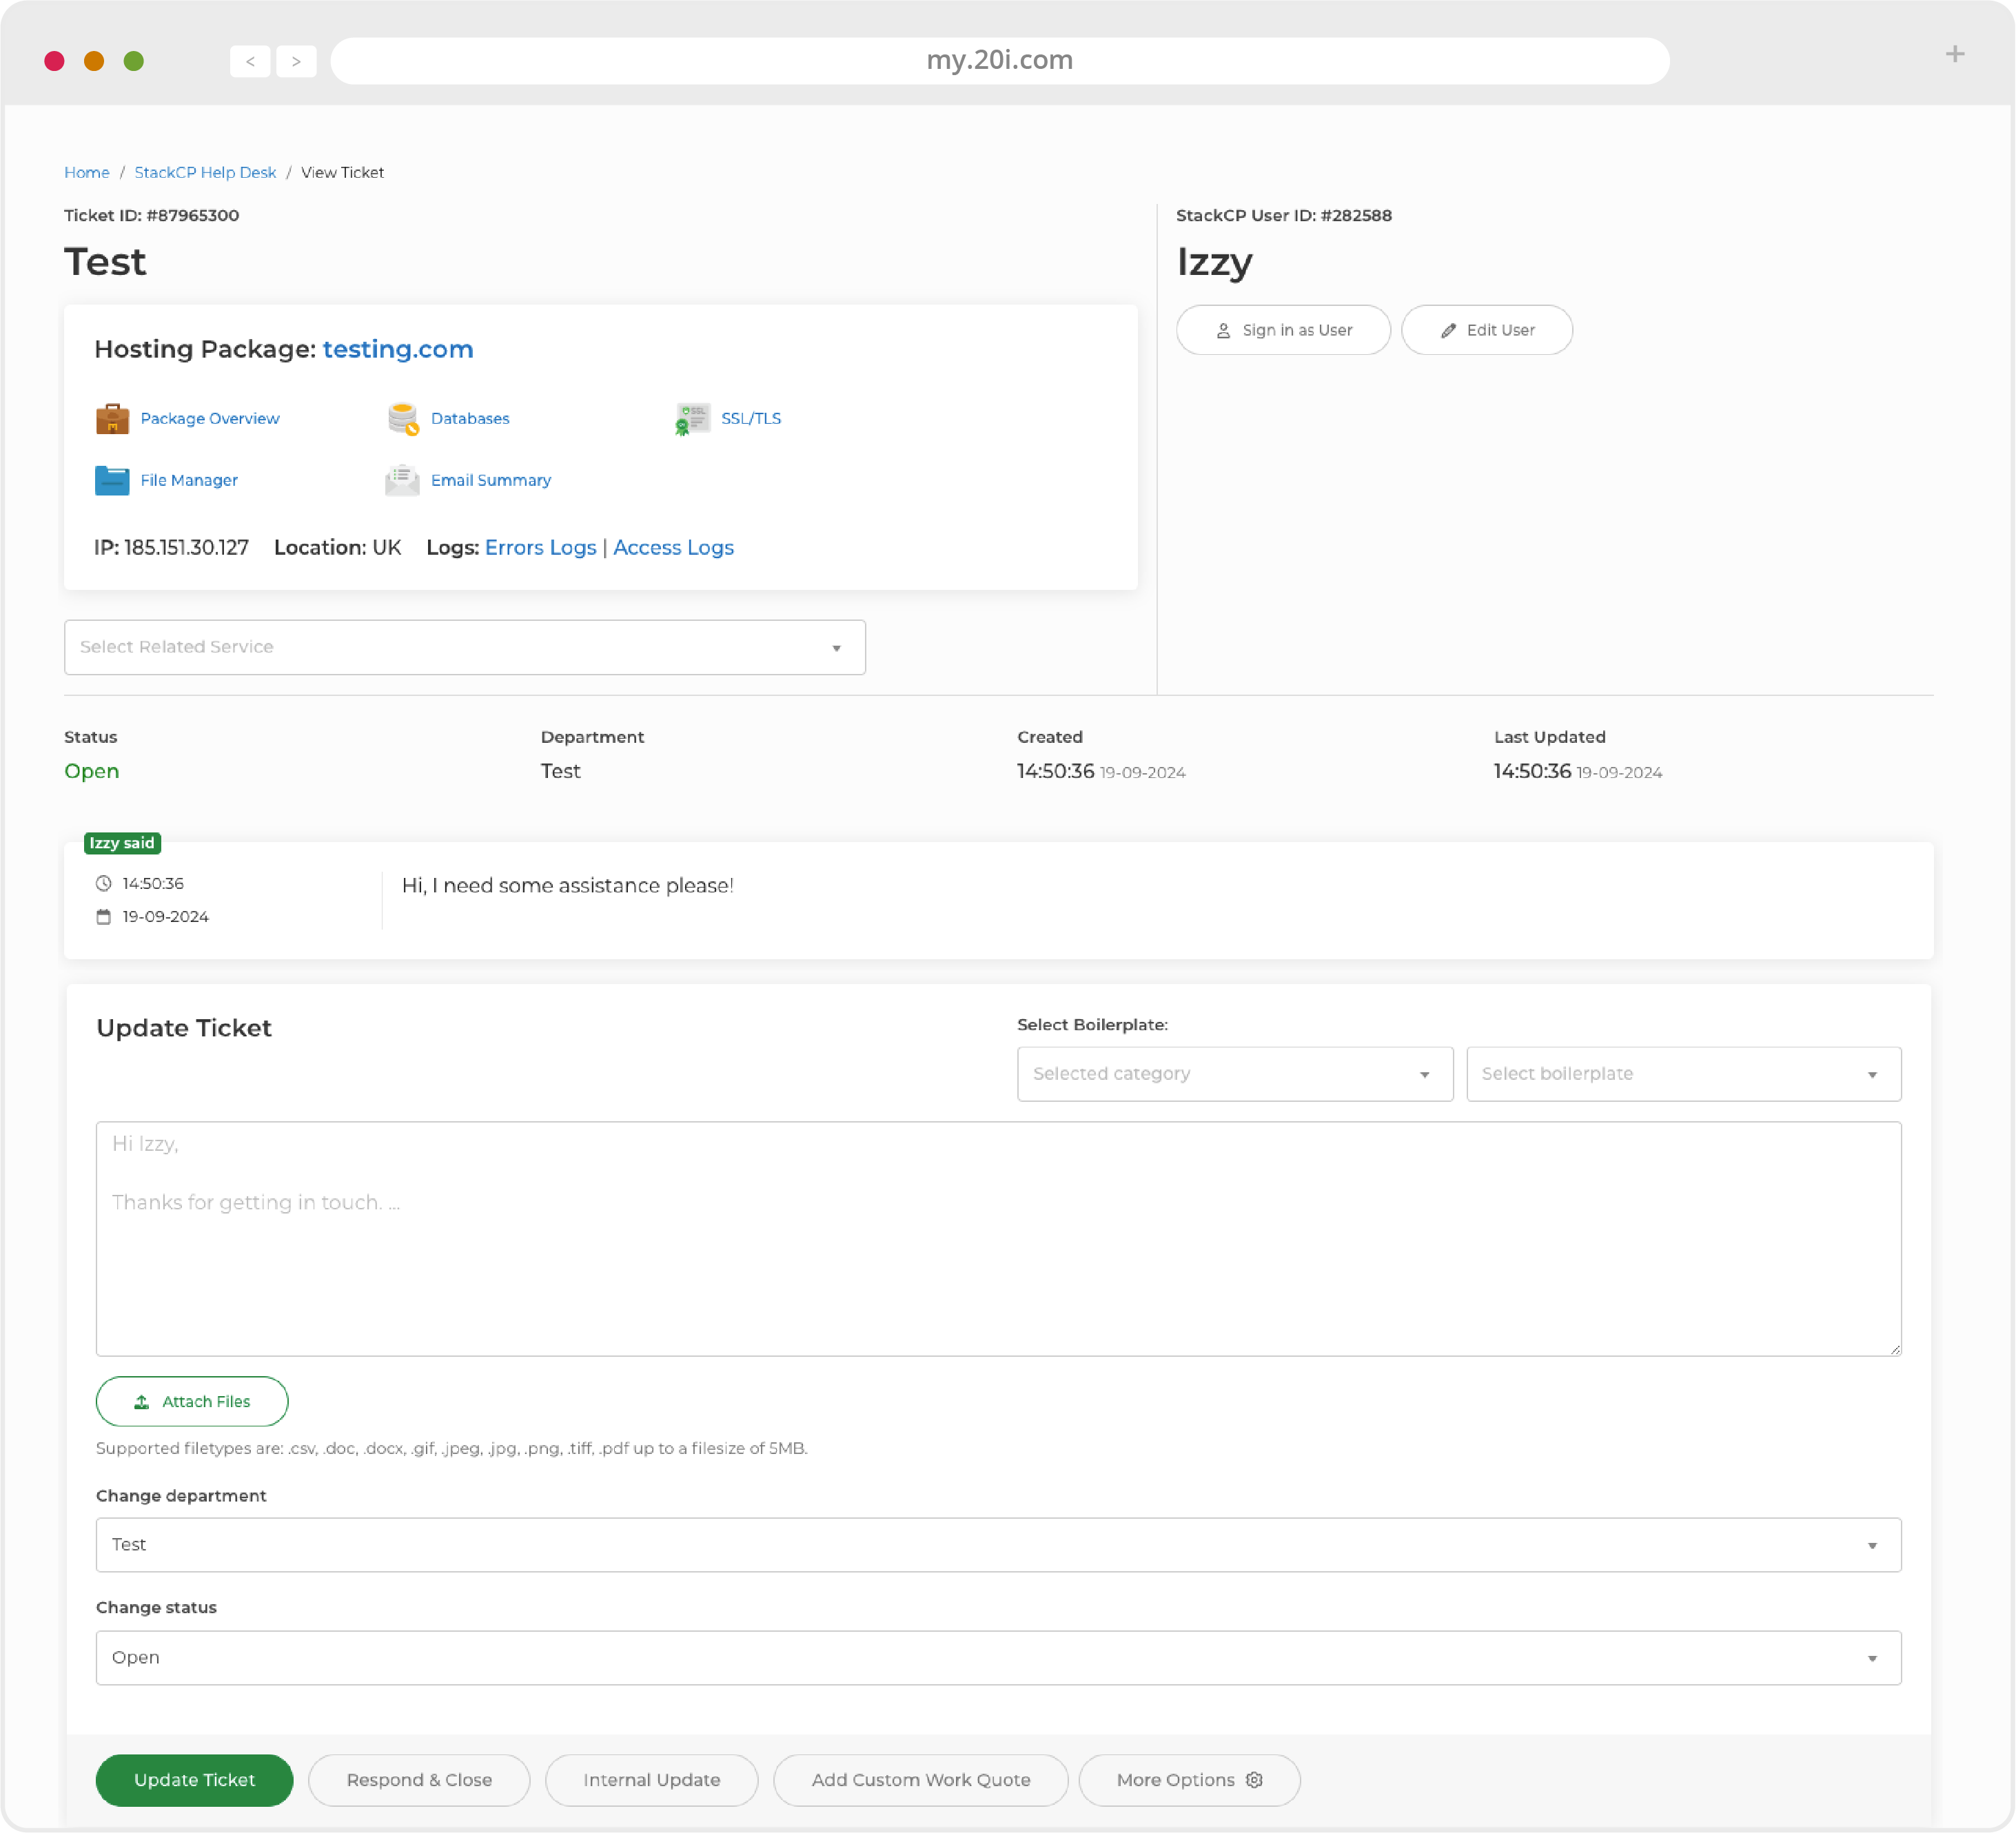
Internal notes can only be seen by your staff. This allows you to easily provide information to help with the resolution of the ticket. To reply to a ticket, enter your response within the text field, when done, select ‘Update Ticket’.

Ticket Statuses
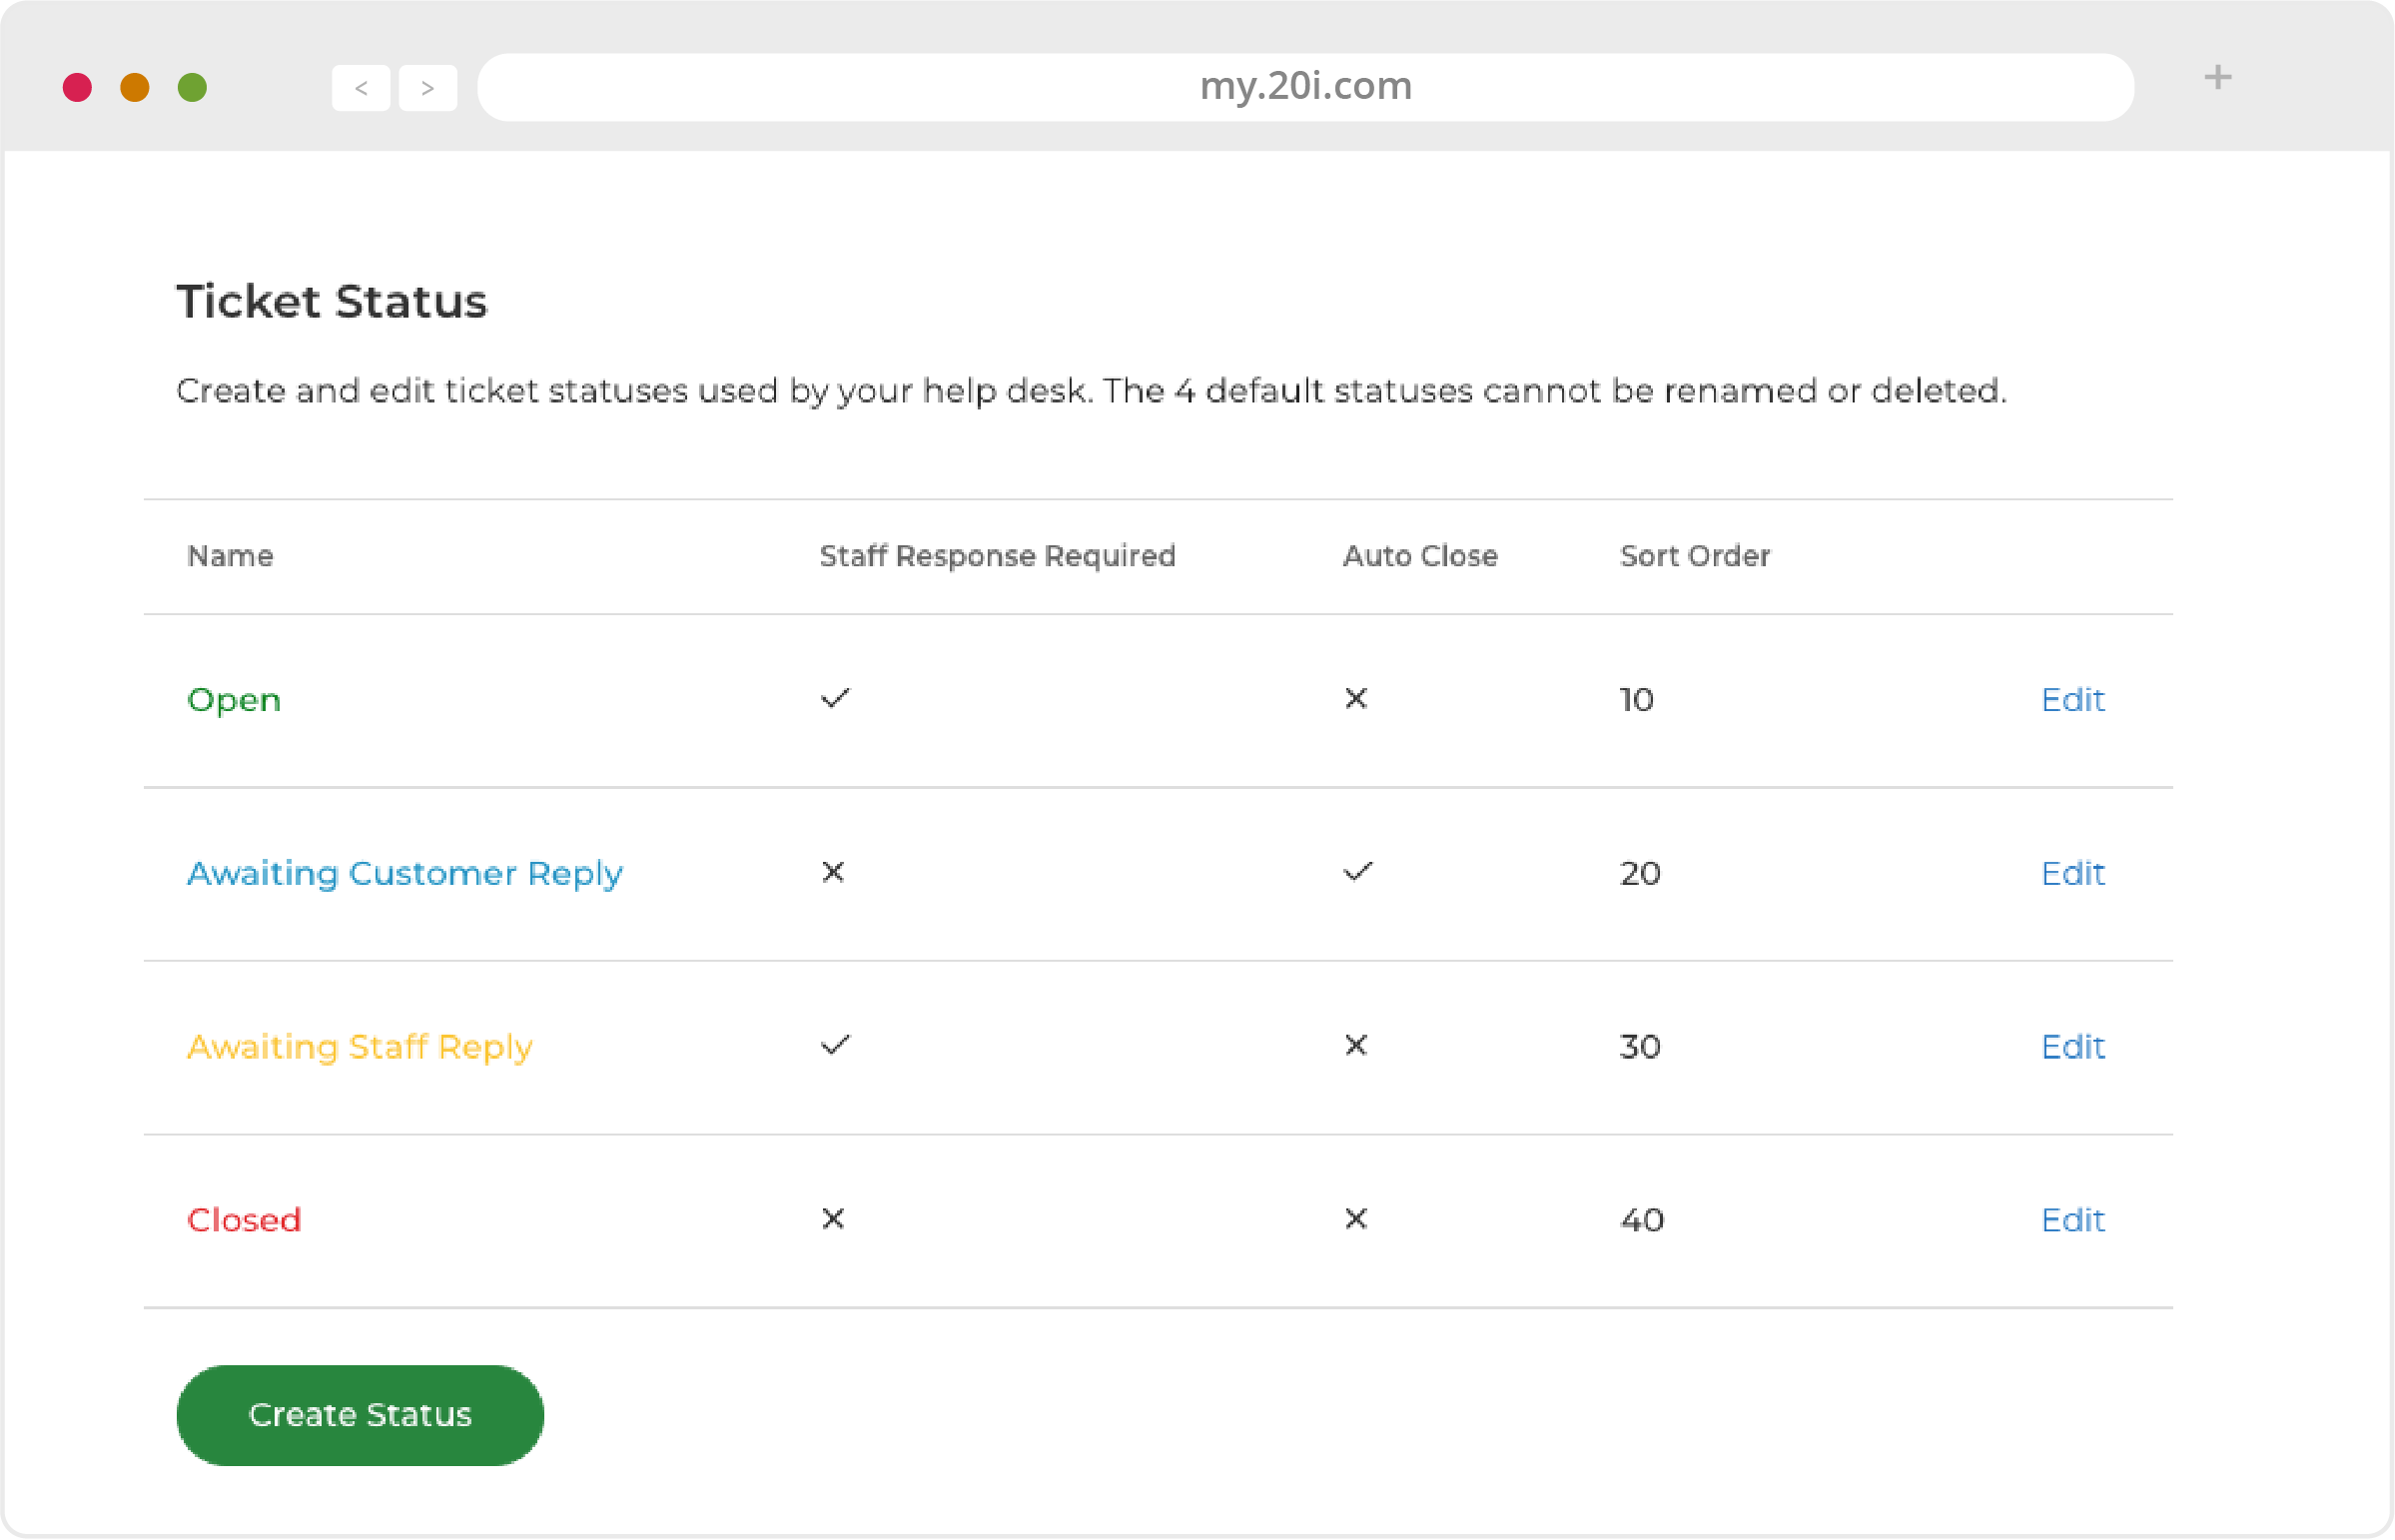
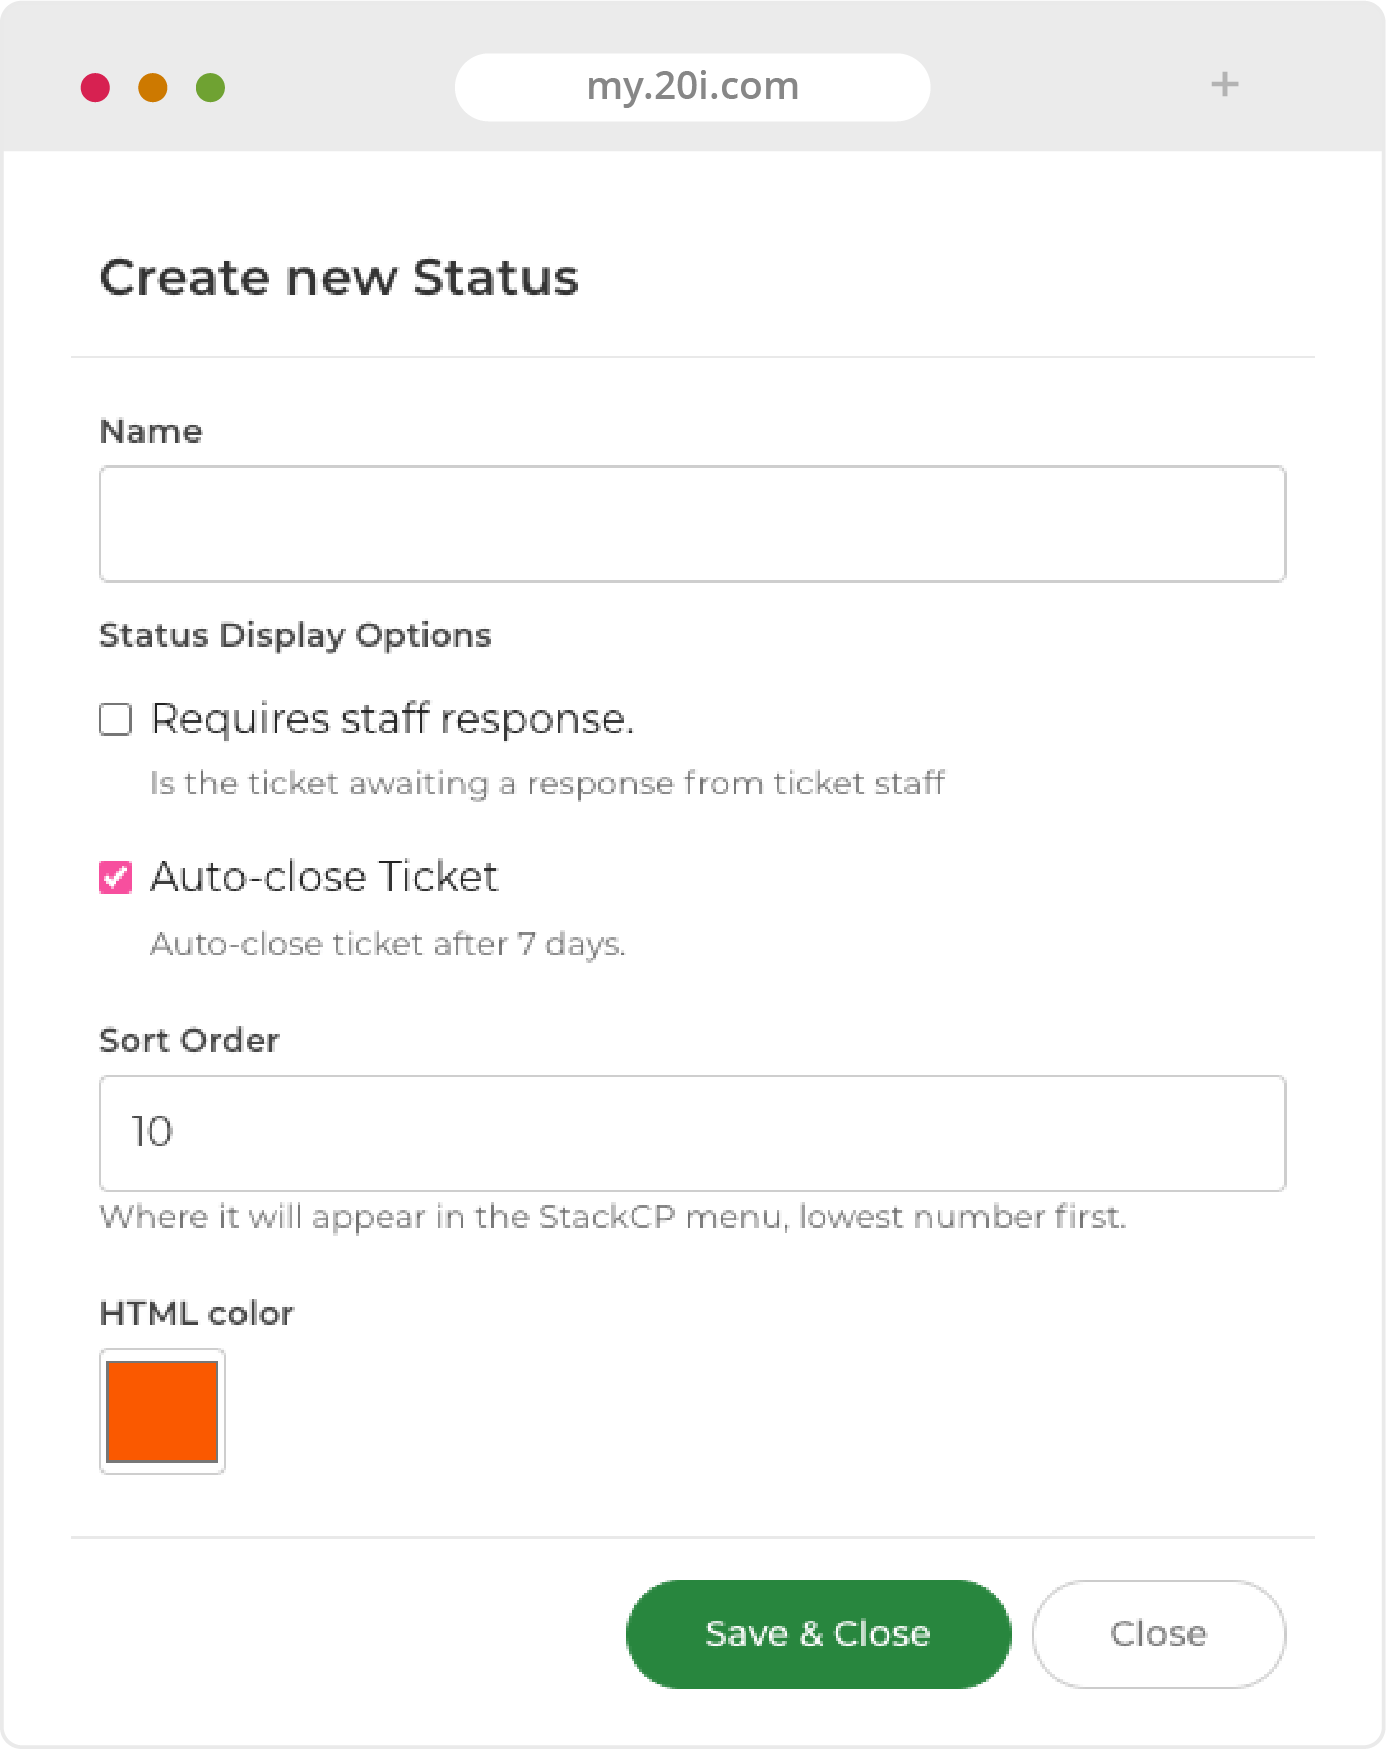
To accurately reflect the current progress a ticket is in, each update will be given a Status. By default there are 4 statuses: Open, Awaiting Customer Reply, Awaiting Staff Reply and Closed. These can’t be edited or deleted. You can also create your own status to reflect what is happening to the ticket. To create a status:
- Select Ticket System Configuration and locate the ‘Ticket Status’ section
- You’ll see the 4 default statuses; select Create Status
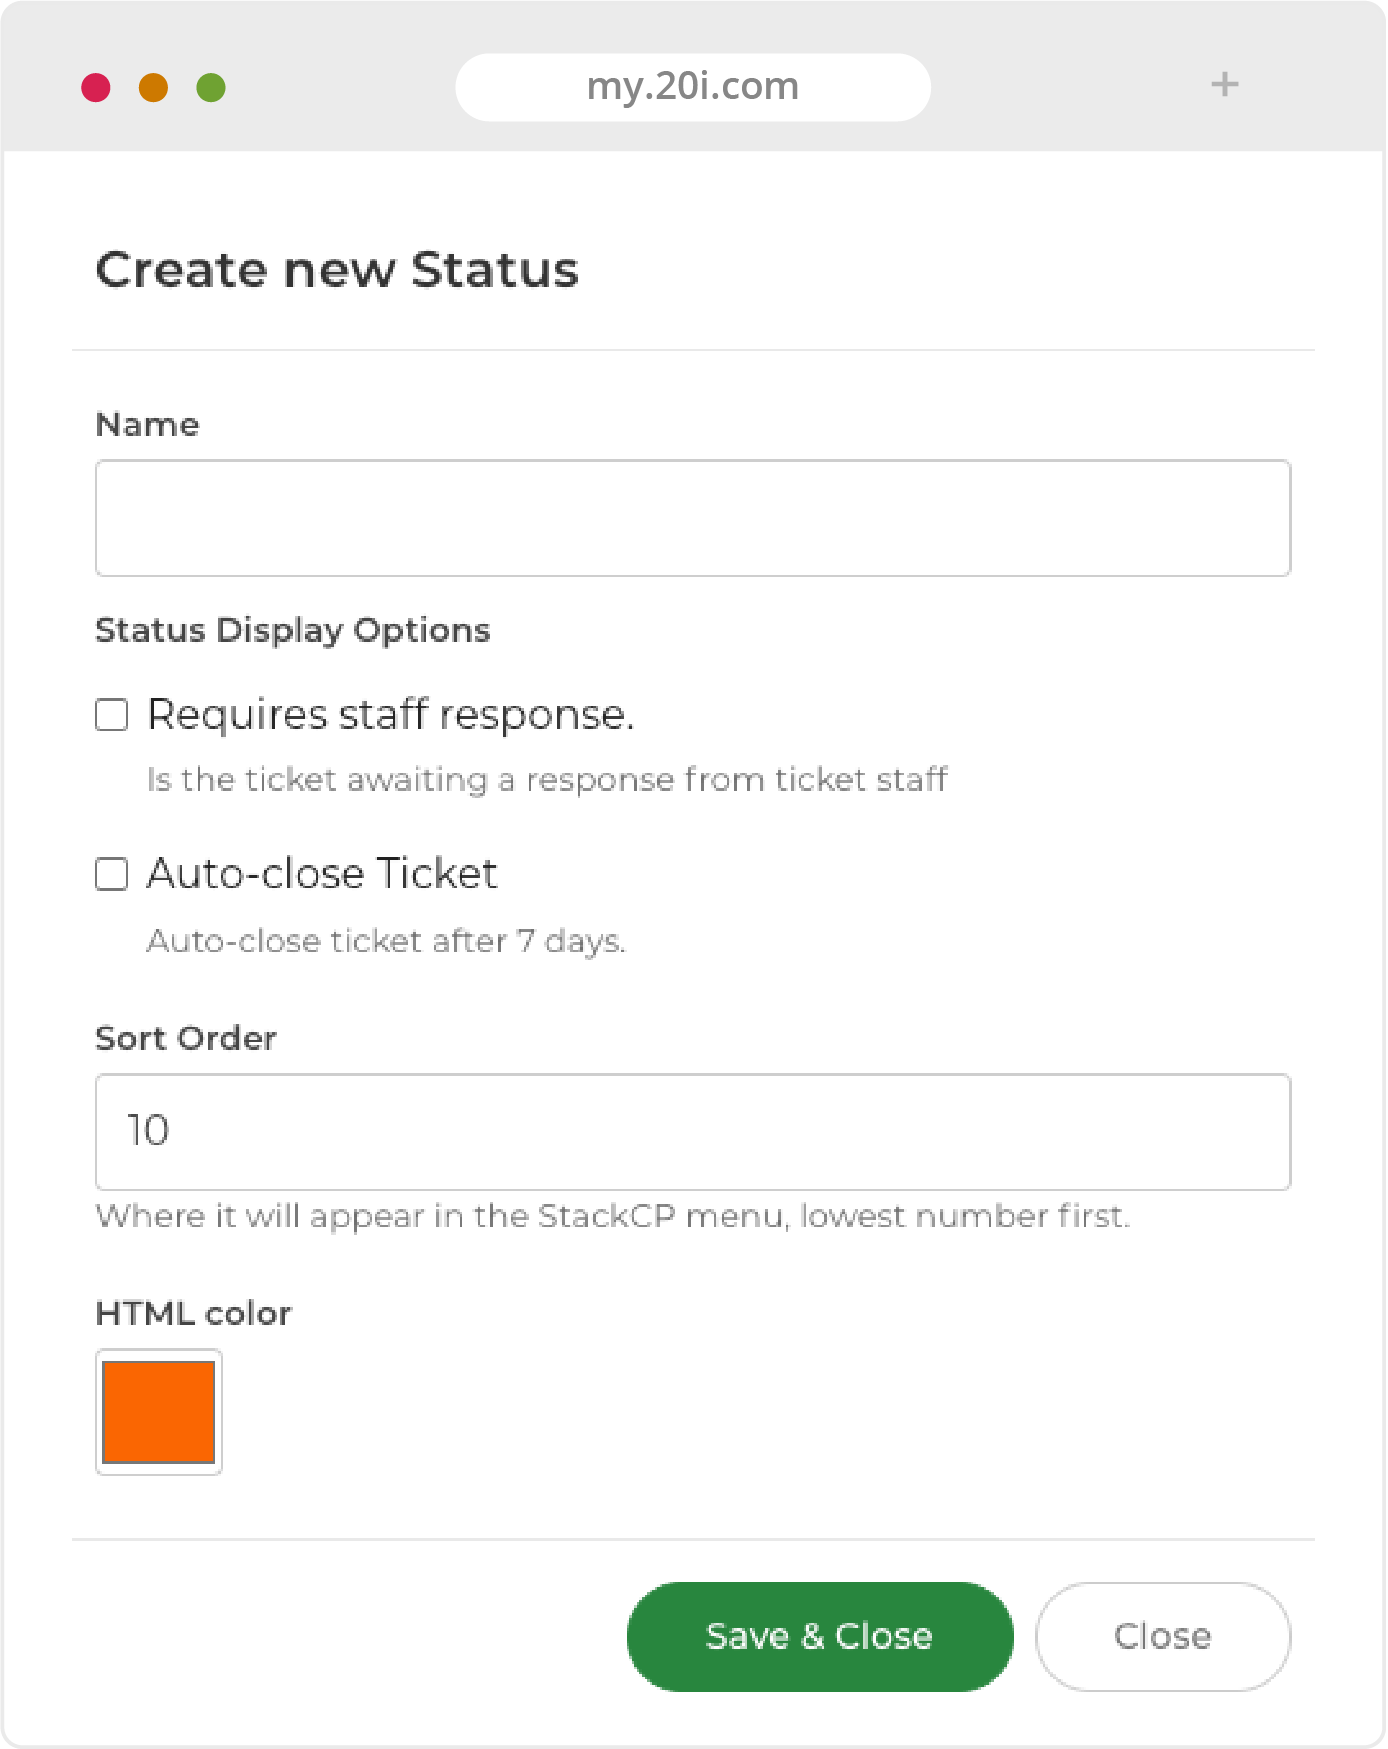
- The Status Name is what will show to the customer when the status has been selected
- You can then choose whether a ticket with this status requires a staff response and whether it needs to close automatically after 7 days
- Select the order you’d like the status to appear in and give it a unique colour
- Select Save & Close
Best Practices for Statuses
To keep work flow efficient, keep the number of statuses concise and accurate to reflect the work being done on the ticket
Ticket Emails
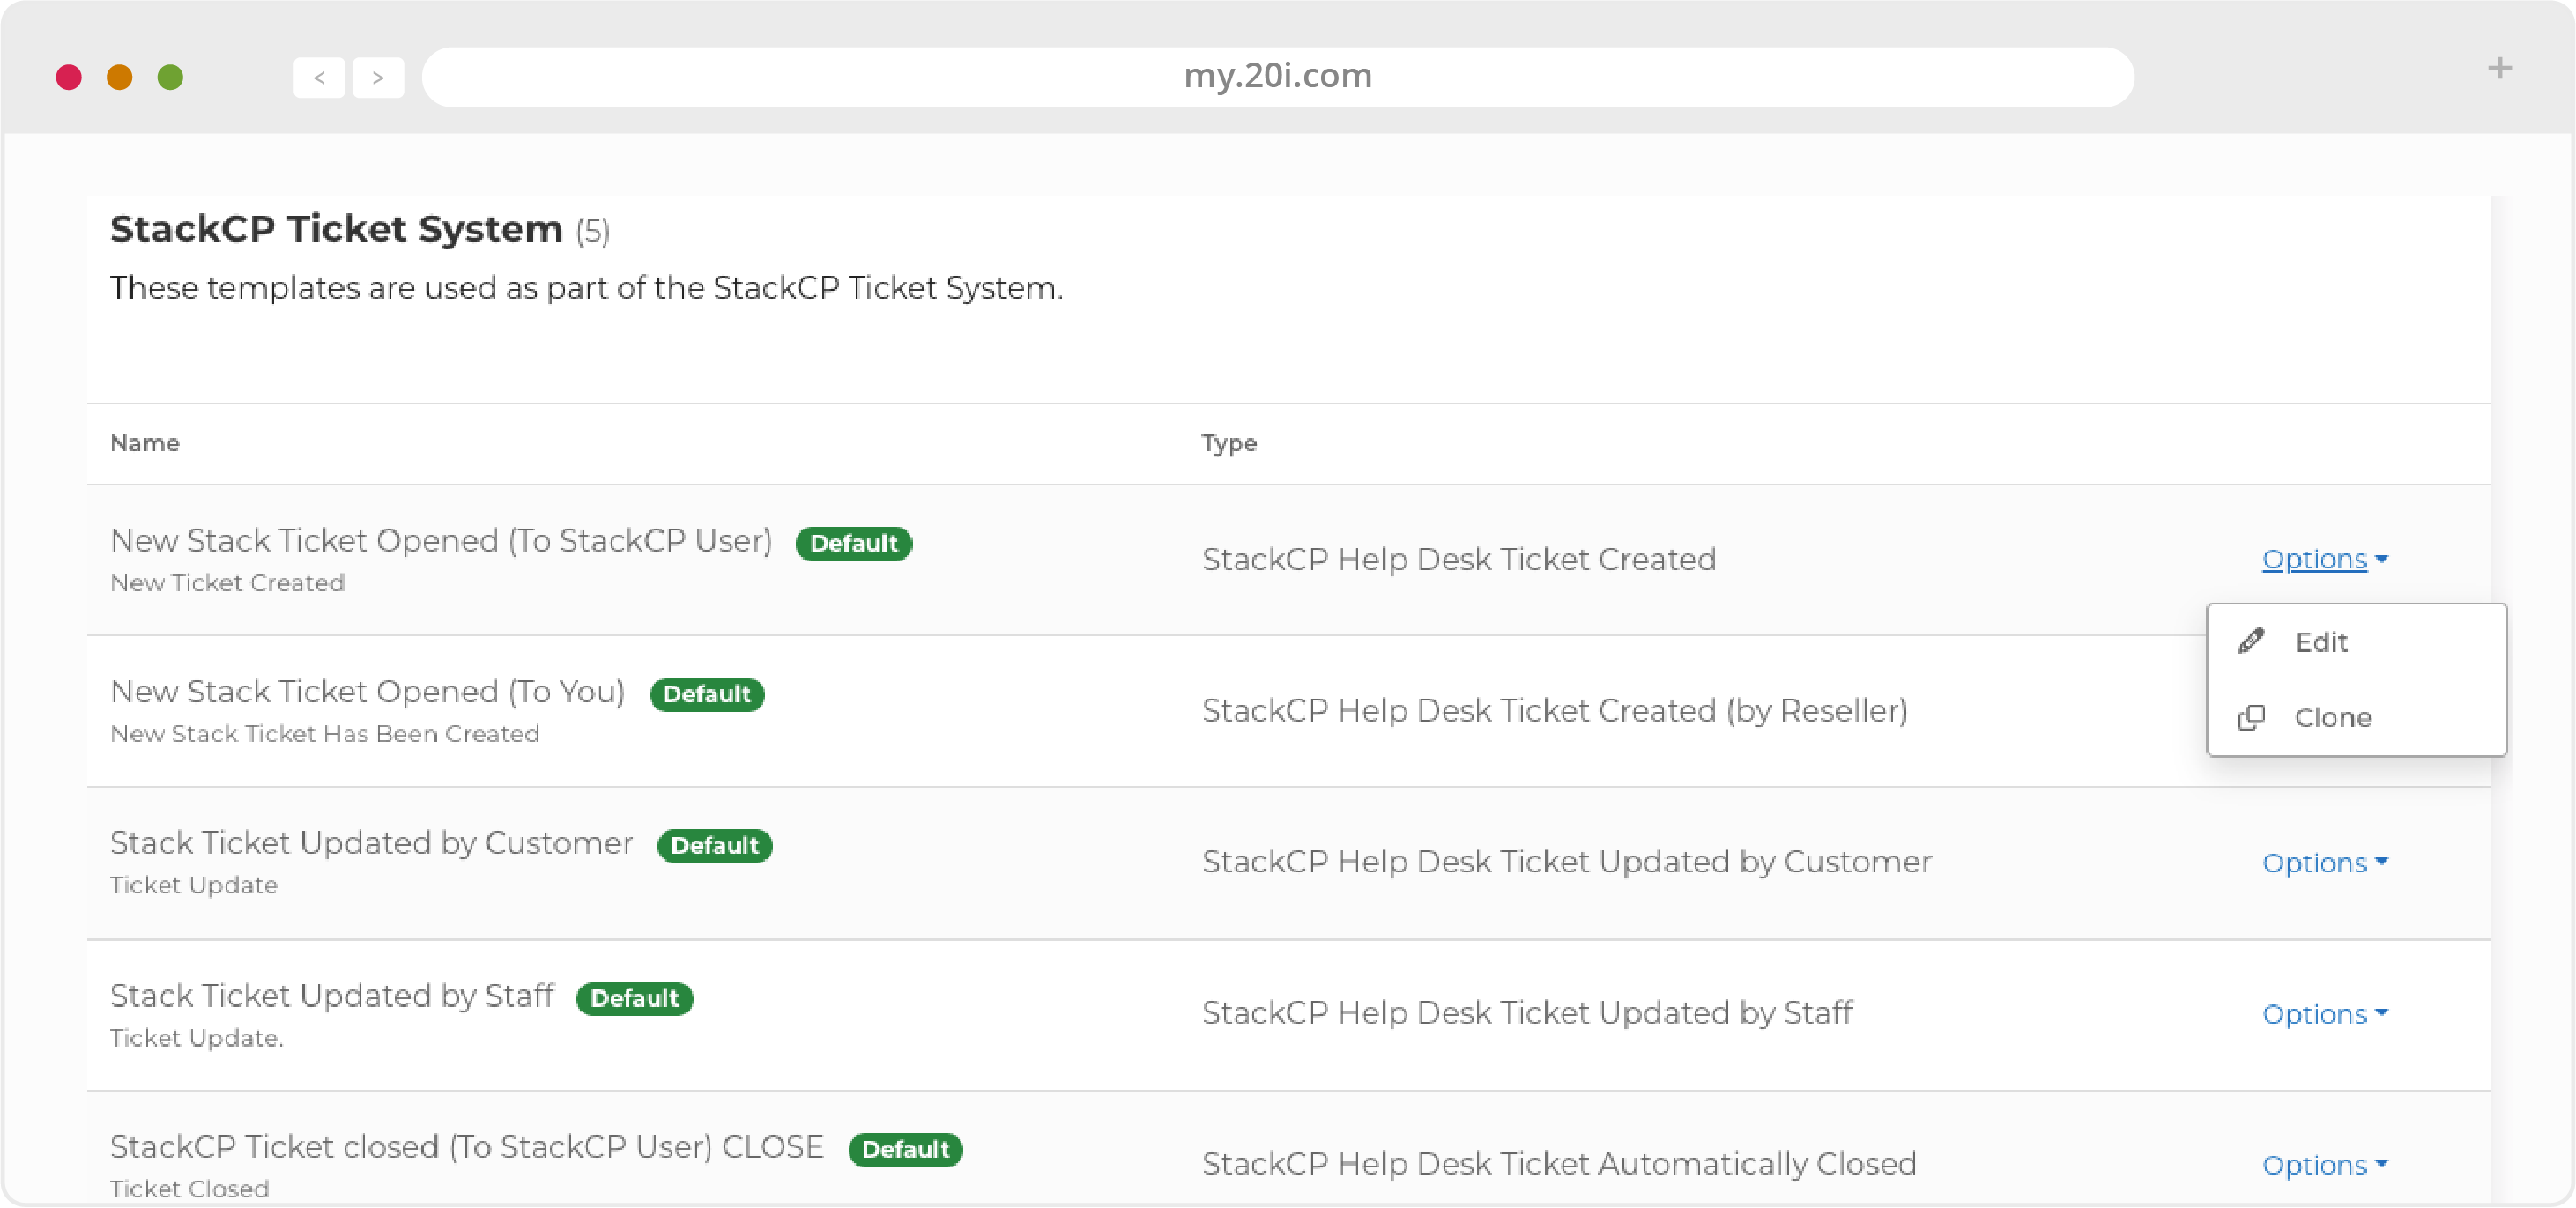
When you or your customer reply to a ticket, the other party will receive an email notifying them of the update. You can customise those email notifications by going to Email Templates in Reseller Preferences and locating the StackCP Ticket System section.
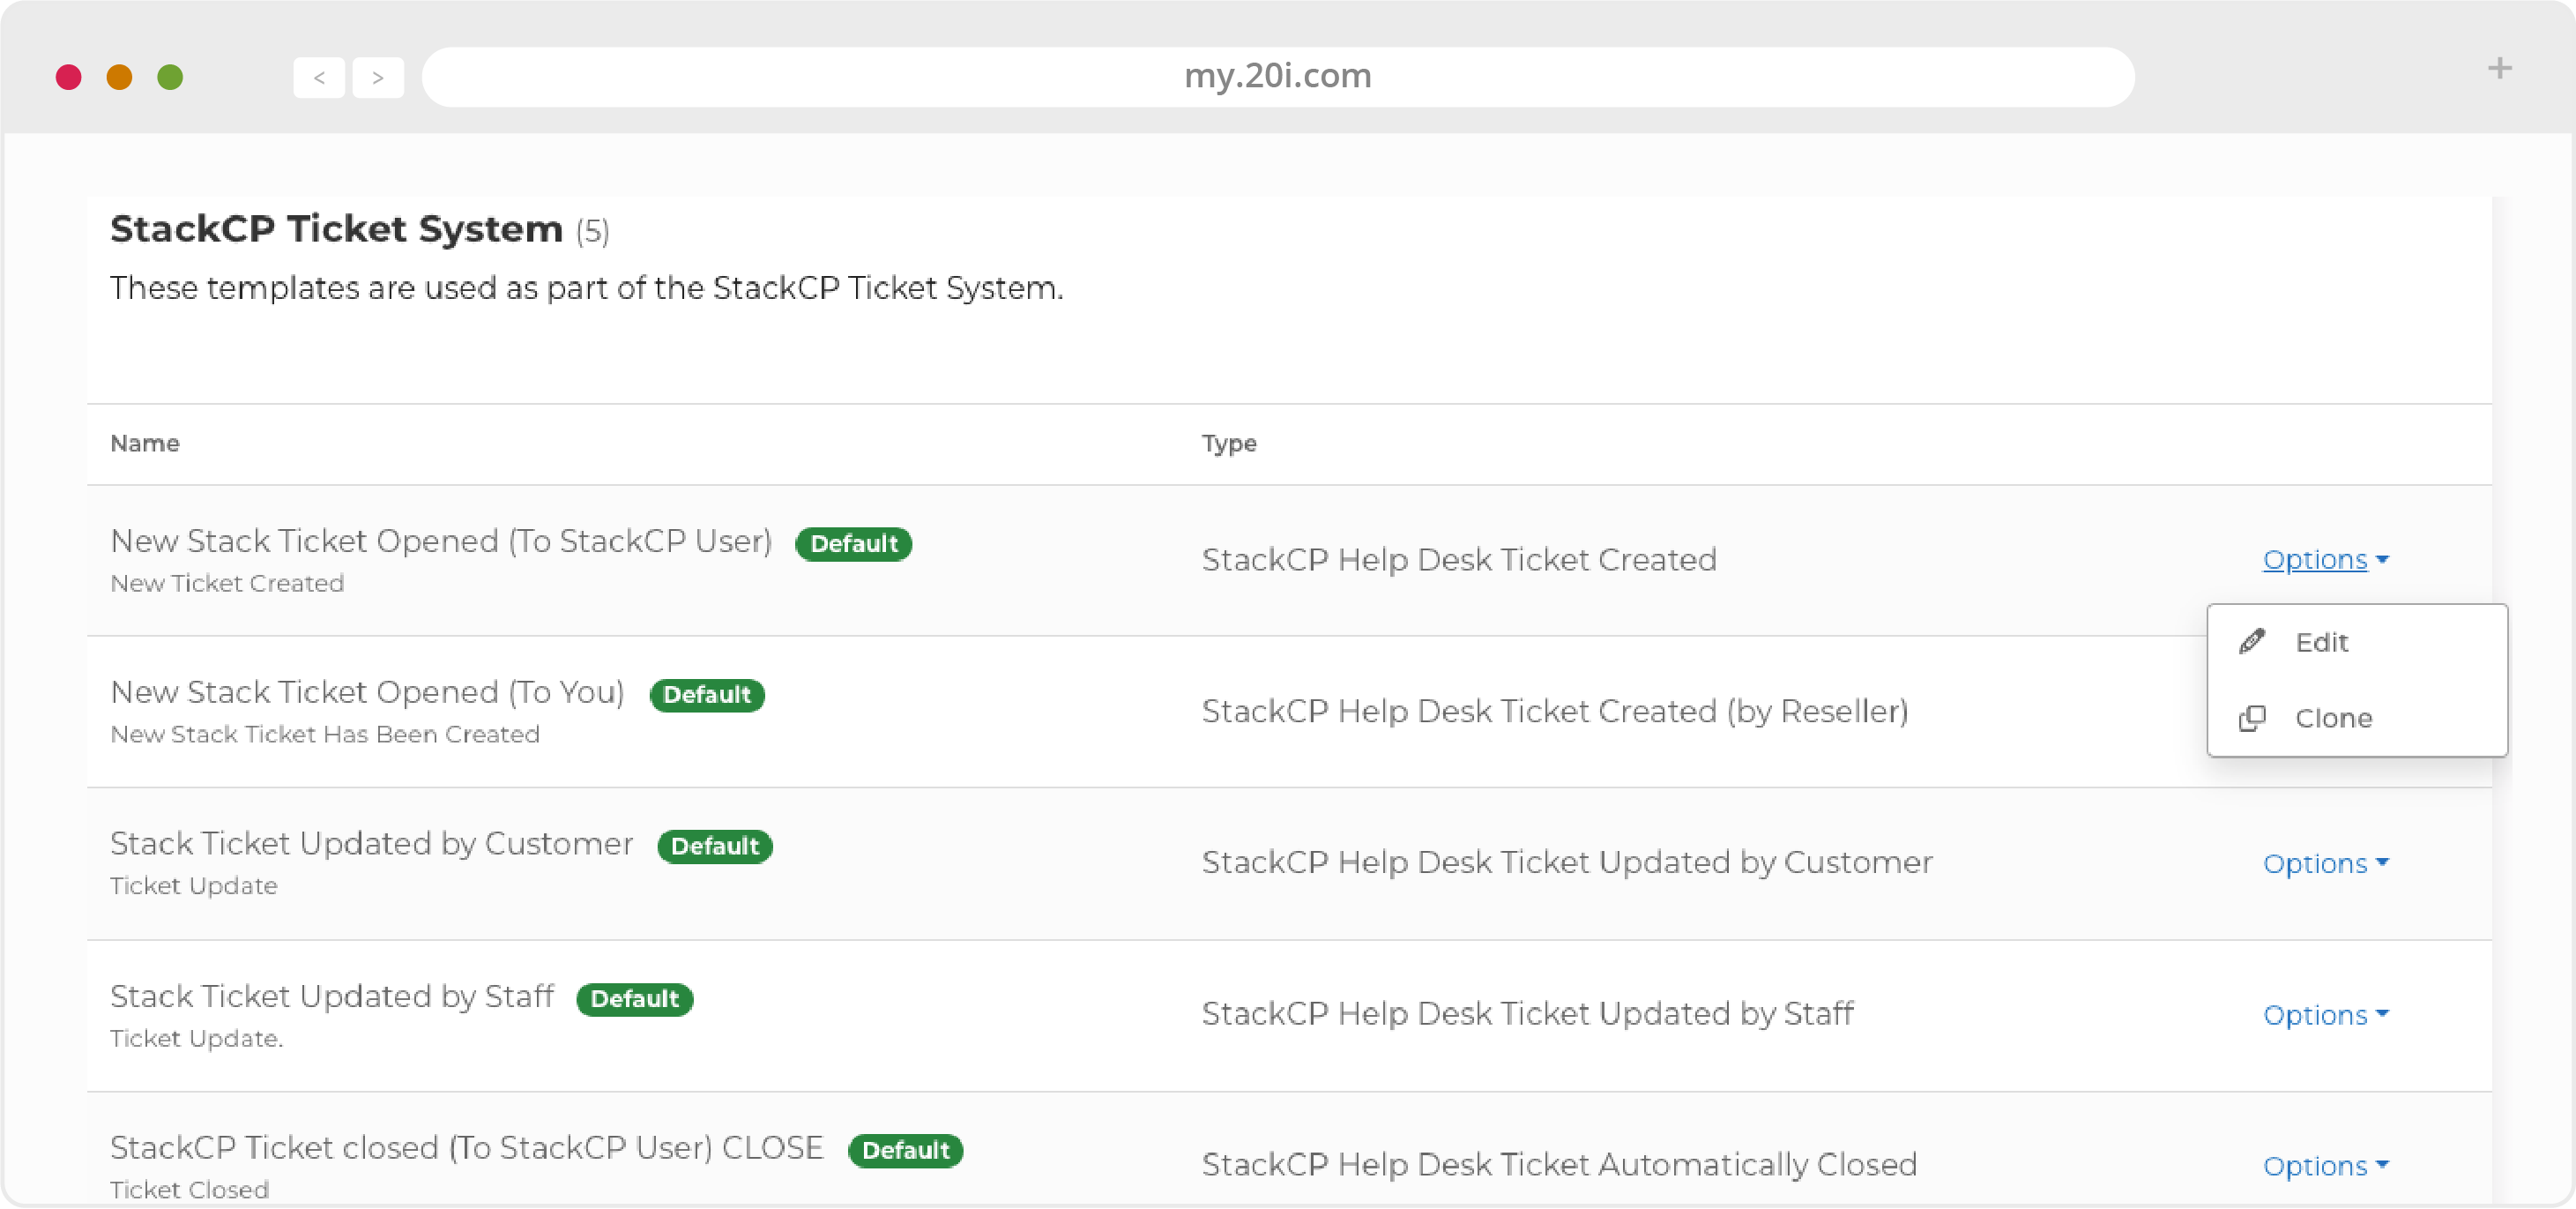
You will see the default templates: New StackCP Ticket Opened (To You), StackCP Ticket Automatically Closed (To StackCP User), StackCP Ticket Opened (To StackCP User), StackCP Ticket Updated (To StackCP User), StackCP Ticket Updated by StackCP User (To You). To customise each template, you can select Options > Edit. The default templates already ensure that your brand name is shown to your customers when a ticket is replied-to.
Ticket Ratings
To monitor how your support is received, you can allow your customers to rate your ticket responses. Ratings can be enabled on a department basis from Ticket System Configuration. Select Edit on the Department you’d like to enable ratings for, and check Accept Response Ratings box. When customers receive a response from this department, they will be able to rate it out of five stars.

Auto-Close Tickets
Depending on a ticket’s status you may want to set it to automatically close for management purposes. To set a ticket to automatically close:
- Head to Ticket System Configuration and locate the Ticket Status section
- Select Edit on the status and check Auto-close Ticket. The ticket will then automatically close after 7 days of no action
White-Label Support Database
We also have a Support Database aimed at your customers that will cut down on the number of queries that you receive. It’s the same as 20i support database, without any reference to 20i or reseller hosting. It will appear in your customers’ control panel Help Desk menu. It’s maintained by us, so it’s always up to date. Feel free to suggest any articles that you think it would be useful to add. You have the option of replacing our generic ‘Stack’ branding with your own. This extends to all custom options: URLs, nameservers, email and FTP.
To enable the Support Database for your customers:
- Head to Reseller Preferences and select White-Label Support Database
- Use the toggle button to enable it

Once you’ve enabled it, a Preferences section appears. Here you’ll be able to customise what level of branding is shown to your customers in the support articles.
You can then also enable which Categories will be displayed to your customers. You can view the white-label support database by logging in as a StackCP User: select Options -> Sign in. You’ll now see under the Help Desk menu there’s a new link to the customer’s Support Database.
For those who’ve customised StackCP so it doesn’t have a Help Desk menu, it’s available at the URL: YourBrandOrStackCP.com/support-database.
>> Next step: Connecting with your customers
 Ruth Turner
Reseller Hosting: Connecting With Your Customers
As well as StackCP Help Desk (see previous chapter) My20i offers other ways communicate directly with your customers: the StackCP Message Centre, StackCP System Email and automated Email Campaigns.
Dynamic Content Tags
There are numerous tags which automatically insert dynamic content in to your messages. They can be used for both direct messages to the control panel and in emails. They allow you to personalise your message to the recipient and insert the information that is unique to your brand. Here’s a list of tags available:
StackCP User Tags
- Full Name {{contact.person_name}} - The first and second name of the StackCP User that the email template will be sent-to
- Company Name {{contact.company_name}} - If the StackCP User has a contact type that requires a company name, this tag will output the company name for the StackCP User
- Address {{contact.address}} - The first line of the postal address of the StackCP User that the email template will be sent-to
- Country/State/Province {{contact.sp}} - The country/state/province line of the postal address set for the StackCP User
- City {{contact.city}} – The city set for the StackCP User that the email template will be sent-to
- Postcode {{contact.pc}} – The postcode that is set for the StackCP user that the email template will be sent to
- Country Code {{contact.cc}} – The country code of the country that has been set for the StackCP User
- Phone Number {{contact.voice}} – The phone number set for the StackCP User
- Email Address {{contact.email}} – The email address set for the StackCP User. This is also used as the StackCP User username.
StackCP Welcome Email Tags
- First Name {{firstName}} – The first name set for the StackCP User
- Username {{username}} – The username your customer will use to login; it’s also their StackCP User email address. They will also need their password to login
- Password {{password}} – This is the password your customer will use to login to manage their services. They’ll need this along with their username to login to their control panel. We don’t recommend sending this by email, but if you do, ensure they have two-factor authentication set up
StackCP Ticket Tags (see StackCP Ticket section)
- Ticket Link {{ticket.url}} – The URL to your My20i account where you can reply to the ticket raised by your customer
- Ticket ID {{ticket.id}} – The unique ID given to the ticket. It can be used to identify or search for a specific ticket
- Ticket Subject {{ticket.subject}} – The subject your customer gives to the ticket to identify what the ticket is about
- Ticket Status {{ticket.status}} –The current status that the ticket is in - such as ‘Open’ or ‘Closed’. It can be set via StackCP Help Desk Configuration
Mailbox Usage Tags
- Email Address {{mailboxUsage.emailAddress}} – The mailbox that’s the subject of the email
- Current Usage {{Percent mailboxUsage.usagePercent}} – This shows how full the mailbox currently is as a percentage. It doesn’t include the ‘%’ symbol, so you’ll need to add this after the tag
- Current Usage in MB {{mailboxUsage.usageMb}} – This shows how full the mailbox currently is in Mb. Again, you’ll have to add ‘Mb’ after the tag if you wish
Password Reset Email
- Brand name {{brandname}} - The Brand Name you’ve given your account from Reseller Customisation
- Business Name {{businessname}} - The Company Name you’ve set within Reseller Customisation under the StackCP Sidebar section
- Control Panel Address {{cpurl}} - The custom control panel URL you’ve set within Reseller Customisation under the Control
Panel URLs section
- Help Address {{helpurl}} - The Support Site URL you’ve set within Reseller Customisation under the StackCP Sidebar section.Homepage Address {{homeURL}} - The Home Page URl you’ve set within Reseller Customisation under the StackCP
Sidebar section
- Sales Email Address {{salesemail}} - The Sales Email Address you’ve set within Reseller Customisation under the StackCP Sidebar section
- Support Email Address {{supportemail}} - The Support Email Address you’ve set within Reseller Customisation under the StackCP Sidebar section
- Reset Password Address {{resetURL}} - This is the URL that your customers will be taken to in order to reset their password, it will utilise the custom control panel URL you’ve set to ensure it’s white-labelled
- Webmail Address {{webmailurl}} - The URL that your customers can go to log in to their webmail as set within Reseller Customisations under the Webmail Domain section
Email Templates
All emails that you send via My20i to your customers are based on Email Templates. All templates can be edited under Reseller Preferences > Email Templates.
Here, you can view and edit:
- Welcome Emails, for when a hosting package is created and when a new StackCP User is created
- StackCP Help Desk (see Supporting your customers)
- Email Campaigns, for newsletters or any other bulk mailings to your customers (see below)
- StackCP Usage Notifications, to warn customers about exceeding their mailbox size
- StackCP System Notifications, for billing notifications and password resets
Our standard email templates already contain default content. This can be edited to include whatever text content you’d like, and include dynamic content tags too.
To make changes to these emails, select Options > Edit and you’ll be taken to a page where you can make changes to the defaults and see previews of how the email will appear.
StackCP Message Centre
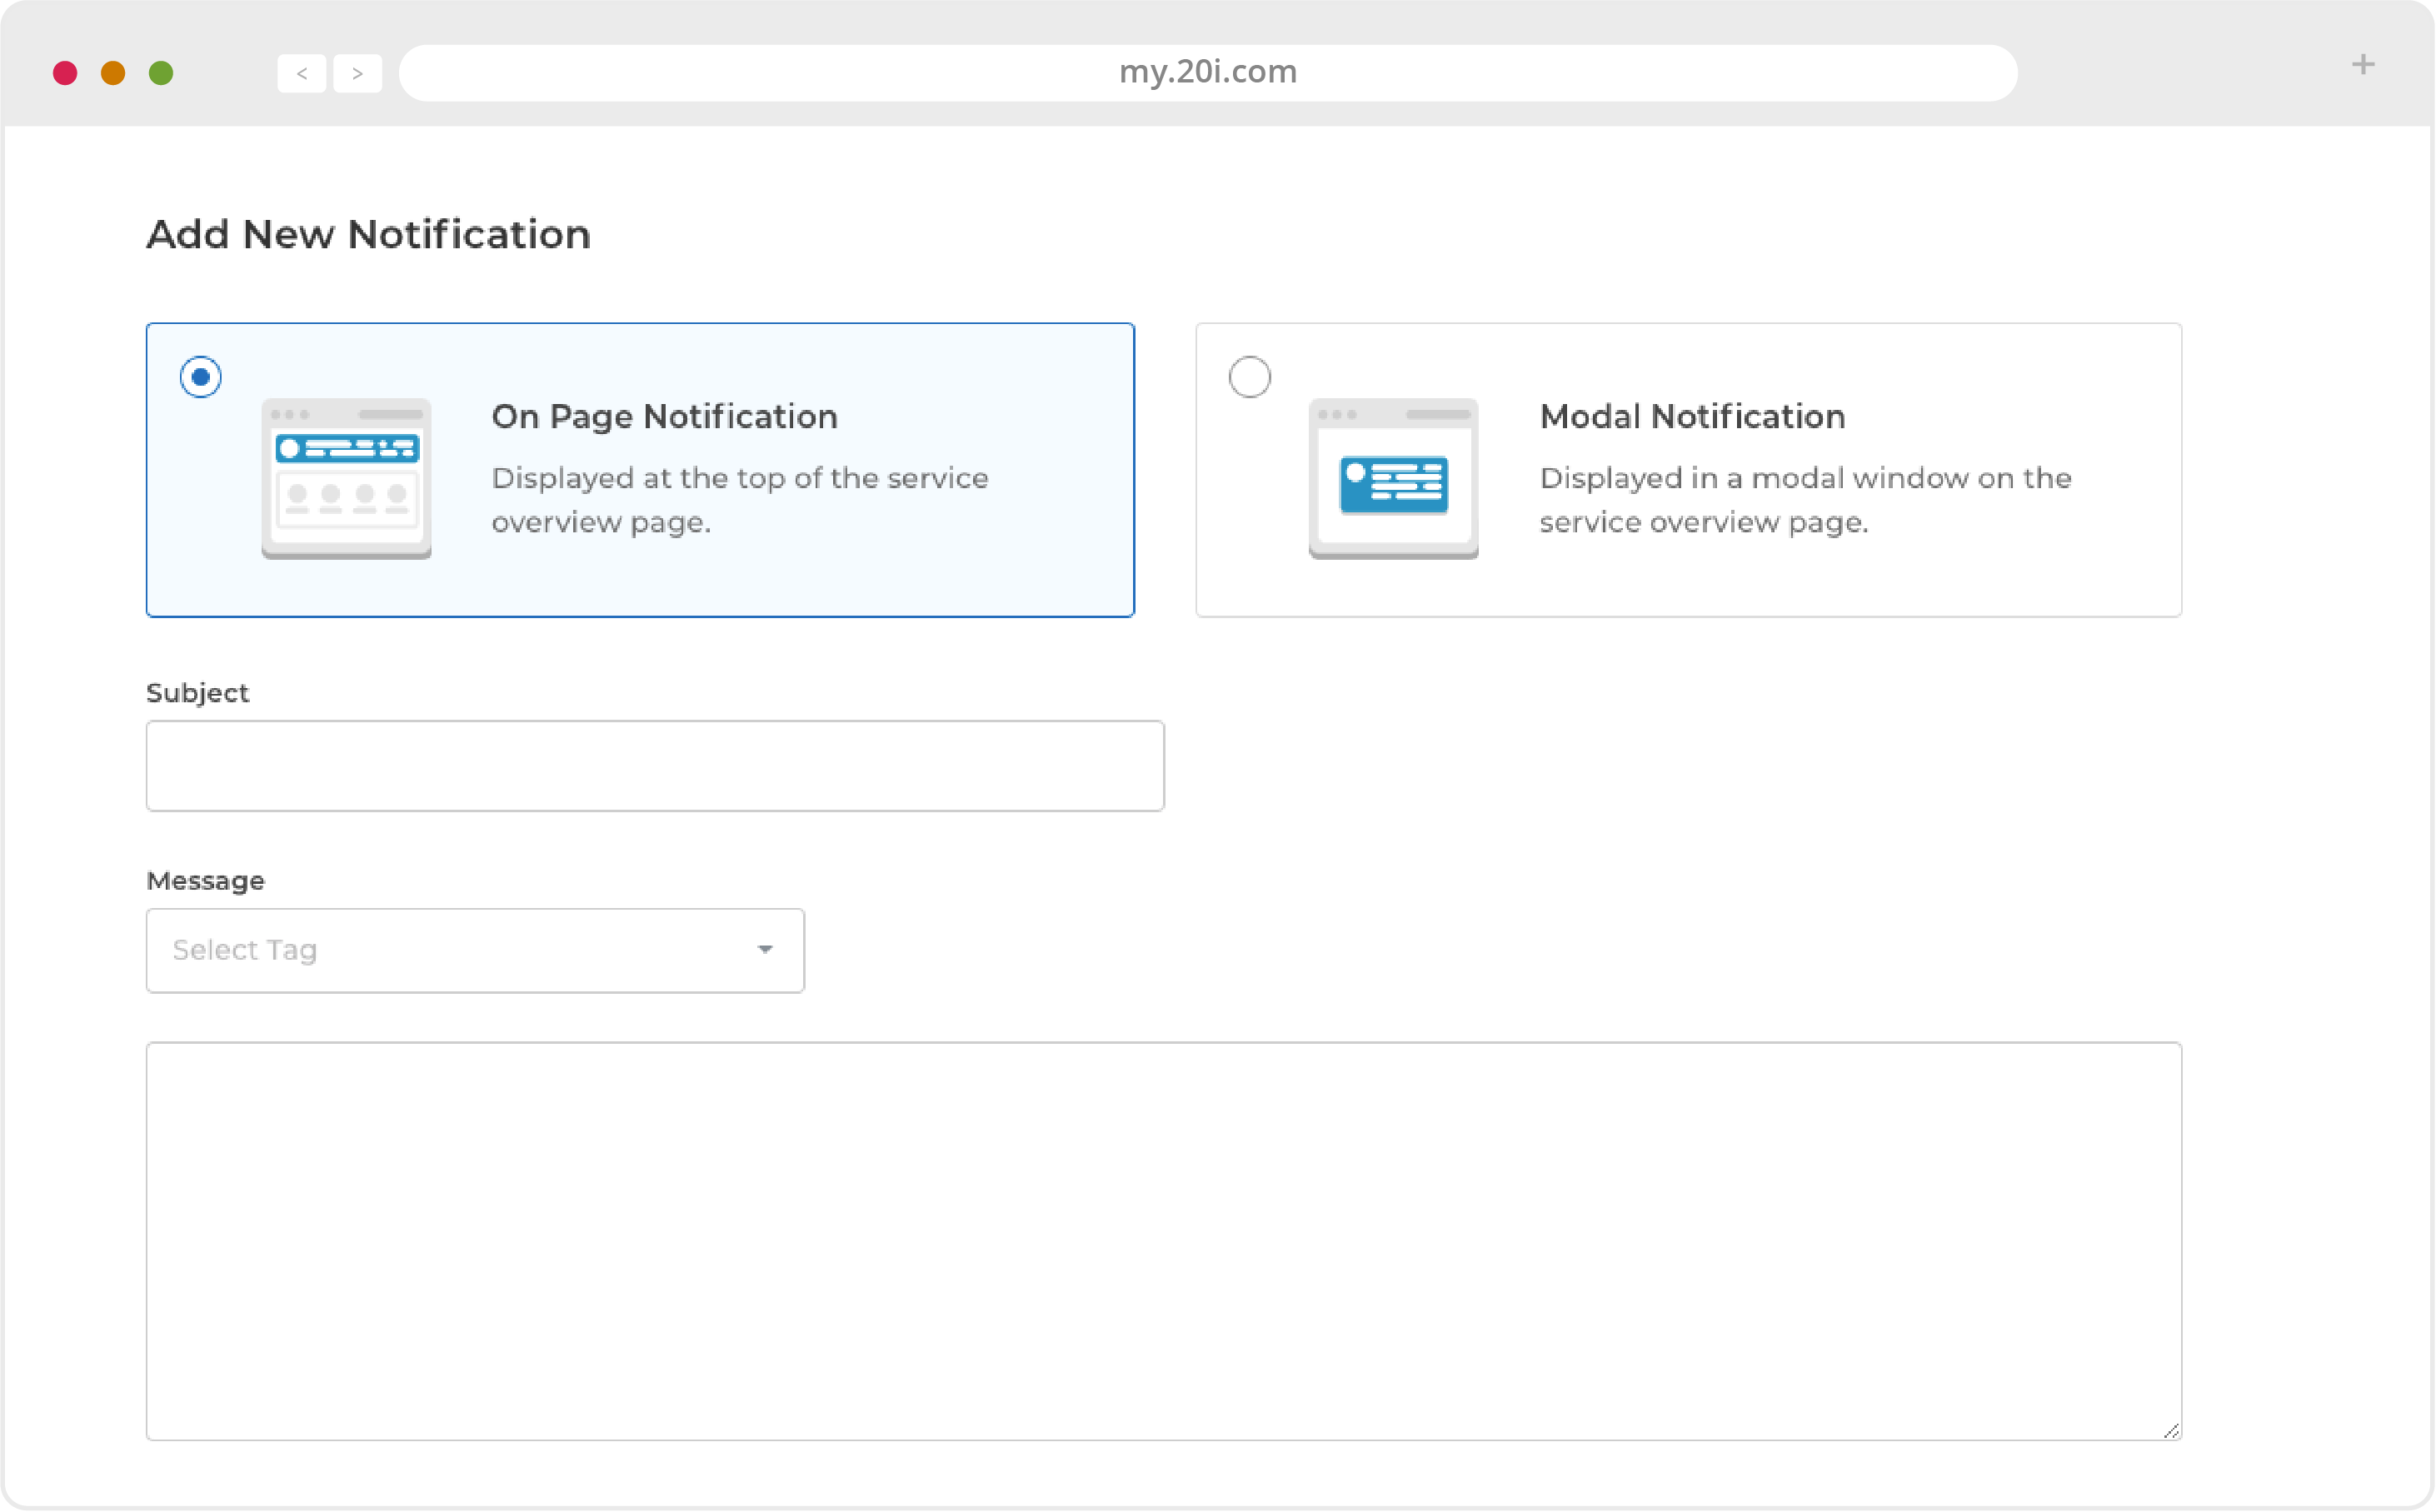
The Message Centre is a way to send a message to a customer which will appear when they log in to StackCP. The same message can be sent to all users, to those on a particular package or to selected individuals. They message can be in two formats:
- An On Page Notification displayed at the top of the service overview page of StackCP
- A Modal Notification - a pop up - in a window on the service overview page of StackCP
To create a message:
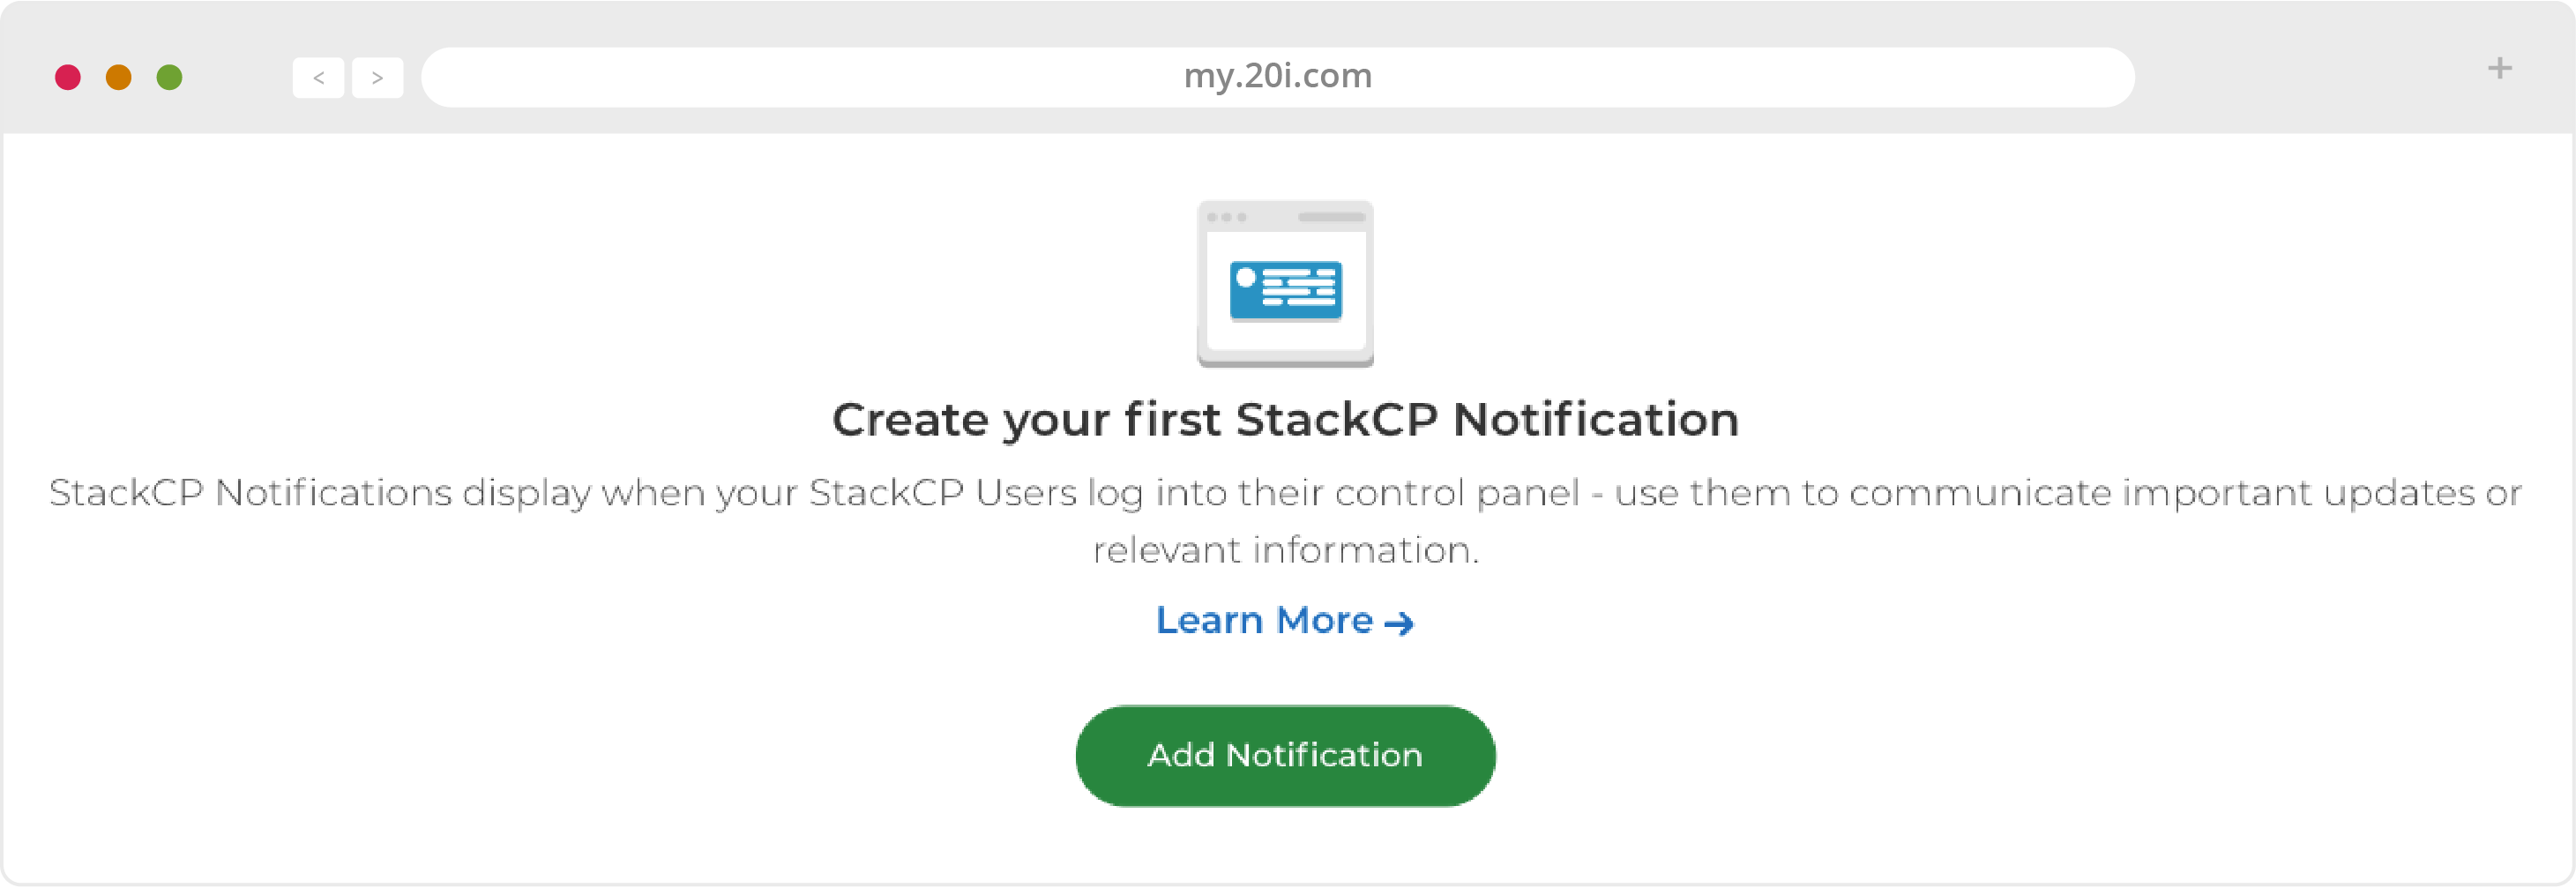
- Go to HostShop > Customer Management > Message Centre
- Select Add Notification and choose whether you want the notification to be On Page or Modal
- Enter the message subject and its content
- To personalise messages you can add in StackCP User Tags (see above)
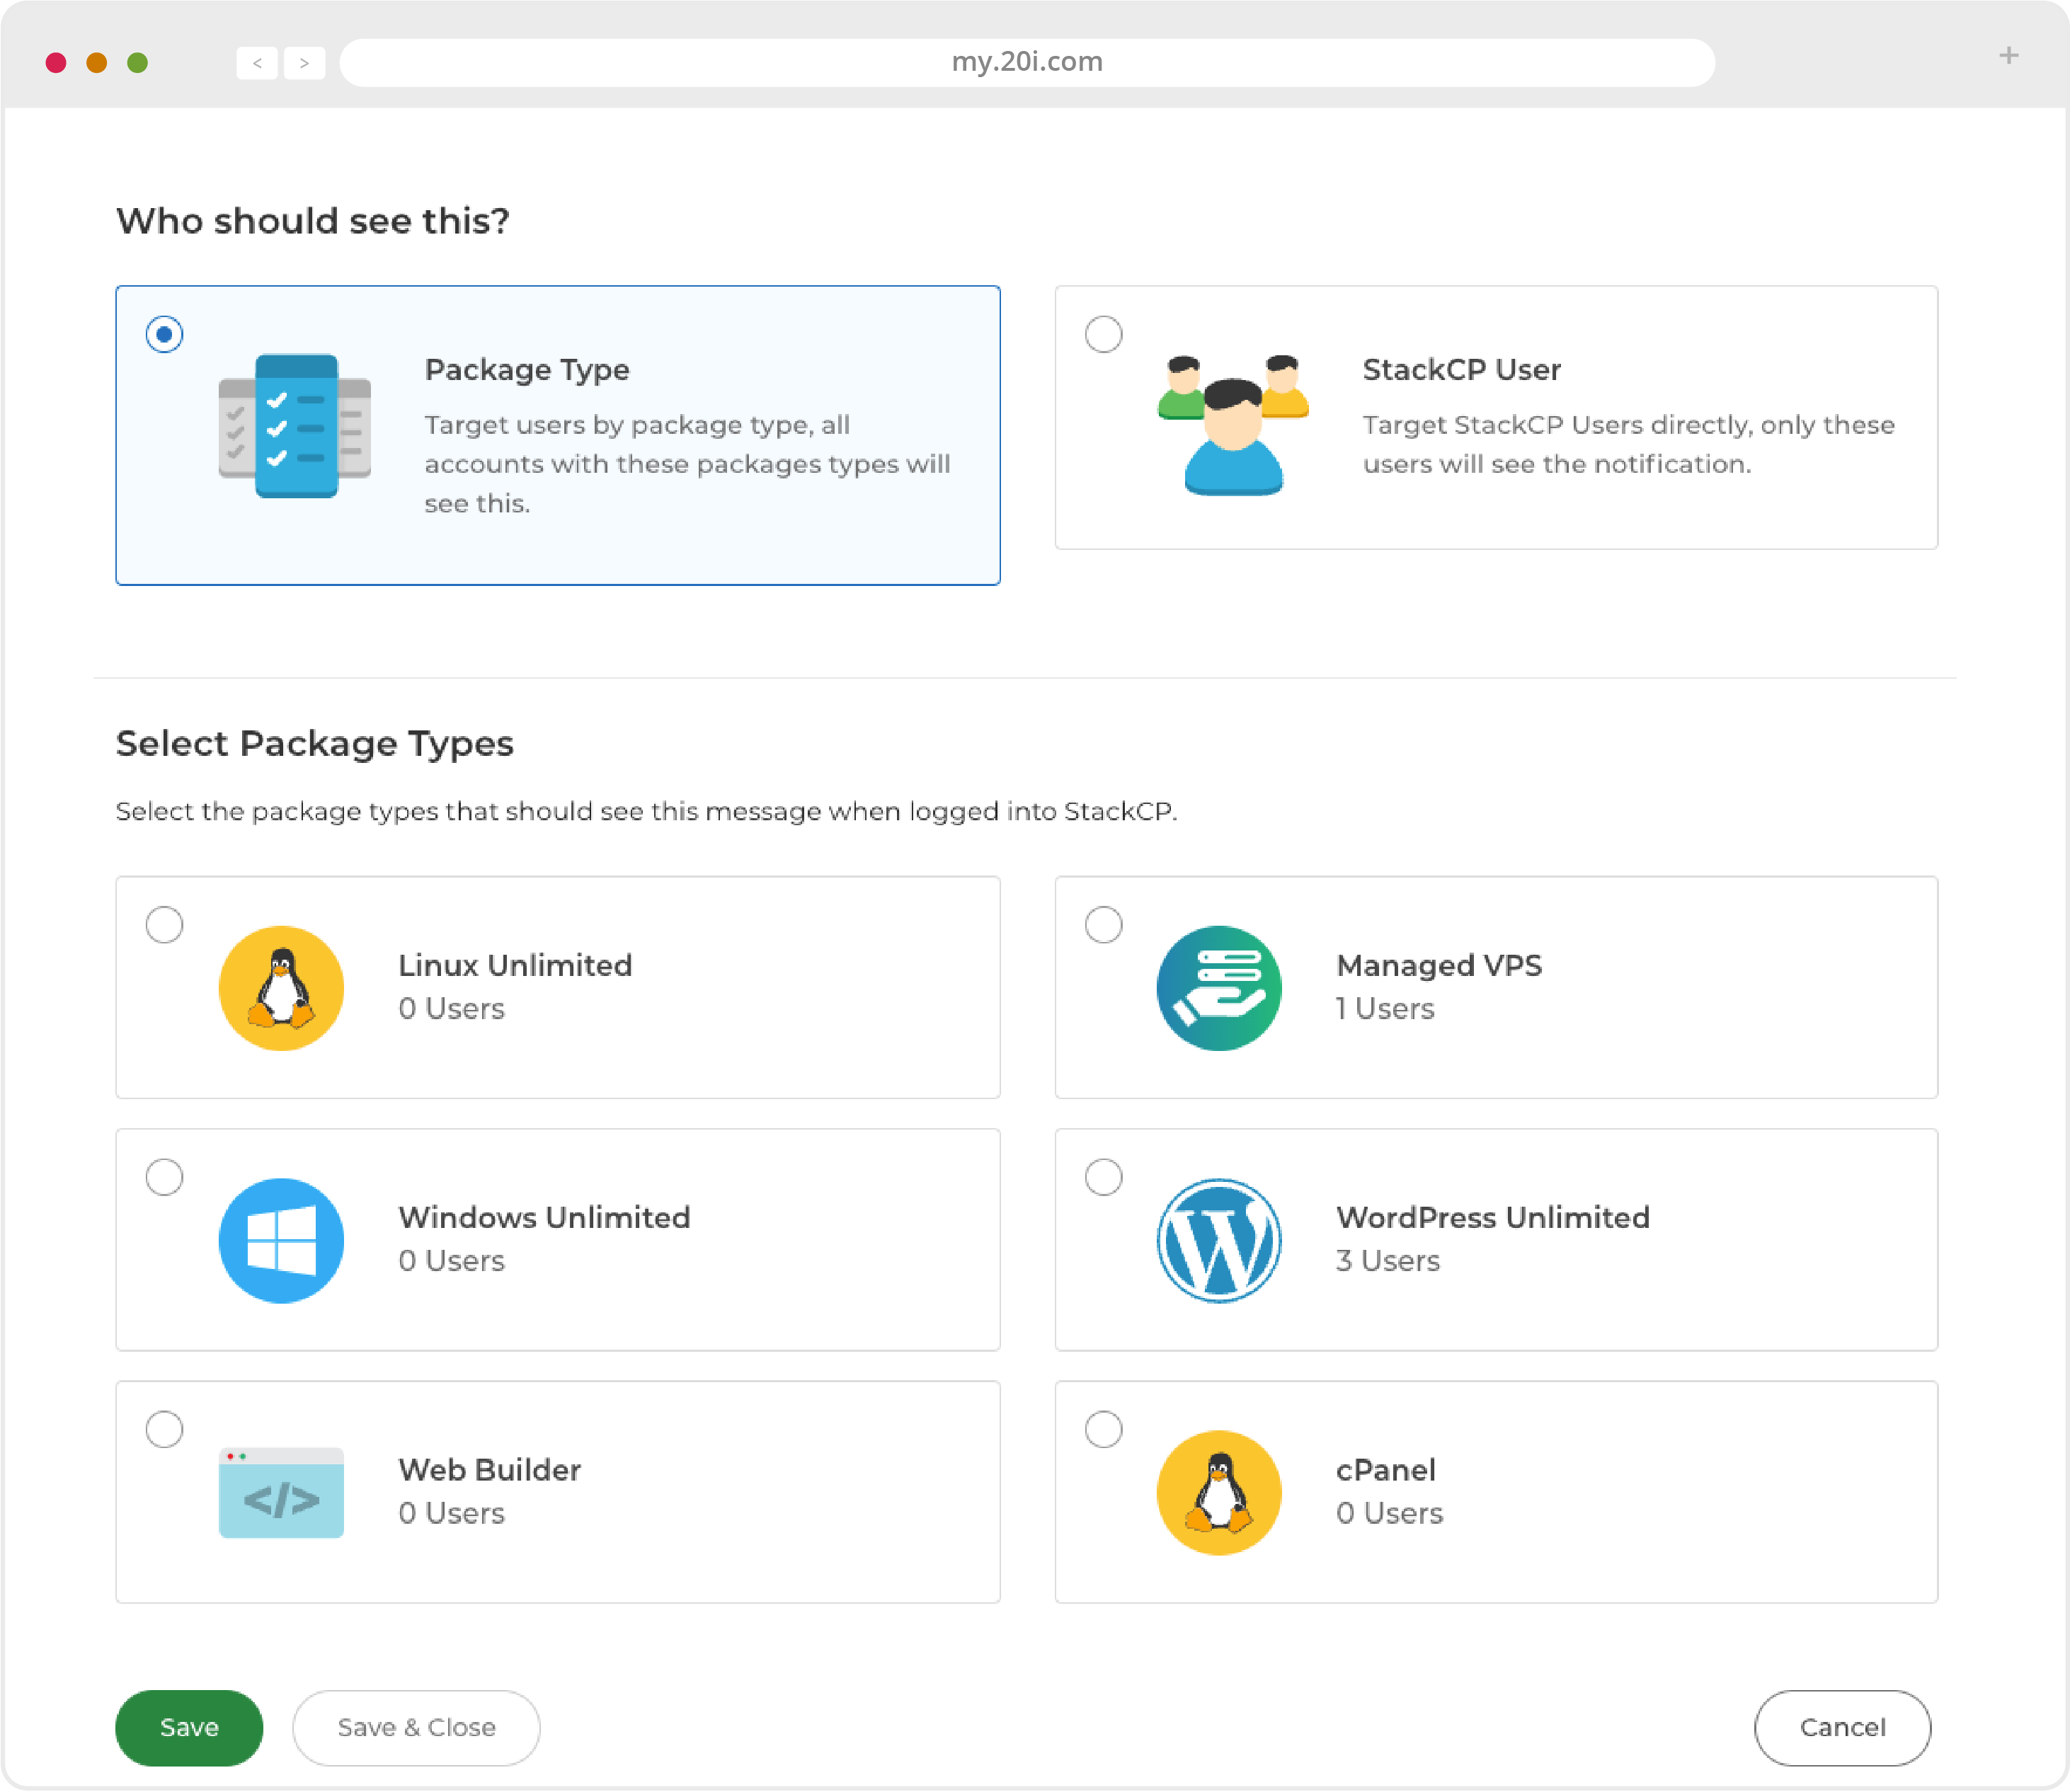
- If you want to send the message to those on a particular package, then choose Package Type under ‘Who should see this?’ and select which package(s) should see it (or all packages)
- If you want to send the message to selected Users, then choose StackCP User and select the individual(s) you wish to receive the message
- Select Save Notification and you’ll be returned to a list of your available notifications
- Here you can check User Reach and see a preview of your message, before selecting Send to activate it
>> Next step: Branding your business
 Ruth Turner
Reseller Hosting: Branding Your Business
We offer a ‘white-label’ service, meaning that you may brand our services with your company name, colours, logo, messaging and preferences. Here’s an overview of some of the ways you can brand your business.
Branding the Control Panel and Subdomain URLs
You can create a branded control panel login for your services as an alternative to using the default control panel login, www.stackcp.co.uk. To set a custom control panel URL:
- Go to Reseller Customisation in the Reseller Preferences section
- Locate the Control Panel URLs section
- You can then select your business / brand domain name that you want to use
- You’ll be shown a list of fields where you can set subdomains for the control panel, SSH, the File Manager, phpMyAdmin and our web builder

Virtual Nameservers
As standard we provide free white-labelled nameservers, these are:
- ns1.stackdns.com
- ns2.stackdns.com
- ns3.stackdns.com
- ns4.stackdns.com
If you want to take branding a step further you can look into having your own Virtual Nameservers. This means that if any of your clients were to do a nameserver lookup on their domain name, it would return the nameservers in the format:
- ns1.your-domain.com
- ns2.your-domain.com
- ns3.your-domain.com
- ns4.your-domain.com
To buy these, head to Reseller Preferences under ‘Hosting Management’, click ‘Manage’, and then click ‘Virtual Name Servers’.
Temporary URL
From your My.20i.com dashboard, navigate to the Hosting Management section and click ‘Manage’ under the Hosting Package Types icon. From the assigned hosting package you want to add a Custom Temporary URL to click ‘Options’ and then ‘Edit’.
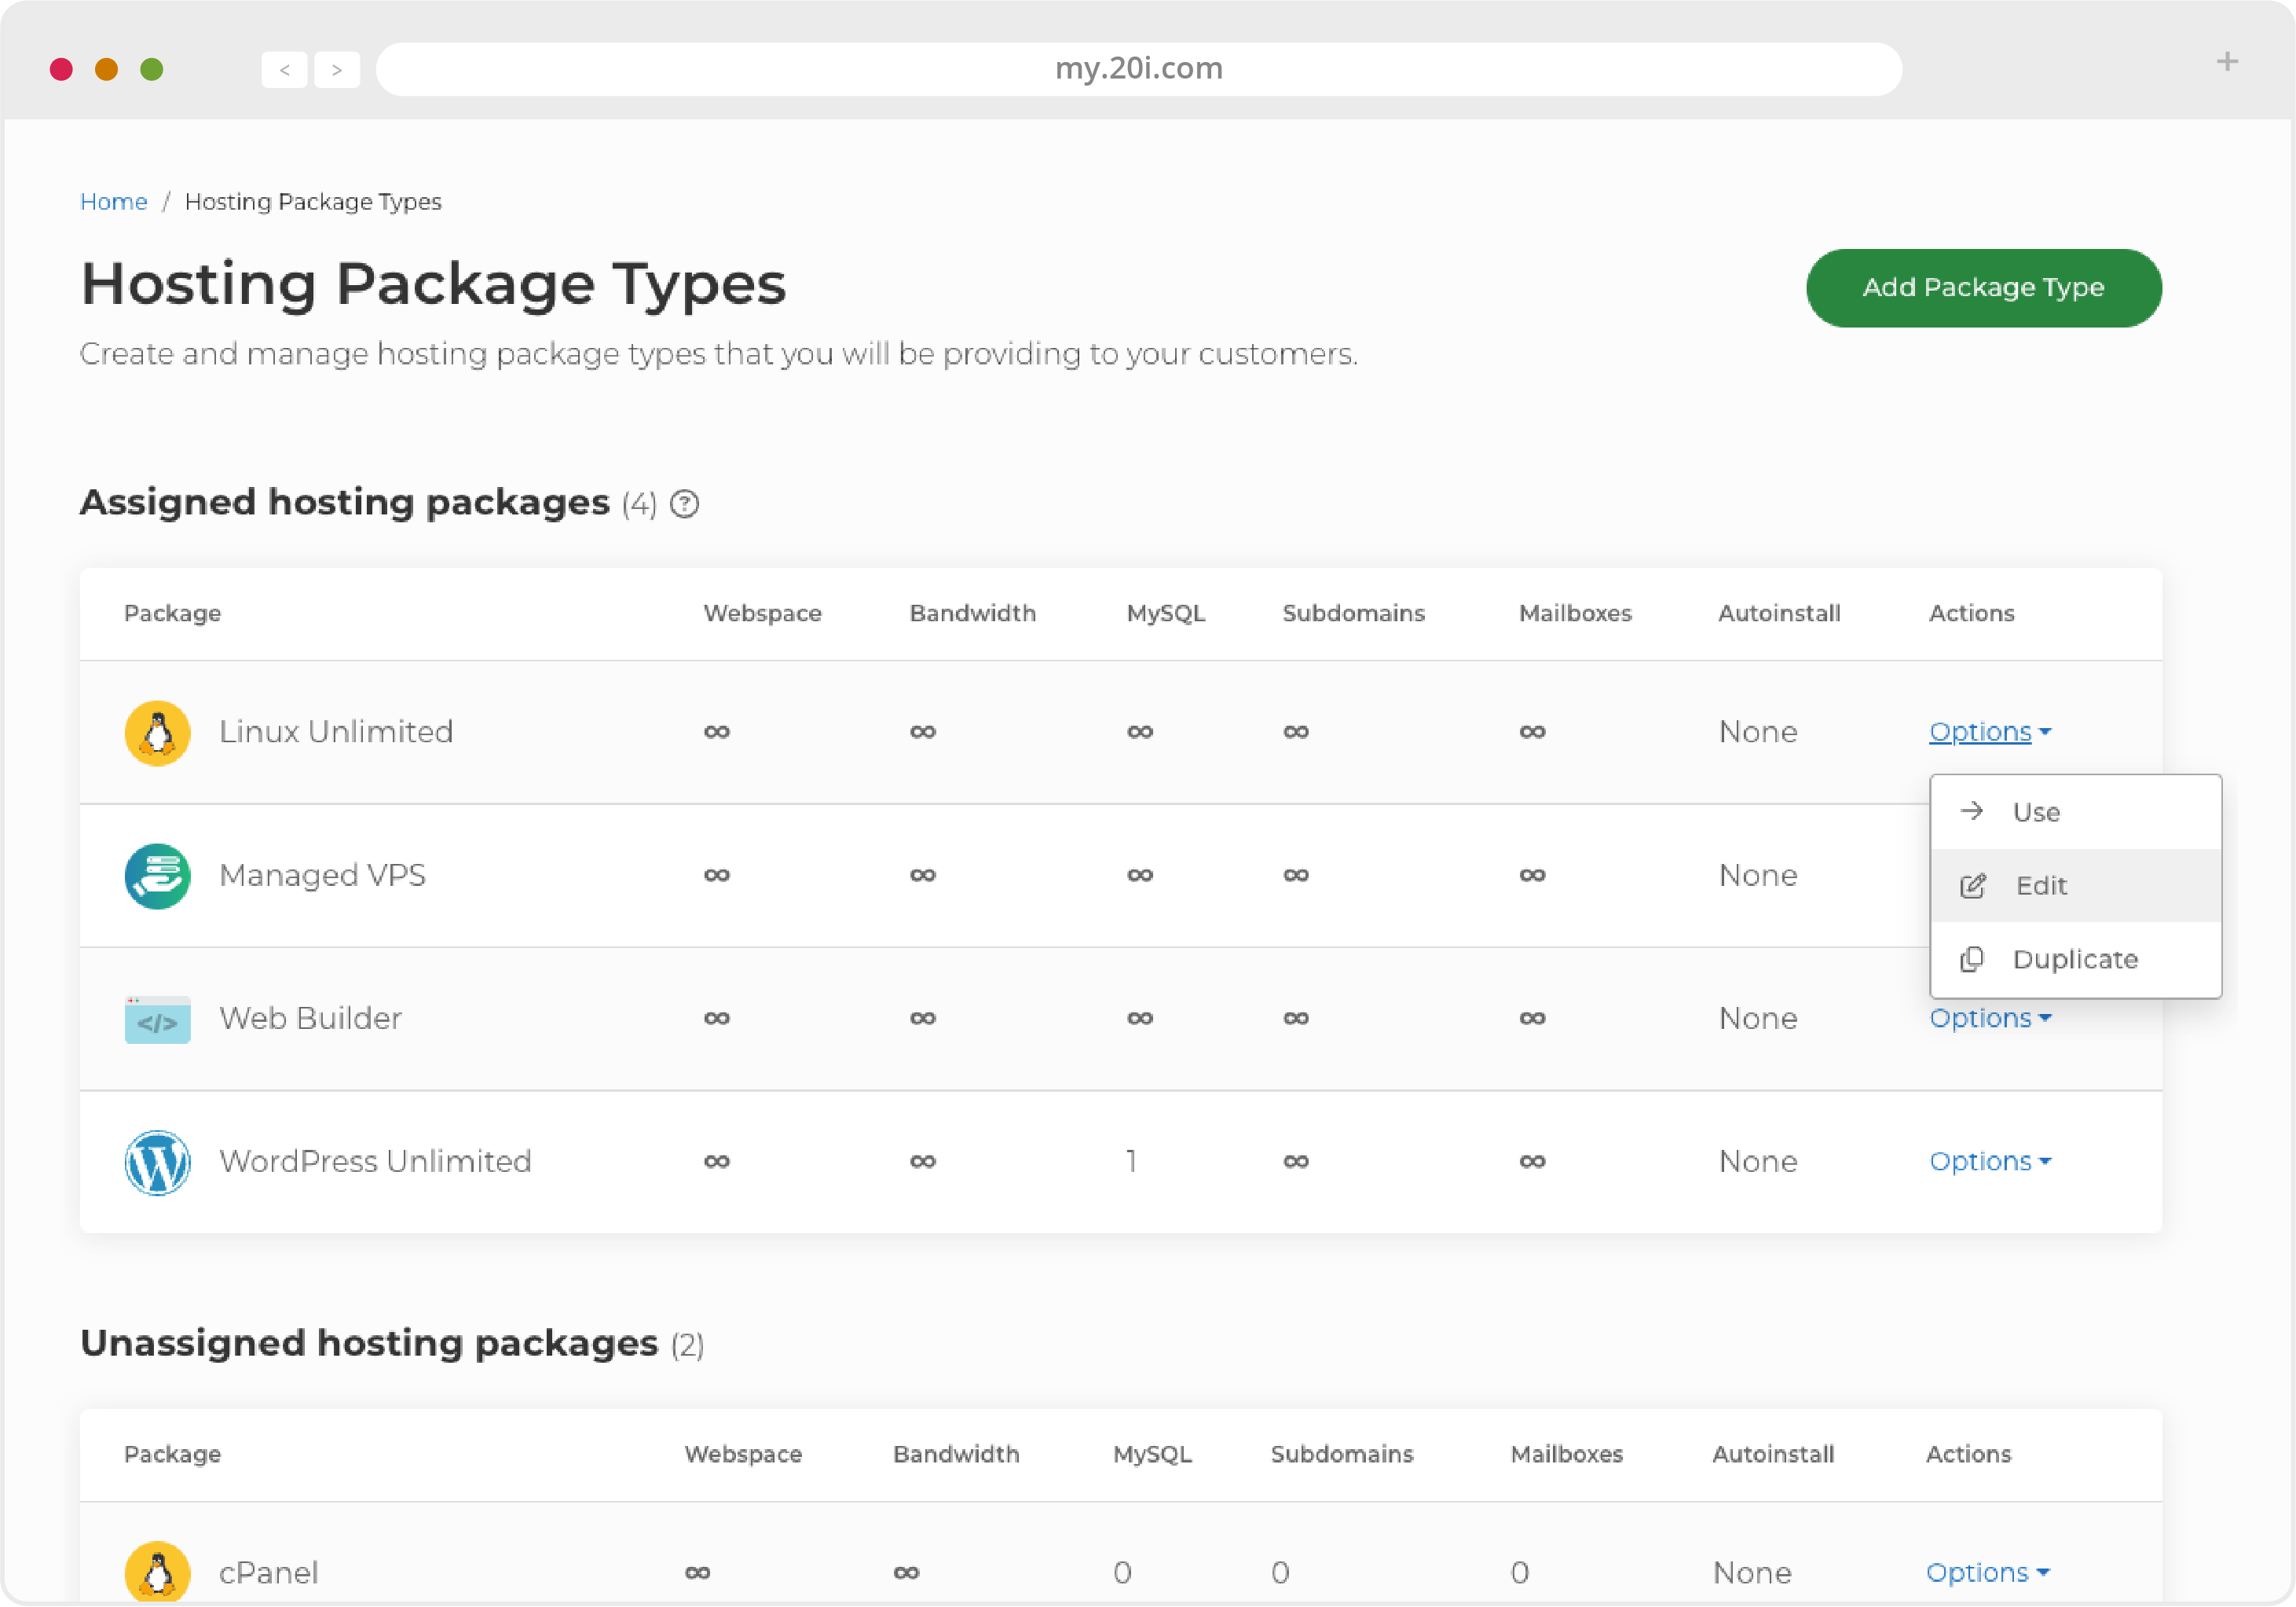
Scroll down and locate ‘Temporary URL Domain’ towards the bottom of the page, and set the domain you’d like to use from the dropdown menu. All Hosting Packages using this Hosting Package Type will then use your set Custom Temporary URL.

Default Site Pages
Edit the default site page templates displayed at offline, deactivated and unavailable sites. You can leave the defaults as they are or customise them to suit your brand on a per package basis. To do this:
- Head to Reseller Preferences, then select Default Site Pages
- You can then edit what is displayed when a site is in different states: the Index Page, when a site has been deactivated and when the service is unavailable

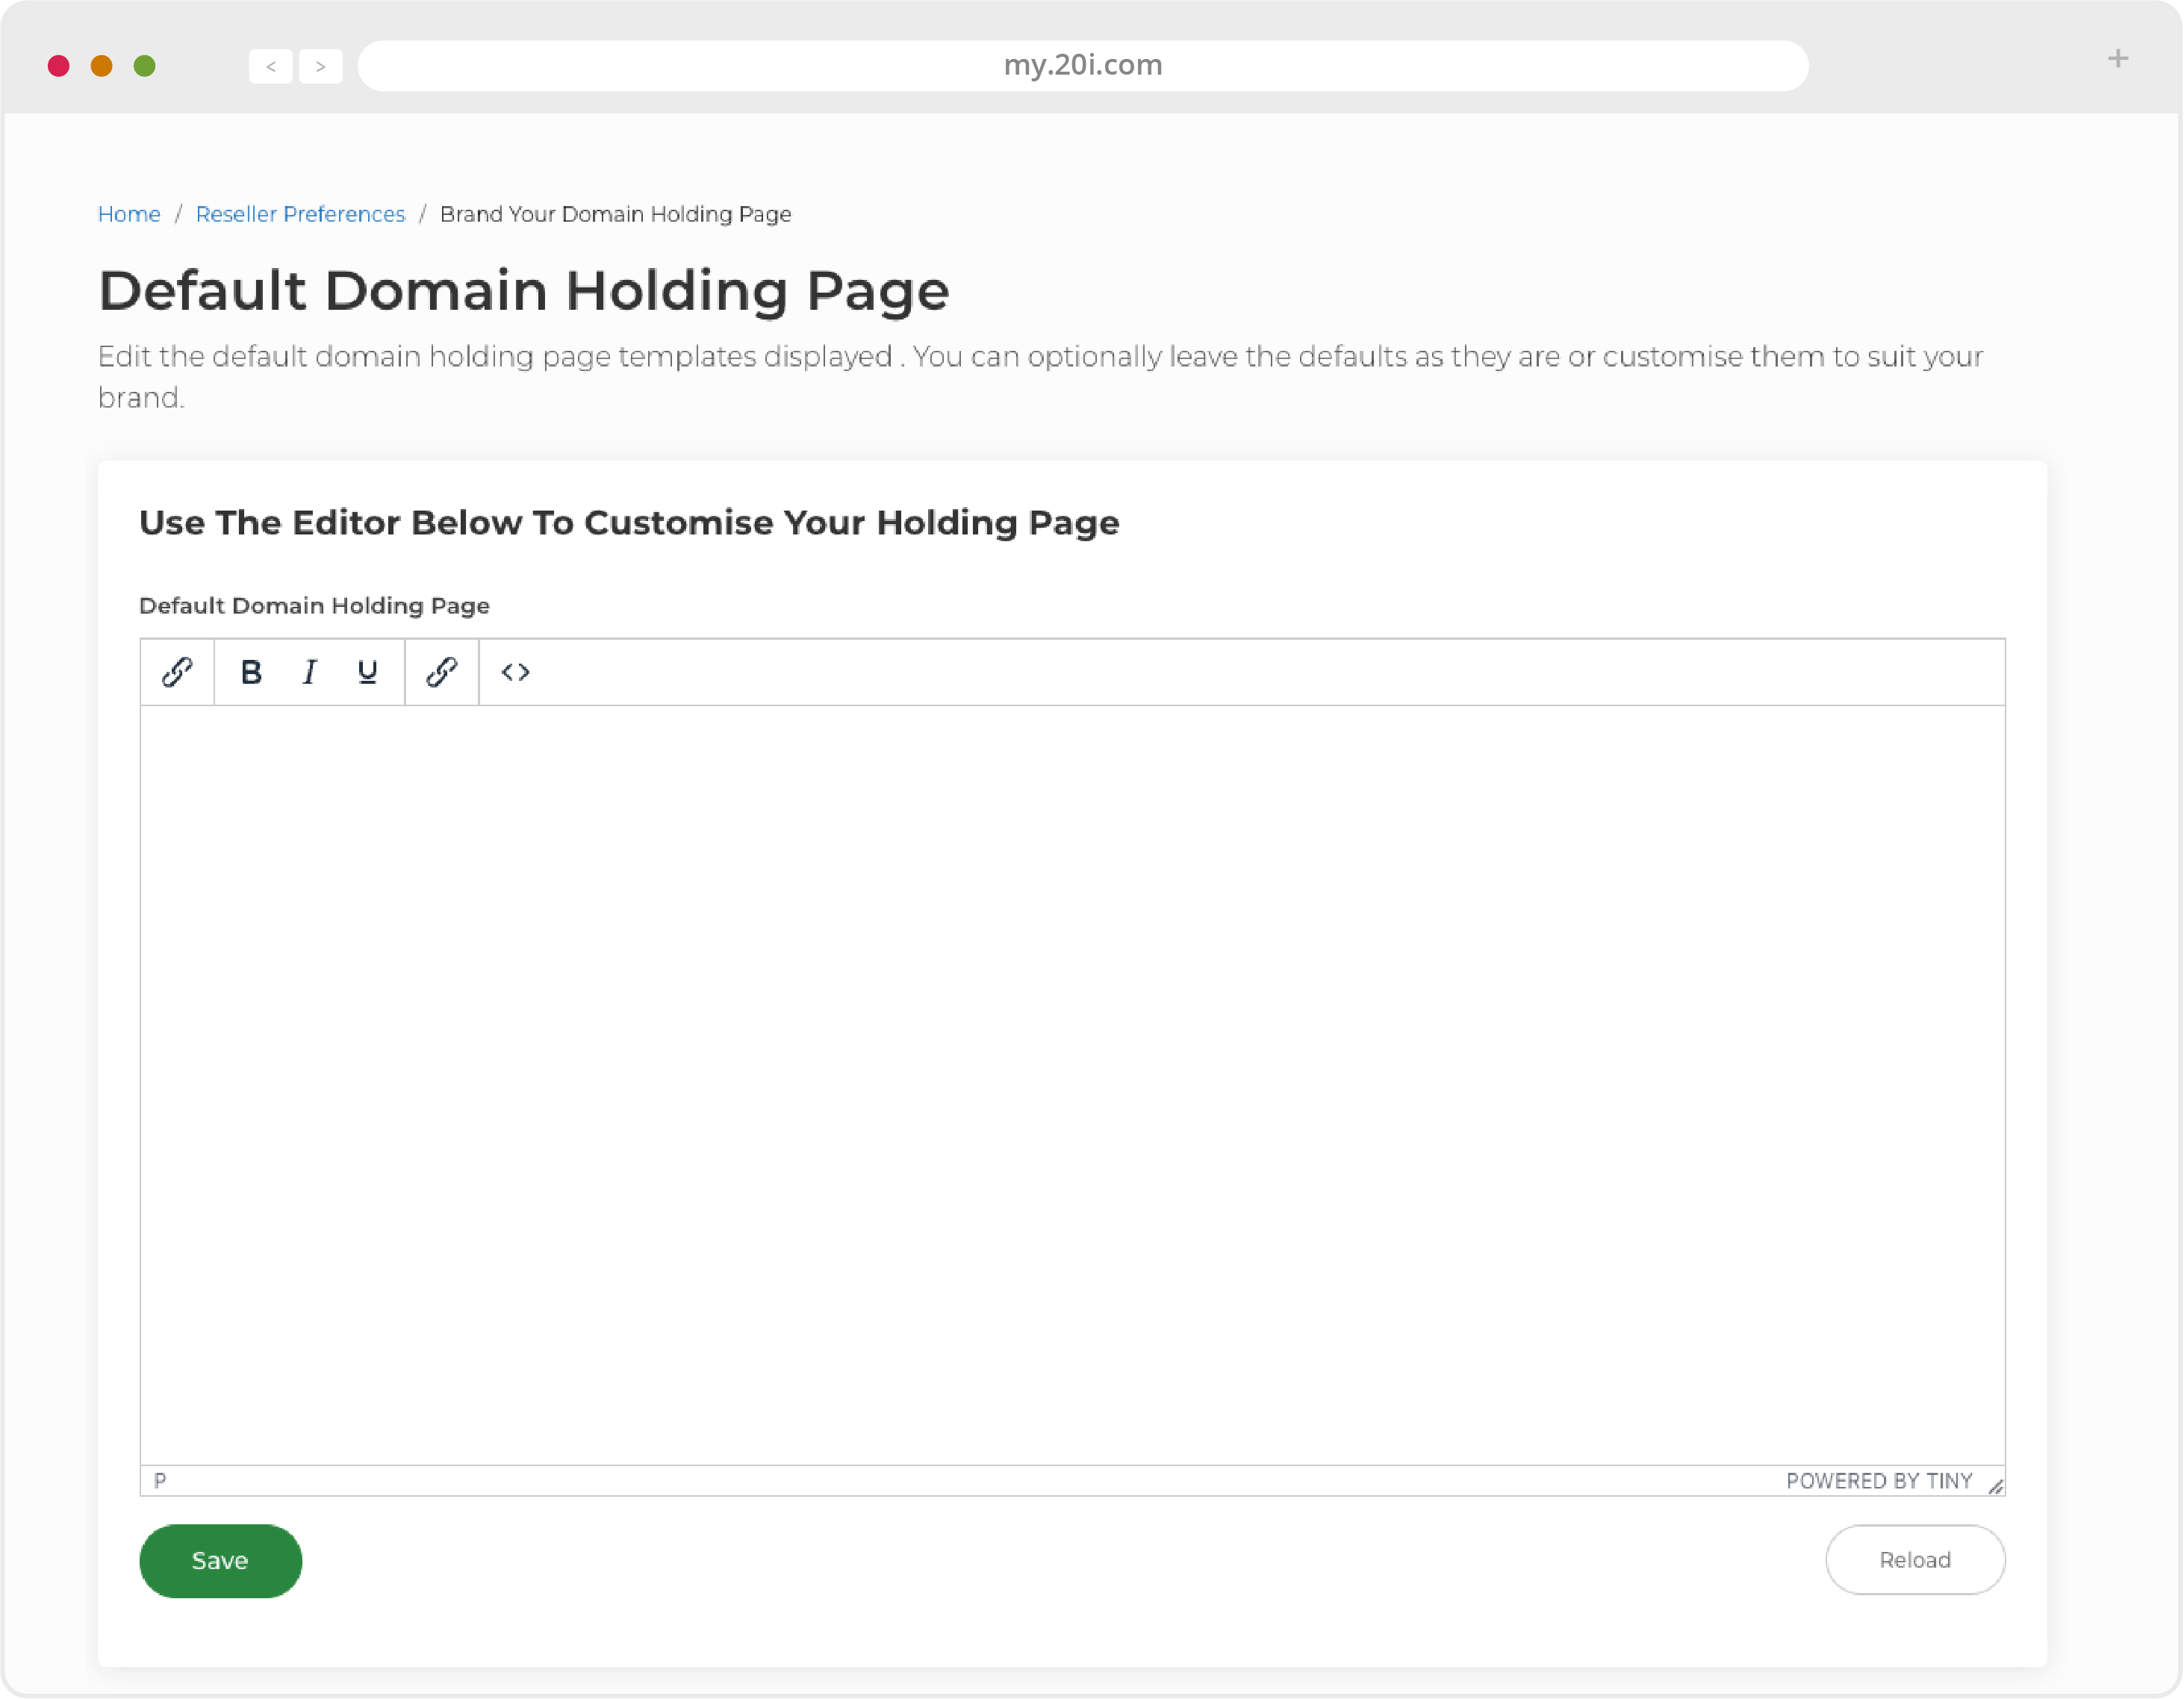
Default Domain Holding Page
The Default Domain Holding Page will appear when you have bought a domain but it has not yet been attached to a hosting package, You can choose from a selection of 32 themes - or write your own code.
- Select Domain Holding Page from within Reseller Preferences
- Choose a template, customise it as you wish and select Save
Branding the Webmail URL
Instead of directing your clients to log in to their webmail account via our white-labelled www.stackmail.com, you can create a custom webmail brand. To set this up:
- Head to Reseller Customisation
- Locate the Webmail Domain section
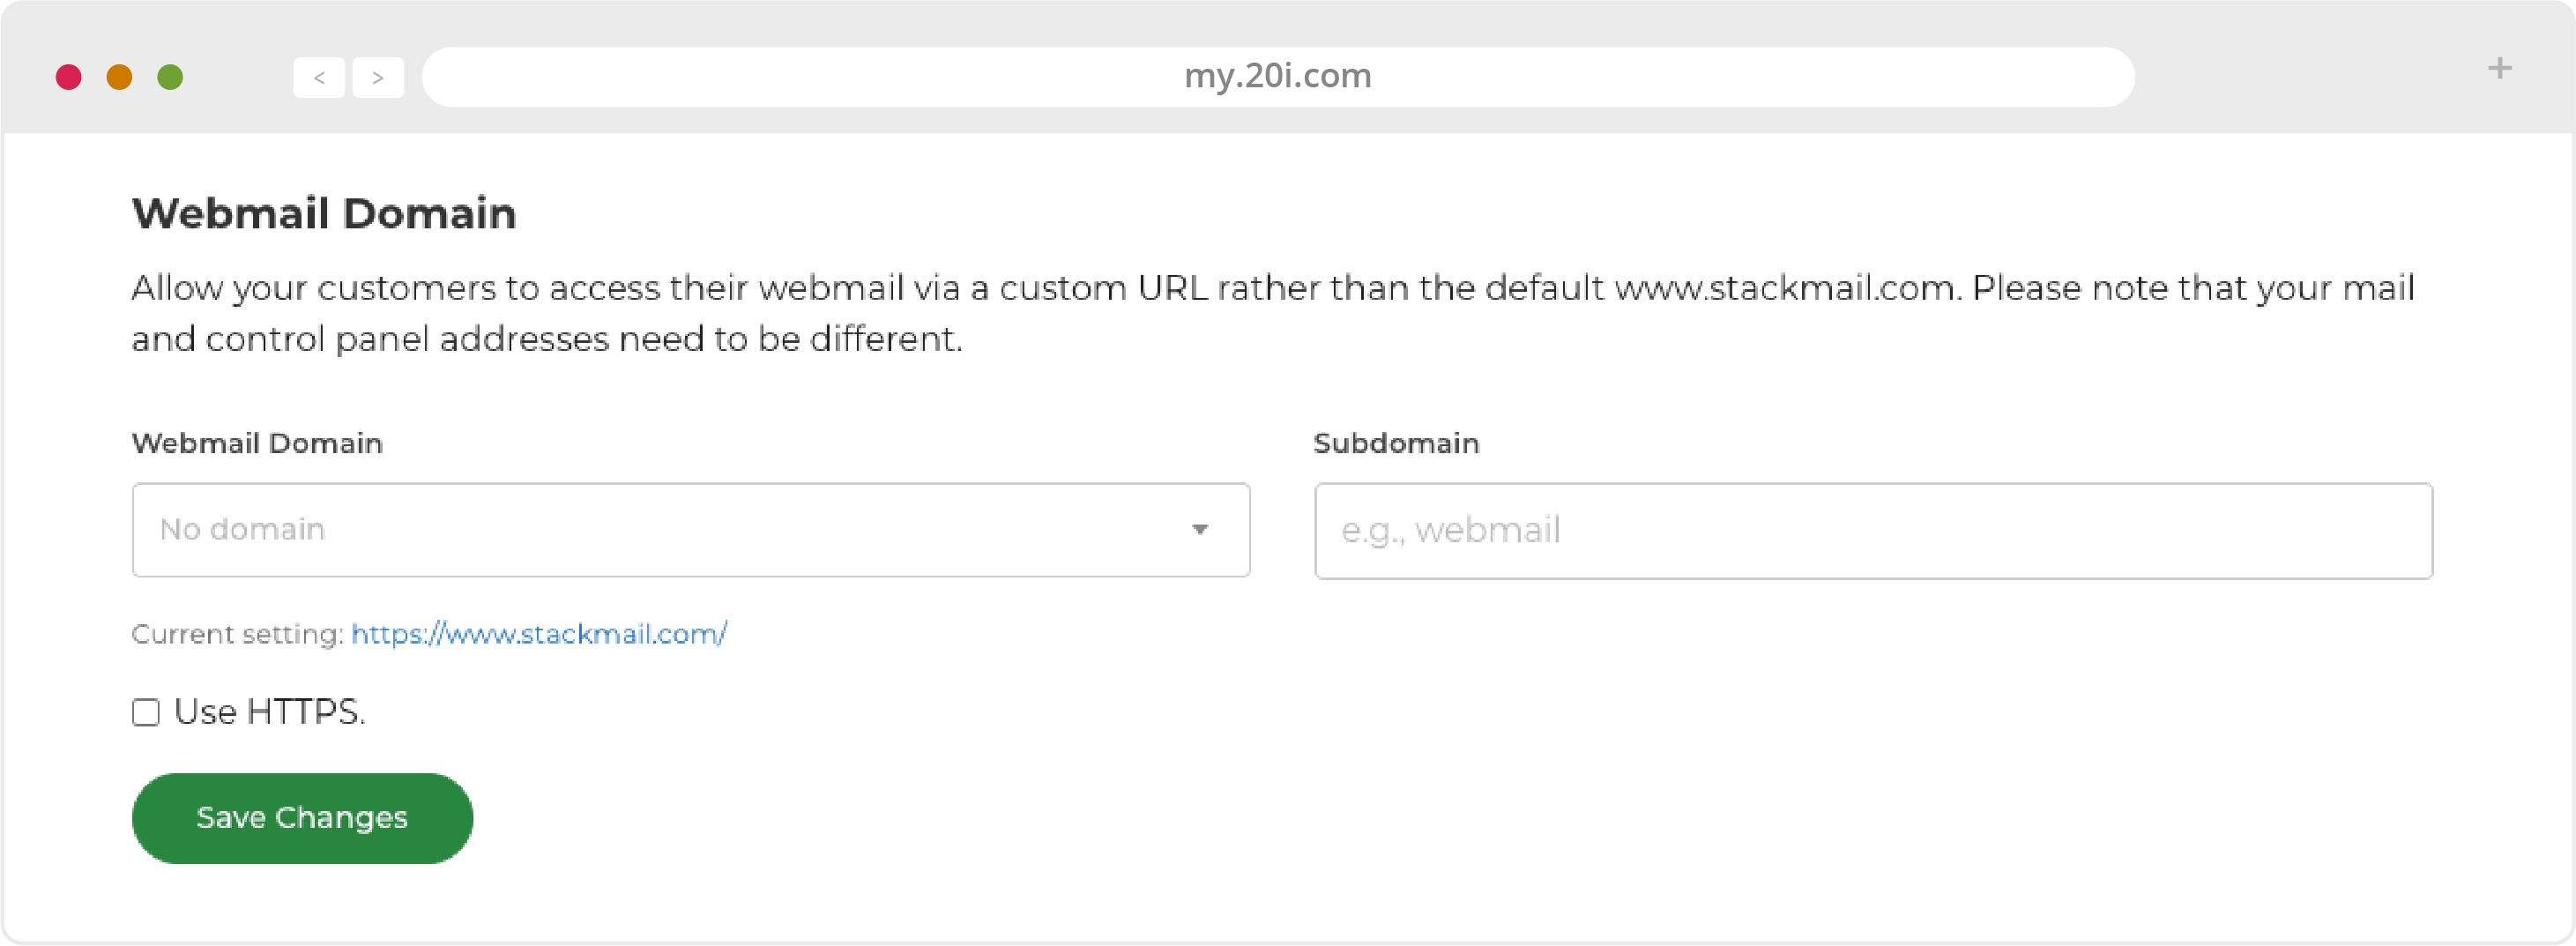
- Select the brand domain you want
- Then select the subdomain you want webmail to be accessible from, for example if the domain name you’ve selected is mytesthosting.co.uk, you could allow your customer to login to their webmail via webmail.mytesthosting.co.uk
You can style the webmail login page from Reseller Preferences > StackCP Theme.
StackCP Customisation
StackCP can be branded as much - or as little - as you like. Once you’ve entered your company name it will show up in StackCP straight away.
StackCP Visual Preferences
There are a number of different StackCP themes available, which radically change the appearance of StackCP. Three of them are based on Bootstrap 4 and can be changed under Reseller Preferences > StackCP Visual Preferences.
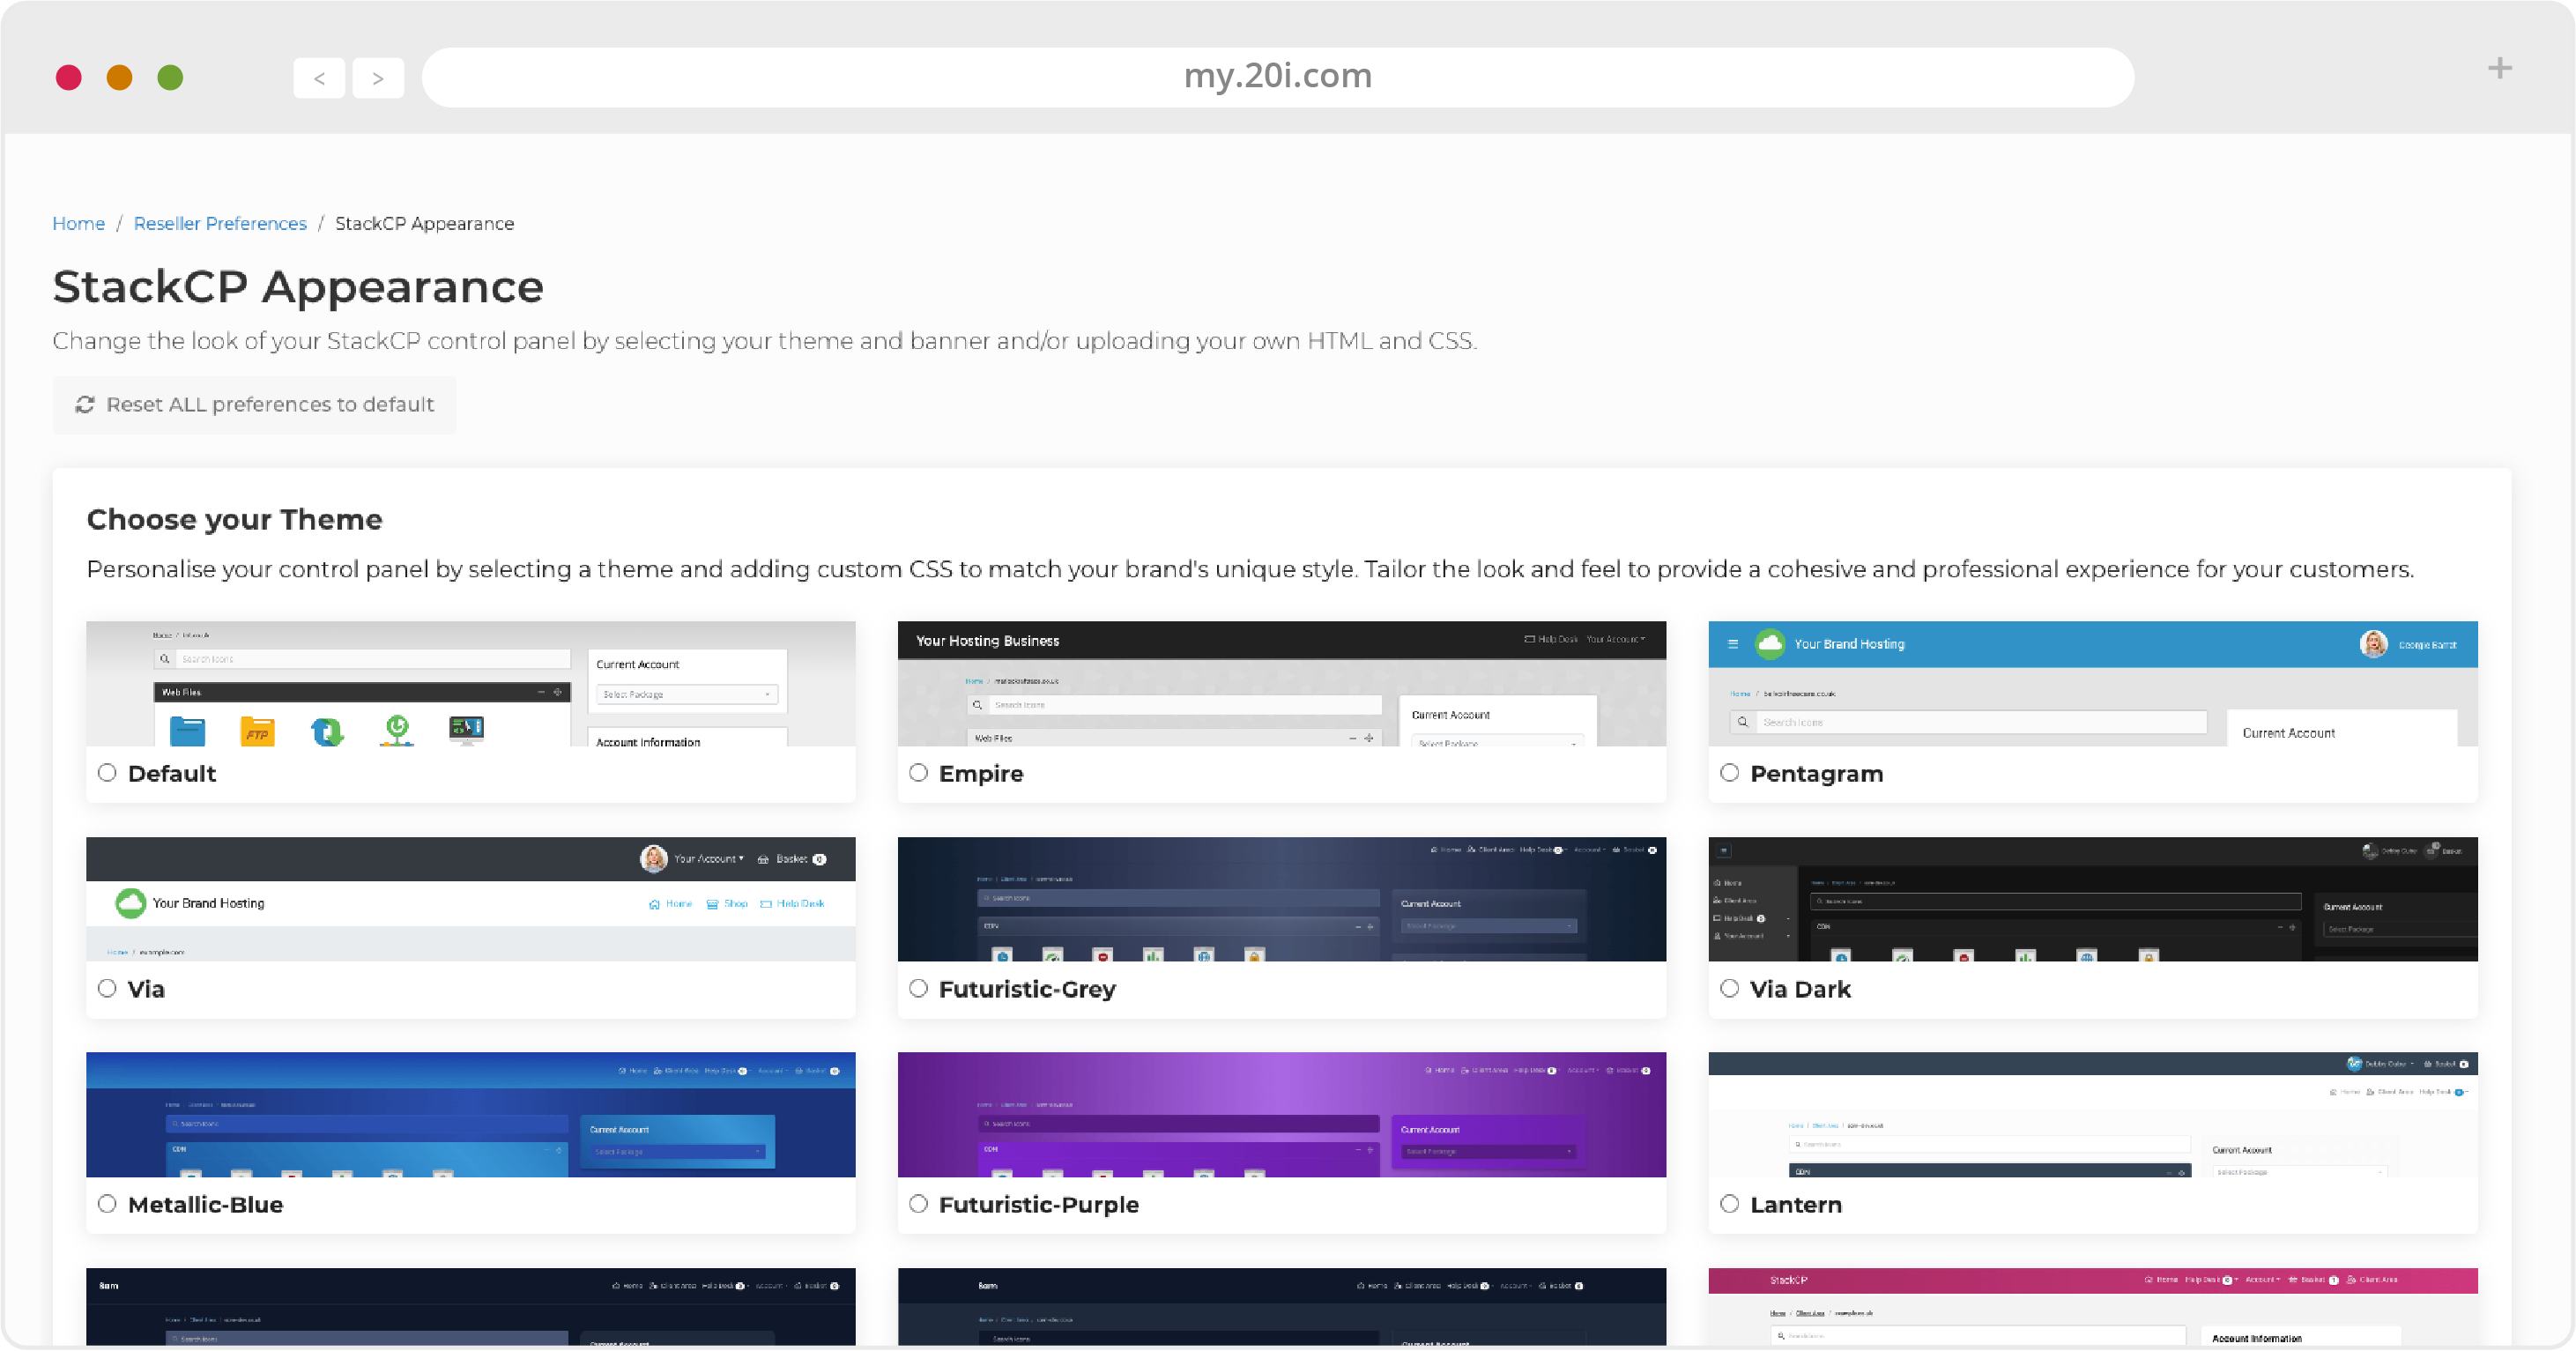
On this page, you can also choose from a number of header banners (or upload you own) and apply custom CSS to the StackCP pages. You can also add a custom favicon here.
StackCP Log In Page
If you’re looking to customise your StackCP log in page you can do this by editing the Custom CSS. A guide can be found in this support article: https://20i.co/2KzzLxW.
The following changes can also be made in Reseller Customisation:
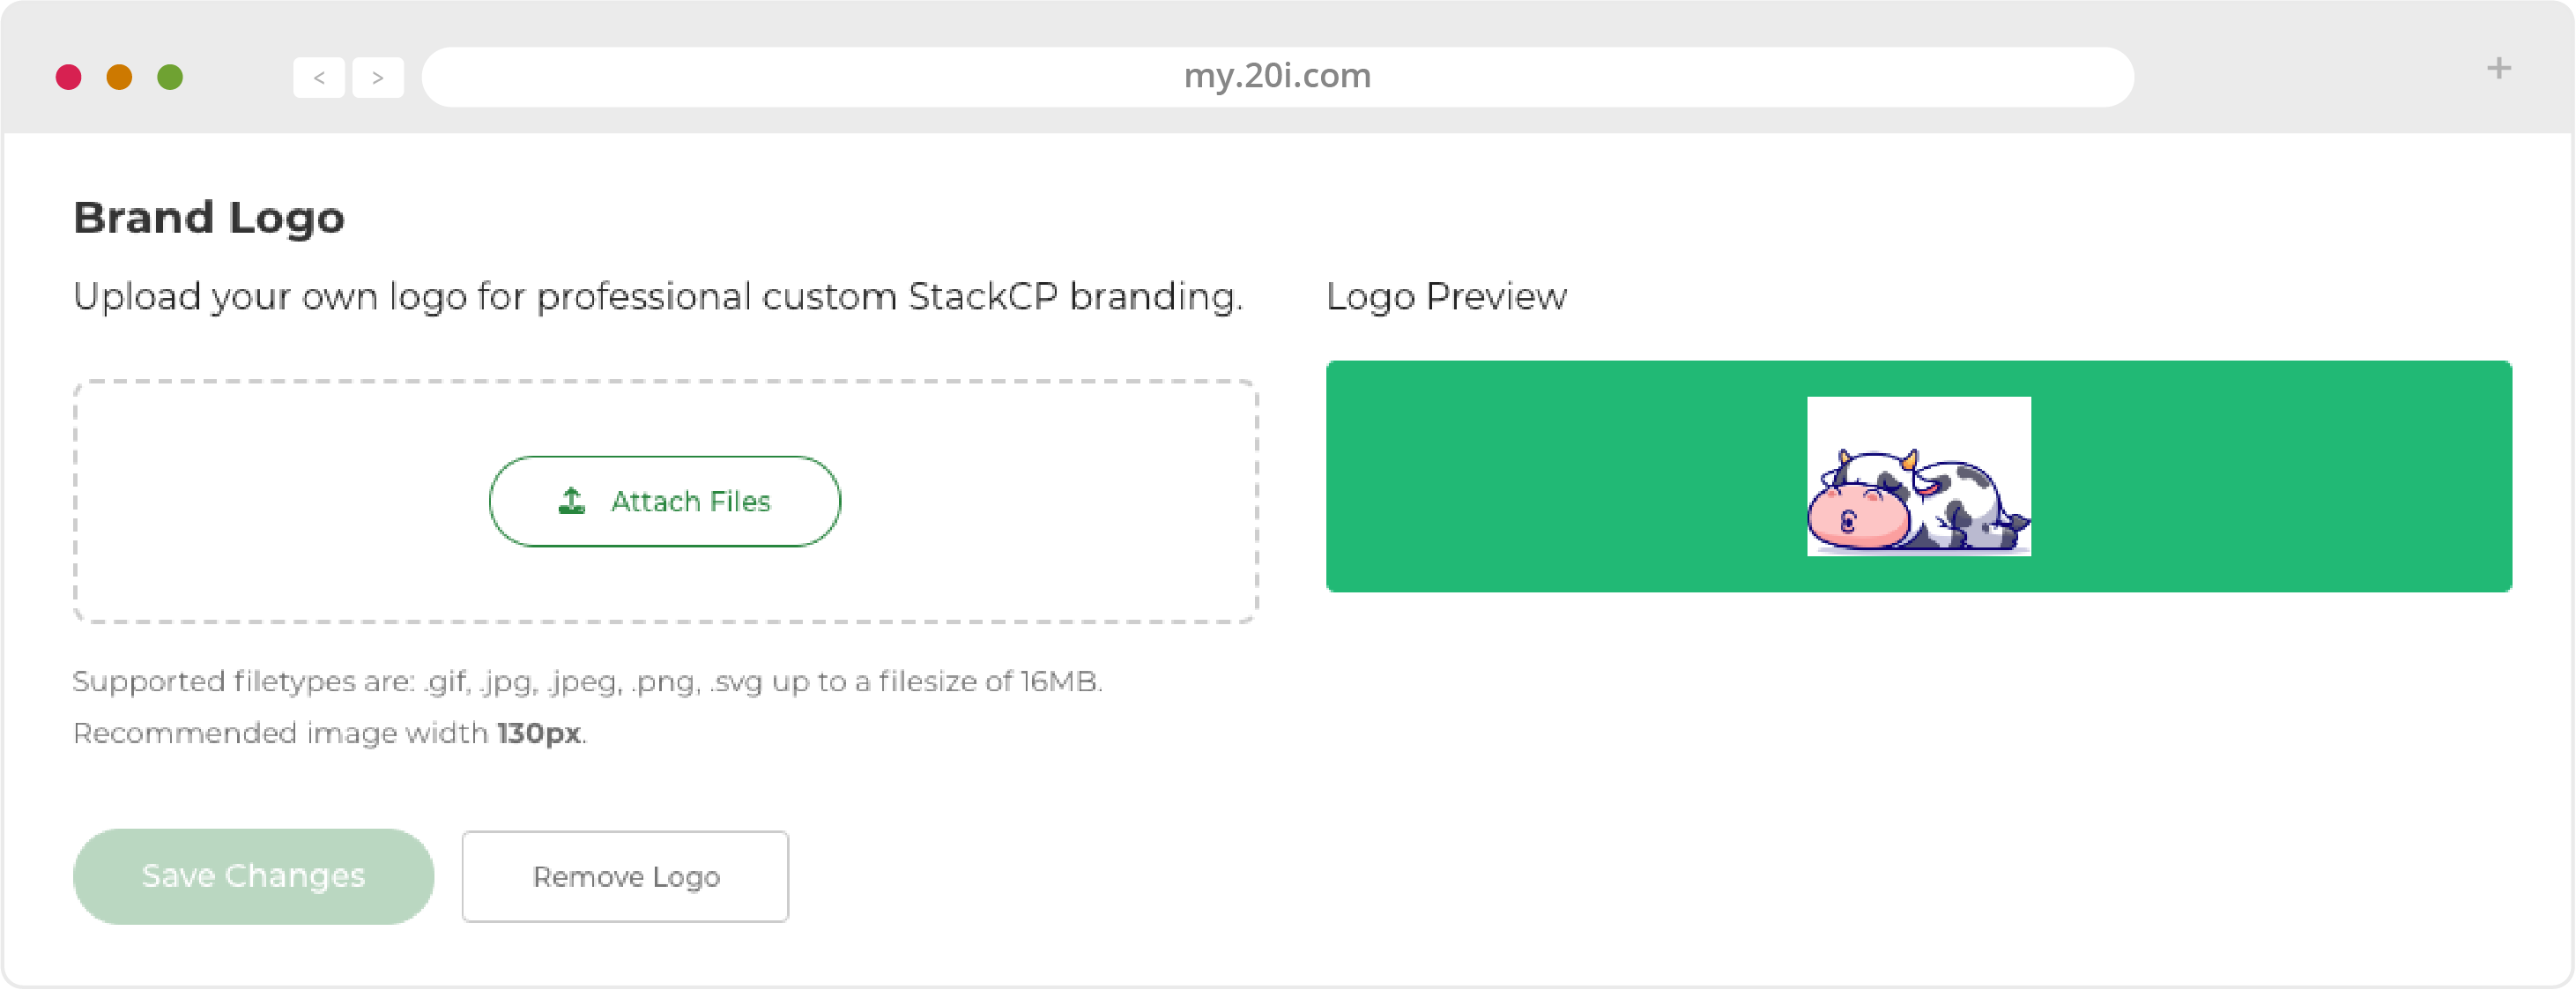
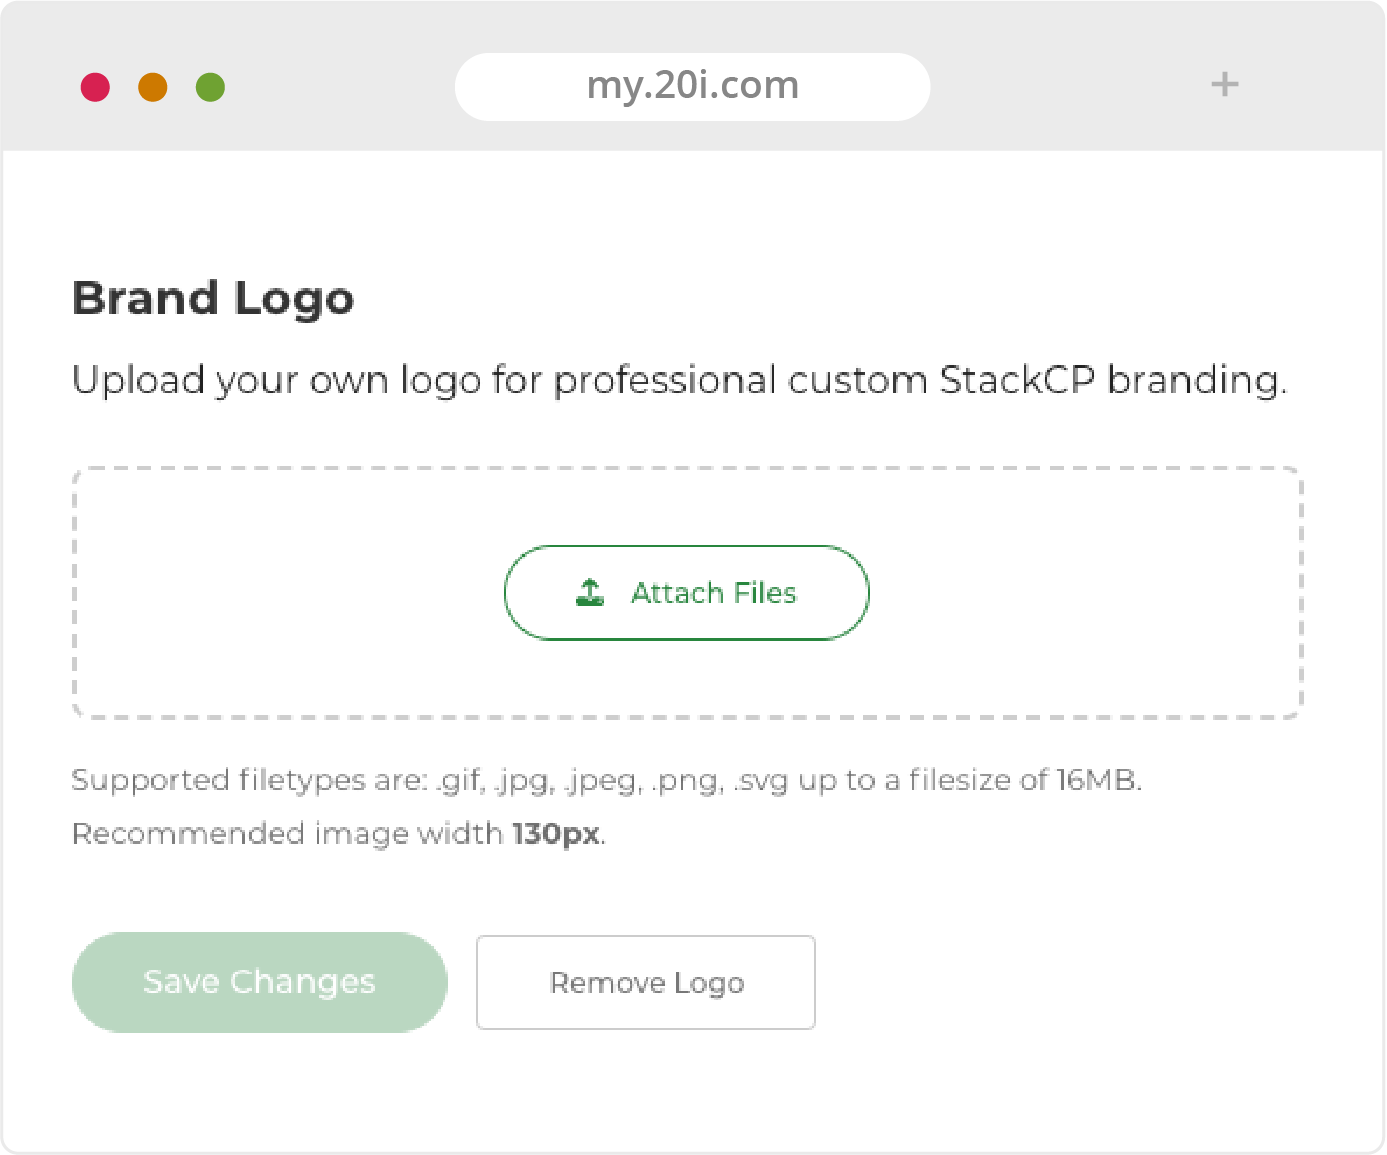
StackCP Logo
Upload your company logo. This is applied to the StackCP header.
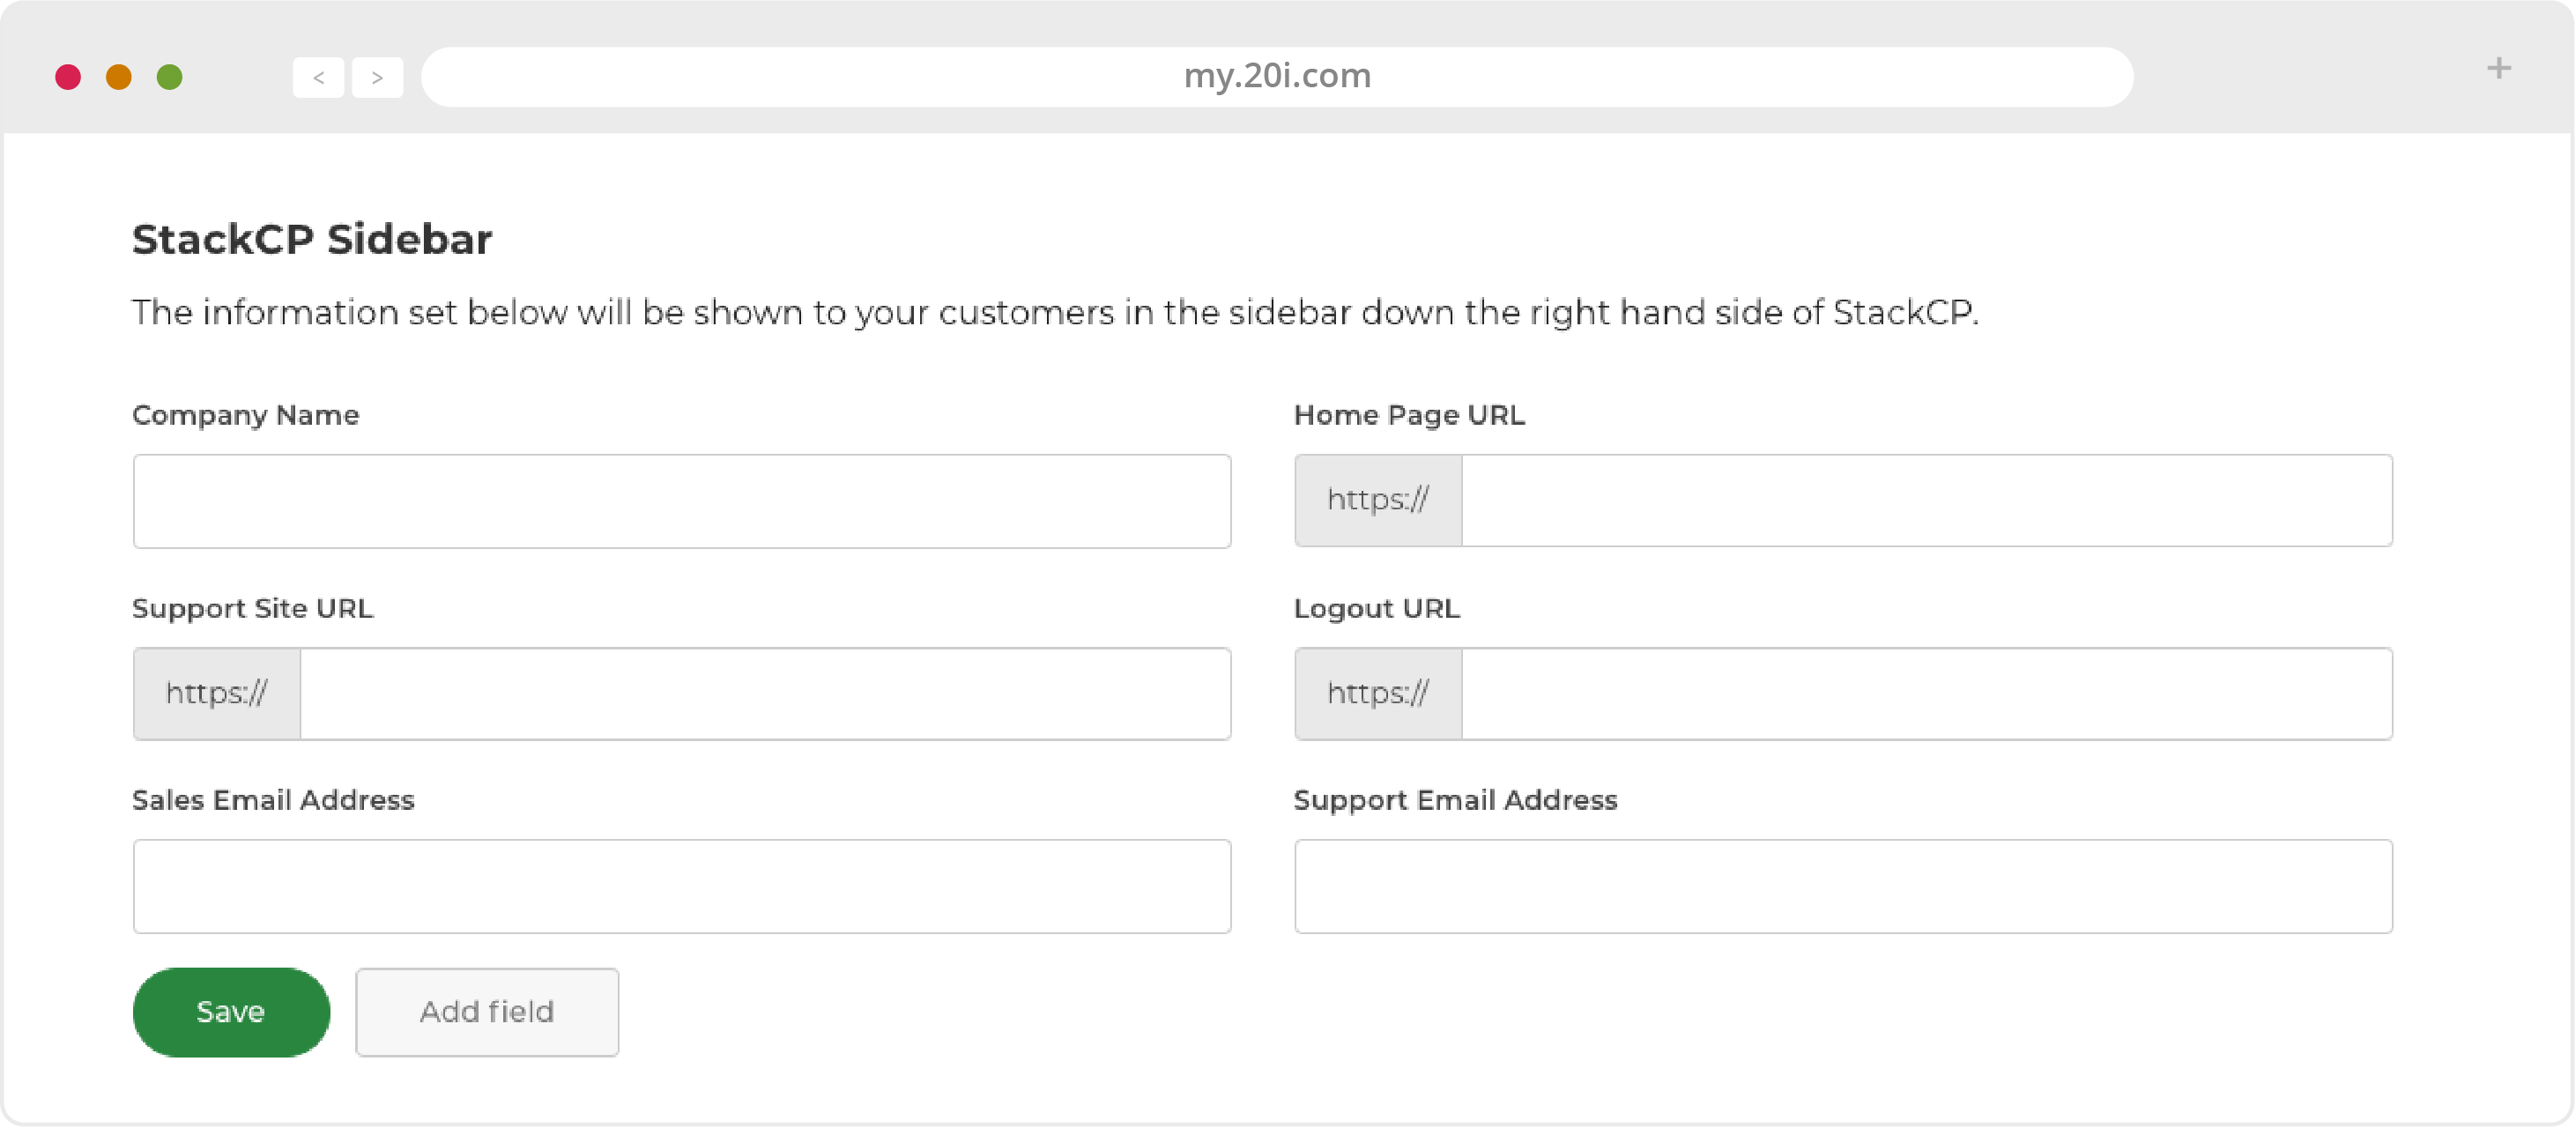
StackCP Sidebar
You can set your company contact details to be displayed in StackCP
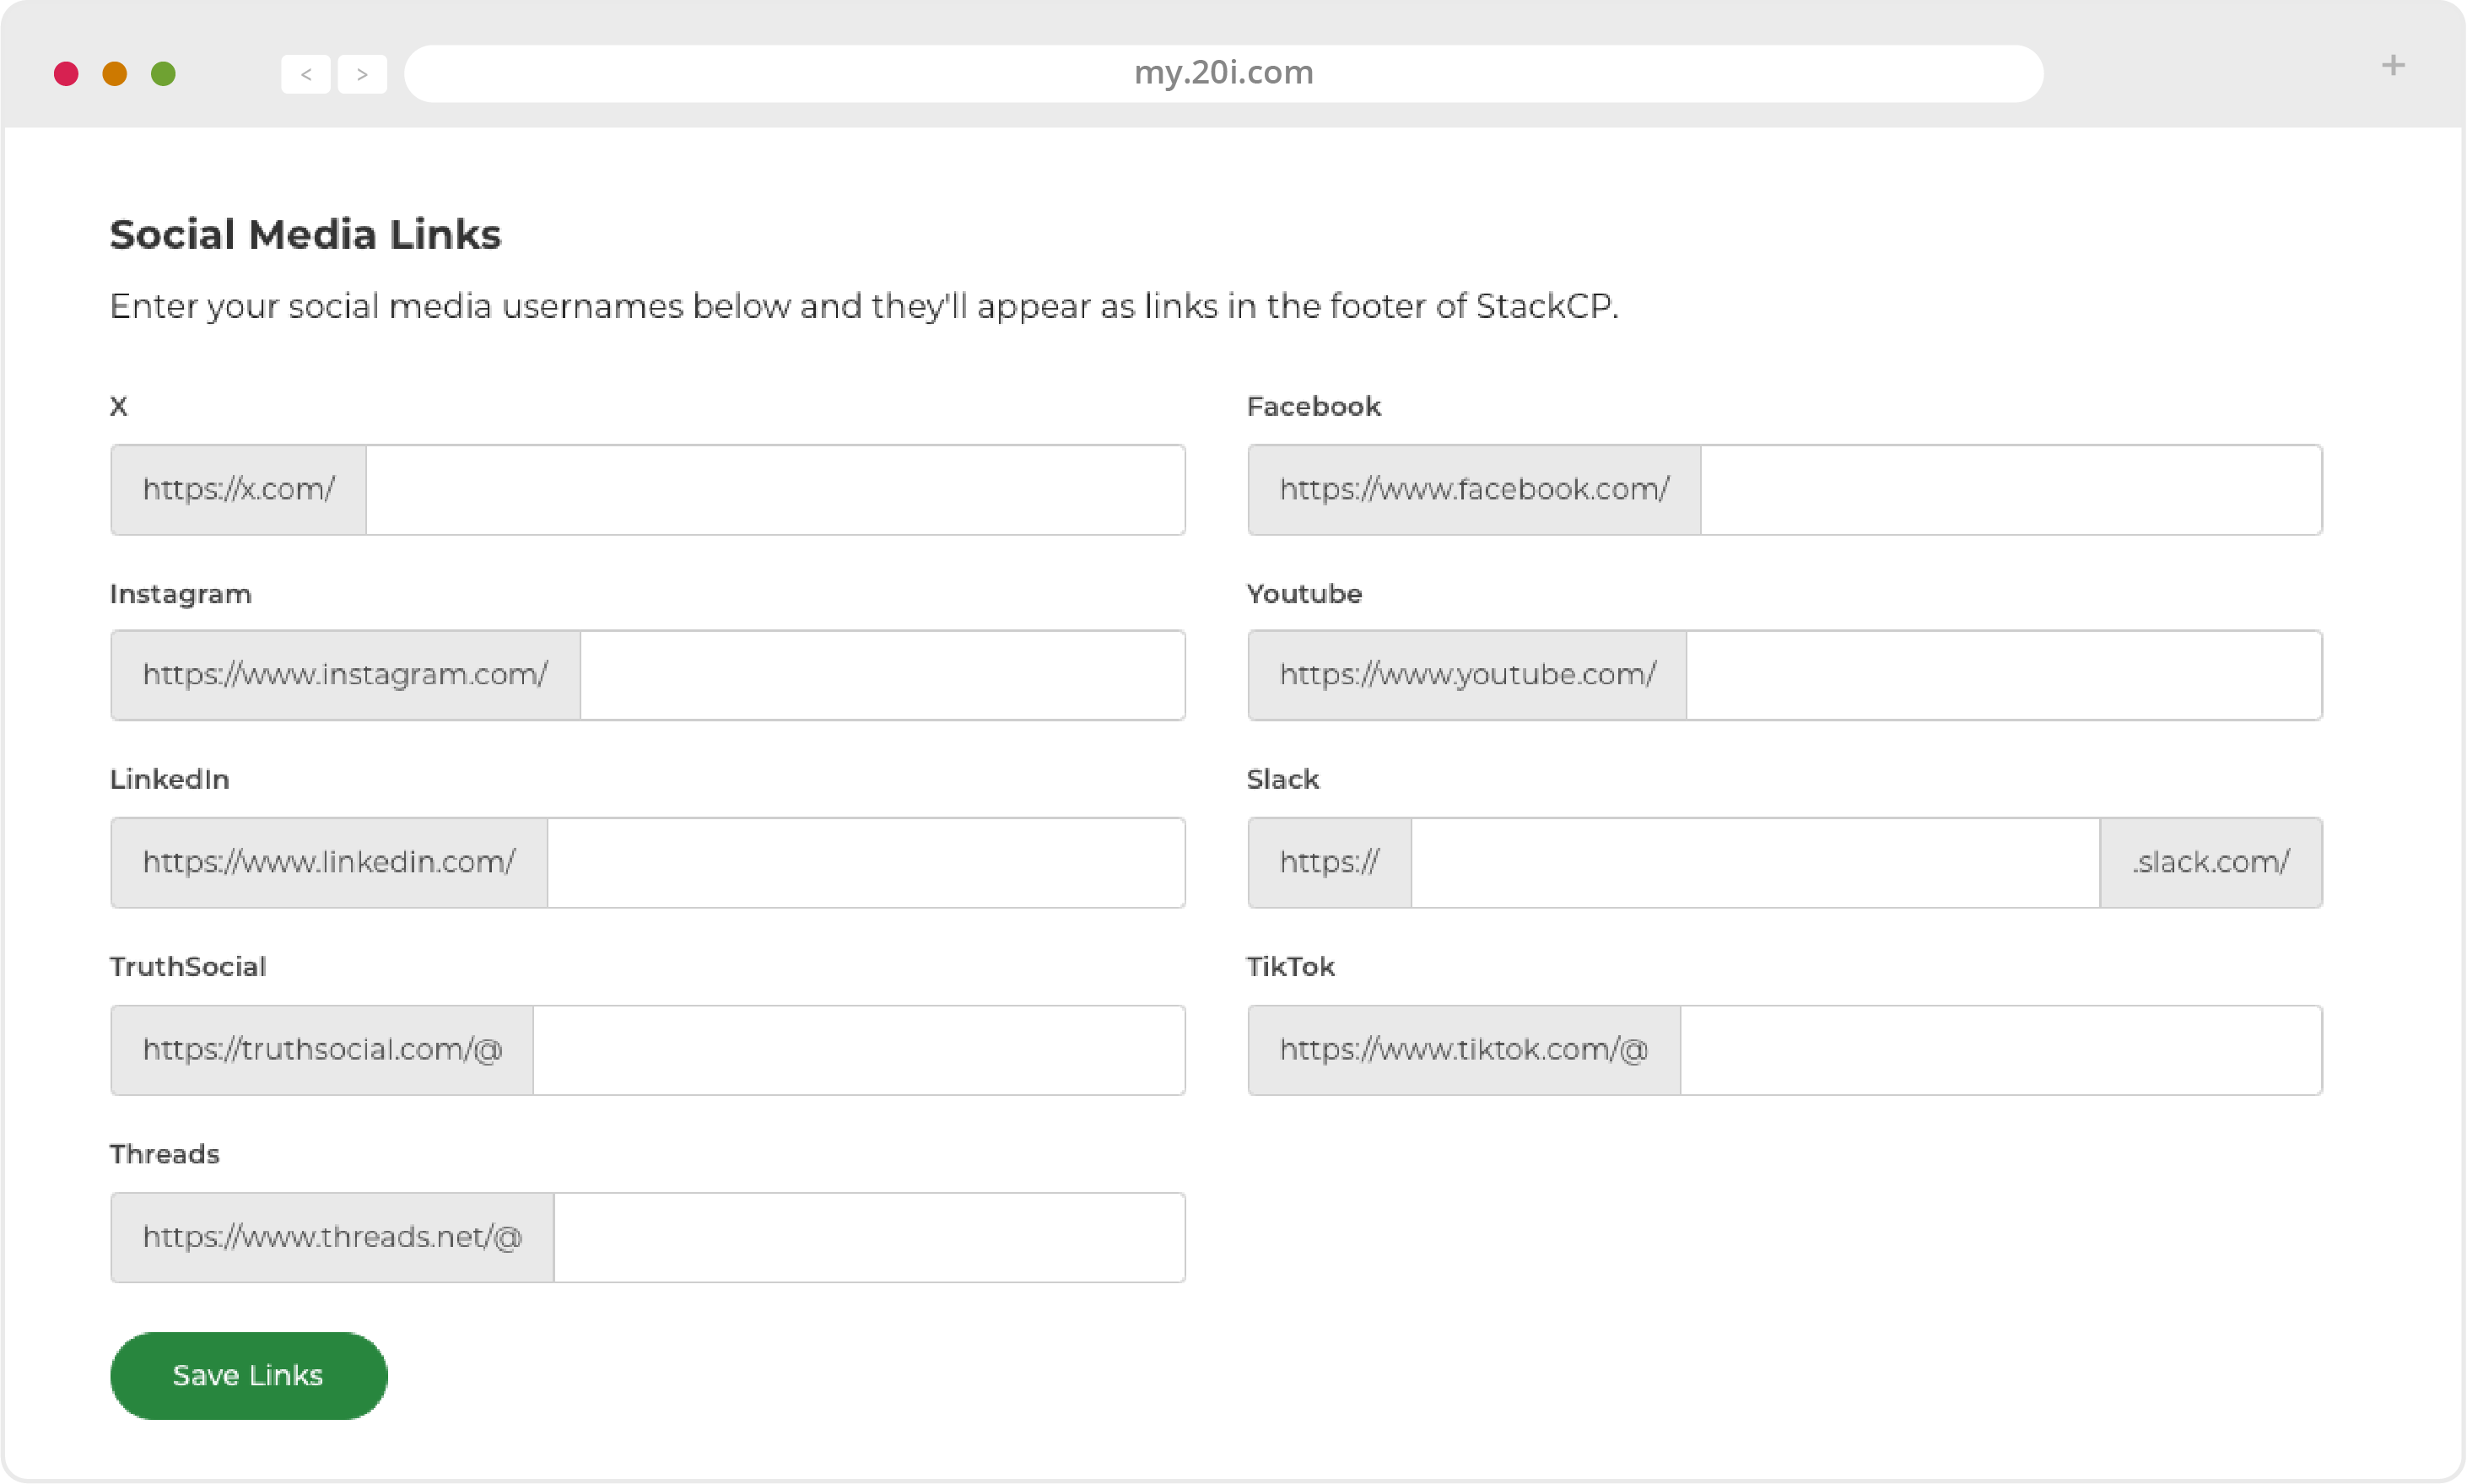
StackCP Social Media Icons
You can add links to your social profiles. These will then appear on the footer of StackCP.
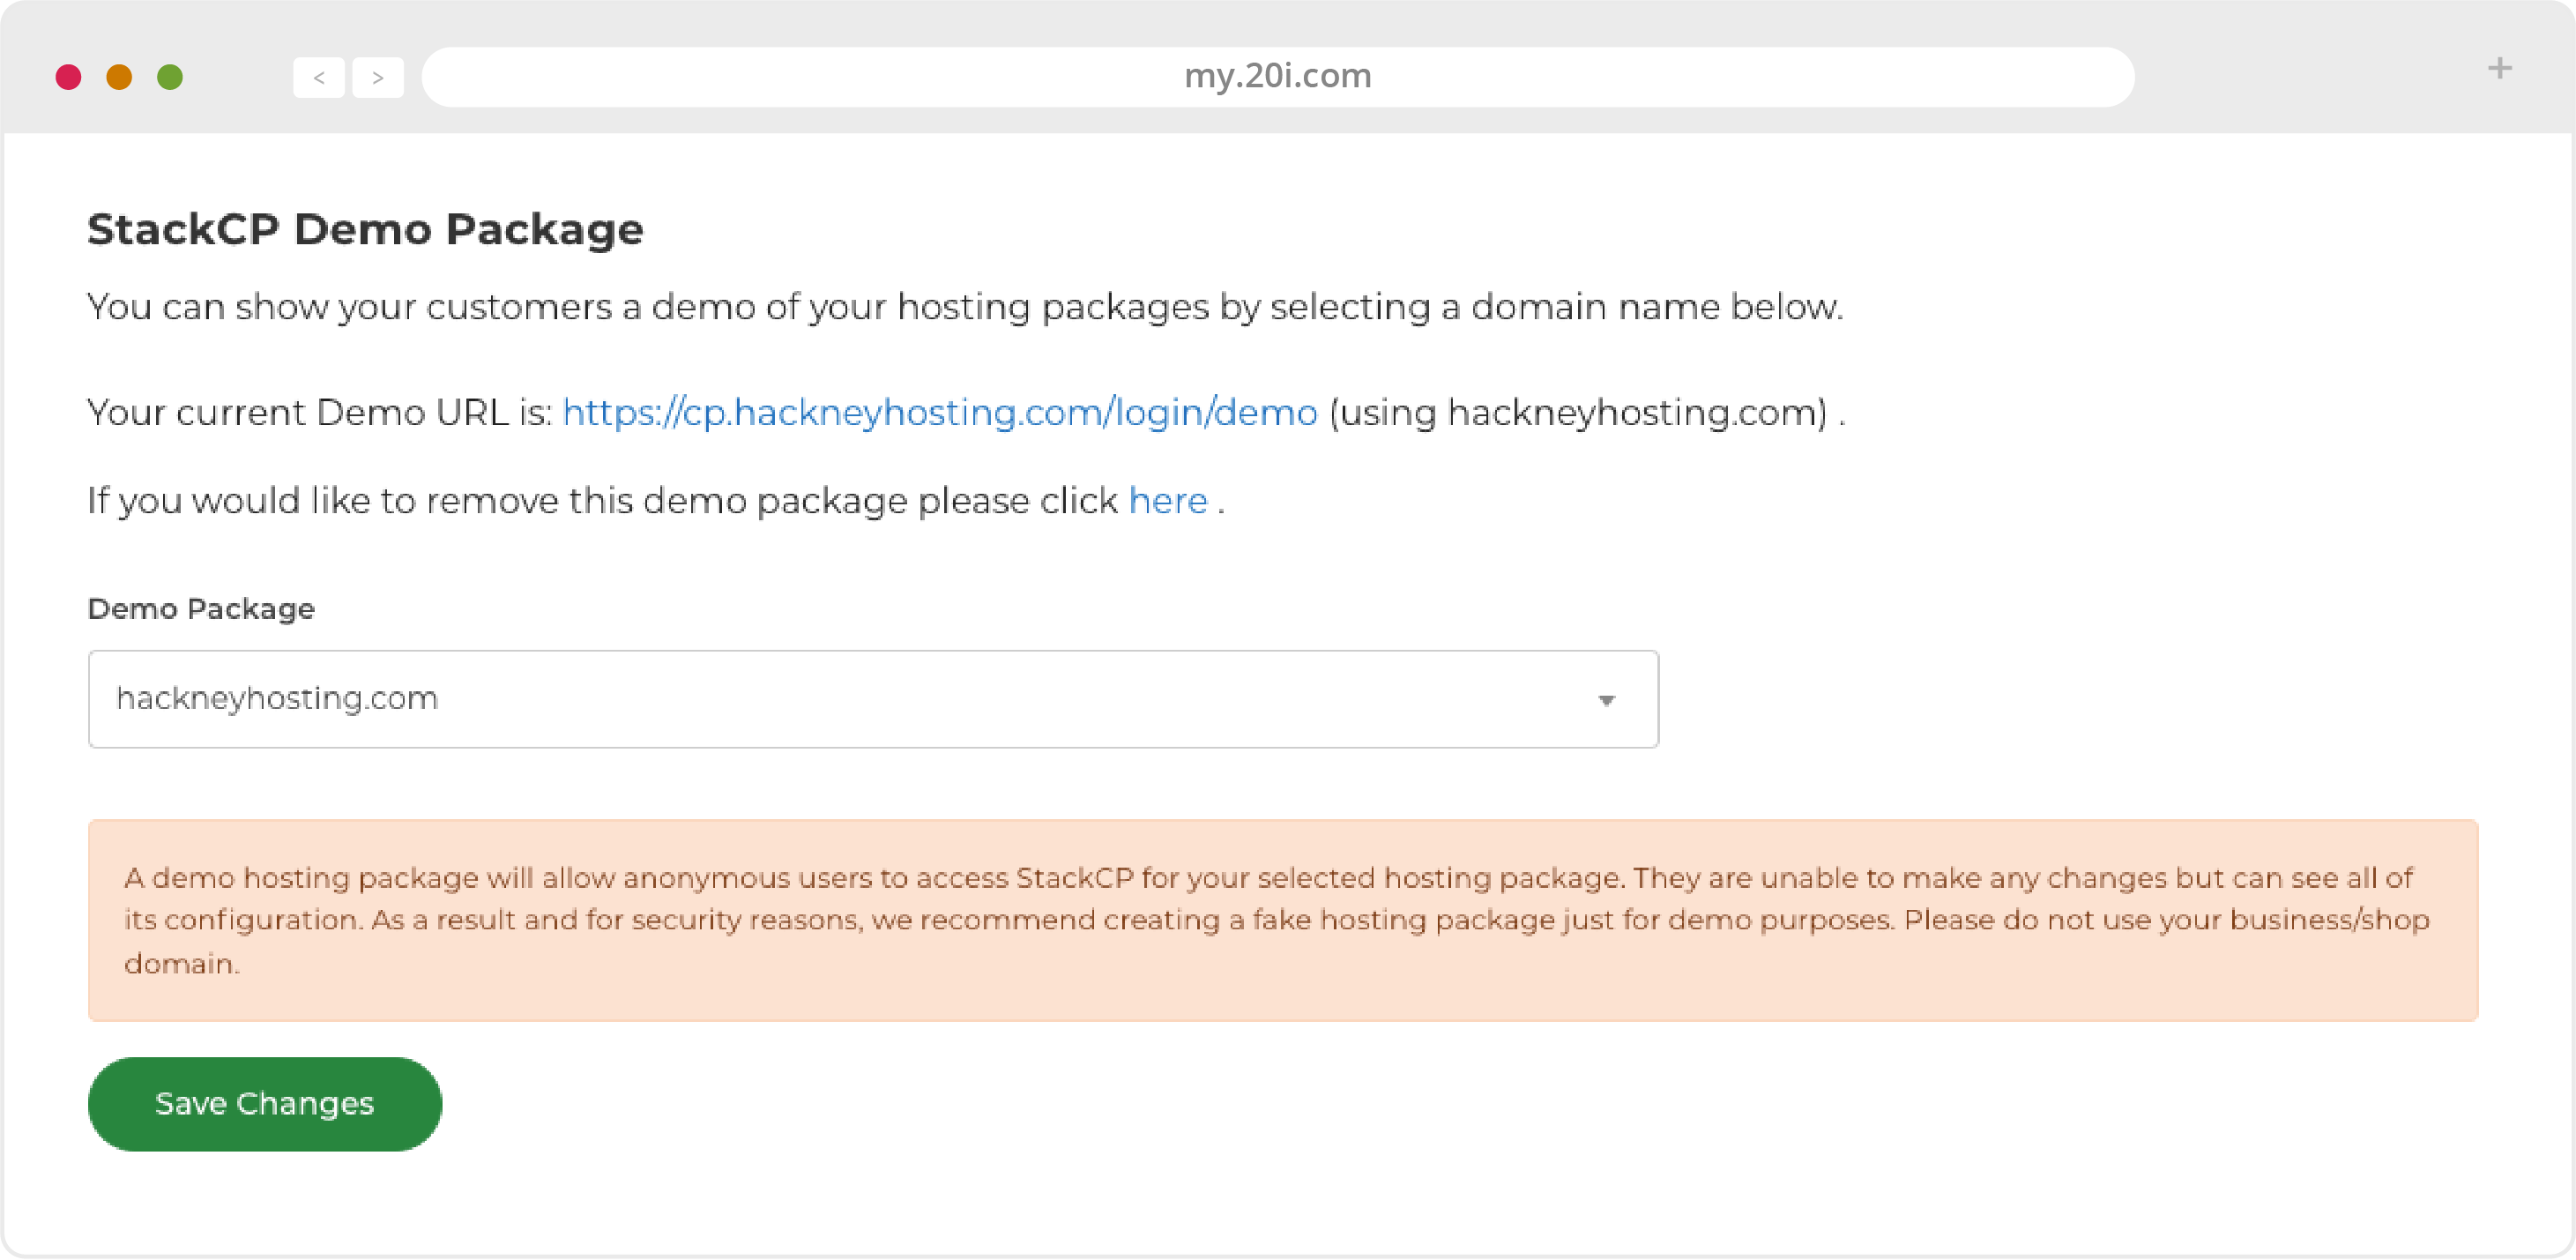
StackCP Demo
You can also change the URL of the StackCP demo so it appears as part of your company website.
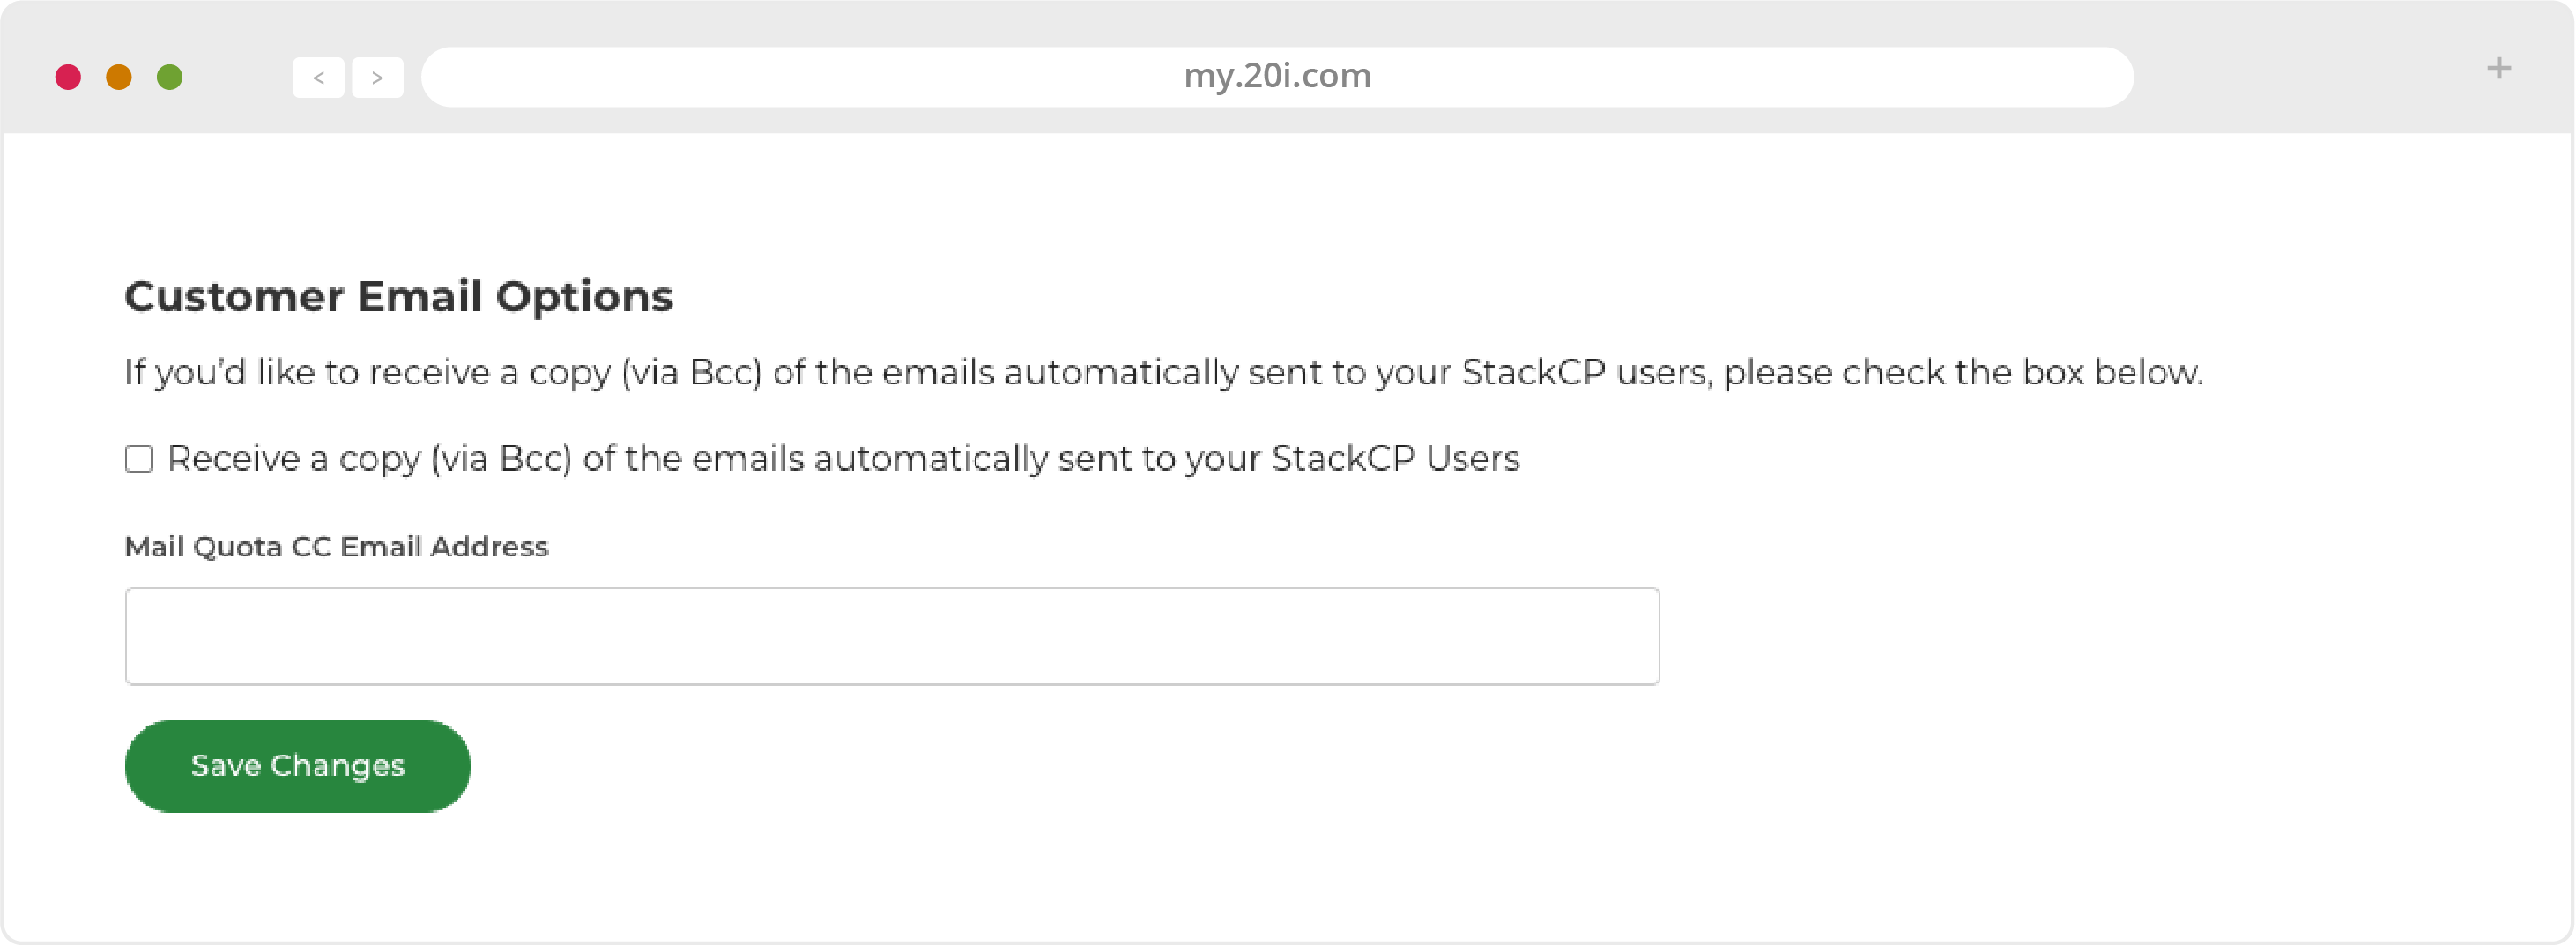
Customer Email Options
If you’d like to receive of copy (via BCC) of the emails automatically sent to your StackCP users, you can also set your preference for this.
>> Next step: Reports
 Ruth Turner
Reseller Hosting: Add-Ons
Various added-value services are available for yourself and your customers. Add-ons are designed so you can upsell them to your own clients and if required, manage them via StackCP.
Website Turbo
Sell white-label high-frequency hosting with Website Turbo. Our High-Frequency Hosting uses state-of-the-art servers, with HF CPUs built to handle complex tasks and process large volumes of data simultaneously. High-Frequency Hosting is perfect for high-traffic websites, large applications and complex ecommerce databases that demand ultra-low latency.
- High-Frequency compute nodes with clock speeds of up to 4.20GHz
- CDN pre-caching - a feature most only include in their enterprise plans
- 5GB database storage for added capacity
- Quick, one-click setup with no downtime
Website Turbo is a great opportunity to:
- Sell an upgrade to your existing plans
- Create premium High-Frequency Hosting plans
- Launch a new High-Frequency Hosting brand
Purchase and assign Website Turbo credits in My20i.
Virtual Nameservers
From the Reseller Preferences section you can fully brand your company with custom nameservers. Instead of our white-label ‘stackdns’ nameserver name, you can replace it with your brand name.
Domain Privacy
This is found in Manage Domains > Options > Manage > Domain Privacy. Prevent personal contact details being publicly shown with a domain. ‘.UK’ Nominet free opt-out is only available to individuals. If a .uk domain is registered as a UK Sole Trader, you won’t be able to get free Nominet Opt-Out
SSL Certificates
This can be found in Manage Domains > Options > Manage > SSL/TLS. Offer visitors peace of mind with an encrypted connection between browser and website. Our Let’s Encrypt certificates are free, but we also offer paid versions
Timeline Backups
This can be found in Manage Hosting > Options > Manage > Timeline Backups
While you are able to create backups in My20i, this service automates backups for all your hosting packages and stores them for 30 days.
We also offer Timeline Backups Pro. This will store your website file snapshots for 30 days like standard Timeline Backups. But it will also store your database for 60 days – giving you double the amount of time. It also offers full backups of all emails, across all email accounts.
WHMCS
Automate the provisioning of hosting and domain names with the Web Host Manager Complete Solution (WHMCS ) add-on. As a partner of WHMCS you can buy your licence at a reduced rate.
For more information please see the support guide here: https://20i.co/2x2dWnE
Order DC
Your default data centre will be in the UK or US, set when you create your first hosting package. Here, you can order another origin data centre: handy for those who have customers on both sides of the Atlantic
Premium Mailboxes
Upgrade from the Mailbox Usage tab to increase storage from 10GB to 50GB of storage, and get both contact sync and calendar sync. Synchronisation work across Outlook, Apple Mail, Gmail etc
Mailbox Quota Addons
Extend the capacity of mailboxes and premium mailboxes in 10GB increments. Mailboxes can be increased to any size. Access through Reports > Mailbox Usage > Upgrade
>> Next step: CDN and Website Acceleration
 Ruth Turner
Reseller Hosting: CDN and Website Acceleration
A Content Delivery Network (CDN) and Website Acceleration Suite is included for all Resellers and their customers, although you’re welcome to sell it as an optional extra in your packages.
To activate the CDN:
- Manage the package you want to enable our CDN for and locate the CDN section
- To activate the main Edge Caching element of the CDN select the toggle
- To purge the cache that’s stored at the CDN node head to the Edge Caching section and select the Purge Everything button.

You’re able to analyse all CDN traffic in the ‘Statistics’ section and block traffic visitors by country or IP in the ‘Block Visitors’ section.
Website Acceleration
20i’s CDN powers-up your websites further by feeding them through our Website Acceleration Suite. The module improves website load times by automatically implementing web performance best practices to a website. This includes optimising images, JavaScript minification and combining CSS – all to improve website load times and the Google PageSpeed Score. This in turn positively impacts SEO and helps you develop high-performing websites at scale.
To activate the Website Acceleration Suite:
- Head to Manage Hosting > Manage > Web Optimisation
For a full list of the optimisations, see the Web Optimisation section within the package to be optimised.
You’ll be able to select the One Click Optimisation option to add the recommended settings, or experiment with the advanced options to achieve the fastest performance. Alliteratively try out our new Website Acceleration Wizard.

>> Next step: Customer Services and Account Settings
 Ruth Turner
Reseller Hosting: Customer Services and Account Settings
In addition to the Reseller Manager, Reseller Preferences and Migration Centre, your 20i control panel also provides you with instant access to various 20i Customer Services options and account settings.
Support
20i Support Database
Frequently asked questions and informative ‘how to’ articles can be found here. This should be your first port of call if you have a query. It’s situated in the top-right menu in My20i and on the 20i website. It also includes some of our most popular articles.
Customer Services
Open a new support ticket or live chat with our team for personal, friendly in-house support tailored to your needs. You can also view the status of your current and previous support tickets here.
Submit Feedback
Our ongoing development is guided by customer feedback, so let us know what you think of our services and make any suggestions. Our directors and senior management see all feedback that’s submitted.
System Status
A link to all the latest information on 20i service performance, including news about scheduled maintenance: https://www.stackstatus.com/.
Account Settings
This menu is accessed by hovering over your name in the top right of the menu.
Account Overview
Here’s you can find the most important information about your account, including credit balance, last invoice cost, your personal details, security information and general preferences.
Manage Renewals
View and manage ongoing renewals of services.
Security Details
Here’s where you can change your password, security questions and two-factor authentication.
Active Sessions
View your logged-in sessions and terminate them if you think one was mistakenly left logged-in elsewhere.
Contact Details
Update your personal or business address information.
Payment Methods
Manage payment methods associated with your 20i account.
Account Credit
In order to secure domains through HostShop, payment needs to be made immediately. So this is where you can add credit to your account to buy a domain on behalf your customer. Your customer will still be the registered owner, but buying credit allows HostShop to provision the domain immediately. You will then receive payment from your customer.
Invoices
View transaction details and download your 20i account invoices.
Account Preferences
This is where you can set your time zone, date format, your hosting experience level, global FTP access, additional email addresses, default DNS, default domain renewal status, order of support tickets (e.g, newest on top), and choice of dark or light themes.
Email Notifications
Here you can see your past email notifications about your account from 20i.
Team Members
If you’d like to give any number of people access to your account, this is where you can set up team members. They will be given their own login details, and you apply permissions to user groups so that they only have access to certain areas. For example, a support agent may only need access to the Ticket System, or an accountant only need access to your invoices.
Refer a Friend
Use our refer a friend scheme to earn credit for both you and whoever you refer. Using credit to pay for any of our services, including renewals, Website Turbo, Timeline Backups and Premium Mailboxes. There are no limits on how much you can earn.
>> Next step: Using Git to develop websites
 Ruth Turner
Reseller Hosting: Further Help
This guide is just the beginning of your journey to becoming a successful Reseller of 20i hosting. It’s a complex business.
So if you have any questions or issues at all, please raise a ticket or a chat with our in-house support staff via My20i and one of our helpful team members will get back to you.
There are also alternative ways to get help. You can search our detailed Support Database. Many of these support articles are supported by step-by-step videos and you can browse all these videos at our YouTube channel. You can also get business tips and read articles on ‘everything internet’ at https://www.20i.com/blog.
Thanks again for choosing 20i Reseller Hosting, and best of luck with your business!
 Ruth Turner