My Services Questions
My services support articles: if you have a question about your 20i web hosting or domain account services, here's where to look.
What payment methods do you accept?
We support most electronic methods of payment, including:
- Delta
- Maestro
- Mastercard
- American Express
- Visa
- Visa Electron
We also accept both Apple Pay and Google Pay at checkout.
PayPal is not available at checkout, however, can be used to load credit onto your account balance.
How do I remove a payment card?
There is a limit of 5 payment cards per My20i account, should this be exceeded, you would need to reach out to our support team to remove at least one card should you wish to add another payment method by creating a support ticket.
Please also contact our support team if you're having any issues with payment.
 Chris Wright
How do I Enable Two-Factor Authentication (2FA) for My20i?
2FA or two-factor authentication is a two-step verification process which offers an extra layer of security when accessing your account. Once enabled, your logins to My20i can only be completed if both your password and an authenticator code is provided. We support TOTP authenticator apps, such as those from Google and Microsoft.
Add a New Authenticator
From inside My20i, follow the link to Security Details under Account Preferences section.
Towards the bottom of this page, you'll see a section titled Two-Factor Authentication. To add your first device, enter your current login password and name the device you wish to add. The Device Name is purely for your own reference.
Adding a Second Authenticator
There's no limit on the number of devices you can add, and we recommend having at least two devices on your account. This is in case one of your authenticators is lost or unavailable. Once a device has been added to your account, future devices can be added by entering a code from an existing authenticator device.
Removing an Authenticator
To remove a device, select delete from the list of your authenticator devices, on the same page.
Lost Device
If you're unable to access your account after it has been protected by 2FA, please call our sales team on 0333 344 2720 (Option 1). We’ll work with you to reset your access. Lines are open 24 hours a day. Alternatively, please email sales@20i.com.
2FA for StackCP Users
Users of the StackCP control panel can enable 2FA themselves. 2FA setup is in the StackCP Security Details menu (top-left). Resellers can manage users' devices and verify 2FA codes in the StackCP Users area of My20i.
Compatible 2FA Apps
We recommend using the 2FA mobile app from either Google or Microsoft, as these have been tested to work on our platform:
Alternatively, other customers have used and had success with the following apps:
- Authy (iPhone/Android)
- AuthenticatorCC (Chrome/Firefox)
- Ente (Windows/Mac/Linux)
- 2fast (Windows/Mac/Linux)
- 2stable Authenticator (Mac)
- Raivo (Mac)
If you'd prefer a different app, our 2FA system should be compatible with all standard TOTP apps.
 Chris Wright
How do I change the Username on my 20i account?
To change your username/email address on your 20i account:
- Head to the Contact Details section in your account
- In the Email Address field enter the new email address/username.
- Select Update Details.
You'll now need to log out and log in using the previous email address to confirm the change.
If you then head back to Contact Details your email address will have updated.
 Austin B.
How do I check my active account login sessions?
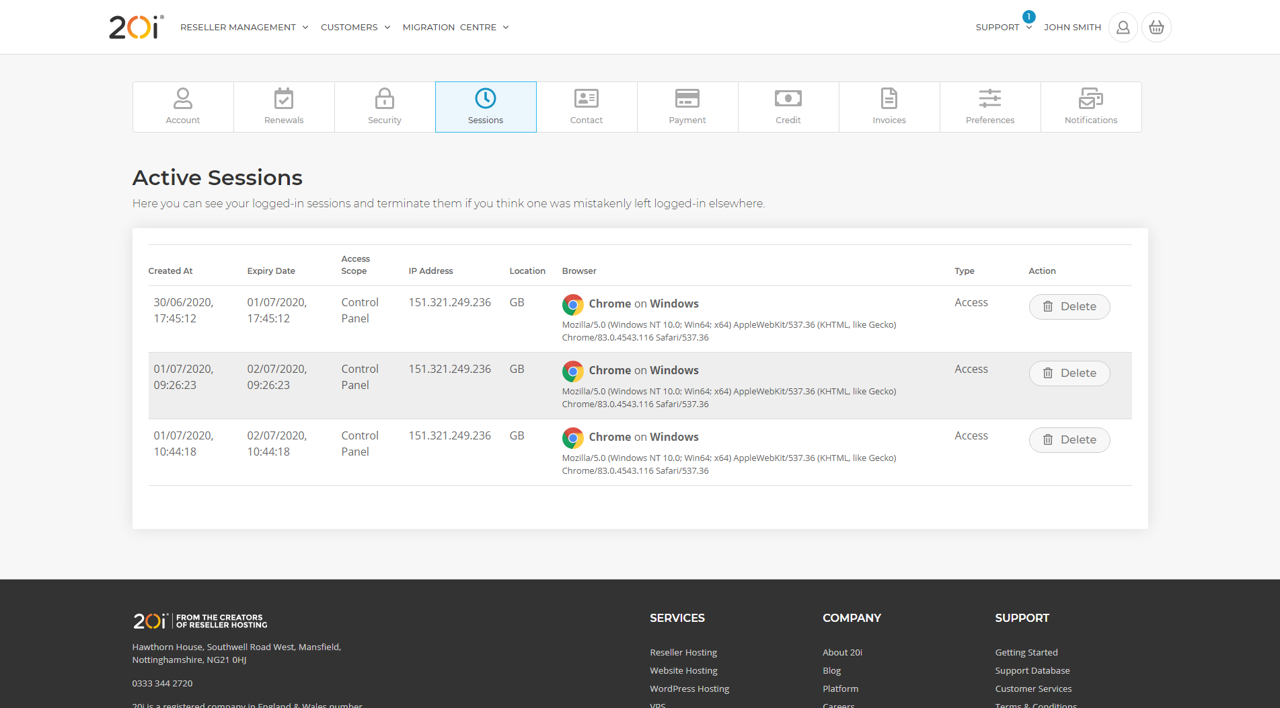
You can view and manage active login sessions to your My20i account, ensuring your account is kept secure. If you've left yourself logged in to a computer that you're no longer using or a public device you can use Sessions to delete the session you're no longer using.
- Choose Account Preferences > Sessions.
- Select Delete to close any active sessions you'd like to close.
 Austin B.
How to view an invoice
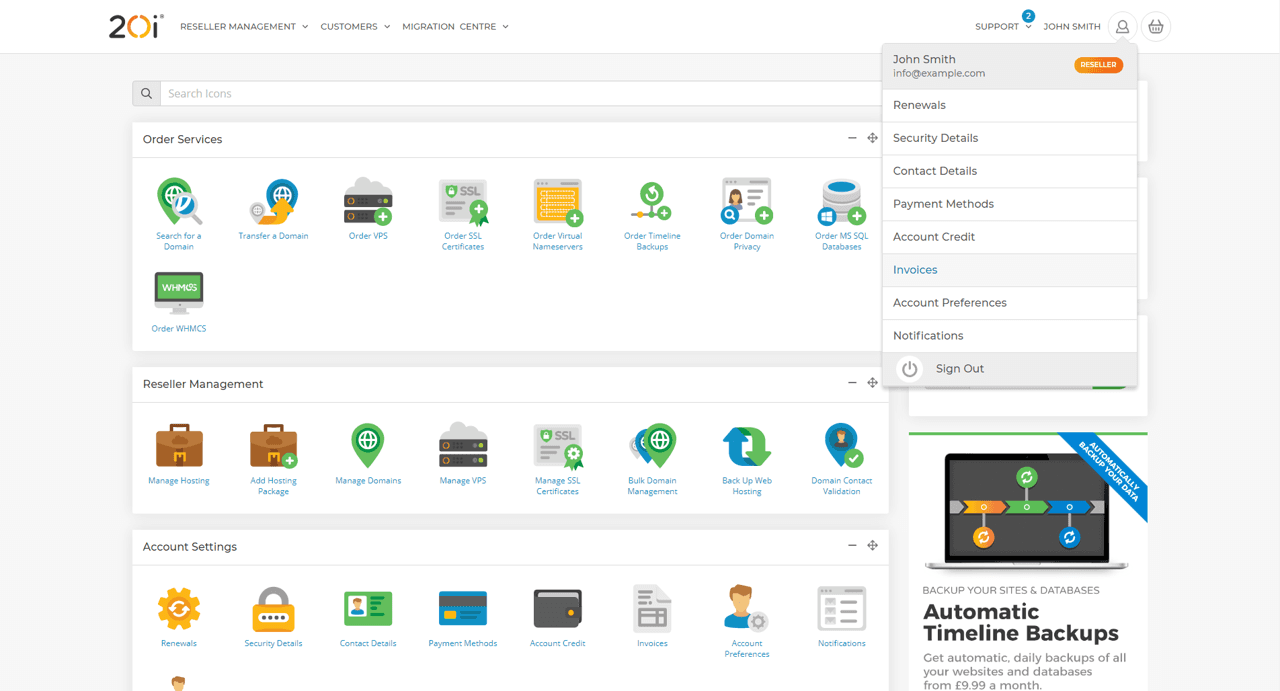
Invoices can be viewed from within your My20i account.
- Choose Invoices from the My20i home page, under Account Settings or from the menu icon on the top right (as below).
- You'll see a detailed breakdown of all your invoices.
- Search by product name to find a specific invoice.
 Austin B.
How to get a balance statement
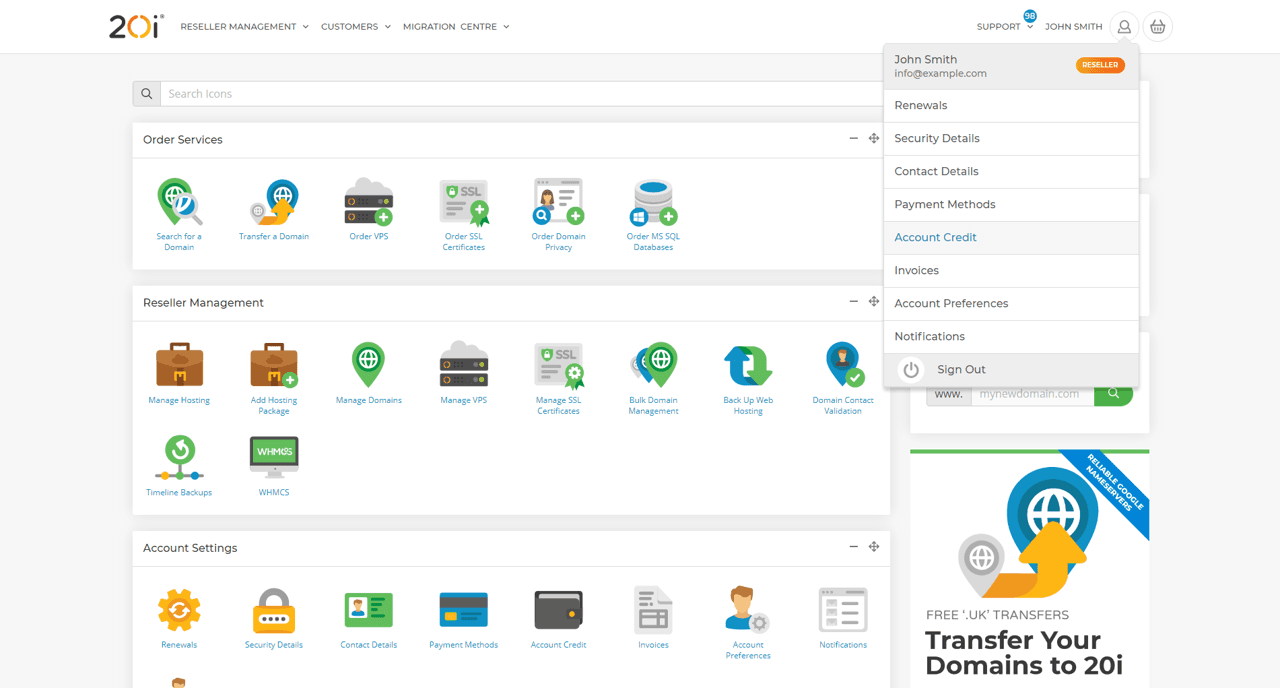
You can view a statement of all transactions made via your account balance through the Balance Statement section.
- Choose Account Credit from within My20i. This is accessed from the Account Settings menu on the My20i home page or from the menu icon on the top right (as below).
- Select View Statement.
- You'll see a statement of all balance transactions within your account.
 Austin B.
How do I add 2FA to my account?
2FA or two-factor authentication is a two-step verification process which offers an extra layer of security when accessing the control panel for your account. Once enabled, your logins to My20i can only be completed if both your password and an authenticator code is provided. We support all common authenticator apps, such as those from Google and Microsoft.
To add 2FA to your My20i account:
- Choose Security Details.
- You'll see a section titled Two-Factor Authentication. To add your first device, enter your current login password and name the device you wish to add. The Device Name is purely for your own reference. Select Add Device.
- You'll be given a QR Code to scan with your 2FA device. Scan this code and select Done to complete the process.
For more information see: How do I Enable Two-Factor Authentication (2FA) for My20i?
 Austin B.
Does 20i have an affiliate program?
Yes, we currently have an affiliate program.
You can promote our WordPress Hosting, Reseller Hosting and Managed Hosting If someone uses the link you provided to make a purchase, you'll receive commission on sales.
Please see 20i Affiliates for more details.
 Austin B.
How do I add account credit to my 20i account?
You’ll need account credit on your 20i Reseller account to take orders through HostShop. When a client orders services like domains, we’ll use account credit to pay for the domain so it can be provisioned automatically. To do this:
- Head to the Account Credit section in your 20i account.
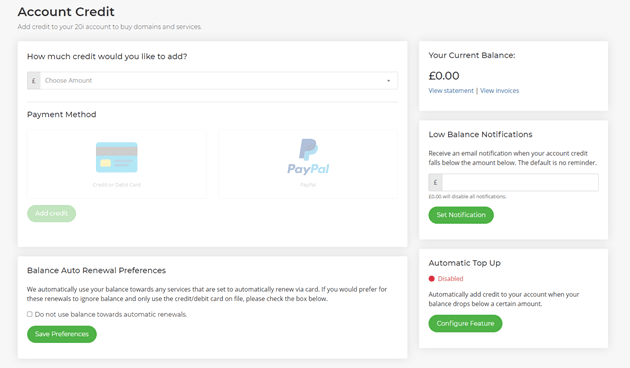
- Select the amount of credit you’d like to add from the drop-down menu
- Select whether you want to add credit using a card or PayPal
- Select Add Credit to Basket or Add Credit with PayPal
Note: Should an order fail due to insufficient balance in your account, once you’ve added credit to your account you’ll be able to find and re-process the order by going to Customers > Overview > Failed Orders and selecting View Order and then Process. This will retry the order with your new balance.
You'll then be able to complete the order and add balance to your 20i account.
 Austin B.
How do I contact accounts?
All billing and accounts issues are firstly handled by our technical support team via ticket. You can raise a ticket with our support team by heading to Contact Customer Services.
For more information on how to raise a ticket see here.
 Austin B.
Renewals and Billing Cycles Explained
To ensure a smooth experience for our customers, it's important to understand how our billing cycles work. This short guide will walk you through the key stages of our billing process, including the actions we take and the options available to you if you encounter any payment issues. This process applies to web hosting products, including Reseller Hosting, Managed VPS and Managed Cloud Hosting only.
Billing Cycle Overview
Renewal Overdue (Day 1)
After your renewal date has passed without payment, we take the following steps:
- We lock out the control panel to prevent any further account modifications.
- However, all hosted websites and email services will remain fully functional, ensuring minimal disruption to your online presence.
If you are experiencing difficulties with payment and need temporary access to the control panel, we encourage you to raise a ticket with our support team. We will do our best to assist you during this period.
Temporary Service Deactivation (Day 14)
If payment has not been received by the 14th day after your renewal date, we will take further action:
- We will temporarily disable the services associated with your account.
- This means your websites and email services will be unavailable until the outstanding payment is settled.
Data and Service Deletion (Day 28)
After 28 days from your renewal date, if payment is still not received, we proceed with the following:
- All data and services on your account will be permanently deleted.
- This includes website files, databases, emails, StackCP/HostShop data, and associated configurations.
- Please note that this action is irreversible, so it's crucial to resolve payment issues promptly to avoid data loss.
Backups
We understand the importance of your data, even in challenging situations. Therefore, we maintain backups of your data for an additional 30 days after the 28-day grace period.
After the 28-day mark, we cannot directly restore your deleted data. If you wish to recover your data after this period, you will need to take the following steps:
- Purchase hosting services again, including Timeline Backups if needed.
- Set up your hosting packages as required.
- Once your packages are configured, you can use Timeline Backups to restore the deleted data to the newly created packages.
 Chris Wright
How to use the Customer Handoff feature in My20i
With your website’s design, development, and deployment complete, you can now effortlessly transfer control of web hosting to your client, including billing, using our new ‘Handoff’ feature.
Advantages of Using Handoff
- Instantly transfers ownership of a hosting package to your client’s 20i account with no downtime or data loss.
- Avoids the hassle of manual data transfer, FTP, MySQL databases, ZIP files, or DNS changes.
- Earn a £25/$25 commission when a service you hand off is renewed.
Note: Your client will need an existing 20i account or will need to create a free My20i account. Ensure they provide you with the email address used to create the account.
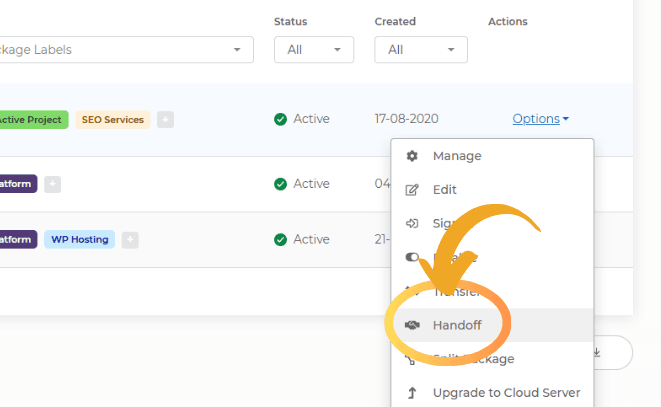
Step-by-Step Instructions
1. Access the Handoff Feature:
- Log in to My20i.
- Click Manage under the Manage Hosting icon.
- Navigate to the package you want to transfer and click Options.
2. Initiate the Handoff Process:
- Select Handoff and follow the on-screen instructions.
3. Configure the Managed Cloud Server:
Choose the specifications and optimisations for your client’s Managed Cloud Server:
- Cloud platform: 20iCloud, AWS, or GCP
- Server specifications/size
- Data centre location
- Server optimisation: PHP, WordPress, Laravel, etc.
- Timeline Backups Pro

4. Submit the Configuration:
- Review the settings you have chosen.
- Once satisfied, click Submit.
5. Client Completes the Process:
- Your client will receive an email from 20i with instructions.
- They will need to log in to their 20i account and complete the purchase (the server will already be in their account’s basket).
6. Final Steps:
- The Cloud Server is built.
- The hosting package is handed off to your client.
- Enjoy the simplicity and efficiency of the Handoff feature!
This process ensures a smooth transition of control to your client, allowing them to manage their hosting with ease and without interruption.
Please note: The above steps should only be used where you're looking to hand off your customer's website to a Managed Cloud Hosting product. If you're looking to transfer a website to another 20i Reseller or an existing customer with a shared hosting package, then follow these steps instead.
For Website Turbo hosting packages:
If a hosting package has a Website Turbo credit assigned it can only be moved to an Autoscale plan. This ensures that the hosting package retains its performance benefits and features, such as the caching report. If you would like to Handoff a hosting package with a Website Turbo credit assigned but would like the package transferred to a Managed Cloud Server instead, please remove the Website Turbo credit assigned by heading to Manage Hosting >> Options >> Unassign Website Turbo Credit
 Matthew Wright