StackCP Questions
StackCP support articles: StackCP is the control panel that 20i resellers use for their customers' hosting and domain services.
How do I use the StackCP Message Centre?
If you're a 20i Hosting Reseller then the StackCP Message Centre lets you create alerts that show directly within your customers control panel. You can create either a banner alert, or a modal alert to communicate essential information, updates, or exclusive offers to your customers.
Get started by composing the message content using the message short codes to target the message to the recipient.
Select who you'd like to receive the message, you can target users based on the type of hosting/package they have with you, or by their direct username, then select Save & Close. You can then select Options > Publish to send the alert to the StackCP Users you've chosen to target, they'll then see the alert when they log into their control panel.
 Austin B.
How do I customise the 20i webmail login page?
As part of our White-Label Reseller Hosting you can customise the webmail (Stackmail) login page using HTML and CSS directly via the 20i control panel.
Here are some example CSS below to help you get started!
To add the code:
- Login to My20i.
- Head to Reseller Preferences -> StackCP Theme -> Locate the Webmail Login Page section near the bottom.
- The examples below will need to be entered in to the CSS field.
Note: Ensure you've loaded in the default HTML which is required for the CSS changes to be picked up.
Changing the StackCP Login Logo and Adding Branding
Should you wish to change the branding and logo on your Webmail form, you’ll need to modify the default HTML. On line 58 within the default HTML, you should see the following lines:
<div id="layout-content" class="selected no-navbar" role="main">
<img src="skins/elastic/images/logo.svg?s=1582888499" id="logo" alt="Logo">
<form id="login-form" name="login-form" method="post" class="propform" action="./?_task=login">
This is the HTML that adds the logo and form to the page – to alter the logo, simply change the src part of this line:
<img src="skins/elastic/images/logo.svg?s=1582888499" id="logo" alt="Logo">To the URL of the image you wish to use. For example:
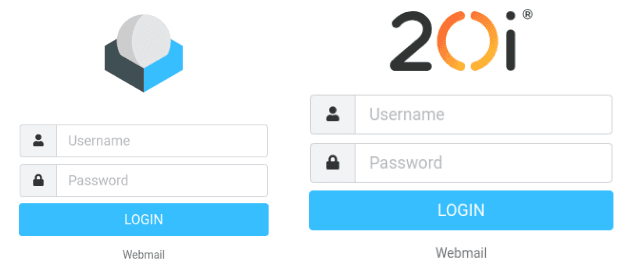
<img src="https://mydomain.com/images/my-logo.svg" id="logo" alt="Logo">Note: The default size for the default webmail logo is 150x150.
In our example we've replaced the default webmail image with our business logo.
Altering the StackCP Login Form
If we wish to change the look of the form itself, we can use the following CSS:
#login-form {
background-color:#eee;
border-radius:10px;
padding:10px;
max-width: 400px;
}
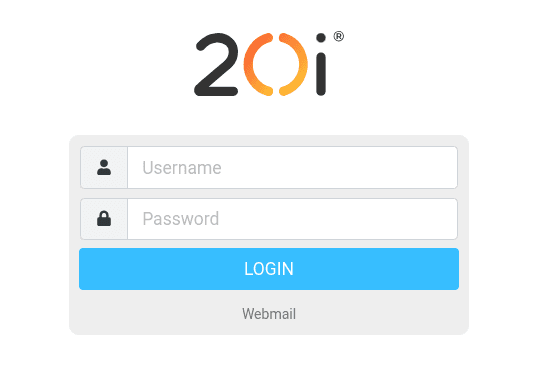
The #login-form section here adds a faint grey background colour to the form, adds some padding to better space the border away from the form entry fields, rounds the corners and increases the size. Modify these values to suit your preferences as needed. As is, this results in the following look:
Updating the StackCP Button and Form colours
Next, let’s modify the login button, and make some changes to the input fields to match the rest of the form. We can do this with the following CSS:
#rcmloginsubmit {
width:150px !important;
border-radius:20px;
background-color:#f7921e;
border:0;
}

#rcmloginsubmit:hover {
background-color:#dd7a08;
}

.form-control:focus {
border-color: #f7921e;
box-shadow: 0 0 0 0.2rem rgb(255,118,0,.25);
}
The #rcmloginsubmit selector handles the login button here – through this, we modify the size of the button, round the corners and change the colour. Update the hex value for the colour and the size values as per your preferences.
The #rcmloginsubmit:hover section handles the colour of the button when your mouse hovers over it – feel free to change the hex value to whichever colour you prefer.
Lastly, the section .form-control:focus controls the colour of the border around the form entry fields when the user has selected it.
This adds a glow that helps users see what section they’re currently inputting data to. Update the hex value to the colour you want for the border, and fill in the rgb values to match the shades you need for your glow colour.
Tools are available online to covert hex codes to RGB values, if required. The ‘.25’ refers to the level of transparency for the highlight (In a range from 0 to 1, in decimals), so if you wish to make this fainter you may wish to reduce it to ‘.1’.
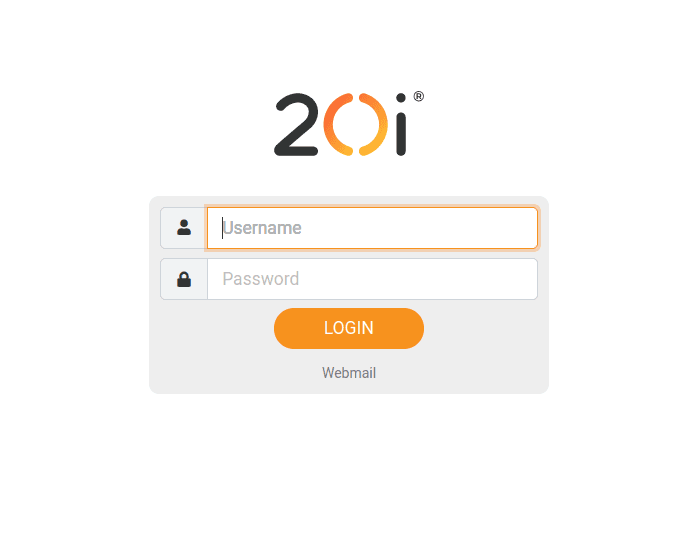
To follow on from our example above, you can see how the above CSS has updated the colours of the 'Login' fields and 'Login' button.
 Ruth Turner
How can I create a subdomain?
Subdomains can be useful for hosting additional websites under your main domain, such as a blog (e.g., blog.yourdomain.com) or a support portal (support.yourdomain.com). Watch to see how it's done step by step!
To create a subdomain:
- Log in to My20i
- Head to Manage Hosting -> Manage.
- Select the Subdomains icon.
You can then add your subdomain into the Subdomain field and select Create Subdomain. You're also able to change the Document Root so that you can direct the subdomain to the folder of your choosing.

What is the document root?
The document root is the folder which the subdirectory will use, for example, you may have a directory within your web space located within public_html called support (i.e. public_html/support), you could point your subdomain to this location by adding public_html/support in the Document Root field.
Note: Updating a document root can take ~15 minutes, so you may just need to be patient whilst that updates.
 Austin B.
How do I change the language used in StackCP for my customers?
As your business grows, it’s important to ensure you’re accommodating the needs of both your local and global hosting customers. One such way to do this would be to provide multiple language options for your overseas clients.
Doing so could increase the accessibility of your setup, allowing for those who may not have English as their first language to still make the most of your hosting setup and control panel.
This could increase the accessibility, and profitability, of your reseller hosting business.
Changing the language via StackCP
To alter the language that is currently being used by your StackCP setup:
- Log into My20i
- Under Manage Reseller at the top of the page then, select StackCP Settings
- Scroll down to 'Language Support'
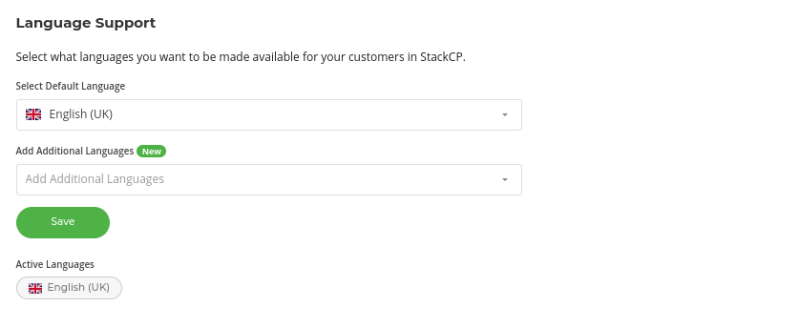
- From here, you can use Select Default Language to choose what language you want your control panel to initially appear in.
- Once that is set, under Add Additional Languages you can select what other languages you wish to be a selectable option within your control panel.
Note: Language options are always being updated based on demand If you have a specific language you wish to use that isn’t available for selection, consider requesting this via our Feedback Form for us to add in the future.
In the meantime, it’s possible to give your customers access to Google Translate, which will make automatic translations. Please see this article: Can StackCP be translated?
 Reudiger Dalchow
How do I add my own logo to StackCP?
Part of our white-label Reseller Hostnig is that you can customise the StackCP control panel with your own logo. Only your brand will be seen by your customers
To add a logo to the StackCP web hosting control panel, you'll need to make sure you've updated to the latest StackCP theme - Pentagram:
- Log in to My20i.
- Head to Reseller Preferences -> StackCP Theme.
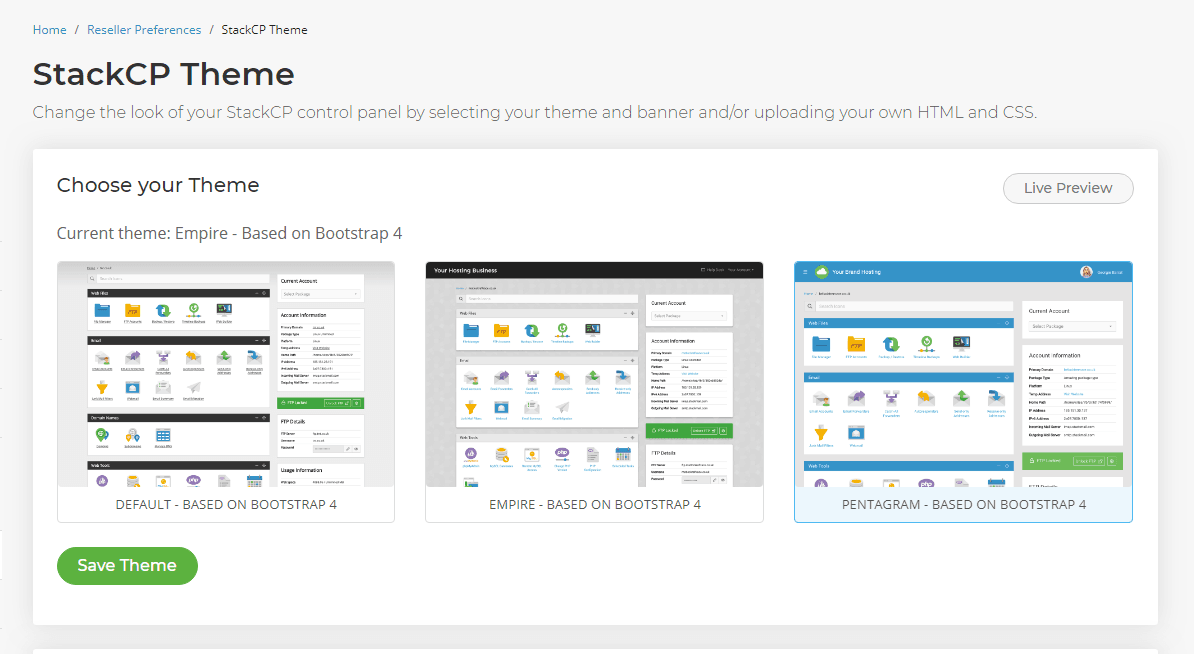
- To add your logo, head to Reseller Customisation.
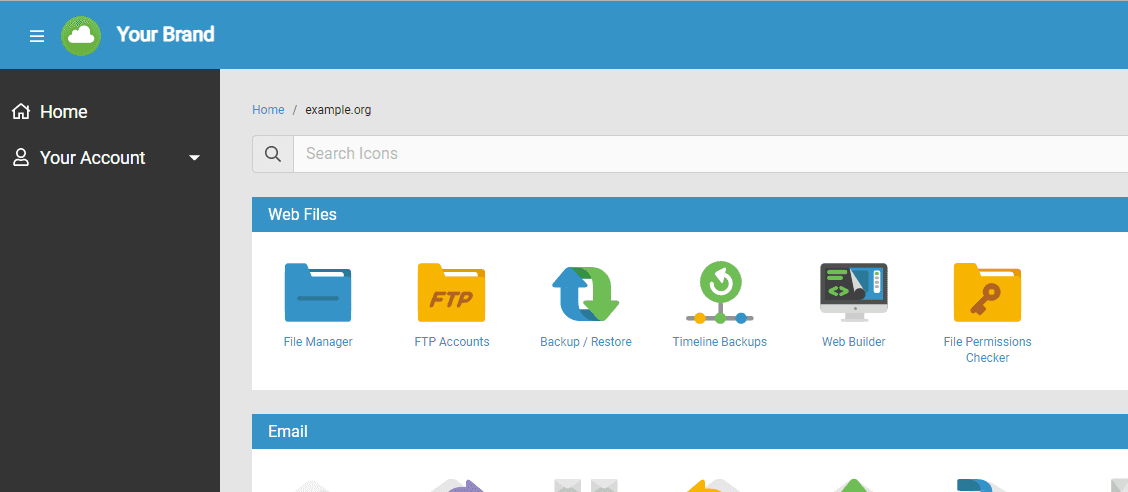
- Locate the Brand Logo section and select Upload Logo.
- Choose your brand logo and select Upload.
When you now preview or login to your branded version of StackCP, you should now see your logo.
 Austin B.
How do I brand and customise StackCP's login page?
If you're looking to customise your StackCP login page you can do this by editing the Custom CSS.
To do this you will need to:
- Log in to My20i.
- Locate StackCP Appearance under the Reseller Preferences section.
- Scroll to Custom Styling and you will see the input field for Custom CSS, Custom Header and Customer Footer.
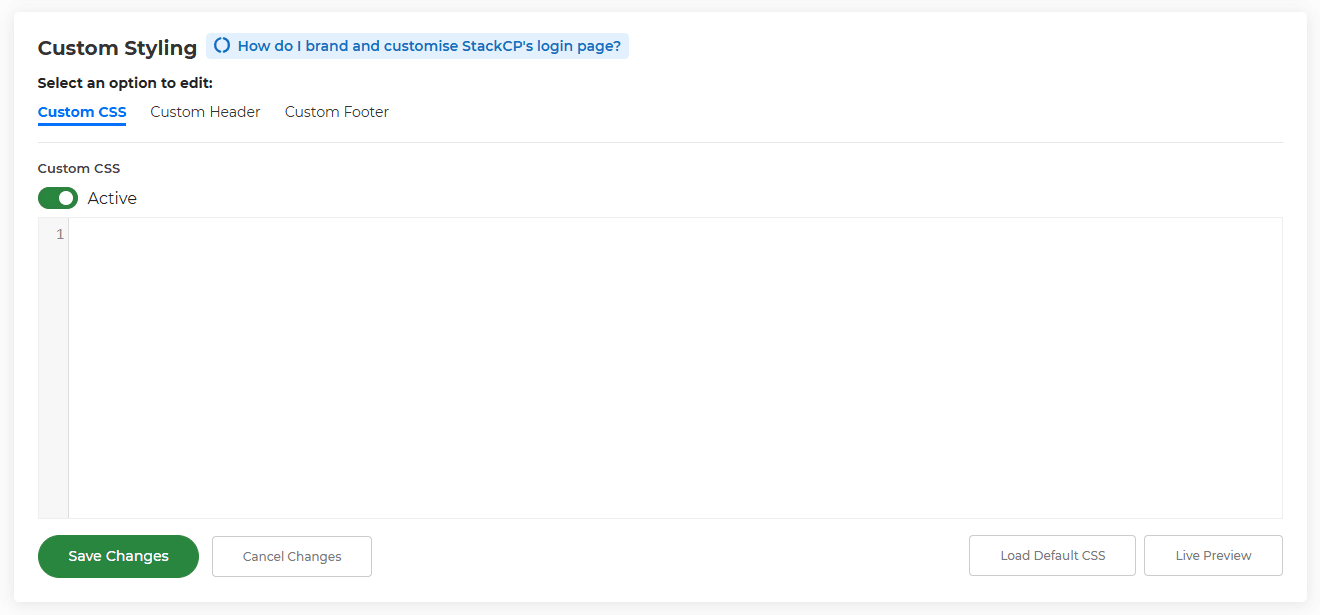
To preview your brand, select Preview Your Brand.
 Austin B.
How do I allow clients access to StackCP?
As a Reseller, you may want to give your clients access to StackCP.
They can use StackCP to carry out many site management tasks themselves - without needing to bother you with support requests - so it's definitely worth doing! It also lets them use the HostShop store to upgrade their services.
To do this you need to create StackCP users:
- Log in to My20i
- Under Customer Management select StackCP Users

- If you don't already have a StackCP User created select Add StackCP User and enter your client(s) credentials.

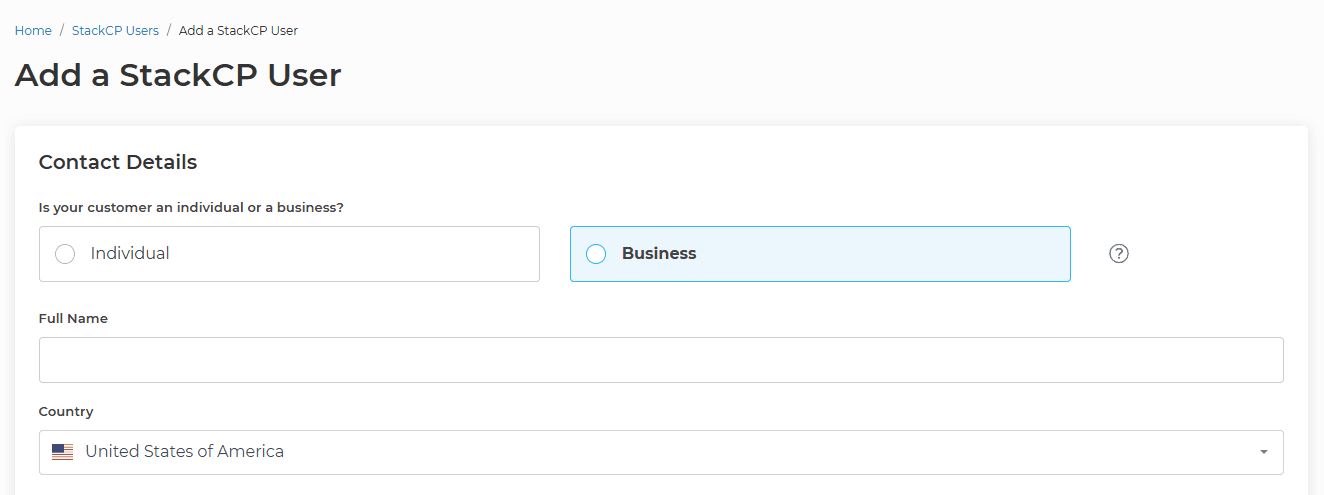
- Then select Add StackCP User.
- You'll be taken back to the StackCP Users list. The user will have been assigned a password - change this if you want.
- To assign the StackCP user to a Hosting Package and give them Domain Access, hover over Options and select Edit

- Select the Package you'd like to give them access to, along with access to the relevant domain, and select Save.
Your new StackCP user is now set up.
You can now email your client their StackCP login email address and password, they can then log into their control panel via https://stackcp.com or your customer login URL.
 Austin B.
Can StackCP be translated?
While you can set multiple languages for your customers to choose in StackCP, it can also be translated using Google Translate.
To enable the Google Translate tool:
- Head to Manage Hosting -> Options -> Edit.
- Then select Edit Hosting Package.
- Under Package Features, ensure the Google Translate option is selected.
Clients accessing StackCP will now see the option to use Google Translate at the bottom of the page. This will translate all options into their selected language.
 Austin B.
How do I customise the limits for an individual package?
You may want to customise what is shown in StackCP for an individual package. For a particular user, for example.
However, you may not want to make changes to the hosting package that will affect everyone on that package type.
Here's how to do that:
- Go to Manage Hosting and locate the package that you want to customise
- Hover over Options and select Edit
- Select the text link at the top of the page: Edit Hosting Package
- You'll be shown the limits being used for that particular package
From here you can alter the limits, only affecting that particular hosting package. This means that you can customise what that individual user has available.
 Austin B.
How do I change PHP version?
Standard PHP Version
By default, our hosting runs PHP 7+. If you need to switch PHP versions:
- Go to My20i.
- Select Manage Hosting.
- Find the package that you would like to change the PHP Version on and click Options, then Manage.
- Under Web Tools, select Change PHP Version.
Available PHP Versions
We support the following PHP versions on our Linux platform:
- PHP 5.3
- PHP 5.4
- PHP 5.5
- PHP 5.6
- PHP 7.0
- PHP 7.1
- PHP 7.2
- PHP 7.3
- PHP 7.4
- PHP 8.0
- PHP 8.1
- PHP 8.2
- PHP 8.3
- PHP 8.4
Note: Version changes are typically instant but may take up to 60 seconds.
Managed WordPress Platform
On our Managed WordPress Platform, we run PHP 7.0 and higher.
Note: PHP versions prior to 7.0 are not supported on the WordPress platform.
Changing PHP Version for Subdirectories/Subdomains
Note: This method is applicable only to shared hosting packages and is not supported on Managed VPS or Cloud Servers.
To host multiple websites on the same package using different PHP versions:
- Navigate to the directory where you want to change the PHP version.
- Edit or create a
.htaccessfile. - At the top of the file, add the following line to set the PHP version:
- For PHP 8.3:AddHandler x-httpd-php83 .php
- For PHP 7.4:AddHandler x-httpd-php74 .php
- For PHP 5.6:AddHandler x-httpd-php56 .php
Changing PHP Version for WordPress Staging
To change the PHP version for a WordPress staging site:
1. Navigate to staging_html within your WordPress package.
2. Add the appropriate AddHandler line to the .htaccess file with the desired PHP version.
Checking PHP Version
To verify the PHP version in use:
- Create a new PHP file, such as `info.php`, in the directory where you've changed the PHP version.
- Add the following code to the file:
  <?php
  phpinfo();
  ?>
3. Access the file directly in a browser (e.g., staging.domain.com/info.php). The PHP version will be displayed at the top of the page like this:

Security Note: PHPinfo files can expose sensitive information. It's advisable to delete the PHPinfo file after checking your PHP version.
 Corey Seymour
How do I secure my brand URLs?
From Your Brand and StackCP Settings, you're able to set which URLs you'd like your customers to use to access their various services. For example, their control panel, webmail or file manager.
Whichever domain you choose - or if you choose all domains - you'll need to make sure it's assigned to a hosting package and that the free SSL has been applied.
If the domain doesn't have a hosting package assigned to it:
- Head to Add Hosting Package and create a package for the domain.
- Apply the free SSL.
We'll add the correct DNS automatically for you and your brand URLs will load securely.
:bulb: Take your branding further with Virtual Nameservers.
Unlike traditional custom nameservers, our virtual nameservers are hosted with Google's Cloud DNS infrastructure which means they're ultra-scalable and reliable.
DNS infrastructure is the backbone of a high-performance web hosting company, so we wanted to be able to allow our Resellers to offer the same using virtual nameservers. The benefit of virtual nameservers means you can brand and have your very own Google Cloud DNS nameservers and market it as such to your own customers, giving you a unique advantage over traditional custom nameservers. View Virtual Nameservers.
 Austin B.
How do I let my customers manage a domain name?
If you have a customer who has purchased a domain name from you, you may want to give them access to manage it.
You can do this by giving them access to the StackCP control panel.
To do this, you’ll first need to create a StackCP User for your customer:
- Login to My20i
- Under Reseller Preferences select StackCP Users
- Select Please add one (or Add a StackCP User if you already have one).
- Enter your client(s) credentials then Add StackCP User.
- You'll be taken back to the StackCP Users list. The user will have been assigned a password - change this if you want.
- To assign the StackCP user to a Hosting Package and give them Domain Access, hover over Options and select Edit
- Select the domain name you’d like to give them access-to and choose Save Permissions.
You can now give your customer their StackCP User username and password, and they’ll be able to login to StackCP.com and manage their domain and services.
 Austin B.
Block search engines from indexing your control panel
You can easily prevent search engines from indexing StackCP - your customers' control panel - login page through Reseller Customisation.
Head to Reseller Preferences > Your Brand and locate the section entitled Control Panel URLs. Select the checkbox labelled Block search engines indexing control panel. We'll automatically create a robots.txt to ensure that search engines are discouraged from indexing your control panel URL.
 Austin B.
What is a StackCP User?
A StackCP User is the account you create to give your customers access to manage their hosting package(s) via StackCP - your customer's control panel.
Creating a StackCP User creates a username and password that you provide to your customer which will enable them to login to stackcp.com in order to manage their services. There is a guide on how to create a StackCP User here.
 Austin B.
Can I view my FTP, email address or database passwords?
We encrypt all FTP, email and database passwords so they are not visible as plain text inside your control panel.
The exception is the very first FTP account: this password is visible on the right hand side when you manage your hosting. If you're a hosting reseller, this also allows your Customer access to StackCP. You're able to change all passwords and changes are usually processed immediately.
Please note: the majority of database passwords will be saved in the configuration or connection strings for your website. For example, for WordPress, the database password is visible inside the wp-config.php file.
 Lloyd Cobb
Reset StackCP Theme customisations
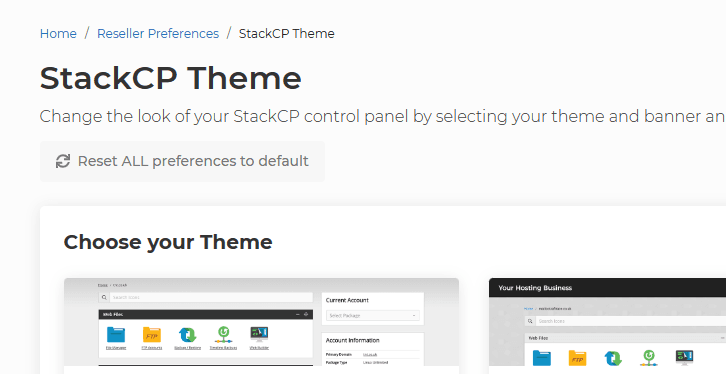
You can easily reset any changes you've made to your StackCP Theme by using the new 'Reset All' option on the StackCP Theme page. This will undo any changes you've made to your theme, including colours, fonts, custom headers, custom footers and anything else. Please note, this option can't be undone and all values will be reset to their default value.
 Austin B.