Email Hosting Questions
Email hosting support articles: everything you need to know about setting-up and managing 20i's secure email services.
What are the recommended Thunderbird Mail client settings?
There are various methods of connecting to mailboxes on our platform. We always recommend IMAP as that helps keep messages in sync between various devices and our webmail system. This is our recommended configuration for Thunderbird mail clients for your email.
Lloyd CobbHow do I add Office 365 DNS records?
If you need email to route via Office 365 instead of 20i’s StackMail platform, you can use our one-click record addition tool from within Manage DNS.
To use this tool:
- Head to Manage Hosting and select Manage on the hosting package
- Select Manage DNS within the package

- Select Office 365 Mail from the dropdown box under Preconfigured Settings. This will add the correct records for Office 365 Mail automatically.

- Save by selecting Update DNS
Usually it can take about 30 minutes for DNS changes to propagate. However. it can take a little longer for changes to update across various DNS systems.
Here's a video covering the subject, demonstrated using an older user interface:
Austin B.Can I add SPF records for my domain name?
Sender Policy Framework (SPF) records help reduce the chance of your domain being spoofed in spam messages. It can also increase the deliverability of e-mail to external providers such as Gmail and Outlook.
Lloyd CobbCan 20i Support migrate my emails if I use WordPress FTP migration?
To migrate your emails and mailboxes to 20i email hosting, you can use our in-house Email Migrations tool. This will let you migrate your IMAP mailboxes, your Gmail mailboxes and your Outlook mailboxes into 20i.
Austin B.How do I create an email signature in 20i webmail?
To create an HTML or plain text email signature that will be appended to all emails:
How do I connect to my mailbox through Outlook for mobile?
Here's how to set up a 20i mailbox on a mobile device using Outlook. You can get Outlook for Android here, and Outlook for iOS here,
Firstly, you will need to open the Outlook app on your mobile device.
- Enter the email address of the mailbox that you would like to use on the device and select Add Account

- Select the type of mailbox that you'd like to use – in this case, select IMAP, under Advanced.
- Enter the configurations as shown below:
Email Address: example@yourdomain.com
Display Name: Your name
Description: Enter any description that matches how you want to use the mailbox
Incoming mail server: imap.stackmail.com.
Outgoing mail server: smtp.stackmail.com.
Incoming server port (IMAP): 993
Use the following type of encrypted connection: SSL
Outgoing server port (SMTP): 465
Use the following type of encrypted connection: SSL/TLS
IMAP/SMTP Username: example@yourdomain.com
IMAP/SMTP Password: Mailbox Password

Ruth TurnerWhat are your mail DNS records?
Any domain name using our nameservers will automatically have 'smtp', 'pop3' and 'imap'.your-domain.tld hostnames created, and MX records automatically pointed. If you're managing DNS externally, or wish to use the stack hostnames directly, the following can be used to access our mail services:
Lloyd CobbHow do I set up email on my iPhone?
There's a quick and easy way to set up email on your iPhone or iPad.
On the device you wish to set up mail:
Auto-Configuration
- Head to Manage Hosting > Options > Manage.
- Select Email Accounts.
- Select Options > Account Setup.
- You'll then see the Download iOS Mobile Profile button, select this to download the correct information to your iPhone to set up your email account.
- Review and install the profile on your phone, you'll need to enter your mailbox password to complete the setup.
Manual Configuration
To set up your 20i mailbox on an Apple iPhone or iPad, you need to:
- Head to the Settings icon and locate the Apps option.
- Go to Mail.
- Then select Mail Accounts.
- Next, click Add Account
- Select Other from this list.

- Select Add Mail Account.

- Input the information requested:
Name: Anything
Email: example@yourdomain.com
Password: Mailbox Password
Description: Work, Business...etc

IMAP:
Incoming Mail Server
Host Name: imap.stackmail.com
Username: example@yourdomain.com
Password: Mailbox Password
Outgoing Mail Server
Host Name: smtp.stackmail.com
Username: example@yourdomain.com
Password: Mailbox Password

- Finally, select the mail account and go into the Outgoing Mail Server settings. Select Primary Server, make sure SSL is switched on and the port is set to 587.
Click here for our guide to set up email with Outlook.
Austin B.Why is my domain blacklisted, and how do I get it removed?
What is a domain blacklist?
A Domain Name System Blacklist (DNSBL) is a list that allows internet service providers (ISP) and other website administrators to block emails or traffic from specific systems. It's usually those that are known for sending spam and other malicious content. Normally, a blacklist contains domains, email addresses or IP addresses.
Having a domain blacklisted can prevent emails being sent. Instead, 'bounce back' messages are received from the server that has rejected the email.
Why is my domain blacklisted?
Having a domain blacklisted usually results from the degradation in the reputation of the domain itself. Most often this is caused by sending emails that have been classified as "spam-like". If your IP is listed on a blacklist this may be due to the reputation of your ISP itself. There are various ways that you can improve the sender reputation of your domain name.
- Add an SPF Record: https://www.20i.com/support/email-hosting/spf-records
- Add a DKIM Record: https://www.20i.com/support/domain-names/add-dkim
- Test the emails that are being sent using online tools: https://www.mail-tester.com/
- Send emails using only authenticated SMTP over an SSL/TLS Connection.
How can I delist my domain?
You'll want to remove your domain from blacklists as soon as possible because they're often shared between providers. If you believe you've fixed the root cause of the listing, by ensuring spam isn't being sent, head to the blacklist providers site and follow their blacklist-removal process.
You may find two types of removal process:
Self-Service Removal – This means that you can remove the blacklist manually without much trouble or waiting. You must ensure you have fixed the issues before doing this. If the domain is listed again it may be more difficult to remove.
Time-Based Removal – Most blacklists have a time-based process whereby domains that have lower-level listings will be removed on a periodic basis, usually 1-2 weeks. Higher-level listings may take a longer period of time to be removed.
Austin B.What is the Stackmail Customer Login URL?
If you need to log in to Stackmail - 20i's free webmail available with all hosting packages - the URL they need is www.Stackmail.com.
Austin B.WordPress knowledge: use SMTP with and without plugins
Sending emails directly from your WordPress site can be critical to your site’s success. It could be from a contact form to help your clients get in touch if they’re interested in your services, order emails to confirm details and provide receipts for purchases, or password reset emails to allow users access to their accounts.
WordPress itself comes with functionality out of the box that can allow for sending emails, but it’s not as secure as it could be, and can more often than not result in your business-critical emails resulting in the Spam folder.
Making use of SMTP with your WordPress site, however, can ensure that all of these important emails make it to their intended audience. Setting them up is much easier than you’d think. This guide will step you through what SMTP is, why it’s important to make use of it on your WordPress sites, and explain a couple of ways for you to get started using SMTP as soon as possible.
What is SMTP?
SMTP, also known as the Simple Mail Transfer Protocol, is the main protocol used to send and receive email. A majority of email systems make use of SMTP to send out emails between servers. These emails can then be retrieved using email client protocols such as IMAP or POP3.
Why should I use SMTP with WordPress?
By default, WordPress makes use of PHP Mail using the wp_mail function to send emails from contact forms, product orders and other functions that send out automated emails. However, PHP Mail lacks any form of authentication – it simply sends with the from address it’s provided directly from the server itself.
As a result, PHP Mail often gets used to spoof email addresses, commonly enough that some mail hosts simply mark emails from PHP Mail as spam or may even get blocked.
SMTP, on the other hand, connects to a mailbox directly and authenticates the connection using the mailbox password before it sends. This means that only setups with the correct mailbox details can actually send out emails. This is considered much more secure and can ensure that your site’s emails are less likely to be seen as spam and make their way to your intended recipients.
How can I connect using SMTP?
Connecting your WordPress site to your mailboxes using SMTP first requires you to understand where your emails are hosted – each mail host has a different hostname for their SMTP services. Knowing what this is can save you a headache in the long run. Some services have setups available to allow you to use smtp.yourdomain.com to connect, but this requires that subdomain on your domain to be pointed to their services.
If your emails are hosted here with us at 20i, our SMTP settings are as follows:
Hostname: smtp.stackmail.com
Port: 465 (SSL) or 587 (TLS)
Security: SSL/TLS
Username: Your email address you want to send with
Password: The password of the mailbox you want to send with
If you use Office365 to host your mailboxes instead, you’ll need to use their SMTP details:
Hostname: smtp.office365.com
Port: 587
Security: STARTTLS
Username: Your email address you want to send with
Password: The password of the mailbox you want to send with
Other mail hosts will provide guidelines or quick references online that will specify the SMTP connection details you need. If you’re unsure, check with them directly to confirm.
Once you have the details you need, it’s time to connect. Doing so can be done a couple of ways, depending on how confident you are with coding.
Connecting to SMTP using a Plugin
If you’re unsure and want an easy way to do it, there are a great number of WordPress plugins that handle the heavy workload of the connection for you, allowing you to simply pop in your SMTP details and begin sending straight away. We'll demonstrate the setup SMTP in WordPress with a plugin using two examples of popular ones. These are:
WP Mail SMTP
WP Mail SMTP is a free plugin that comes with a wizard that runs automatically upon installation and steps you through setting up your SMTP connection. When you first install it, you’ll be prevented with the following screen:

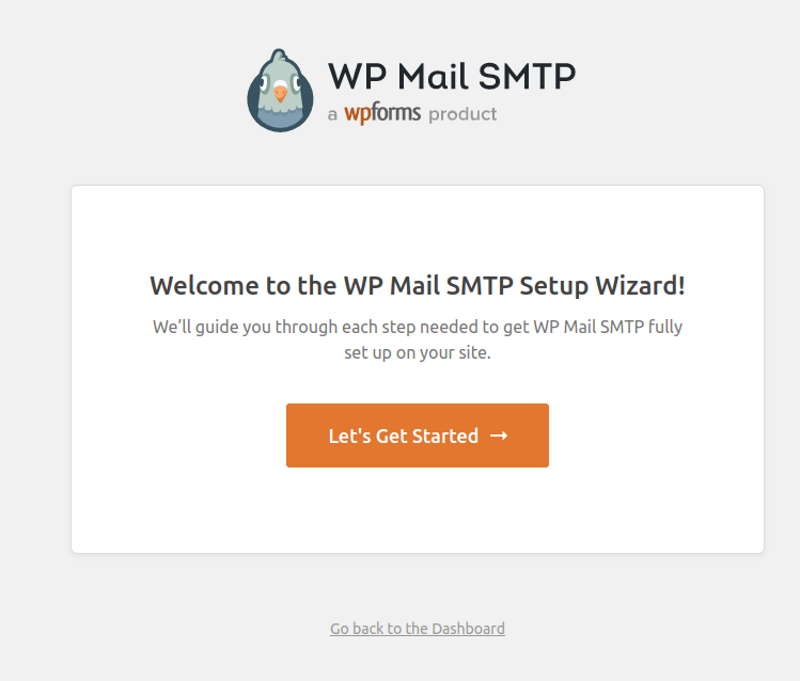
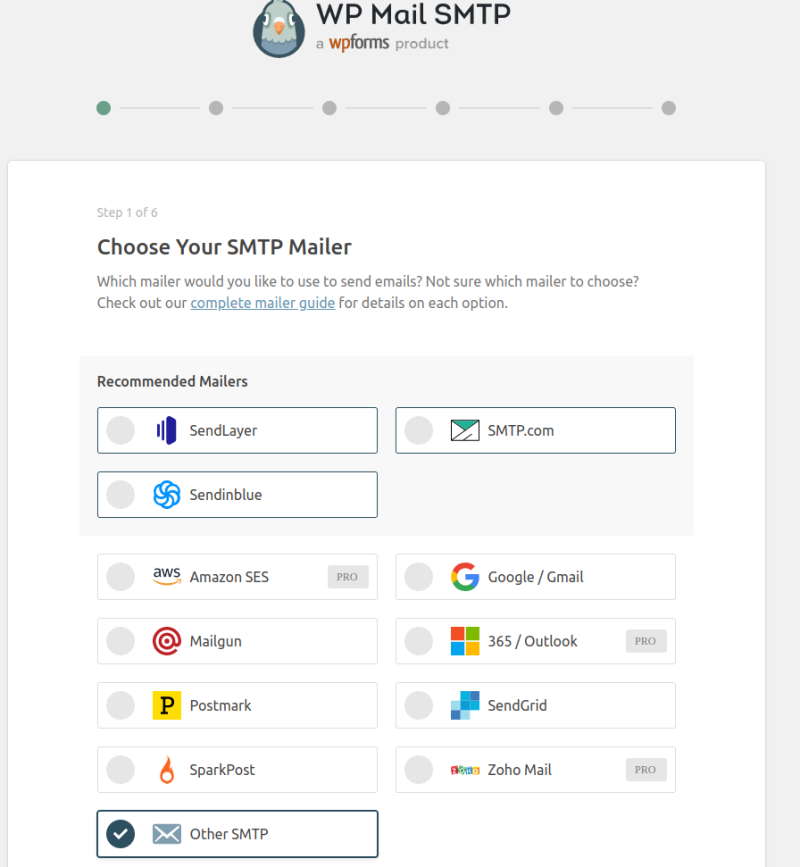
Select Let’s Get Started and you’ll be presented with some options for what type of SMTP service you use – there’s various auto configurations for different hosts, such as Google, Office365, Mailgun and SendGrid. If you use 20i’s mail services, you’ll want to select Other SMTP. If you’re unsure, check with your current mail host.

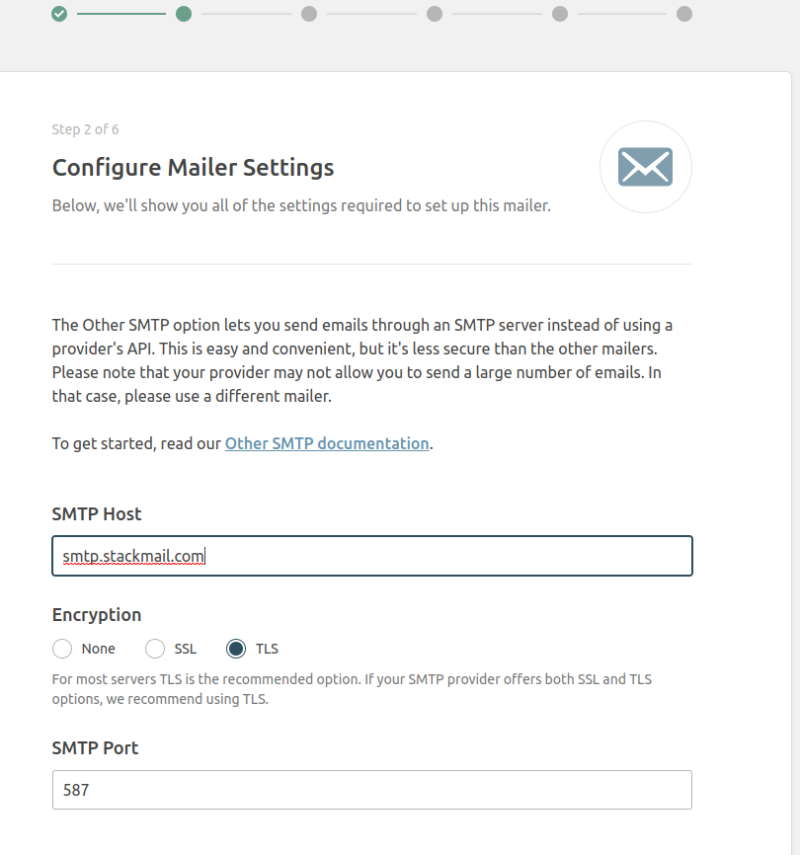
On the next page, you’ll be presented a form – follow the steps here to fill out your details. SMTP Host is where you’d input your hostname, and Encryption is your security – we recommend SSL or TLS, depending on what host you use.

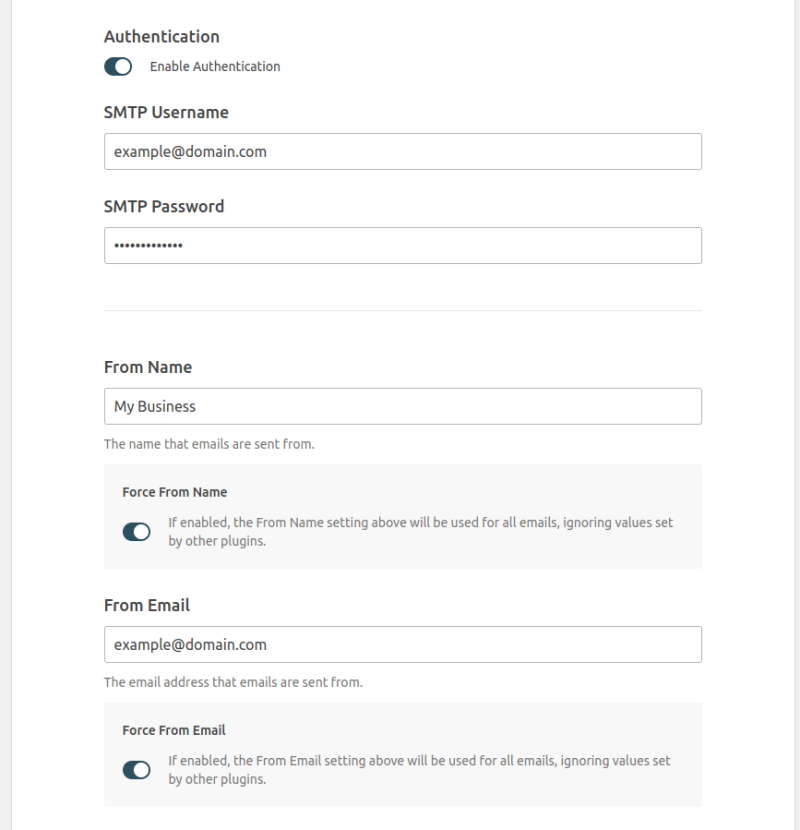
Make sure that Authentication is enabled, then input your SMTP Username and SMTP Password – these are the email and the mailbox password respectively. Lastly, set a From Name, which is the name that will appear as the sender of the email, and the From Email. You’ll want to make sure the From Email matches the SMTP username.

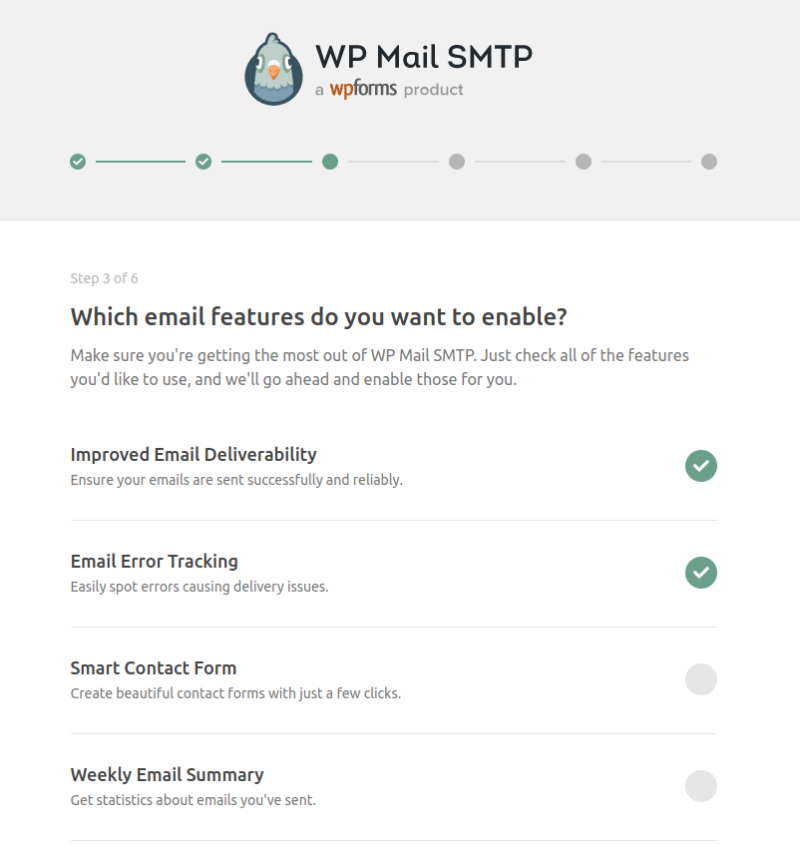
WP Mail SMTP will then prompt you with some additional preferences – you can choose to enable these based on what you’d like of the plugin. If you’re unsure, leave it as default.

WP Mail SMTP will then run a quick test of the settings you’ve used – if there’s any errors, you’ll then be prompted to recheck your details.
If not, you’ll see the following screen:

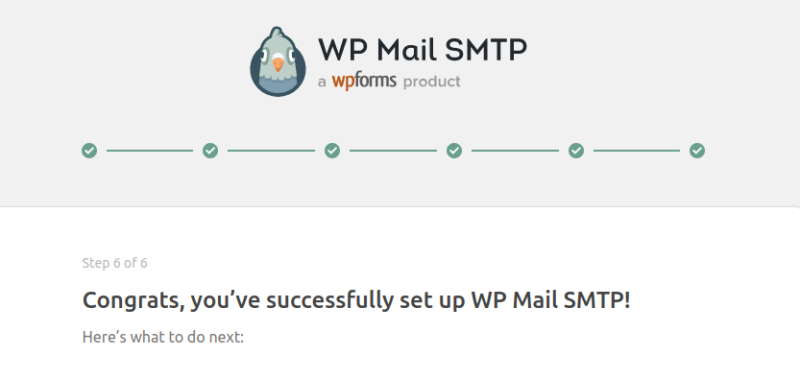
And you’re all set to send your emails using SMTP.
Easy WP SMTP
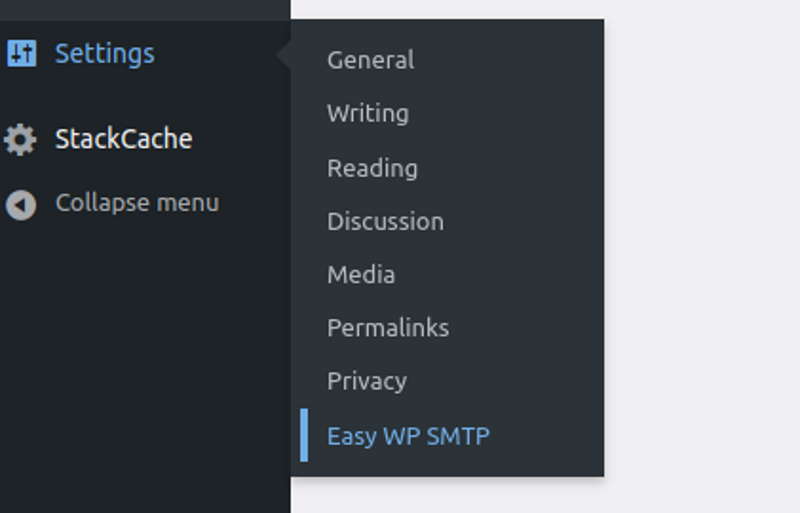
Easy WP SMTP aims to make setting SMTP up and testing as quick and as simple as possible. Once it’s installed, head to the Settings tab of your WP Admin area, and you should see a new option for Easy WP SMTP.

Once selected, you’ll be greeted with a form with all of your needed details. From Email Address is the email address you wish to use for sending, and your From Name is the name you want the email to appear to come from. Reply-To Address is the address used for the Reply-To field, and you can also set a BCC Email Address if you want to have a copy of the email sent to another mailbox.

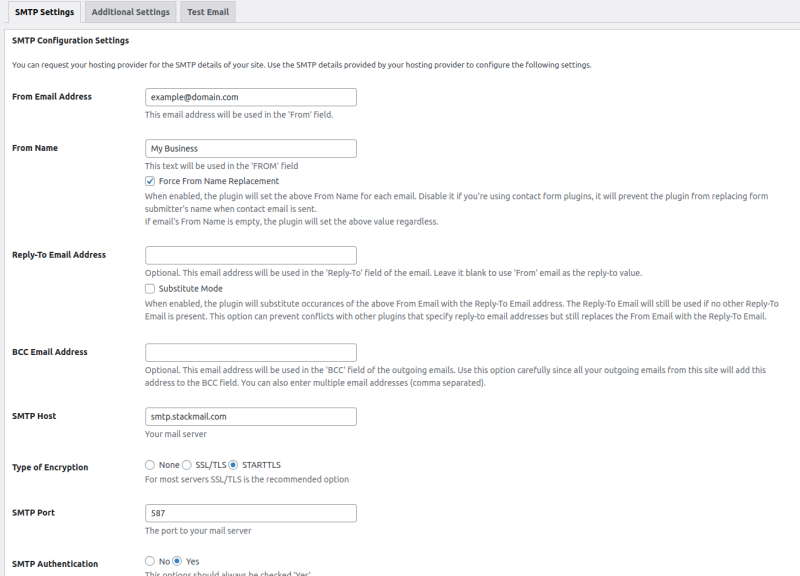
Below that, you have entry fields for your SMTP Host, which is your email provider’s SMTP hostname, the Encryption, which is the security, and your SMTP Port. Set these to your mail provider’s required settings, and select Yes on SMTP Authentication.
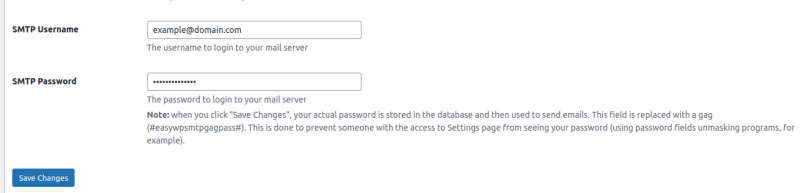
Lastly, enter the mailbox you wish to send from into SMTP Username and the mailbox’s password in SMTP Password, and hit Save Changes.

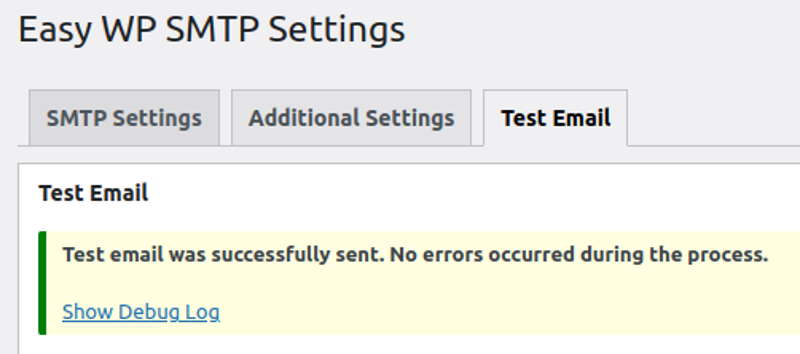
You can then navigate to the Test Email tab at the top of the form, and send a test email to check the SMTP settings are configured correctly.
If everything is configured correctly, you’ll get a popup confirming your email went through, and you’ll be all set to begin sending emails from your WordPress site using SMTP.

Without Plugins
If you’re more confident with PHP coding and the inner workings of WordPress, you can also set up your SMTP details directly using code. To do this, you’ll need to have set up a WordPress child theme – WordPress themselves provide a guide on how to do so here [ https://developer.wordpress.org/themes/advanced-topics/child-themes/ ]
Note: Before attempting this, make a backup of your site files so that you have a restore point.
In order to do so, first head to your wp-config.php file in the core folder of your WordPress site and add the following code:
// Configure your site to use SMTP
define( 'SMTP_USER', 'email@example.com' ); // Username to use for SMTP authentication
define( 'SMTP_PASS', 'MAIL_PASSWORD' ); // Password to use for SMTP authentication
define( 'SMTP_HOST', 'smtp.stackmail.com' ); // The hostname of the mail server
define( 'SMTP_FROM', 'email@example.com' ); // SMTP From email address
define( 'SMTP_NAME', 'FROM_NAME' ); // SMTP From name
define( 'SMTP_PORT', '587' ); // SMTP port number - likely to be 25, 465 or 587
define( 'SMTP_SECURE', 'tls' ); // Encryption system to use - ssl or tls
define( 'SMTP_AUTH', true ); // Use SMTP authentication (true|false)
define( 'SMTP_DEBUG', 0 ); // for debugging purposes only set to 1 or 2
This sets up the base configurations for your SMTP setup – you’ll want to modify the values above to match the recommended settings provided by your email host, and your own personal preferences.
Then, head to your child theme folder in wp-content > themes and open functions.php. In this file, add the following code:
// Configures SMTP authentication for your site
add_action( 'phpmailer_init', 'send_smtp_email' );
function send_smtp_email( $phpmailer ) {
$phpmailer->isSMTP();
$phpmailer->Host = SMTP_HOST;
$phpmailer->SMTPAuth = SMTP_AUTH;
$phpmailer->Port = SMTP_PORT;
$phpmailer->Username = SMTP_USER;
$phpmailer->Password = SMTP_PASS;
$phpmailer->SMTPSecure = SMTP_SECURE;
$phpmailer->From = SMTP_FROM;
$phpmailer->FromName = SMTP_NAME;
}
And that’s it – your site should now be able to use SMTP for sending your emails directly from your website.
Setting up SMTP with the above steps can ensure that your sent emails are safe, and better improve your chances of having them arrive with your clients without being flagged as spam and potentially missed.
Austin B.How to configure DNS settings for G Suite and Gmail
Our control panel allows automatic configuration of DNS Records. You can configure your domain name for G Suite (Google Apps) in My20i or StackCP.
- First, select 'Manage hosting', and select Manage on the hosting package you wish to add G Suite DNS records-to.
- Select the Manage DNS icon

- In the dropdown beneath Preconfigured Settings, you'll see two available options: G Suite (E-mail only) and G Suite (All services). The configuration you should use depends on the services you want from Google. If you're using Google just for mail under your own domain name (MX records) use the G Suite (E-mail only) link. For all the other G Suite applications, including records for Docs, Chat, Calendar, and services like Hangouts, use the G Suite (All services) option.

The control panel will show you the records that will be automatically added as a result of this change, allowing you to save them.
Please bear in mind that DNS changes can take up to 24 hours to fully propagate worldwide.
See above for a video demo, using an older UI:
Lloyd CobbWhat's the difference between using mail.domain.com and imap/smtp.domain.com?
When selecting what credentials to use within your mail client, you have a choice between using either: mail.yourdomain.com or imap/smtp.yourdomain.com
There is no difference between using either of those options.
Primarily, we allow you to use mail.yourdomain.com so that you don’t have to give your customers any instances of ‘stack’, creating a more customised experience.
If you use mail.yourdomain it is likely you'll get a “mail certificate name mismatch” / “cannot verify server identity” error. This is explained in the guide here.
Austin B.Will installing the Roundcube One-Click affect current emails?
No.
The Roundcube one-click install provides a separate installation of Roundcube for you to manage, send and receive emails. This won't affect the standard stackmail.com webmail application.
As third party software, we can't help with the customisation of this software, but it can be used to create a more bespoke webmail client.
Our one-click install for Roundcube is available with our Web Hosting and VPS.
Austin B.Why can't I send emails?
There are a few very common reasons why you may not be able to send emails using 20i email hosting.
Austin B.How do I stop emails going to junk?
Here are the best ways to stop emails from being put in the junk mail folder.
Austin B.How do I check mailbox usage across packages in My20i?
20i provides a simple and easy way to monitor mailbox sizes across the packages and sites within your My20i account. This allows you to monitor and manage client’s mailboxes without having to enter individual packages.
To access the Mailbox Usage report:
- Login to My20i.
- Head to the Reporting section on the home page and select Mailbox Usage.

You’ll be shown the total number of mailboxes along with their combined total resource usage.
By default, the list will be ordered according to the highest Percentage Used column. You can also sort the list by selecting the column heading you wish to sort by, i.e. select ‘Mailbox Name’ to sort the domains alphabetically.
Austin B.How do I create and send welcome emails?
As a 20i hosting reseller, there are two types of welcome emails that can be sent to your customers:
Austin B.Why are emails not forwarding?
The primary reason for mail not being forwarded is if it is being classed as spam. If an email has been designated as spam, it may be received by one email address but then not forwarded-on to the subsequent email address. This helps the reputation of the server and prevents blacklisting.
To resolve this, you can try lowering the spam filter via Junk Filters within the StackCP web hosting control panel.
To do this:
- Login to My20i
- Locate the package containing the forwarder and select Junk Filters
- You could also try whitelisting the domain/email address the email is coming from.
Austin B.Do you support email piping?
We do not support email piping - as our email and web server platforms are located in physically different networks to provide higher performance.
Email piping can only work in a 'single-server' type system. There, the server that handles email is the same server that hosts your website, and therefore has access to your website files.
As a result, an alternative means to 'pipe' mail on our platform would be the creation of a script that occasionally connects to a mailbox via POP3/IMAP. This script can then be configured to run via Scheduled Tasks at a desired frequency or time interval.
Andrew PorterHow do I customise the 20i webmail login page?
As part of our White-Label Reseller Hosting you can customise the webmail (Stackmail) login page using HTML and CSS directly via the 20i control panel.
<img src="skins/elastic/images/logo.svg?s=1582888499" id="logo" alt="Logo"> <form id="login-form" name="login-form" method="post" class="propform" action="./?_task=login">This is the HTML that adds the logo and form to the page – to alter the logo, simply change the src part of this line:
<img src="skins/elastic/images/logo.svg?s=1582888499" id="logo" alt="Logo">To the URL of the image you wish to use. For example:
<img src="https://mydomain.com/images/my-logo.svg" id="logo" alt="Logo">Note: The default size for the default webmail logo is 150x150.
In our example we've replaced the default webmail image with our business logo.

Altering the StackCP Login Form
If we wish to change the look of the form itself, we can use the following CSS:
#login-form {
background-color:#eee;
border-radius:10px;
padding:10px;
max-width: 400px;
}The #login-form section here adds a faint grey background colour to the form, adds some padding to better space the border away from the form entry fields, rounds the corners and increases the size. Modify these values to suit your preferences as needed. As is, this results in the following look:

Updating the StackCP Button and Form colours
Next, let’s modify the login button, and make some changes to the input fields to match the rest of the form. We can do this with the following CSS:
#rcmloginsubmit {
width:150px !important;
border-radius:20px;
background-color:#f7921e;
border:0;
}
#rcmloginsubmit:hover {
background-color:#dd7a08;
}
.form-control:focus {
border-color: #f7921e;
box-shadow: 0 0 0 0.2rem rgb(255,118,0,.25);
}The #rcmloginsubmit selector handles the login button here – through this, we modify the size of the button, round the corners and change the colour. Update the hex value for the colour and the size values as per your preferences.
The #rcmloginsubmit:hover section handles the colour of the button when your mouse hovers over it – feel free to change the hex value to whichever colour you prefer.
Lastly, the section .form-control:focus controls the colour of the border around the form entry fields when the user has selected it.
This adds a glow that helps users see what section they’re currently inputting data to. Update the hex value to the colour you want for the border, and fill in the rgb values to match the shades you need for your glow colour.
Tools are available online to covert hex codes to RGB values, if required. The ‘.25’ refers to the level of transparency for the highlight (In a range from 0 to 1, in decimals), so if you wish to make this fainter you may wish to reduce it to ‘.1’.
To follow on from our example above, you can see how the above CSS has updated the colours of the 'Login' fields and 'Login' button.

Ruth TurnerHow do I create and send email campaigns?
If you're a 20i Reseller, email campaigns allow you to send targeted, personalised bulk emails to your customers (StackCP Users). These can be used to cover common customer-related scenarios.
Austin B.How can I use a custom domain with iCloud mail?
With Apple's latest update to iOS and iCloud+ you can use a custom domain with your iCloud Mail accounts. Setting up iCloud Mail with your custom domain name is easy.
Step 1 - Setting up iCloud Mail on your devices
You'll first need to set up the Mail app on your Apple device.
Set up an iOS or iPadOS device
On your iPhone, iPad or iPod touch, go to Settings > [your name] > iCloud, then turn on Mail.
Set up on a Mac
![]()
On your Mac, choose Apple menu > System Preferences, then do one of the following:
- macOS 10.15 or later: click Apple ID, click iCloud, then select Mail
- macOS 10.14 or earlier: click iCloud, then select Mail
Step 2 - Setting up iCloud Mail with your custom domain
To add your custom domain name you'll need to have an iCloud+ account.
- Head to to icloud.com
- Select Account Settings
- Locate the Custom Email Domain and select Manage
You'll be prompted to confirm who'll use the domain and email addresses you'll be adding:
You'll then be asked to enter the domain name you wish to add. Once you've entered your domain name select Continue.
Step 3 - Complete the setup
You'll be then prompted to follow a few more steps shown below. You can add your mailbox now or skip to the next step.
This step requires you to enter the DNS records at your registrar. With 20i that's easy and the steps below will show you how you can do that. Select View and you'll be shown the records you need to add.
Add the iCloud Mail DNS to 20i
- Head to Manage Hosting > Options > Manage (or Manage Domains > Options > Manage DNS).
- Select Manage DNS.
- Add the DNS as follows:
MX:
Name: [example.com]. (Can be left blank)
points to: mx01.mail.icloud.com.
priority: 10
MX:
Name: [example.com]. (Can be left blank)
points to: mx02.mail.icloud.com.
priority: 10
TXT:
Name: [example.com]. (Can be left blank)
points to: [personal TXT record provided during setup]
TTL: 3600
TXT:
Name: [example.com]. (Can be left blank)
points to: " v=spf1 redirect=icloud.com"
CNAME:
Name: sig1._domainkey
points to: sig1.dkim.[example.com].at.icloudmailadmin.com.
Once done, select Update DNS.
Back within iCloud, select Finish set up.
Select Confirm and Apple with verify the DNS records you've just added.
Using the Mail app on your Apple device you should now be able to send and receive emails from your domain name through Apple's email service. If you didn't add an email address in Step 3 you can do so within the iCloud Account Settings > Custom Email Domain > Manage > select your domain and then add an email address.
Austin B.How do I create an email account for my domain?
Creating a new email account for a domain name is done through My20i.
Austin B.How do I allow-list all email from a specific domain / mailbox?
If you want to allow all emails to be received from a specific sending email address - so that even mails classed as 'junk' will arrive - then you can 'allow-list' this address within Junk Mail Filters within the package.
- Log in to My20i
- Select the package where your mailboxes are located
- Locate the Junk Mail Filters icon
- Locate Allow by Sender and add a domain rule or a mailbox rule to allow mail to always be received from a specific address
Austin B.How do I create a mailbox?
To create a new email mailbox:
- Select Manage Hosting.
- Select Manage for the package you wish to add the mailbox to.
- Select Email Accounts - enter the prefix of the mailbox you wish to create and select Create Email Account.
A password will automatically be generated for you, but you can change this if needed. You will have immediate access to your webmail account by selecting Options -> Webmail.
Austin B.The Impact of Marking Forwarded Emails as Spam
At 20i, our email hosting offers the ability to forward your emails from one account to another, streamlining communication and ensuring you never miss an important message.
Andrew PorterHow to configure a Catch-All forwarder
What is a Catch-All forwarder?
A Catch-All forwarder refers to a configuration where all emails sent to a domain name, that do not match any specific email address, are forwarded to a designated email address.
Corey SeymourHow to setup a 20i mailbox without a hosting package
At 20i, our platform allows domain owners to create a single mailbox without requiring hosting services.
To create a mailbox on a domain name you'll need to go to the Manage Domain Names page within your 20i account.
This will show a list of the domains in your account and if they have hosting attached or not. For a domain without hosting.
Next to the domain you want to add the mailbox to, click the options link and then click Manage.
This will open the Domain management page for the domain and, as long as the domain doesn’t have hosting attached, will show an email management section.
To create and manage a mailbox, click on the Email Accounts icon which is highlighted in the image below:
Once you’re on the Email Accounts page, you'll have the option to create the mailbox you need by entering the first part of the email within the Create Email Account field.
Once you fill in the field you need to click the Create Email Account button. This will reload the page and you will be able to see the mailbox that you created on the same page.
You will have the option to reset the password for the new mailbox as well as some options under the options link like being able to log into webmail, find the settings to use to set the mailbox up in an email client, adjust the junk filter level and increase the size of the mailbox.
Once the mailbox is created, the option to create a mailbox will be greyed out since only one mailbox can be created without hosting. If multiple mailboxes are required, you will need to purchase a hosting package.
Corey SeymourHow to migrate emails from Microsoft 365 to 20i via a .PST file
To migrate a Microsoft 365 email account to 20i, you will need to use Microsoft's .pst file format to export and import a .pst file. The .pst file format is a Microsoft file format used by Outlook to store copies of emails, calendars, and other logged data. To generate a .pst file, you must first have a Microsoft 365 account.
Please note: these steps are only required for a Microsoft 365/Work account. If you have a personal Microsoft, Outlook.com, MSN.com, or Hotmail.com account instead, you can follow these steps to migrate your mailbox automatically. Similarly, Gmail and IMAP mailboxes can also be migrated automatically.
- To start with, please open your Microsoft 365 email account in Outlook.
- From the Inbox, select New Items, then More Items, then Outlook Data File.

- Once selected, save this file to your local machine.
For this next step, you will need to have set up your 20i mailbox in Outlook and then log in to that email account via Outlook. We have a full support article detailing how to do this here.
- Once set up, head to the Inbox, navigate to File, then Open & Export, and finally Import/Export.

- The Import and Export Wizard should then appear. From this menu, select the Import from another program or file option, then click Next.

- In the next menu, select Outlook Data File (.pst)

- And then finally, locate the .pst file that you generated, select it and click Next.

- Choose the import items into the current folder option and click finish.

Outlook will now start importing the data from the .pst file into the 20i mailbox. Once complete, you will have successfully migrated a Microsoft 365 email account to 20i using the .pst file import method.
Jordan Graves
Chris Wright
Joshua Miner
Harry Leverton
Ben Gayson
Louie Reid-Smith