CDN Questions
CDN support articles: all you need to know about 20i's free content delivery network that will speed up your website.
How do I use 20i's CDN?
20i’s CDN is quick and easy to use.
Manage the package you want to enable our 20iCDN for and locate the CDN section.

To activate the main Edge Caching element of the CDN, select Edge Caching - select the toggle to activate it (Manage Hosting > Manage > Edge Caching).

There’s nothing more you need to do! All static content on your website will now be cached automatically and served from the CDN node closest to the website user's location.
How do I purge the cache?
To purge the cache that's stored at the CDN node head to the Edge Caching section and select the Purge Everything button.

For more information about the 20iCDN please see the guide here: What is 20i's CDN?
 Austin B.
Does the 20i CDN perform cache warming?
Yes. The 20i CDN performs cache warming to ensure cached pages are served as frequently as possible, to as many users as possible.
When a user requests a web page, a cached copy is stored at the 20iCDN node closest to where they made the request.
If another user requests the same web page and uses the same CDN node they’ll be served the ‘warmed’ cache generated by the first user. This ensures that they get a cache HIT on their first visit, meaning that the website will load faster.
 Austin B.
How is SEO affected by 20i's CDN?
With 20i’s CDN, you’ll get a Website Acceleration Suite which gives you the tools to help get your Google PageSpeed Score to 100/100.
You can access this from within the package you’d like to optimise via:
Manage Hosting -> Manage -> Web Optimisation
The module improves website load times by automatically implementing web performance best practices to website. This includes optimising images, JavaScript minification and combining CSS – all to improve website load times.
You’ll be able to select the One Click Optimisation section to add the recommended settings which should add the ideal, safe settings to improve website load times.
Because page speed is a direct ranking factor for your websites ensuring these options are selected within the 20i control panel can help ensure your websites are optimised for SEO.
Could using the 20iCDN hurt my SEO?
Not at all, completely the opposite.
It's critical that web agencies, designers, and web professionals produce fast website experience for their customers. Over 50% of all web traffic comes from mobile - using 20i's Website Acceleration Suite your websites are optimised to perform well under Google's PageSpeed score, both for mobile and desktop.
 Austin B.
CDN Security Headers
Using HTTP security headers can improve website and application security and protect against clickjacking, cross-site scripting (XSS), as well as other common attacks.
HTTP security headers let the client and server pass additional information using an HTTP request or response which can have an impact on its final behaviour.
Security headers are the subset that have a positive impact on the security of the website or application specifically.
As a web hosting reseller, you can choose to set the security headers for your clients and have full control over them, or to let your customers take care of this.

How to add HTTP security headers to a website
You can use the 20i Security Headers tool to add security headers to your website easily. To use this tool:
- Head to Manage Hosting and select Options > Manage on the site you want to add security headers for.
- Select the Security Headers icon within the CDN section.
There are several main security headers that you can set. You can find more details about each in the section below.
Using Security Header Profiles
We offer a convenient and powerful feature that enables you to save and load HTTP security header settings using named profiles.
Creating a Profile
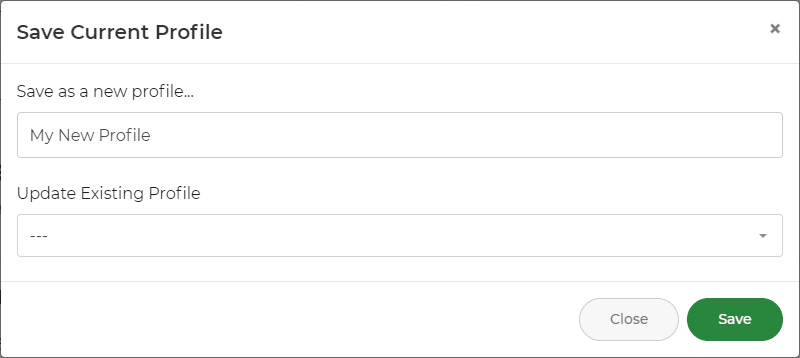
Start by configuring your desired HTTP security headers in the way that best suits your specific security needs. Once you've fine-tuned these settings, save them as a named profile. Give your profile a meaningful name to easily identify its purpose.
Loading a Profile
To quickly apply a set of security headers to your package, select the desired profile from the list. The headers associated with that profile will be loaded instantly.

Most relevant HTTP security headers and how to use them
We've outlined what each security header does and in what scenario you may want to use the header below.
- X-Frame-Options
- X-Content-Type-Options
- Referrer-Policy
- Strict-Transport-Security
- X-XSS-Protection
- Content-Security-Policy
X-Frame-Options
The X-Frame-Options header is used to indicate whether or not a browser should be allowed to render a page in an iframe or object tags. Sites can use this to avoid click-jacking by ensuring that their content is not embedded into other sites.
Note: The added security is provided only if the user accessing the document is using a browser that supports X-Frame-Options.
There are two options you can use with X-Frame-Options:
- DENY - The page cannot be displayed in a frame, regardless of the site attempting to do so
- SAMEORIGIN - The page can only be displayed in a frame on the same origin as the page itself.
For more information on X-Frame-Options please see the documentation here: https://developer.mozilla.org/en-US/docs/Web/HTTP/Headers/X-Frame-Options
X-Content-Type-Options
The X-Content-Type-Options header is a marker used by the server to indicate that the MIME types in the Content-Type headers should not be changed. This is a way to opt out of MIME type sniffing or to say that the MIME types are configured deliberately.
There's only one option with X-Content-Type-Options, nosniff, this blocks requests if the request destination is of type style and the MIME type is not text/css, or of type script and the MIME type is not a JavaScript MIME type.
For more information on X-Content-Type-Options please see the documentation here: https://developer.mozilla.org/en-US/docs/Web/HTTP/Headers/X-Content-Type-Options
Referrer-Policy
The Referrer-Policy header controls how much referrer information, which is sent using the Referer header, should be included with requests.
The options you can use with Referrer-Policy header are as follow:
- no-referrer - The Referrer header will be omitted entirely. No referrer information is sent along with requests.
- no-referrer-when-downgrade - Send the origin, path, and querystring in Referer when the protocol security level stays the same or improves. This includes HTTP to HTTP, HTTP to HTTPS and HTTPS to HTTPS but excludes HTTPS to HTTP and HTTPS to file.
- origin - Send only the origin in the Referrer header.
- origin-when-cross-origin - Send the origin, path, and query string when performing a same-origin request to the same protocol level. Send only the origin for cross origin requests and requests to less secure destinations.
- same-origin - Send the origin, path, and query string for same-origin requests. Don't send the Referrer header for cross-origin requests.
- strict-origin - Send the only the origin when the protocol security level stays the same (HTTPS to HTTPS). Don't send the Referer header to less secure destinations (HTTPS to HTTP).
- strict-origin-when-cross-origin - This is the default, this will send the origin, path, and querystring when performing a same-origin request. For cross-origin requests it will send only the origin when the protocol security level stays same (HTTPS to HTTPS). Don't send the Referer header to less secure destinations (HTTPS to HTTP).
- unsafe-url - Send the origin, path, and query string when performing any request, regardless of security.
Note: This policy will leak potentially-private information from HTTPS resource URLs to insecure origins. Carefully consider the impact of this setting.
For more information as well as examples of the Referer-Policy header please see the documentation here: https://developer.mozilla.org/en-US/docs/Web/HTTP/Headers/Referrer-Policy
Strict-Transport-Security
The Strict-Transport-Security header (often abbreviated as HSTS) lets a web site tell browsers that it should only be accessed using HTTPS, instead of using HTTP.
The options available are:
- max-age= - Which allows you to set the time in seconds that the this should remember that it can only be accessed using HTTPS.
- includeSubDomains - This is an optional parameter and if applied the rule will aply to all of the sites subdomains as well.
For more information on Strict-Transport-Security please see the documentation here: https://developer.mozilla.org/en-US/docs/Web/HTTP/Headers/Strict-Transport-Security
X-XSS-Protection
The X-XSS-Protection header is a feature of Internet Explorer, Chrome and Safari which stops pages from loading when they detect reflected cross-site scripting (XSS) attacks. Although these protections are largely unnecessary in modern browsers with sites that have implemented a strong Content-Security-Policy that disables the use of inline JavaScript ('unsafe-inline'), they can still provide protections for users of older browsers that don't yet support Content-Security-Policy.
- 0 - Disables XSS filtering.
- 1 - Enables XSS filtering. If a cross-site scripting attack is detected, the browser will sanitize the page.
- 1; mode=block - Enables XSS filtering. Rather than sanitizing the page, the browser will prevent rendering of the page if an attack is detected.
- 1; report= (Chromium only) - Enables XSS filtering. If a cross-site scripting attack is detected, the browser will sanitize the page and report the violation. This uses the functionality of the CSP report-uri directive to send a report.
For more information on X-XSS-Protection please see the documentation here: https://developer.mozilla.org/en-US/docs/Web/HTTP/Headers/X-XSS-Protection
Content-Security-Policy
The HTTP Content-Security-Policy response header allows web site administrators to control resources the user agent is allowed to load for a given page. With a few exceptions, policies mostly involve specifying server origins and script endpoints. This helps guard against cross-site scripting attacks.
For the full list of directives and options please see the documentation here: https://developer.mozilla.org/en-US/docs/Web/HTTP/Headers/Content-Security-Policy
 Austin B.
How long is website data cached for at a CDN node?
The CDN itself is used to cache static content. By default, the following file types are cached for 60 minutes before being purged automatically.
| bmp | class | css | csv |
| doc | docx | ejs | eot |
| eps | gif | ico | jar |
| jpeg | jpg | js | mid |
| midi | otf | pict | |
| pls | png | ppt | pptx |
| ps | svg | svgz | swf |
| tif | tiff | webp | woff |
| woff2 | xls | xls2 | robts.txt |
The 20iCDN comes free with all shared and Managed Hosting.
 Austin B.
Do I need caching plugins in addition to the 20i CDN?
The short answer is no, the 20i Content Delivery Network takes care of caching for you. The free 20iCDN caches static content and stores it until it's purged via the Edge Caching section in My20i.
This means you shouldn’t use any additional caching plugins such as W3 Total Cache or WP Super Cache.
We handle optimisation via the Website Acceleration Suite. The module improves website load times by automatically implementing web performance best practices to a website. This includes optimising images, JavaScript minification and combining CSS – all to improve website load times.
Therefore, you don’t need plugins such as WP Smush, Lazy Loading, EWWW Image Optimizer or Autoptimise.
 Austin B.
How do I create a Website Acceleration Suite template?
There are over 40 settings in the Website Acceleration Suite that can make your site load faster. You can save a template of your ideal settings so you can apply this to any other sites you host with us.
Making a template of your Acceleration Suite settings is quick and easy.
- Head to Manage Hosting > Options > Manage for the package from which you want to create a template.
- Select the Web Optimisation icon.
- If you haven't already done so, configure the options that best suit the site(s) that you build. The options you may select may depend on a number of factors; most of the time you'll want to select the most options whilst ensuring they don't interfere with website functionality.
- Once you've configured your template, select Save Profile from the right-hand side. Enter a name for this profile and select Save.
Restoring a template of your settings.
- Head to Manage Hosting > Options > Manage for the package from which you want to restore a template.
- Select the Web Optimisation icon.
- Select Load Profile from the right-hand side.
- Select the name of the profile you wish to restore and select Load Profile to restore the settings.
You can also update a current template after making changes - and delete saved ones you no longer need - in the same place.
You can get access to 20i's Website Acceleration Suite if you have 20i web hosting, Managed Hosting or WordPress hosting.
 Austin B.
CDN Statistics
With the free 20i CDN, you can get an understanding about the traffic and requests accessing your sites.
Detailed data sets are collated and presented in charts for each of your sites at 20i, giving you insights about your site’s performance.
Accessing site Statistics
You can access the statistics for each site you host from the package overview page with your My20i account.
- Head to Manage Hosting
- Select the package you wish to view the statistics for by selecting Manage
- Select Statistics

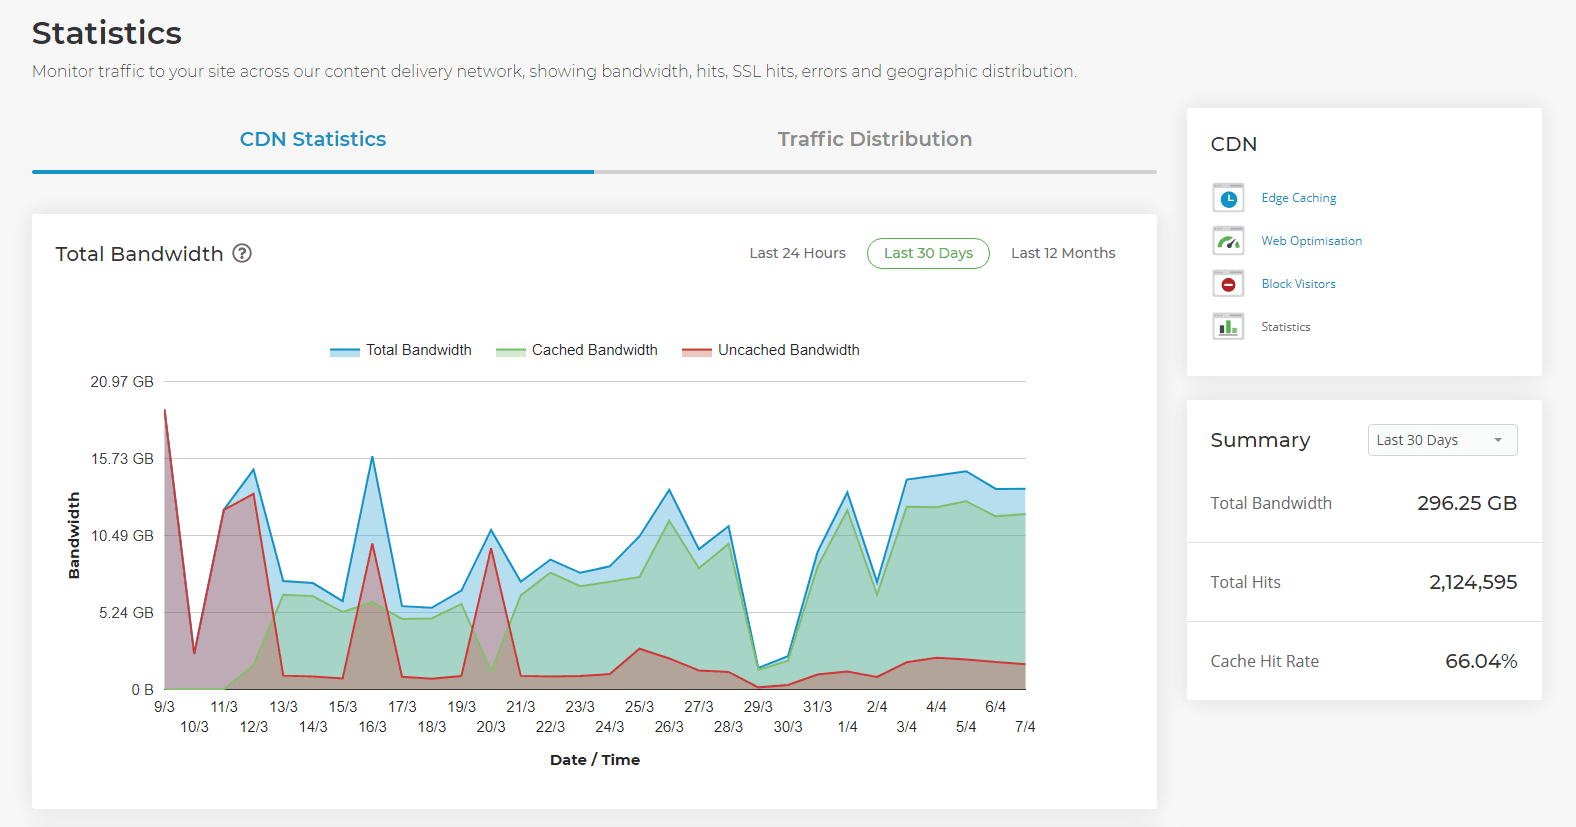
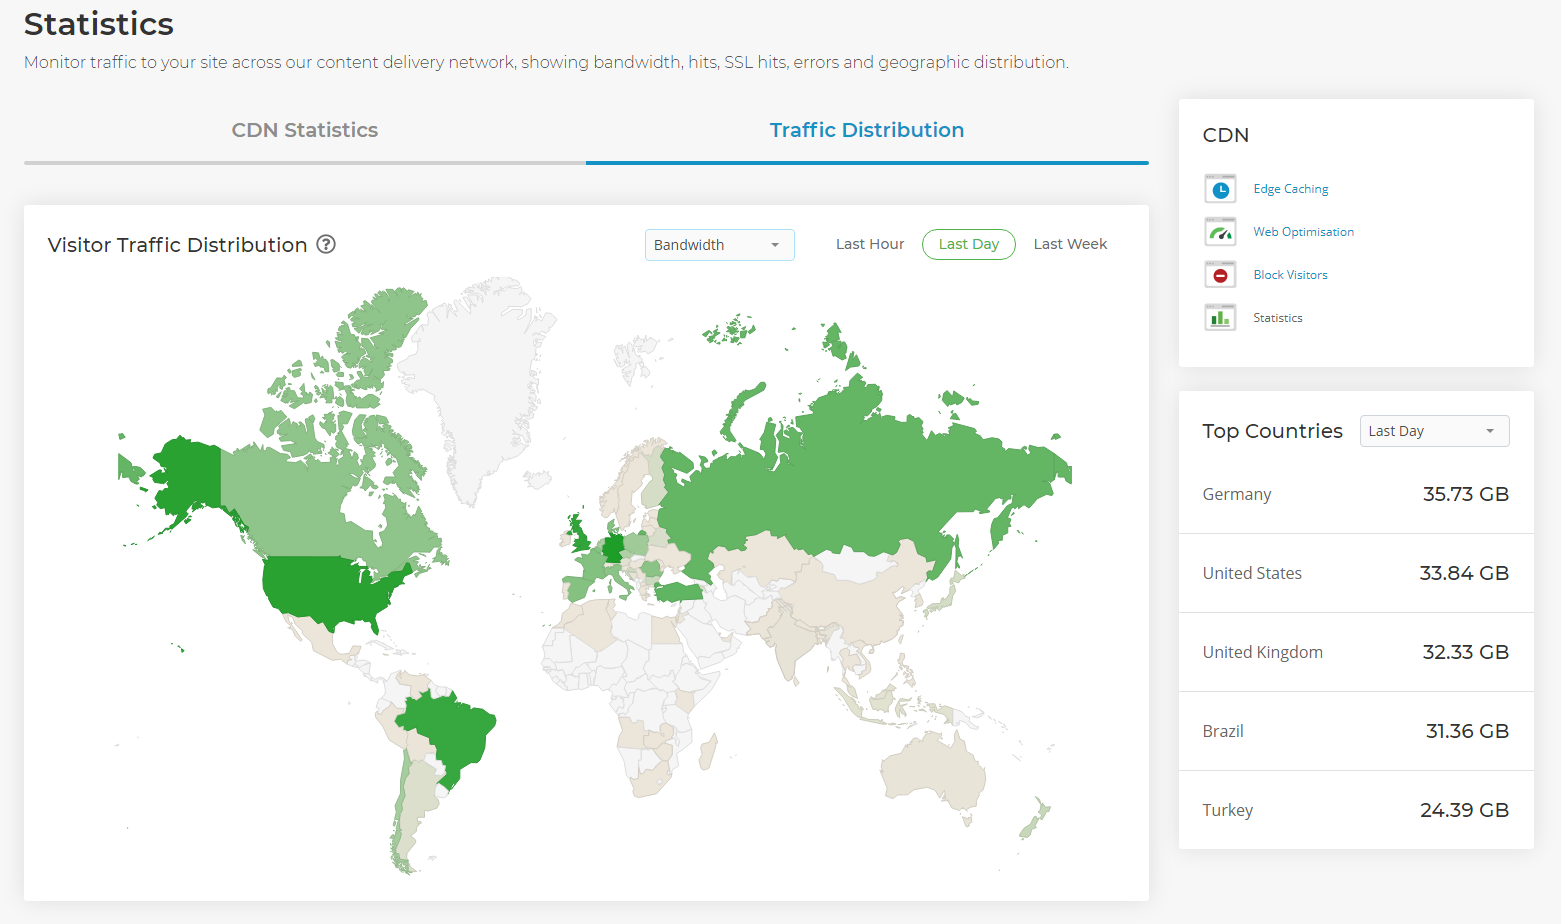
You’ll be presented with the CDN Statistics overview with the option to switch to the Traffic Distribution view.
Total Bandwidth - This refers to the amount of data (in bytes) sent through the 20iCDN to the client. This is split between data that’s been served from the origin server (uncached bandwidth) and served from the CDN nodes (cached bandwidth).
Total Hits - This refers to the number of files and sessions that have been transferred using the CDN network, it’s important to note that this isn't the same as ‘unique visitors’.
You can filter the statistics by a time period using the toggles at the top-right of each section.
Traffic Distribution
The statistics also show geographic overview of incoming requests to your side. This can also be toggled between Last Hour, Last Day and Last Week.
You can hover over a country to see figures for that location.
Understanding the Statistics
The underlying datasets that 20i captures and processes share the following characteristics:
- All metrics reflect HTTP traffic captured through 20iCDN network infrastructure
- 20i does not process HTTP traffic for unproxied web hosts
- In determining the originating country, 20i uses the IP address associated with each request
Understanding Apparent Data Discrepancies
As well as the characteristics described above, it’s possible that your 20i metrics will not fully align with data for the same site reported by other sources such as Google Analytics and other solutions.
Once 20i identifies a unique hostname for a request, we match such hostname with all registered server aliases for that hostname/domain. Therefore, the number of requests 20i show may be higher than the figures other analytics services report.
For example, Google Analytics and other web-based analytics programs use JavaScript on the web browser to track visitors. As a result, Google Analytics doesn’t record threats, bots, and automated crawlers because those requests typically do not trigger JavaScript.
Total Bandwidth
- Total Bandwidth - Total amount of bandwidth (sum of bytes) served by 20i’s CDN network
- Cached Bandwidth - Amount of bandwidth for requests considered as “cached”, i.e., response is served from 20i CDN Cache
- Uncached Bandwidth - Amount of bandwidth for requests considered as “uncached”, i.e., response is served directly from backend server
Total Hits
- Total Hits - Total number of requests captured by 20i’s CDN network.
- Cached Hits - Number of requests considered as “cached”, i.e., response is served from 20i CDN Cache.
- Uncached Hits - Number or requests considered as “uncached”, i.e., response is served directly from the backend server.
SSL Hits vs Non-SSL Hits
This graph shows the number of requests that are encrypted via the HTTPS protocol as opposed to the unencrypted HTTP protocol. If requests to a site such as http://example.com are made, this would constitute an insecure request.
You’ll want to ensure that as much as possible requests to your sites are made over HTTPS. Most often, this can be achieved using a 301 redirect, WordPress plugin, or ensuring the WordPress site and home URL utilise HTTPS. You will also need an SSL certificate to cover the site. You can apply the free SSL from within the hosting package.
HTTP Successful Requests vs Error Requests
Successful Request - These requests are defined as being all HTTP requests in the range of 200-399, such as '200 OK' requests or 301 Redirects.
Error Requests - These are defined as being HTTP requests ≥ 400, such as 404 Not Found requests or 503 Internal Server Errors.
It’s important that the amount of successful requests is maximised. If you’re seeing a higher rate of error requests, you should consider checking the access and error logs for any data about requests.
The 20iCDN comes free with all web hosting and Managed Hosting on a VPS at 20i.
 Austin B.
What is 20i's CDN?
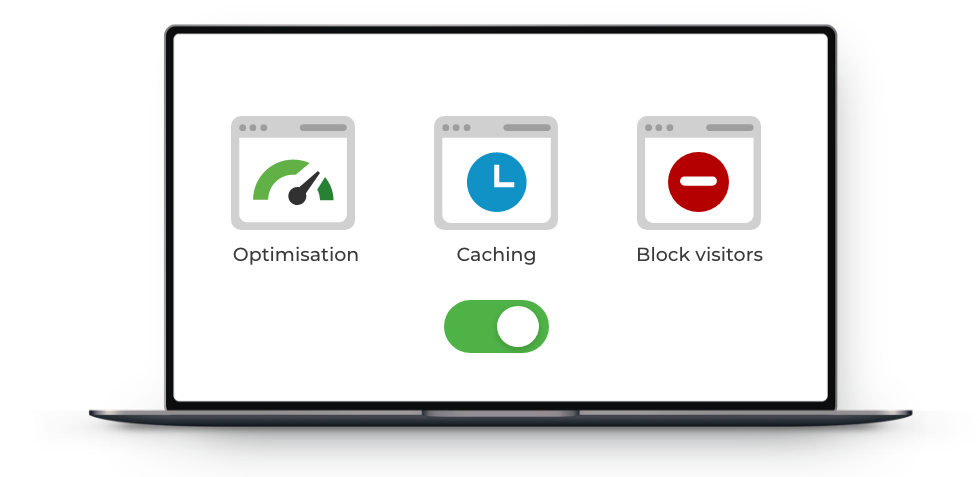
The 20iCDN is a powerful, free content distribution network (or content delivery network) that uses physical, highly optimised servers across the world to cache the content of your websites served from the 20i platform.
Cached content of the data is stored at multiple CDN nodes so global customers will connect directly to CDN nodes instead of directly to our local network, resulting in content being served faster and your websites loading quicker.
It's included for no extra charge with our Web Hosting, WordPress Hosting, Reseller Hosting, Agency Hosting and Managed Hosting packages. The 20iCDN is comparable to paid plans from other CDN providers, like Cloudflare.
What are the benefits of a CDN?
- Content is actively cached: Every global CDN node actively caches static files. This offers an enhanced and consistent user experience to visitors everywhere - at the same time, page speed is improved and you'll deliver better-performing sites to your users.
- Latency is reduced: The 20iCDN has highly connected CDN nodes globally - this means your users will always reach a node close to them, reducing latency and improving website load times.
- Improved SEO: With the 20iCDN, you’ll get a Website Acceleration Suite which gives you the tools to help get your Google PageSpeed Score to 100/100. You’ll be able to select the One Click Optimisation section to add the recommended settings which should add the ideal, safe settings to improve website load times. Because page speed is a direct ranking factor for your websites ensuring these options are selected within the 20i control panel can help ensure your websites are optimised for SEO.
You can power-up your websites using the 20iCDN from within your My20i account. See the guide here for more information: How do I use 20i's CDN?
Understanding the 20iCDN
The CDN itself is used to cache static content. By default, the following file types are cached for 1 day before being purged automatically.
| bmp | class | css | csv |
| doc | docx | ejs | eot |
| eps | gif | ico | jar |
| jpeg | jpg | js | mid |
| midi | otf | pict | |
| pls | png | ppt | pptx |
| ps | svg | svgz | swf |
| tif | tiff | webp | woff |
| woff2 | xls | xls2 | robots.txt |
This type of cache is referred to as our Edge Caching as it's cached at our network edge (a.k.a the CDN nodes).
This cache can be purged at any time from the Edge Caching section within your control panel, this is accessed via Manage Hosting > Manage > Edge Caching.
Head down to the Purge Cache section to clear all the cached static content from all CDN nodes.
You can also change the amount of time Image, CSS and JavaScript cache is kept on our edge from the Edge Caching section or directly from within StackCache in the WordPress admin area.
What is Dynamic Cache?
Dynamic caching is when content that is generated dynamically on the website is cached. This can be content that is generated from scripts on the website.
A copy of that content is stored and is then served to subsequent users who request the same content until the cache expires. Our Dynamic Cache provides the ability to cache any resource like this at our edge by using public Cache-Control and Expires headers.
For websites using our StackCache plugin, this gives you full page dynamic content caching ensuring rapid TTFB times for all resources regardless of visitor location.
You can cache any other dynamic content using public Cache-Control and Expires headers via a .htaccess file - however, this is recommended only for advanced users only.
How to check your website is being cached
The easiest method to check that your site is being cached is to use Google Chrome's console to view your website's response HTTP headers.
In Google Chrome, follow the steps below:
- Using Chrome, visit your website, right-click and select Inspect to open the Developer Tools.
- Select the Network tab.
- Reload the website and the select any HTTP request from the left panel. The HTTP headers will be displayed in the right panel.
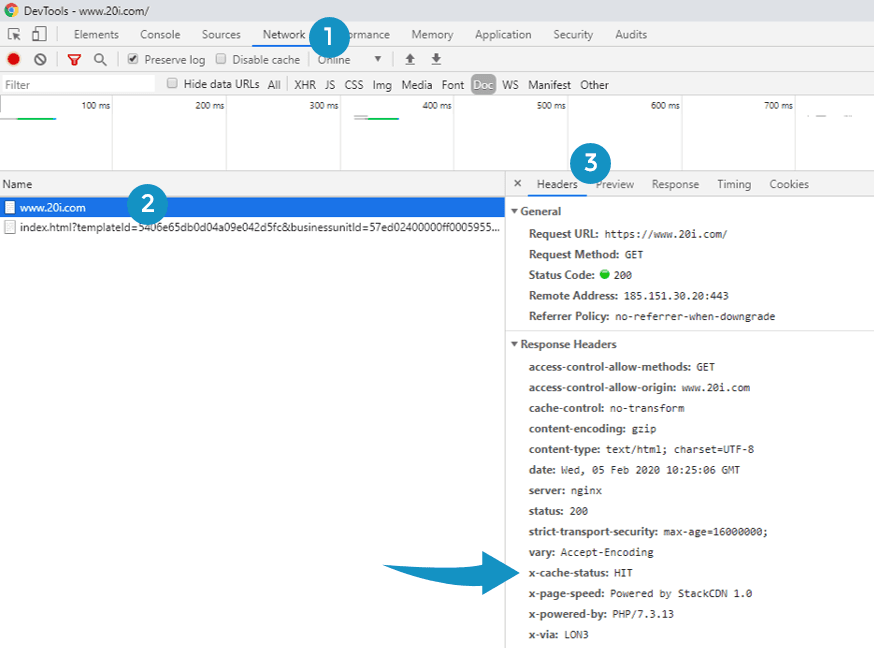
You'll be looking for the x-cdn-cache-status response to determine if the website has been cached. Please see the table below for the various responses you may see.
| HIT | The websites static content was requested from 20i's CDN. |
| MISS | The websites static content was not found in 20i's CDN and was loaded from the origin server. You'll see this on the first load of a website; subsequent reloads should show cache HIT. |
| BYPASS | The origin server instructed the 20iCDN to bypass cache. You'll see this if you're within the WordPress Admin - this ensures you'll always see the latest changes you make. |
Note: If you have other caching plugins such as W3 Total Cache or WP Super Cache these may interfere with the CDN and cause a cache MISS. These plugins can be disabled. For more information please see the guide here: Do I need caching plugins in addition to the 20i CDN?
 Austin B.
Why am I getting a 'Too Many Redirects' error?
'Too Many Redirects' errors are caused by sites stuck in a loop of redirects.
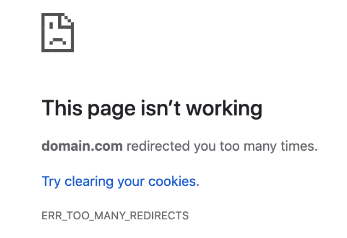
What is the ERR_TOO_MANY_REDIRECTS?
One or multiple redirections point to themselves, resulting in the site being unable to load as it will continuously redirect until either the browser stops it early or the site goes down.
Most commonly, ERR_TOO_MANY_REDIRECTS are caused by incorrect or poorly-defined redirect rules in your .htaccess file, or a plugin forcing a redirect over and over.
Common causes of ERR_TOO_MANY_REDIRECTS
Below are some common causes - 'always true' rules, mixed content and caching. We'll explain what they mean and show you how to fix them.
Always true rules
Redirect rules set in the .htaccess file have conditions. These conditions decide when a redirect rule should redirect a site, so that the site doesn’t always redirect. If these conditions aren’t set correctly however, they can always be ‘true’, meaning that the redirect will always occur and as a result the site will loop.
For example, we have a site domain.com and we try to redirect this to our subdomain my.domain.com
One way we could do this is via the following:
RewriteCond "%{HTTP_HOST}" "domain.com$"
RewriteCond "%{REQUEST_URI}" "^/"
RewriteRule ".*" "https://my.domain.com/" [L,R=301]
In the above example, we have our condition:
RewriteCond "%{HTTP_HOST}" "domain.com$"Which states that, if the URL contains ‘domain.com’, redirect the site. However, this will lead to a loop, as our subdomain also contains ‘domain.com’, resulting in the too many redirects error.
A much better way to do this redirect would be instead to use:
RewriteCond %{HTTP_HOST} !^my\.domain\.com [NC]
RewriteRule ^(.*)$ http://my\.domain\.com/$1 [R=301,L]
Which instead uses the condition:
RewriteCond %{HTTP_HOST} !^my\.domain\.com [NC]This checks to see if the URL is not the subdomain, and redirects the site if it’s not.
It’s worth looking through your rules and making sure this type of logical loop doesn’t occur.
If you’re unsure, try renaming your .htaccess file. If the error stops when doing so, something in that file is causing the loop itself.
Mixed Content
The term ‘Mixed Content’ refers to when parts of a website on HTTPS try to load content over HTTP. In more uncommon cases, this can result in a site correcting itself to HTTP, then redirecting to HTTPS, resulting in a loop between the two which causes the ERR_TOO_MANY_REDIRECTS.
In cases such as this, it’s best to temporarily remove any rules that may be enforcing HTTPS, and then updating all of your site’s URLs to ensure they’re either all on HTTP or all on HTTPS.
We have a full guide on finding and fixing mixed content here.
Force HTTPS Scripts
Some Content Management Systems (CMS) such as Joomla have options that can force HTTPS connections to your site as a part of the integration. Enabling these makes tweaks to the code to enforce this – however, if you’ve already included your own scripts to force HTTPS or are using 20i’s option to do so in the SSL/TLS area, then this could potentially conflict and lead to a loop.
Check your current CMS setup to see if any options to force HTTPS connections are enabled. If they are, disable or remove any other scripts or options that will be enforcing this to remove any conflicts.
Caching
Caching can also cause a redirect loop as site and server caching can store redirects, resulting in a rule that has been removed to continue to be used.
The quickest way to check to see if this is the case is to visit the site with a query string at the end, for example:
https://mydomain.com/?nocache
Anything after the '?' is ignored, so you can write anything. Doing so will bypass the cache on the site and force the site to load directly.
If the site then loads fine without the redirect error, you can confirm that caching is what's causing the redirect.
Check your site for any cache folders and clear them, and then clear the edge cache from within your package:
- Log into My20i and head to your Manage Hosting area
- Select Options > Manage on the hosting package you’d wish to edit
- Select Edge Caching from under the CDN section of the package

At the bottom of the Edge Caching page, select Purge Everything. The server cache will be cleared within a few minutes.
Now you should be free of the 'too many redirects' error. Get in touch with our support team if you need further help.
How do I redirect a user based on their location and IP address?
The 20i CDN nodes have inbuilt support for GeoIP.
This means that each request gets an X-Country HTTP Header set which can be used to redirect traffic from specific countries.
For example, if you wanted to redirect UK traffic that hits the '.com' version of your site you could add this in a .htaccess file.
RewriteCond %{HTTP:X-Country} UK [nc]
RewriteRule (.*) http://my-new-domain.co.uk/$1 [L,R=302]
The free 20i CDN is available on our shared Web Hosting, Agency Hosting, WordPress Hosting, Reseller Hosting and Managed Hosting.
 Austin B.
Why am I getting a cache status 'MISS'?
Headers returning x-cdn-cache-status MISS indicate the request was served by the origin 20i server. This means that the response was not found in the cache and so was fetched from the origin server. This could result in a longer time-to-first byte (TTFB) and a longer total load time. On pages you want to be cached you'd expect to see x-cdn-cache-status HIT.
A cache 'MISS', or 'BYPASS' status is usually caused under three main conditions:
- Browser cookies being set
- Conflicting caching plugins
- Cache-control headers set in a .htaccess file
- Being logged into /wp-admin
Browser cookies
When a cookie is in use on a webpage the CDN edge cache will automatically avoid caching the content. When present, cookies work with the PHP as the page is loaded in order to perform a unique action. When a page is served from cache, it’s already been generated previously by the server. If the page is cached, the cookie cannot be generated and perform its action with the page load as expected.
Some applications also use a PHPSESSID cookie which prevents pages from being cached, for example, WooCommerce sets a PHPSESSID. In many cases this cookie doesn't alter behaviour, so disabling the cookie is one way to optimise and configure your site to work best with cache.
We have an option you can use within StackCache to help with this.
- Log in to /wp-admin and head to StackCache which you'll find down the left-hand side.
- By default, Remove PHP Session Cookies Matching Empty PHP Sessions will already be set, but you may wish to try selecting Remove PHP Session Cookies From All Pages.
- Select Save Changes.
Once saved, log out of /wp-admin and try refreshing your site or page you're trying to ensure is cached.
Conflicting Caching Plugins
Our platform comes with various layers of caching built-in. One of the most effective of these caching layers, especially at scale, is our edge cache system.
Unfortunately, most cache plugins will interfere with this and as a result, we don't recommend running any caching plugins on your WordPress site.
This includes, but is not limited-to: W3TC, Super Cache, WP Rocket and Hummingbird.
Don't panic! You won't need them - all caching plugins are built for speed, and you can rest assured our StackCache plugin will do that hard work for you.
Cache-control headers set in a .htaccess file
Cache-Control and Expires headers can be set in the .htaccess file within the root directory for the site. These let you control various elements of how your site is cached, including preventing caching altogether.
If you were to add Cache-Control: no-store into a .htaccess file then the HTTP headers would serve a directive to prevent the site from caching and a cache MISS would be received via the HTTP headers.
If you receive a cache MISS then you should review your .htaccess file for any conflicting directives.
Being logged into /wp-admin
When you're logged into /wp-admin we'll always force a cache bypass in the HTTP headers to ensure WordPress admin is never cached. If you're trying to ensure your site is being cached you'll need to logout of /wp-admin first, and then test your site, otherwise, the site will never be cached.
 Austin B.
What is the Website Acceleration Suite?
Our CDN powers-up your websites further by feeding them through our Website Acceleration Suite.
It's included for no extra charge with our Web Hosting, WordPress Hosting, Reseller Hosting, Agency Hosting and Managed Hosting packages.
The module improves website load times by automatically implementing web performance best practices to a website. This includes optimising images, JavaScript minification and combining CSS – all to improve website load times and the Google PageSpeed Score. This in turn positively impacts SEO and helps you develop high-performing websites at scale.
To access Web Optimisation, head to Manage Hosting -> Manage -> Web Optimisation

For a full list of the optimisations head to the Web Optimisation section within the package to be optimised. You’ll be able to select the One Click Optimisation option to add the recommended settings.
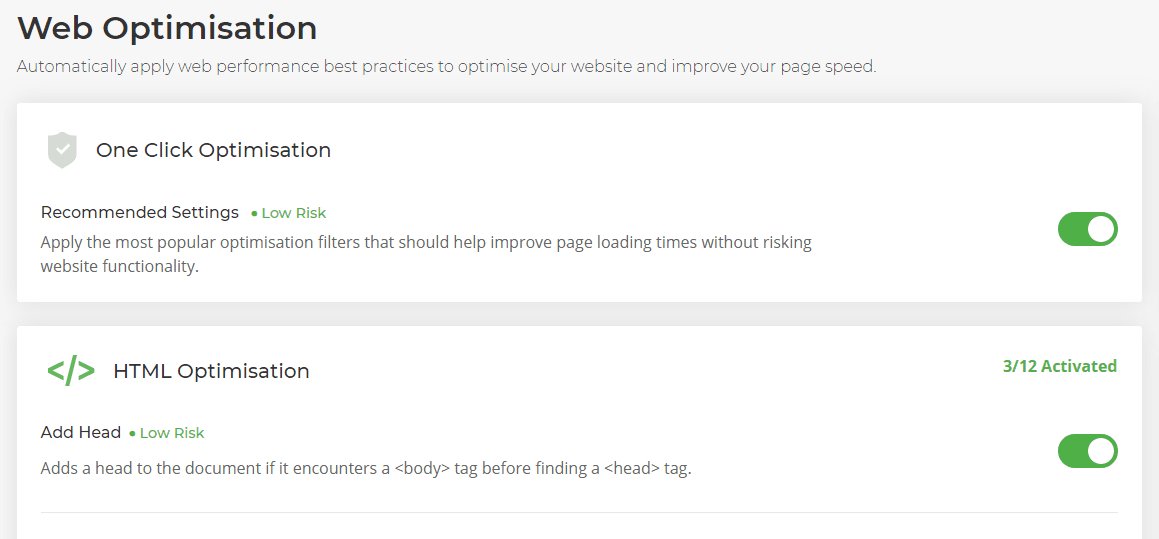
If you have created a set of unique optimisations, you can save that as a template to apply to other sites. Please see: How do I create a Web Acceleration Suite template?
Understanding the Website Acceleration Suite
Each optimisation is referred to as a filter as is designed to directly complement the recommends/audits Google PageSpeed Insights performs on your websites.
It avoids the need to manually carry out the recommended optimisations, helping your websites get the highest PageSpeed score possible.
How our Website Acceleration Suite supercharges your websites
Our Website Acceleration Suite slims-down the data payload of your site, without affecting its appearance or function.
Optimisations are done at the server level, this means you don't need multiple plugins to optimise your sites. Reducing the number of plugins itself will improve the performance of PHP and result in faster load times!
- Automatic image resizing: Slow-loading images are the bane of website performance. Our image CDN will scan your images and resize them for the appropriate size for mobile and desktop.
- Image compression: ‘Raw’ images often contain information that can be removed or compressed without a visible loss in quality. The 20iCDN will compress your images ‘on the fly’, saving you time.
- Next-Gen image formats: Our image optimisation tools will convert files to fast-loading next-gen image formats like JPEG 2000, JPEG XR, and WebP.
- Code minification: We can minify and strip whitespace from our code. Our CDN will compress HTML, CSS and JavaScript files to reduce time spent parsing, compiling and executing it. Network payload is reduced, so sites load faster.
- Lazy loading: Only load what’s going to be presented to the user immediately: what’s going to be seen first. Your above-the-fold content will appear in a browser more quickly by deferring off-screen images or other non-critical resources.
Here's a full list of the optimisation filters to accelerate your websites:
HTML Optimisation
Add Head
Adds a head to the document if it encounters a tag before finding atag.
Collapse Whitespace
Reduces the transfer size of HTML files by replacing contiguous whitespace with a single whitespace character.
Combine Heads
Attempts to combine multiple tags into one.
Convert Meta Tags
Adds a response header that matches each meta tag with an http-equiv attribute.
Elide Attributes
Reduces the transfer size of HTML files by removing attributes from tags when the specified value is equal to the default value for that attribute.
Extend Cache PDFs
A version of Extend Cache that acts on PDFs. Unlike 'Extend Cache' it applies not only to resources but also to hyperlinks.
Extend Cache
Seeks to improve the cacheability of a web page's resources without compromising the ability of site owners to change the resources and have those changes propagate to users' browsers.
Hint Resource Preloading
Uses resource preloading HTTP headers to inform browsers of CSS and JavaScript resources early in page processing, to permit them to fetch them earlier than would otherwise be possible.
Pre-Resolve DNS
Provides hints to the browser at the beginning of the HTML, which allows the browser to pre-resolve DNS for resources on the page.
Remove Comments
Eliminates HTML comments, which are often used to document the code or to comment out experiments.
Remove Quotes
Eliminates unnecessary quotation marks from HTML attributes.
Trim Urls
Trims URLs by resolving them by making them relative to the base URL for the page.
JavaScript Optimisation
Canonicalize JavaScript Libraries
Identifies popular JavaScript libraries that can be replaced with ones hosted for free by a JS library hosting service (the default is Google Hosted Libraries).
Combine JavaScript
Seeks to reduce the number of HTTP requests made by a browser during page refresh by replacing multiple distinct JavaScript files with a single one.
Defer JavaScript
Defer Javascript until after the page loads to avoid render blocking
Include JavaScript Source Maps
Source maps are files that tell browsers how to map between a minified JavaScript file and the original, readable version so that you can see the readable version while debugging minified production code.
Inline JavaScript
Reduces the number of requests made by a web page by inserting the contents of small external JavaScript resources directly into the HTML document. This can reduce the time it takes to display content to the user, especially in older browsers.
Move CSS Above Scripts
Seeks to make sure scripts do not block the loading of CSS resources.
Minify JavaScript
Rewrites JavaScript files to remove excess whitespace and comments. In OptimizeForBandwidth mode, the minification occurs in-place without changing URLs.
CSS Optimisation
Combine CSS
Seeks to reduce the number of HTTP requests made by a browser during page refresh by replacing multiple distinct CSS files with a single CSS file.
Fallback Rewrite CSS URLs
Parses linked and inline CSS, rewrites the images found and minifies the CSS.
Flatten CSS Imports
Reduces the number of HTTP round-trips by combining multiple CSS resources into one.
Inline CSS
Reduces the number of requests made by a web page by inserting the contents of small external CSS resources directly into the HTML document. This can reduce the time it takes to display content to the user, especially in older browsers.
Move CSS To <head>
Seeks to reduce the number of times the browser must re-flow the document by ensuring that the CSS styles are all parsed in the head, before any body elements are introduced.
Prioritize Critical CSS
Improves page render times by identifying CSS rules needed to render the page, inlining those critical rules and deferring the load of the full CSS resources.
Rewrite CSS
Parses linked and inline CSS, rewrites the images found and minifies the CSS.
Rewrite Style Attributes With URLs
Rewrite CSS inline style attributes that contain URLs, for example background-images can be targetted using this filter.
Image Optimisation
Convert to WEBP Animated
Converts animated images to WEBP animated images.
Convert to WEBP lossless
Converts any images to WEBP lossless.
Deduplicate Inlined Images
Reduce the transfer size of HTML files by eliminating redundant image data URLs.
Inline Images
Replaces references to small images by converting them to inline data: URLs, eliminating the need to initiate new connections for fetching the image data.
Inline Preview Images
Generates low quality versions of the images that are inlined in the HTML page. Users experience faster rendering of the page and the low quality images are replaced by high quality versions after an onload event is triggered.
Insert Image Dimensions
Adds width= and height= attributes to the tags if they are missing. Values for the width= and height= attributes are computed from the image.
Lazyload Images
Optimize browser rendering and reduce number of HTTP round-trips by deferring the loading of images which are not in the client's viewport.
Recompress Images
Recompresses images, removing excess metadata and transforming gifs into pngs.
Resize Images
Shrinks the dimensions of an image to the width= or height= attribute specified in the tag or in the inline style= attribute.
Resize Mobile Images
Generates low quality versions of the images that are inlined in the HTML page.
Resize Rendered Image Dimensions
Shrinks images to their rendered dimensions on the web page. Unlike resize_images, it ignores any width and height attributes specified for the images.
Responsive Images
Makes images responsive by adding srcset attributes which provide multiple versions for different pixel density screens.
Optimize Images
Performs common image optimizations, including recompression, transcoding to optimal formats, reduction of image dimensions, and inlining of small images into HTML or CSS.
Sprite Images
Detects GIF and PNG images used as backgrounds in CSS, and combines all such images referenced from a CSS file into a single large image. The individual CSS backgrounds are then rewritten to point to the single large image.
 Austin B.
Why is my Google PageSpeed score lower on mobile?
The main difference in the Google PageSpeed results between desktop and mobile is due to the way they're tested.
How is the mobile PageSpeed score tested by Google?
The mobile test is run with internet connection limits and a relatively-slow CPU. Currently, Google PageSpeed loads the web page as if it's on a mid-tier device (Moto G4) on a mobile network. The mobile network has these limits:
Latency: 150ms
Throughput: 1.6Mbps down / 750 Kbps up
Packet loss: none
More information about the network throttling can be found here.
Why is the mobile PageSpeed score low?
With this being the case, if your website is JavaScript-heavy, then you'll find that the less powerful mobile device - when compared to a desktop - will parse and process JavaScript much slower. This will lead to a longer load time. So it's important when optimising your site for mobile that you make sure that there is no unused JavaScript, and that any being used is well optimised.
How to improve a low PageSpeed score?
You can optimise the site with our Website Acceleration Suite, part of the free 20iCDN. You can use the JavaScript section to minifiy and optimised the JavaScript for the site and the image optimisation section to automatically create appropriately sized images for the mobile devices loading the site. More details on that here.
Unfortunately, this won't always get you a perfect score on mobile. This is because our tools won't ever remove Javascript from your site and Google PageSpeed Insights will still give a lower score for any unused Javascript on the page.
In most cases, to get a better score you'll need to make changes to the website's code, making sure that all JavaScript being loaded on any page is being used by that page.
 Dominic Elford

 Chris Wright