Virtual Private Server Questions
Virtual Private Server support articles: how to self-manage your 20i virtual private server; all you need to know about VPS.
How do I connect to my Windows virtual machine via Remote Desktop?
20i Self-Managed Virtual Private Servers using Windows Server can be accessed using Remote Desktop.
Remote Desktop is available as standard with Windows operating systems.
To connect from a Windows machine to a VPS using a Windows Server install:
- Via the Windows Start Menu on your local machine, search for Remote Desktop Connection
- Select Remote Desktop Connection, and you'll be be presented with a dialogue box
- Within the dialogue box, select Show Options
- Enter the IP address of the virtual machine within the Computer field
- Within the username field, enter Administrator
- Select Connect
From this point, you can manage the VPS with full Administrator privileges.
How do I back up my virtual machine automatically?
Thanks to our Snapshot Backups tool, you can back up your Unmanaged VPS quickly and easily.
The Snapshot Backups service will automatically create a full backup of your virtual machine.
Snapshot Backups can be bought by:
- Logging in to My20i
- Select Manage VPS from the My20i dashboard
- Select Options > Manage for the VPS in question
- Wtihin the VPS Management dashboard, select Snapshot Backups
- Select Add to Basket and make payment
After purchase, you'll have control over how often backups are taken, with daily, weekly, and fortnightly backups as options.
How do I upgrade my VPS?
Virtual machines can be upgraded at any time via the VPS dashboard.
To upgrade a VPS:
- Log in to My20i
- Select Manage VPS
- Select Options > Manage for the VPS in question
- Under the VPS Specification header, select Upgrade your VPS
From this point, you can decide which tier of virtual private server you'd like. The tier determines the specification of the virtual machine, in terms of available space, cores, and memory.
Once you are happy with the tier you have chosen, select Accept & Upgrade VPS.
Due to the nature of the change involved, a reboot of the VPS will be needed for the changes to be applied.
How do I raise an additional IP address on my CentOS virtual machine?
You can buy additional IPs for your 20i virtual machine.
You must raise the IP address on the virtual machine for it to begin working.
To begin, connect to the VPS using SSH.
After connecting via SSH, you will need to head to the network-scripts directory by using the following command:
cd /etc/sysconfig/network-scripts/
You'll then need to use the ifconfig command to check the current network interfaces. You should see something like this:
[root@vps-3f44d1 network-scripts]# ifconfig
eth0: flags=4163
inet 185.151.29.110 netmask 255.255.255.0 broadcast 185.151.29.255
inet6 fe80::5054:ff:fed1:de53 prefixlen 64 scopeid 0x20
ether 52:54:00:d1:de:53 txqueuelen 1000 (Ethernet)
RX packets 2840575155 bytes 183137039747 (170.5 GiB)
RX errors 0 dropped 0 overruns 0 frame 0
TX packets 20430463 bytes 3227329206 (3.0 GiB)
TX errors 0 dropped 0 overruns 0 carrier 0 collisions 0
Once you have determined the network interface, you'll need to use a text editor of your choice to create a file within the network-scripts directory (based on the network interface name).
In our example, we'll need to create a script with a name of ifcfg-eth0:1. Within that file, the following will need to be added:
DEVICE=“eth0:1”
IPADDR=”[the new additional IP address]”
NETMASK=”[the Subnet Mask for the IP address, which can be found via Manage VPS IP Addressing]”
ONBOOT=“yes”
Once added, you'll need to restart networking on the virtual machine using:
service network restart
Upon successfully restarting, the new additional IP address should be raised.
Building a MySQL instance on CentOS 7
You might need a larger database - for large ecommerce stores or complex sites, for example. To do this, you can configure a CentOS 7 VPS as a MySQL instance on an Unmanaged virtual private server.
This guide will show you how to build a MySQL instance using a 20i VPS.
Step 1 - Install MariaDB
You'll first need to install MariaDB - here's a guide: https://www.tecmint.com/install-mariadb-in-centos-7/
Once you've installed MariaDB you can test the installation by running the following:
[root@vps-b92a95 ~]# mysql -V
Which should give you:
mysql Ver 15.1 Distrib 10.1.44-MariaDB, for Linux (x86_64) using readline 5.1
Step 2 - Access MySQL
You can access MySQL with:
[root@vps-b92a95 /]# mysql -u root -p
You will then be prompted for the password, set when following the guide above. It might be easier to use the VPS password for convenience at this stage.
Enter password: Welcome to the MariaDB monitor. Commands end with ; or \g. Your MariaDB connection id is 15 Server version: 10.1.44-MariaDB MariaDB Server Copyright (c) 2000, 2018, Oracle, MariaDB Corporation Ab and others. Type 'help;' or '\h' for help. Type '\c' to clear the current input statement. MariaDB [(none)]>
Step 3 - Create the database
So now that MariaDB is installed, you will want to create the databases and database users within MariaDB.
To create a database:
[root@vps-b92a95 ~]# create database DATABASE_NAME;
If the site is to be hosted on the shared platform and the database is to be hosted on the VPS, you should create a user with remote access privileges.
So in this format:
[root@vps-b92a95 ~]# create user 'DATABASE_USER'@'%' identified by 'PASSWORD';
For example:
[root@vps-b92a95 ~]# create user 'wordpress_user'@'%' identified by 'password123!';
Now that the user and databases are created, you will want to grant all privileges.
[root@vps-b92a95 ~]# grant all privileges on DATABASE_NAME.* TO 'USER_NAME'@'%';
For example:
[root@vps-b92a95 ~]# grant all privileges on wordpress_testing.* TO 'wordpress_user'@'%';
Then let the privileges take effect:
[root@vps-b92a95 ~]# flush privileges;
You can check to see if the users and databases are accessible:
[root@vps-b92a95 /]# mysql -u wordpress_user -p wordpress_testing Enter password: Welcome to the MariaDB monitor. Commands end with ; or \g. Your MariaDB connection id is 18 Server version: 10.1.44-MariaDB MariaDB Server Copyright (c) 2000, 2018, Oracle, MariaDB Corporation Ab and others. Type 'help;' or '\h' for help. Type '\c' to clear the current input statement. MariaDB [wordpress_testing]>
Step 4 - Upload the .SQL file
Once you're happy with the database and user access, you can now look at uploading the database file to the server. You can use WinSCP if you're a Windows user. When the file is uploaded, you'll need to import the file:
[root@vps-b92a95 ~]# mysql -u DATABASE_USERNAME -p DATABASE < importedfile.sql
For example:
[root@vps-b92a95 ~]# mysql -u wordpress_user -p wordpress_testing < wordpress-3132333666.sql
Now that the database is imported you should open the firewall for the incoming MariaDB connections:
[root@vps-b92a95 ~]# firewall-cmd --permanent --add-service=mysql && firewall-cmd --reload
Conclusion
So that's the server all set up and ready. You would need to update the configuration file to connect to the database on the VPS, and you should be good to go.
How do I migrate from an Unmanaged VPS to Managed Hosting on a VPS?
With any Managed Hosting package you'll get full access to the Migration Centre. It gives you a few easy migration options.
Unmanaged VPS with cPanel ➡ Managed Hosting on a VPS
- Log in to My20i
- Select Start a Migration.
- Choose WHM/cPanel from the list and click Next.
- Enter the required credentials: hostname, username and the password for cPanel/WHM, and click Next.
- You can then choose your Managed VPS from the Service Target dropdown menu and Package Bundle Type.
- Go to Migrations Overview in My20i at any time to see the status of your migration. You’ll be notified when it’s successfully completed.
Unmanaged VPS with WordPress➡ Managed Hosting on a VPS
The best way to migrate a WordPress site from unmanged VPS is by using a WordPress migration plugin. We'd recommend using All-in-One WP Migration
https://en-gb.wordpress.org/plugins/all-in-one-wp-migration/
Unmanaged VPS with a Custom Site ➡ Managed Hosting on a VPS
To migrate a custom site when you don't have a control panel or isn't WordPress would be a manual migration.
Can I install ZeroMQ on the shared hosting platform?
No.
ZeroMQ can't be installed on the shared platform (Web Hosting & WordPress Hosting) as it requires root access to run sudo commands and to have additional modules installed.
If you'd like to run ZeroMQ you can use an Unmanaged VPS.
How do I order an Unmanaged VPS with cPanel?
To order a Virtual Private Server (VPS) with cPanel included, you should:
Login to My20i and head to Order VPS.
In Step 1, Select Unmanaged.
In Step 2, Choose the specification of the VPS based on your needs: Number of cores, Amount of RAM/memory and the amount of SSD storage.
In Step 3, Select the Data Center where you would like the VPS to be provisioned: London, UK or Dallas, US.
In step 4, You can select Cpanel and choose the type of license you need. This is licensed based on the number of sites you wish to host. The options are:
- Max 5 Sites
- Max 30 Sites
- Max 50 Sites
- Max 100 Sites
These can be upgraded to a higher tier in the future if required.
In Step 5, You need to select your Operating System from either Alma Linux 8/9 or Rocky Linux 8/9 as both currently support cPanel. We recommend choosing Alma Linux as it has the biggest support community.
In Step 6, you can add our Snapshot Backup addon to the server which you can set an automatic snapshot to take place on a daily, weekly or fortnightly basis. This will take a backup of the image of your VPS.
In Step 7, you can also add Additional Disks in the form of Block storage which we have more information about here
Once you have selected everything you need, you can choose the Payment frequency on the right-hand side of the page to choose either Monthly or yearly renewal periods and click Add to Basket to continue with the purchase.
Once you have purchased an unmanaged VPS with Cpanel the server will be provisioned and Cpanel will be automatically installed.
Can I upgrade from an Unmanaged VPS to a Managed VPS?
Unmanaged VPS and Managed Hosting on a VPS are different services. So it isn't possible to simply upgrade from Unmanaged to Managed through our dashboard.
You may be able to migrate from one to the other. For more information we'd recommend viewing: How do I migrate from an Unmanaged VPS to a Managed VPS?
How can I access my unmanaged VPS if I have lost external network access?
If you lose access to your virtual machine because of an incorrect firewall rule, or a software update gone wrong, you can still gain access by using VNC.
VNC can be used on both Linux and Windows virtual machines running on self-managed 20i virtual private servers.
Using VNC
To use/enable VNC, you will need to do the following:
- Head to My20i and select Manage VPS.
- Select Options > Manage for the VPS you intend to do this with.
- Select Rescue VPS.
- Under Unlock VNC by IP Address enter the IP address you wish to unlock VNC access for and select Unlock.
- Make a note of the VNC Hostname - this should say something like 'vnc.stackvps.com:6157'. Also make a note of the password.
- With both the VNC hostname and password, use a VNC client (such as Tight VNC) to gain access to your virtual machine.
How do I set up Load Balancing on an Unmanaged VPS?
20i Load Balancers distribute traffic across multiple virtual private servers (VPS) to create better-performing, more robust infrastructure for your HTTP and TCP applications.
Setting up a Load Balancer is a two-step process. Firstly, adding the Load Balancer, and then choosing the VPS you’d like to balance the traffic between. VPS can be added or removed as required.
Each Load Balancer is assigned a single unique IP. This becomes the target address for your website or applications.
What improvements am I likely to see?
Your apps will be more available and perform faster by having more resources to draw from.
If you’re already using the 20i VPS platform in a highly available way, you’ve probably got at least three servers: one VPS acting as a Load Balancer and the other two serving the requests.
By using 20i Load Balancing, it’s a) managed by us b) scaled by us and c) completely highly available. You will no longer need that Load Balancer server. So that not only means there’s one less server to maintain, you also don’t need to worry about that server’s capacity management.
Before you begin
You’ll need at least two Unmanaged VPS to distribute incoming requests between. Each VPS will need to contain identical content so that all balanced requests receive the same content.
Ordering a Load Balancer
To order a Load Balancer, head to Manage VPS > Manage Load Balancing > Order Load Balancer. They cost £9.99/month and allow load to be balanced between up to 10 virtual machines.
Assigning guests to your Load Balancer
Assigning your VPS to your Load Balancer is quick and easy:
- Head to Manage VPS > Manage Load Balancing
- Select Options > Configure Guests
- Select the VPS you’d like to balance load between and select Save.
You can now use the IP address as the target address. For example, for an A record, load will then be balanced between your selected guest machines.
Configuring your Load Balancer
There are several configurable options you can set to get desired behaviour and best performance from your Load Balancer.
To manage and configure your Load Balancer:
- Head to Manage VPS > Manage Load Balancing
- Select Options > Manage
Here’s what you can configure:
Name
This is what you’d like your Load Balancer to be called. This is just for your reference.
Location
At present, Load Balancers are only based in the UK. We’ll be working on further deployment locations shortly.
Balancing Algorithm
The load balancing algorithm determines what method the Load Balancer uses to divert traffic between your selected guest machines. There are three available options for the algorithm:
- Least connection - balances to the server with the least number of connections
- Source - balances a single client IP to the same server (as long as it’s healthy)
- Round robin - balances to a server in sequence (A>B>C>A…)
Mode
- HTTP – Standard HTTP load balancing routes requests using the standard HTTP protocol. For example, if you’re distributing requests between two web servers, you’d select HTTP.
- TCP – TCP load balancing is required for applications or infrastructure that doesn’t use the HTTP protocol. For example, if your Load Balancer is deployed in front of two database instances, you’d need to use TCP.
Domains
In HTTP mode you need to tell the Load Balancer which domains you want to be balanced between. This also allows us to do SSL offloading.
Healthcheck URL
A healthcheck verifies that the virtual machines are live and reachable. The Load Balancer does this by periodically sending a request (ping) to check that status of the attached servers. If a virtual machine fails a healthcheck, the Load Balancer stops traffic to that instance and routes traffic to another live server.
A healthcheck URL will continue to be checked even if an instance is down. This way, when the instance becomes live again the Load Balancer will begin balancing requests back to that server. All servers that are assigned to the Load Balancer are checked via the same healthcheck URL.
Interval
This is the frequency at which a healthcheck is run. By default, this is set to 5000ms (i.e., 5 seconds).
Rise/Fall
The rise is the number of successful checks before a server is put back in balancing after a failure. The fall is the number of failed checks before a server if taken out of balancing.
Accept Proxy
Accept proxy (proxy protocol) forwards client information through the Load Balancer to the attached backend guest instances. A human-readable header is added to the request with information such as the original client IP address.
This may help in situations where you need to access the original client information in your logs, or for other purposes. You must make sure your VPS are configured to process the proxy protocol information.
What is a PTR record?
PTR (or DNS pointer records) are records that associate a domain name with an IP address. They serve as the reverse of an A record – rather than having a hostname or domain associated with an IP address, the IP address is instead associated with a hostname. These can be used in reverse DNS lookups, providing the hostname or domain when the IP is queried.
How do I set up a PTR record on Shared Hosting?
In order to set up PTR records with 20i, you’d need one of our Self-Managed solutions – it isn’t currently possible to set up a PTR record on the 20i shared hosting or Managed Cloud hosting.
How do I set up a PTR record on a Self-Managed VPS?
Many people like to configure reverse DNS for their virtual machine IP address(es). This is often done for several reasons, with the main purpose generally being white-labelling.
To do this:
- Choose Manage VPS in My20i
- Select Options > Manage for the VPS you intend to do this with.
- Select Manage IP Addressing.
You should then see the IP address, subnet mask, default gateway, and hostname for the virtual machine, the latter of which can be changed.
To configure reverse DNS, the hostname you intend to use must be set to point to the VPS beforehand.
For example, if the IP address you were doing this for was 185.151.31.186, and you wanted to use 20isupport.com as the hostname, you would point the non-www A record for 20isupport.com to 185.151.31.186. This process would be the same for any hostname you wish to use.
Once you have the appropriate A record in place, select Edit under Hostname.
Enter the hostname you want to use - which should have been configured to point to the IP address you’re doing this for beforehand - and Save.
How do I add a VPS Private Network?
Private Networks allows servers to communicate with each other without exposing the traffic to the public internet. A second network interface is added to your servers which you can assign a private IP to that’s not publicly accessible. This is perfect for VPS-to-VPS communication.
As an example, if you wanted to build your own hosting network, you could use two Unmanaged VPS as web servers, and two as database servers. Your web servers would need to reach the internet via their public network interface as normal, but they could speak to the database servers over a private network. In the same way, the database servers can replicate with each other over their private network. In this example, you could even disable the database servers public internet so they cannot be accessed via the internet for security reasons.
Each private network runs over a 1G bps network port. Bandwidth is unmetered.
To add a private network:
- Head to Manage VPS > Manage Private Networks
- Select Create a New Private Network and enter a Description/Name for your network. This is for display purposes only. Select Update.
You’ll now need to assign the private network to your VPS.
- Head to Manage VPS and on the VPS you’d like to add to your private network, select Options > Manage > Manage Networking
- Select Assign to Network and choose the network you’d like to use from the drop-down menu. Select Add.
Your VPS is now assigned to your private network.
You will now need to configure the network interface on your server. The way in which you’ll do this depends on what OS you’re running.
How do I point my domain to my Unmanaged VPS?
If you’ve purchased an Unmanaged VPS from 20i, you can point an existing domain to it. You need to replace the A record of the domain name to the IP address of the VPS.
At 20i you’ll have two A records that should look similar to these:
domain.com -> A Record -> IP Address
*.domain.com -> A record -> IP Address
All you need to do is replace the default IP address with the VPS IP address:
domain.com -> A Record -> VPS IP Address
*.domain.com -> A record -> VPS IP Address
Allowing about an hour for propagation, the domain should then point to the VPS.
IPv6
You don't need to add an IPv6 address to your domain for it to work as ISP's will automatically point you to the IPv4 (A record) address if there is no IPv6 (AAAA record) for the domain. If you want to add a IPv6 address for your domain to point to your VPS though that can be done by going to here > Options > Manage > Manage Networking.
From here you can then click Request IPv6 Address to get a range for your VPS. From the given range you'll then just need to point your domain via an AAAA record to a particular IPv6 address from the given range.
Initial Server Setup with CentOS 7
When you buy your CentOS 7 server this will be automatically provisioned and built for you. From there you should be able to find it in the Manage VPS section of your account. Selecting Options > Manage from the Manage VPS page will take you to the overview for your VPS.
From here you can find the root login details at the time the VPS was provisioned. Please note that if you update these details, the UI will not also update - so take care when changing the root password.
This article goes through what you should do to create a solid base for your new server, before installing or configuring any software or services.
Step 1 - Logging in
Initially, there will only be the root account set up. You'll first want to note the username for the server which should always be root and the given password and IP address on the right hand side of the VPS overview page. The password can be seen be clicking on the eye symbol.
You can connect to VPS using these details by following our guide here.
The root user is an administrative user and has full access rights to everything on the VPS. With this in mind we'd discourage you from using it on a regular basis. This is because root user access can make very devastating changes and mistyping a single command could potentially cause unfixable damage to the server.
With that in mind, we'll now go through creating a new user with reduced privileges.
Step 2 - Creating a User
Once you're logged into the server using the default root details, you can create a new user. This example creates the user admin but you can use whatever name you like.
# adduser admin
Next we set a password for the new user:
# passwd admin
Changing password for user admin. New password: Retype new password: passwd: all authentication tokens updated successfully.
From here the user will be ready to be used. We'll also want to give them access to the sudo command, so that they can run commands as root when needed.
Step 3 — Granting Administrative Privileges
Now we have our normal user account, we'll want to give them increased privileges. We do this because sometimes you'll need to run commands as root and we don't want to be swapping between this user and root all the time.
What we're going to do is make our user a "superuser". This means that will have access to the sudo command - meaning they can run other commands as if they are the root user.
To do this we're going to add them to the wheel group. The wheel group in CentOS 7 is a default group that allows users to use the sudo command.
We'll need to use our root user and run the command below, replacing admin with whatever you called your user.
# usermod -aG wheel admin
Now if you log in with your new user you can type sudo before other commands to run them as if you were the root user.
Step 4 — Setting Up a Simple Firewall
Firewalls provide some simple security for your server. They're responsible for stopping traffic going to every port on your server with the exception of those that you've approved specifically. CentOS has a service called firewalld to do this and the tool used to configure this service is called firewall-cmd.
First you'll want to install firewalld with the following command:
# dnf install firewalld -y
As the default settings for firewalld allow for SSH connections we can turn the service on straight away:
# systemctl start firewalld
Then we can check the status of the service to make sure it's started:
# systemctl status firewalld
That should give you something like:
● firewalld.service - firewalld - dynamic firewall daemon Loaded: loaded (/usr/lib/systemd/system/firewalld.service; enabled; vendor preset: enabled) Active: active (running) since Tue 2021-07-13 13:26:32 BST; 4min 54s ago Docs: man:firewalld(1) Main PID: 18518 (firewalld) Tasks: 2 (limit: 11222) Memory: 24.5M CGroup: /system.slice/firewalld.service └─18518 /usr/libexec/platform-python -s /usr/sbin/firewalld --nofork --nopid
You can see this is both active and enabled. This means that it will start by default when and if the server is rebooted.
Now we have the servive running we can use firewall-cmd to retrieve and apply policies to the firewall.
We'll first list the services already allowed:
# firewall-cmd --permanent --list-all
Which give us:
public target: default icmp-block-inversion: no interfaces: sources: services: cockpit dhcpv6-client ssh ports: protocols: masquerade: no forward-ports: source-ports: icmp-blocks: rich rules:
Then to get other services you can enable by name, you run:
# firewall-cmd --get-services
And to add a service that should be allowed through the firewall you use the --add-service flag:
# firewall-cmd --permanent --add-service=http
Running the above would add the http service and allow TCP traffic to port 80. You'll then need to reload the firewall:
# firewall-cmd --reload
Going forward, keep in mind that you have to open the firewall with services or ports for any additional services you may configure later.
Step 5 — Enabling Access for Your None-Root User
Now that we have a normal non-root user, we'll need to make sure that we can use it to access the server.
Like how we accessed the root user originally with a password, you should now be able to make a similar connection to the server using the user we have created.
If you're connecting from PuTTY you'll just need to use the new username when connecting in place or root.
If you're connecting from a Linux server you'll just need to use the command:
# ssh admin@yourServerIP
Then enter the password you set when prompted.
Once connected, keep in mind that to run a command with administrative privileges you have to type sudo before it like so:
# sudo command_to_run
To improve the servers security, we would strongly recommend setting up SSH keys instead of using password authentication. To do that you can follow our guide here on setting up SSH Key's for CentOS 7.
Conclusion
From here you have a good foundation for your server. You can now install any software you may need on your server.
Discover Powerful VPS Infrastructure
Get Started Now
How do I add a Let's Encrypt certificate to my Unmanaged VPS?
Unlike our shared web hosting platforms, some manual intervention is required to enable and install Let's Encrypt certificates on a 20i Unmanaged VPS. The process of installing Let's Encrypt certificates depends on the operating system in use, and whether or not one is using a control panel, such as cPanel.
cPanel
To install a Let's Encrypt SSL on a cPanel VPS you'll need to do the following.
1). Login to the VPS via SSH.
2). Once logged in, preferably as root, or a user with sudo access, run the following command:
/scripts/install_lets_encrypt_autossl_provider
Once ran, the Let's Encrypt plugin will be installed.
Once installed, you will then be able to issue a Let's Encrypt certificate via the WHM interface. Specifically, you will need to access Home > SSL/TLS > Manage AutoSSL.
Within the Manage AutoSSL section, you will need to select Let's Encrypt from the list of available AutoSSL providers. Once selected, agree to the terms of service, and select 'Save'.
After agreeing to the terms of service, you will then be able to issue certificates for the users/domains/accounts on the VPS.
This can then be done by selecting the 'Run AutoSSL For All Users' facility, which will then subsequently attempt to issue Let's Encrypt certificates for all users. Alternatively, certificates can be issued on a user by user basis by selecting 'Manage Users' on the 'Manage AutoSSL' page.
CentOS 6
For those without a control panel, Let's Encrypt certificates can be installed through the installation and use of Certbot.
To get started, you'll need to access the VPS via SSH, as either the root user, or a user with sudo privleges.
Once you've logged into your VPS, you'll need to run the following commands:
wget https://dl.eff.org/certbot-auto
sudo mv certbot-auto /usr/local/bin/certbot-auto
sudo chown root /usr/local/bin/certbot-auto
sudo chmod 0755 /usr/local/bin/certbot-auto
You'll then need to run Certbot to grab and install your certificates. The exact command you need to run will differ depending on whether you're running an Apache setup, or an Nginx setup.
For those running an Apache setup, you will need to run the following:
sudo /usr/local/bin/certbot-auto --apache
Those running Nginx will need to run:
sudo /usr/local/bin/certbot-auto --nginx
Upon the enacting of either command, you may then be prompted to install a number of packages and dependencies. If this happens, once the list of packages and dependencies are present, simply enter 'Y' to accept and install.
Once the packages and dependencies have been installed (if you were prompted to do so), Certbot will then prompt you to enter several credentials.
Firstly, you'll be prompted to enter an email address for any urgent renewal or security notices. This can be anything you like, though we recommend ensuring it is an address you manage, and have access-to. Once you have entered the email address, press 'ENTER' on your keyboard.
Subsequently, you'll then be prompted to accept the Let's Encrypt Terms of Service, which must be accepted in order to be able to issue certificates. To accept, simply enter the letter 'A' and press 'ENTER'.
You will then be prompted to share your email address with the Electronic Frontier Foundation. Sharing your email address is up to you. To share, you will want to enter the letter 'Y', and then press 'ENTER'. Conversely, if you do not wish to share your email address, enter the letter 'N', and press 'ENTER'.
Once complete, a list of available domains will be displayed in a numbered menu. The numbered menu is generated based on the virtualhosts/domains defined in your Apache/Nginx configuration file. To install a certificate for a particular domain, you'll need to enter the number(s) you desire, and 'ENTER'.
A certificate will then be generated and installed for your chosen domain(s).
To ensure that the certificate renews automatically in the future, you may want to ensure a cronjob has been set-up to renew it automatically. This can be done by running the following command:
echo "0 0,12 * * * root python -c 'import random; import time; time.sleep(random.random() * 3600)' && /usr/local/bin/certbot-auto renew" | sudo tee -a /etc/crontab > /dev/null
CentOS 7
The setup of Certbot via CentOS/RHEL 7 is slightly different to that of CentOS 6.
Firstly, you'll want to ensure that the Extra Packages for Enterprise Linux (EPEL) repository has been enabled. To enable the EPEL repository, run the following command:
sudo yum install epel-release
Once you have enabled access to the repository, you can then run the following to install Certbot:
sudo yum install certbot python2-certbot-apache
If you are running Nginx, you will need to run the following:
sudo yum install certbot python2-certbot-nginx
Once installed, you can then look to issue a certificate for any of the domains/virtualhosts mentioned in your Apache and Nginx configuration files.
To begin the process for Apache servers, run the following:
sudo certbot --apache
For Nginx, you will need to run:
sudo certbot --nginx
Again, as with the CentOS 6 example above, you'll be prompted to enter information, i.e. an email address through which you can be contacted, whether you agree to the Let's Encrypt Terms of Service, and whether you wish to share the entered email address.
Next, you'll be prompted to enter the number of the domain/virtualhost for which you would like to install a Let's Encrypt certificate. Enter the number you desire, and then press 'ENTER' on your keyboard.
Once issued, you will then want to set-up the automatic renewal of your Let's Encrypt certificate(s) by running the following command:
echo "0 0,12 * * * root python -c 'import random; import time; time.sleep(random.random() * 3600)' && certbot renew" | sudo tee -a /etc/crontab > /dev/null
How To Set Up SSH Keys on CentOS 7
SSH or the Secure Shell Protocol is a protocol used to enable computers and servers to communicate. An important feature of SSH is that it's always encrypted: meaning it can allow two computers to communicate securely over an insecure network.
Here we'll go through setting up SSH keys for a CentOS 7 server. SSH keys are a straightforward and secure method of connecting to logging into your server and are recommended for all users.
Step 1 — Creating a RSA Key Pair
The first step is to create a key pair on the client machine, the one that will make the connection. This is usually your local computer.
This can be done with:
$ ssh-keygen
The default behaviour of ssh-keygen is to create a 2048-bit RSA key pair. For most use cases this is strong enough but you can also create a 4096-bit key by amending the command with the flag -b 4096
After running the command you should see output like the following:
Generating public/private rsa key pair. Enter file in which to save the key (/yourHomePath/.ssh/id_rsa):
You'll need to press ENTER here to save the key pair into the .ssh subdirectory in your home directory. Or you can specify a different path altogether.
If you already have a key in the given location you may see a prompt like the following:
/yourHomePath/.ssh/id_rsa already exists. Overwrite (y/n)?
If you choose to overwrite the old key that will delete it and so the old key will no longer be usable. As such you'll need to be careful when doing this.
You'll then see the following prompt:
Enter passphrase (empty for no passphrase):
Here you can set a passphrase for the key pair. This is recommended for increased security as it prevents unauthorised users from using said key pair.
You should then see:
Your identification has been saved in /yourHomePath/.ssh/id_rsa. Your public key has been saved in /yourHomePath/.ssh/id_rsa.pub. The key fingerprint is: a9:49:2e:2a:5e:33:3e:a9:de:4e:77:11:58:b6:90:26 username@remote_host The key's randomart image is: +--[ RSA 2048]----+ | ..o | | E o= . | | o. o | | .. | | ..S | | o o. | | =o.+. | |. =++.. | |o=++. | +-----------------+
You now have a public private key pair you can use to authenticate connections. We'll next need to copy the private key onto our server.
Step 2 — Copying the Public Key to Your Server
The quickest method of copying your public key to to your server is to use a utility called ssh-copy-id. If you don't have ssh-copy-id available to you there are two other methods that can be used which we will cover later in this article.
Copying your Public Key Using ssh-copy-id
The ssh-copy-id utility is included as standard with many operating systems. As such you may already have it on your local system. However, for this to work you must already have password-based SSH access to your server.
To use the tool you'll only need to specify the remote host you would like to connect to and the user account you have password SSH access to. This is the account your public SSH key will be copied to:
$ ssh-copy-id username@remote_host
When doing this you may get the following message:
The authenticity of host '45.8.225.59 (45.8.225.59)' can't be established. ECDSA key fingerprint is fd:fd:d4:f9:77:fe:73:84:e1:55:00:ad:d6:6d:22:fe. Are you sure you want to continue connecting (yes/no)? yes
This means your local system doesn't recognise the host you're connecting to. This will happen whenever you first connect to a new host. Type yes and press ENTER to continue.
The tool will now scan your local account for the id_rsa.pub key we created. Once it has found the key it will ask you for the password for the remote user's account:
/usr/bin/ssh-copy-id: INFO: attempting to log in with the new key(s), to filter out any that are already installed /usr/bin/ssh-copy-id: INFO: 1 key(s) remain to be installed -- if you are prompted now it is to install the new keys username@45.8.225.59's password:
Enter the password and press ENTER. ssh-copy-id will then connect to the account on the other server and copy the contents ~/.ssh/id_rsa.pub into your remote account's ~/.ssh/authorized_keys file.
You should then see the following:
Number of key(s) added: 1 Now try logging into the machine, with: "ssh 'username@45.8.225.59'" and check to make sure that only the key(s) you wanted were added.
Your id_rsa.pub key should now have been uploaded to the the account on your remote server. You can continue on to Step 3.
Copying the Public Key Using SSH
If you don't have ssh-copy-id available but you do have password-based SSH access to the remote server; you can upload your keys using a more conventional method.
We can do this using the cat command to read the contents of our public SSH key on our local system and piping that through an SSH connection to the remote server
On the other server we also need to make sure that the ~/.ssh directory exists and that it has the correct permissions under the account we're using.
We can then output the content we piped-over key into a file called authorized_keys within this directory. We'll use the >> command to amend the content to the file without overriding existing content. This will avoid removing any previously added keys.
The full command then looks like so:
$ cat ~/.ssh/id_rsa.pub | ssh username@remote_host "mkdir -p ~/.ssh && touch ~/.ssh/authorized_keys && chmod -R go= ~/.ssh && cat >> ~/.ssh/authorized_keys"
When doing this you may get the following message:
The authenticity of host '45.8.225.59 (45.8.225.59)' can't be established. ECDSA key fingerprint is fd:fd:d4:f9:77:fe:73:84:e1:55:00:ad:d6:6d:22:fe. Are you sure you want to continue connecting (yes/no)? yes
This means your local system doesn't recognise the host you're connecting to. This will happen whenever you first connect to a new host. Type yes and press ENTER to continue.
You should then be asked for the remote users password:
username@45.8.225.59's password:
After entering your password the contents of your d_rsa.pub key will be copied to the end of the authorized_keys file of the remote user’s account. You can now continue to Step 3 if this was successful.
Copying the Public Key Manually
If you do not have password based SSH access to your server you may have to complete the process manually.
We'll now go through manually amending the content of your id_rsa.pub file to the ~/.ssh/authorized_keys file on your remote server.
To see the contents of your id_rsa.pub key you can type this into your local computer:
$ cat ~/.ssh/id_rsa.pub
You will see the keys content which should look similar to this:
ssh-rsa AAAAB3NzaC1yc2EAAAABIwAAAQEAuU1IPiy3Jrtylyx6sB0ZkfgxphvYCqzJmOJ7p0zTyg9VEPK7C1B8zhT8c3pGlhckDoZPqlvOOgFXlTaG9YfQlvhCuEPkK7OreGvrK/f1Gf7fC6RjcN+ukUa3YPPWEb4PUmA8lSSKSLzFCbXzI7rRDgsbhJJt857vAvFCjVoF8gPOPuj7wytYXgewuXeLtNC0WTKTKDxUT+Jps5lfwQfWS3slju2565ENRr5IuriinKa5hzzcKPGYmA9PFMlYqN2GQyVq4bsvc+/oBXnMK2UMN/wL3HuheJuVN9esY6tlFE5eXvxeVEWnAgowDYv8HHO2sLMLX9CAKLh7TB1WVh5/Uw== admin@example.server
Now log in to your remote server using whatever method you have available to you.
Once in, you should make sure that the ~/.shh directory exists. If not, you can create the directory with the following command. If the directory does already exist, this won't do anything:
$ mkdir -p ~/.ssh
Now you can create or update the authorized_keys file in this directory. You'll need to add the content of your id_rsa.pub to the end of the authorized_keys file, creating it if needed, using the command:
$ echo publicKeyString >> ~/.ssh/authorized_keys
In the above command the publicKeyString is the output from the command cat ~/.ssh/id_rsa.pub we ran before.
Lastly we'll need to ensure that the ~/.ssh directory and authorized_keys file have the correct permissions set:
$ chmod -R go= ~/.ssh
This command will recursively remove all group and other permissions for the ~/.ssh directory.
If you're using the root account to set up the keys for a user account then it's also important you make sure that the ~/.ssh directory belongs to the intended user and not to the root user:
$ chown -R admin:admin ~/.ssh
In this example our user is named admin but you should substitute that with the name of the appropriate user when running the above command.
We should now be able to connect to our server using key-based authentication.
Step 3 — Logging In to Your Server Using SSH Keys
If you have completed one of the above procedures you should now be able to log into your remote server without the need remote user account's password.
The process begins the same as with password-based authentication:
$ chown -R admin:admin ~/.ssh
When doing this you may get the following message:
The authenticity of host '45.8.225.59 (45.8.225.59)' can't be established. ECDSA key fingerprint is fd:fd:d4:f9:77:fe:73:84:e1:55:00:ad:d6:6d:22:fe. Are you sure you want to continue connecting (yes/no)? yes
This means your local system doesn't recognise the host you're connecting-to. This will happen whenever you first connect to a new host. Type yes and press ENTER to continue.
If you did not set a passphrase for the key pair earlier then you will be logged in straight away. If you did set a passphrase then you should be asked to enter it now. After doing so a new shell session should open for you with the configured account on the server.
If the key-based authentication worked then you can continue with the next step to learn how to further secure your system by turning off your server's SSH password based-authentication.
Step 4 — Disabling Password Authentication on your Server
If you've been able to log in to your server using SSH without a password (with the expectation of any passphrase set for the key pair), you have successfully set up key based authentication for your remote account. However, the password-based authentication is still active - so the server is still vulnerable to brute-force attacks.
Before you continue with this step please make sure you have either SSH-key-based authentication configured for the root account on this server, or preferably, that you have SSH-key-based authentication configured for a non-root account on this server with sudo privileges. To see how to create a non-root user, please see this article: Initial Server Setup with CentOS 7.
This step will disable password-based authentication to the server, so making sure you will continue to have administrative access is critical.
Now you've confirmed that your remote access has administrative privileges you can login to your remote server with the SSH keys we've just set up, as either root or with an account that has sudo privileges. Then open the SSH daemon’s config file:
$ sudo vi /etc/ssh/sshd_config
Once inside the file you'll want to search for a directive called PasswordAuthentication. This maybe commented out using a hash #. If you then press i to put vi into INSERT mode, you can uncomment the line by deleting the # and setting the value to no. This will disable password-based authentication for the SSH access to the server:
... PasswordAuthentication no ...
Once you have made the change you'll need to hit ESC, then type :wq and hit ENTER to write the changes to the file and quit out of it.
Then to actually implement the changes to the server you'll need to restart the sshd service:
$ sudo systemctl restart sshd
Then, as good practice you should open up a new terminal window and test the SSH service is functioning correctly before closing the current session:
$ ssh username@remote_host
Once you have confirmed that the SSH service is still working as expected, you can safely close all current server sessions.
The SSH daemon on your server now only allows the use of SSH keys. Password-based authentication has been disabled.
You should now have SSH-key-based authentication configured on your server, allowing you to sign in without needing an account password.
Discover Powerful VPS Infrastructure
Start Now with the best VPS hosting
How do I connect to an Unmanaged VPS using SSH?
Unmanaged Virtual Private Servers from 20i are pre-configured to be accessible using SSH.
To connect to your VPS via SSH you’ll need to make sure you have an SSH client available in order to connect - If you’re running Mac OS or Linux you should be able to utilise your terminal application to connect. If you’re running Windows we’d recommend downloading and using PuTTY to connect.
https://www.chiark.greenend.org.uk/~sgtatham/putty/latest.html
In this guide, we’ll describe how to use PuTTY to connect.
- In My20i, select Manage VPS.
- Head to Options -> Manage on the VPS you wish to connect to.
- In the VPS Information section on the right-hand side, you’ll note the IP Address, Username and Password.
- Open PuTTY and in the Host Name (or IP address) field, add the IP address from the VPS Information section. Select Open.
- You should be prompted with login as: to which you’ll just need to enter the username.
- Finally, you’ll then be prompted for the password, simply enter the password for the VPS as found in the control panel.
You should now be connected to your VPS via SSH.
20i Block Storage
20i's Block Storage technology allows you to add additional, high performance storage to your VPS. The cloud data storage is highly available, redundant, and SSD backed.
If you need big data cloud storage, you can deploy volumes as large as 10,000 GB.
Add Block Storage
To add Block Storage to your 20i VPS you need to first navigate to the Manage VPS page within your 20i account.
From there you will need to Options > Manage on the VPS you want and then Manage Disks. From here you can select the Disk Size you want to add via a drop down in the Add Block Storage section and Order Disk.
We will then assign your storage to the VPS. If you go back to the Manage VPS page you should be able to to see the Status for the VPS is now Busy. Once this goes back to Active your new storage has been added.
Mounting Block Storage on a Linux OSBy default we do not create any file systems on the block storage volumes. You can use the below steps to initialise, delete all data and mount the block storage volume.
-
Check the device name on the Manage Disks page for the VPS accessible from the VPS's overview page. The first block storage device will be connected to your server as /dev/vdb. Additional devices will be labeled as /dev/vdc, /dev/vdd etc. You can use the lsblk command to verify the devices name. The below example shows a 50GB volume available as /dev/vdb
# lsblk NAME MAJ:MIN RM SIZE RO TYPE MOUNTPOINT sr0 11:0 1 370K 0 rom vda 252:0 0 50G 0 disk └─vda1 252:1 0 50G 0 part / vdb 252:16 0 50G 0 disk
-
Create a new disk label using parted.
# parted -s /dev/vdb mklabel gpt
-
Make a primary partition to fill the entire disk.
# parted -s /dev/vdb unit mib mkpart primary 0% 100%
-
Create an EXT4 filesystem on the primary partition and format it.
# mkfs.ext4 /dev/vdb1
-
Make a mount point.
# mkdir /mnt/blockstorage
-
Add a blank line and a mount entry to /etc/fstab. This will automatically mount the block storage at /mnt/blockstorage at reboot.
# echo >> /etc/fstab # echo /dev/vdb1 /mnt/blockstorage ext4 defaults,noatime,nofail 0 0 >> /etc/fstab
You can also manually mount the block storage without rebooting.
# mount /mnt/blockstorage
By default we do not create any file systems on the block storage volumes. You can use the below steps to initialise, delete all data and mount the block storage volume.
The following instructions are based on a Windows Server 2016 however the basic process is very similar for all current versions of Windows.
-
Click "Start", search for "Computer Management", and launch it.
-
Select "Storage -> Disk Management" on the left side menu.
-
The right panel displays the current disk configuration. The first block storage device connected to your server is usually Disk 1. Additional devices will be Disk 2, Disk 3, and so forth. This example shows a 50 GB volume as Disk 1.
-
If the disk is offline, right-click on the new disk volume and select Online.
-
Right-click on the new disk volume and select Initialize.
-
Select MBR or GPT partition style and click OK.
-
Right click on the Unallocated Space and select New Simple Volume.
Follow the wizard and format the attached volume.
There are two steps to upgrading Block Storage. You'll first need to upgrade the Block Storage in your control panel. You'll then need to resize the file system in the instance OS.
Upgrade block storage sizeFirst navigate to Manage VPS within your account. Then Options > Manage > Manage Disks. Then under Current Storage on this page, under Actions you can use the drop down on a current Block Storage device to select a larger disk to upgrade to. You then just need to press the Upgrade button.
Resize the filesystem - LinuxYou can resize the Block Storage to reflect the changes made in your control panel using the growpart tool. This tool is provided by cloud-init and is available for all major Linux distributions.
-
You'll first need to unmount the block storage.
# umount /mnt/blockstorage
-
Use the lsblk command to verify the partition name. This example shows a 60 GB partition as /dev/vdb1. Note that the mountpoint is blank, because it was dismounted in step 1.
# lsblk NAME MAJ:MIN RM SIZE RO TYPE MOUNTPOINT sr0 11:0 1 370K 0 rom vda 252:0 0 50G 0 disk └─vda1 252:1 0 50G 0 part / vdb 252:16 0 60G 0 disk └─vdb1 252:17 0 60G 0 part
-
Now we grow the partition to fill the available block storage space.
# growpart /dev/vdb 1
-
Now we force a filesystem check before resizing.
# e2fsck -fp /dev/vdb1
-
Resize the filesystem to fill the entire partition.
# resize2fs /dev/vdb1
-
Remount the block storage.
# mount /mnt/blockstorage
-
Click "Start", search for "Computer Management", and launch it.
-
Select "Storage -> Disk Management" on the left side menu.
-
The right pane displays the current disk configuration. The block storage device will have new unallocated space available. Right-click on the volume and select Extend Volume... as below.
Then follow the wizard to extend the volume.
It's not possible to perform a downgrade or "shrink" block storage. If you'd like to move your files to a smaller block storage device, perform these steps:
- Make a backup of your block storage volume.
- Check your files to determine the space needed. Windows users can use Windows Explorer, while Linux users may want to use df.
- Purchase a new Block Storage device of the correct size.
- Mount the new volume on your VPS.
- Copy your files from the larger block storage volume to the new, smaller volume. Use the tools appropriate for your platform.
- Unmount the Block Storage device from your VPS.
- Reboot your server instance and verify your new volume is correct.
Note: Linux instances need to remove the any references to the block storage volume from the /etc/fstab file as well to prevent system boot failure due to the OS waiting on a drive that no longer exists.
- When satisfied with the new volume, cancel the old block storage device from your 20i account.
How do I reboot my Unmanaged VPS?
Self-Managed Virtual Private Servers can be rebooted using the VPS control panel by following these steps:
- Login to My20i.
- Select Manage VPS from the My20i dashboard.
- Select Options > Manage for the VPS in question.
- In the VPS management dashboard, select Reboot.
This will then force a reboot of the virtual machine.
After selecting the option, you should see that the status of the VPS changes, and it should begin booting.
Is your hosting environmentally-friendly?
Yes, we're committed to reducing our carbon footprint, both in our data centres and workplace.
We achieve this through efficient power systems, renewable energy, a modern hosting platform and green company policies. You can find full details at Green Hosting, and you check whether your website is hosted using green energy at the Green Web Foundation.
Our commitment to sustainable hosting.
All our data centres are powered with 100% renewable energy. Our data centres use the best technology for fast hosting performance and energy efficiency.
Our proprietary autoscaling technology, not only gives you the power of a true ‘elastic cloud’ to react to the demand of processing power, bandwidth and memory your website needs at any given time, it also scales down when the demand is lover and therefore reduces the energy consumption.
Not just green hosting – but a green company
Our efforts to be a sustainable business are not only applied to our hosting. Our office runs on solar power. We run a paperless office, recycle waste and even our cleaning products are chosen for their environmentally friendliness.
How set up Mastodon on a Self-Managed VPS
Mastodon is an open-source social network. Users can create their own servers and operate a microblogging service based around a timeline, similar to Twitter. These servers are often called ‘instances’.
It benefits from being ad-free and wholly managed and moderated by its users: it’s decentralised.
So we’ve created this guide on how set up a Mastodon instance on a Self-Managed VPS. At minimum, we would recommend setting up a 2-Core Self-Managed VPS on Ubuntu 22.04.
By using a 20i VPS, you'll also be able to register your instance on the Green Fediverse, as our VPS run on 100% renewable energy.
In order to begin setting up Mastodon, you’ll need to first make sure that your Self-Managed VPS is set up on the correct operating system (OS). This guide will be using Ubuntu 22.04, which we recommend using for your installation. You may need to modify the commands that follow if you decide to go with a different OS.
Depending on the number of updates required by your system, you may need to reboot before proceeding. Once done and you’re all up to date, these instructions should help you get your Mastodon instance up and running in an hour.
Connect via SSH and run updates
To get started with setting up Mastodon, you’ll need to first connect to your VPS using SSH. If you’re unfamiliar with this process, we have a full guide on how to do so available here - https://www.20i.com/support/ssh/connect-vps-ssh
Once you’ve connected to your VPS, you should see something similar to the following:
20i Support:~$ ssh root@111.111.111.111 root@111.111.111.111's password: Welcome to Ubuntu 22.04.1 LTS (GNU/Linux 5.15.0-50-generic x86_64) Last login: Wed Nov 16 15:05:51 2022 root@vps-a1n2c3d4:~#
If you do, you’ll be signed into your VPS as the root user.
From here, you’ll want to make sure you have the latest system packages by running the following commands:
apt-get update -y apt-get upgrade -y
This will ensure your VPS is up-to-date. If your VPS requires a reboot after the update, you can do so via the Manage VPS area in your My20i account.
Secure your server
Next, you’ll want to secure your VPS and protect it from potential brute force attacks, as well ensuring that only SSH, HTTP and HTTPS ports are open. To do this, first install fail2ban:
apt install fail2ban
Once that’s completed, you’ll want to edit the file /etc/fail2ban/jail.local and add the following:
[DEFAULT] destemail = example@email.com sendername = Fail2Ban [sshd] enabled = true port = 22 [sshd-ddos] enabled = true port = 22
Replacing the email example@email.com with your email. Once that’s configured, restart fail2ban using the following command:
systemctl restart fail2ban
You’ll then want to look into adding some firewall protection to close off any ports except for SSH, HTTP and HTTPS access. To do this, first install iptables-persistent:
apt install -y iptables-persistent
Then, edit the file /etc/iptables/rules.v4 and add the following code:
*filter # Allow all loopback (lo0) traffic and drop all traffic to 127/8 that doesn't use lo0 -A INPUT -i lo -j ACCEPT -A INPUT ! -i lo -d 127.0.0.0/8 -j REJECT # Accept all established inbound connections -A INPUT -m state --state ESTABLISHED,RELATED -j ACCEPT # Allow all outbound traffic - you can modify this to only allow certain traffic -A OUTPUT -j ACCEPT # Allow HTTP and HTTPS connections from anywhere (the normal ports for websites and SSL). -A INPUT -p tcp --dport 80 -j ACCEPT -A INPUT -p tcp --dport 443 -j ACCEPT # Allow SSH connections # The -dport number should be the same port number you set in sshd_config -A INPUT -p tcp -m state --state NEW --dport 22 -j ACCEPT #Allow ping -A INPUT -p icmp -m icmp --icmp-type 8 -j ACCEPT # Log iptables denied calls -A INPUT -m limit --limit 5/min -j LOG --log-prefix "iptables denied: " --log-level 7 # Reject all other inbound - default deny unless explicitly allowed policy -A INPUT -j REJECT -A FORWARD -j REJECT COMMIT
On your next load time, the above configuration will be loaded. However, if you want to load this configuration now, you can use the command:
iptables-restore < /etc/iptables/rules.v4
Install Mastodon dependencies
Now that the VPS is set up and has some baseline security, we can now begin working on installing Mastodon. We’ll first need to make sure curl, wget, gnupg, apt-transport-https, lsb-release, make and ca-certificates are installed as these are required to set up Mastodon, so add these dependencies with the following command:
apt install -y curl wget gnupg apt-transport-https lsb-release make ca-certificates
You’ll also want to add the following dependencies, which will be used by Mastodon and include core services such as NGINX, Redis, and PostgreSQL:
apt install -y \ imagemagick ffmpeg libpq-dev libxml2-dev libxslt1-dev file git-core \ g++ libprotobuf-dev protobuf-compiler pkg-config nodejs gcc autoconf \ bison build-essential libssl-dev libyaml-dev libreadline6-dev \ zlib1g-dev libncurses5-dev libffi-dev libgdbm-dev \ nginx redis-server redis-tools postgresql postgresql-contrib \ certbot python3-certbot-nginx libidn11-dev libicu-dev libjemalloc-dev
With these added, we’ll next need to configure Node.js and Yarn.
Install Node.js and Yarn
Setting up Node.js for Mastodon will first require you to add the nodesource repo – you can do so with this command:
curl -sL https://deb.nodesource.com/setup_16.x | bash -
You can then install nodejs using apt-get:
apt-get install nodejs -y
Once this is completed, you’ll have access to the command corepack, which can be used to set up and enable Yarn:
corepack enable yarn set version stable
And that’s set. Now, we need to set up a user for your Mastodon server on your VPS.
Create a new system user
Mastodon will require a user on the server to grant it access to the services it requires. You can add one using the command below:
adduser --disabled-login --gecos 'Mastodon Server' mastodon
You’ll want to now sign in as that user – this will test to make sure it’s set up correctly, and allow you to proceed with the next step of installing Ruby. To sign in the user, simply run the command:
su - mastodon
If done correctly, you should see a different username in your bash area like so:
mastodon@vps-a1n2c3d4:~$
Install Ruby
While logged in as the Mastodon user, you’ll need to set up the rbenv repo for Ruby. This can be done with the git clone command below:
git clone https://github.com/rbenv/rbenv.git ~/.rbenv
Then navigate to the directory .rbenv and set this up – these commands do this:
cd ~/.rbenv && src/configure && make -C src echo 'export PATH="$HOME/.rbenv/bin:$PATH"' >> ~/.bashrc echo 'eval "$(rbenv init -)"' >> ~/.bashrc exec bash
You can then clone Ruby’s main build to your VPS using git clone with this command:
git clone https://github.com/rbenv/ruby-build.git ~/.rbenv/plugins/ruby-build
You now have all you need to install Ruby. Using the built-in RUBY_CONFIGURE_OPTS that was added with the git, install Ruby 3.0.4.
RUBY_CONFIGURE_OPTS=--with-jemalloc rbenv install 3.0.4
You’ll now want to set the global Ruby version as 3.0.4, and then update gem with these commands:
rbenv global 3.0.4 gem update –system
Finally, install bundler, which will be required to complete your Mastodon installation later on.
gem install bundler --no-document
You will now have Ruby fully installed and ready to go. You can check this by running the following command to check the current Ruby version:
ruby --version
Once you’re happy and ready to move on, simply use the exit command to log out of the Mastodon user and return to root:
exit
Configure PostgreSQL
You’ve already installed base PostgreSQL, but you also need to add their latest repository. You can do so with the following command:
wget -O /usr/share/keyrings/postgresql.asc https://www.postgresql.org/media/keys/ACCC4CF8.asc echo "deb [signed-by=/usr/share/keyrings/postgresql.asc] http://apt.postgresql.org/pub/repos/apt $(lsb_release -cs)-pgdg main" > /etc/apt/sources.list.d/postgresql.list
Once that’s done, you’ll need to sign into the PostgreSQL user that will have been created by the command. You can do so much as you did with the Mastodon account, with the following command:
su – postgres
You can then boot PostgreSQL to access your database:
psql
In this database, we’ll want to set up a user for Mastodon, which will allow it to access the database, create tables and update any data for functionality. You can do so with the following SQL command:
CREATE USER mastodon CREATEDB;
Now that’s created, we can close PostgreSQL. To do so, enter the command exit twice – first to close the connection to the database, then again to return to the root user.
Configure Mastodon
You’ll now want to install and configure your Mastodon setup. You’ll need to swap back to Mastodon’s user for this next step, so do so as you did before:
su - mastodon
First, we’re going to grab the latest Mastodon version from git with git clone, as we did with Ruby:
git clone https://github.com/tootsuite/mastodon.git ~/live
Then navigate to the live directory:
cd ~/live
And use git to ‘checkout’ the repository’s latest branch. You can do so with the following command:
git checkout $(git tag -l | grep -v 'rc[0-9]*$' | sort -V | tail -n 1)
Now that we have this downloaded, we can enable development, and use bundle and yarn to install the remaining files. You’ll want to use the following commands for this:
bundle config deployment 'true' bundle config without 'development test' bundle install -j$(getconf _NPROCESSORS_ONLN) yarn install --pure-lockfile
Now that we have all the files we need, we can use Ruby to initiate Mastodon’s setup wizard:
RAILS_ENV=production bundle exec rake mastodon:setup
If you’ve done everything correctly, you’ll get the following output – “Mastodon will step you through each of the requirements and ask for answers”. Use the below as a guide for what to add, replacing the domain name with what domain you want to use for Mastodon and your own email. For options like PostgreSQL’s host, port and database and Redis’ host and port, the wizard should autofill these selections. You’ll want to leave the passwords as blank for these unless you’ve added a password for these yourself.
Your instance is identified by its domain name. Changing it afterward will break things. Domain name: mastodon.mydomain.com Single user mode disables registrations and redirects the landing page to your public profile. Do you want to enable single user mode? No Are you using Docker to run Mastodon? no PostgreSQL host: /var/run/postgresql PostgreSQL port: 5432 Name of PostgreSQL database: mastodon_production Name of PostgreSQL user: mastodon Password of PostgreSQL user: Database configuration works! Redis host: localhost Redis port: 6379 Redis password: Redis configuration works! Do you want to store uploaded files on the cloud? No Do you want to send e-mails from localhost? yes E-mail address to send e-mails "from": MastodonSend a test e-mail with this configuration right now? no This configuration will be written to .env.production Save configuration? Yes Now that configuration is saved, the database schema must be loaded. If the database already exists, this will erase its contents. Prepare the database now? Yes Running `RAILS_ENV=production rails db:setup` ... Created database 'mastodon_production' Done! All done! You can now power on the Mastodon server Do you want to create an admin user straight away? Yes Username: admin E-mail: example@email.com You can login with the password: [PASSWORD] You can change your password once you login.
Once you’ve got all the information you need and you’ve made a note of the username and password of the admin user, you can exit the Mastodon user on your VPS with exit, as before.
exit
Configure Nginx and add an SSL to your installation
We’re getting close to the end of our installation now – we have Mastodon installed and configured, and our requirements are all set. We now need to link up the domain we’re using to the VPS, install an SSL and configure NGINX to allow it to serve Mastodon.
First, point the domain you wish to use for Mastodon to your VPS. Your VPS IP can be found in your hosting control panel, on the Manage VPS page in your My20i account. Simply select Options, then Manage on the VPS you’re using and you’ll see this available under VPS Information on the right of the screen.
Your domain registry should have instructions on how to update the DNS of your domain – if your domain is registered with 20i and the nameservers are on our StackDNS nameservers, you can do so with the following steps:
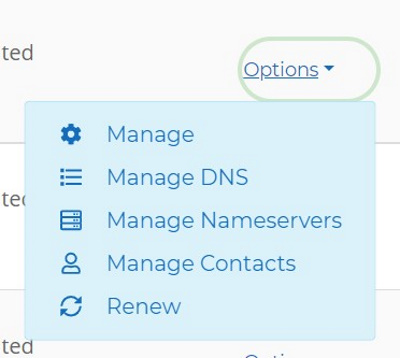
- Log into My20i and navigate to Manage Domains.
- Search for your domain, and hit Options, then Manage DNS.
- Using the fields provided at the bottom of the DNS page, enter your record.
- Enter your subdomain in the ‘Name’ field. If you’re using your main domain, leave this area blank.
- Select A from the dropdown box.
- Insert the IP of your VPS into the data field.
- Hit Update DNS, and once propagated, your domain should be properly pointing to your site.
Once that’s pointing to the site you can use certbot, which we installed earlier, to install a Let’s Encrypt free SSL on the domain, and configure NGINX to use it:
certbot --nginx -d mastodon.example.com
Then take the Mastodon NGINX config file from their file setup and copy this over to NGINX. You can do so with the following command:
cp /home/mastodon/live/dist/nginx.conf /etc/nginx/sites-available/mastodon
You should then use a symlink to set up the virtual host configuration file with this command:
ln -s /etc/nginx/sites-available/mastodon /etc/nginx/sites-enabled/
Then, you’ll need to update the domain in the virtual host configuration file to the domain you wish to use, replacing mastodon.mydomain.com in the below code with the domain you want to add:
sed -i 's/example.com/mastodon.mydomain.com/g' /etc/nginx/sites-enabled/mastodon
After this has done, remove the NGINX default configuration file to prevent the NGINX default page loading on your site:
rm -v /etc/nginx/sites-enabled/default
Lastly, open your mastodon file in sites-enabled with a file editor such as vim:
vim /etc/nginx/sites-enabled/mastodon
You should see two lines commented out in this file, like so:
# Uncomment these lines once you acquire a certificate: # ssl_certificate /etc/letsencrypt/live/mastodon.mydomain.com/fullchain.pem; # ssl_certificate_key /etc/letsencrypt/live/mastodon.mydomain.com/privkey.pem;
Remove the hashes before ‘ssl_certificate’ and ‘ssl_certificate_key’ to uncomment these lines. Once done, save and close the file (you can do this in vim by entering :x or :wq) and then restart nginx.
systemctl restart nginx
You’ve now fully installed and configured NGINX to serve Mastodon.
Create a System service for Mastodon
Mastodon requires a few services to launch with the VPS whenever it reboots. You can configure this by first copying the systemd service templates from the Mastodon directory to your system folder with these commands:
cp /home/mastodon/live/dist/mastodon-web.service /etc/systemd/system/ cp /home/mastodon/live/dist/mastodon-sidekiq.service /etc/systemd/system/ cp /home/mastodon/live/dist/mastodon-streaming.service /etc/systemd/system/
Now that the system services are in place, you can start them up and enable them – this will ensure that they launch at startup:
systemctl start mastodon-web systemctl start mastodon-sidekiq systemctl start mastodon-streaming systemctl enable mastodon-web systemctl enable mastodon-sidekiq systemctl enable mastodon-streaming
To make sure that this has been configured correctly, you can use the following command to check the status of these services:
systemctl status mastodon-web mastodon-sidekiq mastodon-streaming
Lastly, you’ll want to make sure that Mastodon has all the right permissions to access the core files. So, run the following commands to set the permissions.:
chown mastodon:www-data /home/mastodon/ chmod 0710 -v /home/mastodon/
You’ve successfully installed Mastodon, and should now be able to access it from your site!
Access the Mastodon interface
The final steps are now to access the site itself. Open your web browser, and navigate to your domain. You should be greeted with Mastodon’s Dashboard.
![]() |
You can log in using the ‘Sign in’ option on the right. The credentials to log in are the admin details you noted earlier while running the configuration wizard for Mastodon.
With that, you’ve fully set up a Mastodon service on your own VPS and domain, and can freely post and configure the setup to customise its appearance.
How do I add an additional IP address to my virtual machine?
Self-Managed Virtual private servers from 20i are configured for use with one IP address by default.
Additional IP addresses can however be bought via the VPS dashboard.
To buy additional IP addresses for a virtual machine:
- Log in to My20i.
- Select Manage VPS from the My20i dashboard.
- Select Options > Manage for the VPS in question.
- In the VPS management dashboard, select Manage IP Addressing.
- Under Buy IP Addresses, select Order IP Address.
After ordering the additional IP, you'll need to configure it as a secondary IP address by following the steps required for the specific operating system or control panel you are using.
