20i Block Storage

20i's Block Storage technology allows you to add additional, high performance storage to your VPS. The cloud data storage is highly available, redundant, and SSD backed.
If you need big data cloud storage, you can deploy volumes as large as 10,000 GB.
Add Block Storage
To add Block Storage to your 20i VPS you need to first navigate to the Manage VPS page within your 20i account.
From there you will need to Options > Manage on the VPS you want and then Manage Disks. From here you can select the Disk Size you want to add via a drop down in the Add Block Storage section and Order Disk.
We will then assign your storage to the VPS. If you go back to the Manage VPS page you should be able to to see the Status for the VPS is now Busy. Once this goes back to Active your new storage has been added.
Mounting Block Storage on a Linux OSBy default we do not create any file systems on the block storage volumes. You can use the below steps to initialise, delete all data and mount the block storage volume.
-
Check the device name on the Manage Disks page for the VPS accessible from the VPS's overview page. The first block storage device will be connected to your server as /dev/vdb. Additional devices will be labeled as /dev/vdc, /dev/vdd etc. You can use the lsblk command to verify the devices name. The below example shows a 50GB volume available as /dev/vdb
# lsblk
NAME   MAJ:MIN RM  SIZE RO TYPE MOUNTPOINT
sr0     11:0    1  370K  0 rom
vda    252:0    0   50G  0 disk
└─vda1 252:1    0   50G  0 part /
vdb    252:16   0   50G  0 disk
-
Create a new disk label using parted.
# parted -s /dev/vdb mklabel gpt
-
Make a primary partition to fill the entire disk.
# parted -s /dev/vdb unit mib mkpart primary 0% 100%
-
Create an EXT4 filesystem on the primary partition and format it.
# mkfs.ext4 /dev/vdb1
-
Make a mount point.
# mkdir /mnt/blockstorage
-
Add a blank line and a mount entry to /etc/fstab. This will automatically mount the block storage at /mnt/blockstorage at reboot.
# echo >> /etc/fstab
# echo /dev/vdb1 /mnt/blockstorage ext4 defaults,noatime,nofail 0 0 >> /etc/fstab
You can also manually mount the block storage without rebooting.
# mount /mnt/blockstorage
By default we do not create any file systems on the block storage volumes. You can use the below steps to initialise, delete all data and mount the block storage volume.
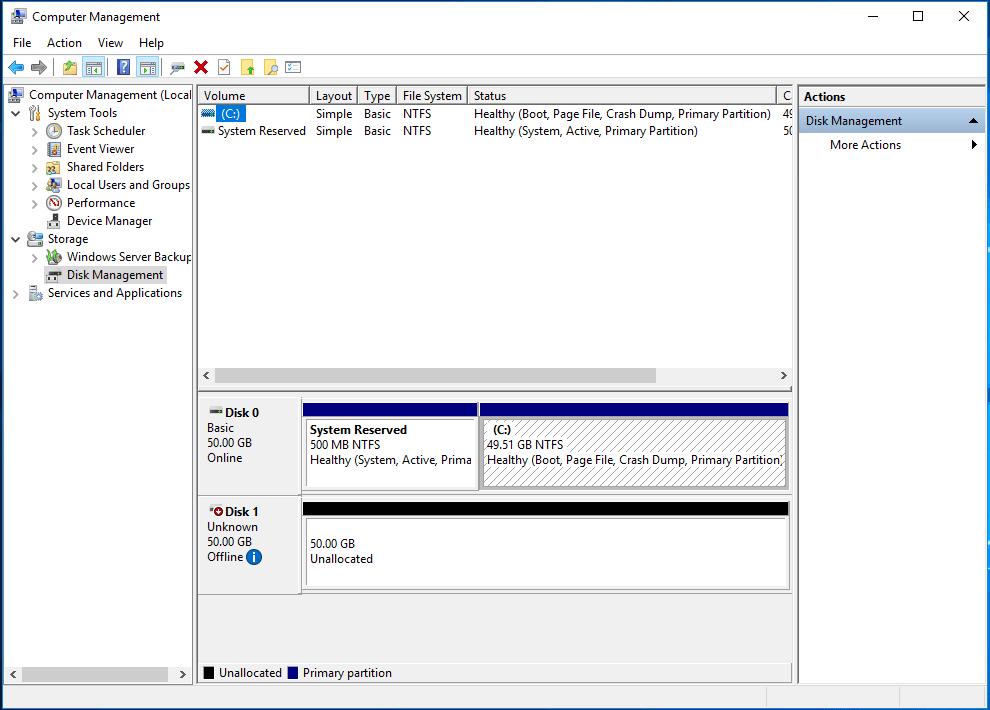
The following instructions are based on a Windows Server 2016 however the basic process is very similar for all current versions of Windows.
-
Click "Start", search for "Computer Management", and launch it.
-
Select "Storage -> Disk Management" on the left side menu.
-
The right panel displays the current disk configuration. The first block storage device connected to your server is usually Disk 1. Additional devices will be Disk 2, Disk 3, and so forth. This example shows a 50 GB volume as Disk 1.
-
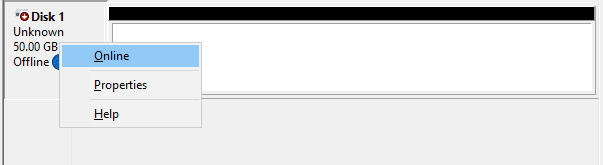
If the disk is offline, right-click on the new disk volume and select Online.
-
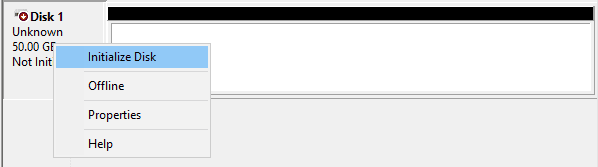
Right-click on the new disk volume and select Initialize.
-
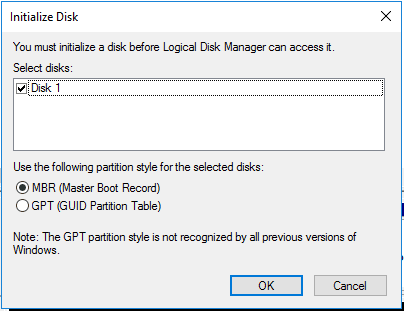
Select MBR or GPT partition style and click OK.
-
Right click on the Unallocated Space and select New Simple Volume.
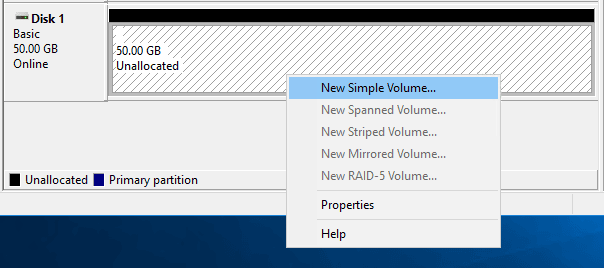
Follow the wizard and format the attached volume.
There are two steps to upgrading Block Storage. You'll first need to upgrade the Block Storage in your control panel. You'll then need to resize the file system in the instance OS.
Upgrade block storage sizeFirst navigate to Manage VPS within your account. Then Options > Manage > Manage Disks. Then under Current Storage on this page, under Actions you can use the drop down on a current Block Storage device to select a larger disk to upgrade to. You then just need to press the Upgrade button.
Resize the filesystem - LinuxYou can resize the Block Storage to reflect the changes made in your control panel using the growpart tool. This tool is provided by cloud-init and is available for all major Linux distributions.
-
You'll first need to unmount the block storage.
# umount /mnt/blockstorage
-
Use the lsblk command to verify the partition name. This example shows a 60 GB partition as /dev/vdb1. Note that the mountpoint is blank, because it was dismounted in step 1.
# lsblk
NAME   MAJ:MIN RM  SIZE RO TYPE MOUNTPOINT
sr0     11:0    1  370K  0 rom
vda    252:0    0   50G  0 disk
└─vda1 252:1    0   50G  0 part /
vdb    252:16   0   60G  0 disk
└─vdb1 252:17   0   60G  0 part
-
Now we grow the partition to fill the available block storage space.
# growpart /dev/vdb 1
-
Now we force a filesystem check before resizing.
# e2fsck -fp /dev/vdb1
-
Resize the filesystem to fill the entire partition.
# resize2fs /dev/vdb1
-
Remount the block storage.
# mount /mnt/blockstorage
-
Click "Start", search for "Computer Management", and launch it.
-
Select "Storage -> Disk Management" on the left side menu.
-
The right pane displays the current disk configuration. The block storage device will have new unallocated space available. Right-click on the volume and select Extend Volume... as below.
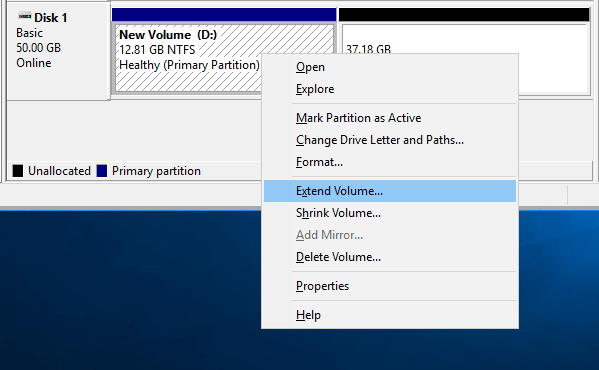
Then follow the wizard to extend the volume.
It's not possible to perform a downgrade or "shrink" block storage. If you'd like to move your files to a smaller block storage device, perform these steps:
- Make a backup of your block storage volume.
- Check your files to determine the space needed. Windows users can use Windows Explorer, while Linux users may want to use df.
- Purchase a new Block Storage device of the correct size.
- Mount the new volume on your VPS.
- Copy your files from the larger block storage volume to the new, smaller volume. Use the tools appropriate for your platform.
- Unmount the Block Storage device from your VPS.
- Reboot your server instance and verify your new volume is correct.
Note: Linux instances need to remove the any references to the block storage volume from the /etc/fstab file as well to prevent system boot failure due to the OS waiting on a drive that no longer exists.
- When satisfied with the new volume, cancel the old block storage device from your 20i account.