WordPress Support Questions
WordPress support articles: find answers to your questions about WordPress Hosting, including setting up email, staging, performance and more.
How do I migrate a website manually?
20i provide an automatic 'one click' Migration Centre that supports migrations from the largest hosts and most popular control panels. This is available to all customers for no extra charge.
However, it's not always possible to migrate a website automatically. For these cases the process of a site migration has 3 key stages:
- downloading the data from the old provider
- importing the data into 20i
- updating the website configuration file
We've laid out the steps usually required for a manual site migration below.
1. Create the hosting package at 20i. This provisions the website to our platform, lets you access the site over the temporary URL, and ensures that you have FTP access.
2. Start downloading your website files from the old provider: make an FTP connection using your previous FTP account details, and download all files from the web space to your local computer.
3. Download your database. You'll need a backup of all databases the website is using. All major hosts will be running the phpMyAdmin management software that lets you import and export your databases via a website. The steps are:
- First, access phpMyAdmin (My20i > Manage Hosting > [select package] > phpMyAdmin)
- Click the database you wish to backup down the left-hand side
- Click the 'Export' tab at the top of your page
- Leave 'Quick' selected under Export Method
- Select your desired format: we recommend SQL for most cases
- Click 'Go'
4. Upload the files to 20i. To access 20i FTP before you change the nameservers or update DNS for your domain, you'll need the FTP hostname displayed in the 'Nameserver Check' section. This automatically appears for any domains not using our nameservers as the last section down the right-hand side when you're managing your hosting packages.
5. Create a database at 20i. You can do that via My20i > Manage Hosting > [select package] > MySQL Databases. Note down the hostname, database name/username and password for your new database as you'll need these details later.
6. Import your database backup to the newly-created database. Once again we recommend using phpMyAdmin for this purpose:
- My20i > Manage Hosting > [select package] > phpMyAdmin
- Automatically login to phpMyAdmin for each of your databases. Click the 'Import' tab at the top of your page.
- Browse your computer for the database export you have taken previously
- Select the format that matches the export: this will be SQL for most cases
- Click 'Go'
If the import fails, you may wish to try again with 'Enable foreign key checks' unchecked.
7. Update the credentials in the website configuration file. The exact file you need to update depends on the software the website is running, but we've listed the most common configuration files below:
- WordPress: wp-config.php
- Joomla: configuration.php
- Drupal: sites/default/settings.php
- Magento: app/etc/local.xml
8. The website will now be fully functional on our platform. To test the website, we provide a Temporary URL that will be visible down the right-hand side of the control panel. For a more complete test, you can modify your hosts file, which allows you to override the domain name at your PC, so you can visit your domain at 20i while the rest of the internet still reaches the current website.
9. Time to go live! Once tested, you can change the nameservers of the domain and (optionally) transfer the domain in.
 Austin B.
Is it safe to update the PHP version on my website?
Updating your PHP version on a website can be a critical decision that can affect the functionality and security of your website. On one hand, keeping your PHP version up to date is essential for ensuring that your website runs smoothly, quickly and securely.
On the other hand, upgrading to a newer version of PHP can also result in compatibility issues with your existing plugins and themes, which can cause significant problems and even lead to a website crash.
See how to do it here: How do I change PHP version?
Let's take a closer look at the importance of updating your PHP version and some of the potential drawbacks and issues that you might encounter.
Why it's important to keep PHP up to date?
Security
Outdated PHP versions are more vulnerable to security exploits and vulnerabilities. Updating to the latest version of PHP will help ensure that your website is protected from known security threats.
Performance
Newer versions of PHP are designed to be faster and more efficient, which can result in improved website performance and faster page load times.
Improved features
Updating PHP gives you access to new features and functions that can enhance the functionality of your website.
Better support
Support for older versions of PHP is often limited and discontinued, which can make it difficult to find solutions to problems or get help if you encounter issues.
Potential drawbacks and issues
Compatibility
Updating PHP can result in compatibility issues with your existing plugins and themes. Some plugins and themes may not be fully compatible with the latest version of PHP, which can cause significant problems, including broken functionality and even website crashes. If you're switching between any 7.* or 8.* version then all modern plugins and themes should be compatible. However, if you update the PHP version and notice any negative behaviour changes then you can change back instantly to the previous version to resolve any issues.
If you're switching from a very old version of PHP such as 5.6 then you may wish to review your plugin and confirm with their authors if they're compatible with a higher version of PHP.
Cost
Updating PHP can require significant time and resources, including hiring a developer to handle the update, testing and debugging any compatibility issues, and resolving any problems that may arise.
Risk of downtime
Updating PHP can result in unexpected downtime, which can be costly and time-consuming to resolve.
How can I check which version of PHP I am currently running in WordPress?
Use the Site Health Check feature
WordPress 5.2 and later include a Site Health Check feature, which displays information about your PHP version and other critical information about your website. You can access this feature by going to "Tools" > "Site Health" in the WordPress dashboard.
Check with a plugin
There are several plugins available in the WordPress repository that can help you check your PHP version, including "Display PHP Version" and "Health Check & Troubleshooting." Simply install and activate the plugin, and then check the information displayed on the plugin's settings page.
Check via info.php
You can create a new file called "info.php" in your WordPress root directory and add the following code to it: . Then, open the file in your browser, and look for the "PHP Version" section, which will display the version of PHP you are currently running.
PHP Version Tool on My20i
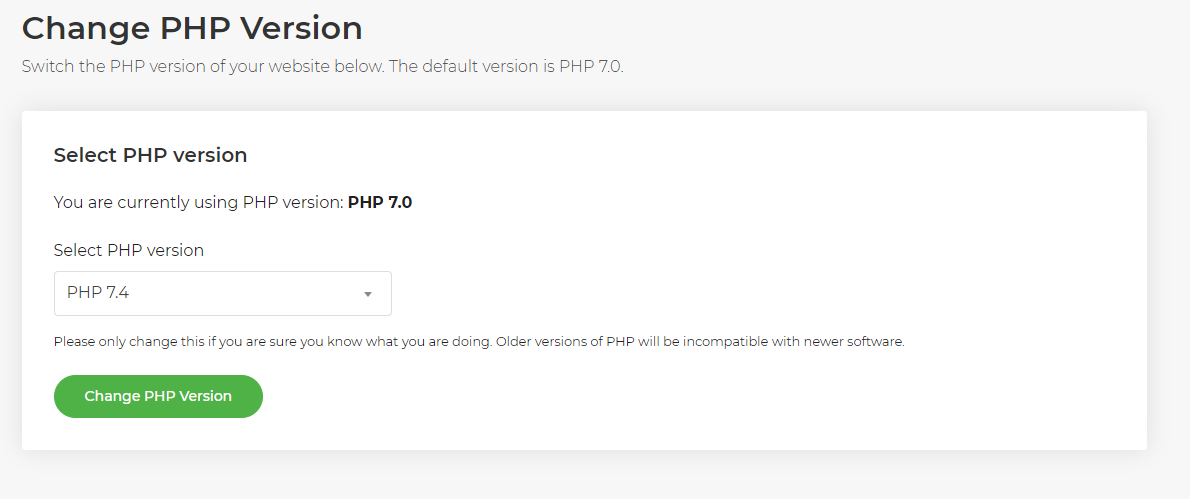
Every 20i hosting package has access to the ‘Change PHP Version’ tool on the My20i hosting control panel. To use this feature, head to Manage Hosting > [Select Package] > Change PHP Version.
PHP versions of WordPress sites can also be changed in bulk using our WordPress Manager.
In conclusion, while updating your PHP version on a website is important for ensuring the security, performance, and functionality of your website, it's important to consider the potential drawbacks and issues that can arise.
Before proceeding with an update, it's recommended to back up your website, test your plugins and themes for compatibility, and consult with a professional developer if necessary.
If you have Timeline Backups, we’d recommend taking a snapshot prior to amending your PHP version. By taking these precautions, you can minimize the risk of unexpected problems and ensure that your website remains secure, fast, and functional.
 Austin B.
How do I run a search and replace in the WordPress CLI?
The WordPress Command Line Interface (CLI) search and replace function is a useful tool when you need to make global changes to your WordPress site's content.
Some common use cases for this function include:
- Changing the site URL: If you're moving your WordPress site to a new domain or subdomain, you can use the search and replace function to replace all instances of the old URL with the new one.
- Updating internal links: If you've made changes to the structure of your site and need to update internal links, you can use the search and replace function to find and replace those links quickly and easily.
- Replacing deprecated code: If you're using outdated code on your site, you can use the search and replace function to replace it with updated, functional code.
- Updating plugin settings: If you need to update settings for a specific plugin across your site, you can use the search and replace function to make the change to all instances of the plugin's settings in the database.
- Cleaning up data: If you need to remove specific text or data from your site, you can use the search and replace function to find and replace that data with an empty string.
It's important to understand that the search and replace function operates directly on the WordPress database, so it's essential to back up your database before running the command to avoid any potential data loss. We’d recommend taking a snapshot of your site files and database prior to running the search and replace. Additionally, it's recommended to test the function on a staging site before making any changes to your live site.
To use the search and replace function, you'll need to access your website via the command line through SSH and navigate to the directory where WordPress is installed. If you’re unsure about how to connect via SSH then please see this guide: How to connect through SSH.
From there, you can run the following command:
wp search-replace old-string new-string [--network] [--dry-run]
Where:
‘old-string’ is the string you want to search for and replace.
‘new-string’ is the string you want to replace old-string with.
--network is an optional argument that, when used, will perform the search and replace operation on all sites in a WordPress network.
--dry-run is an optional argument that, when used, will perform a dry run of the search and replace operation, meaning it will show you what would be changed, but will not make any actual changes to the database.
For example, if you wanted to replace your temp URL with the live domain name, you’d enter the following:
wp search-replace domain-com.stackstaging.com domain.com
The above would immediately make all the appropriate replacements. If you’d rather perform a ‘dry run’ first then you’d need to enter the ‘--dry-run' flag at the end of the command:
wp search-replace domain-com.stackstaging.com domain.com --dry-run
To perform the action across all sites on the WordPress Network (Multisite) then run the following:
wp search-replace domain-com.stackstaging.com domain.com --network
What are the risks involved with using Search and Replace in the WP CLI?
- Data loss: if the search and replace function is not used correctly, it can result in data loss. For example, if you use the function to search for a string that’s found within another string in the database, it could result in unintended changes. It's important to back up your database before using the function to ensure that you can restore your site if any issues arise.
- Incorrect replacements: if you make a mistake in the search or replace string, it can result in incorrect replacements in the database. This can lead to broken links, incorrect display of content, or other issues on your site.
- Incompatible changes: if you're using a plugin or theme that adds custom data to the database, the search and replace function may not be compatible with that data. It may result in unexpected changes or errors.
- Search and replace errors: if there are any errors in the search and replace function, it could result in incomplete replacements or other issues with the database.
In conclusion, it's important to use the WordPress CLI search and replace function with caution and to thoroughly test the function before using it on a live site.
It's also recommended to have a good understanding of how the function works and the potential issues that can arise. This way, you can avoid any problems and ensure a smooth and successful search and replace operation.
 Chris Wright
Why could my WordPress migration fail?
The following conditions should be met for the WordPress FTP migration tool to migrate a site. These conditions are usually met by default, unless you've made changes to your WordPress installation.
What to do if a WordPress migration has failed
If your migration fails, adjustments may need to be made to allow the migration tool to work correctly:
- The migration tool looks for the directory with the wp-config.php configuration file. If you’ve manually moved the wp-config.php file to another directory (sometimes done for security) then you’d need to move it to be with the rest of the core WordPress files.
- File and directory permissions should be consistent with WordPress best practice, i.e. directories set to 755 and files set to 644.
- Our IPs used for the FTP migration tool should not be blocked: 185.146.165.4 & 45.8.227.14. If you use a web application firewall (WAF) ensure these IPs are whitelisted.
- Ensure the website's domain name points to the correct web host. If the nameservers for the domain name don’t point to the right host then the migration will fail.
If you’re having trouble diagnosing what’s wrong, please feel free to contact support within your account from the support area.
 Austin B.
WordPress caching: what you need to know
Optimising your WordPress site for performance can be done in a variety of ways, but few are as important as implementing caching for your site.
Through caching, a lot of the heavier processes and queries that WordPress runs on each page load can be reduced significantly or outright bypassed thanks to temporary storage. So your sites can load as quickly and efficiently as possible and improve your Google CWV (Core Web Vitals).
This can help improve usability and ensure your site experience is the best it can possibly be.
We’ll go over the fundamentals of caching in regard to WordPress in this guide, how caching can be implemented and why you should consider using our inbuilt caching solution, StackCache on our WordPress optimised hosting platform.
Why do I need my WordPress site to cache?
WordPress, at its core, runs on PHP code compilation and back-and-forth query checks within your site’s database. For example, if you want to load your WordPress site’s homepage, the following happens:
- WordPress loads and checks wp-config.php
- It sets up any default constants set in this file
- It then connects to the database, and begin querying for content
- Active plugins are loaded, as well as the pluggable.php file
- The site then loads any defined rewrite rules
- The site’s theme is loaded, and the corresponding functions.php file
- Once all this information is gathered, WordPress parses all the data for the requested page
- It then fetches the page or post contents from the database
- Finally, it loads the site template and displays the page as it should appear with all data
The above generally occurs within the space of seconds.
However, by implementing caching, many internal queries can be stored locally, which can bypass the need to dive into the database and files. The cached content will be loaded instead, vastly increasing your loading speed and site’s performance.
What do WP cache plugins do, and how do they help with the website’s performance?
WordPress caching plugins come in all shapes and sizes. Most generally handle static HTML caching to reduce the amount of processing required per load time.
Most of these will store the cached content locally in a cache folder, a majority of which are found in the wp-content folder. These files are then checked per site load and prioritised in loading over the core files of the site to cut down time and allow for faster speeds.
Some provide additional minification and compression functions for your CSS and scripts to allow for quicker load times.
They may also provide tools that allow for you to prioritise core files over JavaScript, which can be quite slow to load. This will allow your site to load what's essential to get the site to display much faster, reducing your TTFB (Time To First Byte) and load times overall.
What is the advantage of caching with your hosting and not as a plugin?
A plugin alone will naturally have limitations. Even with the plugin locally storing processes to avoid them being re-run, where these files are stored can still lead to slowdown in the long run.
Anyone connecting to the site still has to connect to the webserver, so if you’re in Australia and your site files are stored in the UK, it’s going to take some time for the site to load even when cached due to the amount of network hops and latency of the connection.
This is where 20i handles things differently. By integrating our caching solutions with our hosting’s built-in CDN.
We can store any cached site files directly on the CDN nodes. This means that anyone connecting to your sites will have the caching served directly from the nodes rather than the webserver. This vastly improves load times by completely bypassing having to reach our webservers directly and pushing your site’s performance further still.
How does the 20i WordPress cache solution work?
As caching is so important to the speed and performance of any WordPress site, we’ve taken it upon ourselves to develop our own caching plugin called StackCache.
StackCache acts as a normal WordPress caching feature, but integrates fully with our CDN and Edge Cache to allow you to fully control your site’s performance globally from a singular interface.
Not only this, StackCache compliments Edge Caching directly as it handles all the dynamic content of your site, while the Edge Cache handles all your static content to ensure that all resources get served faster for your visitors. You can specify how long to handle specific types of caching such as Image and JavaScript caching from either the Edge Caching area or StackCache itself.
On top of this, StackCache comes pre-built with our WordPress-optimised hosting, meaning that you can get your site loading faster as soon as it’s placed onto our hosting – no extra setup or additional installs required. And, if you want to get more advanced with your caching solution, you can set additional Cache-Control and Expires headers via a .htaccess file, and StackCache will follow these to store even more for your site.
As you can see, caching can have a major impact on your site’s performance. With our built-in Edge Caching and StackCache solution, our hosting works with you to provide you easy access and control of your site’s caching, allowing you to push the best speeds possible out of your sites.
 Reudiger Dalchow
How do I migrate a WordPress site automatically?
Migrating a Wordpress website to 20i's scalable platform is quick and easy using our Migration Centre.
To Get Started:
- Log in to My20i
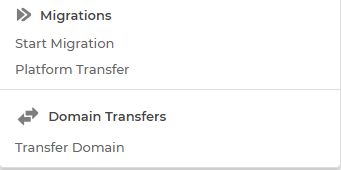
- Click on Migrations in the left navigation panel
- Click Start Migration
4. Choose WordPress from the list and click Next.
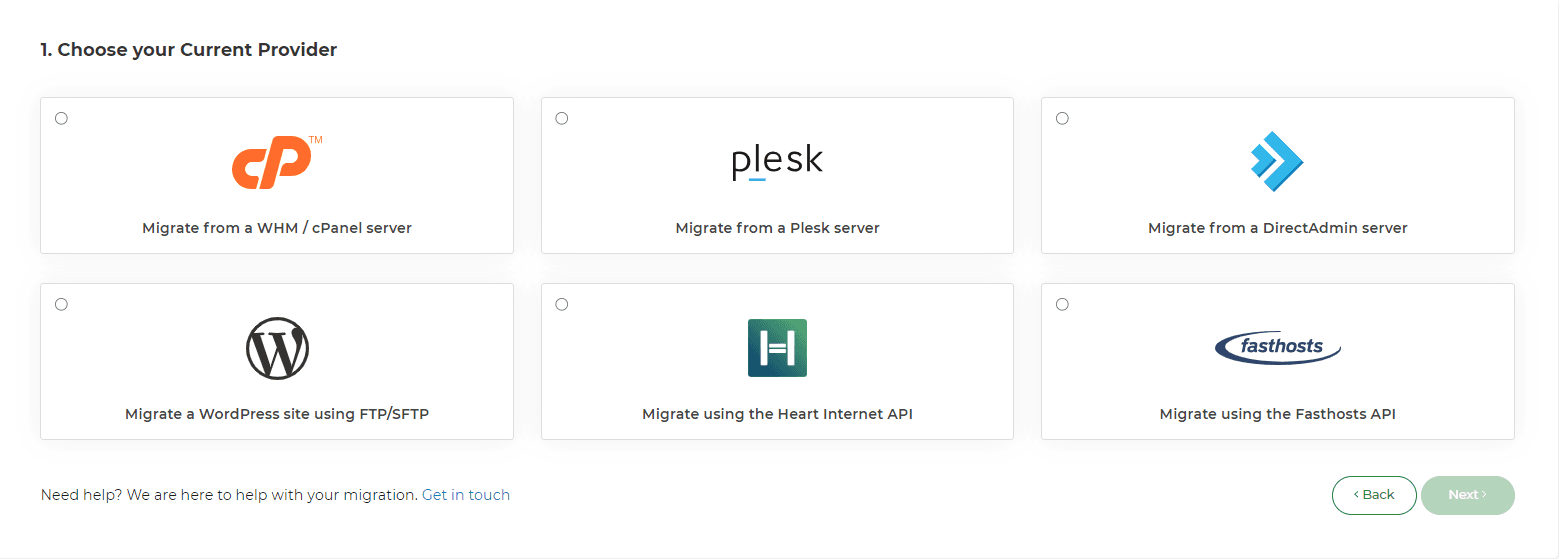
5. Enter the required credentials: hostname, domain, username and password for FTP, and click Next.
6. Go to Migrations Overview in My20i at any time to see the status of your migration. You’ll be notified when it’s successfully completed.

7. Once the migration status has been updated to 'Complete' you can head to Manage Hosting to view the website.
Note: This will only migrate the website to 20i. If you have emails to move as well, you can use our Email Migration tool once the migration has completed.
DNS Records
Note: The Migration Centre does not transfer DNS records.
By default, DNS records will be configured so that they point all services to 20i's services, such as mail and FTP. For example, if you are using Office365 or Gmail you'll want to remove our standard MX records and ensure the Office365/Gmail DNS records have been added before you continue, to avoid any interruption to your mail service.
After migrating your websites, databases, and email, the final step is to update your domain names. You can either transfer your domain name to 20i or leave it with its current registrar and simply point the name servers to your 20i hosting.
If you intend to use our free SSL certificates, the nameservers must be transferred to 20i as a security measure required by the certificate-issuing authority.
Transferring Domain Names
To transfer your own or your customers’ domain names to 20i, head to Transfer a Domain from the Migration Centre section of your 20i control panel. Enter the domain name(s) you want to transfer, confirm them, and then check out.
You can see the progress of your domain transfers from Migration Centre > Pending Domain Transfers. Please note that DNS propagation typically takes an hour but can take anywhere up to 24 hours as a global update is rolled out, so it may be a while before your domain resolves after the nameservers have been updated.
Updating Nameservers
If you’d prefer to update your nameservers with your current domain registrar (meaning you have your non-20i domain pointing to your 20i hosting) instead of transferring your domain to 20i, you will need to log in to your domain registrar’s control panel and update the nameservers to the following:
• ns1.stackdns.com • ns2.stackdns.com • ns3.stackdns.com • ns4.stackdns.com
If your registrar doesn’t support 4 nameservers, simply add as many as it will support. It can take up to 48 hours for nameserver changes to propagate across the web, but in the vast majority of cases, it will be completed much faster.
Congratulations, you’ve successfully migrated to 20i!
Important: You can never have too many backups! Before you delete any data with your old hosting company, please back it up on a separate physical device and/or have a copy in cloud storage. You can also download your data at any time via My20i, or purchase our Timeline Backups service for automatic daily backups.
 Austin B.
Getting started with the 20i WordPress Manager
20i’s WordPress Manager provides a central hub for you to manage, view, and update all your WordPress websites from a single, easy-to-use dashboard.
When you first access WordPress Manager, you’ll see a detailed overview of each individual WordPress site. The tool automatically fetches information about all installed plugins, themes, and users for each site. It also displays the version of WordPress being used, the PHP version running on the site, and whether any Website Turbo credits are currently applied.
At a glance, you can quickly identify what needs updating - such as plugins, themes, or WordPress core versions - helping you keep every site secure and performing at its best.
You’ll then be presented with a clear table that organises this information across all your sites, making it simple to manage everything in one place:
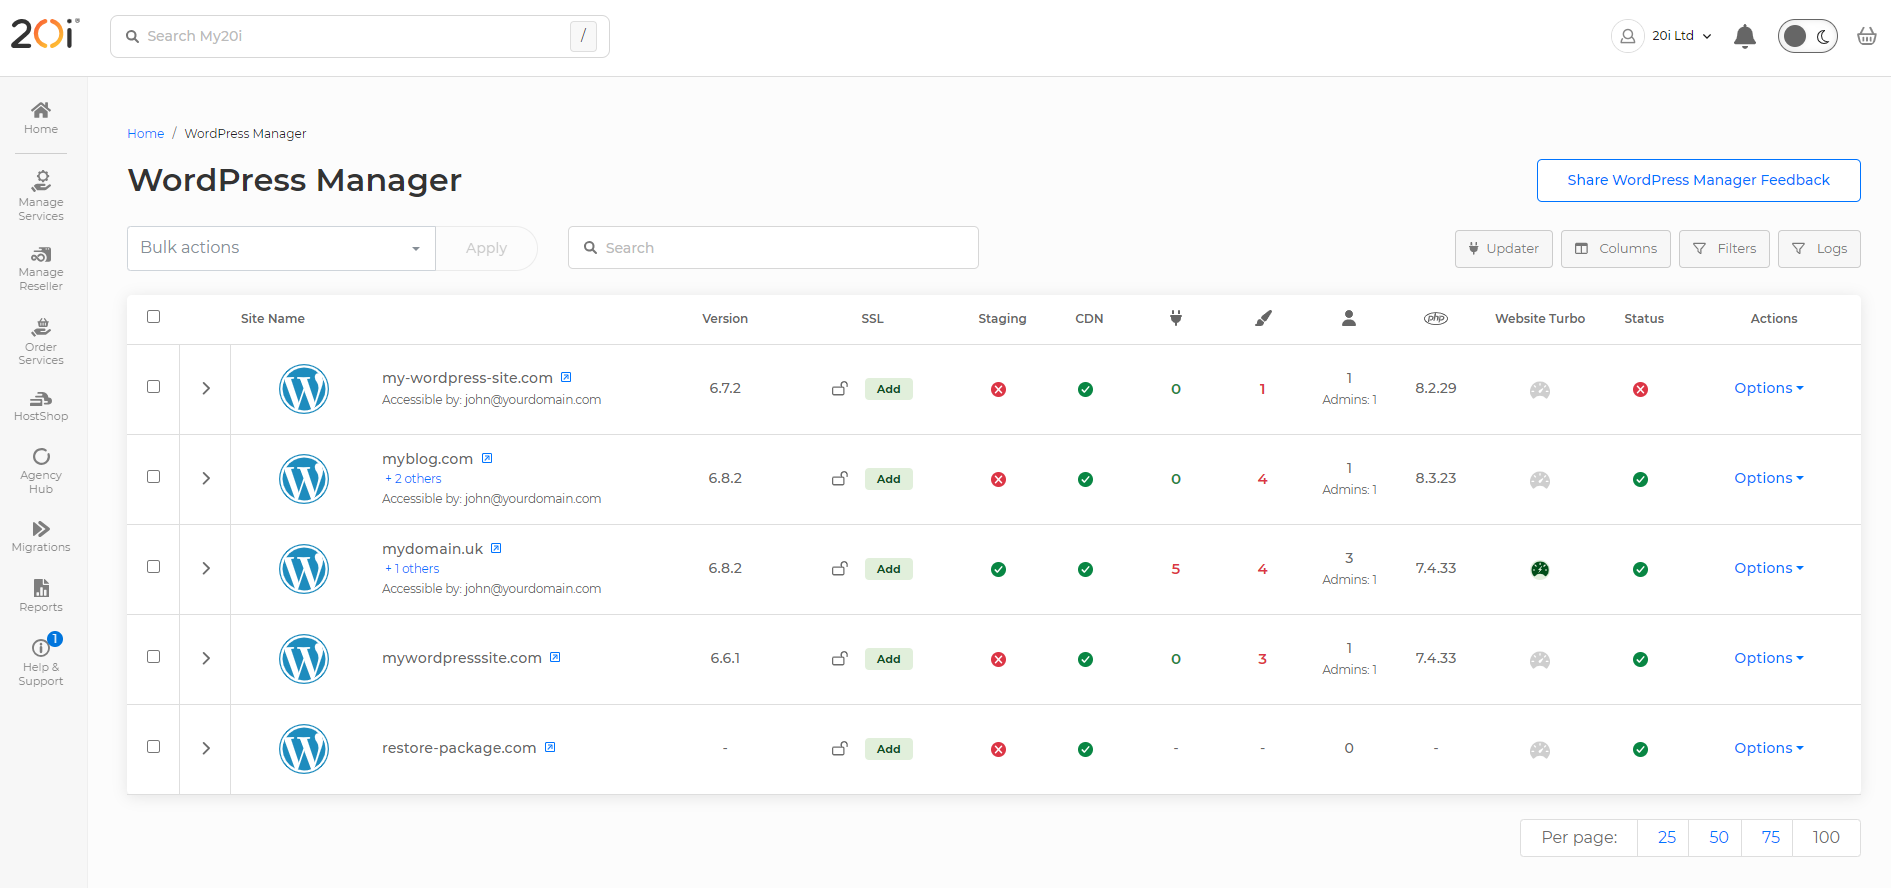
The WordPress Manager displays the following details for each website:
- Site name (URL) with a direct link to the live site
- User access permissions (who can manage the site)
- Current WordPress version in use
- SSL certificate status (installed or not)
- Staging site availability on the hosting package
- 20i CDN caching status
- Number of available updates
- Update breakdown by type — plugins and themes, including quantities
- Timeline backup snapshots associated with the hosting package
- PHP version currently running
- Website Turbo status (enabled or not)
- Malware scan results, indicating any infections
- Site status — either Active (live) or Disabled
- Hosting management options
Is it possible to bulk manage the WordPress Sites?
If you select a number of sites in the tick box on the left, you can then apply bulk actions to those sites:
- Install WordPress
- Install the Core WordPress Files
- Upgrade WordPress Version
- Update Plugins
- Update Themes
- Verify Plugin checksums
- Purge Stackcache
What does 'Verify Plugin Checksums' do?
A checksum is a unique identifier made from the genuine code produced by the plugin’s developers. Basically. it’s a long string of numbers that’s made by applying mathematic transformations to the data. It’s unique, and if any changes are made to the plugin’s code, the checksums won’t match.
So it’s a way of checking that the plugin you have installed hasn’t been tampered with. If the checksums match, the plugin code is as the developer intended.
Can I download the data available in the WordPress Manager?
At the bottom of the page, you’ll have an option to download all this information as a .csv file. The CSV will look similar to this summary view, but also includes the names of all the themes and plugins.
How do I manage individual sites?
Of course, you may not want to apply changes just in bulk. You can still manage individual sites by clicking on it.
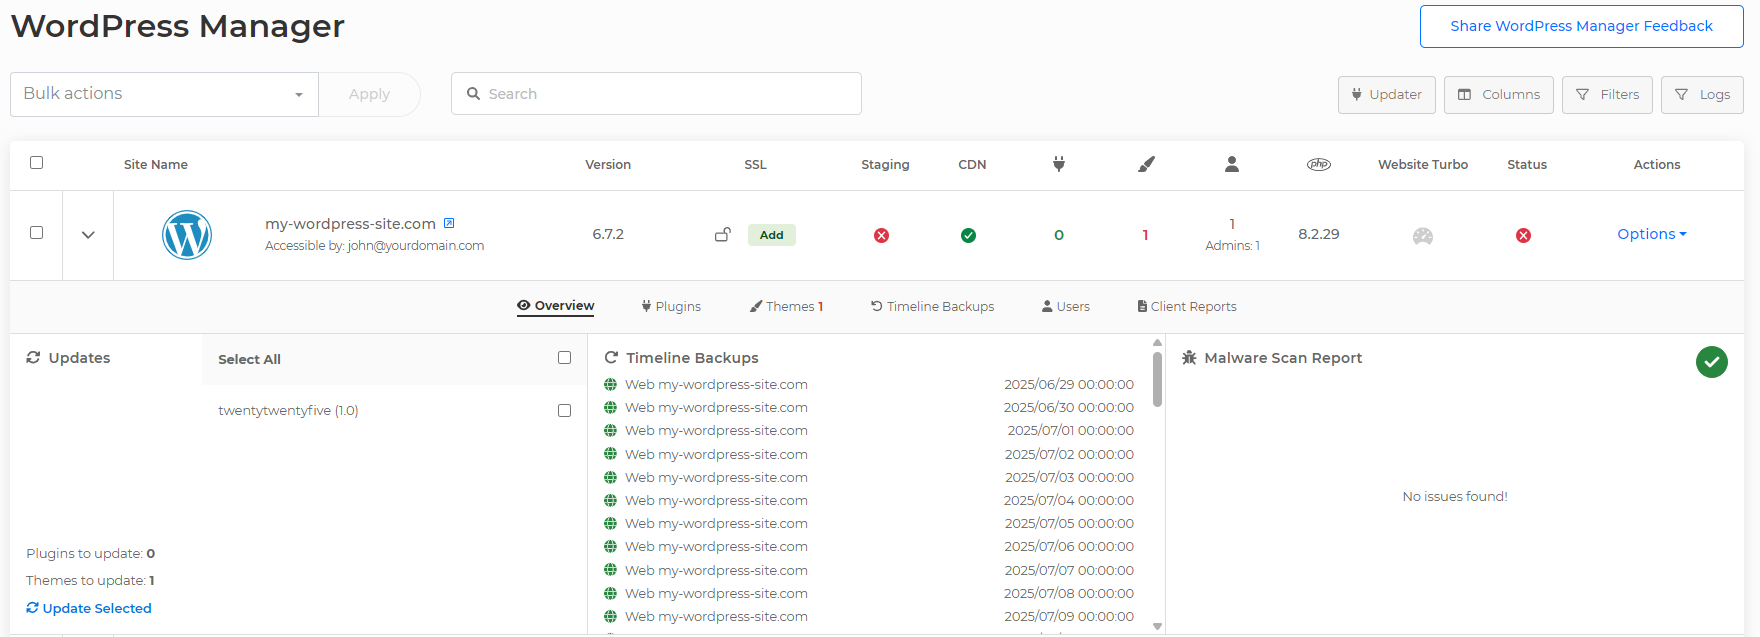
You’ll be presented with a menu that will indicate updates and malware scan results, as well as the options to manage plugins, themes and users.
 Ben Gayson
How do I move my site to the WordPress platform?
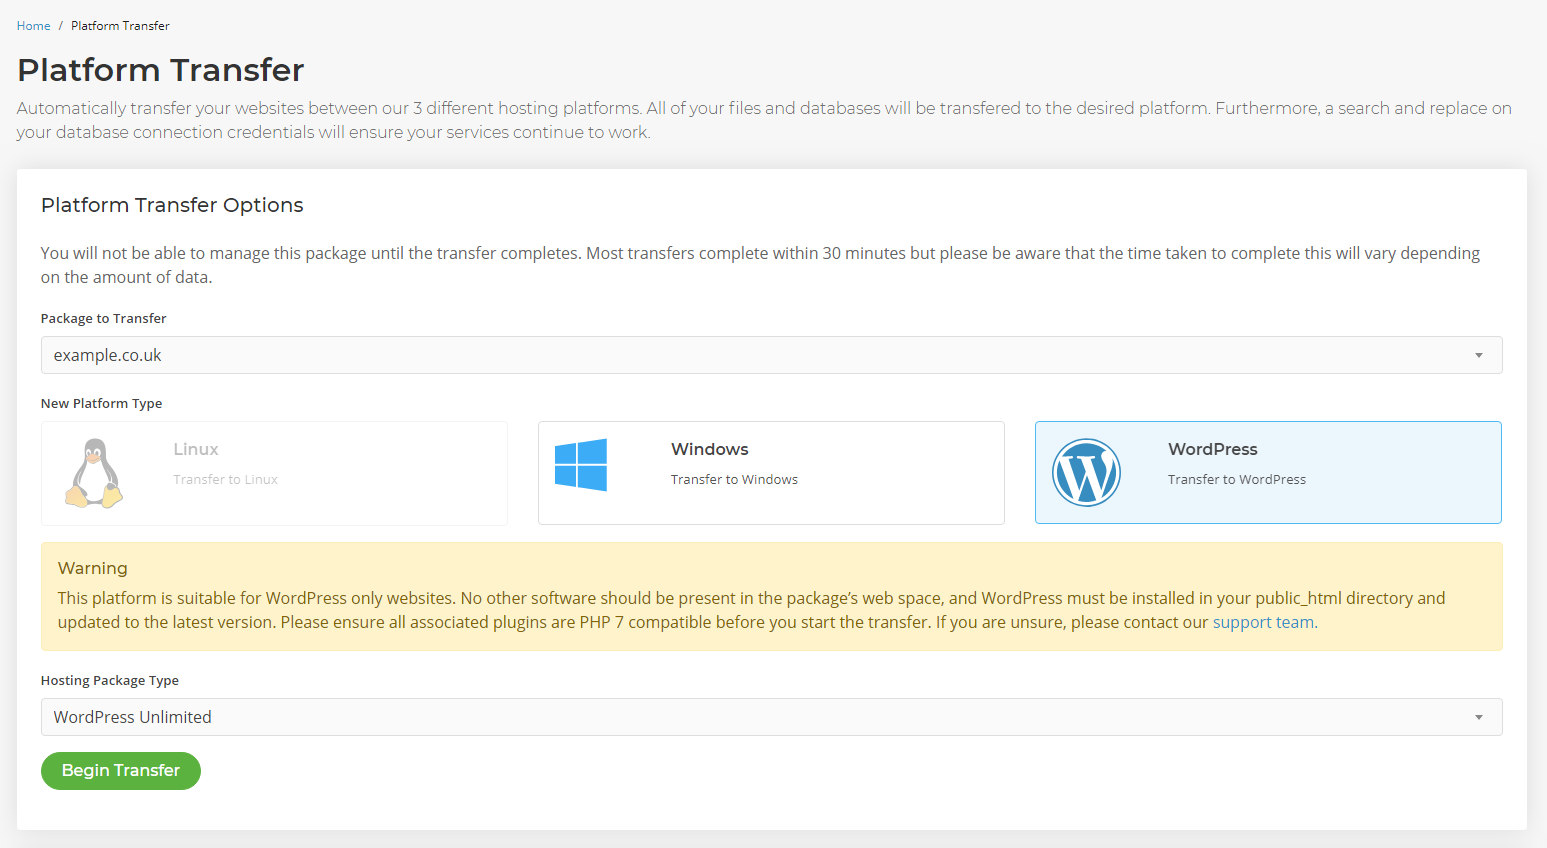
You can move between all our Linux, WordPress and Windows Platforms using the Platform Transfer icon inside My20i.
To do a platform transfer:
- Login to My20i.
- Select the Platform Transfer icon from the homepage.
- Select the package you would like to transfer and then select the WordPress platform icon.
- Confirm the Hosting Package Type you want the package transferred to.
- Select Begin Transfer.
Note: Before performing a migration to the WordPress platform, please note the following requirements:
- WordPress must be installed in the website root. That is, the WordPress install sits inside the public_html folder.
- The WordPress install (including all plugins and themes) must be compatible with at least PHP 7.0, we currently support the latest version of PHP 8.1 across the platform
- The webspace must not contain any software or code that does not belong to WordPress
- Any subdomains or additional domains must be pointing to the same WordPress install and hence configured as a WordPress Network (Multisite)
A platform transfer will also cause the DNS records on our nameservers to be reset, to ensure the package points towards 20i services. You will need to reconfigure any external DNS records after the platform transfer completes.
 Austin B.
Fix Modified Core WordPress Files
A WordPress installation will always contain its core PHP files and directory structure. You might be familiar with the WordPress configuration file, wp-config.php, which connects the WordPress installation to the desired database, or the wp-content directory which contains plugin and theme files. The only files you may need to edit are the wp-config.php file and the .htaccess file. However, as standard there's no need to edit these files right away.
Modifying core WordPress files can be dangerous and result in the WordPress installation not passing a checksum. At 20i, if your WordPress installation does not verify against the official WordPress checksum then some of the 20i WordPress tools may be limited until the installation passes this check.
An installation that does not verify against WordPress's checksum returns the following message:
When your installation does pass, the following message is returned:
There are three methods you can use to re-install WordPress core files:
1. Use the 20i Checksum Report tool
2. Re-Install/Update WordPress Via WP-Admin
3. Verify and Re-install WordPress using the WP CLI
How To FIx Modified WordPress files (Replace Modified Core WordPress Files) Without Damaging Existing Content?
You can re-introduce missing core files, or fix modified core files without harming your hard work. The methods below won't affect the WordPress database, wp-config.php file to wp-content folder. These methods only re-install the core WordPress files.
1. Use the 20i Checksum Report tool
The easiest way to fix missing or modified core files is to use the 20i WordPress Checksum Report tool. This scan checks if your core files match what exists in the official WordPress core repository.
If your files have changed, it’s likely that either you have either modified them yourself (which is not recommended), or your WordPress installation has been infected by malware which has modified your core files.
If your installation verifies against the WordPress checksum, you'll receive this success message:
If your installation contains modified or missing core files, you'll be shown which files are missing and an option to automatically re-install those whilst preserving your WordPress installation.
2. Re-Install/Update WordPress via WP-Admin
This method is straightforward and can be done by logging in the WordPress Admin area via /wp-admin.
Log in to the wp-admin dashboard of your WordPress site - Click Dashboard
- Click Updates
- Select Check Again to check for an update - If you have the latest version of WordPress
- Select Re-Install Now to re-install the core WordPress file
3. Verify and Re-install WordPress using the WP CLI
At 20i the WP Command Line Interface (CLI) is installed by default and can be used by connecting via SSH. Learn more about connecting via SSH here.
You can use the WordPress wp core verify-checksums CLI command to check your own installations files against WordPress's own checksum to ensure all core files match the official repository.
- Connect to your site via SSH.
- Change into the directory where your core WordPress installation is located, usually public_html.
- Run the command
wp core verify-checksums - You'll either receive a Success message indicating that your installation verifies against the WordPress checksum.
Success: WordPress installation verifies against checksums.- Or you'll receive an Error message indicating your installation is has modified or missing core files.
Error: WordPress installation doesn't verify against checksums.
- If your core files have been modified or are missing, you can re-install those files using (whilst keeping your installation safe) by running
wp core download --force
Debugging modified core WordPress files is outside the remit of the 20i Support Team. However, we can help you you perform a re-install of the core WordPress files if you're having any problems with the above process.
 Austin B.
WordPress Tools: Error WordPress is not installed
A key feature of our WordPress hosting is our integrated WordPress tools suite available directly through the hosting management page. It offers a range of functions without having to access the admin area, such as adding new users or managing your plugins.
However, the Tools need to be able to detect a working WordPress installation on the hosting in order to display. If something prevents this being detectable, the Tools user interface will instead display an error, stating that WordPress isn’t installed. Should this occur, there’s a few main causes that are worth checking for.

1. WordPress Install Location
Our WordPress platform expects your site to be installed in a folder called public_html, and to be the only WordPress installation on the file space. If this isn’t the case, and your WordPress setup is located in another folder, the system won’t be able to check for the installation and will presume that it’s not installed at all.
In a case like this, it’s simply a matter of navigating to your package and using the File Manager to move your site files to the correct folder.
- Log into My20i and head to your Manage Hosting area.
- Select Options > Manage on the hosting package you’d wish to edit.
- Under Web Files you should be able to see File Manager.
Once you’ve opened the File Manager, simply drag and drop your site files to the public_html folder and the system should be able to detect them. You can also use FTP to move the files. Read our guide on how to connect your Web Hosting via FTP.
2. Database Connection Issues
Once a set of WordPress files is found in the correct folder, the system checks to ensure that the database defined in the wp-config.php file is reachable and has a WordPress installation present.
If it doesn’t, or the database connection doesn’t work, it will presume that the installation wizard needs to be run and display this option. As such, it’s important to ensure that the database details for the site are correct and the site is able to reach the database.
If your site is displaying the error Cannot connect to database then this is most likely due to incorrect details within the wp-config.php file. You can access this file using FTP or via our File Manager. Within this file, there should be some database connection details in the following format:
// ** Database settings - You can get this info from your web host ** //
/** The name of the database for WordPress */
define( 'DB_NAME', 'database_name_here' );

/** Database username */
define( 'DB_USER', 'username_here' );

/** Database password */
define( 'DB_PASSWORD', 'password_here' );

/** Database hostname */
define( 'DB_HOST', 'localhost' );
Your database connection details can be accessed via the MySQL Databases area on your package. To access these:
- Log into My20i and head to your Manage Hosting area.
- Select Options > Manage on the hosting package you’d wish to edit.
- Head to the Web Tools section and select MySQL Databases.
Set the details in the file to match the details specified on the above page, and your site will then be able to connect to the database.
If your WordPress site continues to throw a database connection error despite the details being correct, it is possible that your database may be corrupted and will need to be repaired.
This can be done via SSH using the command wp db repair. We have a guide on how to connect to your hosting package via SSH.
Once you’re connected, navigate to the public_html folder with the command
cd public_html
And run wp db repair – you’ll receive output as the site goes through and runs repair on each table. Once it has completed, retest the site and it should be back online.
3. Website Errors
Once a valid WordPress installation is detected, the system uses WordPress CLI to pull data such as the Plugins, Themes and Users. If a 500 error is occurring on the site, however, it will prevent the CLI from running. This will result in the tools also failing to load via the UI, so it’s important to check your site for any 500 errors.
500 errors are critical errors that get reported directly to the Error Logs area of your package. We have a full guide on how to check and debug ‘Error 500’.
4. Must-use Plugins
If the site loads fine and there’s notable errors within the site itself, it’s possible a plugin on the site is interfering with our platform’s ability to detect your WordPress install.
Most commonly, this is caused by Must-use Plugins, or mu-plugins. These are critical plugins used by specific platforms and processes in order to function, stored in a folder of the same name on the site separate from standard plugins. Platforms such as WP Engine have their own mu-plugin that they use for additional functionality – however, they aren’t required on our hosting and actually can interrupt the platform’s ability to detect the WordPress installation. It is worth checking your site’s mu-plugins folder, and remove any unrequired to function on the 20i platform. If you’re unsure, take a backup of the folder before you remove any.
5. Change PHP Version
Another cause could be the PHP version that's currently being used on the website. It could be that the PHP version is out of date which causes problems with Wordpress or the installed plugins/themes.
You can update the PHP version from the Change PHP Version page when you manage the hosting package. This will show the current PHP version currently in use and you can choose another version within the drop down to update it to a newer version.
6. wp-salt.php
One final common cause of the WordPress tools not being able to display on a WordPress package is the system being unable to detect the WordPress Salts. These are security keys generated to protect WordPress, and are defined in the wp-config.php file.
Our system checks for these as a part of its installation check, and if it fails to find them it can result in the system believing WordPress is not installed. Some systems and setups store the salts in a separate file called wp-salt.php. If this is how your site stores these, you’ll need to remove the salts from this file and instead place them back in wp-config.php. This will then allow the system to detect your WordPress install as normal.
By carrying out these steps, you can perform a number of checks to determine why your WordPress installation may not be detected. Generally, the cause boils down to either errors on the site itself, or a plugin or configuration interrupting the platform’s ability to detect your installation. Once these are cleared, you’ll be able to see WordPress Tools once more, and manage your site directly via My20i.
 Corey Seymour
WordPress knowledge: use SMTP with and without plugins
Sending emails directly from your WordPress site can be critical to your site’s success. It could be from a contact form to help your clients get in touch if they’re interested in your services, order emails to confirm details and provide receipts for purchases, or password reset emails to allow users access to their accounts.
WordPress itself comes with functionality out of the box that can allow for sending emails, but it’s not as secure as it could be, and can more often than not result in your business-critical emails resulting in the Spam folder.
Making use of SMTP with your WordPress site, however, can ensure that all of these important emails make it to their intended audience. Setting them up is much easier than you’d think. This guide will step you through what SMTP is, why it’s important to make use of it on your WordPress sites, and explain a couple of ways for you to get started using SMTP as soon as possible.
What is SMTP?
SMTP, also known as the Simple Mail Transfer Protocol, is the main protocol used to send and receive email. A majority of email systems make use of SMTP to send out emails between servers. These emails can then be retrieved using email client protocols such as IMAP or POP3.
Why should I use SMTP with WordPress?
By default, WordPress makes use of PHP Mail using the wp_mail function to send emails from contact forms, product orders and other functions that send out automated emails. However, PHP Mail lacks any form of authentication – it simply sends with the from address it’s provided directly from the server itself.
As a result, PHP Mail often gets used to spoof email addresses, commonly enough that some mail hosts simply mark emails from PHP Mail as spam or may even get blocked.
SMTP, on the other hand, connects to a mailbox directly and authenticates the connection using the mailbox password before it sends. This means that only setups with the correct mailbox details can actually send out emails. This is considered much more secure and can ensure that your site’s emails are less likely to be seen as spam and make their way to your intended recipients.
How can I connect using SMTP?
Connecting your WordPress site to your mailboxes using SMTP first requires you to understand where your emails are hosted – each mail host has a different hostname for their SMTP services. Knowing what this is can save you a headache in the long run. Some services have setups available to allow you to use smtp.yourdomain.com to connect, but this requires that subdomain on your domain to be pointed to their services.
If your emails are hosted here with us at 20i, our SMTP settings are as follows:
Hostname: smtp.stackmail.com
Port: 465 (SSL) or 587 (TLS)
Security: SSL/TLS
Username: Your email address you want to send with
Password: The password of the mailbox you want to send with
If you use Office365 to host your mailboxes instead, you’ll need to use their SMTP details:
Hostname: smtp.office365.com
Port: 587
Security: STARTTLS
Username: Your email address you want to send with
Password: The password of the mailbox you want to send with
Other mail hosts will provide guidelines or quick references online that will specify the SMTP connection details you need. If you’re unsure, check with them directly to confirm.
Once you have the details you need, it’s time to connect. Doing so can be done a couple of ways, depending on how confident you are with coding.
Connecting to SMTP using a Plugin
If you’re unsure and want an easy way to do it, there are a great number of WordPress plugins that handle the heavy workload of the connection for you, allowing you to simply pop in your SMTP details and begin sending straight away. We'll demonstrate the setup SMTP in WordPress with a plugin using two examples of popular ones. These are:
WP Mail SMTP
WP Mail SMTP is a free plugin that comes with a wizard that runs automatically upon installation and steps you through setting up your SMTP connection. When you first install it, you’ll be prevented with the following screen:
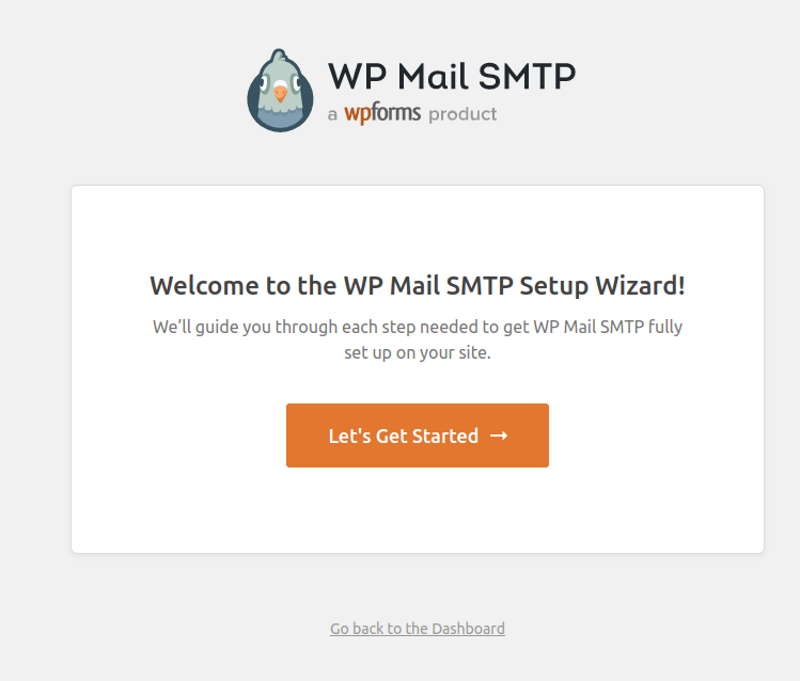
Select Let’s Get Started and you’ll be presented with some options for what type of SMTP service you use – there’s various auto configurations for different hosts, such as Google, Office365, Mailgun and SendGrid. If you use 20i’s mail services, you’ll want to select Other SMTP. If you’re unsure, check with your current mail host.
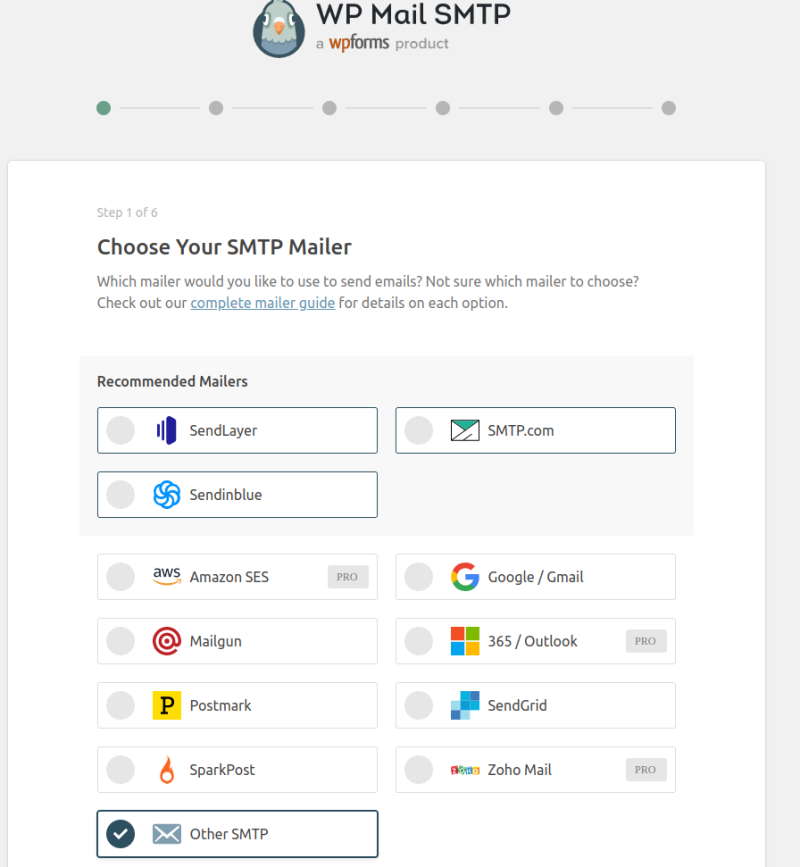
On the next page, you’ll be presented a form – follow the steps here to fill out your details. SMTP Host is where you’d input your hostname, and Encryption is your security – we recommend SSL or TLS, depending on what host you use.
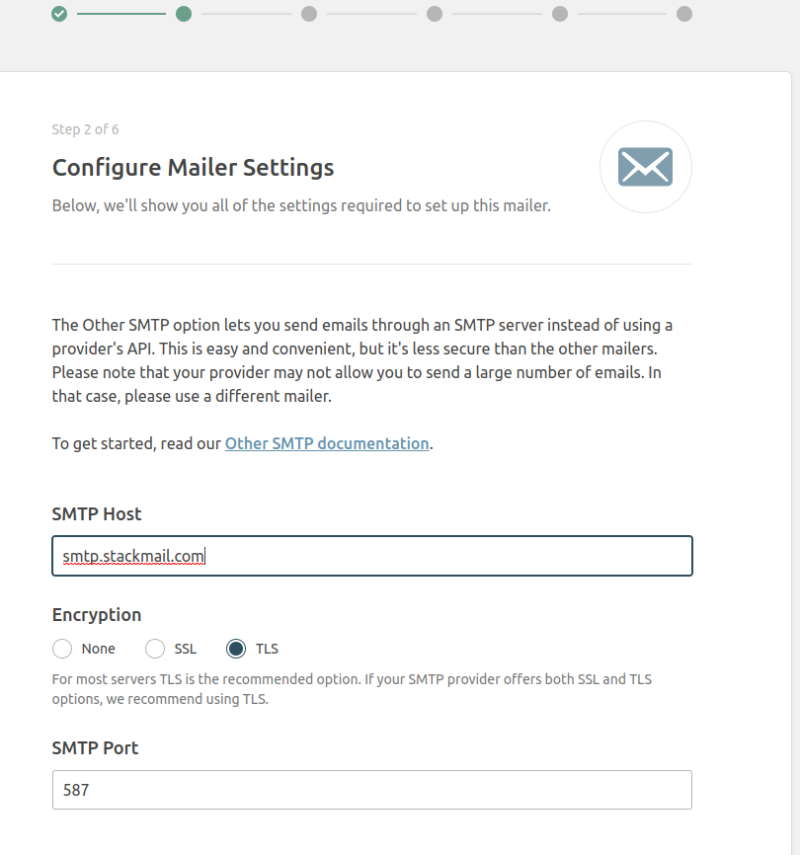
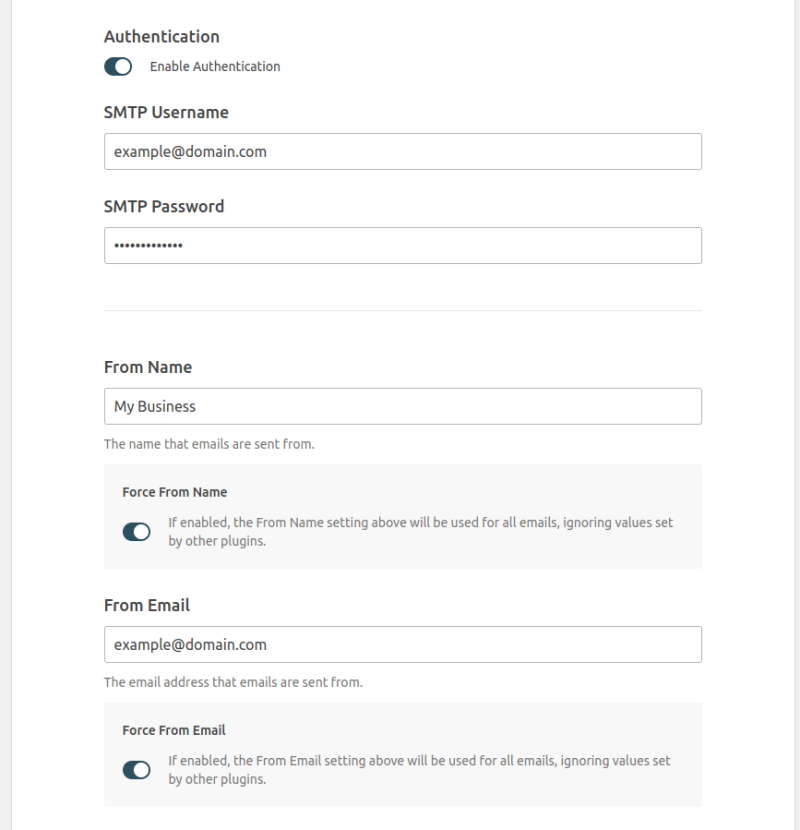
Make sure that Authentication is enabled, then input your SMTP Username and SMTP Password – these are the email and the mailbox password respectively. Lastly, set a From Name, which is the name that will appear as the sender of the email, and the From Email. You’ll want to make sure the From Email matches the SMTP username.
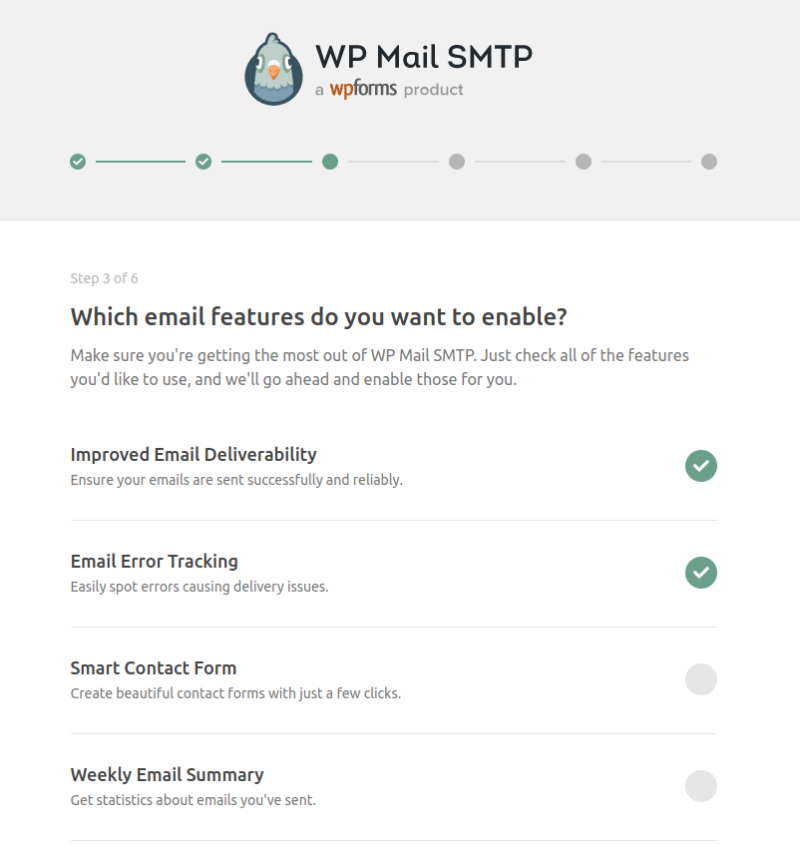
WP Mail SMTP will then prompt you with some additional preferences – you can choose to enable these based on what you’d like of the plugin. If you’re unsure, leave it as default.
WP Mail SMTP will then run a quick test of the settings you’ve used – if there’s any errors, you’ll then be prompted to recheck your details.
If not, you’ll see the following screen:
And you’re all set to send your emails using SMTP.
Easy WP SMTP
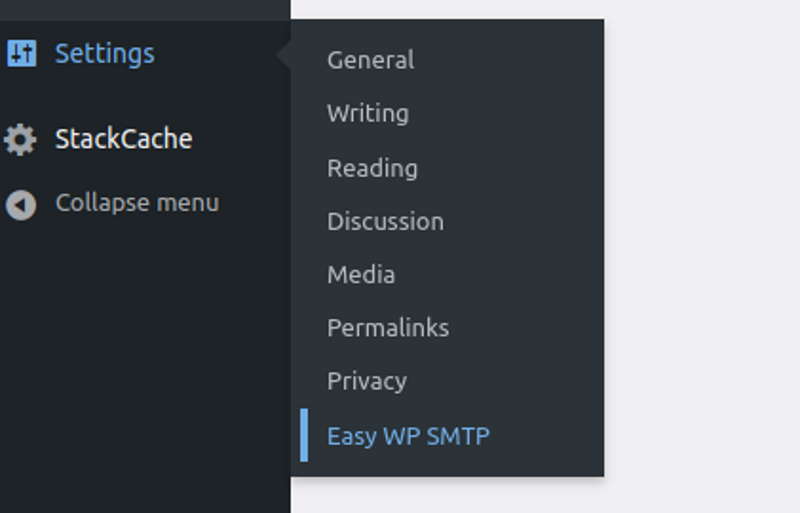
Easy WP SMTP aims to make setting SMTP up and testing as quick and as simple as possible. Once it’s installed, head to the Settings tab of your WP Admin area, and you should see a new option for Easy WP SMTP.
Once selected, you’ll be greeted with a form with all of your needed details. From Email Address is the email address you wish to use for sending, and your From Name is the name you want the email to appear to come from. Reply-To Address is the address used for the Reply-To field, and you can also set a BCC Email Address if you want to have a copy of the email sent to another mailbox.
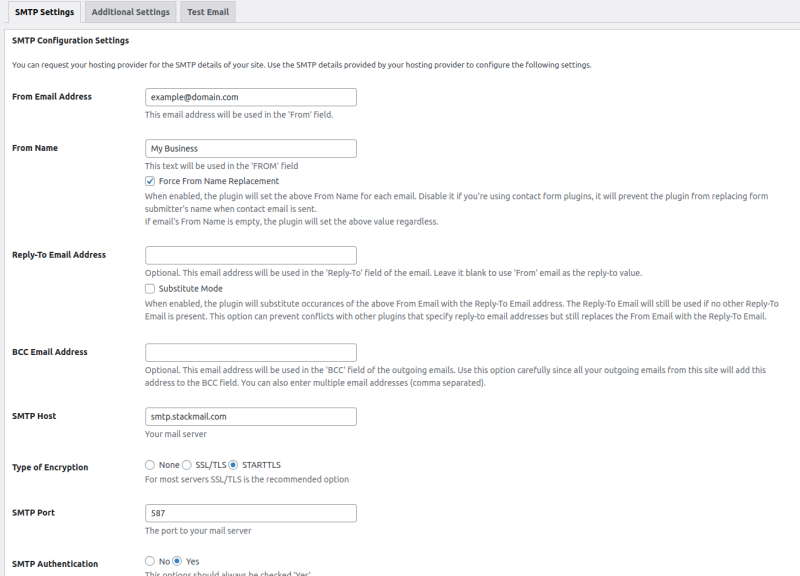
Below that, you have entry fields for your SMTP Host, which is your email provider’s SMTP hostname, the Encryption, which is the security, and your SMTP Port. Set these to your mail provider’s required settings, and select Yes on SMTP Authentication.
Lastly, enter the mailbox you wish to send from into SMTP Username and the mailbox’s password in SMTP Password, and hit Save Changes.

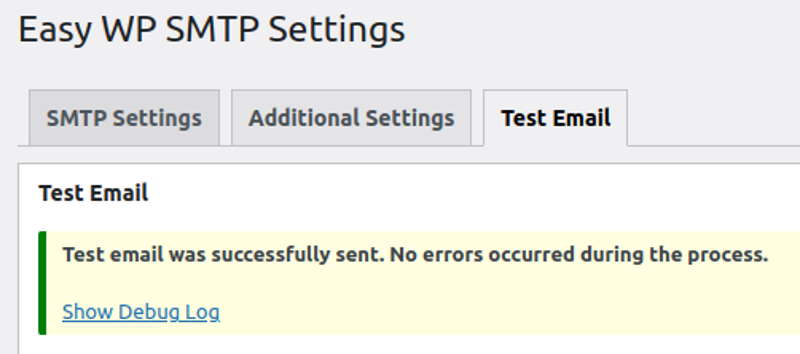
You can then navigate to the Test Email tab at the top of the form, and send a test email to check the SMTP settings are configured correctly.
If everything is configured correctly, you’ll get a popup confirming your email went through, and you’ll be all set to begin sending emails from your WordPress site using SMTP.
Without Plugins
If you’re more confident with PHP coding and the inner workings of WordPress, you can also set up your SMTP details directly using code. To do this, you’ll need to have set up a WordPress child theme – WordPress themselves provide a guide on how to do so here [ https://developer.wordpress.org/themes/advanced-topics/child-themes/ ]
Note: Before attempting this, make a backup of your site files so that you have a restore point.
In order to do so, first head to your wp-config.php file in the core folder of your WordPress site and add the following code:
// Configure your site to use SMTP
define( 'SMTP_USER', 'email@example.com' ); // Username to use for SMTP authentication
define( 'SMTP_PASS', 'MAIL_PASSWORD' ); // Password to use for SMTP authentication
define( 'SMTP_HOST', 'smtp.stackmail.com' ); // The hostname of the mail server
define( 'SMTP_FROM', 'email@example.com' ); // SMTP From email address
define( 'SMTP_NAME', 'FROM_NAME' ); // SMTP From name
define( 'SMTP_PORT', '587' ); // SMTP port number - likely to be 25, 465 or 587
define( 'SMTP_SECURE', 'tls' ); // Encryption system to use - ssl or tls
define( 'SMTP_AUTH', true ); // Use SMTP authentication (true|false)
define( 'SMTP_DEBUG', 0 ); // for debugging purposes only set to 1 or 2
This sets up the base configurations for your SMTP setup – you’ll want to modify the values above to match the recommended settings provided by your email host, and your own personal preferences.
Then, head to your child theme folder in wp-content > themes and open functions.php. In this file, add the following code:
// Configures SMTP authentication for your site
add_action( 'phpmailer_init', 'send_smtp_email' );
function send_smtp_email( $phpmailer ) {
$phpmailer->isSMTP();
$phpmailer->Host = SMTP_HOST;
$phpmailer->SMTPAuth = SMTP_AUTH;
$phpmailer->Port = SMTP_PORT;
$phpmailer->Username = SMTP_USER;
$phpmailer->Password = SMTP_PASS;
$phpmailer->SMTPSecure = SMTP_SECURE;
$phpmailer->From = SMTP_FROM;
$phpmailer->FromName = SMTP_NAME;
}
And that’s it – your site should now be able to use SMTP for sending your emails directly from your website.
Setting up SMTP with the above steps can ensure that your sent emails are safe, and better improve your chances of having them arrive with your clients without being flagged as spam and potentially missed.
 Austin B.
When does StackCache clear my cache automatically?
Our inbuilt StackCache plugin stores your site files and content locally to get the best-possible speeds out of your WordPress website.
However, when you’re working on your site, you’ll want to make sure any changes you do make are reflected on the site itself. As such, we’ve integrated rules that StackCache follows automatically so that it clears the cache to show the latest renditions of your site.
Depending on the type of changes made to the site, different amounts of content will need to be cleared. Below is a full breakdown of the different types of cache clear that StackCache does automatically, and what triggers these to be cleared.
Events that fully purge the WordPress site cache
Changes made to the WordPress site that affect the whole site, such as swapping the site’s theme, will need a clear of the entire site’s current cache. So we purge the cache for the whole site in the case, including all pages and resources.
Here’s a list of events and actions that will trigger this type of purge request:
- Switching the WordPress theme
- Saving settings in the Customise area
- Activating a plugin
- Deactivating a plugin
- Autoptimize cache purge: When a cache clear is requested in Autoptimize, StackCache will also do a full clear.
Events that purge a single page
For changes that only affect a small section of the site, such as editing a single page or updating a current post, a full clear isn’t usually necessary. So StackCache will only run the clear on the URLs that have been changed rather than the whole site.
The events that trigger this are listed below:
- Moving a post to the Trash folder
- Deleting a post or page from the site
- Restoring a deleted post
- Editing a post or page
- When a post or page comment is added or updated
- Updating a post
Note: Our StackCache system treats WooCommerce products as posts, and so any changes made to your products that match with the above will also fire off cache requests.
Can I make StackCache purge more frequently?
Sometimes, based on how often you update aspects of your site, you may want to always make sure that you’re displaying the latest version of your site. Rather than just running cache clears on individual parts of the site, you can enable options within StackCache itself to allow for a more aggressive cache clearing setup. To do this:
- Log into wp-admin on your WordPress site.
- Navigate to the StackCache section in the column on the left-hand side of the page.
- Here, you’ll see StackCache’s main settings. Two of these include:
- Make Automatic Cache Purging Purge Everything: when we detect content changes, we purge the cache automatically for the post/page URL modified, the index page and your site’s RSS feed automatically. Enabling this option will trigger a full cache purge whenever these events are detected.
- Perform Automatic Cache Purging For All Post Types: by default, we only purge the cache automatically when standard post types are modified. Enabling this option will trigger a cache purge regardless of post type.
With this knowledge, you can better manage and customise StackCache to work with your WordPress site. Provide the best possible experience for your visitors by serving fresh content when needed - without sacrificing site speeds.
 Reudiger Dalchow
How do I use 20i's WordPress staging environment?
Sites on our WordPress-optimised platform have access to a full staging environment. Staging allows you to make a clone of a live WordPress site on a staging server in moments. You can then make changes without affecting the live site.
What is a WP staging site and what is it used for?
A WordPress staging site is a clone of your live website to test changes, try out plugins, themes and everything else before making them live. Staging sites help you catch errors, so you don’t end up breaking your live website.
You can install WordPress locally on your Windows or Mac machine to test changes or see if a plugin works and when finished and satisfied with the updates, simply upload those changes from localhost to live server.
One problem, and it can be a major issue, with this approach is that something that worked on your localhost does not always mean it work on the live server
Often localhost and live hosting servers are not running the same environment.
A WordPress staging site lives on your web hosting server, all those errors can be prevented because it runs the same server configuration as your live site.
Now have a look how to use the staging environment on our optimised WordPress platform.
To make use of the staging environment, you’ll need to make sure the site is hosted on our optimised WordPress platform.
To use the WordPress staging environment:
- Login to My20i, head to Manage Hosting and select Manage on the WordPress package you want to use staging for.
- In the WordPress Tools section, select Staging.
- Select Create Staging Site.
- Your current site will then be cloned onto a staging subdomain, i.e. staging.yourdomain.com. This will take a few minutes to complete.
- Once your site has cloned onto the staging subdomain, you will now have access to edit the staging site without having an impact on the live site.
- To view the staging site, select Visit Staging.
To edit the staging site files, you can use either the File Manager or FTP. A newly created staging_html directory will have been created, this is where the cloned files are stored and where you need to go to edit any site files.You can edit the site as normal through WordPress Admin.
To edit the database, you can head to MySQL Databases and you will see a newly created SCSTAGING database which you can simply login to via phpMyAdmin. The site and home URL for the WordPress site will be prefixed with the staging. subdomain.
To push your staging site changes to your live site:
- Head to the WordPress Staging icon.
- Select the checkbox next to 'I can confirm this will overwrite my existing, live website data'.
- Select Clone into live. This will take a few minutes to complete.
Once completed, any changes you’ve made to the staging site will have been replicated onto the live version of your site.
 Austin B.
What is a 404 error and how do I fix it?

What is a 404 error?
A 404 Error, also known as a ‘Not Found’ error, indicates that the resource that a website requested couldn’t be found. This can happen for individual resources like images or CSS files, or for entire sections of a site like a page or the home area. When this occurs, debugging can be a little difficult if you’re unsure what to look for. There likely won’t be any information in the Error Log that can narrow this down.
Why do I get a 404 error code on my website?
404 Errors on your site are usually caused by the path to a file you want to load being defined incorrectly, or that resource simply not being present in the files. Depending on what content is missing, there are different steps you can take to debug and resolve these errors. Below covers three of the most common 404 error occurrences on sites and how to resolve them.
1. What causes an error 404 across my whole website?
If the 404 occurs when trying to load your site directly, then the site isn’t able to locate and load the index file using the site’s current home directory. This is commonly caused by the site’s Document Root being set to a folder that doesn’t exist on the system.
How to fix the 404
- Log in to your control panel (My20i)
- Select the package that is showing the 404 error under Manage Hosting
- Head to the Domains section in the package
- Here, you’ll be able to see the current Document Root set for your domain. You need to make sure that this is pointing to the folder that contains your site files.

- Once that’s been changed to the correct folder for your site, hit the Update button and allow the system 15 minutes to adjust. The 404 message should then stop occurring.
2. What causes the 404 error on all subpages In WordPress?
Another common issue is a WordPress site throwing 404 Not Found errors on every page on the site, except for the homepage. This is caused by the site’s permalink structure not being set up correctly, which can be solved from within WordPress itself. To resolve this:
- Log in to the WP Admin area of your WordPress site.
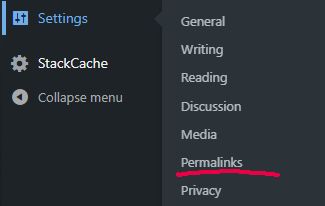
- From the Dashboard, hover over Settings and select Permalinks.
- This page is defines what URL structure your WordPress site uses to display and load its subpages and posts. Make sure this value is set correctly based on your preference, and then hit Save Changes.
-
If the value is already set correctly, hit the Save button regardless. This forces WordPress to rebuild the permalinks internally, which should bring your site’s pages back online and allow them to display once more.
3. Why do my site’s images return a 404 Error?
This generally relates to either the site images not being present in the file manager, or the file path to those images being defined incorrectly.
In order to debug this:
- Log in to your My20i control panel
- Select the package that is showing the 404 error under Manage Hosting
- Head to the File Manager in your package, and navigate to the folder the images should be stored in. Make sure that the images are present there under the correct file name.
- Once done, check your site’s configuration file.
Some setups - such as OpenCart - have a definition for the image file path, for example:
define('DIR_IMAGE', $_SERVER['DOCUMENT_ROOT'].'/image/');
This needs to be set correctly in order for the images to properly load without a 404 error.
WordPress sites have a Media section under Settings in WP Admin that need to be configured to point to the correct uploads folder in order for site images and uploaded content to load and be editable
If your site wasn’t built with a CMS and instead was built using HTML/CSS, you’ll need to check your site’s files and make sure the hardcoded paths to the images you’re attempting to load are correct.
Do you support WordPress multisite?
Yes! All our platforms have full support for a WordPress Multisite network. You just need to follow the Create A Network article from the WordPress codex to get this setup.
Additional Domains
As standard, we automatically map the 'wildcard' alias for your domains to your site. What this means is you can create subdomains such as sub.domain.com and sub2.domain.com without any additional configuration.
However, if you want to add additional domain names/subdomains to the package, you can do that inside Manage Hosting. From there, the 'Domains' icon allows you to map additional domains to your package. For WordPress Multisite Network to work, all domains must point to the same document_root when they are added - usually public_html.
Activating SSL on Subdomains
We automatically map *.domain to all your packages, so you won't need to add new subdomains to the account to get them to point to your WordPress install. However, this means they aren't available for additional services like SSL Certificates and e-mail accounts.
You can take advantage of our Free SSL service for any subdomains by explicitly adding them to the package. To do this, go to 'Manage Hosting', follow the 'Subdomains' icon and add the subdomains you wish to activate SSL on. As above, for WordPress Multisite Network to work, all domains must point to the same document_root when they are added - usually public_html. Once added, head over to the SSL/TLS icon and Activate your Free SSL.
Try 20i's WordPress Hosting today for just £ 1.00. You'll get WordPress staging, a global CDN and unlimited email as well as exclusive WordPress page speed plugins for your website with bullet-proof security. Are you a reseller, agency or web designer? The optimised WordPress platform and all its features come included with 20i's Reseller hosting. Learn more about Reseller hosting here.
 Lloyd Cobb
How to Fix Mixed Content in WordPress
What's in this guide?
What is Mixed Content?
Mixed content is simply when a site is loaded over a secure HTTPS connection, but requests resources such as images, videos, stylesheets or scripts that are loaded over an insecure HTTP connection.
If you've already added an SSL certificate and ensured the site is loading over HTTPS but your site is still not secure you most likely have mixed content on the site. Modern browsers will usually either:
1) Block the content from loading, this often occurs with scripts. This prevents the site loading securely, you may even see a red padlock.
2) Show insecure warnings and indicate to the user that the page they're requesting has insecure content.
When visiting a webpage over HTTPS in Google Chrome, the browser alerts you to mixed content as errors and warnings in the JavaScript console. You can view mixed content in Chrome by selecting F12 on your keyboard or right-clicking and selecting 'Inspect'.

A good tool to help identify mixed content is the Why No Padlock? tool.
How to Fix Mixed Content on Your WordPress Site
To fix mixed content on a WordPress website, a plugin can be used that automatically replaces the insecure URLs with the secure ones.
- Log in to the WordPress Dashboard
- Select Plugins and select Add New
- Search for SSL Insecure Content Fixer, and select 'Install Now'
- Once the plugin has been activated you can change the settings from Settings. From there, you can alter the extent to which the URLs are replaced. We’d recommend selecting either Simple/Capture/Capture All.
- If you’re on the WordPress platform you’ll need to purge cache within StackCache, then try an incognito window to ensure your browser hasn’t cached the previous content.
Your site should now load securely. If not, you can follow the steps below to make sure you've covered all bases to ensure your site is secure.
WordPress Hosting Packages
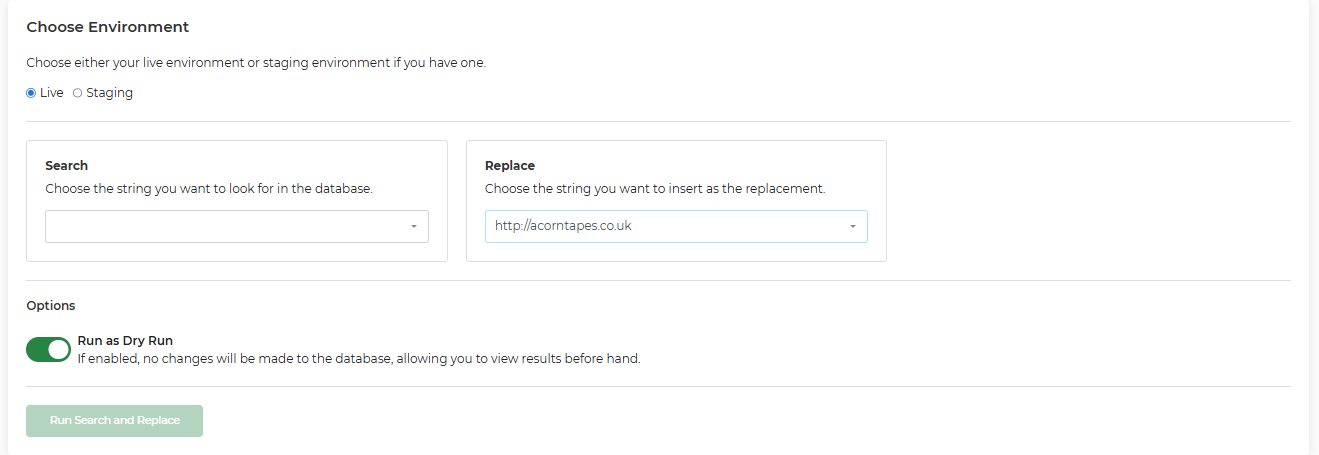
WordPress packages are specifically tailored to WordPress by utilising WP-CLI. As a result, this hosting package type comes with additional features and options. One of these features is a built-in Search/Replace, allowing you to perform a search & replace without needing to run commands via the CLI.
From here, you can select the string that the platform will search for and then the string to replace it with. Additional options are available, such as the ability to choose between the live and staging site, as well as Run as Dry Run, which allows you to review the results of the search & replace before executing the query.
Ensuring Your WordPress Site Loads Securely
Ensuring there's no mixed content on your WordPress site is fundamental to ensuring it loads securely; however, you cannot overlook the other key factors that ensure the site loads securely for its users.
Ensure HTTPS is used
Make sure the WordPress site and home URLs are prefixed with HTTPS i.e. https://example.com. You can do this within the /wp-admin area of your site.
- Log in to the WordPress Dashboard.
- Click on Settings on the left-hand side.
- Make sure the WordPress Address (URL) is prefixed with HTTPS.
- Make sure the Site Address (URL) is prefixed with HTTPS.
:bulb: If you're running an e-commerce store you may consider buying a Simple SSL Certificate. Whilst the level of encryption is the same as the free Let's Encrypt SSLs, the Simple SSL comes with a $10,000 warranty as insurance against loss of money when submitting a payment on an SSL-secured site.
Add an SSL Certificate
Make sure you've added an SSL Certificate to the hosting package through My20i.
- Go to Manage Hosting.
- Select Options > Manage on the hosting package which you wish to activate the SSL.
- Under Security, click on the SSL/TLS icon.
- You will then see your domain name and an option to Activate Free SSL next to it - select this and the SSL will be applied to your domain.
- If you’d like all your visitors to use SSL connections (i.e. for HTTPS to always be used), simply select the Enable option at the bottom of the page.
 Austin B.
Simple guide: wp-config.php - what it is and what you should know
The wp-config.php is an essential file for any WordPress site. Without your website will not work properly.
What is the wp-config.php?
The wp-config.php file is basically a blueprint for your WordPress website. It contains the crucial information WordPress needs to connect to your sites database, like database name, username and password. It also contains security keys to protect your website.
Creating a wp-config.php file
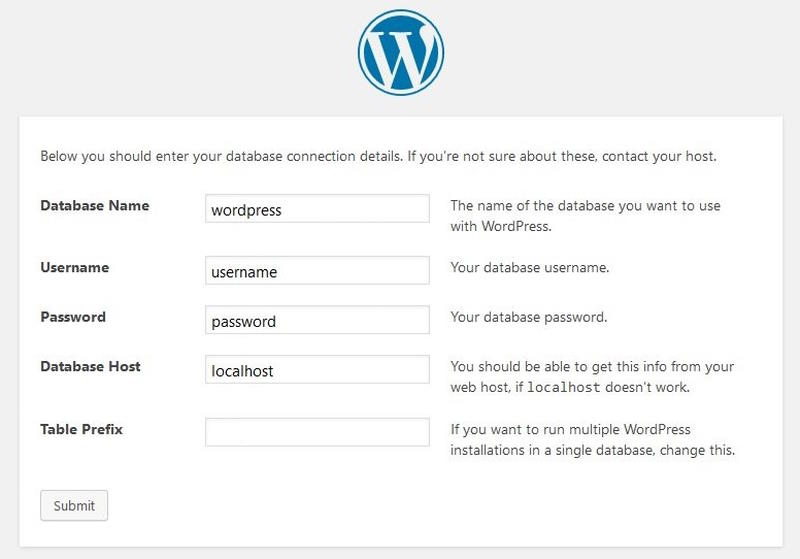
The wp-config.php file does not exist when you download WordPress. It is created in the installation process. If you have a WordPress optimised hosting, like with 20i, it will ab be done automatically and you don’t have to worry about a thing.
If, however, your hosting provider does not provide this service, you have to fill in the relevant data from your hosting provider in the installation process.
For most WordPress users this will be it and the wp-config.php file does not need any more attention.
But if you need to make changes to it, you need to locate it first.
Where is the wp-config.php and how to access it?
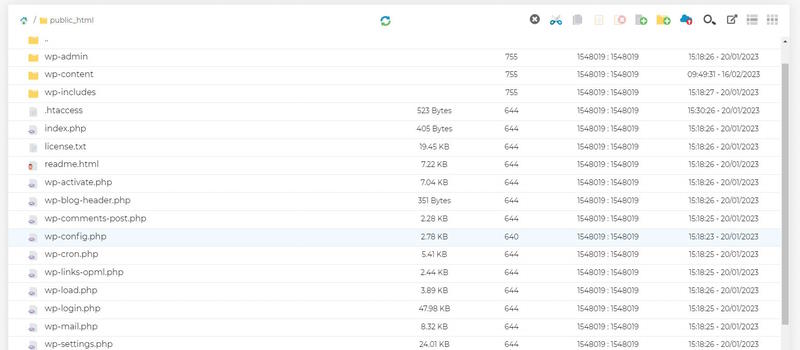
The file is typically located in the root folder of your WordPress installation. It can be easy accessed with the file manager via your My20i control panel (or any other control panel) or you can use a FTP-client to access the file.
Reasons to edit the wp-config.php file
There are some reasons why you would like to access the wp-config.php file and make changes to it, but it is imperative to make a backup of the original file before you make any changes and if you are not confident, please contact a developer before making any changes.
Some reasons why you want to make changes to the file:
- Changing database connection details: If you need to change the database connection details for your WordPress website, you will need to edit the wp-config.php file. This could be necessary if you are moving your website to a new server, or if your database login details have changed.
- Updating security keys and salts: The file contains security keys and salts that are used to improve the security of your WordPress website. These keys and salts should be changed regularly to prevent unauthorized access to your website.
- Modifying debugging settings: The wp-config.php contains debugging settings that can be used to troubleshoot errors and issues with your website. If you are a developer or a technical user, you may need to modify these settings to get more detailed information about errors on your website.
- Changing language settings: If you want to change the language of your WordPress website, you can modify the wp-config.php to specify the desired language.
- Changing the WordPress table prefix: It contains the table prefix for the WordPress database tables. Changing the table prefix can help to improve the security of your website by making it more difficult for hackers to access or modify the database.
- Enabling and disabling WordPress features: The wp-config.php file can be used to enable or disable certain features of WordPress, such as automatic updates, post revisions, and caching. These settings can be modified to optimize the performance of your website.
Please always make sure to have made a backup before making changes to the file and that you know what you are doing.
 Reudiger Dalchow
Do 20i offer WordPress CLI?
If you're using WordPress, you may wish to make use of the WP Command Line Interface (CLI) to make changes to your installation.
It's included by default with all WordPress installs.
If you'd like a detailed overview, please see this article: Get started with WordPress CLI.
How do I create a WordPress hosting package that includes a set theme and plugins?
When creating multiple WordPress sites, you may want to use a similar structure and appearance. Recreating the same structure over and over with just a few changes can be exhausting – instead, what you may want to do is set up a template, and then use that as a basis for your sites. This template could include a specific theme and some key plugins to get you started off without having to repeat the same work. But how to you go about making and using a template with 20i’s hosting?
The answer comes in the form of 20i’s Clone Package tool. This tool allows you to create direct copies of another package and install it on a fresh one with a new domain.
1. Setting up a template package
First of all, you’ll want to set up your template package. The package can be on either our Linux or our WordPress hosting. However, we would recommend making the template the same package type as the packages you intend to clone them to.
- Log into My20i and select Manage Hosting
- Head to Add Hosting Package
- Either select a domain from the drop-down menu or type your domain to create a domain reference
- Select the Package Type you’d like to create
- Select Create Hosting Package
Once this package has been created, open it up and install WordPress, as well as any plugins and themes you intend to use. Configure them to how you want them to be, and your template will be ready to use.
2. Making use of the clone tool
Now that you have your template set up, you can use it to create your first site.
- Log into My20i and select Manage Hosting
- Head to Add a Hosting Package and select Clone From Existing Package in the top right
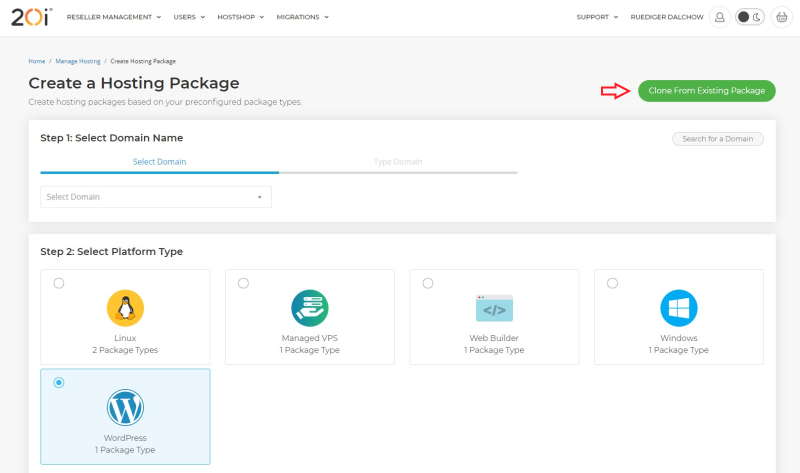
- Select the template hosting package you created previously from the dropdown box that appears
- Once selected, create your hosting package as you normally would. Select or type the domain name, choose the Platform Type and assign any StackCP Users if required.
- Select Create Hosting Package to complete setting up the new package
Once the cloning process completes, the site will be set up with all of the themes, plugins and content you put in place on the template, but will have the new domain attached to it. You can do this as many times as you need and can even set up templates for non-WordPress sites such as Magento or Joomla.
By following these steps, you can save yourself time creating the same base site repeatedly. Our cloning tool allows for you to copy site formats across and use them as a basis for future development.
 Reudiger Dalchow
What are the Free Tools with WordPress Hosting?
We have a suite of WordPress Tools which make the management of WordPress sites much easier.
Rather than having to log in to the WordPress dashboard for each particular site, you can manage themes, plugins and more from within the 20i control panel.
The toolset is available for all sites hosted on our optimised WordPress platform. This guide covers each tool and how it can help you.
WordPress Version Checker
This checks whether the installed version of WordPress is the most up-to-date. If we detect that the version is not up-to-date, you’ll be notified and the UI will present the option to update the core version to the latest stable release. It’s important to keep WordPress updated for security reasons and to ensure you can use the latest plugins.
WordPress Admin
This is a quick link that takes you directly to the WordPress dashboard. If you’re already logged into WordPress then you’ll be directed straight into the dashboard itself.
WordPress Reinstall
This allows you to perform a full WordPress reinstall, wiping the site files and database in the process and replacing them with a brand-new WordPress installation. Use with caution: you'll need to tick a box to confirm that you want to do this.
WordPress Plugin Management
The Plugins tool allows you to manage any plugins that you have installed. You’ll be shown a list of the current plugins and if they’re active or inactive, and if they’re fully up to date.
The version of the plugin will also be shown. Here you can activate or deactivate plugins, and update them.
WordPress Theme Management
This will show you a full list of current themes that are installed on the WordPress installation, their versions and which are active. Similar to the Plugins Management area, you have the option to activate, deactivate or update themes.
WordPress User Management
The Users tool makes it easier to manage WordPress users. It will show a list of all users that are present within the WordPress installation along with their name, username and their role.
You can add new users by entering the relevant information, selecting the desired role and selecting Create Account. As well as standard WordPress roles, custom-created roles will also appear here.
WordPress Settings
This tool allows you to make changes to the Site and Home URL, the site title and the site tagline. Make the changes and select Save Settings.
WordPress Staging
Sites on our WordPress-optimised platform have access to a full staging environment. Staging allows you to make a clone of a live WordPress site on a staging server in moments. You can then make changes without affecting the live site. Here's a full guide to the WordPress staging tool.
WordPress Checksum Report
This tool checks the core files of the WordPress installation and determines if they match those of the official WordPress core repository. If the files have been modified, then you’ll be notified via this tool.
If the check fails and modified files are found, then it’s a good idea to the check the on-demand malware scanner to ensure the installation has not been infected.
 Austin B.
What's the difference between a staging site and the ‘Stackstaging’ temporary URL?
Our WordPress hosting platform makes use of both a staging environment, which can be used for site development, and our temporary URLs, which can be used to test a site before the DNS is pointed to 20i.
It's easy to confuse them both due to the similarities in the URL structure.
Staging sites – staging.domain.com
A WordPress staging site, or staging subdomain, is a copy of your main website that is entirely separate to it.
A staging site allows you to make changes freely, expand upon the design and tweak the copy without having to worry about affecting your live site. When you’ve made all the changes you want to make, you can then clone the staging site to live, so that it replaces the live site completely. Find out more about WordPress staging here.
Staging sites always use the subdomain ‘staging’. So, for a site called domain.com, the staging site would be staging.domain.com. This allows it to be distinct from your live site.
Temporary URLs - domain-com.stackstaging.com
Temporary URLs - also known as StackStaging URLs - are an automatically generated URL that our UI provides that allows you to visit the site before any DNS points to us.
This can be used to preview a site before it goes live, or to make sure that all of a site’s contents have migrated over to us before you transfer the domain across.
Temporary URLs use the URL format domain-com.stackstaging.com. Note the dash in the URL, and that it’s not a subdomain of domain.com.
The temporary URL is not the same as a staging environment. It will always reflect what will be on the live site, so it’s not possible to perform work and then “push” changes to the live domain name.
Note: If the DNS for a site isn’t with us and you create a staging site, the staging site may use a temporary URL to allow it to be accessible. This will follow the format staging-domain-com.stackstaging.com.
 Chris Wright
How do I manage subdomains on the WordPress platform?
Our WordPress platform is optimised just for WordPress. We've developed our own custom plugin - StackCache - that controls our edge caching tech.
Due to this, we don't allow any other software to run on our Wordpress platform. The platform's nature means there are a few restrictions compared to our standard hosting platforms. While we do support both additional domain names and subdomains on this platform, they must be configured to point to the same WordPress installation - and hence should then be managed through a WordPress Network.
If your site requires a different setup to this, then our standard Linux hosting would still be suitable. You can move between all of our platforms including Managed VPS and Managed Cloud Servers, using the 'Platform Transfer' icon inside My20i.
 Lloyd Cobb
Improve your WordPress website's TTFB
Time To First Byte (TTFB) is the time it takes for your browser to receive the first byte of page content from the server. Reducing TTFB plays an important role in ensuring your site is performant and responsive for its users.
You may have seen the Google PageSpeed Insights TTFB audit. This audit can be passed by ensuring TTFB is under 600 ms. Ideally, you'll be wanting to aim for TTFB to be under 200 ms to give your users the best experience possible.
Whilst TTFB isn't the only factor to consider when optimising a site, if content begins to load for your website's users quickly, they'll have an improved first experience.
Quick links
How to measure TTFB in Chrome
Firstly, you'll want to make sure you can measure TTFB accurately and reliably. It may be that TTFB is already low, in which case there are optimisations you can do elsewhere.
To measure TTFB you can make use of Chrome's Network tab. We'd recommend this as your first port of call when determining what your site's TTFB is.
- Open up the website you want to test.
- Right-click and select Inspect, or press F12 to open up Chrome's console.
- Select the Network tab.
- Perform a hard refresh.
- Windows - Ctrl + R
- Mac - ⌘ Cmd + R
- Select the first line, which will be your URL.

- From there, select the Timings tab. You'll then see the TTFB displayed in milliseconds.
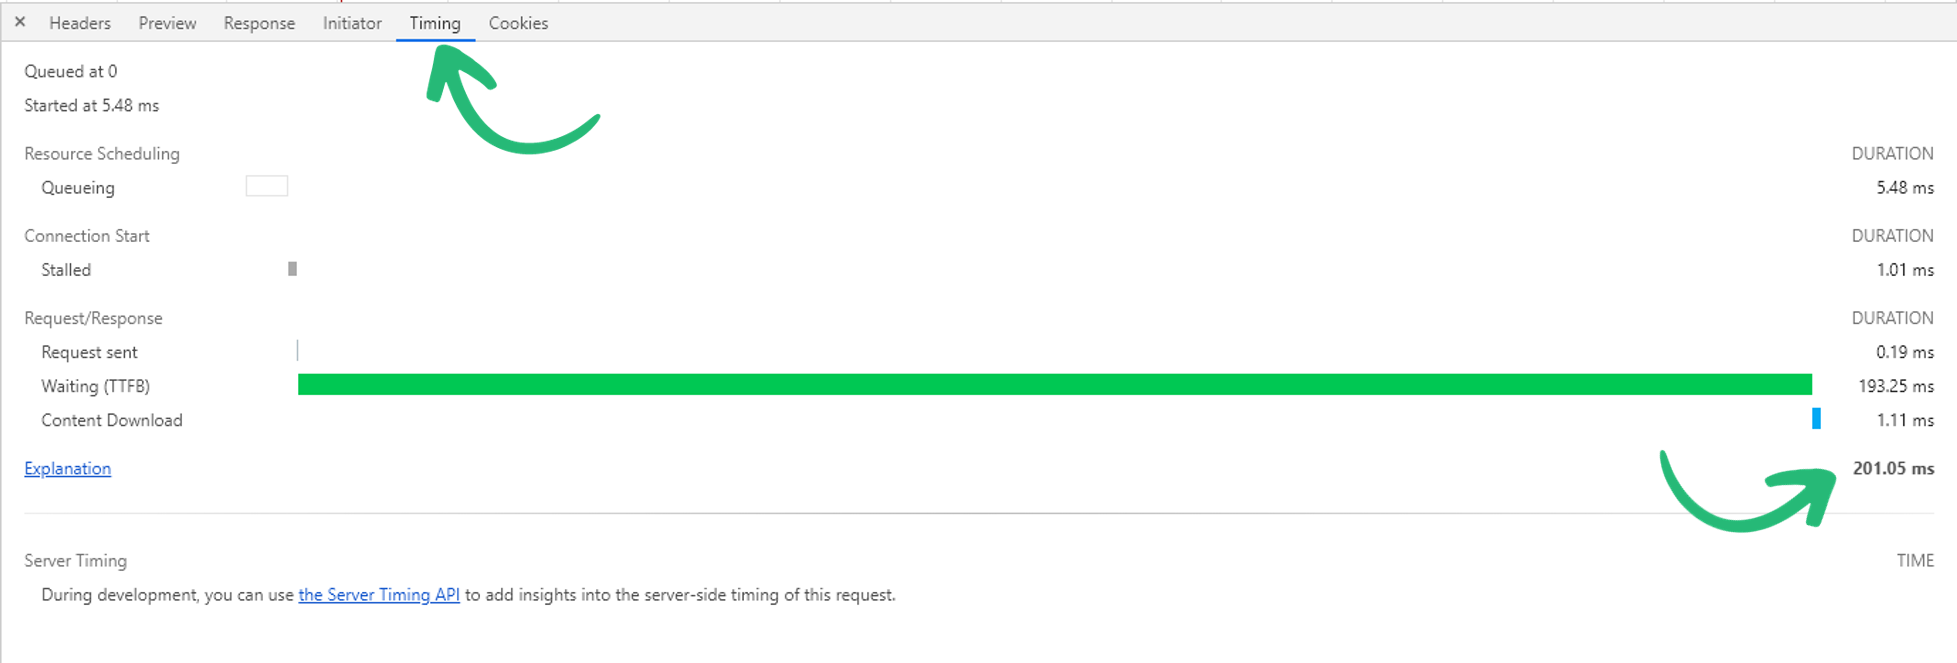
If this time is greater than 600 MS you'll want to look at options to improve this further.
Measuring TTFB Using Speed Tests
You can also test your website's TTFB using online tools such as:
What happens when WordPress sites load?
WordPress is driven by PHP at its core.
When you make a request to load a WordPress site a series of PHP files are interpreted and compiled. This makes up the '227 files long' loading sequence before any content is actually displayed to your browser.
WordPress first loads the index.php file in the root folder of your installation, it then compiles the remaining 226 files until it reaches the template-loader.php file before completing.
Whilst this process usually happens in just a few milliseconds, each additional PHP file added increases the amount of time it takes for the server to complete the sequence of files. This is why adding plugins and other resources can ultimately lead to reduced performance and a longer TTFB.
However, there are ways to ensure your website stays fast. At 20i we have a WordPress platform that is specifically optimised to run WordPress quickly which includes in-house caching, dedicated WordPress MySQL instances, Web Optimisations and, of course, the 20i CDN.
Below we'll cover the best ways to use these tools, as well as some further advice from our resident WordPress experts about how you can get the best performance out of your websites.
Try 20i's WordPress Hosting today. You'll get WordPress staging, a global CDN and unlimited email as well as exclusive WordPress page speed plugins for your website with bullet-proof security. Are you a reseller, agency or web designer? The optimised WordPress platform and all its features come included with 20i's Reseller hosting. Learn more about Reseller hosting here.
How to improve TTFB?
There are various methods you can use to improve TTFB. Of course, it all starts with a fast WordPress host and at 20i we've got that covered for you with fast SSD hardware, exclusive autoscaling technology and load balancing to back that all up. We offer some further tools you can use to further improve your site's performance.
1. Web Optimisations
20i’s CDN powers-up your websites further by feeding them through our Website Acceleration Suite.
The module improves website load times by automatically implementing web performance best practices to a website. This includes optimising images, JavaScript minification and combining CSS – all to improve website load times and the Google PageSpeed Score. This in turn positively impacts SEO and helps you develop high-performing websites at scale.
To access Web Optimisation, head to Manage Hosting > Manage > Web Optimisation
For a full list of the optimisations head to the Web Optimisation section within the package to be optimised. You’ll be able to select the One-Click Optimisation option to add the recommended settings.
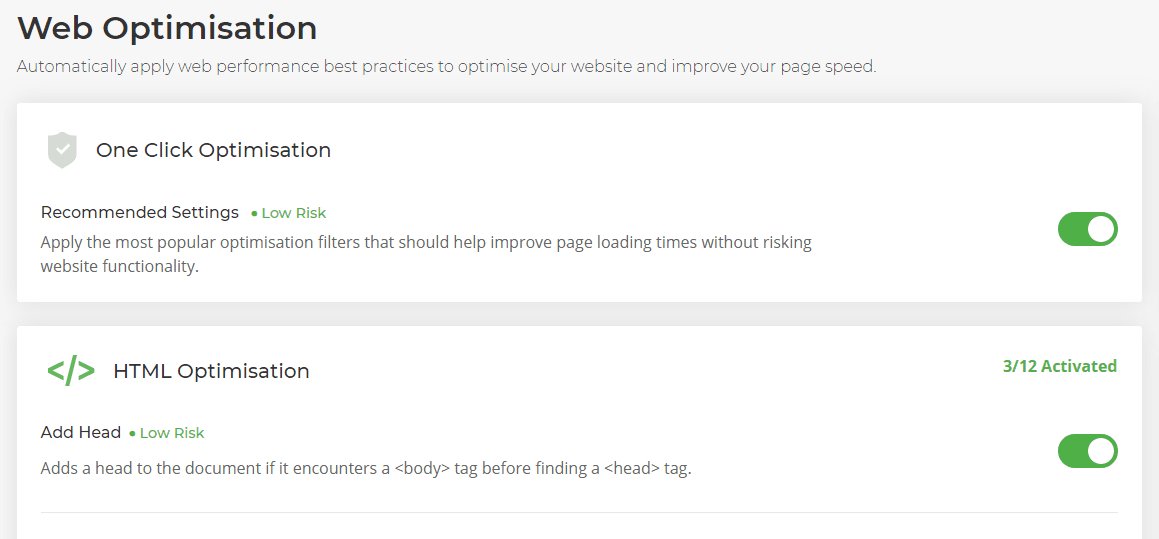
Each optimisation is referred to as a filter. They're designed to directly complement the recommendations that Google PageSpeed Insights provides. This means that you don't need to manually carry out the recommended optimisations. It's done for you, helping your websites get the highest PageSpeed score possible.
Optimisations are done at the server level. This means you don't need multiple plugins to optimise your sites. Reducing the number of plugins itself will improve the performance of PHP and result in faster load times.
2. CDN Caching
To give your websites a global presence our CDN extends across the world to reduce latency for globally distributed visitors and serves cached static and dynamic content closer to those users, improving performance further.
We currently use a number of very well connected data centres in America, Europe, Asia and Oceania. These exclusive POPs are usually used by transit providers and hence provide the very best latency using the smallest number of POPs. We essentially pay the premium to place hardware directly in 'carrier hotels' and neutral data centres that all traffic from a region will traverse through.
You'll want to ensure your site has Edge Caching enabled. Learn more about Edge Cache here.
Making sure your site is actually hitting the cache too is important to ensure it's getting the full benefit of the CDN. Learn more about why you might get a cache MISS here.
3. StackCache
At 20i we've developed our own custom caching plugin - StackCache. It controls our edge caching to truly 'turbo-charge' your website. The nature of this platform means that there are a few restrictions compared to our standard hosting platforms. For example, as this platform is built on PHP 7 OPcache, all plugins and scripts must be compatible with this version of PHP.
The CDN and StackCache can complement each other. The CDN will handle static cache of static file types, whilst StackCache can handle dynamic cache.
For websites on the WordPress Platform (i.e. with StackCache), dynamic content is cached with the default expiry times set.
| Image Cache | 1 day |
| CSS Cache | 1 day |
| JavaScript Cache | 30 days |
You can edit these values from the Edge Caching section or directly from within StackCache in the WordPress admin area. In addition, you can cache any other dynamic content using public Cache-Control and Expires headers via a .htaccess file - however, this is recommended only for advanced users only.
 Austin B.
What StackCache settings should I use with the MemberPress WordPress plugin?
What is MemberPress?
MemberPress is a membership plugin for WordPress. It features a paywall and subscription system that allows you to charge users for any kind of content. You could offer software, e-books and even online courses that you make and charge users for them.
StackCache settings when using MemberPress
In this guide, we’ll go through the best settings to use within StackCache when using MemberPress. As it relies on some pages being up to date, our caching could interfere, so they’ll need to be excluded from caching. We do this by adding cache exclusions.
First, you’ll need to log into the WordPress admin area for your website and select StackCache on the left-hand side menu.
This will show settings that you can change to suit your website. To make exclusions you’ll need to select Cache Exclusions on the top menu.
MemberPress advise making exclusions for the thank-you, account, login and register pages by default. Once you have added these then it will look something like this:
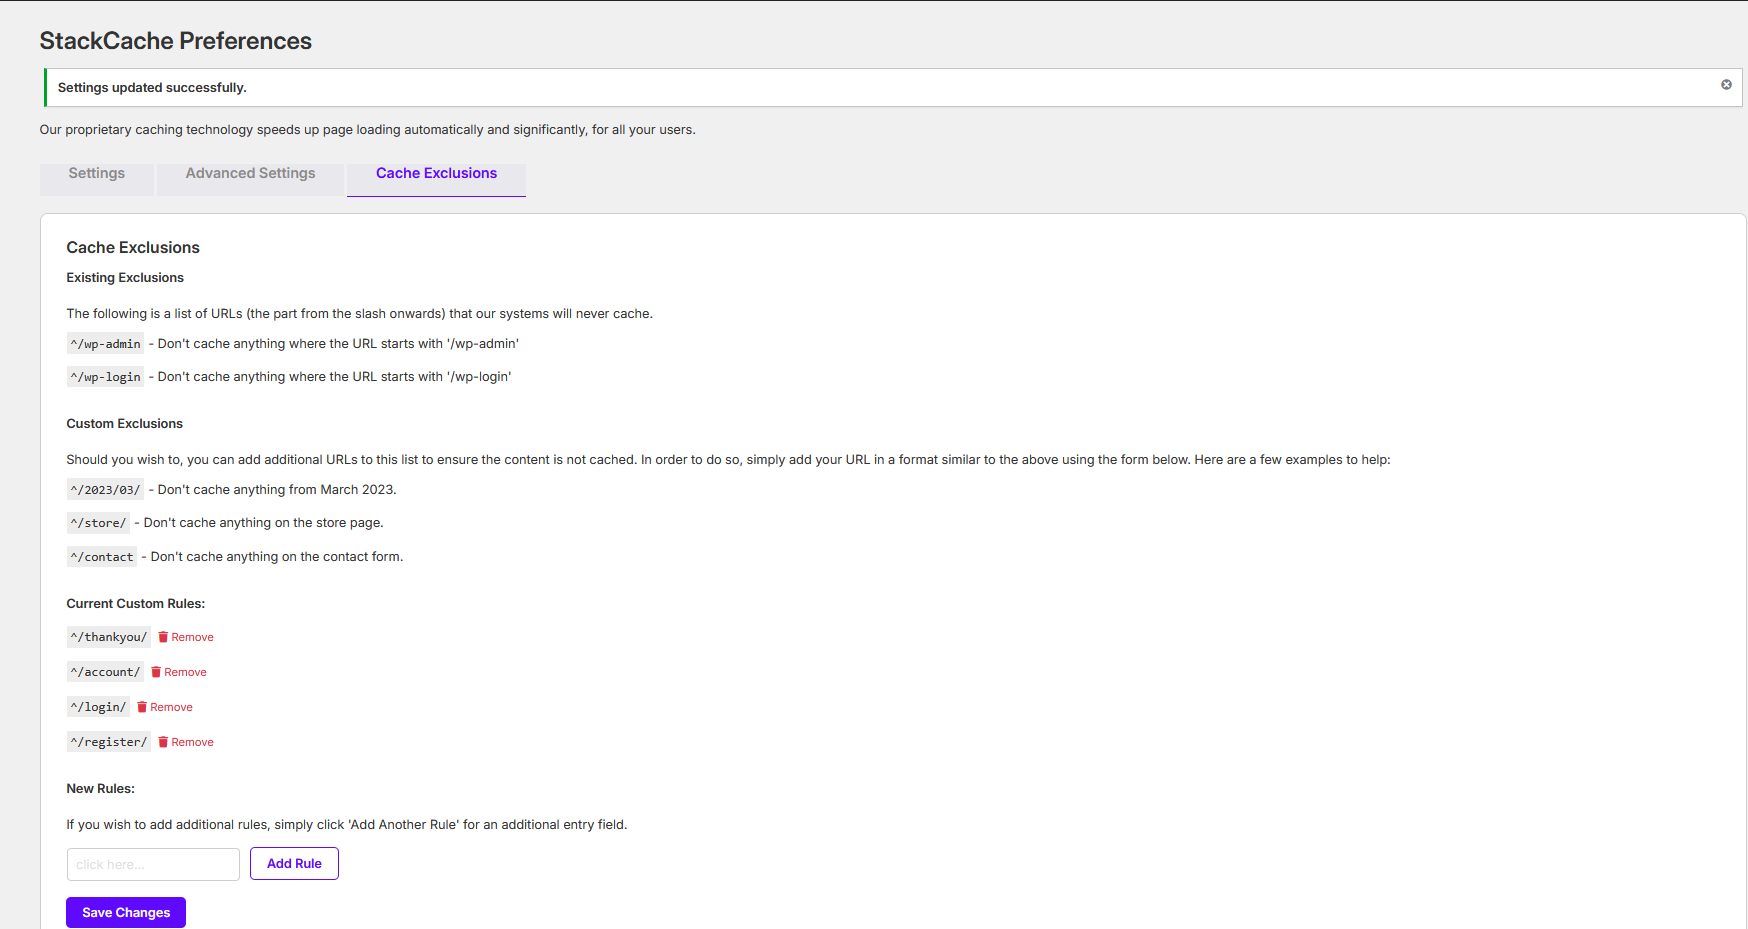
Also bear in mind that if you have used other pages than the default ones mentioned above you will need to adjust them.
That’s all you need to do in order to prevent the MemberPress pages from caching on our platform: now it’s time to build your community!
 Reudiger Dalchow
What is WordPress?
WordPress is a free and open-source content management system (CMS) based on PHP and MySQL.
WordPress is installed on a web server, which either is part of an internet hosting service or is a network host itself; the first case may be on a service like WordPress.com, for example, and the second case is a computer running the software package WordPress.org.
WordPress is considered one of the easiest-to-use CMS, thanks to its user-friendly interface. It also has an amazing number of plugins which allows it to extend its functionality in many ways.
Managed WordPress Hosting
20i's managed WordPress hosting is a dedicated platform that's optimised for speed, security and reliability.
The Wordpress platform is still Linux-based but only hosts Wordpress sites. It's optimised for WordPress, and uses our StackCache plugin.
StackCache was developed in-house to provide the most efficient way of managing multiple caching layers, whilst still giving complete control over our edge cache systems from a familiar admin interface.
 Austin B.
How to fix the WordPress index.php file being outputted
What is the WordPress index.php file?
The index.php file is part of the WordPress template hierarchy, which is a system used by WordPress to determine which template file should be used to display a specific page or content type. When a visitor requests a page on your website, WordPress checks the template hierarchy to determine which template file to use. If a more specific template file is available, WordPress will use that instead of the index.php file.
In most WordPress themes, the index.php file includes PHP code that retrieves and displays the content of your website's homepage. This code typically includes calls to WordPress functions that retrieve information from the WordPress database, such as the site title, tagline, and featured content.
While the index.php file is the default template file for your website's homepage, it is often customised or replaced by a theme's home.php, front-page.php, or custom-page.php template files. These files are more specific and provide greater control over the appearance and layout of your website's homepage
Why is the index.php been outputed and how you can fix it
Occasionally, you may encounter a WordPress site that outputs the contents of the index.php file directly to the browser.
There are two common reasons for this.
1. It's usually caused by the permissions set on the index.php file itself. Using the File Manager's Permissions tool make sure the permissions for this file is set to 640: right click on index.php > Permissions > Type '640'
Now try viewing the site in your browser.
2. If changing the permissions hasn't resolved this, ensure you have a .htaccess file in place inside public_html with the basic WP configuration found here: https://wordpress.org/support/article/htaccess/#basic-wp.
If you have a non-standard configuration in your current .htaccess file, make sure to take a copy of this so that you can add it back later if required. After entering the basic WP data, try viewing the site in your browser.
If you’re still seeing the index.php file being output feel free to let our Support Team know.
 Austin B.
Why can't I edit my WordPress pages using Elementor?
Elementor is a widely used website builder for WordPress that allows for a more advanced, yet streamlined approach to designing and creating your site. Many customers prefer to use this over WordPress’ own inbuilt tools, and our platform fully supports the use of this builder to create your perfect eCommerce store, blog or general website.
The setup comes with an integrated website builder that loads separately to WordPress’ main website builder, which includes a live preview and drag-and-drop UI for page customisation. This preview, however, can sometimes have issues loading. If this occurs, you may see the following error:
The error itself is very non-indicative, and so it can be a little unclear as to what the cause may be. However, there’s a few steps that you can take to narrow down and quickly resolve this error, allowing you to get back to building your site as fast as possible.
Plugin Conflicts
One cause of the above can be a conflict with other installed plugins or themes on your WordPress site. Plugins can provide a wide variety of functionality and tools to add to your site, but most are developed entirely separate from one another.
As a result, they can define rules or classes that will share names. Or they may try to use similar resources which can lead to internal conflicts and cause specific parts of these plugins and themes to fail to load, as with Elementor above.
Thankfully, there’s a quick way to determine whether or not this is the cause. That’s through Elementor’s built-in debugging tool Safe Mode. Safe Mode attempts to load Elementor’s tools without loading any other themes or plugins – it purely uses just what Elementor comes with. This allows you to see whether or not the problem is with other plugins or themes on the site.
To activate Elementor’s Safe Mode:
- Log into wp-admin on your WordPress site
- Navigate to Elementor on the left-hand side of the screen, and select Tools from the pop-out window that appears
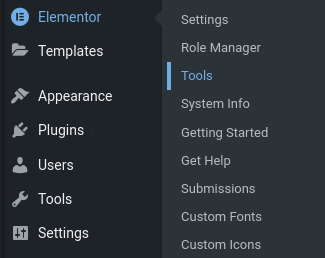
- Under General, select Enable under Safe Mode then select Save Changes
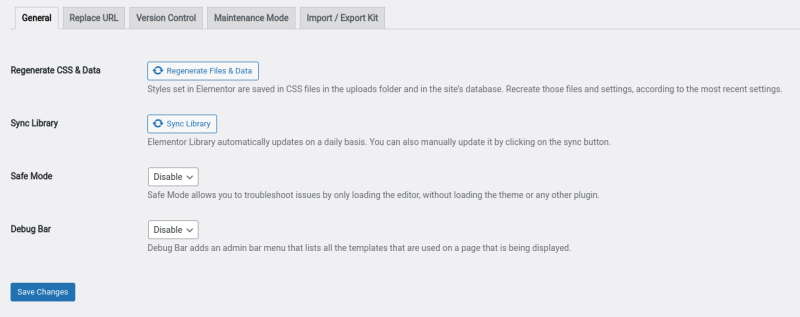
Now, retry loading the page editor again. If this now loads without the error, then there’s a plugin or theme on the site that will be conflicting with a function needed to load Elementor’s web builder preview. It would be best from here to disable any non-critical plugins temporarily to narrow down the potential causes.
If the preview still shows the error in Safe Mode, then it’s possible the issue may be a conflict with our Website Acceleration Suite instead.
Conflicts with our web optimisations
Elementor makes use of a number of JavaScript files when loading the preview of the page to allow for full editing. As a result, any optimisations outside of their own performance suite that make changes to JavaScript files can cause conflicts and result in the preview failing to load, including our own Web Acceleration Suite.
If you have any JavaScript optimisations enabled, you’ll want to disable these to allow the preview to load once more. To do this:
- Log into My20i and head to your Manage Hosting page
- Select Options > Manage on the hosting package you’re currently experiencing the error on
- Under CDN, select Web Optimisations
- You’ll see a section for JavaScript Optimisations on this page. Ensure these are switched off. In particular, Defer JavaScript should be disabled.

Once these have been disabled, retest once more and the preview should be loading.
Feel free to contact our support team should you experience any other issues.
 Reudiger Dalchow
How do I reset my WordPress User password?
If you need to reset a WordPress user password on your 20i hosting package, there are a couple of simple and effective methods available. Whether you're using 20i’s dedicated WordPress Tools or prefer the more traditional route via phpMyAdmin, this guide will walk you through both options step-by-step. Perfect for site owners, developers, and resellers alike, you'll be able to regain access or update credentials in just a few clicks.
Update the password using WordPress Tools
If you would like to reset your WordPress User password, then you can use 20i's WordPress Tools. To reset your password:
- Head to Manage Hosting -> [select package] -> Users.

- Find the user you'd like to reset the password for and select Manage -> Change Password.
- Enter the new password and select Change Password.

You can then log in using your new password.
Updating the password using phpMyAdmin
If you'd like to use the traditional method, or if your WordPress site is not on the 20i WordPress platform then you can update WordPress user passwords directly from the database using phpMyAdmin:
- Head to Manage Hosting -> [select package] -> phpMyAdmin.
- Select Log In for the databse where the core WordPress installation is located.
- Select to expand the database tables on the left had side and locate the wp_users table.
- Locate the row with the user you wish to update the password for and select Edit.
- Locate the row with Column ID user_pass, select MD5 in the function dropdown and enter your new password in the Value field.
- Select Go and your password will now have updated.
Try 20i's WordPress Hosting today for just £1.00. You'll get WordPress staging, a global CDN and unlimited email as well as exclusive WordPress page speed plugins for your website with bullet-proof security. Are you a reseller, agency or web designer? The optimised WordPress platform and all its features come included with 20i's Reseller hosting. Learn more about Reseller hosting here.
 Austin B.
Why am I getting a 'Too Many Redirects' error?
'Too Many Redirects' errors are caused by sites stuck in a loop of redirects.
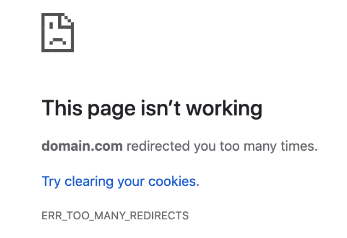
What is the ERR_TOO_MANY_REDIRECTS?
One or multiple redirections point to themselves, resulting in the site being unable to load as it will continuously redirect until either the browser stops it early or the site goes down.
Most commonly, ERR_TOO_MANY_REDIRECTS are caused by incorrect or poorly-defined redirect rules in your .htaccess file, or a plugin forcing a redirect over and over.
Common causes of ERR_TOO_MANY_REDIRECTS
Below are some common causes - 'always true' rules, mixed content and caching. We'll explain what they mean and show you how to fix them.
Always true rules
Redirect rules set in the .htaccess file have conditions. These conditions decide when a redirect rule should redirect a site, so that the site doesn’t always redirect. If these conditions aren’t set correctly however, they can always be ‘true’, meaning that the redirect will always occur and as a result the site will loop.
For example, we have a site domain.com and we try to redirect this to our subdomain my.domain.com
One way we could do this is via the following:
RewriteCond "%{HTTP_HOST}" "domain.com$"
RewriteCond "%{REQUEST_URI}" "^/"
RewriteRule ".*" "https://my.domain.com/" [L,R=301]
In the above example, we have our condition:
RewriteCond "%{HTTP_HOST}" "domain.com$"Which states that, if the URL contains ‘domain.com’, redirect the site. However, this will lead to a loop, as our subdomain also contains ‘domain.com’, resulting in the too many redirects error.
A much better way to do this redirect would be instead to use:
RewriteCond %{HTTP_HOST} !^my\.domain\.com [NC]
RewriteRule ^(.*)$ http://my\.domain\.com/$1 [R=301,L]
Which instead uses the condition:
RewriteCond %{HTTP_HOST} !^my\.domain\.com [NC]This checks to see if the URL is not the subdomain, and redirects the site if it’s not.
It’s worth looking through your rules and making sure this type of logical loop doesn’t occur.
If you’re unsure, try renaming your .htaccess file. If the error stops when doing so, something in that file is causing the loop itself.
Mixed Content
The term ‘Mixed Content’ refers to when parts of a website on HTTPS try to load content over HTTP. In more uncommon cases, this can result in a site correcting itself to HTTP, then redirecting to HTTPS, resulting in a loop between the two which causes the ERR_TOO_MANY_REDIRECTS.
In cases such as this, it’s best to temporarily remove any rules that may be enforcing HTTPS, and then updating all of your site’s URLs to ensure they’re either all on HTTP or all on HTTPS.
We have a full guide on finding and fixing mixed content here.
Force HTTPS Scripts
Some Content Management Systems (CMS) such as Joomla have options that can force HTTPS connections to your site as a part of the integration. Enabling these makes tweaks to the code to enforce this – however, if you’ve already included your own scripts to force HTTPS or are using 20i’s option to do so in the SSL/TLS area, then this could potentially conflict and lead to a loop.
Check your current CMS setup to see if any options to force HTTPS connections are enabled. If they are, disable or remove any other scripts or options that will be enforcing this to remove any conflicts.
Caching
Caching can also cause a redirect loop as site and server caching can store redirects, resulting in a rule that has been removed to continue to be used.
The quickest way to check to see if this is the case is to visit the site with a query string at the end, for example:
https://mydomain.com/?nocache
Anything after the '?' is ignored, so you can write anything. Doing so will bypass the cache on the site and force the site to load directly.
If the site then loads fine without the redirect error, you can confirm that caching is what's causing the redirect.
Check your site for any cache folders and clear them, and then clear the edge cache from within your package:
- Log into My20i and head to your Manage Hosting area
- Select Options > Manage on the hosting package you’d wish to edit
- Select Edge Caching from under the CDN section of the package

At the bottom of the Edge Caching page, select Purge Everything. The server cache will be cleared within a few minutes.
Now you should be free of the 'too many redirects' error. Get in touch with our support team if you need further help.
Why do I get an Internal Server Error 500 and how to fix it?
A white screen or Internal Server Error (error 500) usually means a script used by your website is throwing an exception and/or fatal error. When this happens, it will be logged by our system and you can view recent errors inside the Access/Error Log of our control panel.
A '500 Internal Server Error' message on your site is frequently due to a mistake in the site file such as a .htaccess file or web.config file.
The first step in troubleshooting this is to check the Access/Error logs. To get these:
- Login to My20i
- Select the package that is showing the internal server error
- Select Access/Error Logs under the Logs and Stats section
You'll want to look at the ‘Error Logs’ section and see if you can see the file path where the issue is. For example, you may see:
[code]www.yourDomain.com [Tue Sep 05 09:49:41 2017] [alert] [client xx.xxx.xxx.xx:xxxxx] /home/sites/xx/x/xxxxxxxxx/.htaccess[/code]
Windows
If you're running a Windows hosting package, don’t forget to recycle the app pool after making any changes to your site configuration. You can do this by logging into the hosting package, selecting ‘Application Pool’ and then selecting ‘Recycle Pool’. Error logs do not show in the control panel on Windows packages.
WordPress
A common cause of an internal server error on WordPress sites is if you are running an incompatible PHP version. Some errors are thrown if the server is running a version of PHP that is not compatible with the website code. We currently support PHP 5.3, 5.4, 5.5, 5.6, 7.0, 7.1, 7.2, 7.3, 7.4, 8.0, 8.1, 8.2, 8.3 and 8.4 on our Linux platform. You can switch between all of these versions using the 'Switch PHP Version' icon inside the control panel
If you're running WordPress, you should check if your WordPress admin area is still accessible. This is usually accessible by visiting http://your-domain.com/wp-admin.
If it is, we'd recommend disabling each plugin and theme and revisiting the site in turn to try and identify the root cause.
Also, if your website is on our WordPress hosting platform, please note that this platform only allows PHP 7 and higher. While WordPress core is compatible with all those PHP versions, certain plugins and themes may not be. If so, we recommend hosting the website on our Linux platform. You can automatically migrate packages from WordPress to Linux via the 'Platform Transfer' area of My20i.
Increase the PHP Memory Limits
Sometimes the internal server error may occur if you are exhausting the PHP memory limit. You can increase this by:
- Logging in to My20i
- Select PHP Configuration
- Scrolling down until you see memory_limit. Change this to 1024M, and select Update PHP Configuration
- Retry the page that was showing an internal server error by refreshing using CTRL + SHIFT + R. If this did not work then you should set the memory limit back to 512M
 Austin B.
Why might WP All Import cron imports fail?
If you run a WooCommerce store or hosting a WordPress site where you need to import and export data WP All Import is a widely used tool to managed this. It can be frustrating when the crons you set-up are failing.
There are a few reasons why WP All Import cron jobs/scheduled tasks may fail to run. The methods below will optimise the crons so that they should always run successfully and at the desired time.
Switch the standard HTTP method to PHP-CGI
WP All Import uses HTTP GET calls to perform the import process which can cause imports to time out after 5 minutes. We'd recommend optimising the method used to perform the import by switching to use the PHP command line. That way the crons have a much longer timeout and can do all the hard work in the process itself; all while avoiding the HTTP timeout.
To do this, you can add your cron jobs using the following structure (i.e. a WGET) and we'll handle the rest for you.
Within Scheduled Tasks in your 20i account, you'd add/adjust your cron to use WGET.
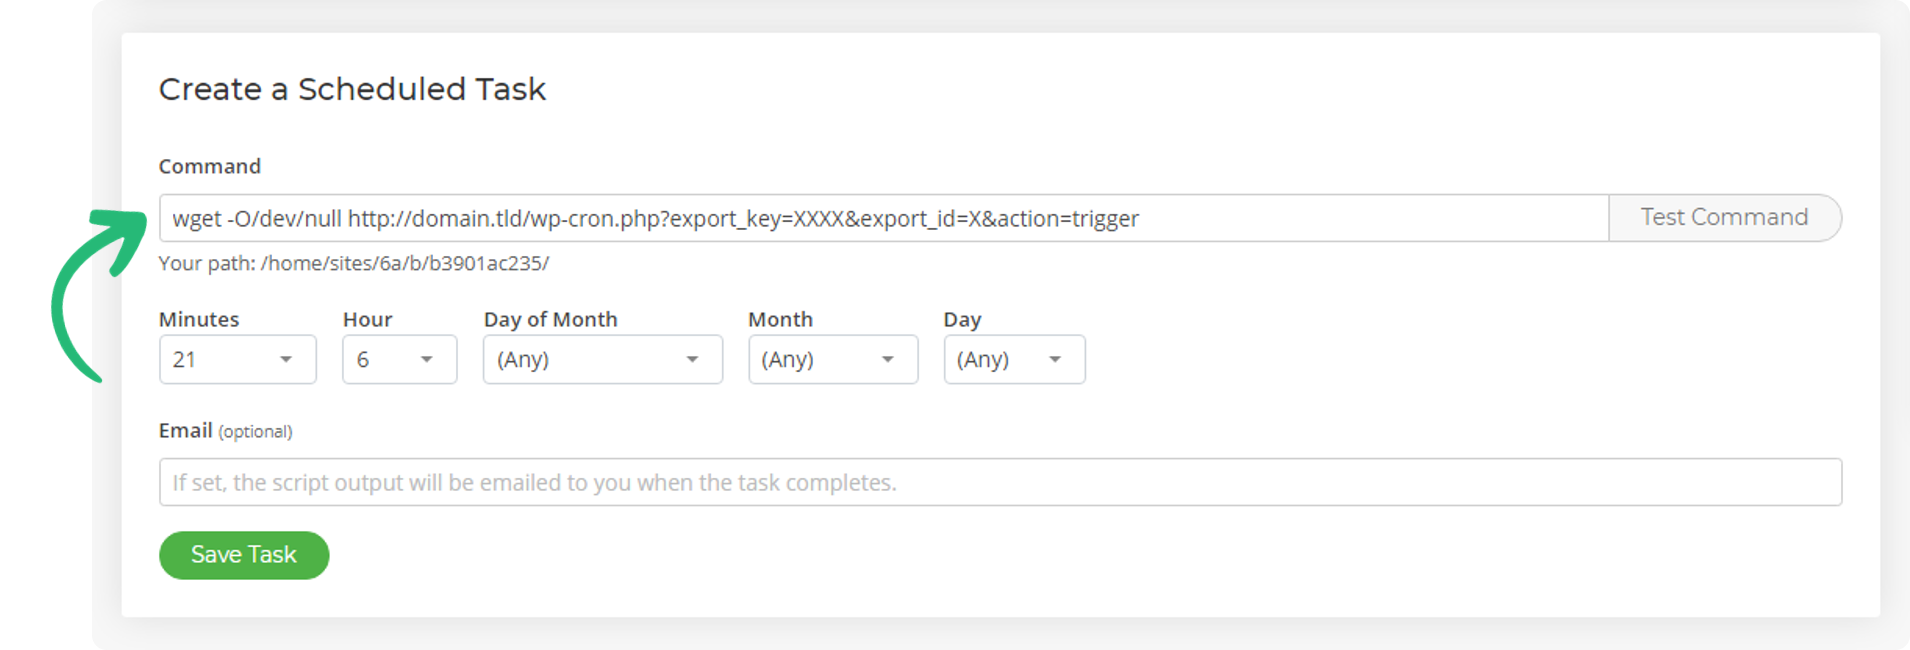
Don't run the trigger and processing crons at the same time
For example, if you run the processing cron every 5 minutes, don't perform a trigger on the hour, perform the trigger a 2 minutes past the hour to avoid collisions and job locking. The example below shows the trigger and processing crons in place, but timed so that they'll never run at the same time.
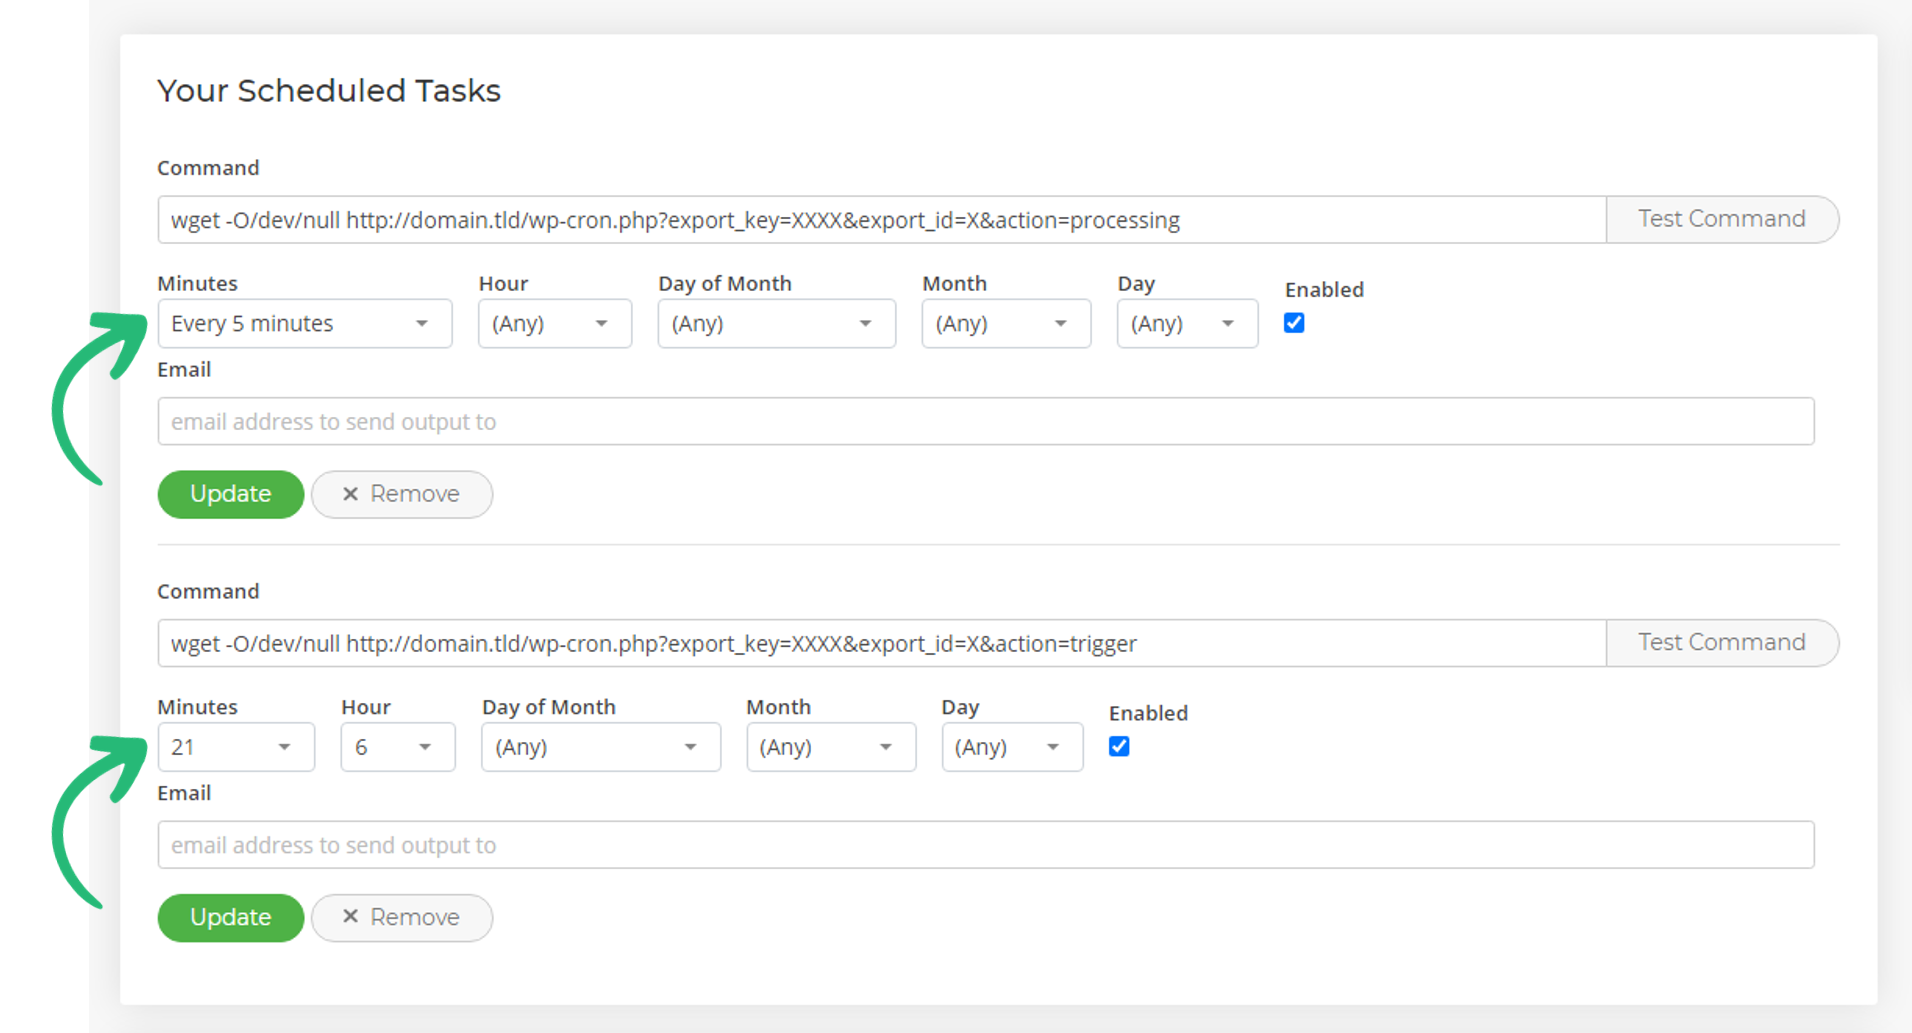
Ensuring these two optimisations are in place should ensure that WP All Import scheduled tasks complete successfully every time.
 Austin B.
I installed WordPress on the temporary URL, how can I change it to my domain name?
Using the 20i WordPress Tools
If you've utilised 20i's temporary URL and would like to update it to your own live domain, then you can easily use the 20i WordPress tools to update this. To update the temporary to the live URL:
- Head to Manage Hosting -> [select package] -> Settings.
- You'll then see the Site URL and Home fields, currently, they should have URL that looks something like http://example-co-uk.stackstaging.com.
- Simply update both of these fields to your live domain, e.g. http://example.co.uk.
- Select Save Settings.
Note: Ensure you update the hyphens (e.g. ' - ') to periods (e.g. ' . ') when updating the URL in order for the live domain to work correctly.
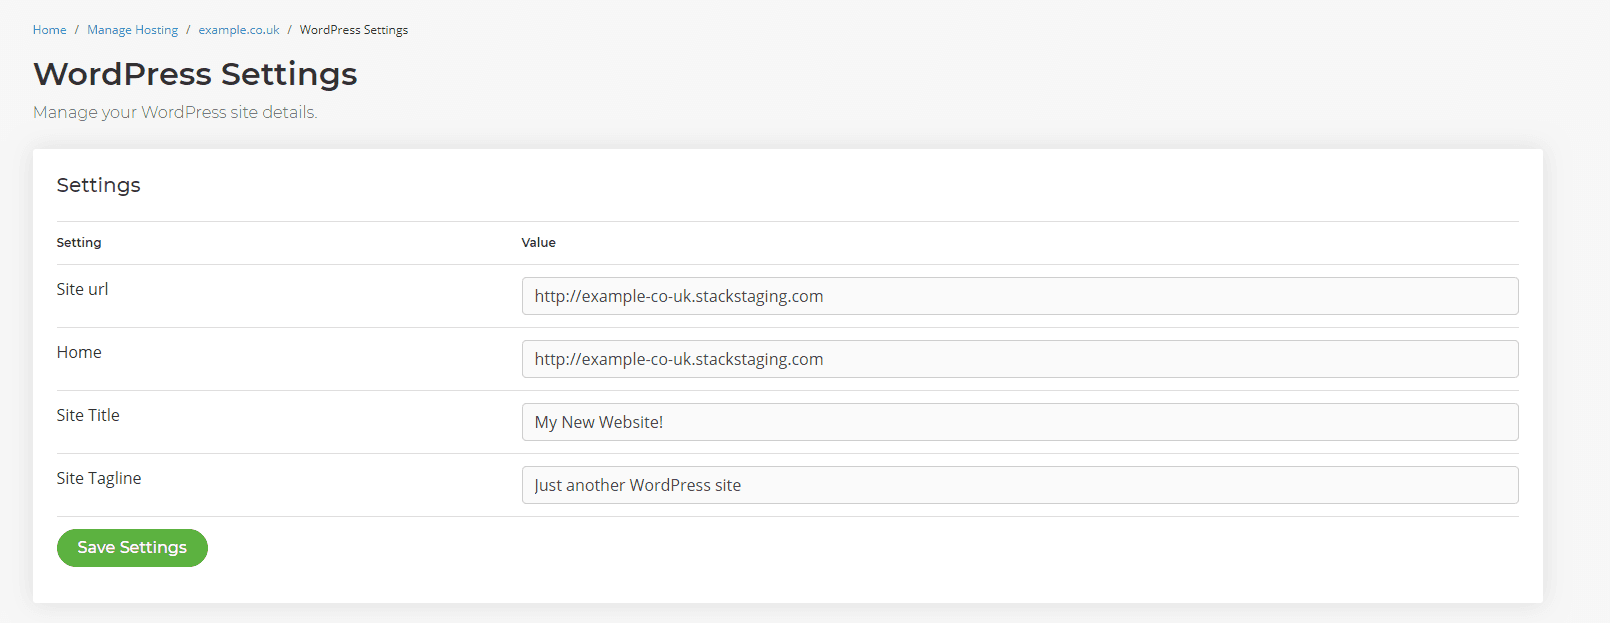
You should now be able to access your site at your live domain.
Try 20i's WordPress Hosting today. You'll get WordPress staging, a global CDN and unlimited email as well as exclusive WordPress page speed plugins for your website with bullet-proof security.
 Lloyd Cobb
How to fix the "Error Establishing Database Connection" in WordPress
The Error Establishing Database Connection error is one of the most commonly experienced errors on WordPress sites. The error itself indicates that the connection between your website files and the database has dropped.
As the database is queried for most of your WordPress site’s content, this drop of connection stops any of the site content from displaying until the connection is re-established. So it’s important to address this error as soon as possible.
There are a number of reasons that the connection to the database may drop – the details that are being used to attempt the connection may be incorrect, or the database itself may not be loading correctly or may have been corrupted. This guide will break down the core areas to check to re-establish the connection as soon as possible and get your site loading.
Note: Take a backup of your website database before attempting any of the following solutions. You can do so using our Timeline Backups service.
1. Checking wp-config.php
In a WordPress site, the database connection details are held within a file called wp-config.php, generally located in the root folder of your WordPress site. If you navigate to this file using our File Manager or via FTP, you’ll see code such as the following:
// ** Database settings - You can get this info from your web host ** //
/** The name of the database for WordPress */
define( 'DB_NAME', 'database_name_here' );
/** Database username */
define( 'DB_USER', 'username_here' );
/** Database password */
define( 'DB_PASSWORD', 'password_here' );
/** Database hostname */
define( 'DB_HOST', 'hostname_here' );
/** Database charset to use in creating database tables. */
define( 'DB_CHARSET', 'utf8' );
/** The database collate type. Don't change this if in doubt. */
define( 'DB_COLLATE', '' );
Each section is labelled via comments that show what each area is used for.
The main details you’ll need to check here are the Database name, Database hostname, Database username and Database password. If any of these details are wrong, the connection to the database won’t be possible and you’ll need to change the details accordingly. But where do we find these database details?
Your site’s database details can be accessed and updated via your hosting package:
- Log into My20i and head to your Manage Hosting area
- Select Options > Manage on the hosting package you’d wish to edit
- Head to the Web Tools section and select MySQL Databases

- Under Manage MySQL Databases you’ll see your databases and their current Server, Database/Username and an area where you can update the password
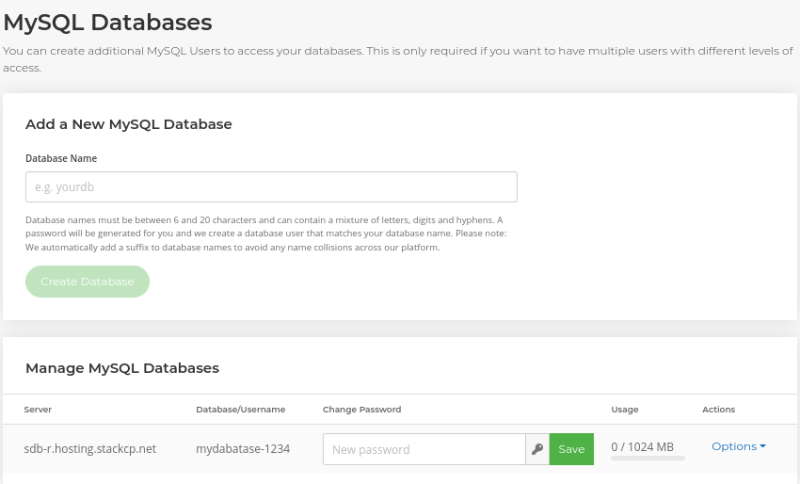
Going back to the wp-config.php file, you can use the above details to fill out and update your connection details:
- The Server is your Database hostname
- Database/Username is the Database name and Database username
- The Database password is the password you’ve added to the Change Password area.
Once these have been updated, recheck your site and the database connection error should no longer display.
2. Checking the database connection
You can also use the above details to test whether your database connection is working. This can be useful to find out if the problem is with the details being used or if there’s something wrong with the database itself.
To do this, head to your site’s File Manager or use FTP to create a new file in the root folder of your site. You can name this whatever you’d like, but make sure that the file is saved as a .php file such as test.php.
Once done, add the following code to the file:
$host = 'hostname';
$user = 'username';
$pass = 'pass';
$test = mysqli_connect($host, $user, $pass);
if (!$test) {
die('MySQL Error: ' . mysqli_error());
}
echo 'Database connection is working properly!';
mysqli_close($test);
Replacing ‘hostname’, ‘username’ and ‘pass’ with the database hostname, database username and database password respectively.
Once that’s set up and saved, load the script via your site. If, for example, you named your file test.php you can load this by visiting your site and appending /test.php to the end of the URL i.e., domain.com/test.php.
If the script loads and displays an error, there’s a problem with the details being used. If it instead displays the line Database connection is working correctly! then the credentials being used for the database are correct.
If that’s the case, and your site is still showing a database error, then the problem may be with the database itself. It will need to be repaired.
3. Repairing a corrupt database
The issue can sometimes be that your database itself has become corrupt. This isn’t a common occurrence. However, it can happen with the amount of data, rows and tables that can be created and removed by various third-party plugins and functions.
One way to test if this is the case is to try and connect via wp-admin. If you receive the following error:

It means that the database has been corrupted. Fortunately, there are tools that can be used to repair this, using both WordPress and PHPMyAdmin.
4. Using WordPress’ database repair tool
To access the tool WordPress provides to fix this, you’ll need to edit your wp-config.php file and add the following line of code before the line: ‘/* That’s all, stop editing! Happy publishing. */’.
Define(‘WP_ALLOW_REPAIR’, true);
Once this code has been added, head to the following URL:
https://domain.com/wp-admin/maint/repair.php
Replacing ‘domain.com’ with your domain. This will open up a repair wizard built into WordPress that will attempt to repair your database. Follow the steps in the wizard and, when it’s finished repairing, your site should come back online.
Once you’ve finished with the repair tool, remove the above line of code from your wp-config.php file.
WordPress CLI also provides a quick tool to repair the database. To access this, connect to your site via SSH and navigate to the root folder of your WordPress installation. You can then run the command:
wp db repair
This will start a full repair of the WordPress database.
5. Repairing a database with phpMyAdmin
You can also repair the database using phpMyAdmin.
To do so:
- Log into My20i and head to your Manage Hosting area
- Select Options > Manage on the hosting package you’d wish to edit
- Head to the Web Tools section and select phpMyAdmin
- Select Sign-In on the database you need to repair
- You’ll be signed into phpMyAdmin. Select your database on the left, and you’ll see a selection of your database’s current tables.
- Select all of your tables with the checkbox next to each
- From the drop-down at the bottom of the screen, select Repair table
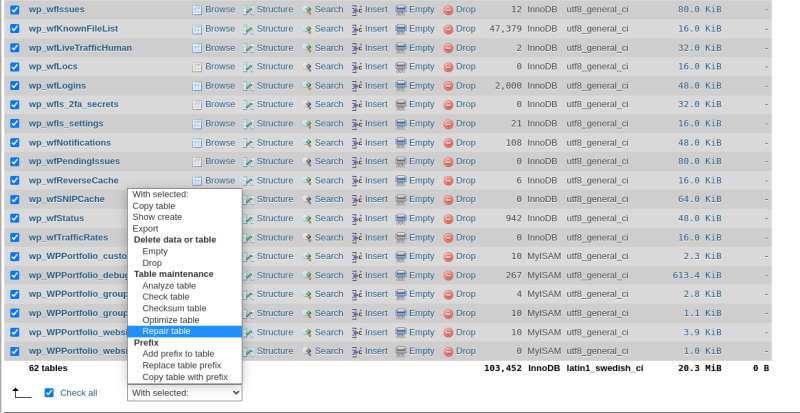
This will run the SQL REPAIR TABLE command on all of your selected tables, which will attempt to repair and remove any corruption or broken data from these tables.
6. Repairing corrupted WordPress files
In some rare instances, the issue may lie with the files of the site rather than the database itself. This can happen when the connection during an FTP upload is interrupted, or malware infects the WordPress site and modifies the core files. If this is the case, you’ll need to replace the core files of the site with a fresh copy directly from WordPress.
In order to do this, first head to download WordPress’ latest version – you can find this here:
https://wordpress.org/download/
Once you have a copy of these files, unzip them on your local device and remove the wp-content and wp-config.php files. Then, connect to your site via FTP and upload the folders and files to your site’s root folder, overwriting your current core files with the fresh upload.
Note: provided that you remove the wp-content files, doing this won’t affect the content of your website – text, images etc.
Once done, your site should be loading with the correct files necessary.
Alternatively, you can use the following WP CLI command after connecting via SSH to achieve this as well:
wp core download --force
There are a number of potential causes and fixes for ‘Error Establishing a Database Connection’ errors within WordPress. By making use of the above steps, you should be able to pinpoint and fix this error, and bring your site back online as soon as possible. Always be sure to take a backup before attempting any form of manual change to your site files and database.
 Austin B.
Error 500 after migrating a WordPress website using Wordfence
After migrating a WordPress website you may see a 500 error when testing the website. If you’re using the Wordfence plugin then chances are this is caused by an old path used within the files that will need to be updated.
To confirm if this is the issue, you can check the error logs on the package. You can do this by following these steps:
- Sign in to My20 and navigate to Manage Hosting > Options > Manage
- Select Access/Error Logs
If the issue is due to the path Wordfence is set to use then it will show an error similar to this:

This will display the path from your old host which will need to updated within the .user.ini in the website files.
Before we do that, you’ll need to get the path you need to replace it with. This can be retrieved when managing the hosting package under the Account information section on the right-hand side.
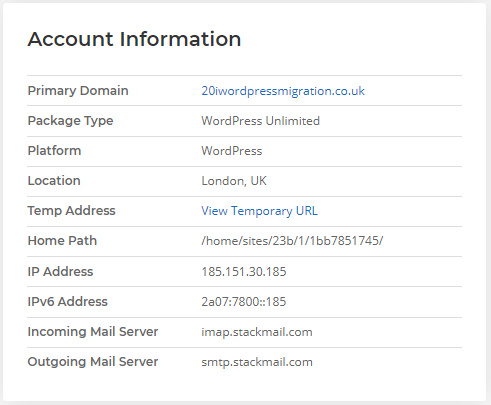
The home path will be the one needed and, in this example, it will be: /home/sites/23b/1/1bb7851745/
Next you will need to go to the file manager and locate the .user.ini which in most cases will be in the public_html folder - but this can depend on how the website is set up. Once you find the .user.ini file, edit it and it should look something like this:
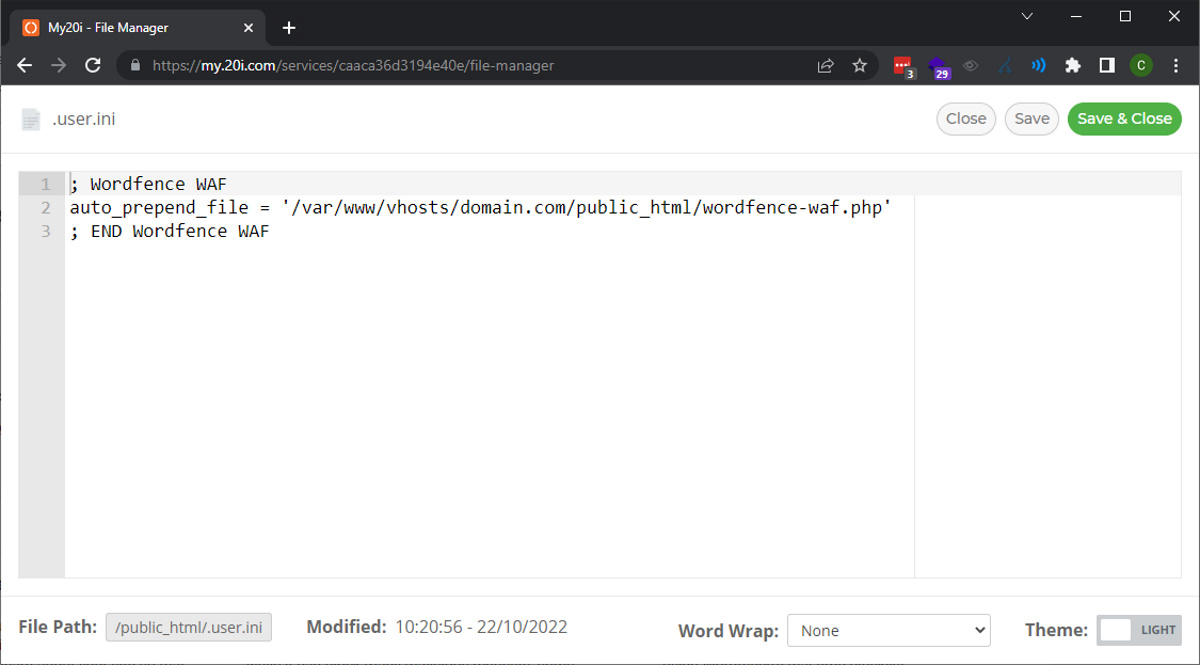
You’ll need to change the /var/www/vhosts/domain.com to the home path link, appended with /public_html/wordfence-waf.php
So in this example you’d need to change /var/www/vhosts/domain.com/public_html/wordfence-waf.php to /home/sites/23b/1/1bb7851745/public_html/wordfence-waf.php
The path will need to follow the same path where the wordfence-waf.php file is located which should be the same location as the .user.ini by default.
Save the changes to the file and test the website again. This should have resolved that error. If there’s an error still showing on the website, then it’s possible that there could be another problem. The error log should have more information about it.
If there are still problems, please contact our support team who will be able to help further.
 Reudiger Dalchow
How to change your WordPress URL
Rebrands and name changes take place from time to time, so you might need to update the WordPress URL that your site uses. Or, you may have finally finished creating your site on a development domain or subdomain and be ready to bring your site live, but you’re unsure how to go about doing so.
Due to the nature of WordPress databases, updating every single internal reference from your old domain to your new one can be time-consuming and difficult. WordPress sites use the URL of the main site for a lot of different internal processes, so it’s important to know how to update this properly to minimise disruption.
Note: Before attempting an update of your WordPress site’s URL, take a backup of the database to ensure you have a restore point. Our Timeline Backups service - which is included free with all WordPress Hosting - can be used for this.
Updating the WordPress URL within the Control Panel
Our WordPress Hosting platform includes inbuilt tools to update the site’s core settings in the form of the Settings area.
To access this:
- Log into My20i and head to your Manage Hosting area
- Select Options > Manage on the hosting package you’d wish to edit
- Under the WordPress Tools section of your package and select the Settings button

Here, you’ll see areas where you can set the Site URL and Home of your WordPress site. Update these fields to the new URL, and hit Save Settings.
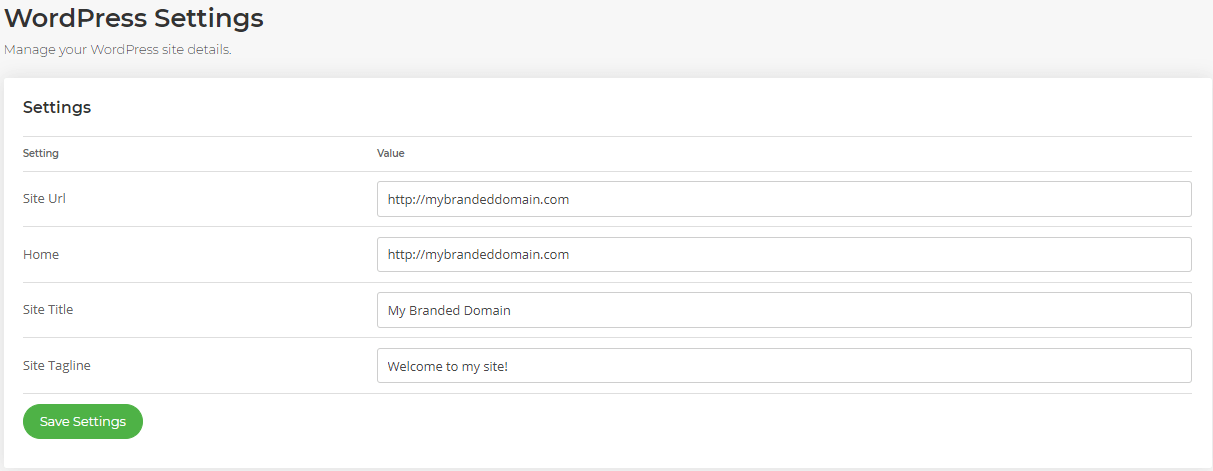
Change the WordPress URL in the WordPress Dashboard
In order to change the WordPress URL from within the dashboard, head to the site’s wp-admin area and edit these details in Settings > General:
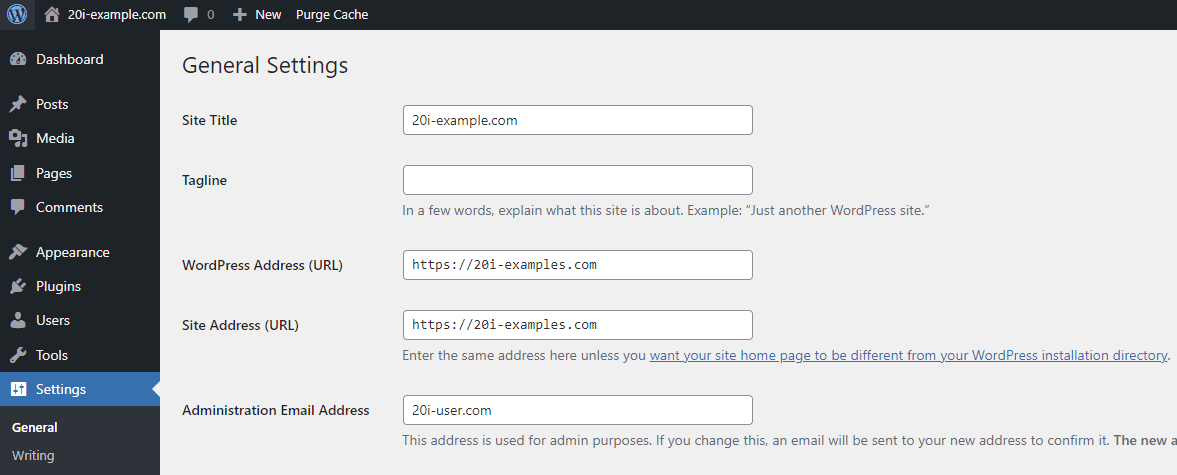
Then hit Save Changes.
Note: Changing the site’s URL while logged into wp-admin will require you to log back in again on the new site URL.
Change the WordPress URL in the Database
Note: If you’re unfamiliar with phpMyAdmin, take a backup of your site’s database before following the steps below so that you have a restore point available, just in case.
- Log into My20i and head to your Manage Hosting area.
- Select Options > Manage on the hosting package you’d wish to edit.
- Head to the Web Tools section and select phpMyAdmin
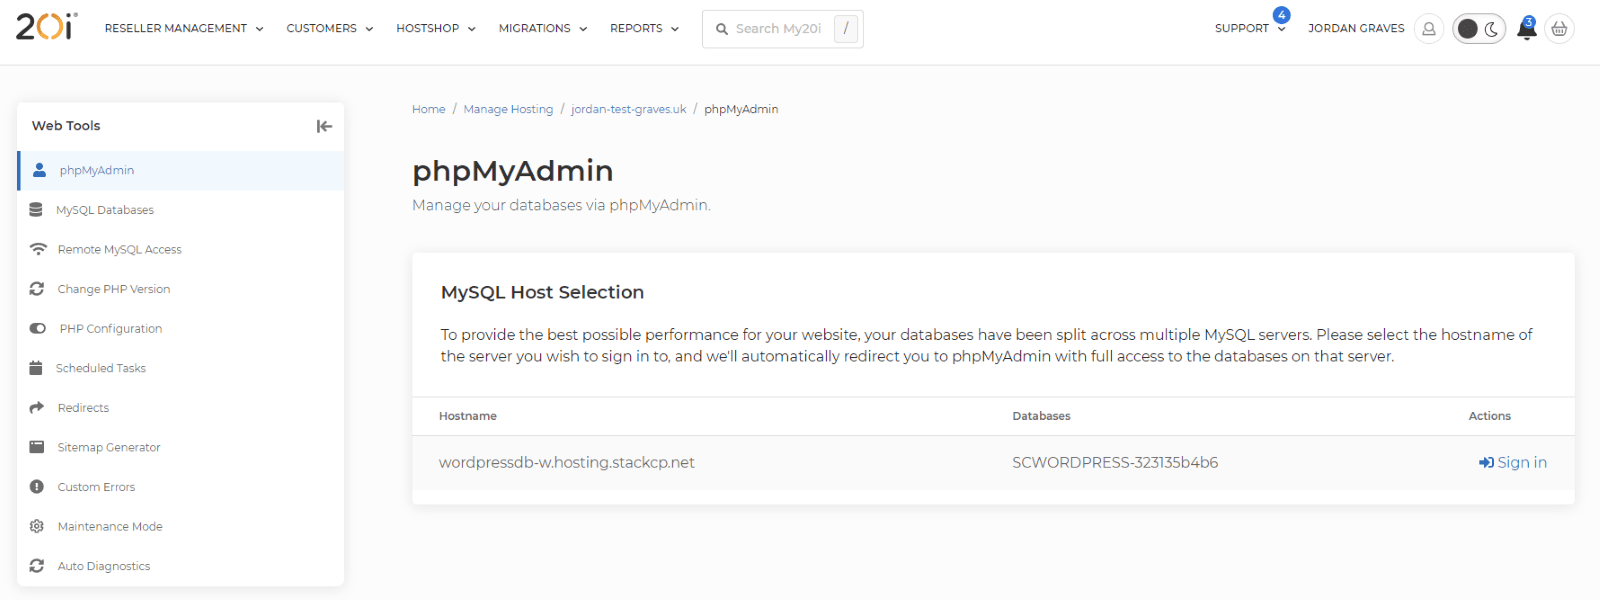
- Select Sign In on your MySQL database. If you’re unsure which database is for your site, check your wp-config.php file.
- You’ll be signed into phpMyAdmin. Select your database on the left, then the _options table from the list
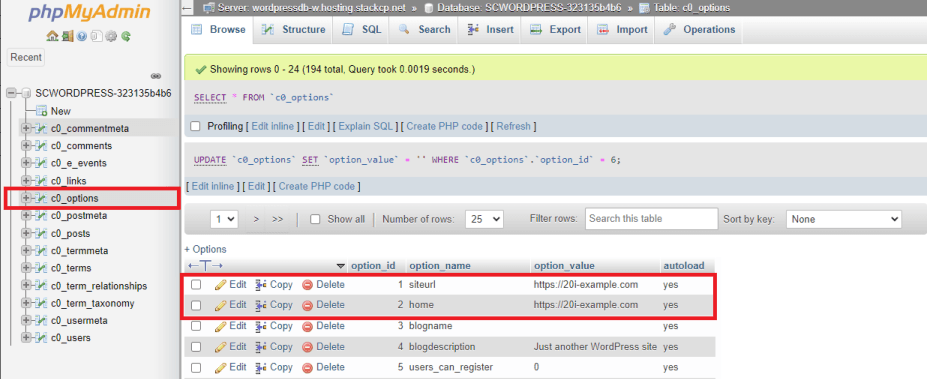
- You'll see entries for ‘siteurl’ and ‘home’. Edit the values of these entries and your site’s URL will be updated.
Change the WordPress URL in the wp-config.php
For this step, navigate to your File Manager or FTP client and locate the wp-config.php file within your WordPress installation directory. For WordPress hosting packages, the file location will be public_html/wp-config.php.
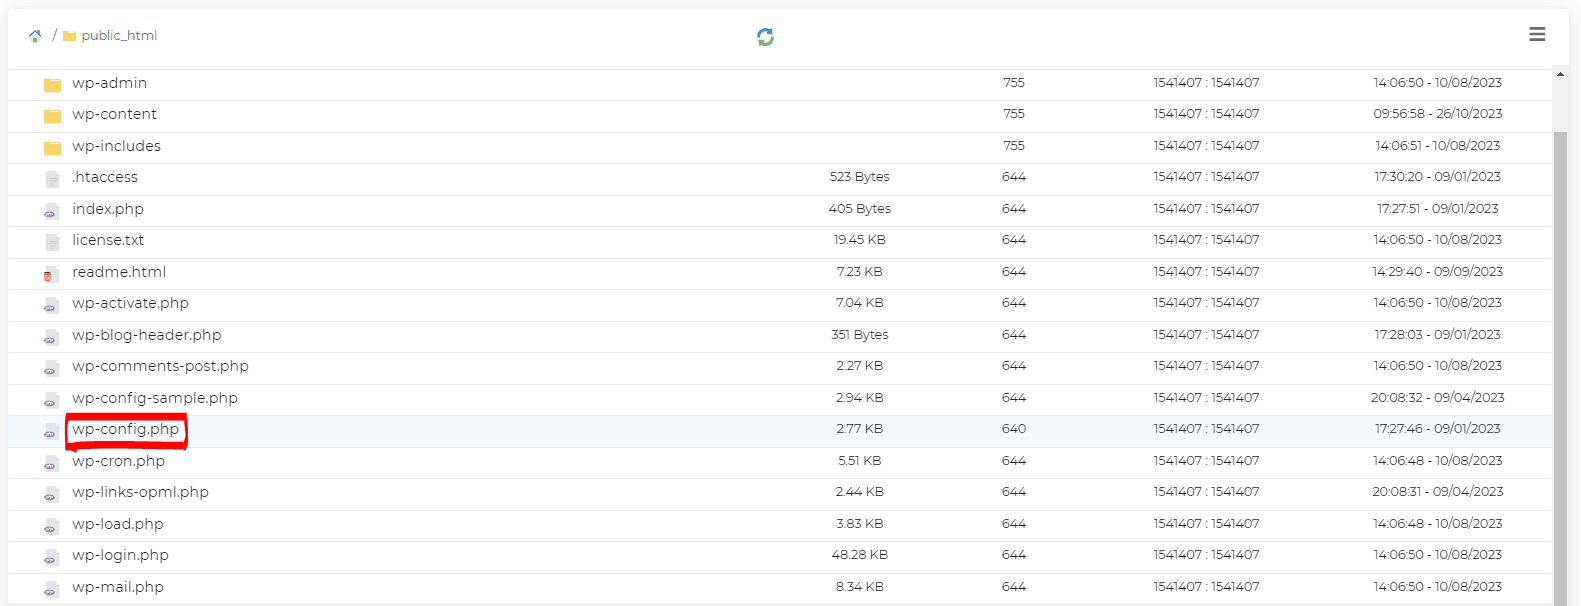
The following definitions can be added within the wp-config.php file, with your URL set.
define( 'WP_HOME', 'http://20i-example.com' );
define( 'WP_SITEURL', 'http://20i-example.com' );
Change the WordPress URL with WP-CLI
For this fourth step, you will require SSH access to utilise WP-CLI (this is available to all 20i customers). Once you have connected to the hosting package via SSH, change directory to your WordPress installation – this is public_html for WordPress hosting packages. You will then need to run the following two commandsL
wp option update home 'http://20i-example.com' wp option update siteurl 'http://20i-example.com'
Search and Replace with a plugin
Occasionally there may be other instances of the old URL being set within the database after a URL chance. Editing the database of your site manually can be risky if you’re unfamiliar with the process.
Alternatively, you can use a third-party plugin to do it for you.
We recommend Better Search Replace. This plugin provides an easy to understand UI in your wp-admin area where you can search for certain entries in your site’s database and update them. This includes searching for your current site URL and updating it.
To do this:
- Log into your wp-admin area of your site, and search for the Better Search Replace plugin in your site’s Plugins > Add New area
- Select Install and Activate
- Better Search Replace will now appear as an option under Tools. Select it from the dropdown menu, and you’ll be presented with a form like below:
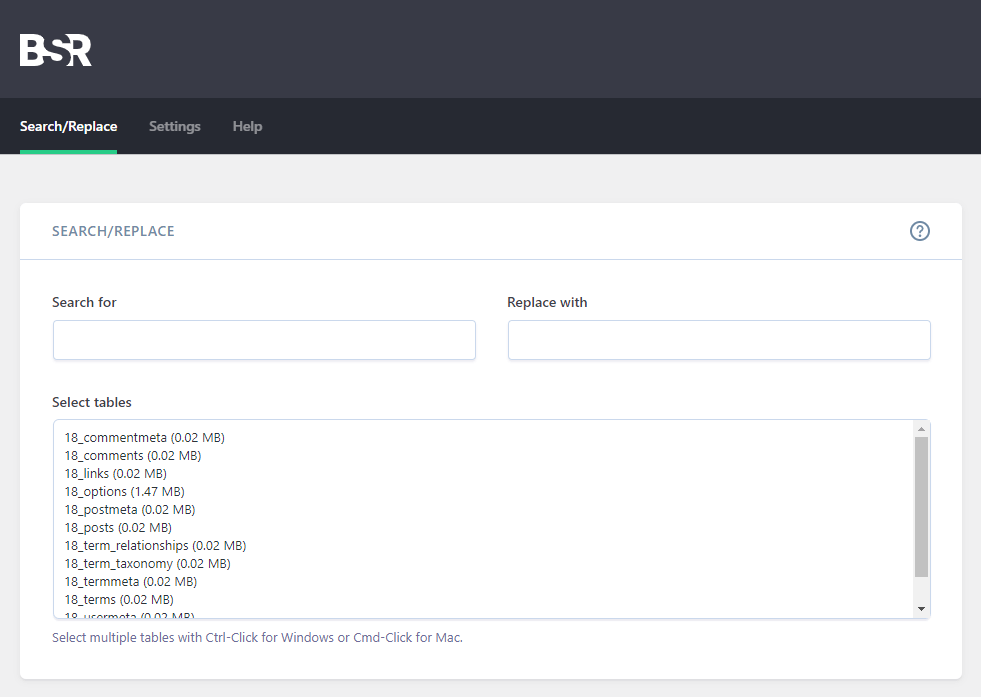
- Enter your current URL in Search for and the URL you’re updating to in Replace with. You’ll see further down a selection of checkboxes:
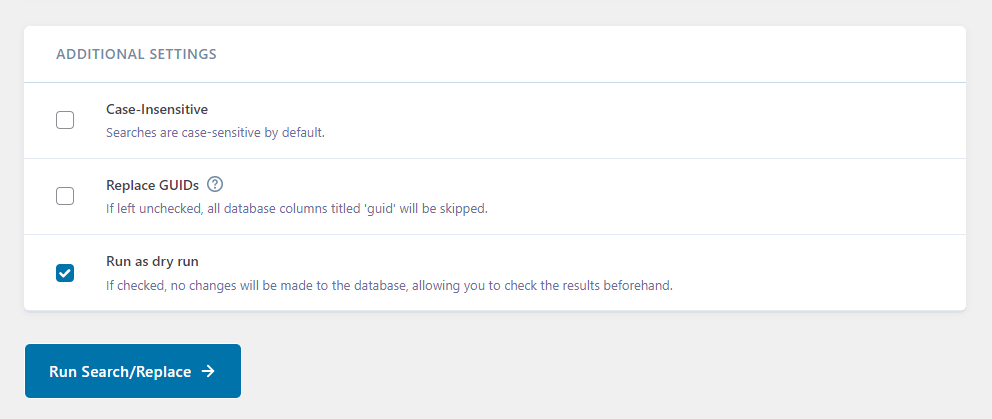
- Use Run as dry run if you want to see what tables the search and replace will update without actually changing anything, and hit Run Search/Replace
- Once you’re happy with what changes will be made, uncheck the Run as dry run option and run the search and replace again
This will update all of your site’s URLs in the database for you.
Updating your site’s URL on WordPress can be handled with multiple different tools and approaches depending on where and how your site is hosted. Always make sure to take backups before making any major changes like this, to ensure that you have a restore point.
FAQs
Do I need to add a redirect to allow my WordPress site to load the new URL?
WordPress should automatically redirect any attempts to connect to your old URL to the new domain you’ve added, so a redirect shouldn’t be required.
I finished updating all of my site’s URLs but the old site still shows, what’s going on?
It’s likely due to one of three reasons. Either the old URL still exists inside the domain in some form, a redirect exists on the domain that is correcting to the old URL or the old URL is caching.
Check your database and .htaccess for any references to the old URL, and run a full purge of the Edge Cache.
 Jordan Graves
Which PHP functions are disabled on your WordPress platform?
Our WordPress platform has been specifically designed to offer the best security, performance and reliability for WordPress.
As a result, we have specifically tuned firewall rules and layers of protection to help keep WordPress sites secure. As part of this protection, a small number of PHP functions have been disabled, as we've found that they're often used for malicious purposes.
The following functions are disabled for security reasons:
- exec
- opcache_get_configuration
- opcache_get_status
- passthru
- parse_ini_file
- popen
- proc_open
- shell_exec
- show_source
- system
In our experience, it's highly unlikely any of your plugins rely on any of the functions above. However, if you have a genuine use case for any of these functions, you can still host your WordPress site on our Linux platform.
If you're a 20i Reseller you can move packages between all 3 of our platforms easily. So for example, if you've setup a WordPress site on Linux and now wish to migrate to the WordPress platform, head to the Platform Transfer area in My20i to get started.
 Lloyd Cobb
Is your hosting environmentally-friendly?
Yes, we're committed to reducing our carbon footprint, both in our data centres and workplace.
We achieve this through efficient power systems, renewable energy, a modern hosting platform and green company policies. You can find full details at Green Hosting, and you check whether your website is hosted using green energy at the Green Web Foundation.
Our commitment to sustainable hosting.
All our data centres are powered with 100% renewable energy. Our data centres use the best technology for fast hosting performance and energy efficiency.
Our proprietary autoscaling technology, not only gives you the power of a true ‘elastic cloud’ to react to the demand of processing power, bandwidth and memory your website needs at any given time, it also scales down when the demand is lover and therefore reduces the energy consumption.
Not just green hosting – but a green company
Our efforts to be a sustainable business are not only applied to our hosting. Our office runs on solar power. We run a paperless office, recycle waste and even our cleaning products are chosen for their environmentally friendliness.
 Chris Wright
Why does WordPress Health Check tell me to use a persisent object cache?
It's possible that your WordPress website's Health Check is suggesting that you make use of a persistent object cache - but what does that actually mean? In this guide, we'll explain what Object Caching is, and which platforms it can be used on with 20i - and the benefits of doing so.

Users with Managed Hosting or a Cloud Server can take advantage of Redis to enable object caching on their WordPress websites.
Please note that object caching requires an additionally managed service such as Redis and as such is not available on the shared hosting platform (Linux/WordPress Optimised/Windows).
WordPress Object Cache
In the context of WordPress, an object cache is an additional component to the WordPress infrastructure designed to improve the performance and speed of a WordPress site by reducing the need to repeatedly retrieve data from the database.
It acts as a temporary storage mechanism that stores commonly used and frequently accessed data, such as database query results, API responses, and other PHP objects, in memory for quick retrieval. Here's how it works and the benefits it provides.
How Object Cache Works in WordPress
1. Data Storage
When a WordPress website loads a page or performs various operations, it often needs to query the database to fetch data like post content, user information, or options stored in the database.
2. Caching Data
Instead of querying the database every time the same data is required, an object cache stores this data in memory. The data is stored in a key-value format, making it easy to retrieve.
3. Faster Retrieval
When a specific piece of data is needed again, WordPress first checks the object cache. If the data is found there, it can be retrieved much faster from memory than by querying the database, which significantly speeds up the website's performance.
4. Expiration and Invalidation
Object cache systems typically allow you to set an expiration time for cached data, ensuring that it remains up-to-date. When data is modified or updated in the database, the object cache should also be updated or invalidated to reflect these changes.
Benefits of Object Caching in WordPress
Improved Website Speed
One of the most significant benefits is improved website speed. By reducing the number of database queries, pages load faster, leading to a better user experience.
Reduced Server Load
Fewer database queries mean less strain on the server. This is particularly advantageous for websites with high traffic, as it can help prevent server overload and slowdowns.
Better Scalability
Object caching is an essential tool for scaling WordPress websites. As traffic increases, the object cache can help handle more requests efficiently.
Optimized Database Performance
With common queries cached in memory, the database is less frequently accessed for the same data, reducing its load and improving overall database performance.
Plugin and Theme Performance
It can also enhance the performance of WordPress plugins and themes that rely on frequently accessed data, as these can benefit from faster data retrieval.
Reduced Latency
Object caching reduces the latency in serving web pages, which can be especially important for e-commerce websites and content-heavy blogs.
To implement object caching in WordPress, you'll need Managed Hosting or a Cloud Server, along with a compatible plugin such as Redis Object Cache.
These tools help store and manage cached data efficiently, making your WordPress site faster and more responsive, ultimately improving the user experience.
 Joshua Rosato
Protecting your WordPress contact form from spam using CAPTCHA
Adding a CAPTCHA to your WordPress contact form is a great way to prevent spam submissions and ensure that the messages you receive are from real users. In this guide, we'll walk you through the process of adding a CAPTCHA to your WordPress contact form using the popular Contact Form 7 plugin.
Step 1: Install and Activate Contact Form 7 Plugin
If you haven't already installed the Contact Form 7 plugin, follow these steps:
- Log in to your WordPress admin dashboard.
- Go to "Plugins" in the left-hand menu.
- Click on "Add New."
- In the search bar, type "Contact Form 7."
- Locate the Contact Form 7 plugin and click "Install Now."
- After installation, click "Activate."
Step 2: Create or Edit a Contact Form
Now that you have Contact Form 7 installed and activated, you need to create a contact form or edit an existing one. Follow these steps:
- In your WordPress dashboard, go to "Contact" in the left-hand menu (usually under the "Contact" or "Contact Form 7" section).
- You will see the default contact form (usually named "Contact form 1"). You can either use this form or create a new one by clicking "Add New" at the top.
- Give your form a name and configure the form fields as per your requirements. Customize the fields, labels, and messages as needed.
Step 3: Add Google reCAPTCHA Integration
Now, you'll integrate Google reCAPTCHA with your Contact Form 7 form. Google reCAPTCHA helps verify that the form submissions are made by humans, not bots.
In your WordPress dashboard, go to "Contact" or "Contact Forms."
Click on the form you want to add reCAPTCHA to or create a new one.
In the form editor, click on the "reCAPTCHA" tab.
Site Key and Secret Key: You will need to obtain these keys from the Google reCAPTCHA website if you don't already have them. Visit the Google reCAPTCHA website and sign in with your Google account. Follow the instructions to create a new reCAPTCHA site.
reCAPTCHA Version: Choose the appropriate version (v2 Checkbox or v3) based on your preference. The v2 Checkbox requires users to check a box to confirm they are not a robot, while v3 works in the background without user interaction.
Enter the Site Key and Secret Key in the respective fields.
Configure additional reCAPTCHA settings as needed.
Save your changes.
Step 4: Add the CAPTCHA Field to Your Form
To add the CAPTCHA field to your Contact Form 7 form, you'll need to insert a shortcode.
- In the form editor, place your cursor where you want to add the CAPTCHA field.
- Click the "reCAPTCHA" button above the editor. This will insert a shortcode like [recaptcha] into your form.
- Save your changes.
Step 5: Update Your Contact Form
After adding the CAPTCHA field, remember to update or save your Contact Form 7 form to apply the changes.
Step 6: Display the Contact Form on Your Website
Now that your form includes the CAPTCHA field, you need to display it on your website where users can access it.
- Create a new page or edit an existing one where you want to display the contact form.
- Use the Contact Form 7 shortcode to add your form to the page. The shortcode looks like [contact-form-7 id="your-form-id"], where "your-form-id" should be replaced with the actual ID of your contact form.
- Save or update the page.
Step 7: Test Your Contact Form
Before making it live on your website, it's essential to test your contact form to ensure that the CAPTCHA is working correctly and that the form submissions are being processed as expected. Make a test submission to ensure everything functions as intended.
Step 8: Publish Your Page
Once you're satisfied with the test submission and the CAPTCHA is working correctly, publish or update the page where your contact form is displayed.
Congratulations! You've successfully added a CAPTCHA to your WordPress contact form using the Contact Form 7 plugin, helping protect your website from spam submissions.
 Chris Wright
Can I make XMLRPC requests to my website?
XMLRPC is a key attack target and denial of service vector against any WordPress site, so we filter traffic towards it as part of our Web Application Firewall.
Known "trusted" applications and networks are permitted access, but unknown sources and especially any web browser-based requests to xmlrpc.php are blocked for security reasons.
This won't prevent any of the below applications from working correctly, but does mean you won't be able to visit /xmlrpc.php on your WordPress website. It's not anything to worry about.
By default, the following are allowed to access xmlrpc.php files on sites hosted by 20i:
- All connections from the Automattic (WordPress.com) network which includes JetPack
- WordPress Android/iPhone Apps
- BlogStomps
- Blogo
- Zapier
- IFTTT
- Open Live Writer
- Ulysses
If there is another application you'd like to add to this whitelist, we'll be happy to review on a case-by-case basis. Please reach out to our support team.
 Chris Wright
How do I configure StackCache?
StackCache comes free for all WordPress sites on our WordPress Managed Hosting and Reseller WordPress Hosting platforms. StackCache has a number of options that can be used to personalise your caching, depending on what your site needs.
This includes altering the cache expiry for different file types, additional options for how caching should be handled and when purging should occur, and the means to exclude pages from StackCache’s caching.
How do I access the StackCache settings?
In order to access the settings for StackCache, you'll need to sign in to the wp-admin area of your site.
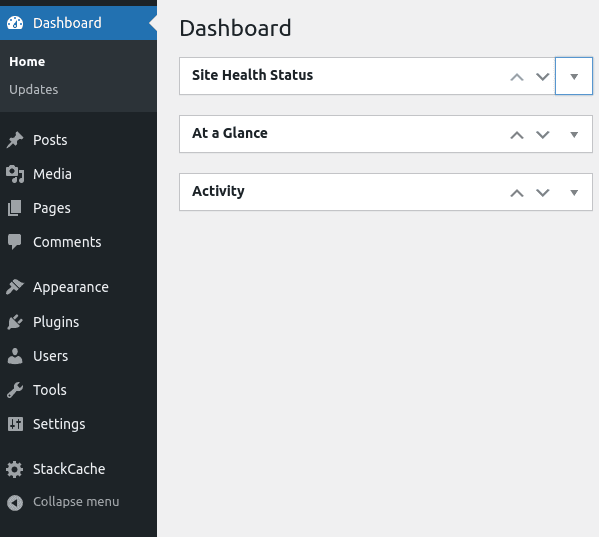
Once there, from the dashboard you will see StackCache listed as one of the options in the sidebar - select this, and you'll be greeted with the main page for StackCache. From here you can begin making changes as you need.
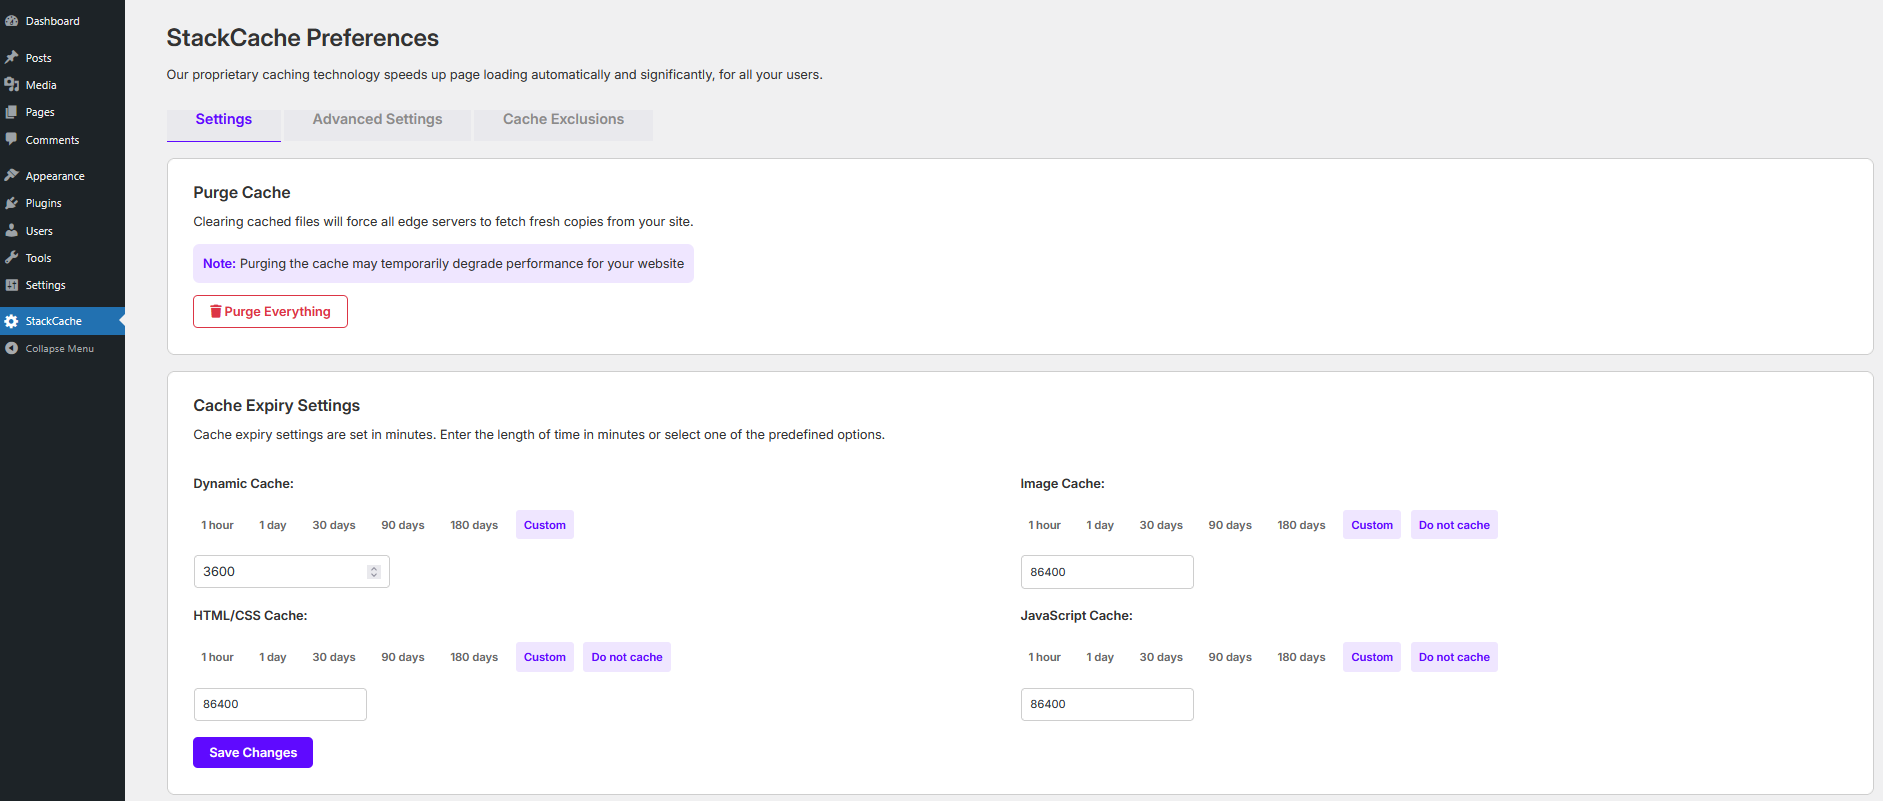
The settings within StackCache are broken down into four sections:
- Cache Expiry Settings
- StackCache Configuration
- Advanced Settings
- Cache Exclusion
Cache Expiry Settings
The first section focuses on managing your site's cache expiry settings for different types of files - these settings determine how long a file type is stored for in cache before a fresh version is requested, and can be set for the following:
- Dynamic Cache: StackCache is primarily responsible for the caching of dynamic content on your site, such as scripts, comments and forms. This value handles how long they're stored for in seconds. By default, the value is set to 3600, which is 1 hour in seconds. Below the box, you'll see various preset values that will auto-fill the corresponding number of seconds for that time, or you can enter your own value.
- Image Cache: This value sets how long your different types of image are stored for, including types like PNG, JPEG, WEBP and SVG. The default value is 1 day.
- HTML/CSS Cache: This value handles how long the HTML content of your site is stored. The default value is 1 day.
- JavaScript Cache: This defines how long the JavaScript for your site is stored for. The default value is 1 day.

These change the expiry dates of files that match the file type – the modifications are saved and stored in the .htaccess file in the root of your site folder. They’ll be saved in a format such as this:
#+StackCache
#={"images":"A86400","css":"A86400","javascript":"A86400"}
ExpiresActive ON
ExpiresByType "image/jpeg" "A86400"
ExpiresByType "image/jpg" "A86400"
ExpiresByType "image/gif" "A86400"
ExpiresByType "image/png" "A86400"
ExpiresByType "image/svg+xml" "A86400"
ExpiresByType "image/webp" "A86400"
ExpiresByType "image/vnd.microsoft.icon" "A86400"
ExpiresByType "image/x-icon" "A86400"
ExpiresByType "image/ico" "A86400"
ExpiresByType "font/ttf" "A86400"
ExpiresByType "font/otf" "A86400"
ExpiresByType "application/x-font-opentype" "A86400"
ExpiresByType "application/x-font-woff" "A86400"
ExpiresByType "application/x-font-ttf" "A86400"
ExpiresByType "application/font-woff" "A86400"
ExpiresByType "font/woff2" "A86400"
ExpiresByType "application/vnd.ms-fontobject" "A86400"
ExpiresByType "text/css" "A86400"
ExpiresByType "text/javascript" "A86400"
ExpiresByType "application/javascript" "A86400"
#-StackCache
StackCache Configuration
Further changes can be made to the behaviour of WordPress and StackCache using the settings available in this section.

- Automatic WordPress Updates: This adds a rule to wp-config that disables WordPress core updates – useful for if you wish to keep your WP version to a specific one for security or compatibility. This is enabled by default.
- Hide Purge Cache Link: The header bar at the top of wp-admin has an area that states Purge Cache and allows for you to purge the cache from anywhere in wp-admin. This option hides that link if it’s not needed. It’s disabled by default.
- Allow Editors to control StackCache: By default, StackCache is only accessible by wp-admin users with Administrator level access. This option changes it to allow Editor roles access as well, in case these need to clear the cache to show new updates. This is disabled by default.
- Disable StackCache: This temporarily disables the StackCache plugin entirely for debugging purposes. By default, this is enabled.
Advanced Options
The Advanced Options area allows for more specific cache-related modifications to be made to StackCache.
These settings can cause issues with the caching if implemented poorly, and so we recommend only enabling these on advice of either a developer or our support team.
These options are as follows:
- Remove PHP Session Cookies From All Pages: Prevent PHP Sessions from being started by your website. This will allow cache to function if PHP Session cookies are preventing it.
- Remove PHP Session Cookies Matching Empty PHP Sessions: This prevents any empty sessions being set by PHP cookies.
- Remove All Cookies From Your Homepage: Stops any cookies being set by your home page to help guarantee a cache hit. If you require cookies around your site but are looking for a quick loading home page, this can enable full page caching on your homepage whilst allowing cookies to be set on subpages.
- Make Automatic Cache Purging Purge Everything: When we detect content changes, we automatically purge the cache for the post/page URL modified, the index page and your sites RSS feed automatically. Enabling this option will trigger a full cache purge whenever these events are detected.
- Perform Automatic Cache Purging For All Post Types: By default, we only automatically purge the cache when standard post types are modified. Enabling this options will trigger a cache purge regardless of post type.
- Disable WordPress Built-in Theme / Plugin Editor: This is the equivalent of defining DISALLOW_FILE_EDIT in your wp-config.php file.
- Hide WordPress Version: Strip the meta generator tags from the page source and RSS feeds. This makes it harder for bots to identify the version of your WordPress site.
Cache Exclusions
The last page of settings allows for cache exclusions to be added to StackCache.
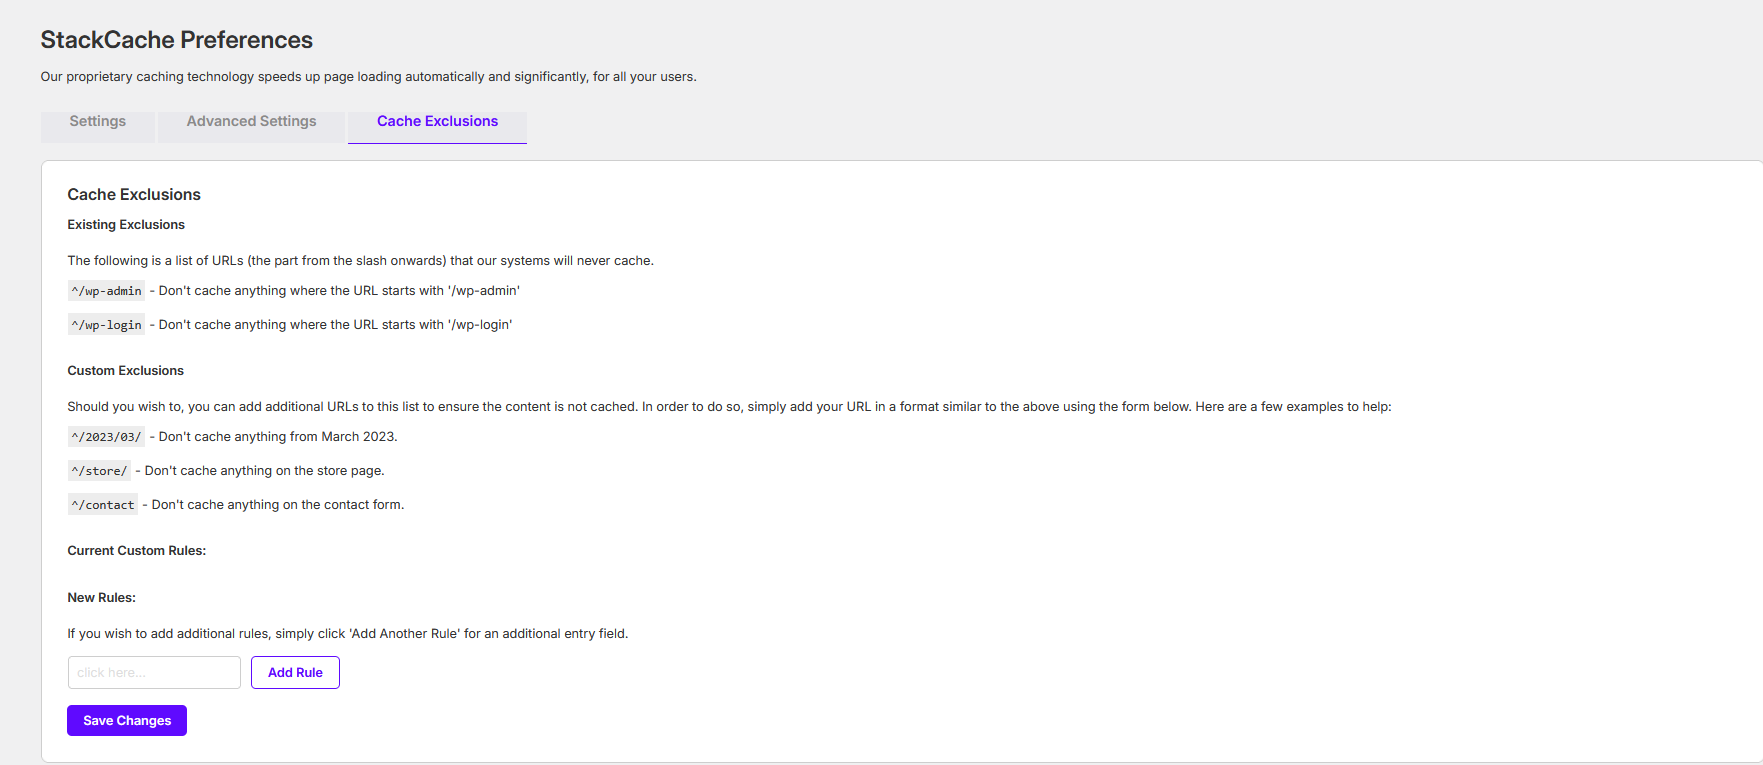
This informs StackCache to not cache that endpoint. Several examples are given of the formatting required for these rules. You can add multiple new rules using the Add Another Rule button if needed, which will create a new field for you to add an additional rule to.
Note: This only excludes the pages from StackCache caching. Origin and CDN cache can still cache these pages if implemented.
 Ruth Turner
What is the WordPress CLI?
WordPress CLI is the command line interface for WordPress. This allows you to manage numerous different aspects of your WordPress website without logging in directly to the WordPress dashboard.
Examples of the tasks that can be accomplished include managing plugins, themes, users and roles.
There is no need to install WP-CLI, this comes preinstalled with every WordPress hosting package automatically.
Connecting to the package via SSH
Before obtaining access to WP-CLI, you will first need to connect to the hosting package via SSH. To see how to connect to your hosting package via SSH, please see our guide How do I connect a website via SSH?
Listing plugins
To list all of the plugins installed, the core command is wp plugin list. You can specify further, and add the --status=active argument, which only lists plugins with the status 'active'.
-bash-4.2$ wp plugin list --status=active
+-----------------+--------+--------+---------+
| name            | status | update | version |
+-----------------+--------+--------+---------+
| bbpress         | active | none   | 2.6.11  |
| buddypress      | active | none   | 14.0.0  |
| classic-editor  | active | none   | 1.6.4   |
| classic-widgets | active | none   | 0.3     |
| jetpack         | active | none   | 13.7    |
| performance-lab | active | none   | 3.3.1   |
+-----------------+--------+--------+---------+
You can take this one step further by formatting the results as a count and totalling the number of active plugins using the --format=count argument.
$ wp plugin list --status=active --format=count
6
Installing plugins
Installing plugins with WP-CLI is easy. The only piece of information required is the plugin name. In this example, we're installing the plugin: User Switching.
The core command for installing a plugin is wp plugin install [plugin-name]. You can add arguments to the end of a command for a further action. In the following example, that is --activate to automatically activate the plugin as soon as it has finished installing.
$ wp plugin install user-switching --activate
Installing User Switching (1.0.9)
Downloading installation package from https://downloads.wordpress.org/plugin/user-switching.1.0.9.zip...
Unpacking the package...
Installing the plugin...
Plugin installed successfully.
Activating 'user-switching'...
Plugin 'user-switching' activated.
Success: Installed 1 of 1 plugins.
This saves an additional step of activating the plugin after installation.
Updating plugins
The core command for updating a plugin is wp plugin update [plugin-name], however, as with most commands you can add arguments to specify the action. Replacing the plugin name with the --all argument will update all plugins at once. Other arguments that can be used include: [--exclude=<plugin-name], which allows you to exclude a specified plugin from the update or [--minor], to only perform 'minor' patches (e.g. from 1.3 to 1.3.3, instead of 1.4).
$ wp plugin update --all --minor
Success: Plugin already updated.
Creating users
The core command for creating new users is wp user create [name] [username] --role=[role-name]. Similarly to the plugin commands, there are numerous arguments to be added to specify the action further. [--user_pass=<password>] allows you to set a pre-defined password for the user - by default, a random password is generated.
$ wp user create bob bob@example.com --role=author --user_pass=password123
Success: Created user 3.
Creating user roles
The core command for creating a new user role is wp role create [role-name] [role-group]. When creating a new role, you must assign the 'role group', which acts as the permission group that will be assigned. In the following example, the role group assigned is 'Approver'.
$ wp role create example-role  Approver
Success: Role with key 'example-role' created.
Retrieving site options
The core command is wp option, with numerous different sub-commands to help add & manage new options for your site. The most common would be to retrieve the site URL. This can be retrieved via the following:
$ wp option get siteurl
https://mydomain-uk.stackstaging.com
More WP-CLI
For a fully comprehensive document on all WP-CLI options, visit https://developer.wordpress.org/cli/commands/
 Jordan Graves
WordPress Site Health - Caching
This article will cover the range of warnings that the WordPress Site Health Check will show regarding caching, as well as how best to rectify these when they occur.
Persistent Object Caching
One of the most common reasons is that the site lacks a persistent object cache. Persistent Object Caching is an additional component to the WordPress infrastructure designed to improve the performance of a WordPress site by reducing the need to repeatedly query the database.
This form of caching is not required on all sites, but can be a valuable addition. Persistent object caching is not available on our Shared Hosting, unfortunately, and you will instead need a WordPress Optimised Managed 20i Cloud hosting server. We have another article based on Persistent Object caching and how this can be implemented on your site.
WP_CACHE is set to fale
Another common reason for the WordPress Site Health Cache warning showing is the fact that WP_CACHE is set to false. This is an option that can be set in your wp-config.php or wp-settings.php files. This can be useful if you are developing the site and do not want it to be cached to have any changes reflect immediately. However, on a live production site, it is recommended that you either remove this or set it to 'true' to ensure that your WordPress site can be cached.
Unable to detect the presence of page cache
Another error that can be seen is that the WordPress site is 'Unable to detect the presence of page cache'. The WordPress health check works by checking for certain HTTP Headers to detect the presence of cache. These are:
cache-control, expires, last-modified, x-cache-enabled, x-cache-disabled
If the caching service you are using does not use the above, then it is possible that WordPress will be unable to detect this. For example, our caching uses: x-stackcache-cacheable, x-cdn-cache-status, x-origin-cache-status . If you are unsure as to whether your site is caching, then you can check the HTTP Headers on your site manually and look for any cache 'HITs'.
"Page cache is detected, but the server response time is still slow"
The final common reason that the WordPress site health check will report regarding caching, is the fact that Page Caching is indeed detected, but the server response is still slow.
In this case, your site is caching as expected, but the response time itself is slow. This can be due to the server itself being under considerable load and traffic, leading to the slow response and load times. Alternatively, this error can also be due to a range of site-related issues. If you see this, we recommend you make sure that your WordPress install, plugins, and themes are all up-to-date, as these are all factors that can slow down the response time of your site.
 Josh Sargent
How to Use Search and Replace in WordPress on My20i
Overview
You can use the WordPress Search and Replace tool in My20i to quickly update text or URLs across your WordPress database without plugins or logging into the WordPress dashboard. It’s beneficial when updating URLs after migrating your site, fixing repetitive text, or replacing outdated information.
Prerequisites
- Your WordPress website must be hosted on 20i’s Managed WordPress Hosting platform.
- WordPress must already be installed on your hosting package.
Steps
- Log in to your My20i control panel.
- Click on Manage Hosting.
- Choose the relevant hosting package, then click Options and select Manage.
- In the WordPress Tools section, click on Search/Replace.
- Select your environment (Live or Staging) using the dropdown menu.
- In the Search box, enter the text or URL you want to find.
In the Replace box, enter the new text or URL to replace it with. - Toggle Run as Dry Run to preview changes without modifying your data.
(We strongly recommend running a dry run first.) - Click Run Search and Replace.
After running, you'll see either a summary of potential changes (Dry Run) or confirmation of changes applied to your database.
Important Notes
- The tool updates database content only. It does not modify any WordPress files.
- Always run a dry run first to review the potential changes.
- Ensure you have a recent backup before performing live replacements, especially on production sites.
Related Articles
- How to change your WordPress URL
- I installed WordPress on the temporary URL, how can I change it to my domain name?
 Chris Wright