Getting Started Guides: Autoscale Questions
Autoscale: Getting Started
Autoscale dynamically adjusts server resources to meet your site's demands. This means your website stays fast and responsive during traffic spikes, without requiring manual intervention. With 20i Autoscale, bottlenecks are eliminated, ensuring consistent performance and a smooth experience for your visitors—no matter how popular your site becomes.
Let’s walk you through the essentials to get started. Follow this guide to make the most of your new hosting platform and unlock its full potential.
This Getting Started Guide will show you how to quickly and easily manage your websites, applications, domain names, security, email and much more all from My20i - our custom built, intuitive control panel.
This guide covers:
- Autoscale: Register & Transfer Domain Names
- Autoscale: Migrating Your Site
- Autoscale: Adding a New Package
- Autoscale: My20i Control Panel
- Autoscale: Manage Your Autoscale Hosting
- Autoscale: Additional Services
- Autoscale: Security and Backups
- Autoscale: Further Help and Next Steps
To get started with your Autoscale Hosting, please log in to your 20i account at https://my.20i.com before continuing with this guide so you can follow along.
If you encounter an issue at any point or you’re not sure what to do next, please raise a ticket in My20i and our friendly Support Team will help you out.
>> Next step: Register & Transfer Domain Names

Autoscale: Register & Transfer Domain Names
You can quickly and easily transfer existing domain names to 20i, or register new ones.
Transferring Existing Domains to 20i
Here’s how to transfer domains from other providers - and start saving money on renewals.
1/ In My20i, select ‘Transfer a Domain’ from the Migration Centre
2/ Enter the domain name(s) you wish to transfer and click ‘Search Domains’
3/ You can then add them to your basket and follow the checkout process to initiate the transfer
Once you’ve started the process of transferring a domain name, you can monitor its status on the ‘Pending Domain Transfers‘ page. Your domain will display one of the following states:
- pending_owner - An email is sent to your domain name’s contact email address asking for confirmation that you wish to transfer your domain to 20i. If approval is not given within five days, the transfer is cancelled and will need to be reinitiated
- pending_admin - Your domain transfer is currently waiting to be approved by registry staff
- pending_registry - Your transfer request has been confirmed, and is awaiting registry approval. Unless declined, the transfer will be completed within a week
- completed - The transfer was completed successfully
- cancelled - The transfer has been stopped.
If you have any questions or concerns about the status of any of your domain names, please contact our support team and they’ll be happy to advise.
Once the domain transfer has been successfully completed, the domain name will disappear from the Pending Domain Transfers page, and appear in your 20i account.
You can then view and manage it from ‘Manage Domains’.
Updating Nameservers
If you’d prefer to update your nameservers with your current domain registrar (meaning you have your non-20i domain pointing to your 20i hosting) instead of transferring your domain to 20i, you’ll need to log in to your domain registrar’s control panel and update the nameservers to the following:
- ns1.stackdns.com
- ns2.stackdns.com
- ns3.stackdns.com
- ns4.stackdns.com
If your registrar doesn’t support 4 nameservers, add as many as it will support. It can take up to 48 hours for nameserver changes to propagate across the web, but it’ll be completed much faster in the vast majority of cases.
If you need additional help transferring domains from your registrar then click here for more detailed guidance or raise a ticket with our friendly, award-winning support team. |
Registering a new domain name
Use the ‘Register New’ tab within ‘Hosting Management’ section of My20i to search for the domain name you’d like to buy.
When you’ve found the domain you want to register, follow the selection and checkout process and your domain name(s) will automatically be added to your 20i account.
>> Next step: Migrating Your Site or Adding a New Package

Autoscale: Migrating Your Site
Moving your website over is safe and painless.
Migration Centre
Our automatic Migration Centre supports automatic migrations from fellow 20i customers, web hosts who use the cPanel or Plesk control panels, as well as Fasthosts.
A backup of your website(s), database(s) and email is created before being seamlessly and securely transferred to our data centres, so nothing can get lost and your users don’t experience any downtime.
1. Open the ‘Start Migration’ tool from your My20i dashboard
2. Choose your provider from the list and click 'Next'.
3. Enter the required credentials (usually username and password), and select ‘Next’.
4. Enter the required API credentials (there are descriptions of where to find these for your particular host), choose the package you’d like to migrate and click the button to start your migration.
5. Go to Migrations Overview at any time to see the status of your migration. You’ll be notified when it’s successfully completed.
>> Next step: My20i Control Panel

Autoscale: Adding A New Package
Creating packages for Autoscale is easy, and this step-by-step guide will get the server-side of your new website or app ready in no time!
Step 1
Sign in to My20i using a computer, tablet or phone.
In the Hosting Management section of the main dashboard, you’ll see the Manage Hosting icon. Click the button called ‘Add Package’.
Step 2
The Manage Hosting interface will load, and you’ll see all your live packages listed.
In the Autoscale section, click the ‘Add new hosting package’ button.
Step 3
You’ll be presented with options for your new package:
Choose location: Choose the location nearest to your users. This will deploy your new package from the data centre that’ll deliver the optimal, lowest latency experience for your users, while our global CDN and pre-caching technology work together to deliver a blazing-fast performance for your international users.
Profile: Select the profile that your website or application is built on.
Note that you can still set up and use a WordPress site if you select PHP, but you’ll not get access to our powerful, time-saving WordPress Manager Suite.
Enter Domain Name: Add the domain that you want your new package to use into the text box.
Step 4
Double check that everything is correct with your options and, when you’re ready, click the green ‘Add Hosting’ button. Your package will be ready in a few moments.
With your new package created, it’s time to introduce you to the powerful suite of tools in our Control Panel.
>> Next step: My20i Control Panel

Autoscale: My20i Control Panel
You can manage all aspects of your domains, hosting, and other services from https://my.20i.com.
Top Navigation
The top of the My20i home page has useful features that make using the platform straightforward and intuitive, including:
Search Bar
Desktop users will find the Search Bar in the top left of the My20i home page.
Mobile and tablet users can find it by tapping the hamburger icon (three lines) in the top right of the My20i home page.
Use the Search Bar to find everything from Agency Hub to your VPS.
Your Account
View and manage all aspects of your 20i account:
- Account Overview
- Renewals
- Security Details
- Active Sessions
- Contact Details
- Payment Methods
- Account Credit
- Invoices
- Account Preferences
- Email Notifications
- Team Members
- Refer a Friend
Side Navigation
Desktop users have access to the Side Navigation menu from all areas of My20i, making it incredibly convenient to manage everything to do with your account and services.
Mobile users can access these menu options from the My20i home page by using the hamburger. Side Navigation is available from within individual packages.
Here’s an overview of what you can do with each Side Navigation option:
Home
Use this menu item to return to your My20i home page from wherever you are in the platform.
Manage Services
This menu lets you view and manage your Autoscale packages, Domains, Managed Cloud Servers and SSL certificates. You can also Deploy New Servers, Add Hosting Packages and order useful add-ons such as Timeline Backups and Premium Email.
Agency Hub
This is where agencies using Managed Hosting can manage their Clients, Projects, Invoices, Resources and other settings related to the business side of hosting.
Migrations
Begin migrating websites or domains from another provider. You can also carry out Platform Transfers to move your websites or applications between our own services.
Reports
View useful, insightful reports on your Mailbox Usage, Bandwidth Usage, Disk Usage, Database Usage and Malware Detection.
Help & Support
Search our Support Database, read popular articles, contact our Support Team and submit feedback to our management team.
Main My20i Dashboard
My Cloud Servers
My20i makes it easy to manage multiple hosting services. Alongside Autoscale, you can add products like Managed Cloud Servers. This panel shows the status of, and how many Packages that are assigned to your Managed Cloud Servers.
The Options dropdown menu at the side allows you to Manage, Add Packages, Upgrade, Start, Restart, Stop, Transfer and Delete your Cloud Servers.
Hosting Management
This section appears below your Managed Cloud Servers, and houses key elements pertaining to core aspects your services.
- Manage Hosting: Use these controls to get an overview of all packages you’re hosting, and add new ones
- Domain Names: Search for, and manage your domains
- VPS: Order and manage your Virtual Private Servers
- WordPress Manager: Administer all WordPress-optimised packages you’re hosting.
Certain icons will only be present in this menu if relevant to the services you’re using to keep the interface simple and streamlined.
Migration Centre
The powerful and easy-to-use tools you’ll need to bring your domains and websites over to your new platform are found in this section.
- Migrations Overview: Start, or and view the progress of migrations
- Platform Transfer: Start, or manage transfers within our platform
- Domain Transfers: Start, or view the status of domain transfers
Other Homepage Information
The My20i home page will also show links to the most-recently managed Hosting Packages, Favourite Packages, a dropdown menu to manage Packages, 20i system status, domain search and the latest development updates.
>> Next step: Additional Services

Autoscale: Additional Services
Autoscale breaks the constraints of conventional hosting, delivering an unparalleled user-experience for your high-traffic sites and applications.
Whether you need enhanced security and identity validation, comprehensive backups, or expanded email capabilities; these add-ons complement Autoscale to perfectly integrate the platform with your use case.
Using the Sidebar Navigation menu on desktop and the Hamburger menu for mobile users, you will see the following:
Order SSL Certificates
Free Wildcard SSL certificates from Let’s Encrypt are included with Autoscale. If your business involves high value, large scale financial transactions you can purchase a Geotrust extended SSL certificate that:
- Covers you for up to $1,500,000 of financial loss due to mis-issuance.
- Provides maximum trust for your customers by extensively validating your business identity
Timeline Backups Pro
Timeline Backups Pro is the safety net that mission-critical operations need, taking 7 days of automatic website snapshots up to 30 days.
The File Manager gets the powerful ‘View File History’ feature so you can easily restore files or entire folders to squash bugs or defeat ransomware.
Database snapshots get increased from 7 days to 60 days, and you also get all of your emails automatically backed up with 30 days of snapshots.
Premium Email
Boost your inboxes from 10GB to a massive 50GB, and get the headroom you need to keep up with busy ecommerce businesses and popular apps.
Premium Email also comes with both Contact Sync and Calendar Sync to seamlessly manage your schedule and contacts across multiple devices, and popular mail clients like Outlook, Apple Mail, Gmail and more.
>> Next step: Manage Your Hosting

Autoscale: Manage Your Hosting
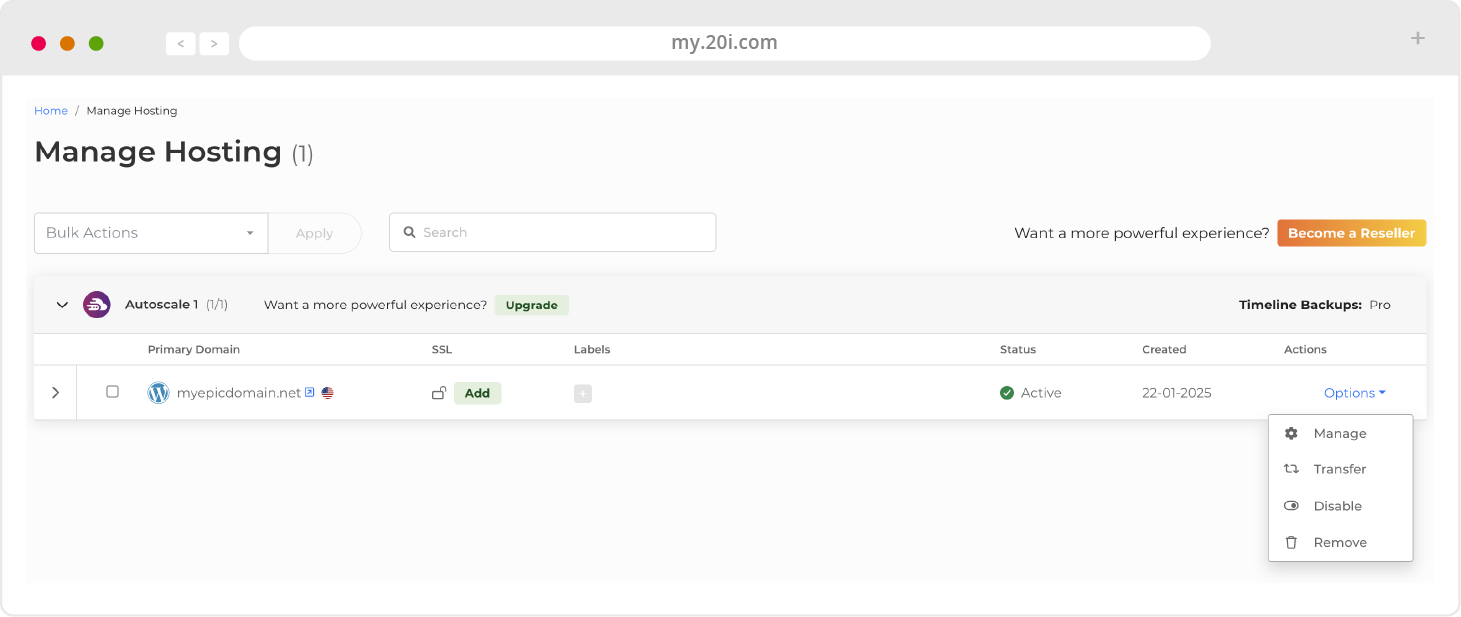
You can select and manage all hosting packages through the menus and shortcuts on the My20i home screen.
Choosing ‘Options’ and then ‘Manage’ will take you to the packages’ service overview page, where you can manage all aspects of the package and website.
WordPress Tools
If the package you’re managing is on our enhanced WordPress platform, a range of WordPress Tools will appear at the top of the main section.
Our suite of WordPress Tools make it easier to manage individual and large numbers of WordPress sites. Instead of having to log in to the WordPress dashboard for each site, you can manage themes, plugins and more from within My20i.
Version Checker - When managing a WordPress hosting package you’ll see a green message if you are fully up to date. If you’re running an older version, the version information will be orange. This is a handy way of checking if a website is up to date without having to log into /wp-admin and check manually.
It’s important to keep WordPress updated for security reasons and to ensure there are no issues with the latest versions of any plugins you may be using. Always double check before updating to ensure compatibility.
WordPress Admin - This acts a shortcut to take you into WordPress admin panel. If you’re already logged-in to WordPress on your browser, this will take you straight to your WordPress dashboard.
Reinstall WordPress - Sometimes, reinstalling a fresh copy of WordPress is the answer. With this feature it couldn't be easier or more straight forward.
Plugins - Manage all your WordPress plugins: you can activate/deactivate them and update them with this tool.
Themes - A full list of current themes that are installed, their versions and which are active. Similar to the Plugins tool, you have the option to activate, deactivate or update themes.
Users - Lists all users along with their name, username and their role. You can add new users accounts, assign custom roles and delete users from here too.
Settings - Make changes to the site, home URL, site title and the site tagline.
Staging - A one-click WordPress staging environment for you to test changes and updates in a safe staging environment without impacting your live site. When happy with your changes; seamlessly migrate them over to your live site. We’ll show you how this is done in the next chapter.
Checksum Report - This checks the core files of the WordPress installation, and determines if they match those of the official WordPress core repository. If the files have been modified, then you’ll be notified. If the check fails and modified files are found, then a next step would be to check the on-demand malware scanner to ensure the installation has not been infected.
CDN - Content Delivery Network
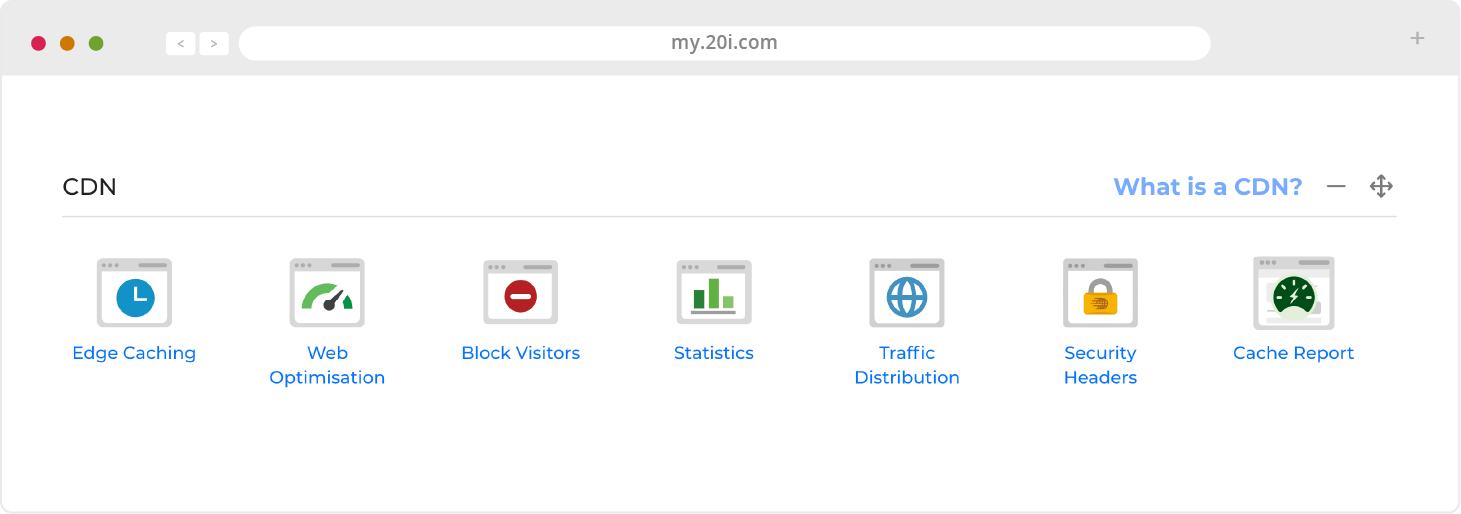
Edge Caching - Speed up your site for users wherever they are in the world. Control how your website content is cached, and purge the cache if necessary
Website Optimisation - Improve the responsiveness of your website through these powerful enhancements. This module can be configured to automatically improve website load times and performance by implementing best practices.
This includes optimising images, JavaScript minification and combining CSS - all to enhance speed and the Google PageSpeed Score. This in turn positively impacts search rankings and helps you develop high-performing websites at scale.
To apply these free performance enhancements; head to My20i and select the package that you’d like to speed up. From there, click on the Web Optimisation section where you’ll see the full list of the tweaks that can be toggled on or off.
We’d recommend using Web Optimisation and Staging together to ensure that your optimisations don’t conflict with any plugins.
If you are unsure where to start our Web Optimisation Wizard will guide you through the process.
Block Visitors - Block users for your site by country or IP address
Statistics - See detailed CDN performance statistics - useful for debugging problems
Traffic Distribution - View a map and stats of where the CDN traffic is coming from
Security Headers - Manage Security Headers and control the how CDN can be accessed
Cache Report – Ensure your site is making use of the speed and performance boosts of pre-caching. This tool displays the caching status of your web pages, if there are any problems, and the last pre-cache update time for each URL.
Web Files
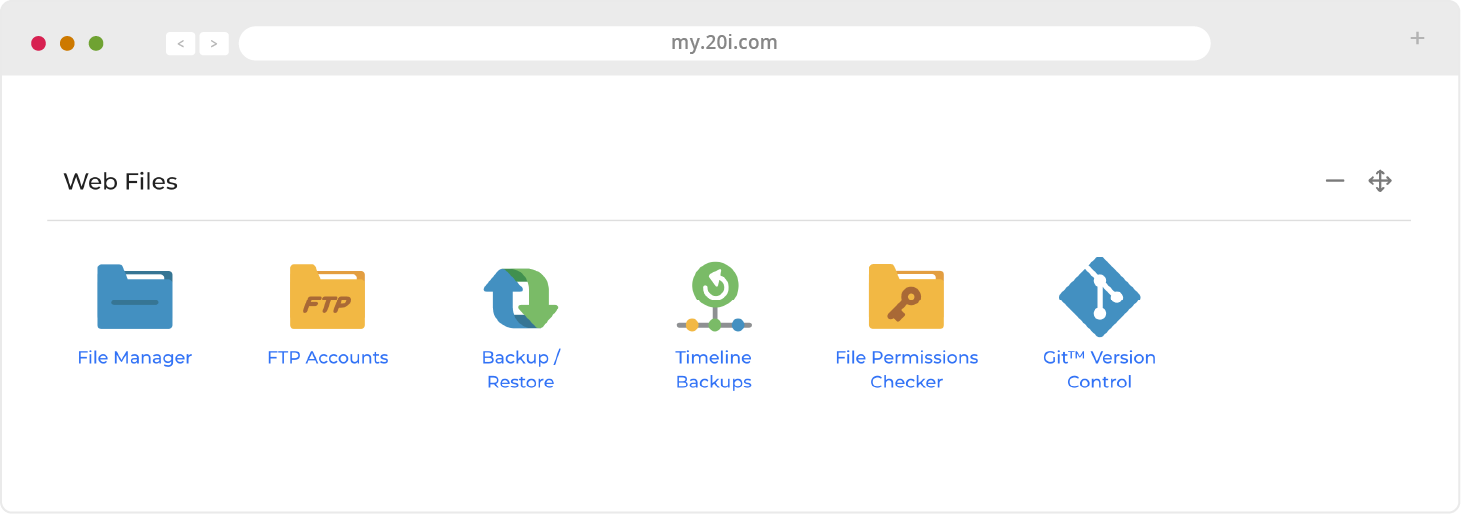
File Manager - Add, delete, open and edit website files and folders via a user-friendly web interface
FTP Accounts - Manage access, permissions and users to allow easy collaborations, manual backups etc
Backup/Restore - Creates and downloads website backups
Timeline Backups - Access daily backups of your site - see Security and backups for more info
File Permissions Checker - Websites can be hacked if they have the incorrect file permissions. This tool will check that you have the correct permissions and fix them if necessary
Git Version Control - GitHub is used for collaborative web development, and My20i includes a graphical user interface that helps simplify and speed up the process. Integrate your GitHub account and clone, manage and create local and remote repositories
Email Accounts - Create, manage and change passwords for your mailboxes
Email Forwarders - Create rules to forward your email to a different email server
Catch-All Forwarders - If someone sends an email to your domain, but gets the first part wrong, you can use this tool to make sure that it is forwarded on and simply blocked from getting through
Autoresponders - Set up and edit automatic email messages in plain text or HTML. You can choose the dates they run for and whether or not to forward incoming email
Send-only Addresses - Set up and edit email accounts that can only send emails, not receive them
Receive-only Addresses - Set up and edit email accounts that can only receive emails, not send them
Junk Mail Filters - Set rules and control the level of junk email filtering applied
Webmail - Sign in to your online email service
Email Summary - An overview of all email accounts, forwarders and autoresponders being used by this package
Email Migration - The place to migrate your email from a previous provider
Domainkeys (DKIM) - Improve the deliverability of your email by using a DKIM signature
DMARC Wizard - Reduce spam and the risk of phishing by adding DMARC policies
Web Tools
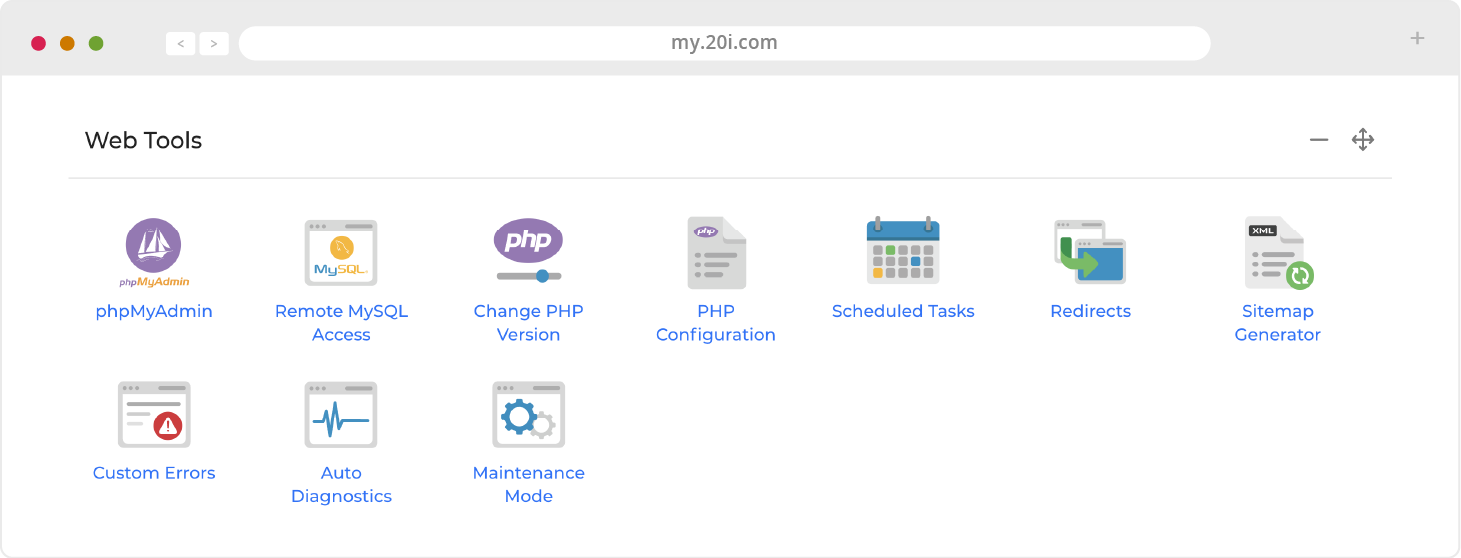
phpMyAdmin - This is used for PHP-based MySQL database management
MySQL Databases - Manage databases and grant access other users
Remote MySQL Access - Here you can allow others to access your database remotely by enabling specified IP addresses
Change PHP Version - Change PHP version from default to the latest version to ensure optimal compatibility
PHP Configuration - Change settings to suit the requirements of your applications
Scheduled Tasks - Run tasks at specific times and intervals
Redirects - Create temporary or permanent redirects from My20i
Sitemap Generator - Create an XML sitemap of your site to help search engines and other bots
Custom Errors - Manage what happens for your different error types on your site
Auto Diagnostics - Check for any common misconfiguration issues or errors involving malware, error logs, file permissions or SSL certificates
Maintenance Mode - Put your site into ‘Maintenance mode’ where a message will appear indicating that the website is undergoing maintenance
Domain Names
Domains - Add or remove domain names on your hosting package
Subdomains - Add and manage subdomains in the format: subdomain.yourdomain.com
Manage DNS - Add, edit and reset DNS records
Domain Contacts - Manage the contact details of the people associated with a domain
WHOIS - View the WHOIS Result for the associated domain
Nameservers - Edit and change the nameservers of a domain
Domain Privacy - Manage all aspects of your domain privacy from this dashboard
DNSSEC Protection - Activate or deactivate protection against forged DNS answers when using our nameservers
Transfer Away - Lock, unlock and easily transfer your domains to another provider
Security
SSH Access - Add and manage public keys for SSH
Hotlink Protection - Prevent websites direct linking your website resources (e.g. images and video) and consuming bandwidth
SSL/TLS - Ensure all your visitors access your website via an encrypted connection
Password Protection - Create password protected directories for your website
Directory Indexing - Turn directory indexing on or off for your website
Malware Scan - Scan your site’s files for malware. While we scan your site every day automatically, you can start a manual scan here
Logs & Stats
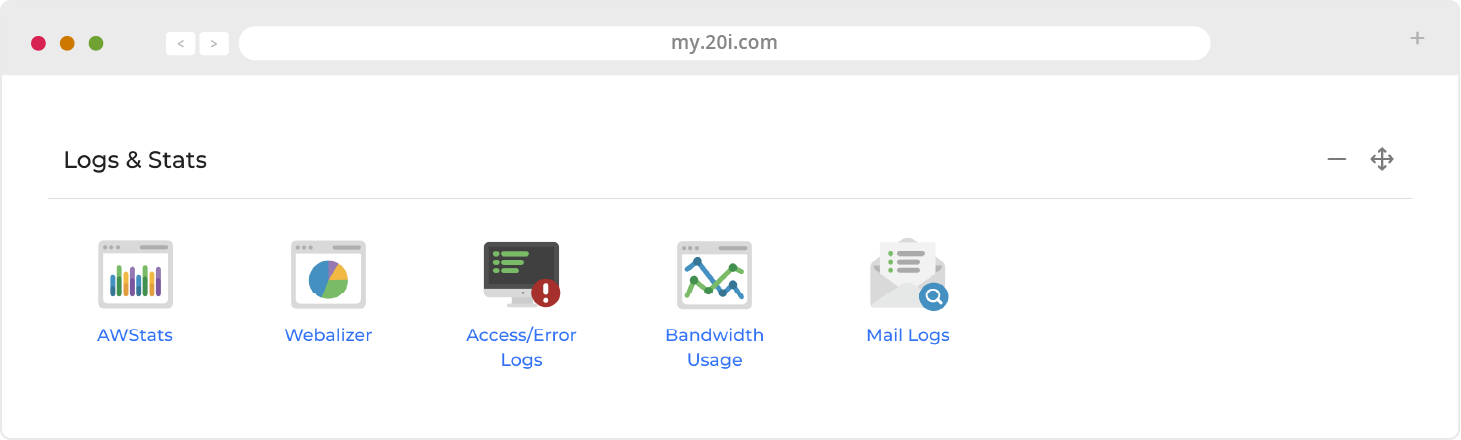
Access/Error Logs - View access logs and errors, and download full logs for analysis
Bandwidth Usage - Bandwidth and hot statistics taken directly from our load balancers
Mail Logs - Monitor email deliverability, troubleshoot and track important notifications for audit trails and legal compliance
>> Next step: Security & Backups

Autoscale: Security & Backups
Security
While your hosting includes security measures like a web application firewall, malware scanning and brute force login protection, we’d recommend that you still follow security best practices:
- Use strong passwords that you don’t use anywhere else
- Use Two Factor Authentication (2FA) - the two-step verification process that provides an extra layer of security for you when accessing your account
- Only access your website and accounts over secured internet connections
- Only create sub user accounts for people you know and trust
For better security, improved search engine rankings, and helping your visitors’ peace of mind, you can also add an SSL security certificate to your website.
This will ensure that you, your visitors, and your users can browse your site securely and confidently.
Backups
We back up your website files and database daily, so if there’s ever any problems, you can use our Timeline Backups service to restore it. In a few clicks you can restore back to a previous snapshot. All backups are hosted on a different server to your website for extra protection.
You can never have too many backups, so as best practice we’d advise you to take a ’manual’ backup of your site too - especially before making major changes. If you’d like to create a manual backup of your content, you can download all your files via FTP or use the Backup/Restore option in My20i.
Timeline Backups Pro
Our standard Backups will store your files and databases for 30 days.
We also offer Timeline Backups Pro, which will again store your files for 30 days, but your database snapshots for 60 days: important for ecommerce sites.
However, the biggest difference with Timeline Backups Pro is that all your email, across all your email accounts are also backed-up. This could be a lifeline if there was a loss of email services.
>> Next step: Further Help and Next Steps

Autoscale: Further Help & Next Steps
All the latest service and platform updates and information reports are available at https://www.stackstatus.com, which is your first port of call in the unlikely event of service disruption.
If you’re looking for help using any 20i products or services, we’ve developed an extensive support database at https://docs.20i.com with a wealth of ‘how-tos’ and guides. Many articles are supported by videos, and you can browse all these on our YouTube channel: http://20i.co/2ylF8bO. You can also find design and business tips on our blog: https://www.20i.com/blog
If you’re looking for more personal support, you can contact our friendly UK team directly by raising a ticket or live chat through the My20i control panel.
