Reseller Hosting Questions
How do I build a site before changing the nameservers to 20i’s?
You may want to create a package where you can develop a site before linking it to a live site.
At 20i, you can create a hosting package using a domain reference. This means that the hosting package won’t be connecting to a live domain name via DNS, so to view the files you’ve uploaded to the site you can use the temporary URL. It will display the site as if it were live, except it will be on our temporary URL servers and the URL is something like http://example-co-uk.stackstaging.com.
To set this up:
- Login to your My20i account.
- Select Add Hosting Package
- You’ll see you can either Select Domain Name or Type Domain Name.
- To add a domain reference you’ll want to choose Type Domain Name. This can be anything you want and doesn’t have to be a registered domain. It will simply be the name of the hosting package. For example, you could call it ‘devpackage132435.com’.
- You'll be able build the site as normal and use the temporary URL to check how the site looks. Here's a guide to temporary URLs.
The process for linking the finished site with a live domain depends on where you have the domain name registered.
If the domain is registered with 20i:
- Go to Manage Hosting and select Manage on the package you want to add the domain name to.
- Select the Domains icon. This is where you will associate a domain name with the hosting package. You can type in the domain name you want to add the hosting package and select Add Domain. You will then want to select to Make primary. This will sync the live domain name with the hosting package.
If the domain is registered elsewhere:
- You will need to change the nameservers to 20i’s. You can do this where the domain name is currently registered. Our nameservers are here.
- Alternatively, you can point an A record from the domain name to the IP address of the package. You’ll find this IP down the right-hand side of the package.
 Austin B.
How do I set up a cron job?
Cron jobs (also referred to as scheduled tasks), are an important tool for hosting websites looking to incorporate automation into their setups.
When used correctly, websites can automatically check for updates, send out emails, take backups and much more, so it’s worth knowing how to incorporate these through 20i’s hosting.
What is a Cron Job?
A cron job refers to a Linux command that is scheduled to run at a specific time – this command may run a file with a script in it, or utilise a command-line interface (CLI) such as WordPress’s WP CLI to run a specific function once or multiple times per day without user input.
Some setups, such as WHMCS for Reseller Hosting, have their own cron files that run key functions at specific points during the day, such as emailing out reminders to customers and checking domain renewal dates are in sync.
Most cron jobs consist of two key parts – the command, and the interval the command runs at.
How can I set up a cron job in My20i?
You can set up a cron job or 'scheduled task' in the Scheduled Tasks section of your hosting packages control panel.
Manage Hosting -> Manage -> Scheduled Tasks
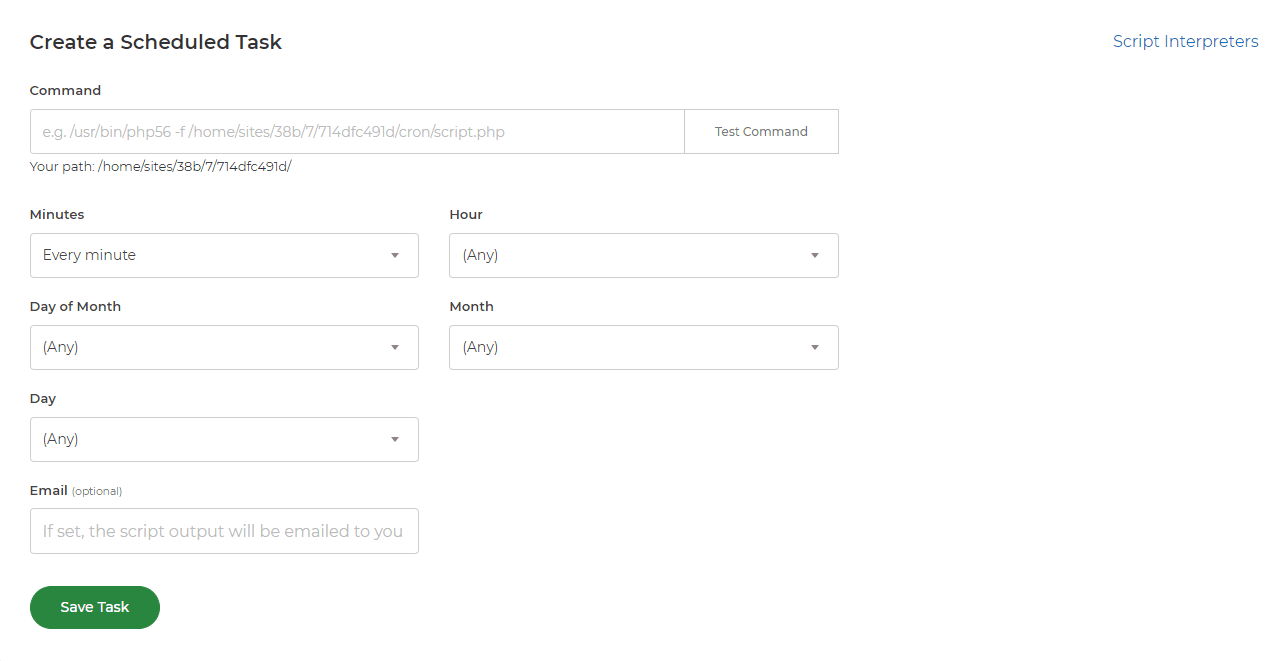
These are commands or jobs that are set to run regularly. They can be set to run at intervals of minutes, or the same time every hour, day or month.
On the Scheduled Tasks page there are three things to consider:
1. What command you are wanting to run?
This is usually something like a WGET to a certain domain name or a PHP script. If you want to run a particular file such as WordPress's cron you'll need to use the correct version of PHP for the website. To select a particular version of PHP to run the command you use the commands to the right of the screen.
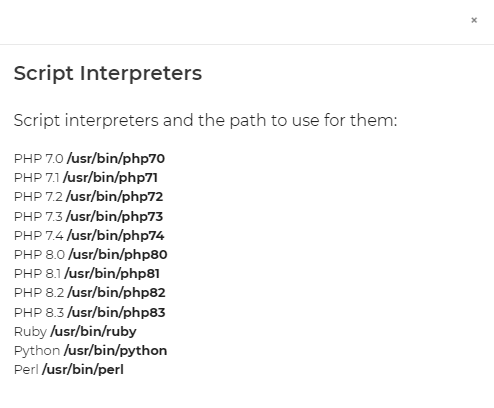
2. How often you need your cron to run?
This is selected from the drop-down boxes under where you enter the command. You can either use the first box to run it every 5, 10, 15 minutes or you can be more specific and select particular minutes in the hour, hours in the day or days in the month for the cron to run.
3. Would you would like to have emails sent to a specified address when a cron is run?
An email will only be sent if the cron produces an output so if the cron doesn't output anything no email will be sent.
 Austin B.
How do I allow clients access to StackCP?
As a Reseller, you may want to give your clients access to StackCP.
They can use StackCP to carry out many site management tasks themselves - without needing to bother you with support requests - so it's definitely worth doing! It also lets them use the HostShop store to upgrade their services.
To do this you need to create StackCP users:
- Log in to My20i
- Under Customer Management select StackCP Users

- If you don't already have a StackCP User created select Add StackCP User and enter your client(s) credentials.

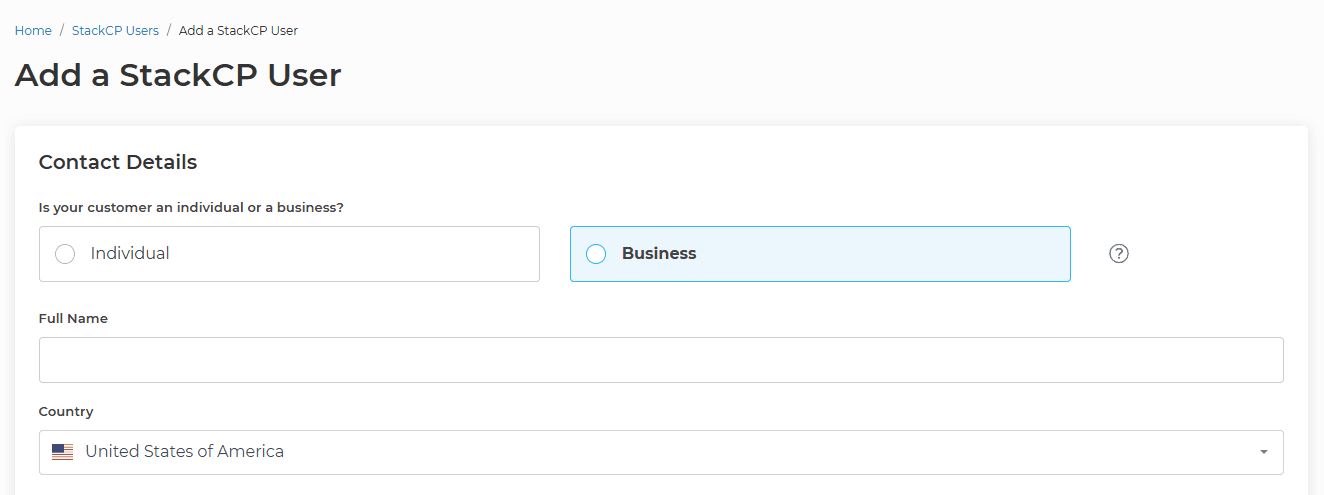
- Then select Add StackCP User.
- You'll be taken back to the StackCP Users list. The user will have been assigned a password - change this if you want.
- To assign the StackCP user to a Hosting Package and give them Domain Access, hover over Options and select Edit

- Select the Package you'd like to give them access to, along with access to the relevant domain, and select Save.
Your new StackCP user is now set up.
You can now email your client their StackCP login email address and password, they can then log into their control panel via https://stackcp.com or your customer login URL.
 Austin B.
How do I set my custom webmail URL?
By default, customers can access webmail using our white-labelled brand, stackmail.com. However, if you are a reseller hosting customer you might like to set your own branded webmail URL that your customer see your brand when they use webmail.
Choose the domain for your custom webmail URL:
First you need to choose one of your domain names to be used as your custom webmail URL.
First, head to Reseller Preferences > StackCP Settings. Locate the section called Webmail Domain and using the dropdown menu select the domain you'd like to use.
This may be your primary business URL, in which case you'd enter a subdomain where customers can go to access webmail, this may be something like webmail, or email.

If your domain is example.com and you choose email as your subdomain, the custom webmail URL for your customers would be email.example.com
Please tick the ‘Use HTTPS’ box that your webmail URL is encrypted. To use this you need to have an active SSL certificate. If you do not have SSL activated, here is how to activate your free SSL certificate.
Note: If you'd like to use a new or separate domain just for webmail i.e., my-branded-webmail.com, you can select your domain name and then just enter www as the subdomain.
Select Save to set your webmail URL.
Now your customers can use this custom URL to log in and use webmail.
Only your chosen URL will be seen by your customers when they log in. This is just one of the white-label options we offer our reseller hosting customers.
If you have customised the webmail URL you probably want also customise the webmail login page.
 Austin B.
What is the Stackmail Customer Login URL?
If you need to log in to Stackmail - 20i's free webmail available with all hosting packages - the URL they need is www.Stackmail.com.
If you have a reseller hosting account, you can change this URL to your own preferred brand in Reseller Customisation in your 20i account.
Frequently Asked Questions
Can I have an SSL on my branded webmail URL?
Yes, you can now add an SSL to your branded webmail URL. To do this, head to Reseller Preferences >> My Brand and scroll down to the webmail section. You'll see below where you've added your subdomain and webmail domain the ability to select SSL. This will add an SSL to your branded webmail URL.
Note: You'll only be able to add an SSL if you've select your 'Brand Domain', selecting (All Domains) won't offer the SSL option due to Let's Encrypt rate limiting rules.
What CNAMEs can I use to point webmail to my own brand?
Using the tool within My Brand adds the relevant CNAMEs for you so there's no need to add these manually. A branded webmail URL will be given the CNAME:
webmail.example.com -> CNAME -> stackmail.com
A branded URL with an SSL applied to it will be given the CNAME:
webmail.example.com -> CNAME -> webmail.stackcp.com
 Austin B.
What happens if I exceed my US Reseller Hosting Tier limits?
Our US Reseller Hosting is available in three different tiers - Reseller 25, Reseller 100 or Reseller Unlimited. Reseller 25 and Reseller 100 are subject to usage limits.
We reommend to compare all features and the pricing for our reseller hosting plans before getting started. If your requirements change you can upgrade or downgrade your plan to meet your hosting business needs.
What happens if I exceed my Disk Space limits?
Reseller 25 has a disk space limit of 30GB, and Reseller 100 has 150GB capacity. Reseller Unlimited remains truly Unlimited.
If you go over your account's allocated disk space usage, you'll receive a daily warning email for 6 days that prompt you to either upgrade or reduce the amount of disk space being used. If the account is still over quota on the 7th day, then the account will be restricted. You'll then need to upgrade or contact support for further help. If you can reduce disk space to under your account quota you won't get any further emails and your account will be unrestricted.
What happens if I need more mailboxes?
The Reseller 25 tier has a limit of 50 email accounts - once the limit is met, it will not be possible to provision another mailbox until either an existing mailbox is removed, or the Reseller Hosting account is upgraded to the next tier.
Reseller 100 includes 500 email accounts and Reseller Unlimited includes unlimited mailboxes.
All mailboxes included in out plans have a 10GB storage. If you or any of your web hosting customers need more storage, you can order more storage at any time.
Are there any limits on the number of StackCP users?
There are no limits on the number of StackCP users that can be created on any of the Reseller Hosting plans.
Is it possible to oversell my tier limits?
Yes, overselling is possible. A StackCP User can be allowed to add unlimited disk space, an upgrade would be required by the Reseller if their total disk space, emails accounts, or number of accounts is hit.
 Chris Wright
How do I change the license key WHMCS uses?
As a 20i reseller, you can buy a discounted WHMCS license. If you have a pre-existing WHMCS license, you'll then need to change the license key in your WHMCS system.
To do this, log in to the admin area and go to Help > Change License Key.
You can then enter your new license key, along with your admin login details to verify the change.
If you are getting a 'license invalid error' - so that you are unable to login - there is a link to the Change License page from that error page.
Further instructions can be found at: WHMCS Support - Licensing.
If you don't want to worry about licenses at all, you can use 20i's free alternative to WHMCS, HostShop!
 Austin B.
How do I add a hosting package?
Hosting packages are where all site files, databases and emails are housed for a particular website.
To create a new hosting package:
- Head to Add Hosting Package.
- Select Create a new package.
- Either select a domain from the drop-down menu or type your domain to create a domain reference.
- Select the Package Type you’d like to create.
- Select Create Hosting Package.
Note: You don't need to have a domain registered with us to create a hosting package. You can create a domain reference by typing your domain as instructed above, you can then use the temporary URL to view the website.
 Austin B.
How do I view the most recent backups taken by Timeline Backups?
Timeline Backups take an automatic daily backup of all your websites and databases and store them for 30 days.
If you have the Timeline Backups product you may want to view the most recent backups of your site.
To do this:
- Log in to My20i.com
- Head to Timeline Backups.
- Select Manage next to the package you'd like to view backups for.
- Select View Snapshots next to either the webspace snapshots or database snapshots that you're looking for.
After selecting View Snapshots you'll see the Snapshot Time drop-down, which will have all the snapshots from the previous 30 days.
 Austin B.
Getting Started with 20i Reseller Hosting
We're sincerely grateful you've decided to use 20i as your Reseller Hosting provider. We're the #1 Rated Web Hosting Provider on Trustpilot and power the largest web design agencies, resellers, and web entrepreneurs.
We give you an innovative platform that focuses on customer success and providing the best infrastructure to truly propel businesses to the next level.
Firstly, the 20i platform is built on your feedback. If you find something that you think just isn't right, or that we could improve, please let us know via our dedicated Feedback Form. All feedback is listened-to and taken on board.
This guide is written to get your site and your customers' sites up and running on the 20i platform.
My20i
Once you've signed up to the 20i Reseller Hosting Account, or even if you've created a free account you'll be using your control panel that we call My20i.
This is the heart of your Reseller Account. It's where you'll do everything from managing your websites, emails and customers, to configuring your brand, sending welcome emails and adding new products. There are some important and common areas of My20i that you'll use.
You can log in to your 20i Control Panel here: https://my.20i.com
Quick Links
- Manage Hosting - This is where you'll manage your hosting packages and websites (sometimes referred to as accounts)
- Manage Domains - If you need to manage a domain name including contact information, nameservers or renewal preference this is where you'll come
- Hosting Package Types - You'll need to set up what hosting packages you'd like to sell, including offering Managed WordPress Hosting, Standard Linux Hosting, Windows Hosting or even VPS Hosting
- Start a New Migration - If you're migrating websites and emails from elsewhere you'll find the tools you need here, including specific tools that make migrating from almost any host easy
- Reseller Preferences - To set up your Reseller Account you'll need to add your branding and configure your Reseller URLs
Managing Your Reseller Account with My20i
My20i
My20i is your equivalent to WHM: it's what allows you to run your business.
The reason we built a bespoke control panel is that cPanel doesn't allow for load-balancing and autoscaling. With 20i your site isn't on one single server as such: it uses the whole platform's resources as needed and scales automatically so you're not affected by high traffic or what other people are doing.
Because we’ve developed StackCP, we’re also able to develop features based on customer requests, a luxury that’s simply not possible with cPanel. WordPress Staging, the Free CDN, Malware Scanner, HostShop and the bespoke File Manager have all been developed based on customer feedback and demand, along with a wide range of other features.
StackCP
StackCP is your equivalent to cPanel. It's what you can give to your end customers to manage their hosting, emails and account. You can find various support articles about StackCP here.
Billing Interfaces
HostShop
HostShop is an all-in-one automated platform to manage clients, commerce, billing, payments, service provision, communication and support. It includes an online shop that you can integrate with your website, or you can use one of our ready-made hosting website templates.
You can enable it by going to Users > Enable HostShop from within your My20i account.
Setting Up HostShop
If you want to use HostShop to provision hosting there's no need to buy a licence. It comes included with your 20i Reseller Account Follow our HostShop Setup Guide to get up and running!
WHMCS
Setting up WHMCS with your 20i Reseller Hosting account allows you to automate the provisioning of your 20i services to your own clients. Clients will be able to buy products from your site without the need for you to set them up manually from within your 20i Reseller Account. We offer a full module to connect WHMCS with 20i's products and services.
Ordering WHMCS
To set up WHMCS with 20i you'll first need to buy a licence. If you have an existing licence you can purchase 20i's discounted WHMCS licence and switch this over using the guide here: How do I change the license key WHMCS uses?
Once you've bought the WHMCS licence you'll need to install it to your webspace.
Setting up WHMCS
Once you've installed WHMCS using our one-click install you'll need to set it up to work with 20i's services. Simply follow the instructions in our Integrating WHMCS with your 20i Reseller Account guide.
With your 20i Reseller Account, you can create unlimited 10Gb mailboxes with the ability to upgrade mailboxes by further 10Gb increments if required. We cluster our mail servers onto separate servers for efficiency and redundancy.
Your emails are secured under advanced antivirus and anti-spam protection at the network level using anti-spam blacklists from Spamhaus, Invaluement and Barracuda Networks, in addition, all emails are virus scanned for malware signatures and for spam-like characteristics.
You can easily create mailboxes within My20i: please see our guide How do I create an email account for my domain for step-by-step instructions.
Setting up mailboxes in mail clients like Outlook, Mac Mail or Thunderbird is easy, for Outlook please find our guide here, How do I set up my 20i mailbox in Outlook?
Domains and DNS
Domains
Becoming a domain reseller is easy with 20i. With your Reseller Account, you'll get access to exclusive discounts on many TLDs for both new registrations and renewals. We have helpful Domain Names Support Articles that cover a variety of questions you might have.
Transferring Domains
You may wish to take advantage of the low renewal prices at 20i by transferring in your existing domains. This also means all management of your websites can be done under your 20i Reseller Account.
On many popular TLDs such as .COM, .NET and .ORG you'll also get a free year added to the renewal date when you transfer to 20i. For information about how to transfer your domain names, please see How do I transfer my domain to you?
Setting Nameservers
If you want to keep your domain names where they are, you can update the domain's nameservers to point to your 20i Reseller Account. You'd make this change at your current domain name registrar.
You can find our default nameservers in the following guide What are 20i's nameservers?
Virtual Nameservers
Unlike traditional custom nameservers, our virtual nameservers are hosted with Google's Cloud DNS infrastructure which is scalable and reliable. DNS infrastructure is the backbone of a high-performance web hosting company, so we wanted to be able to allow our Resellers to offer the same using virtual nameservers.
The benefit of virtual nameservers means you can brand and have your very own Google Cloud DNS nameservers and market it as such to your own customers, giving you a unique advantage over traditional custom nameservers.
DNS Propagation
After making an update to your nameservers the change usually takes 6-8 hours to update but can take up to 24 hours. Changes you make to your DNS settings in your 20i Reseller Account will usually take 1-hour to take effect, but often will be much quicker.
If you want to test your sites work at 20i before pointing the nameservers here you can use the temporary URL. More information about that can be found here Temporary URLs: what are they and what are they used for?
FTP and SFTP
At 20i we support both the File Transfer Protocol (FTP) and Secure Shell File Transfer Protocol (SFTP) so you're not limited to one or the other. Our article How do I connect via FTP? explains how to connect to a package via FTP, just use port 22 instead of 21 to connect via SFTP.
SSH
Secure Shell (SSH) allow you full command-line access to your websites hosted under your 20i Reseller Account. SSH is a powerful tool to help you manage your websites and do operations that may take longer using another method. It also lets you access the WordPress Command Line Interface (WP CLI) which can help you manage your WordPress sites with 20i. See our guide for help connecting via SSH: How do I connect via SSH?
Securing Sites
Your 20i Reseller Account is protected by our sophisticated and powerful firewall. This is fully managed for you but you can block IPs and countries through My20i. You can read more about our security here Secure Web Hosting.
Free SSL Certificates
With your 20i Reseller Account, you get unlimited free SSL certificates provided. Activating the free SSL for all your websites ensures you can use the more secure HTTPS protocol, ensuring the connection between the server and end client is encrypted. We provide wildcard SSLs which also secure all subdomains you have too. Read our guide How do I activate my free SSL? to see how you can easily apply the free SSLs to all your websites.
Setting Up Your Reseller Brand
Your Reseller Account is completely white-labelled. This means your customers never see any instance of the 20i brand ensuring they get an experience branded to your business. We'd recommend you start by setting your Reseller brand domain which is outlined in the following guide How do I set my Reseller brand domain?
Migrating Sites
You'll get full access to the 20i Migration Centre which has tools to move websites from cPanel/WHM, Plesk, Heart Internet, Fasthosts, Direct Admin and WordPress sites using SFTP/FTP. Our Support Team are on hand to help with any migration questions you might have.
- How do I migrate from WHM/cPanel?
- How do I migrate from Heart Internet?
- How do I migrate a WordPress site automatically?
Need help getting set up?
Our expert Support Team are on hand to help whenever you need it. You can view our full Support Database for more helpful support articles, or contact our Support Team through your My20i account.
 Austin B.
How can I create a subdomain?
Subdomains can be useful for hosting additional websites under your main domain, such as a blog (e.g., blog.yourdomain.com) or a support portal (support.yourdomain.com). Watch to see how it's done step by step!
To create a subdomain:
- Log in to My20i
- Head to Manage Hosting -> Manage.
- Select the Subdomains icon.
You can then add your subdomain into the Subdomain field and select Create Subdomain. You're also able to change the Document Root so that you can direct the subdomain to the folder of your choosing.

What is the document root?
The document root is the folder which the subdirectory will use, for example, you may have a directory within your web space located within public_html called support (i.e. public_html/support), you could point your subdomain to this location by adding public_html/support in the Document Root field.
Note: Updating a document root can take ~15 minutes, so you may just need to be patient whilst that updates.
 Austin B.
Integrating WHMCS with your Reseller Account
1. Overview
Setting up Web Host Manager Complete Solution (WHMCS) with your 20i Reseller Hosting account allows you to automate the provisioning of your 20i services to your own clients. Clients will be able to buy products from your site without the need for you to set them up manually from within your 20i account.
Note: you can also use HostShop, 20i's free and fully integrated billing solution as an alternative to WHMCS. View Setup Guide.
2. Getting Started
To set up WHMCS with 20i you'll first need to buy a licence. If you don't have an existing licence you can purchase 20i's discounted WHMCS licence and switch this over using the guide here: How do I change the license key WHMCS uses?
Once you've bought the WHMCS licence you'll need to install it to your webspace.
3. Installing WHMCS
At 20i we give you a one-click installation process for WHMCS. To use this, head to https://my.20i.com/whmcs. You'll see the 'Install' button next to your active licence. Select this and you'll be prompted to select a package and a directory to install WHMCS.
Once you’ve installed WHMCS, log in to your admin panel: www.Yourdomain.com/yourWHMCSdirectory/admin
Now that you’ve logged in you'll need to obtain the combined API key. This can be found within your 20i Reseller account by going to “Manage Reseller” > “API”, or by going here: https://my.20i.com/reseller/api
Note: Please keep a note of the Combined API Key as this will be used later on.
4. Adding Custom Client Fields
When your clients sign up and buy products, a StackCP User needs to be created to allow them access to manage their products. Their level of access can be controlled by you as the Reseller. To enable StackCP User creation when your clients sign up you'll need to create a custom client field.
• You can name the first field anything you like, for example, “StackCP User”.

• You can now proceed to create product/services fields.
5. Connecting to the API
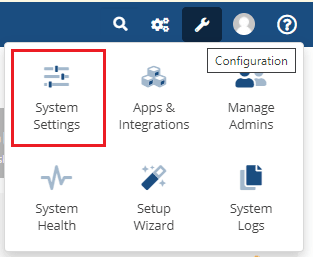
- Within your WHMCS admin, navigate to “System Settings” > “Servers”
- You can use any valid hostname, for example, "20i.com".
- You will need to enter your default name servers this will be:
ns1.stackdns.com
ns2.stackdns.com
ns3.stackdns.com
ns4.stackdns.com
Note: If you have Virtual Nameservers (custom nameservers) you can enter these instead.
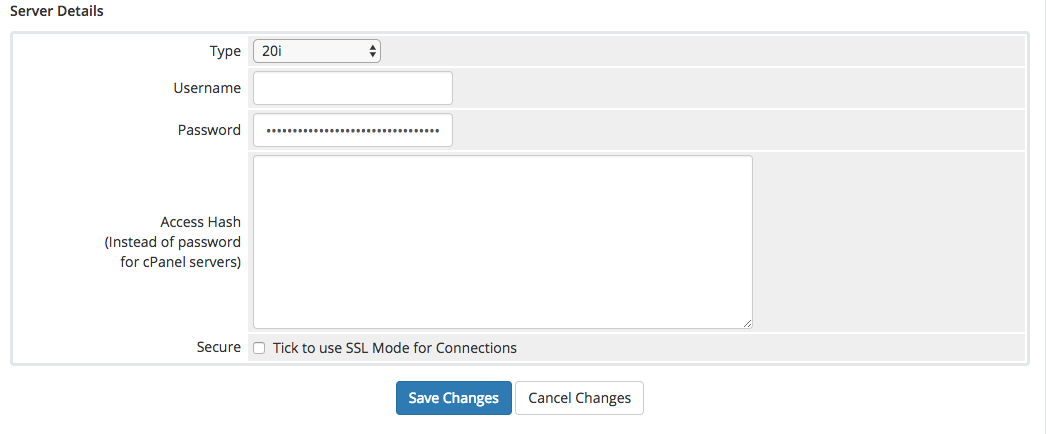
• Locate server details a little further down the page and select “20i”. You can leave the username blank and then enter in the combined API key as the password.
6. Creating product/services fields
- You'll now want to add the products that you'll be selling from 20i via WHMCS. These will be the hosting package types that you've set up within your My20i account.
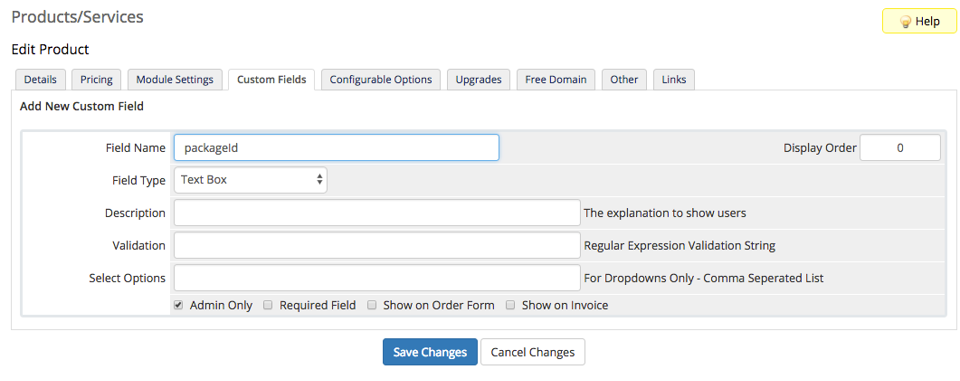
- Navigate to “System Settings” > “Products/Services”. Create a product group if you don't have one using whatever details you like. Then create a new product. On that product select the 'Custom Fields' tab.
- The Field Name will need to be “packageId”. You will need to select this field to be 'Admin Only'.
- Once you've done this head to the 'Module Settings' tab. From here, select '20i' from the 'Module Name' drop-down menu.
- From the 'Type Code' dropdown, select the package type for the product you're configuring.
- Select 'Save Changes'.
Note: For each product/service you configure you'll need to add a new custom field.
You can now proceed to set up 20i as the domain registrar.
7. Setting up domain registrars
- Within your WHMCS admin, navigate to “System Settings” > “Domain registrars”.
- You should see '20i' in the list of modules, please select 'Configure'.
- Enter your combined API key into the 'Password' field. (You can leave your admin username blank)
- Select your admin user.
- Select your custom user field that you created. Our example was “StackCP User”.
You can now click 'Activate'.

Note: If your WHMCS installation is hosted elsewhere, you'll need to ensure outgoing port 3000 is open to ensure our API can connect.
8. What's next?
Now the 20i WHMCS module should now be linked with your account. If you already have services and StackCP users within 20i then you'll want to import those into your WHMCS set up.
If you have existing user/products with us that you wish to add to your WHMCS installation, please see our guide on adding them here.
Note: WHMCS is still a very much liked billing and automation option for resellers. But there are more options on the market. You should read about WHMCS alternatives.
 Austin B.
How do I add Team Members to my main Reseller Hosting account?
As a 20i Reseller, you may wish to allow others to access your Reseller account to help with the management of your sites. However, you may wish to restrict access to all features available within your account. To go about this, you can make use of the Team Members facility within My20i.
To create a Team Member:
- Login to My20i.
- Under Account Settings select Team Members.
- Select Add Team Member at the top and enter the new Team Member's credentials.
- Username: This will be the information the user enters when logging in.
- Name: Your Team Member's name.
- Email Address: The email address of your Team Member.
- Select one of the user types under Group Membership. The group selected will define what permissions the user will have and what features they will have access-to.
- Then select Add.
- You’ll be taken to a form screen, where details including the password are generated. This can be saved, or edited as deemed necessary.
- Once you’re done, select Save and Close.
Your new Team Member is now set up.
If you wish to edit the permissions of your Team Member groups, you can do so by selecting the group you wish to edit beneath the User Groups header on the right-hand side of the Team Member section.
 Austin B.
How does my customer log in to the StackCP control panel?
If you're a 20i Reseller, you can give your customers access to their hosting packages using the white-label login at www.stackcp.com. StackCP is your customer's premium web hosting control panel, designed as a superior alternative to the industry-standard 'cPanel', ensuring an intuitive and efficient management experience.
You can set your own control panel URL from the Your Brand section of My20i. You can modify the look and feel of your customers' control panel in the StackCP Theme section under Reseller Preferences.
Creating a StackCP User
1. Visit the StackCP Users area under Reseller Preferences
2. Click Add a StackCP User in the top right
3. Enter your customers details and select Add Stack User
4. You'll be directed back to the StackCP overview page, and a random password will be shown. You can use this or change the password as desired.
5. Under "Options" click Edit
6. Around half way down the page, you will see a section titled Package Access
7. Select the packages you wish this user to have access-to
8. Remember to save your access changes by choosing Save Permissions
Your customer can now log in to their StackCP control panel and will have access to the packages you have specified. The features, or icons visible to them inside StackCP will depend on the limits configured on your hosting package. You can control these via your Package Types.
Using FTP Login Details
For compatibility reasons, we create a StackCP user for each of your hosting packages that allows logins to the control panel using the websites FTP details. However, this access is limited as features like Recover Password and multi-package access are not available using this style of login.
 Lloyd Cobb
How do I clone a hosting package?
With your 20i Reseller Hosting Account, you can easily clone an entire package's contents from one domain over to another with no manual moving of files or the database.
- Head to Add a Hosting Package and select Clone from an Existing Package.
Note: There's a 2 GB disk space limit on the packages that can be used to clone-from. The purpose of the tool is to allow the cloning of template packages to quicken the development process for new sites.
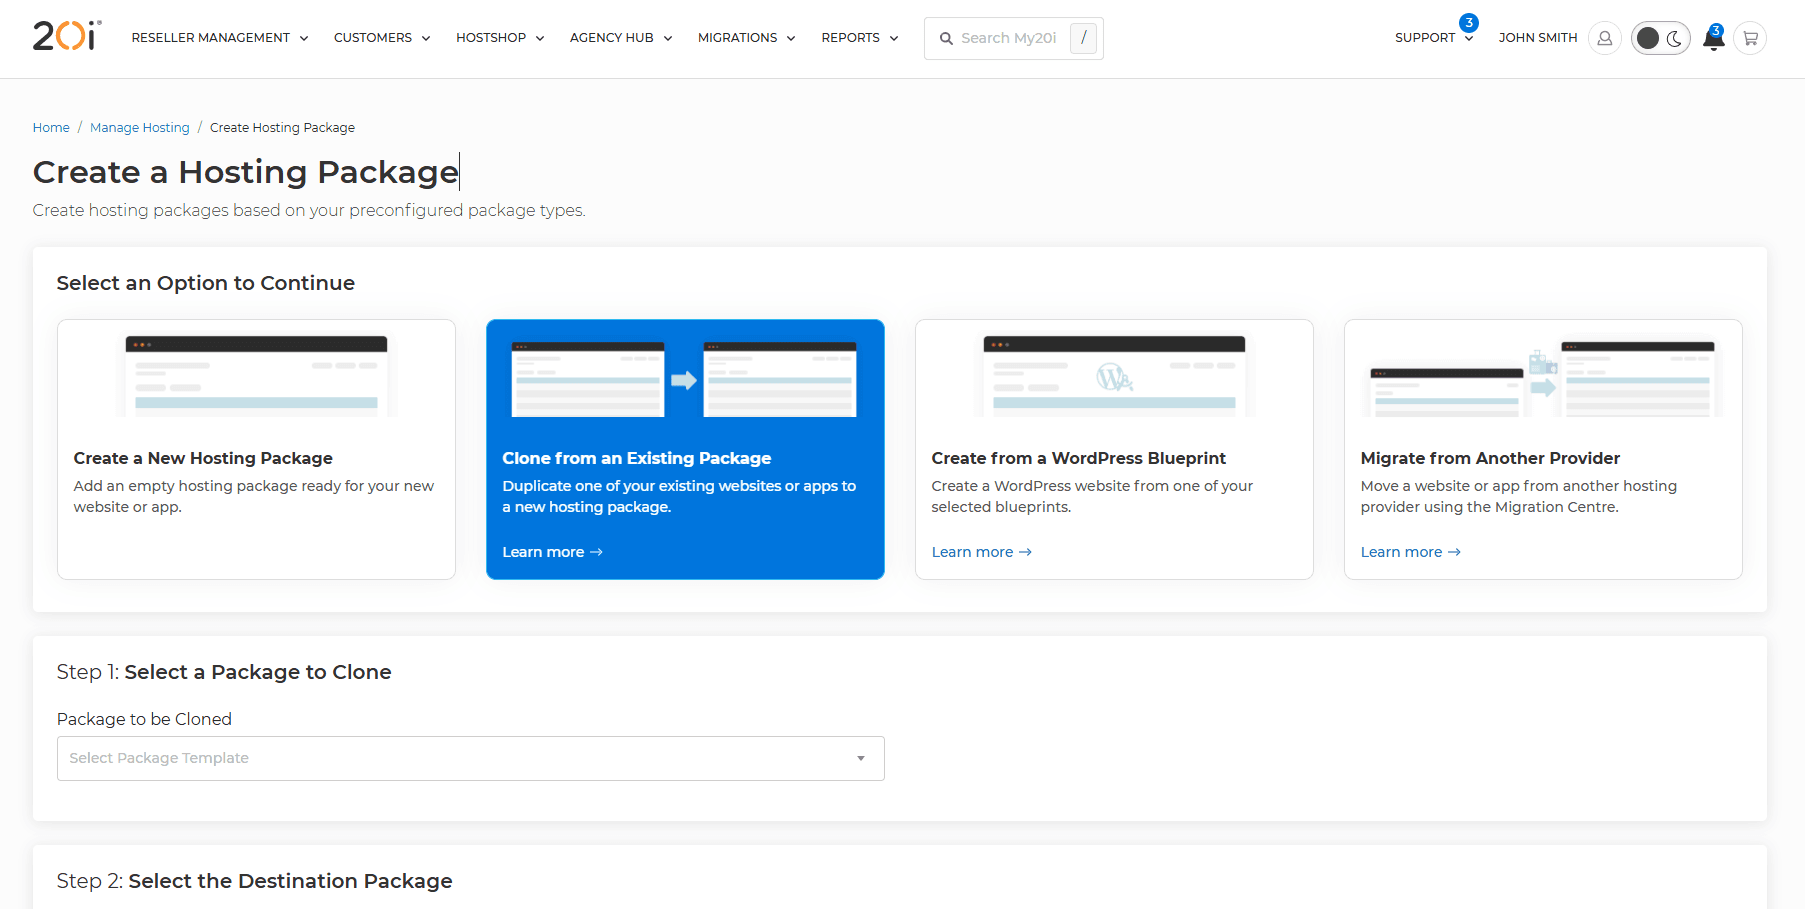
- Choose which package you'd like to clone and the name of the destination package.
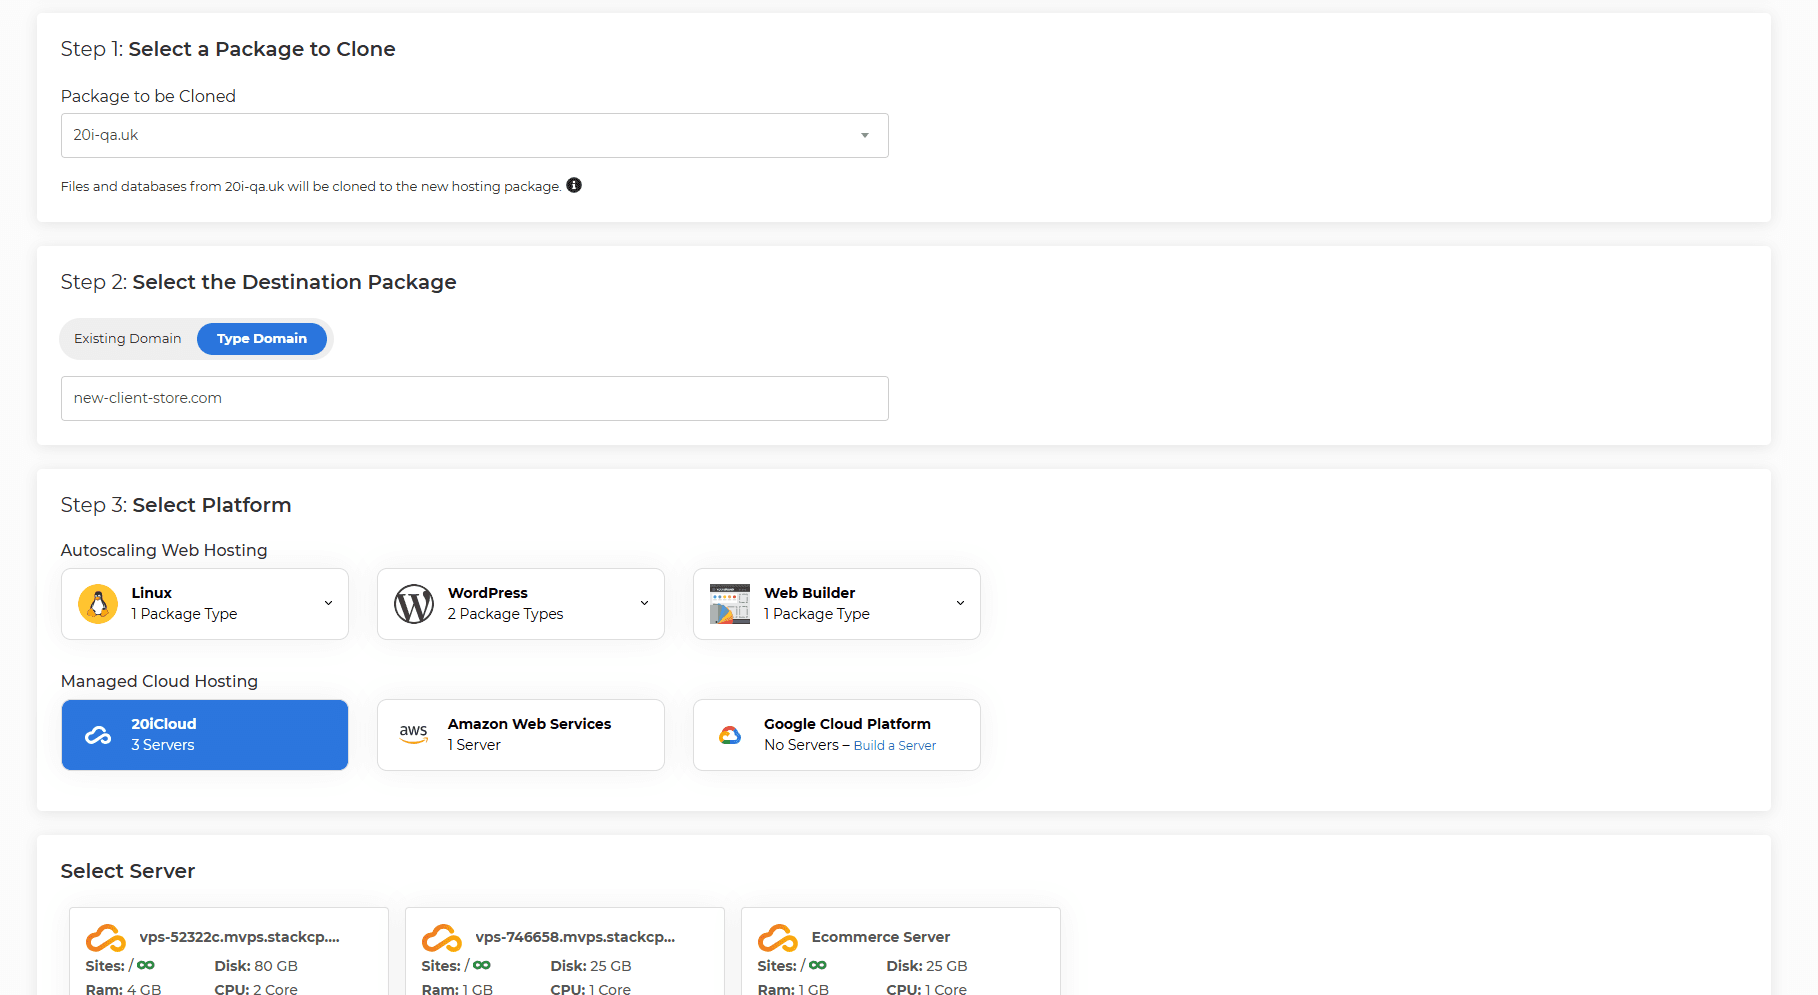
- Choose the Platform and assign any StackCP Users if required.
- Then select Create Hosting Package.
Cloning a package can take up to 30 minutes.
If you access the package via Manage Hosting > Options > Manage, you'll see 'This package is being cloned, please wait...' if it's not yet complete. The time it takes to complete a clone will depend on the size of the site being cloned, the larger the site and its associated files and databases the longer the clone will take.
Note: The tool will try to detect database config files such as wp-config.php and update those details, however, the tool is intended to clone template sites to live domains, so it may not always be able to detect those files.
 Austin B.
How do I take my temporary test site / StackStaging site live?
There are two possible variations on how to approach this, dependent on whether the site in development is hosted elsewhere or whether you're creating a WordPress site on 20i:
Developing your site at 20i but it is hosted elsewhere:
You may be using the temporary URL within StackCP whilst you develop your site. To take the site live you'll need to do either of the following:
1. You can either point the domain to our nameservers which are:
ns1.stackdns.com
ns2.stackdns.com
ns3.stackdns.com
ns4.stackdns.com
2. Point the domain to the A Record that is located within StackCP > Manage DNS.
WordPress Sites:
If you are using the temporary URL within StackCP and you have a WordPress site, you may need to do either, or both of the following:
Update the temporary URL within WordPress Admin:
- Log in to the WordPress admin.
- Click on Settings on the left hand side.
- Change the WordPress Address (URL) to your actual domain name.
- Change the Site Address (URL) to your actual domain name.
- Update the database.
- Backup your database and save the copy off-site.
And/or:
- Log in to phpMyAdmin.
- Select the link to your database and choose the one that is your WordPress database.
- All the tables in your database will appear on the screen. You will then see all the tables in your database, locate wp_options and select Browse.
- A screen will open with a list of the fields within the wp_options table. Under the field option_name, locate 'siteurl'.
- Click the Edit Field icon which usually is found at the far left at the beginning of the row.
- The Edit Field window will appear.
- In the input box for option_value, change the URL information to the new site address.
- Verify this is correct and click Go to save the information. You should be returned to your wp_options table.
- Look for the home field in the table and click Edit Field. Note: there are several pages of tables inside wp_options. Look for the > symbol to page through them.
- In the input box for option_value, carefully change the URL information to the new address.
- Verify this is correct and select 'Go' to save the information.
There is further information about this from WordPress.org: Changing the Site URL.
 Austin B.
How do I create and send welcome emails?
As a 20i hosting reseller, there are two types of welcome emails that can be sent to your customers:
- Package Welcome Emails - when they are assigned a hosting package
- StackCP User Welcome Emails - when they are given access to StackCP
Firstly, you’ll need to create the templates that will be used. To do this:
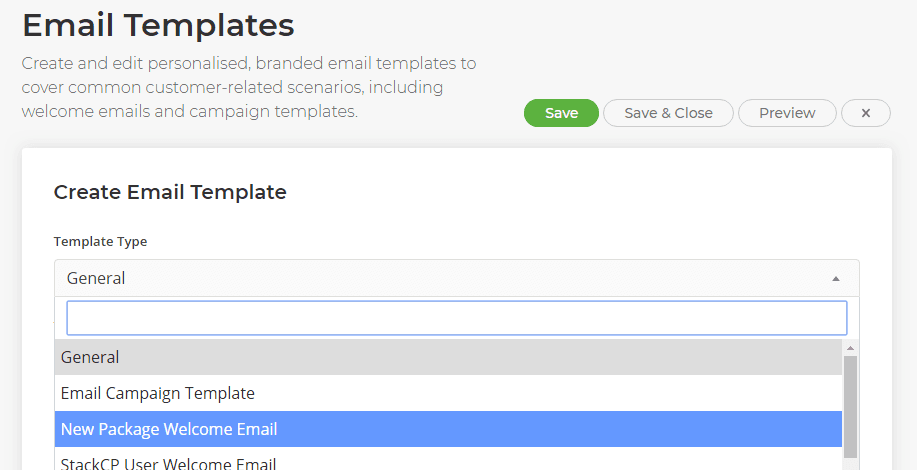
- Head to Email Templates from the My20i homepage.
- Select Create New and choose your Template Type. In this example we’ll be setting up a Package Welcome Email.
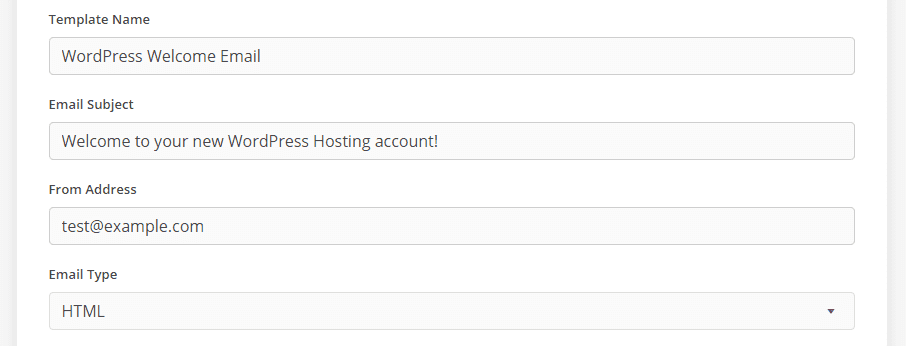
- Give your template a name so you can identify it. For example, ‘WordPress Welcome Email’.
- Enter the email subject that will appear when your customer receives the email, for example ‘Welcome to your new WordPress Hosting account!’
- We’d recommend leaving the email type as HTML, but you can also use plain text if you wish.
- Select Load Default Template and you’ll be given a full example of a welcome email.
- Should you wish to edit the default template, you can use the email tags to include additional dynamic content to your email.
- You can select Preview to view your email template before saving.
- Select which hosting package types you would like to utilise this template. You can select multiple hosting pack types.
- Finally, select Save & Close.
This process can be used for any kind of email, such as newsletters.
You can send a welcome email when you create a hosting package.
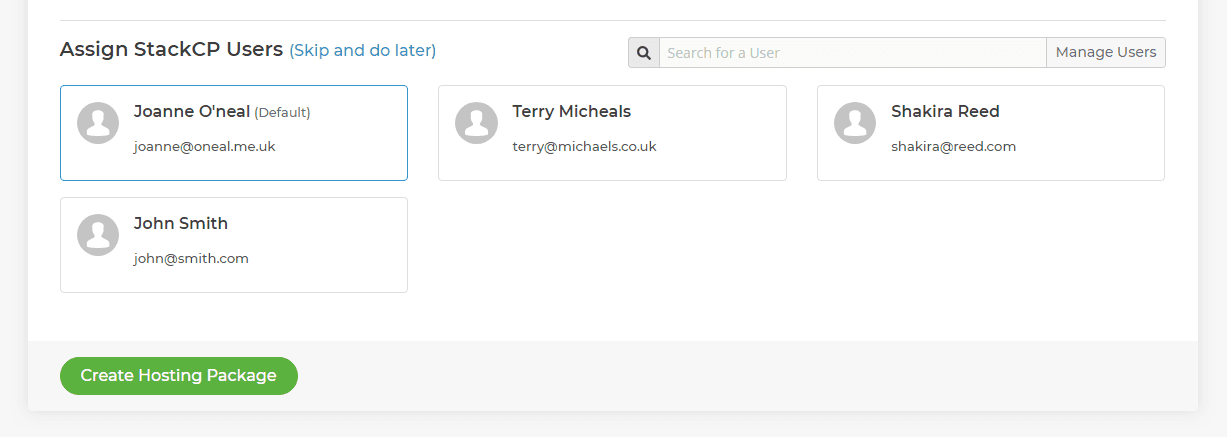
When you select Add Hosting from the Manage Hosting section, you can assign a StackCP user to the hosting package. Doing so will then send the email address associated with that StackCP user the welcome email for the hosting package type that’s been chosen.
To resend a welcome email, simply locate the hosting package from Manage Hosting, then select Options > Resend Welcome Email. You can then choose the StackCP user to send the welcome email to.
 Austin B.
How do I enable the White-Label Support Database?
20i Hosting Resellers can show a White-Label Support Database directly within customers control panels, helping customers find answers they need to common support queries. We maintain these support articles so they're up-to-date with all our new features, but you can also add your own too!
To enable the White Label Reseller Hosting Support Database for your customers:
- Head to Reseller Preferences and select White Label Support Database.
- Select the toggle button to enable the support database for your customers.

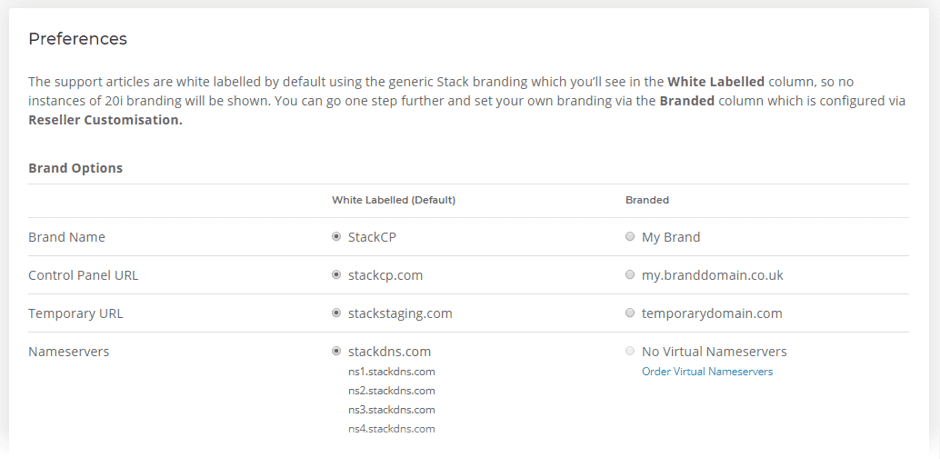
Once you’ve enabled it, you’ll see the Preferences section appears. Here you’ll be able to customise what level of branding is shown to your customers in the support articles.
You can then also enable which Categories will be displayed to your customers. You may only wish to display categories relevant to your customers.
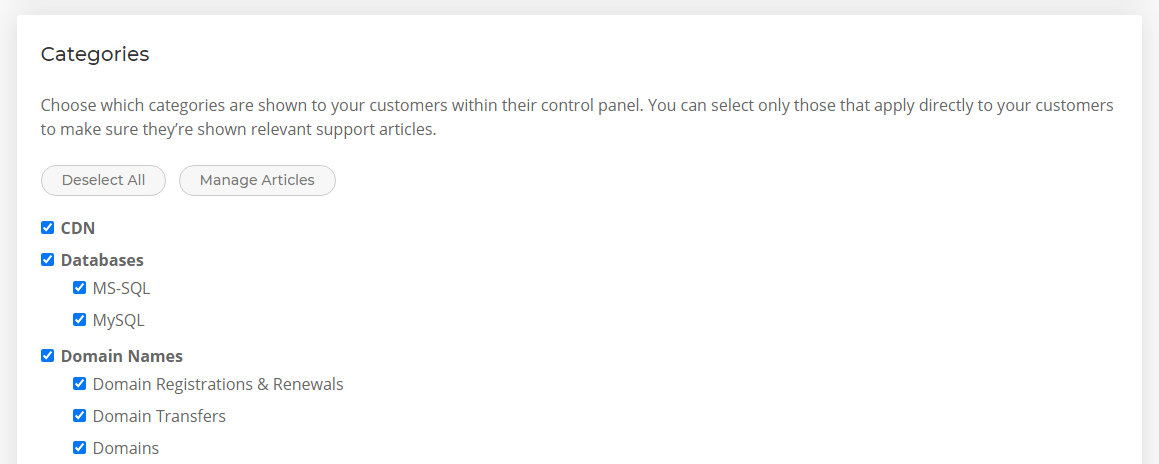
You can view the white label support database by logging in as a StackCP User: select Options -> Sign in. You'll now see under the Help Desk menu there's a new link to the customer's Support Database.
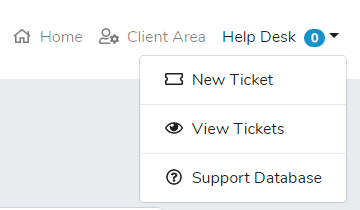
If you've customised StackCP and removed the Help Desk option, you can still link to it at the URL: stackcp.com/support-database ('stackcp.com' should be replaced with your custom URL if you have one).
Adding your own Support Articles
You can add your own articles and categories to the white-label support database, simply select Manage Articles in the Categories section.
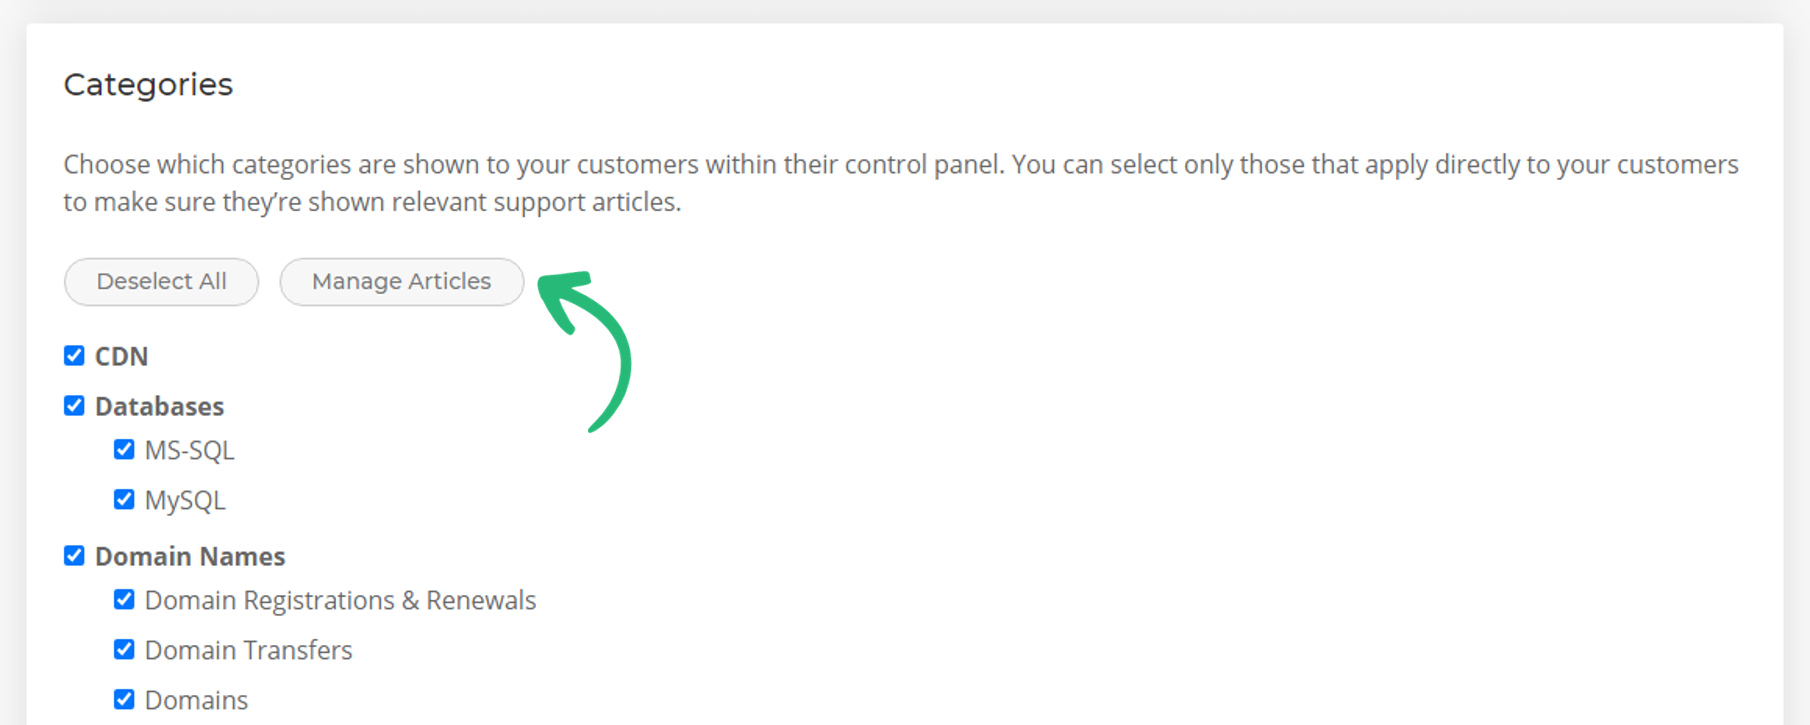
From here, you can add new articles, categories or sub-categories in order to provide your customers with the best self-service support.
 Austin B.
How do I add a domain reference?
A domain not yet registered with 20i or registered elsewhere is often referred-to as a 'domain reference'.
Whenever you wish to add a package to your account you should use the 'Add Hosting' page inside My20i. If the domain is already registered with 20i you can select it from a drop down menu. Otherwise, you can type the domain you wish to host on our platform in the input field.
There's no need to 'Add a domain' before creating the hosting - so you can just get started!
We provide a temporary URL for all packages which allow you to visit the site before the domain resolves, so this is a perfect way of building sites before the domain is registered.
 Lloyd Cobb
Block search engines from indexing your control panel
You can easily prevent search engines from indexing StackCP - your customers' control panel - login page through Reseller Customisation.
Head to Reseller Preferences > Your Band and locate the section entitled Control Panel URLs. Select the checkbox labelled Block search engines indexing control panel. We'll automatically create a robots.txt to ensure that search engines are discouraged from indexing your control panel URL.
 Austin B.
How does your Web Hosting handle high volume of traffic?
Your site or a customer's site may expect a higher volume of traffic if they've launched a successful marketing campaign or have been featured somewhere popular.
Is your web hosting prepared for high volume traffic?
Most web hosting providers are not prepared for such high volume traffic spikes and this causes websites to crash. They are often restricted to the use of just one server and therefore unable to make use of autoscaling to deal with the increased traffic.
The effort spent to get the traffic to your site is lost, because your website is not accessible at the moment you worked hard for.
Ease through high traffic spikes with autoscaling and load balanacing.
With 20i there's no need to worry about expected - or unexpected - large increases in traffic to a website. This is due to our web hosting platform having the ability to autoscale: it grows with your website.
The magic is really from our load balancers. They’re constantly monitoring all requests into our network, so when a website receives a large number of hits, the site is isolated quickly and moved to its own dedicated backend. This backend is raw hardware designed to serve busy sites. They're multiple 40-core machines with no overhead. It's the kind of elastic server power that would cost hundreds per month to buy for a site otherwise.
Once the 'busy period' is over, your site is moved back to the normal infrastructure. Read more about our hosting platform.
At 20i, we have a nickname for a sudden spike in traffic. You can read more about that here: The Dragons Den Effect.
 Austin B.
How do I brand and customise StackCP's login page?
If you're looking to customise your StackCP login page you can do this by editing the Custom CSS.
To do this you will need to:
- Log in to My20i.
- Locate StackCP Appearance under the Reseller Preferences section.
- Scroll to Custom Styling and you will see the input field for Custom CSS, Custom Header and Customer Footer.
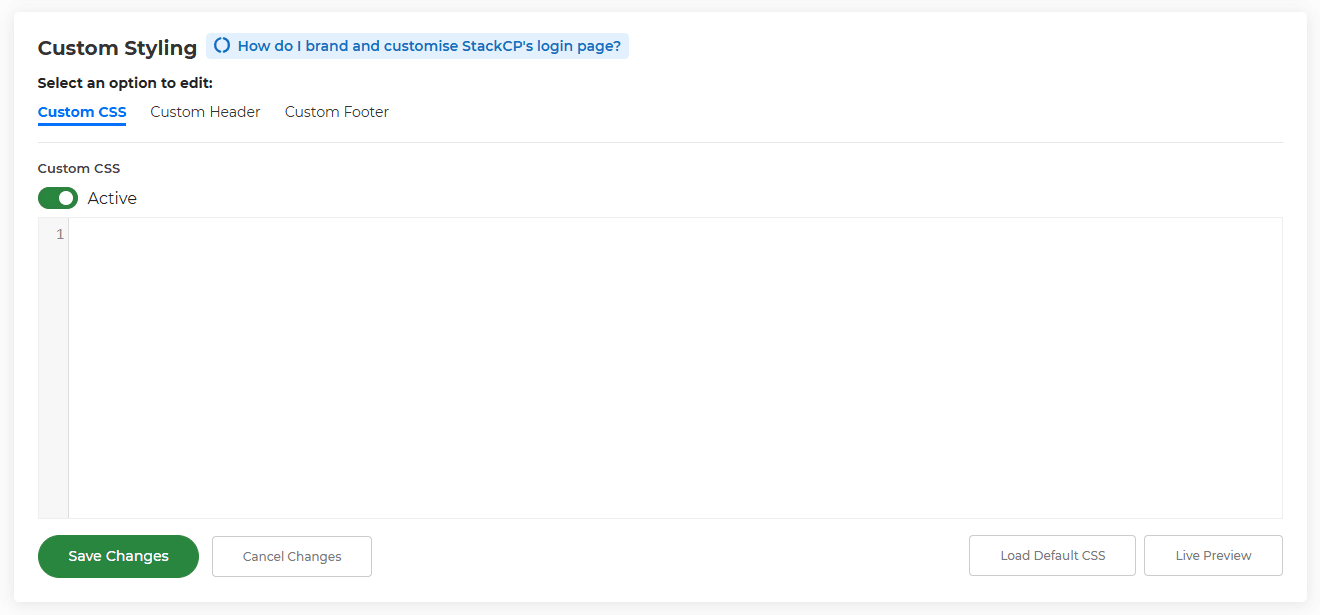
To preview your brand, select Preview Your Brand.
 Austin B.
StackCP Ticket System Guide
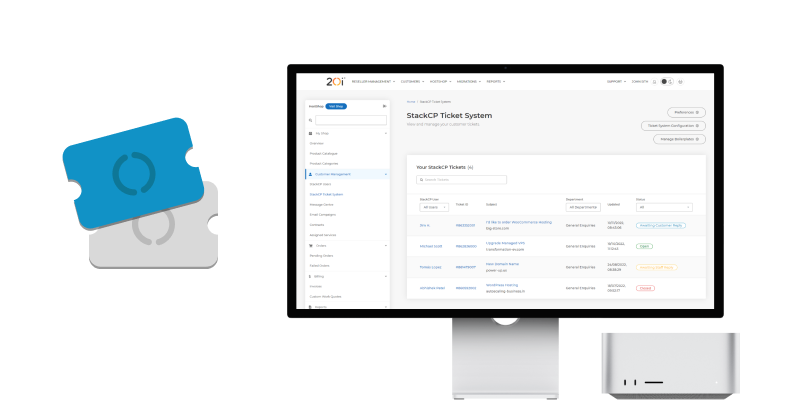
As a Reseller Hosting Business you’ll want communication between yourself and your customers to be as seamless as possible. The StackCP Ticket Syste, is a fully-featured customer service & support system for you and your customers.
Once StackCP Ticket System has been enabled from the Configure StackCP User Ticket System section, your customers will be able to raise tickets from StackCP, which you’ll receive via My20i.
Emails are sent to both yourself and your customers (StackCP Users) when tickets are opened and updated in order to keep both parties notified of the current status of the ticket.
 Overview
Quick Start
To enable StackCP Ticket System:
- Head to Configure StackCP Ticket System and select Enable Ticket System.
Customers can then raise tickets via StackCP, to do this they can:
- Login to StackCP and select Ticket System.
- They can compose their enquiry there and select Create Support Ticket.
To reply to customer tickets:
- Login to My20i and head to StackCP Ticket System.
- You will see the raised ticket in the ticket list view, select Options > View Ticket.
- Compose your reply and select ‘Update Ticket’.
Departments
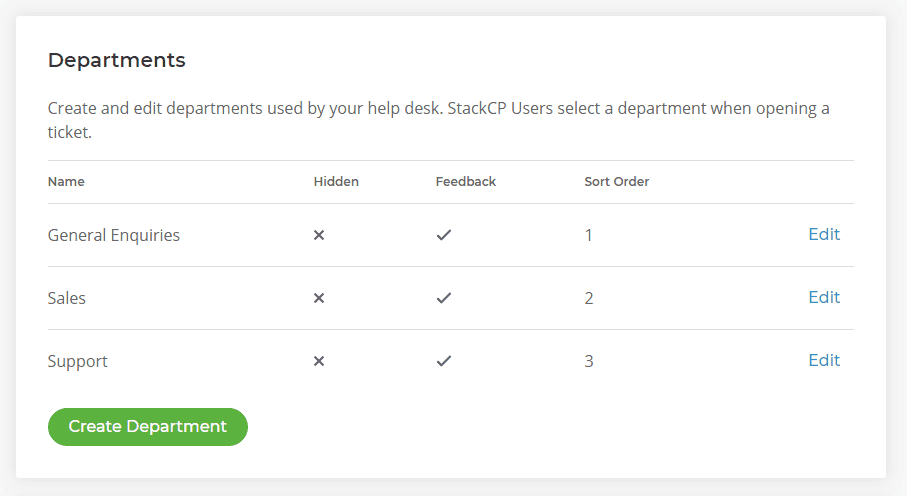
When your customer creates a ticket, they can select which department they believe is best to handle their request. Commonly you’d have General Enquiries, Sales and Support as departments to cover most of the common interactions with customers and helps categorising their queries for your staff.
- To create a department, head to Configure StackCP Ticket System and locate the Departments section.
- The General Enquiries Department is there by default.
- Add a new department by selecting Create Department, give the department a name e.g. Sales. If you want customers to be able to rate responses from this department check Accept Response Ratings. The Sort Order determines where the Department will appear in menus.
- You also have the ability to hide a deparment. If you want to.
- Select Save & Close
- You’ll now see your new department in the list and customers can now select to raise tickets to this department.
Best Practises for Departments
- Keep the number of Departments concise. This is for management purposes and for clarity when your customers are choosing a Department to raise the ticket-to.
- Departments are aimed at increasing efficiency, so if you offer a specific service or product that has more specialised support, we would recommend adding Department for it.
- Departments could be used to create an escalation path for tickets. If it’s a question first line can’t answer, then perhaps someone higher up in the organisation may be able to resolve it?
Ticket list
New and existing tickets can be viewed and managed from the StackCP Ticket System page.
You can filter the current ticket queue by status or department by using the Filter menu. You can also search for a ticket ID or phrase within the ticket itself. Keeping track of the Ticket ID is a great way to jump to a specific ticket.
When a customer raises a new ticket, it will automatically appear in the list. There’s no need to refresh the page to check for updates.
From the Options menu you can do three things:
- View Ticket
- Edit StackCP User
- Login as StackCP User
The ticket list view gives you a good general idea of the volume of support requests you’re receiving, if you have support departments, it’s the primary location they’d be focused on for providing first line support.
View Tickets
To reply to a ticket, select Options > View Ticket from the ticket list. From here you can reply to the ticket, add internal notes for other staff to see, change the status of the ticket or change the department that the ticket is assigned to.
Internal notes can only be seen by your staff, your customers won’t see those. This allows you to easily provide information to help with the resolution of the ticket.
To reply to a ticket, enter your response within the text field, when done, select Update Ticket. This will set the ticket status to Awaiting Customer Reply. It will then also not show by default on the ticket list page.
Files can be attached to updates: they can be a useful way to show more clearly where a customer may need to navigate-to to resolve an issue.
Ticket Statuses
To accurately reflect the current progress a ticket is in, each update will be given a Status. By default there are 4 statuses: Open, Awaiting Customer Reply, Awaiting Staff Reply and Closed. These can’t be edited or deleted.
You can also create your own status to reflect what is happening to the ticket. To create a status:
- Select Configure StackCP Ticket System and locate the Ticket Status section
- You’ll see the 4 default statuses; select Create Status
- The status name is what will show to the customer when the status has been selected
- You can then choose whether a ticket with this status requires a staff response and whether it needs to close automatically after 7 days.
- Select the order you’d like the status to appear in and give it a unique colour.
- Select Save & Close.
Best Practises for Statuses
- To keep work flow efficient, you won’t want to spend time choosing between multiple statuses. Keep the number of statuses concise and accurate to reflect the work being done on the ticket.
Ticket Emails
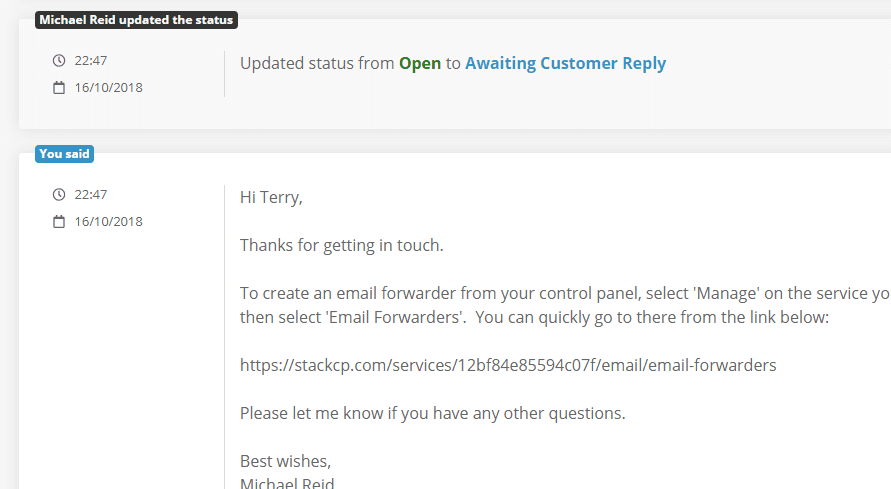
When you or your customer reply to a ticket, the other party will receive an email notifying them of the update. You can customise those email notifications by going to Email Templates and locating the StackCP Ticket System section.
You’ll see the default templates:
- New StackCP Ticket Opened (To You)
- StackCP Ticket Automatically Closed (To StackCP User)
- StackCP Ticket Opened (To StackCP User)
- StackCP Ticket Updated (To StackCP User)
- StackCP Ticket Updated by StackCP User (To You)
To customise each template, you can select Options > Edit. The default templates already ensure that your brand name is shown to your customers see when a ticket is replied-to.
Ticket Ratings
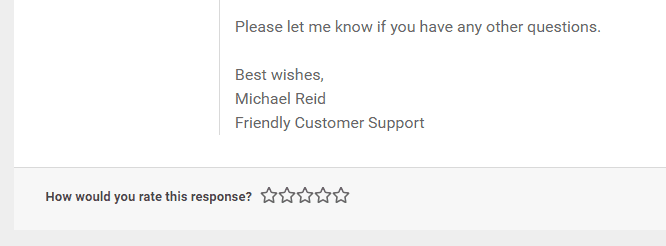
To monitor how your support is received, you can allow your customers to rate your ticket responses. Ratings can be enabled on a Department basis from Configure StackCP Ticket System.
Select ‘Edit’ on the Department you’d like to enable ratings for, and check Accept Response Ratings box. When customers receive a response from this department, they will be able to rate it out of five stars.
Auto-close Tickets
Depending on a ticket's status you may want to set it to automatically close for management purposes. To set a ticket to automatically close:
- Head to Configure StackCP Ticket System and locate the Ticket Status section.
- Select Edit on the status and check ‘Auto-close Ticket’. The ticket will then automatically close after 7 days of no action.
Boilerplate Responses
You can configure pre-written responses to help quickly respond to common customer questions.
- Head to StackCP Ticket System and select Manage Boilerplates.
- You can then add a category by selecting Manage Boilerplate Categories, for example you may wish to have pre-written response for common WordPress questions.
- Once done, head back to Manage Boilerplates and select Add Boilerplate. Give your boilerplate a title and enter the response in the template field, select the category and click Save Boilerplate.
When you respond to a customers support or sales queries you'll be able to select a boilerplate response from the dropdown menu to quickly provide a response.
 Austin B.
How do I secure my brand URLs?
From Your Brand and StackCP Settings, you're able to set which URLs you'd like your customers to use to access their various services. For example, their control panel, webmail or file manager.
Whichever domain you choose - or if you choose all domains - you'll need to make sure it's assigned to a hosting package and that the free SSL has been applied.
If the domain doesn't have a hosting package assigned to it:
- Head to Add Hosting Package and create a package for the domain.
- Apply the free SSL.
We'll add the correct DNS automatically for you and your brand URLs will load securely.
:bulb: Take your branding further with Virtual Nameservers.
Unlike traditional custom nameservers, our virtual nameservers are hosted with Google's Cloud DNS infrastructure which means they're ultra-scalable and reliable.
DNS infrastructure is the backbone of a high-performance web hosting company, so we wanted to be able to allow our Resellers to offer the same using virtual nameservers. The benefit of virtual nameservers means you can brand and have your very own Google Cloud DNS nameservers and market it as such to your own customers, giving you a unique advantage over traditional custom nameservers. View Virtual Nameservers.
 Austin B.
What does "Platform Transfer Failed" mean?
The most common reason platform transfer failures occur when moving to our WordPress hosting platform and the website does not currently meet the requirements.
In order for your site to work on our WordPress platform, you should ensure:
- You have a WordPress install in the public_html directory of your webspace
- WordPress is up to date - PHP 7 compatible
- Any additional plugins or themes should also be PHP 7 compatible
- The webspace is being used for no other software and just WordPress
- Any additional domains or subdomains point to the public_html directory and are therefore configured using a WordPress Network and not additional code/directories.
If any of the above requirements are not met, the transfer may fail or your website may not work correctly.
Note: We recommend making sure your website runs correctly using PHP 7 on our Linux Web Hosting platform before switching to WordPress. This is because our Linux platform allows you to easily Change PHP Version allowing you to resolve any version-related issues before transfer.
If you have any other platform transfer issues, our Support Team are here to help.
 Lloyd Cobb
How do I use the 20i Maintenance Mode tool?
When developing a site you may want to put up a maintenance page. You can use the 20i Maintenance Mode tool to do that. The maintenance page can be bypassed using a password, so only selected users can view the progress of the website's development. The tool is accessed directly from your My20i account.
To use the tool:
- Head to Manage Hosting > Options > Manage
- Select Maintenance Mode
Here you'll have two options: Configure (all domains) & Configure. If you want to set up Maintenance Mode for individual domains on the package, select Configure next to the domain in question. Choose Configure (all domains) to put all domains on the package behind a maintenance page.
Note: You can set your default maintenance page and maintenance login page templates via Default Website Pages.
To configure the maintenance page:
- Select Configure and check Enable Maintenance Mode
- You'll need to set a password to allow selected users to authenticate and bypass the maintenance page
- We'll set a default theme for your maintenance page, but you can configure your own by selecting Customise Page Templates
- Once done, select Save
Your selected domains will now be behind a maintenance page and visitors will be prompted for a password to view the site.
Note: If a wrong password is entered, you'll be redirected to the Maintenance Page template. To view the password field again you'll need to re-visit the URL. Once you've logged in, your session will be saved for one hour before automatically ending. At that point you'll need to reauthenticate with the password.
 Austin B.
What is Reseller Hosting?
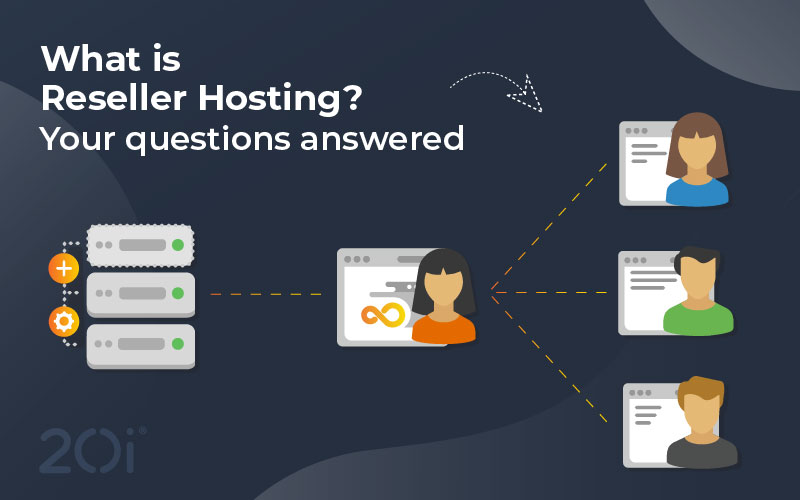
Reseller hosting is where businesses use a 3rd party's infrastructure to sell webspace to other businesses or individuals. The website reseller buys server storage space and bandwidth from a provider with data centres, like 20i. They will sell this on as part of a hosting package, sometimes with additional services like domain names, email and SSL Certificates.
How does Reseller Hosting work?
Effectively, the reseller becomes the hosting provider to their customer. Your customers buy their hosting from you, and you are their first point of call. Here is a (simplified) list of steps that you have to take on your way to become a hosting reseller.
- Choose a Reseller Hosting Plan: The first step is to choose a reseller hosting plan from a reputable hosting provider. A lot of these plans typically include a limited amount of storage, bandwidth, and other resources that you can divide among your clients. With an unlimited reseller hosting plan you are set for the future not matter what.
- Create Hosting Packages: Next, you'll create individual hosting packages that you can sell to your clients. These packages can be customized to include a certain amount of storage, bandwidth, email accounts, and other features.
- Set Pricing for Profit: Determine the pricing for your hosting packages. Your prices should cover the cost of your reseller hosting plan, any additional expenses (like customer support or marketing costs, office rent), and also allow to make a profit.
- Set Up a Website and Billing System: You'll need a website where clients can learn about your services, choose a hosting package, and make a purchase. You'll also need a system for billing clients and managing their accounts, like HostShop with no usage licence fees or account limits.
- Market Your Services: Once your website and hosting packages are set up, you'll need to market your services to attract clients. This could involve search engine optimization, paid advertising, content marketing, and other strategies.
- Support Your Clients: As a reseller, you'll be responsible for providing support to your clients. This could involve answering questions, troubleshooting issues, and helping clients set up and manage their websites. But don’t worry a good reseller hosting provider like 20i has a 24/7 support team that helps you every step of the way.
What are the benefits of running a reseller hosting business?
Running a reseller hosting business can offer several benefits for entrepreneurs and existing agencies looking for added streams of revenue and profit. Some key advantages of running a reseller hosting business are:
- Low startup costs: Starting a reseller hosting business typically requires lower initial investment compared to starting a web hosting company from scratch. Reseller hosting providers usually offer pre-configured server packages and infrastructure, eliminating the need for expensive hardware and data center setup.
- No technical expertise required: Reseller hosting providers handle the server management, maintenance, and technical support, allowing resellers to focus on business operations. This makes it an attractive option for entrepreneurs who don't possess extensive technical knowledge or experience.
- Scalability: Reseller hosting allows you to start small and scale your business as you acquire more clients. Hosting providers often offer flexible plans, allowing resellers to upgrade their resources and services as their customer base grows.
- Additional revenue stream: Running a reseller hosting business enables you to generate recurring income by offering hosting services to your clients. You can set your own pricing and profit margins, creating an additional revenue stream for your business.
- White-label branding: Reseller hosting providers offer white-label web hosting, allowing you to brand the hosting services as your own. This gives you the opportunity to establish your own hosting brand and build customer loyalty without the need to develop your own infrastructure.
- Business diversification: If you already operate a web design agency, development, or IT-related business, adding reseller hosting services can complement your existing offerings. It allows you to provide a complete package to your clients, offering both website development and hosting services.
- Customer management: As a reseller, you have direct control over managing your customers. You can provide personalized support, manage billing, and establish strong customer relationships, leading to customer satisfaction and retention.
- Minimal maintenance and support: The hosting provider takes care of server maintenance, security, and helps you with technical support. This reduces your workload and allows you to focus on customer acquisition, marketing, and growing your business.
- Access to features and resources: Reseller hosting packages include a range of features and resources, such as control panels, email services, security tools, and more. These value-added services enhance the offerings you can provide to your clients.
- Recurring revenue: Hosting services typically have a subscription-based model, resulting in recurring revenue from your customers. As long as your clients continue to use your services, you can enjoy a steady stream of income.
Complete list of reseller email template tags
As a web hosting reseller you want a clear and individualised way of communicating with your customers. As part of our white-label web hosting we provide you with email templates for you customer communication.
When using the templates you can make use of tags. Tags allow you to enter dynamic content into your Email or Message Centre Template.
Dynamic content refers to information that is unique to individual customers, such as their name, passwords or products they have - you can personalise your emails. Tags can be added directly into the body of the email. You can also insert your own business information automatically.
They'll need to have double curly brackets around them (which are added automatically in our template manager).
StackCP User Tags
Full Name contact.person_name – The first and second name of the StackCP User that the email template will be sent to.
Company Name contact.company_name – If the StackCP User has a contact type that requires a company name, this tag will output the company name for the StackCP User.
Address contact.address – The first line of the postal address of the StackCP User that the email template will be sent to.
Country/State/Province contact.sp – The country/state/province line of the postal address set for the StackCP User.
City contact.city – The city set for the StackCP User that the email template will be sent to.
Postcode contact.pc – The postcode that is set for the StackCP user that the email template will be sent to.
Country Code contact.cc – The country code of the country that has been set for the StackCP User.
Phone Number contact.voice – The phone number set for the StackCP User.
Email Address contact.email – The email address set for the StackCP User, this is also used as the StackCP User username.
StackCP User Welcome Email Tags
First Name firstName – The first name set for the StackCP User.
Username username – The username your customer will use to login; it’s also their StackCP User email address. They will also need their password to login.
Password password – This is the password your customer will use to login to manage their services. They’ll need this along with their username to login to their control panel. We don't recommend sending this by email, but if you do, ensure they have two-factor authentication set up.
StackCP Suppoert Ticket Tags
Ticket Link ticket.url – The URL to your My20i account where you can reply to the ticket raised by your customer.
Ticket ID ticket.id – The unique ID given to the ticket. It can be used to identify or search for a specific ticket.
Ticket Subject ticket.subject – The subject your customer gives to the ticket to identify what the ticket is about.
Ticket Status ticket.status –The current status that the ticket is in - such as 'Open' or 'Closed'. It can be set via StackCP Help Desk Configuration.
Mailbox Usage Tags
Email Address mailboxUsage.emailAddress – The mailbox that’s the subject of the email.
Current Usage – Percent mailboxUsage.usagePercent – This shows how full the mailbox currently is as a percentage. It doesn't include the '%' symbol, so you'll need to add this after the tag.
Current Usage – in MB mailboxUsage.usageMb – This shows how full the mailbox currently is in Mb. Again, you'll have to add 'Mb' after the tag if you wish.
Password Reset Email
Brand Name brandname - This is the Brand Name you've given your account from Reseller Customisation.
Business Name businessname - This is the Company Name you've set within Reseller Customisation under the StackCP Sidebar section.
Control Panel Address cpurl - This is the custom control panel URL you've set within Reseller Customisation under the Control Panel URLs section.
Help Address helpurl - This is the Support Site URL you've set within Reseller Customisation under the StackCP Sidebar section.
Homepage Address homeUrl - This is the Home Page URl you've set within Reseller Cusomisation under the StackCP Sidebar section.
Sales Email Address salesemail - This is the Sales Email Address you've set within Reseller Customisation under the StackCP Sidebar section.
Support Email Address supportemail - The is the Support Email Address you've set within Reseller Customisation under the StackCP Sidebar section.
Reset Password Address resetURL - This is the URL that your customers will be taken to in order to reset their password, it will utilise the custom control panel URL you've set to ensure it's white labelled.
Webmail Address webmailurl - This is the URL that your customers can go to log in to their webmail as set within Reseller Customisations under the Webmail Domain section.
Personalised emails can be created in the Email Template Manager and StackCP Email. Direct messages sent to StackCP control panel can be created in the Message Centre.
 Austin B.
Does 20i have an affiliate program?
Yes, we currently have an affiliate program.
You can promote our WordPress Hosting, Reseller Hosting and Managed Hosting If someone uses the link you provided to make a purchase, you'll receive commission on sales.
Please see 20i Affiliates for more details.
 Austin B.
How do I add a domain mapping or alias?
From My20i, head to Manage Hosting > Select Package > Domains. This area allows you to configure all domain names associated with that hosting package.
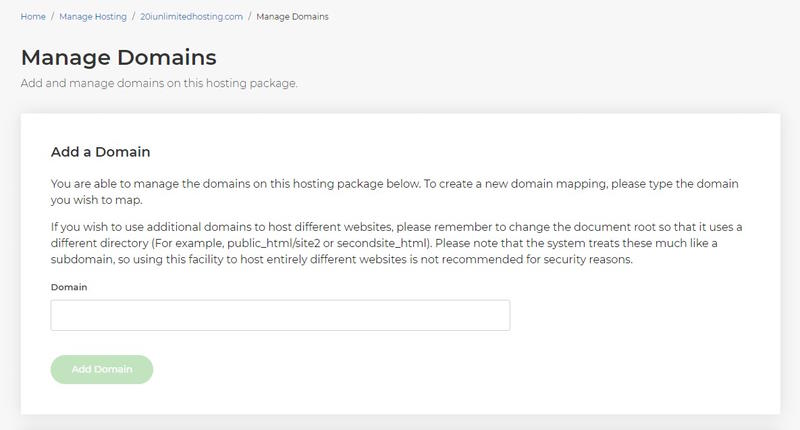
Domain mappings or aliases are simply additional domains that point to exactly the same files - an identical document root - as your primary domain name on the package. So, to alias or map a domain simply type it in the 'Domain' box.
Note: don't include 'www' and leave the document root as the default public_html.
What is domain mapping?
Domain mapping enables the connection of multiple domains with a primary domain or content management system (CMS). It can be used to have separate domains in the same CMS installation. WordPress Multisite networks are one example where domain mapping can be used.
All mapped domains can be managed from a single source. You can create subpages for your blog, shop, log-ins for employees, subsidiaries of your business or categories under the roof of your main domain.
You can serve different content for each of your mapped domains while the files are all in the CMS installation of the main domain.
Why use domain mapping?
It can be very helpful when you have a vast range of services or products that all justify a distinct domain name. With domain mapping you can connect them all, which makes it easier to and update all subpages in your network
What is the difference between domain mapping and domain redirecting?
Redirecting does what is says. Users are redirected from one domain to the target you set. This can be confusing and lead to less trust if the user has not searched for the target domain. The user will also see only the content of the domain the redirect is set to.
Domain mapping works different as it connects the content via a multi-site network. The URL they see in the browser does not change. Different content can be served for each domain, so the user can have a distinct user experience on each domain while all are managed from one root directory.
 Lloyd Cobb
How can I use 20i's Package Cloning tool to improve my development work flow?
20i's package cloning tool can fit seamlessly into your agency's workflow by allowing you to clone a website from a template package over to a live domain. The package cloning tool comes free with your Reseller Hosting account and can be used to clone any package quickly.
You may first want to create a template package that you can clone for all of your similiar projects, like a blueprint! If you have a standard WordPress setup including a theme, plugins and any code-level customisations you may wish to create a template hosting package with that configuration. You can then label the hosting package as a template using hosting package labels.

If you're creating multiple sites from the same original template you'll save valuable time getting the new sites off the ground quickly.
Here we show you how you can clone a package quickly and easily.
 Austin B.
Does 'Back Up Multiple Sites' back up databases?
Yes.
You can back up multiple sites from the Back Up Web Hosting icon under the Reseller Manager section within My20i.
Here you can select multiple packages to create a backup of all at once.
The backup created contains both site files and database information.
 Austin B.
How do I check mailbox usage across packages in My20i?
20i provides a simple and easy way to monitor mailbox sizes across the packages and sites within your My20i account. This allows you to monitor and manage client’s mailboxes without having to enter individual packages.
To access the Mailbox Usage report:
- Login to My20i.
- Head to the Reporting section on the home page and select Mailbox Usage.

You’ll be shown the total number of mailboxes along with their combined total resource usage.
By default, the list will be ordered according to the highest Percentage Used column. You can also sort the list by selecting the column heading you wish to sort by, i.e. select ‘Mailbox Name’ to sort the domains alphabetically.
 Austin B.
How to give a StackCP User access to a site on Managed Hosting
If you want to give your StackCP Users (customers) access to a site hosted on a Managed Hosting you set this up through My20i.
First ensure that you've created a StackCP User for this customer: https://my.20i.com/reseller/stack-users
Once you've created your StackCP User, you can delegate the User access to a site on the Managed VPS:
- Head to StackCP Users > Options > Manage/Edit
- Locate the Access & Contracts and from the dropdown menu. Select the hosting package on the Managed VPS
- Select Add Access
Your customer will now be able to log in through stackcp.com or your customer login page (configured via Reseller Customisations) and manage their website on the Managed VPS.
 Austin B.
How do I activate my free SSL?
Every 20i hosting package comes with a free wildcard SSL certificate, enabling you to use the more secure HTTPS protocol to keep your site users secure.
To activate the SSL, you’ll need to make sure you’ve pointed the domain name to our nameservers (why our nameservers are required).
These are:
- ns1.stackdns.com
- ns2.stackdns.com
- ns3.stackdns.com
- ns4.stackdns.com
With that done, you need to:
- Go to Manage Hosting.
- Select Options > Manage on the hosting package which you wish to activate the SSL.
- Under Security, click on the SSL/TLS icon.
- You will then see your domain name and an option to Activate Free SSL next to it - select this and the SSL will be applied to your domain.
- If you’d like all your visitors to use SSL connections (i.e. for HTTPS to always be used), simply select the Enable option at the bottom of the page.
Once the SSL Certificate has been activated, it will take up to 30 minutes to secure your website. This is due to the changes needed to be made on our load balancers.
 Lloyd Cobb
How can I set a custom status page for my reseller brand?
Should anything occur on the hosting that could lead to potential issues, such as upcoming maintenance or an issue that could be causing service downtime, it’s important to ensure that your clients are kept informed.
We provide a status page called StackStatus (https://www.stackstatus.com/) which reports all ongoing incidents and scheduled maintenance. You can configure StackStatus to show on a custom subdomain to maintain consistency with your own brand.
To do this you can:
- Set a custom domain and subdomain to display the StackStatus page.
- Add custom CSS to brand the UI of the StackStatus page.
Setting Your Status Page Domain
- Head to StackCP Settings.
- Locate the Status Page Domain section.
- Choose your status page domain and a subdomain.

Please note, we'd highly recommend using a new domain name for your status page which you can route through an external DNS such as Cloudflare by pointing the nameservers to them. This ensures that your status page is redundant from 20i's own DNS. So if we experience internal issues, this ensures your status page will remain live.
As an example, you could choose something like example-status.com as the domain name, and then type www as the subdomain.
Adding DNS Records Manually
You need to ensure that you've added the correct CNAME so your custom status page works. This simply needs to be a CNAME from your custom status hostname to stackstatus.com.
Note: As an example, you could choose something like example-status.com as the domain name, and then type www as the subdomain.
Custom DNS at Cloudflare
Log in to your Cloudflare account and select DNS, then add the CNAME record as show below, or for your chosen hostname.
Custom DNS at 20i
Head to Manage Hosting > Options > Edit > DNS, then add the CNAME record as shown below, or for your chosen hostname.
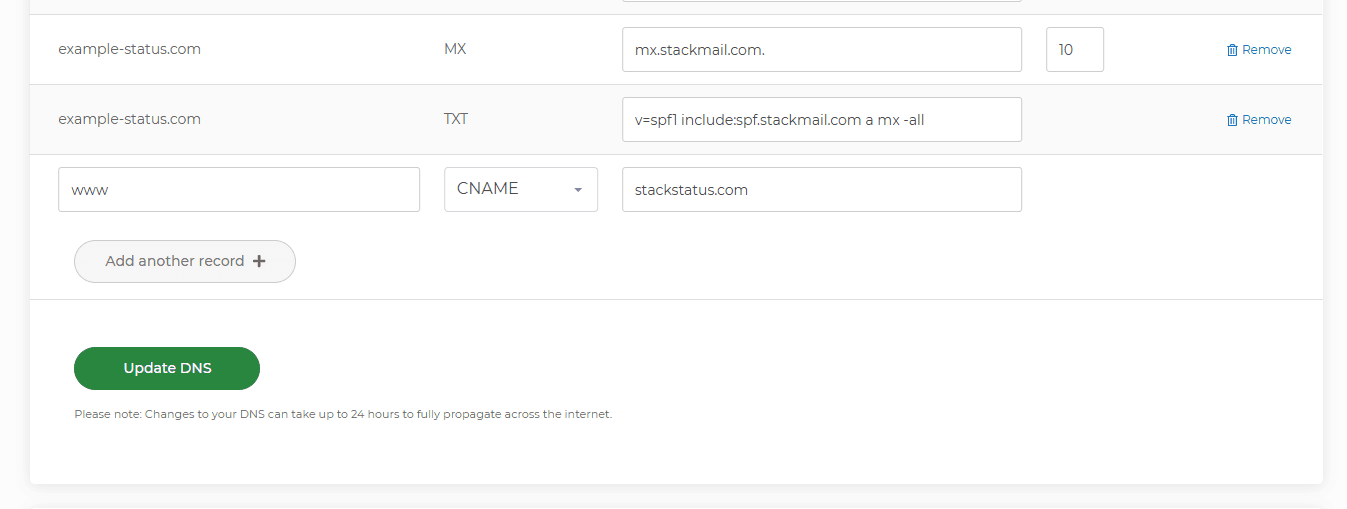
You should then be able to head to your custom status hostname (i.e., www.example-status.com), which will then display your status page. You may need to wait a bit longer for DNS to propagate if you can't see this straight away.
You can then brand your status page!
Branding Your Custom Status Page
To add custom CSS to your status page, head to StackCP Appearance and locate the Status Page section. You'll see you have the options to make changes to the header, footer, and the CSS.
 Austin B.
Why do I get an Internal Server Error 500 and how to fix it?
A white screen or Internal Server Error (error 500) usually means a script used by your website is throwing an exception and/or fatal error. When this happens, it will be logged by our system and you can view recent errors inside the Access/Error Log of our control panel.
A '500 Internal Server Error' message on your site is frequently due to a mistake in the site file such as a .htaccess file or web.config file.
The first step in troubleshooting this is to check the Access/Error logs. To get these:
- Login to My20i
- Select the package that is showing the internal server error
- Select Access/Error Logs under the Logs and Stats section
You'll want to look at the ‘Error Logs’ section and see if you can see the file path where the issue is. For example, you may see:
[code]www.yourDomain.com [Tue Sep 05 09:49:41 2017] [alert] [client xx.xxx.xxx.xx:xxxxx] /home/sites/xx/x/xxxxxxxxx/.htaccess[/code]
Windows
If you're running a Windows hosting package, don’t forget to recycle the app pool after making any changes to your site configuration. You can do this by logging into the hosting package, selecting ‘Application Pool’ and then selecting ‘Recycle Pool’. Error logs do not show in the control panel on Windows packages.
WordPress
A common cause of an internal server error on WordPress sites is if you are running an incompatible PHP version. Some errors are thrown if the server is running a version of PHP that is not compatible with the website code. We currently support PHP 5.3, 5.4, 5.5, 5.6, 7.0, 7.1, 7.2, 7.3, 7.4, 8.0, 8.1, 8.2, 8.3 and 8.4 on our Linux platform. You can switch between all of these versions using the 'Switch PHP Version' icon inside the control panel
If you're running WordPress, you should check if your WordPress admin area is still accessible. This is usually accessible by visiting http://your-domain.com/wp-admin.
If it is, we'd recommend disabling each plugin and theme and revisiting the site in turn to try and identify the root cause.
Also, if your website is on our WordPress hosting platform, please note that this platform only allows PHP 7 and higher. While WordPress core is compatible with all those PHP versions, certain plugins and themes may not be. If so, we recommend hosting the website on our Linux platform. You can automatically migrate packages from WordPress to Linux via the 'Platform Transfer' area of My20i.
Increase the PHP Memory Limits
Sometimes the internal server error may occur if you are exhausting the PHP memory limit. You can increase this by:
- Logging in to My20i
- Select PHP Configuration
- Scrolling down until you see memory_limit. Change this to 1024M, and select Update PHP Configuration
- Retry the page that was showing an internal server error by refreshing using CTRL + SHIFT + R. If this did not work then you should set the memory limit back to 512M
 Austin B.
How do I check bandwidth usage across packages in My20i?
20i provides a way to view bandwidth usage across packages and sites within your My20i account, making it easy to monitor the resources used by each site.
As a hosting reseller there are no bandwidth limits for the websites you host or resell. But you might want to set quotas for your clients. The Bandwidth Usage Report allows you to monitor what sites are using a higher level of bandwidth and may be getting close to the limits you’ve set.
Reporting for Bandwidth usage for websites:
To access the Bandwidth Usage Report:
- Login to My20i.
- Head to the Reports section on the home page and select Bandwidth Usage.

The bandwidth usage report for all hosting packages:
You’ll see a full list of sites and their relative bandwidth usage. For every website you see the daily and monthly hits, the daily and monthly used bandwidth. If you have set a quota for any hosting package it will show how many % of this quota have been used already.
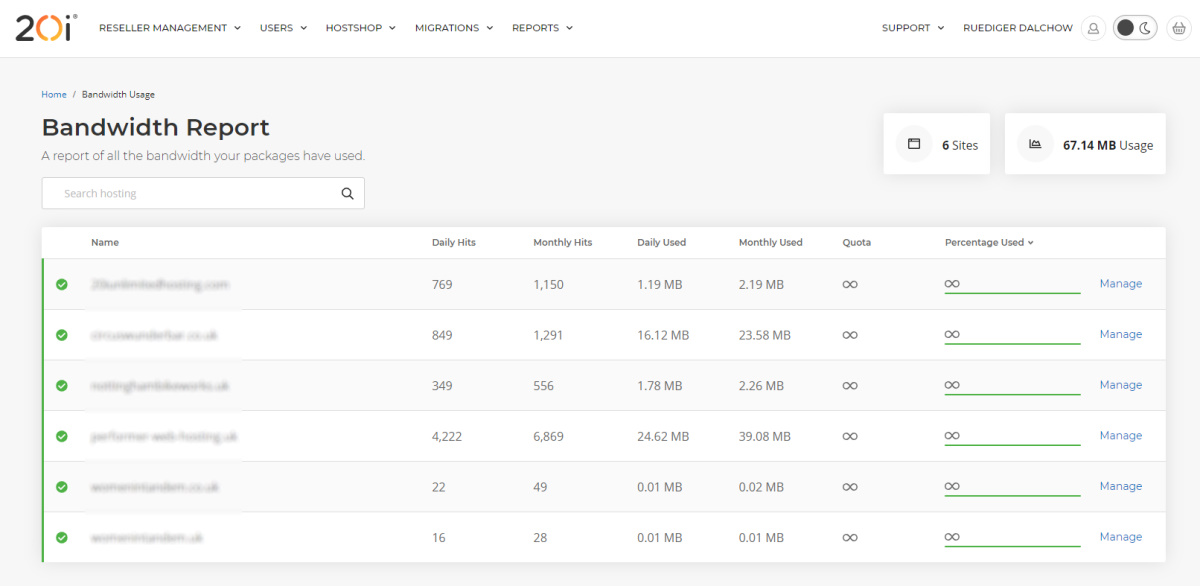
If you and / or your customer want to have a more detailed overview about the bandwidth usage of a website this is possible as well. This might be useful to see if any special event has lead to an increase of usage.
Follow the link ‘Manage’ on the hosting package in question. Then scroll down again to ‘Logs & Stats’ and choose ‘Bandwidth Usage’
You know see a detailed breakdown of the daily bandwidth usage, you can change this view even to hourly if you want it more granular or to monthly to see a wider picture of the usage.
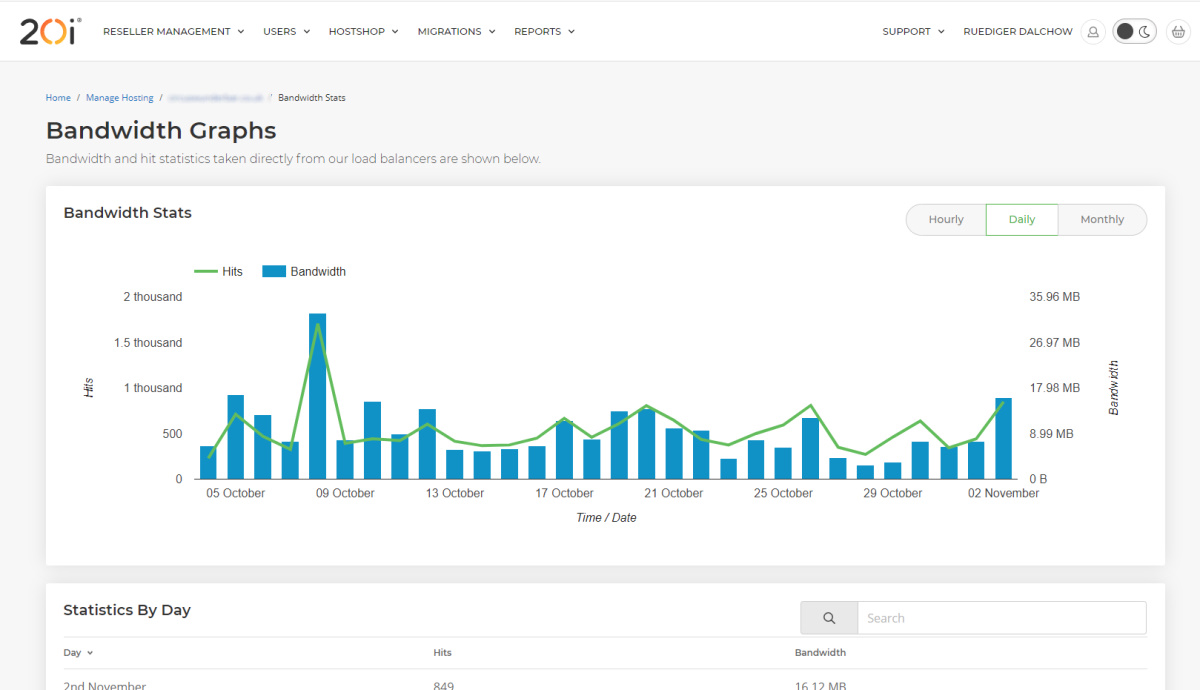
 Austin B.
Can I enable HSTS?
The HTTP Strict-Transport-Security response header (often abbreviated as HSTS) lets a website tell browsers that it should only be accessed using HTTPS, instead of using HTTP.
You can enable this by adding the following to your .htaccess file:
Header set Strict-Transport-Security "max-age=5184000; includeSubDomains; preload"
The 'max-age' is the time in days you want the warning to be cached for, the above would set that to a default of 60 days.
Be aware that if you set this header, the site will only ever load over HTTPS.
For instance, while people can usually click through a browser warning about a name mismatch or expired certificate, browsers do not allow such a click through for hostnames with an active HSTS header. It also means that if they ever move the site to a web hosting provider that doesn't support HSTS or if they wish to remove the certificate, they cannot do so and their site will be unavailable.
 Austin B.
How do I set up Automatic Timeline Backups?
With our Timeline Backups product, automatic snapshots of your website files and databases are taken on a daily basis, and can be restored at any point.
You don't have to take any action to configure this service. Once activated, we include all of your website files and databases as standard. To view any of the previous snapshots taken, you should visit the Timeline Backups page in My20i, click Manage Snapshots next to the package you are interested in and choose Restore Snapshot next to the website or database you wish to view.
From the management page you can:
View Snapshots
This option allows you to view and restore any of the previous snapshots for your services.
The Snapshot Time dropdown shows the date and time of all previous snapshots we've taken. If you want to go ahead with a restore, select the snapshot time, choose the target and how you'd like the data to be restored and click 'Restore'.
Take Snapshot
This option allows you to run an 'on demand' snapshot of the particular service. This is a manual task which you do as well as the daily snapshots that are taken automatically. Once completed, you can go to Restore Snapshot and you will see the snapshot that has just been taken.
Note: the Snapshot takes a backup of all domains and subdomains on a given package.
View Previous Actions
This section shows all previous 'manual' tasks against that snapshot. This does not include the automatic, daily snapshots.
Restore Indvidual Files
To restore individual files:
- Head to File Manager and locate the file you want to restore a previous version of.
- Right-click on the file and select View File History.
- Find the date/time you want to restore from and select Restore.
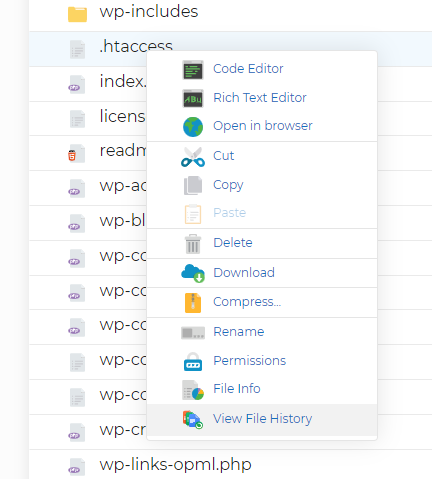
The individual file will be restored leaving all other files the same.
Restore Individual Folders
To restore individual folders:
- Head to File Manger and locate the folder you want to restore a previous version of.
- Right-click on the folder and select View Folder History.
- Find the date/time you want to restore from and select Restore.
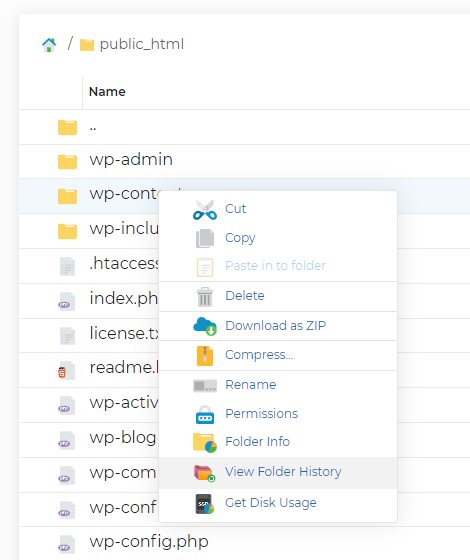
The folder and its contents will be restored.
 Lloyd Cobb
How do I use the package split tool?
If you have a package that holds multiple mapped domains or subdomains, you may wish to split the package up, and assign a new package to one of these domains/subdomains while retaining the files and the database.
How to split your hosting package:
We've created a tool to make this process simple.
- Head to Manage Hosting
- Locate the package you wish to split into multiple packages and hit Options > Split Package.
Note: This option will only appear on packages that have multiple domains or subdomains that can be split.
- You'll then get:
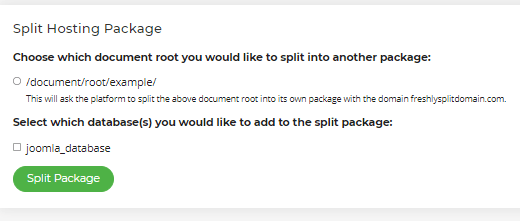
The document roots of the addon domains and subdomains will be listed alongside the domain they're attached to.
Select the document root of the domain you wish to split under Choose which document root you would like to split into another package. In the example above, we want the root of freshlysplitdomain.com so we'll select /document/root/example/
- Then, select the database name of the database you want to split with the package under Select which database(s) you would like to add to the split package. You can choose multiple databases if needed.
- Finally, hit Split Package.
- The system will process the above, and once done you'll get a notification that the package has split successfully.
- If you check Manage Hosting you'll see your newly split package all set and ready to go.
 Austin B.
How do I disable automatic renewal of a domain?
To prevent a domain name from renewing, you need to:
- Log in to My20i
- Head to Renewals from within your account.
- Locate the domain you don't want to renew and select 'Options' > 'Cancel Auto-Renew'.
This will prevent the domain from renewing.
 Austin B.
How do I check disk usage across packages in My20i?
20i allows you to easily check and monitor disk usage across all your packages and sites within your My20i account.
There are no limits on disk space for Resellers. However, you may want to limit what your clients can use. The Disk Usage Report allows you to keep track of what resources are being used.
To access the Disk Usage Reports:
- Login to My20i.
- Head to the Reporting section on the home page and select Disk Usage.

You’ll see a full list of all your packages and their respective disk usage as well as the percentage used of the quota you’ve set for that package.
 Austin B.
Reseller Hosting with cPanel
What is cPanel?
cPanel is a well-known web hosting control panel. cPanel and Web Host Manager (WHM) software enables users to manage multiple websites and domains. Resellers can run a web hosting business by selling hosting to third party clients.
Resellers using cPanel are charged a licence fee, which increases depending on the number of websites that are hosted. Optional paid extras include software like Web Host Manager Complete Solution (WHMCS), which includes automatic billing and provisioning tools.
20i’s Reseller Hosting account uses a free control panel created by our team of developers: My20i. It improves on cPanel in every way. But you can still use cPanel to run a reseller business on 20i web hosting - see below.
cPanel vs My20i - what’s the difference?
My20i was developed as a better alternative to cPanel. With decades of experience in the web hosting industry, our team of developers identified many areas where cPanel could be improved.
Complexity and user experience
cPanel has been around for a long time and has many foibles as a result. For a new user, it’s a steep learning curve. My20i is designed to be simple and intuitive, and work perfectly on any device. Users still have access to all the features available in cPanel - but they are more user-friendly and accessible. It has a fresh, modern look that makes web hosting management a pleasure.
Familiar design and features
While we wanted to improve the user experience, we didn’t want to alienate people! We’ve made it easy for those experienced in using cPanel by making the design familiar. You can get up and running in moments.
Developed for bulk management
If you’ve got lots of websites, it can be a pain to manage them all in cPanel. My20i is under constant development, based on feedback from our reseller customers. Almost all our new features are focused on improving Resellers’ experience.
It’s fast and easy to get to where you need to go, and you can see bulk views of what’s important. You can organise the user interface to your preferences and apply flexible tags to items to make sure they can be easily filtered and managed.
Infinite customisation
My20i is designed to be customised and includes an API to integrate it into your existing systems. StackCP - which is the control panel that Resellers' customers use - can be customised to match your brand, much more than the cPanel offering.
Fast and easy cPanel migration
It isn’t difficult to make the switch to My20i. Head to our automated Migration Centre, enter your credentials, choose which packages you want to transfer, hit ‘Migrate’ - and your hosting is transferred over to My20i. Learn more about how to migrate from cPanel.
No limits
WIth 20i Reseller Hosting, you get to host as many websites as you like - for no extra cost. You don't pay a licence fee for My20i, and unlike Reseller Hosting with cPanel, you won’t be charged based on the number of sites you host. HostShop - which is like an improved version of WHMCS with more features - is also included in the price. It’s unlimited web hosting, for a simple monthly fee.
You can test out My20i and see how it compares with cPanel, for just £1. Head over to our Reseller Hosting page to find out more.
cPanel Reseller Hosting with 20i
Perhaps you’d prefer to use cPanel? No problem: you can still take advantage of the excellent value and performance that you get with 20i hosting.
You can do this with a virtual private server (VPS). With a VPS, you get dedicated resources - processors, RAM and storage - and more freedom than a standard shared web hosting account. It’s like your own computer in the cloud.
We offer two types of VPS. Our Managed Hosting uses My20i. If you want to use cPanel for reseller hosting, you should use our Unmanaged VPS.
With Unmanaged VPS, you can install any software that you’d like. That includes a choice of operating systems, although if you want to use cPanel the OS will need to be CentOS 7. You get unlimited bandwidth, DDoS protection, a network SLA of 99.99% and much more.
How to order a VPS for cPanel Reseller Hosting?
- First, you need to choose a VPS based on your needs: cores, RAM memory and SSD storage.
- cPanel will be preselected for you. Choose from the dropdown whether you would like Admin (5 sites), Pro (30 sites), Plus (50 sites) or Premier (100 sites).
- Add Snapshot Backups if you wish.
Your final price, including the cPanel licence and any extras will be shown.
Your VPS will be deployed in less than a minute, and you can start running your reseller hosting business on 20i hosting - using cPanel. Good luck!
How do I suspend or disable a hosting package?
With Reseller Hosting, you have the ability to enable and disable individual hosting packages as you see fit. This can be useful to limit access to services temporarily without removing them from your account entirely.
Note: Disabling a package will also disable emails on that package.
To disable a package:
- From the My20i control panel, click Manage Hosting.
- Locate the hosting package you wish to disable from the list, and select Options -> Disable.

In order to re-enable a package you have disabled:
- As before, click Manage Hosting from the My20i control panel.
- Find the disabled hosting package you wish to enable, and select Options -> Enable.

Packages that are disabled will have '(Disabled)' appending to their domain name on the Manage Hosting page, and will display a holding page – you can customise this page in your Default Pages area within Reseller Customisation.
Note: It takes around 30 minutes for websites to deactivate once the option has been selected, the same also applies for activating websites.
 Lloyd Cobb
Is your hosting environmentally-friendly?
Yes, we're committed to reducing our carbon footprint, both in our data centres and workplace.
We achieve this through efficient power systems, renewable energy, a modern hosting platform and green company policies. You can find full details at Green Hosting, and you check whether your website is hosted using green energy at the Green Web Foundation.
Our commitment to sustainable hosting.
All our data centres are powered with 100% renewable energy. Our data centres use the best technology for fast hosting performance and energy efficiency.
Our proprietary autoscaling technology, not only gives you the power of a true ‘elastic cloud’ to react to the demand of processing power, bandwidth and memory your website needs at any given time, it also scales down when the demand is lover and therefore reduces the energy consumption.
Not just green hosting – but a green company
Our efforts to be a sustainable business are not only applied to our hosting. Our office runs on solar power. We run a paperless office, recycle waste and even our cleaning products are chosen for their environmentally friendliness.
 Chris Wright
How do I connect a website via SSH?
SSH, or ‘Secure Shell’, is a method of remotely accessing and managing your site files, as well as allowing for configuration changes and remote command execution within your file space. SSH on the 20i platform is encrypted, and protected by either 2FA or public/private key pairs to validate the connection, making it reliable and secure.
Below are instructions for connecting to your site via SSH for Windows, Apple Mac and Linux devices using public/private key pairs. If you wish to connect using 2FA, please see our guide How do I connect to SSH using 2FA?
Note: It's only recommended that you connect to your package via SSH if you're familiar with the command line interface.
Note: If your SSH connection closes immediately, your account may be blocked for unauthorized Sudo use. Please contact support for assistance.
Windows
If you're using Windows, you'll need to download an SSH Client to access SSH.
Note: This guide uses PuTTY which is a free SSH client for Windows and can be downloaded here:
https://www.chiark.greenend.org.uk/~sgtatham/putty/latest.html
- Once you have downloaded PuTTY, search for and open PuTTY Key Generator on your computer.
- Select Generate and move the mouse around in the gray box to generate some Randomness. This will generate a public key.
- Add a passphrase (password). This is what you'll need to put into the command line interface.
- Log in to My20i, head to Manage Hosting and select the package that you want SSH access for. Then select, SSH Access from under the Security section.
- Then input the public key that was generated from PuTTYgen into the Public Key box. A handle will be generated automatically. Then select Add Public Key.
- Head back to PuTTY Gen and select Save private key. Save this as any name you want.
- Open PuTTY. Down the left-hand side, select to expand the SSH, select Auth and then Credentials.
- There should be an area labelled Private key file for authentication – select Browse next to this and add the private key you have just saved.
- Head back to Session using the left-hand menu and add the SSH host name. The hostname you wish to use depends on what data center you’re using. For the UK data center, use ‘ssh.gb.stackcp.com’, and for the US use ‘ssh.us.stackcp.com’. Then, once that has been added, select Open.
- The command line interface will then open. You’ll want to enter your domain here as your username (e.g. domain.co.uk).
- You'll then be prompted for the passphrase that you set earlier. Enter this in the prompted area – PuTTY will hide the characters being entered for security purposes, so do not worry if any input doesn’t seem visible.
- You'll then be logged into your account and have full access to your SSH area on your site.
Linux
Connecting to SSH on Linux will require you to set up a Public/Private Key pair on your local machine, add it to the SSH area on your package and then connect using the details provided.
- Open a Terminal session, and navigate to the directory that you wish to store your Public/Private Key pair in.
- Enter the command
ssh-keygenand follow the on-screen prompts – the tool will prompt you for a name for the file, as well as setting a password. This is what you'll need to put into the command line interface later, so make note of it once set. - Once the files have been created by the process, log in to My20i, head to Manage Hosting and select the package that you want SSH access for. Then select, SSH Access from under the Security section.
- Back in your Linux terminal, use the command
catto view the contents of your public key file. This will be the file ending in .pub that was generated by the command earlier and should use the name you set.
For example, if you chose to name your key example, the command to open it would becat example.pub - Copy the contents of the file, and paste it into the Public Key box in the SSH area on My20i. A handle will be generated automatically. Then select Add Public Key.
- Now that you’ve got your public key added to My20i, you can connect via SSH by using the command:
ssh -i keyname hostname
Where keyname is the name of your private key file you entered earlier. The hostname you wish to use depends on what data centre you’re using. For the UK data centre, use ‘ssh.gb.stackcp.com’, and for the US use ‘ssh.us.stackcp.com’. - You’ll be asked if you wish to connect using the key. Enter yes.
- You'll then be prompted for the passphrase that you set earlier. Enter this in the prompted area – PuTTY will hide the characters being entered for security purposes, so do not worry if any input doesn’t seem visible.
- You'll then be logged into your account and have full access to your SSH area on your site.
MacOS
To connect via SSH on a Mac you can follow this video or the instructions below:
- Log in to My20i.
- Head to Manage Hosting and select Manage on the hosting package you want to connect to.
- Select the SSH Access icon.
- You’ll now need to generate a public key, on a Mac this is done via the Terminal utility. Open Terminal on the Mac.
- Enter the following command into the Terminal:
ssh-keygen - Press Enter
- You’ll be prompted to enter the location that you want the public and private keys saving. In this case, we’ll keep this as the default location. Press Enter
- You’ll be prompted for a passphrase, in this guide we’ll just leave this empty. If you enter one, make sure you remember this as you’ll be prompted for this later. Press Enter.
- You’ll be asked to confirm the passphrase, since we’ve left this empty just press Enter.
- Your keys will have been generated and the public key will have been saved in a specified location, in our example it has been saved in:
/Users/20i/.ssh/id_rsa.pub - Copy the path and enter the following command:
cat /Users/20i/.ssh/id_rsa.pub - The key will be outputted, copy the whole key from the start to the end.
- Paste the key back in My20i in the Public Key field in the SSH Access section. The handle should be added automatically. Press Add Public Key. Please note that can take up to 5 minutes.
- Head back to Terminal and enter the SSH username and hostname found at the top of the SSH Access section, it should be something like domain.com@ssh.gb.stackcp.com for packages in the UK, and domain.com@ssh.us.stackcp.com for packages in the US. You’ll need to prefix it with the ssh command as follows:
ssh domain.com@ssh.gb.stackcp.com
Orssh domain.com@ssh.us.stackcp.com
You’ll be prompted to confirm you would like to connect, simply type yes and press enter.
You should have successfully connected via SSH from your Mac to your hosting package at 20i.
 Ruth Turner
How do I check MySQL Database sizes across packages in My20i?
20i provides an easy way to monitor and view all MySQL database sizes across all packages in your My20i account.
To access the MySQL Database Size Reports:
- Login to My20i.
- Head to the Reporting section on the home page and select MySQL Database Sizes.

You’ll see a full list of all the databases under your 20i account and their sizes. You’re also shown which domain they are associated-with so that you can manage the MySQL database, should you need-to.
 Austin B.
How do I customise the header and footer of an email template?
As a 20i hosting reseller you can add your own branding to the header and footer of the email templates that are sent to your customers.
This is part of our white-label Reseller Hosting, which lets you customise all customer facing hosting products and communication.
- Head to Reseller Preferences and select Email Component Templates.
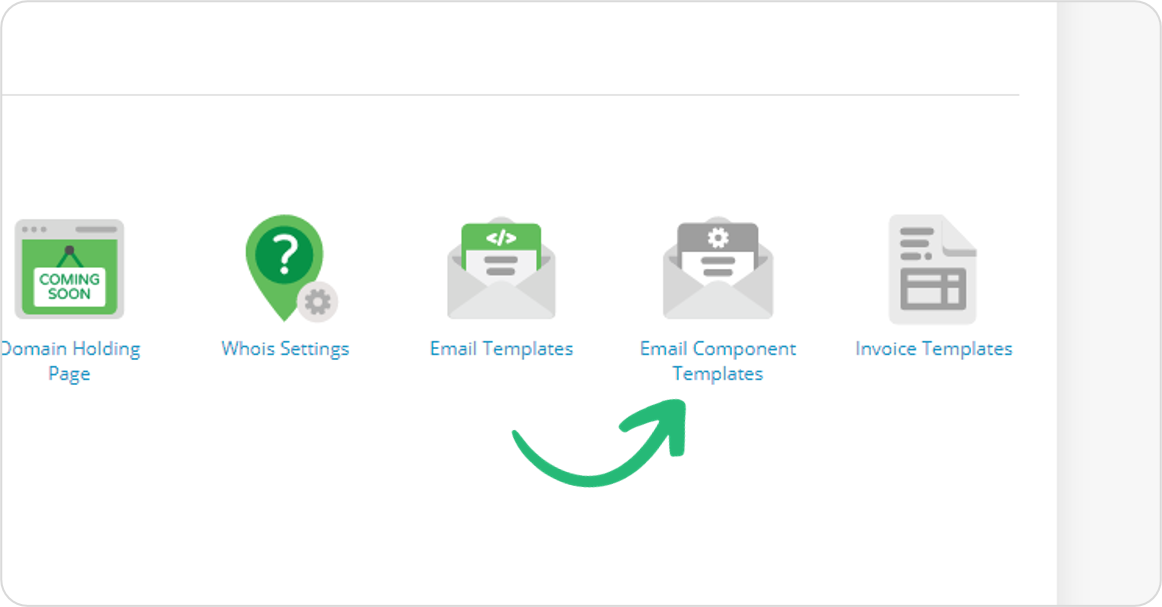
- Select Create Template. Here you can add your HTML to create a header and footer templates which you can then apply to your emails.
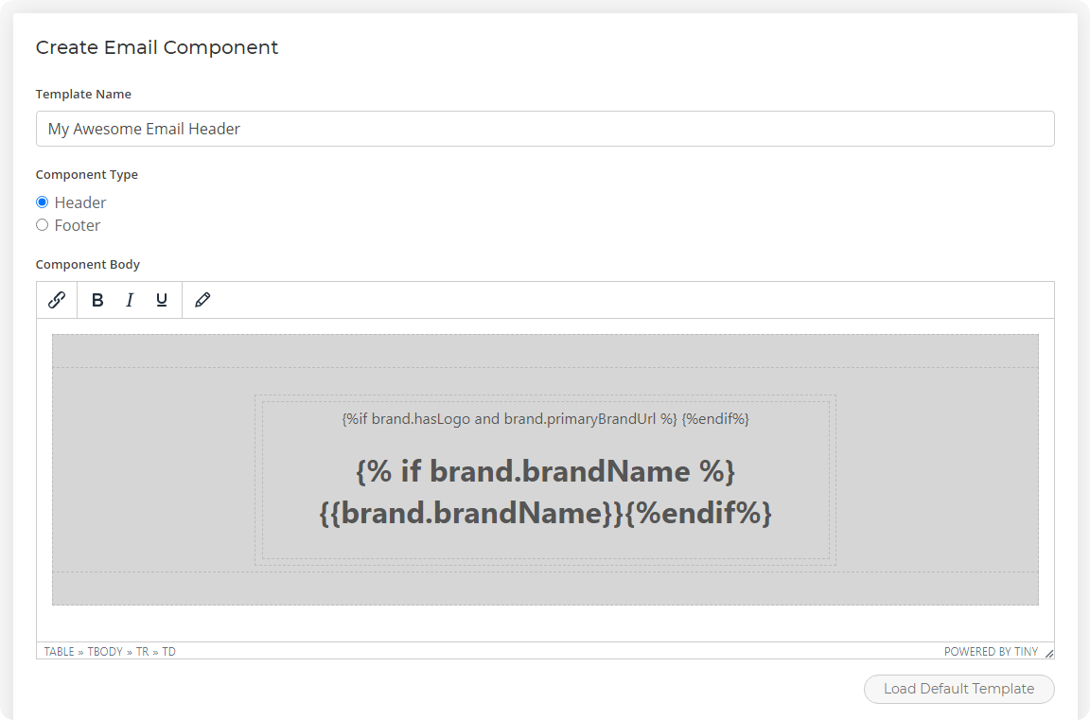
- Select Save.
- Head to Email Templates and select Options > Edit on the template you want to apply your custom header and footer to.
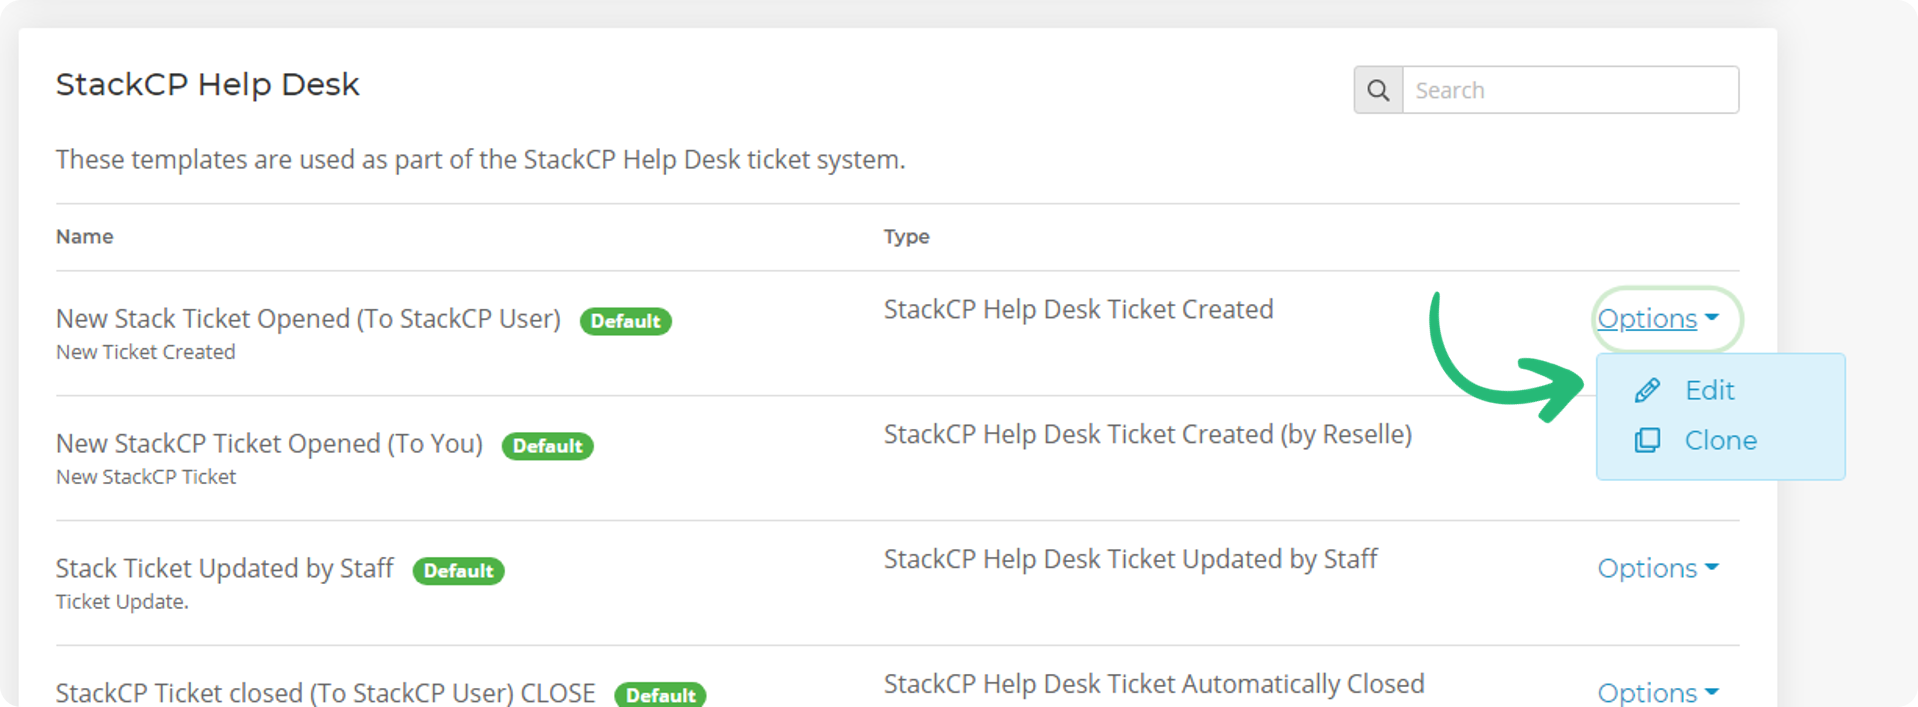
- Select the Use a custom header and/or footer component checkbox to use your customised settings. Please note, this will remove the contents of the email template body due to removing the default header and footer, so make sure you've got a copy of that first.

- Once done, select Save.
The email template will now have your custom branding when sent to your customers.
 Austin B.
Can I assign each hosting package to a dedicated IP address?
Our Reseller Account does not come with a 'dedicated' IP address for your packages, as your web hosting accounts aren't tied to a particular server.
When you create a package it's provisioned to our cloud hosting platform and can be served from many web servers across our network. Requests to your sites are then distributed via our load balancers. This allows us to scale each of your websites independently based on load and number of requests.
It's our way of ensuring that your pages(s) load as fast as possible and have no single point of failure in our network.
 Austin B.
How do I restore mailbox backups with Timeline Backups Pro?
You can restore lost mailbox data using the Timeline Backups Pro tool – which can be ordered through your My20i account. With Timeline Backups Pro you will receive 30 days of snapshots of all the email accounts on your account.
- Firstly, you’ll need to head to the Timeline Backups tool. In My20i, if you're a Reseller, this can be found under Hosting Management. If you're not a Reseller, it willl be under Manage Hosting > Web Files
- Now find the hosting package that the email account is assigned-to from the list. Once you've found the relevant package, you will then need to select Manage.
- You'll see a list of different webspace, database and mailbox snapshots. From this list, find the name of the mailbox that you’d like to restore a snapshot for and select View Snapshots.

- Select the snapshot time/date that you'd like to restore to the mailbox.
Note: At this stage, you'll have the option to select Restore to temporary mailbox. This will create a new mailbox and restore the snapshot to the new mailbox instead of the original mailbox. This feature may be useful if you do not want to overwrite the contents of the original mailbox.
- Select Restore Snapshot
 Chris Wright
How can I clone a site with Timeline Backups?
Timeline Backups allow you to restore data between hosting packages, making them an ideal tool to assist with 'cloning' websites in your account.
For example, if you wanted to clone example.com into a package called example-clone.com:
- Set up an empty package with domain name example-clone.com
- Head to the Timeline Backups Page
- Click View snapshots next to example.com
- Select a snapshot time
- Set the target package to be example-clone.com
- Start the restore by pressing the Restore Snapshot button
The control panel will show you when the restore is in progress. Navigating away from the page will not cancel the restore and you can view on any previous jobs by heading back into the Manage Snapshots area for example.com and clicking View Jobs.
How do I use hosting Package Labels?
Package labels can help organise your hosting packages. You can add any kind of label - it's just a text string that you decide. For example, if you wanted to categorise packages that are in development, you might apply a 'Development' tag to them.
Then, on the Manage Hosting page, you can filter by label to find them easily.
To add a hosting Package Label:
- Login to your My20i control panel.
- Head to Manage Hosting -> [select package].
- Down the right hand side, you’ll find the Package Labels section.
- To add a Label, type in the Label field (e.g. Testing) and select Add.
Now when you head back to the Manage Hosting page, you’ll see the drop-down menu allowing you to filter packages by Label (you may need to refresh the page if you've used the 'back' button).
Also, by clicking on a Label you can select all packages with that Label applied.
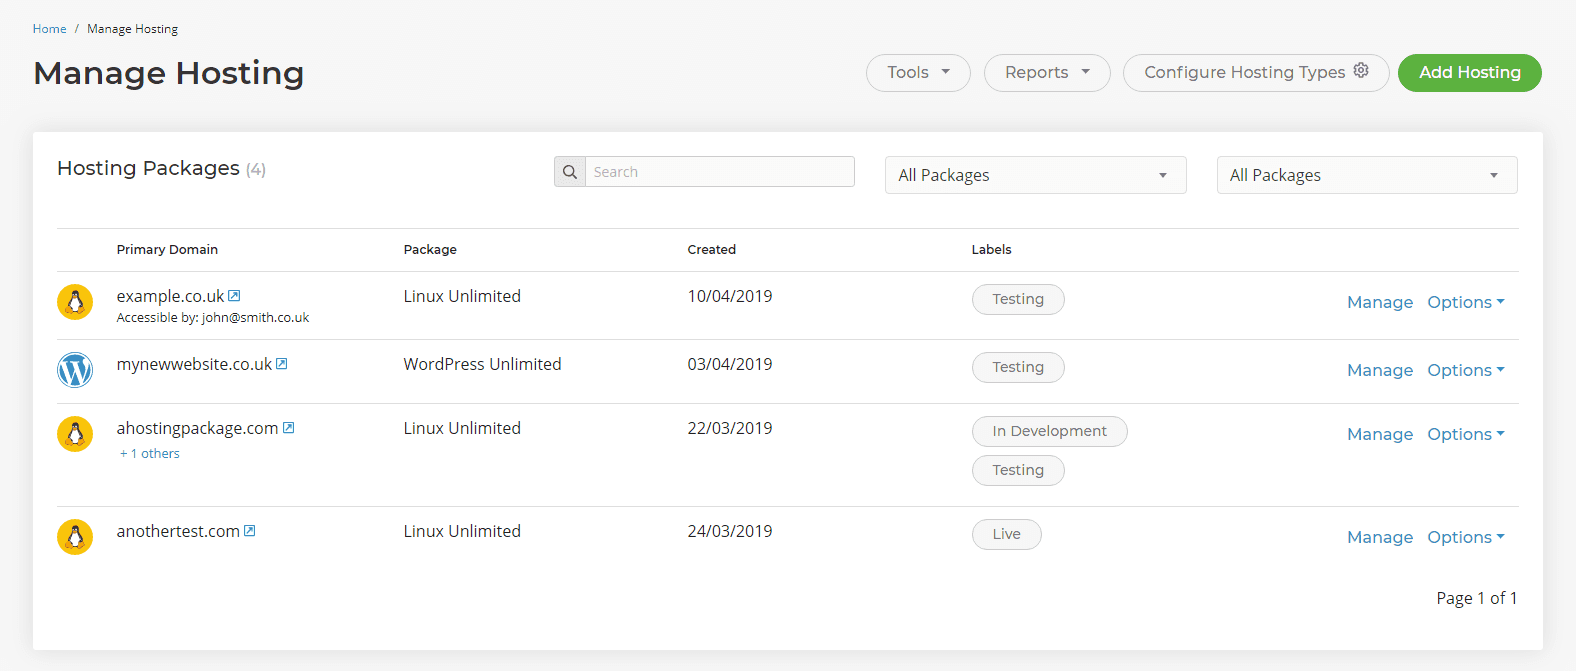
Here are some examples of Labels you may use:
- Testing
- New Website
- In Development
- Ready for Launch
- Awaiting Client Approval
- Subject to Change
- On Hold
- High Priority
- Low Priority
- Rework
- Personal
- Requires Review
 Austin B.
How do I transfer a domain or website to another 20i customer?
As a 20i reseller, you can transfer hosting packages and domain names to different 20i customers through our My20i control panel.
To process a transfer, you need to know the email address of the 20i account you wish to transfer the package to. The receiving account will be sent an email notifying them of an incoming transfer, and will need to accept the transfer by logging into My20i. You will be notified via email when the new account accepts the transfer.
Transfer a Hosting Package
- Log in to my.20i.com
- Visit Manage Hosting
- Find the Options menu next to the package you wish to transfer, and click Transfer
- Enter the email address of the 20i customer you wish to transfer to
Transfer a Domain Name
- Log in to my.20i.com
- Visit Manage Domains
- Manage the domain name you wish to transfer
- Click Transfer Away
- Enter the email address of the 20i customer you wish to transfer to
Note: The option to transfer domain names individually is only available if the domain name is not attached to a package.
Please note that while domain names can be transferred between any 20i customer, hosting packages can only be transferred between two 20i resellers or from a reseller to a standalone hosting package direct with 20i.
 Lloyd Cobb
How do I switch to renew my hosting account annually?
You may want to switch to renewing your hosting account annually to take advantage of the additional month free you get and to simplify your billing over the year.
To change your account renewal period:
- Login to your My20i account.
- Head to Manage Renewals.
- Locate your Reseller Account and select Options > Edit Payment.
- You can now switch the renewals period via the dropdown menu under Renewal Period.
- Once you've selected 'Yearly', select Done.
You will now have switched to renew your account annually on the next renewal.
 Austin B.
How do I link services and users to WHMCS?
Linking Services
Under some circumstances, you may want to set up a service as if it had been purchased via 20i on your WHMCS install. This may include cases where you've migrated your Reseller Hosting from another WHMCS provider and want to continue to provide the same services to your existing customer. Linking the existing service that you have set up in WHMCS with 20i means that your customers can log in and manage the hosting through their own WHMCS login.
Manual method:
- Log in to My20i.
- Go to Manage Hosting
- Click Options -> Edit on the package you're looking for
- Copy the ID number from the header
- Go to the Product/Service in WHMCS Admin
- Paste the ID number into the "packageId" field near the bottom
Autodetect method:
- Go to the Product/Service in WHMCS Admin
- In the "packageId" field near the bottom, type an asterisk ' * '
Autodetect only works when you have a package with a name which exactly matches the domain name in WHMCS. The behaviour is undefined if you delete and recreate a package, or move a domain name between packages.
Linking Stack Users
If you've set up Stack Users, you may want to link them to an existing client set up on WHMCS so that your customer can access all their services from within WHMCS without having to go back to your StackCP site. This is only applicable to existing unlinked Stack Users, as new Stack Users are set up automatically whenever a new order is placed in WHMCS.
Note: Imported users will not have their access changed, so you may also want to review which services they have access to.
Manual method:
- Log in to My20i.
- Go to StackCP Users
- Click Options -> Edit on the User you're looking for
- Copy the User reference from the header (something like "stack-user:42")
- Go to the appropriate Client in WHMCS admin
- Select Profile
- Paste the user reference into your Stack User field near the bottom
Autodetect method:
- Go to the appropriate Client in WHMCS admin
- Select Profile
- In your Stack User field (towards the bottom of the page), type an asterisk "*"
If you use autodetect, you should be aware that this may connect a Stack user which you didn't intend to allow access to. Autodetect only works when the WHMCS user email address exactly matches one of your stack user email addresses.
Note: WHMCS is still a very much liked billing and automation option for resellers. But there are more options on the market. You should read about WHMCS alternatives.
 Austin B.
Are there any reseller hosting guides?
When you've signed up with 20i you get access to a range of guides and data sheets including a "Getting Started with Reseller Hosting" guide. This guide covers the basics of establishing yourself as a Reseller Host and covers areas such as the reseller management, migrations, managing users and more.
This is a comprehensive step-by-step guide that goes through all the stages of setting up your account and getting going with your reseller hosting business.
Free reseller hosting business startup guides
We also have a publicly-available guide which we add to regularly on the 20i Blog: Reseller Hosting: Make Your Business a Success.
There is always more to learn though! We share regular tips from across the web on our Facebook and Twitter feeds, from both the business side and the web design perspective.
 Austin B.
Instant savings with the .UK Domain Saver tool
All Resellers can transfer any .CO.UK or .UK domain to 20i instantly, and for free. Save money on every renewal.
The .UK Domain Saver tool scans through your hosting packages and determines those that have domains held with a registrar that's charging you (or your customer) a higher renewal price. It's free to transfer any. co.uk or .uk domain to 20i and you don't need to pay a renewal until it's due, it's an effortless way to save money. Easily filter the list of savings by registrar and transfer domains in batches, or transfer domains individually, whichever suits you - you'll make savings on every single domain.
Click here to view the .UK Domain Saver tool
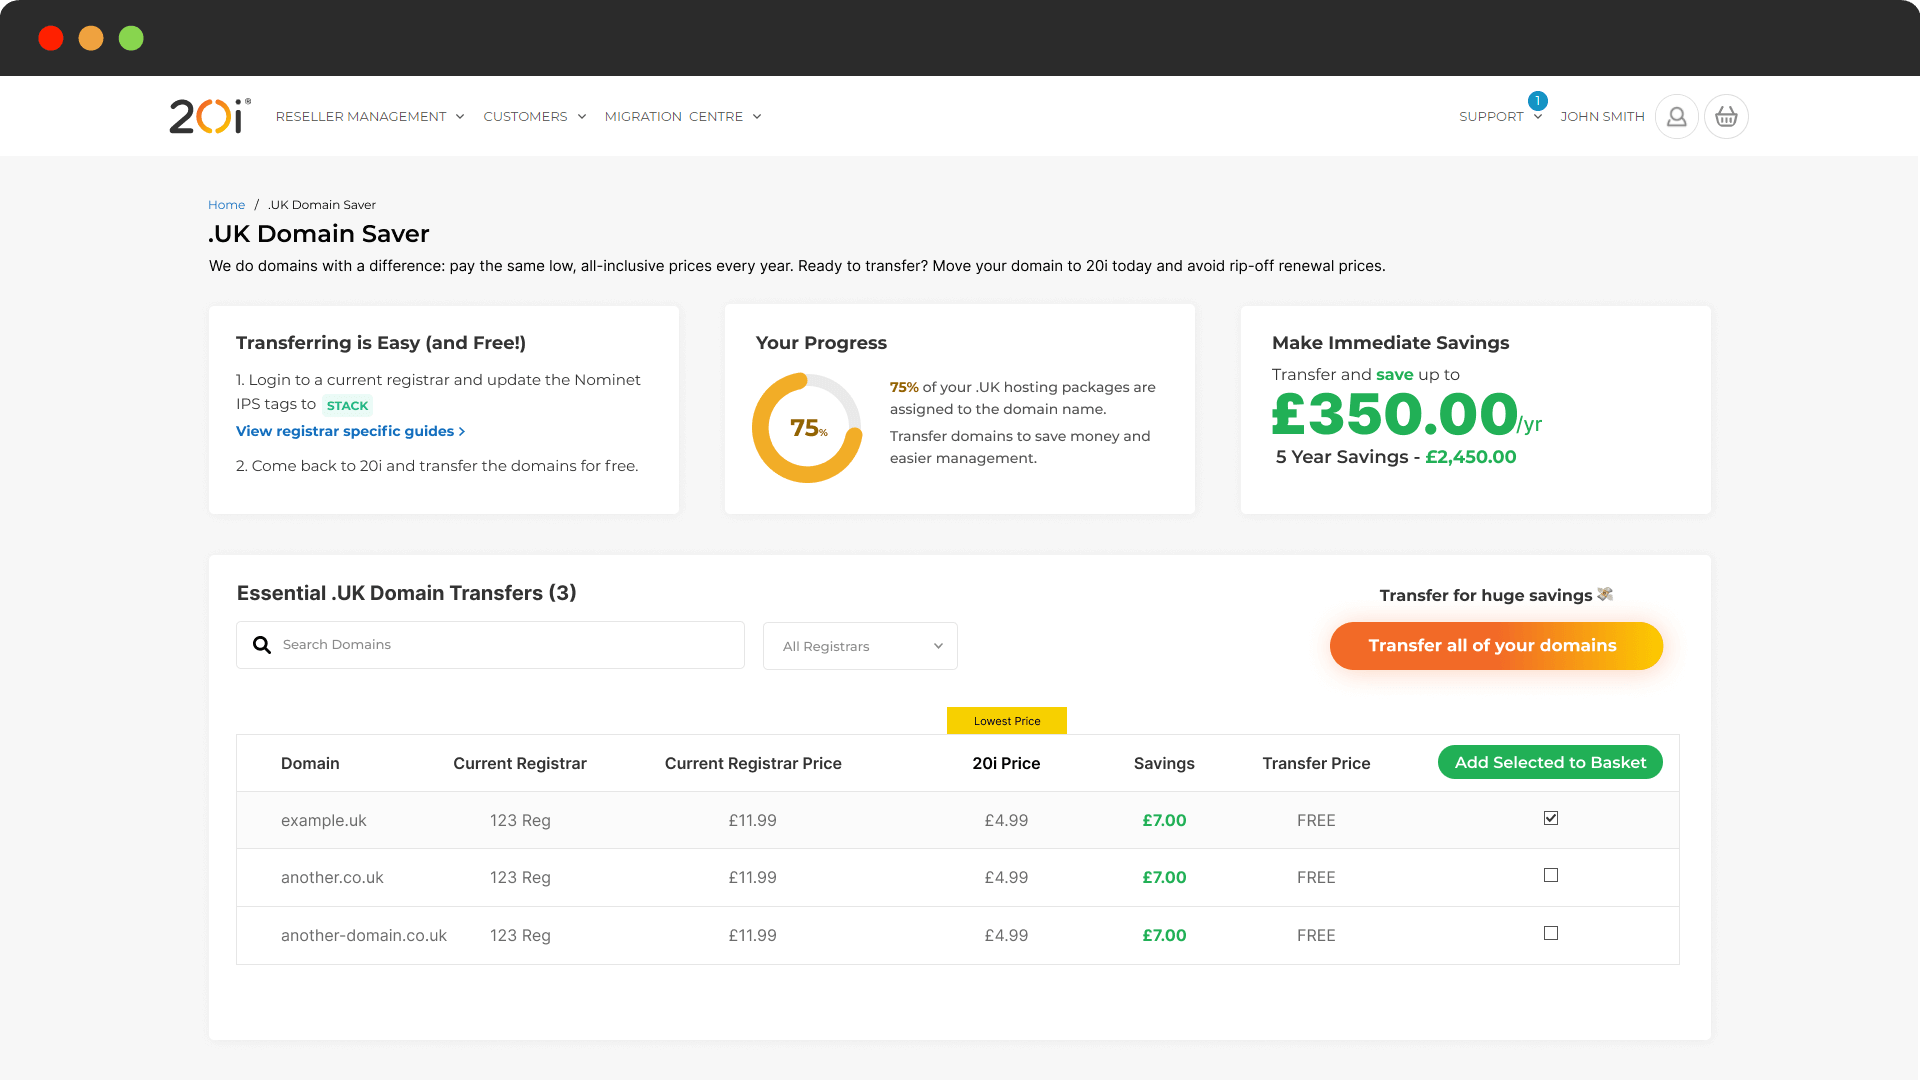
Head to the .UK Domain Saver tool in My20i to view a list of all the .UK domain names you can make instant savings on.
Transferring is Easy (and Free!) - No tech skills required.
- Log in to your current registrar and update the Nominet IPS tags to STACK
- Come back to the .UK Domain Saver and transfer the domains for free.
 Austin B.
How do I add a custom temporary URL?
You can replace 20i's white-label temporary URL (stackstaging.com) with your own custom temporary URL.
To add a custom staging URL you'll need to have a registered domain name within your 20i account. You can either register a new one or transfer-in an existing domain.
Note: The domain name cannot be associated with an existing hosting package, so you may want to register a new domain for the purpose of customising the temporary URL.
To add your custom temporary URL:
- Login to your My20i account.
- Select the Hosting Package Types icon under Reseller Preferences.
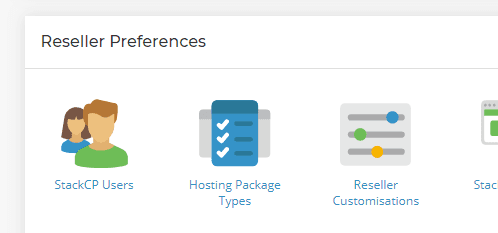
- Locate the hosting package type you want to add a custom temporary URL for and select Edit.
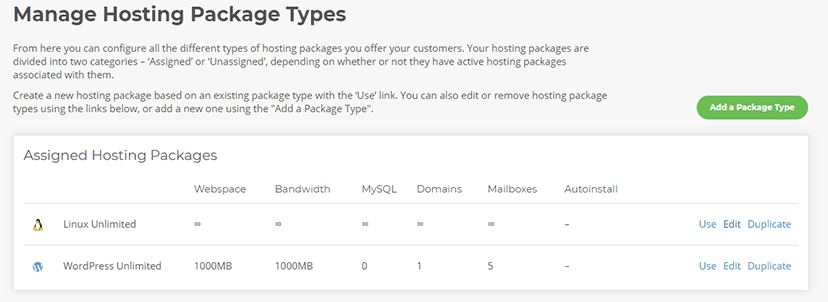
- Scroll to the bottom the page and you will see the Temporary URL Domain section. Select a domain from the dropdown menu. This will become the temporary URL you and your customers will see for all packages on the hosting package type selected.

Being able to add a unique custom temporary URL to each hosting package type allows you differentiate between a WordPress temporary URL and a Linux temporary URL.
For example, you could have the temporary URLs: MyBusinessWordPressStaging.com and MyBusinessLinuxStaging.com
However, you may want to keep things simple and use one custom temporary URL for all hosting packages - that's up to you!
Frequently Asked Questions
Do I need to have a domain registered within 20i to have a custom temporary URL?
Yes, you need to have the domain name you want to use registered within 20i in order to have a custom temporary URL. You can either register a new one, use an existing one or transfer one in from another host.
How long does it take for a custom temporary URL to set up?
Using a domain for temporary URL requires DNS updates so may take a few hours to become fully stable.
 Austin B.
How do I do a web hosting platform transfer?
With 20i you can easily move your website(s) from one hosting platform to another using our Platform Transfer tool.
For example, you may wish to move from Linux Web Hosting to WordPress Web Hosting to take advantage of the WP-optimised platform or to move your hosting package from our shared hosting platform to the Managed VPS or Cloud Server platforms.
This tool can also be used to move your hosting packages between our UK or USA Data Centres.
Head to the Platform Transfer tool under Migrations > Platform Transfer on the My20i Control Panel header menu.
Upon loading the Platform Transfer menu, you should be prompted with a Start Transfer button and all previous platform transfers.
Select the Start Transfer button.
Next, select the package you want to transfer from the Package to Transfer dropdown menu.
Select the New Platform Type that you would like to move the hosting package to, and the Package Type.
You will then need to select the Data Centre that you would like the Hosting Package to be hosted from.
Note: If you have purchased the Additional Data Centre add-on then you will have the option to select either the UK-based or US-based Data Centre at this stage. If you have not purchased the add-on, you will only be able to select your default Data Centre location.
Select Begin Transfer.
You will now need to wait for the Platform Transfer tool to complete the transfer for you. The status of your Platform Transfer can be found under Current Platform Transfers further down the Platform Transfers page.
Platform Transfer FAQs
Will I need to update my DNS records after a Platform Transfer?
When running a Platform Transfer between any of the shared hosting platforms (Linux, Windows and WordPress), the IP address of the hosting package will not change – so there will be no need to make any amendments to any of your domains' DNS records.
However, when moving from a shared hosting platform to a Managed VPS or Cloud server, the hosting package’s IP address will need to be changed.
If the domain that your hosting package uses is using our nameservers, the Platform Transfer tool will automatically update the DNS for you – however, if you are managing your DNS externally then you would need to ensure that the IP address on the A record is updated after the transfer is completed.
The package’s new IP address can be found under Account Information on the Hosting Package Overview page.
Why has my Platform Transfer failed?
On occasions, a platform transfer may fail – this could happen for several reasons, however, it’s most likely to happen when transferring to the WordPress hosting platform, usually because the website does not currently meet the WordPress platform requirements.
When moving a hosting package from a shared hosting platform to a Managed VPS or Cloud Server, you would need to ensure that the server has enough capacity to handle the hosting package that you are moving. For example, if moving to a Cloud server has 25GB of storage capacity then you won’t be able to transfer a package exceeding 25GB in size – attempting to do so would result in a platform transfer failure.
 Austin B.
How do I import StackCP Users from a CSV file?
20i Resellers can import StackCP Users from a CSV through the My20i control panel.
To do so, head to StackCP Users > Import Users from CSV. The CSV must have the following headings, and each cell must be wrapped in quotation marks, with empty cells filled with two quotation marks (i.e., "").
CSV Headings from left to right.
- Name
- Company Name
- Company Number
- Trading Name
- Address
- City
- County
- Postcode
- Country Code
- Phone Number
Note: If you're using a program such as Excel, your CSV may be formatted to not show the quotation marks. You can try opening the CSV in a program such as Notepad to check the formatting.
 Austin B.
Can I use WHMCS with my Reseller Hosting Package?
Yes - you can absolutely use WHMCS with our platform. We offer a WHMCS module that integrates perfectly with our platform.
You can find the module by logging in to your My20i account and going here: WHMCS.
We have a full comprehensive guide on integrating WHMCS with your reseller account to get you started as quick as possible.
All our Reseller Hosting comes with a free WHMCS module and get can a discount on their WHMCS license.
Read more about why it might be right for you to consiter a alternative to WHMCS
 Austin B.
How do I use Git version control in My20i?
My20i includes a graphical user interface to manage Git™ version control.
You can clone, manage and deploy Git repositories directly. You're able to manage multiple repositories in one package, allowing you to keep track of version changes and deploy your sites as and when you’d like - at the click of a button.
To access this tool:
- Log into My20i and head to your Manage Hosting area.
- Select Options > Manage on the hosting package you’d wish to edit.
- Under the Web Files area you should see the option for GitTM Version Control – select this option.

- You’ll be prompted for a name and email – set these to be the name and email you’d like to show when deploying using Git, and select Enable.
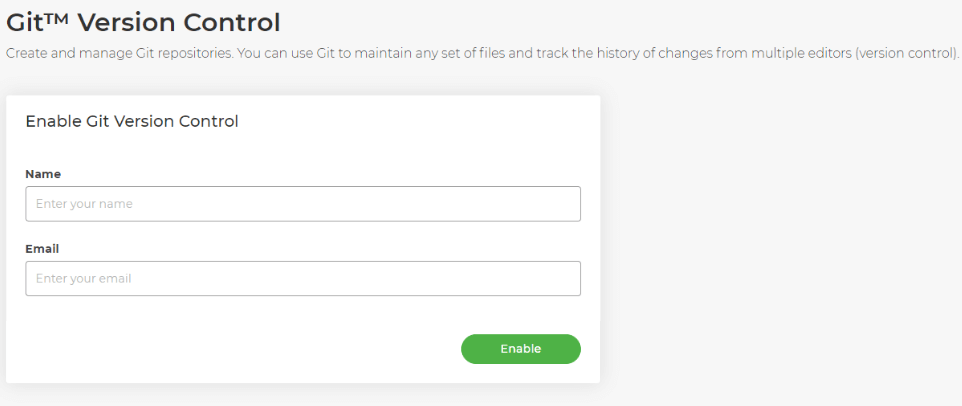
You'll then see your current repository list, and see options to set up your first repository.
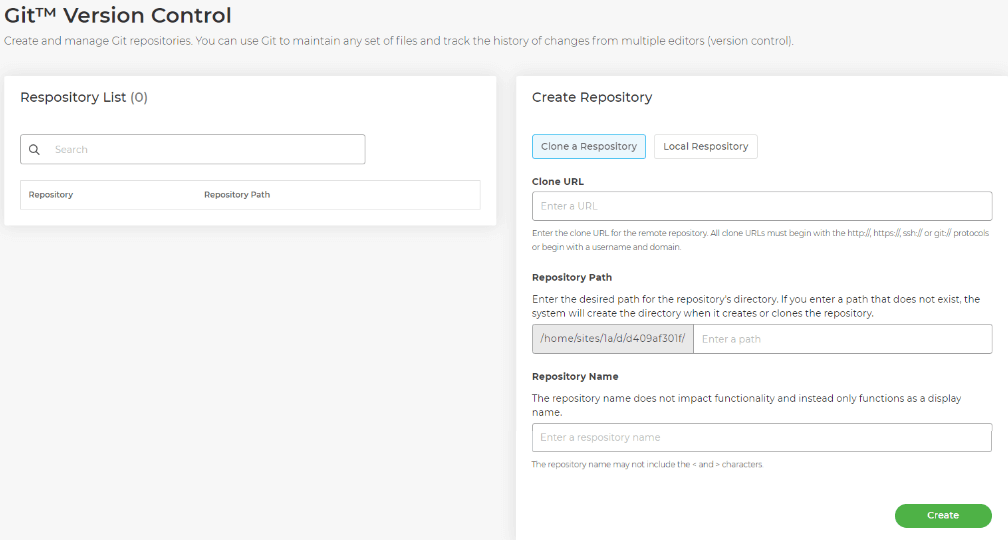
Cloning a Git repository
Cloning a repository via the tool requires you to first create a remote repository using GitHub, following the steps highlighted in their documentation.
Once done, head to the repository and copy the URL by selecting Code, then copying the URL provided without the SSH protocol included.
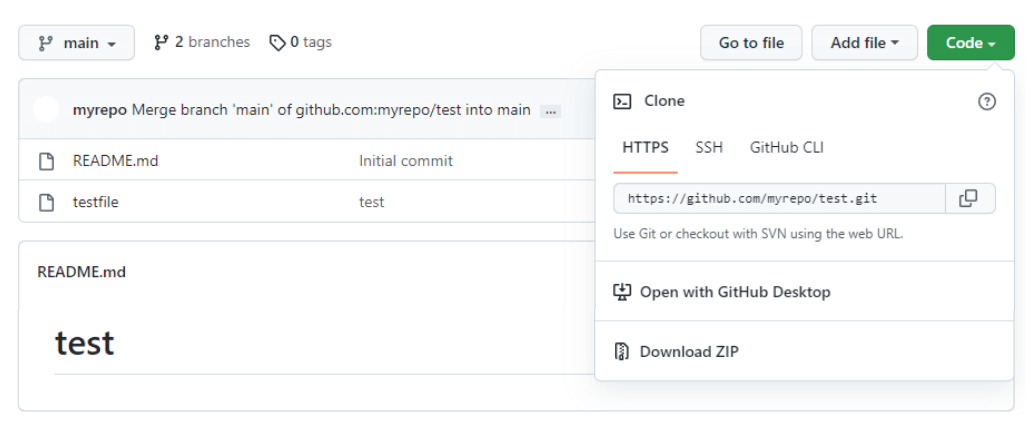
Note: For private repositories, you'll need to set up a public/private key pair and use the SSH URL provided instead.
Once you have the URL above, paste it into the Clone URL area, then set the file path of where you want your repository to set up. Lastly, set up a Repository Name - this is purely a display name for the UI itself.
Then, hit Create. Once done, your repo should show in the list like this:
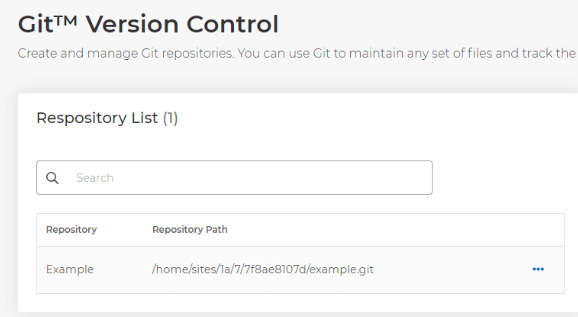
You can then use the three dots to manage the repository, check the history, go to the files directly via File Manager, copy the URL or remove the repository from the list.
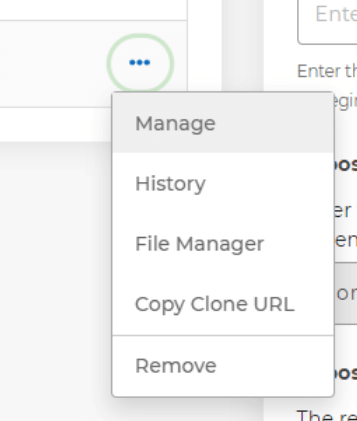
Managing a repository
Managing a repository allows you to check and update information about the repo itself. You can do so via the Basic Information tab:
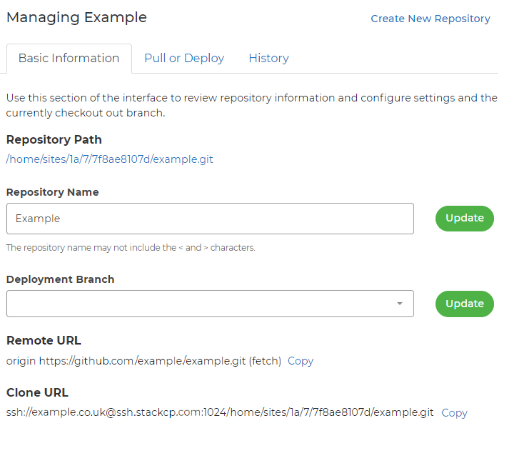
You can also pull or deploy changes to the repo using the Pull or Deploy tab. Select Deploy HEAD Commit to deploy the changes you've made to your repository directly.
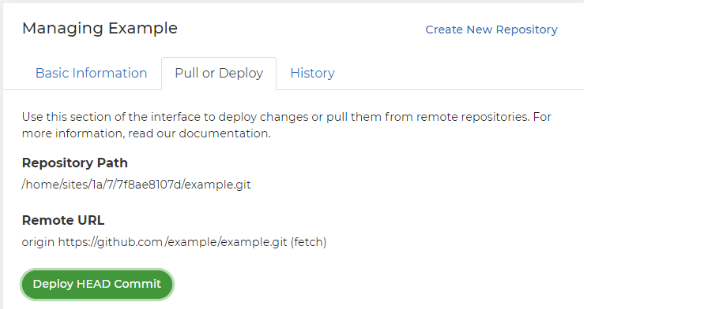
You can use the History tab to see what changes have been deployed in the history of the Git setup.
Creating a local repository
If you don't want to deploy to a remote repository, and instead simply use a local one in your package’s file space, you can set this up via the UI too. To do so, select Create New Repository and then hit the Local Repository tab.
.png)
You can then fill out the fields to choose the folder you'd like the repository to be in, the name, as well as selecting the Deployment Type and Deployment Branch.
The type defines whether or not you want automatically to deploy changes, or if you want to only deploy your changes when manually selecting the Deploy button.
The branch is what Git branch you want to deploy these changes to. You can have multiple branches of development to work from if you want to make tweaks to the code without affecting your repository's main codebase.
More information on branches is available here: Using Git Branches.
How do I use Master FTP?
As a 20i Reseller you can use Master FTP to globally unlock your own IP address across all your hosting packages.
This is so that you don’t need to worry about unlocking FTP for each package every time you need to access them.
To use Master FTP:
- Create a StackCP User for yourself. To create a StackCP User please see this guide.
- Locate your StackCP User from the list and select Options > Edit
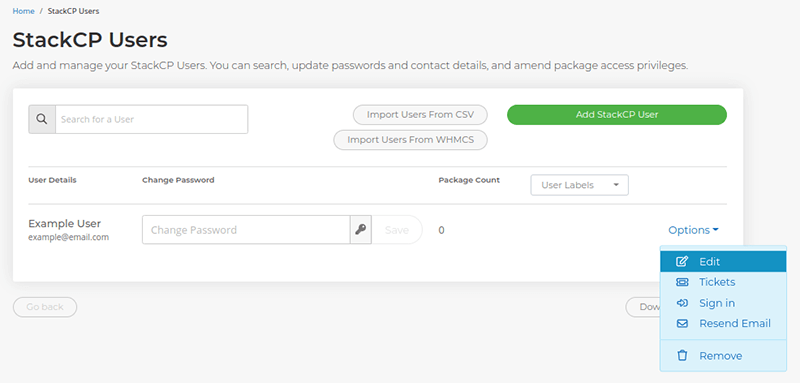
- Select all the Packages you would like to access via Master FTP, then select ‘Save’.
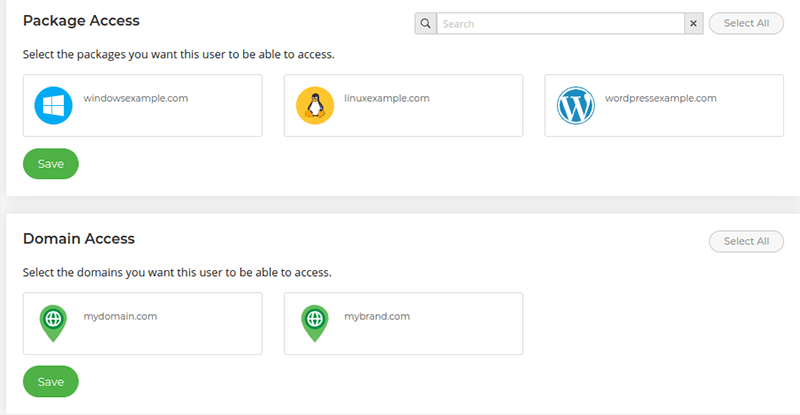
- Select Options > Edit again. This time, scroll to the bottom and you'll see the ‘Master FTP Access’ section. From here, you can select Enable Master FTP and enter your own IP address. This will enable you to gain access to all site files via a single login from this IP.
- Select ‘Add’ once you've entered your IP address

- You should use the following details to connect via your FTP client:
- Host: The value of this depends on which data centre your package is located in.
For packages in the UK: masterftp.gb.stackcp.com
For packages in the US: masterftp.us.stackcp.com
- Username: the StackCP User's email address (e.g. email@example.com)
- Password: the StackCP User's password
You'll now be able access the packages you selected earlier using these details.
 Austin B.
Should I transfer my site to the WordPress platform?
Yes - absolutely, to get the best performance from a WordPress site it's best to transfer it to the optimised WordPress platform. While you can still run your website on our standard shared Web Hosting, our WordPress platform is optimised and includes WordPress Tools.
 Austin B.
Can I set a default PHP version for my packages?
Yes, you can set the PHP version you'd like your different package types to be provisioned with.
If you are a hosting reseller you might want to set a default PHP version for certain packages you offer to your customers.
Why set a default PHP version?
As a web developer, agency or owner of multiple websites setting a default PHP version can bring benefits in managing your projects.
With each new version of PHP, there are often changes to the language and new features introduced, which can affect how websites and applications function.
Having a default PHP version simplifies the process of managing different versions of PHP. It allows administrators and developers to easily switch between versions when necessary, without having to modify configuration files for every website or application you manage.
It also helps to prevent compatibility issues with plug-ins or themes if you are hosting WordPress websites.
How to set the default PHP version
To set this, firstly head to Manage Services > Configure Types. You can set the default PHP version on a per-package type basis, just select Options > Edit on the package type you'd like to set the PHP version on.
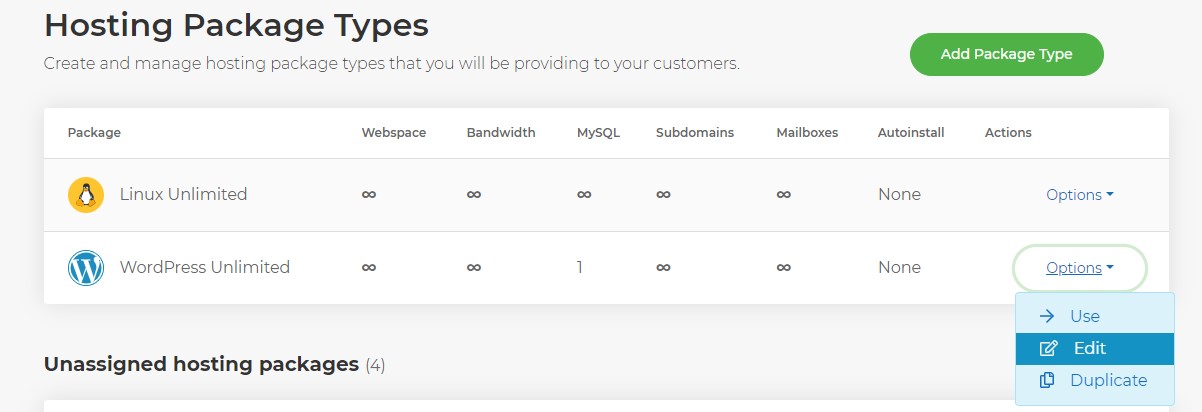
Head to the section (near the bottom) entitled Default PHP Version. Select the default PHP version you'd like to be used on this package type and select Save Changes.

When a new package is created using the package type you've edited the default PHP version will be what you've just set.
 Austin B.
Can 20i provide support to my clients if they require support?
We're happy to provide 24x7x365 support to our direct hosting customers.
However, if you're a Hosting Reseller, 20i cannot directly provide support to your customers. We value the specialist support that we provide to our clients: our response rates are the best in the industry. So at least at this stage, we can't risk devaluing one of our most important features by providing support to everyone.
If your customer requires support, they need to speak directly to you, the reseller. From here you can communicate issues your customers are having to us.
We're happy to provide support to all our UK and US hosting resellers this way.
 Austin B.
Why am I getting a 'Too Many Redirects' error?
'Too Many Redirects' errors are caused by sites stuck in a loop of redirects.
What is the ERR_TOO_MANY_REDIRECTS?
One or multiple redirections point to themselves, resulting in the site being unable to load as it will continuously redirect until either the browser stops it early or the site goes down.
Most commonly, ERR_TOO_MANY_REDIRECTS are caused by incorrect or poorly-defined redirect rules in your .htaccess file, or a plugin forcing a redirect over and over.
Common causes of ERR_TOO_MANY_REDIRECTS
Below are some common causes - 'always true' rules, mixed content and caching. We'll explain what they mean and show you how to fix them.
Always true rules
Redirect rules set in the .htaccess file have conditions. These conditions decide when a redirect rule should redirect a site, so that the site doesn’t always redirect. If these conditions aren’t set correctly however, they can always be ‘true’, meaning that the redirect will always occur and as a result the site will loop.
For example, we have a site domain.com and we try to redirect this to our subdomain my.domain.com
One way we could do this is via the following:
RewriteCond "%{HTTP_HOST}" "domain.com$"
RewriteCond "%{REQUEST_URI}" "^/"
RewriteRule ".*" "https://my.domain.com/" [L,R=301]
In the above example, we have our condition:
RewriteCond "%{HTTP_HOST}" "domain.com$"Which states that, if the URL contains ‘domain.com’, redirect the site. However, this will lead to a loop, as our subdomain also contains ‘domain.com’, resulting in the too many redirects error.
A much better way to do this redirect would be instead to use:
RewriteCond %{HTTP_HOST} !^my\.domain\.com [NC]
RewriteRule ^(.*)$ http://my\.domain\.com/$1 [R=301,L]
Which instead uses the condition:
RewriteCond %{HTTP_HOST} !^my\.domain\.com [NC]This checks to see if the URL is not the subdomain, and redirects the site if it’s not.
It’s worth looking through your rules and making sure this type of logical loop doesn’t occur.
If you’re unsure, try renaming your .htaccess file. If the error stops when doing so, something in that file is causing the loop itself.
Mixed Content
The term ‘Mixed Content’ refers to when parts of a website on HTTPS try to load content over HTTP. In more uncommon cases, this can result in a site correcting itself to HTTP, then redirecting to HTTPS, resulting in a loop between the two which causes the ERR_TOO_MANY_REDIRECTS.
In cases such as this, it’s best to temporarily remove any rules that may be enforcing HTTPS, and then updating all of your site’s URLs to ensure they’re either all on HTTP or all on HTTPS.
We have a full guide on finding and fixing mixed content here.
Force HTTPS Scripts
Some Content Management Systems (CMS) such as Joomla have options that can force HTTPS connections to your site as a part of the integration. Enabling these makes tweaks to the code to enforce this – however, if you’ve already included your own scripts to force HTTPS or are using 20i’s option to do so in the SSL/TLS area, then this could potentially conflict and lead to a loop.
Check your current CMS setup to see if any options to force HTTPS connections are enabled. If they are, disable or remove any other scripts or options that will be enforcing this to remove any conflicts.
Caching
Caching can also cause a redirect loop as site and server caching can store redirects, resulting in a rule that has been removed to continue to be used.
The quickest way to check to see if this is the case is to visit the site with a query string at the end, for example:
https://mydomain.com/?nocache
Anything after the '?' is ignored, so you can write anything. Doing so will bypass the cache on the site and force the site to load directly.
If the site then loads fine without the redirect error, you can confirm that caching is what's causing the redirect.
Check your site for any cache folders and clear them, and then clear the edge cache from within your package:
- Log into My20i and head to your Manage Hosting area
- Select Options > Manage on the hosting package you’d wish to edit
- Select Edge Caching from under the CDN section of the package

At the bottom of the Edge Caching page, select Purge Everything. The server cache will be cleared within a few minutes.
Now you should be free of the 'too many redirects' error. Get in touch with our support team if you need further help.
How do I customise the limits for an individual package?
You may want to customise what is shown in StackCP for an individual package. For a particular user, for example.
However, you may not want to make changes to the hosting package that will affect everyone on that package type.
Here's how to do that:
- Go to Manage Hosting and locate the package that you want to customise
- Hover over Options and select Edit
- Select the text link at the top of the page: Edit Hosting Package
- You'll be shown the limits being used for that particular package
From here you can alter the limits, only affecting that particular hosting package. This means that you can customise what that individual user has available.
 Austin B.
How do I receive a copy of the mail quota emails sent to my customers?
If you'd like to receive a copy (via Bcc) of the emails sent to your customers warning them that they're approaching their mailbox quota, you can opt into these by heading to Reseller Preferences > Reseller Customisations.
Locate the section entitled Customer Email Options and select the checkbox to Bcc your My20i account email address into those emails. Your 20i email address will be added as a Bcc address to emails sent to your StackCP Users about their mailbox usage. It will allow you to monitor and potentially upsell customers a mailbox upgrade.
 Austin B.
Can you add support for features I would like to use or offer my clients that is not yet supported?
Customer feedback is invaluable to us at 20i.
Although we have over 20 years' hosting experience, we're a young company and we're always learning.
We take great care when it comes to listening to customers and acting on suggestions and recommendations. You can submit all feedback within Your Feedback in My20i. Some of our most innovative ideas originated from customer feedback, so we read and discuss everything you send to us.
 Austin B.
Domain status clientHold: meaning and troubleshooting
When checking WHOIS for a domain, one of the entries that will show is the Domain Status.
This is a brief summary of the current state of the domain and will change based on what the registry is currently doing with it. Usually these are rather self-explanatory: for example, a domain status of ‘ok’ simply means the domain is working correctly.
Some, however, are unclear at a first glance but can be rather important to be aware of.
What does the Domain status clientHold mean?
One such status is clientHold. In this status, the domain registrar has put a hold on the domain until the current owner of the domain takes action that they require.
During this hold, the domain may stop resolving any DNS until the verification has passed.
This will result in any emails not arriving at the domain, as well as the sites on it becoming inaccessible. As such, it’s important that you work to clear this status as soon as possible.
The action required to clear the status can differ depending on the context, however a few common requirements are as follows.
How to resolve the clientHold status:
Contact Verification
Whenever a new domain is registered or the contact details on an existing domain are modified, the domain will be put into clientHold while the registrar verifies the new details. This verification process usually involves accepting an email sent to the Admin contact email of your domain.
Once accepted and the steps in the verification link are followed, the status should be lifted, and the domain will come back online within a few minutes.
Expired Domain
Occasionally, upon a domain date passing its expiry date without being renewed, the domain will be placed into clientHold to suspend it until payment is made.
If your domain is in clientHold, check the expiry date. If it’s due for renewal, the best course of action would be to renew it with your current registrar as soon as possible. The renewal should bring the domain back online once complete.
Compliance Issues
In rare cases, the registrar may suspend or place a domain in clientHold due to the contents of the site on the domain, or the domain name itself, not following the terms set by the registrar.
In situations such as this, it’s best to reach out to your registrar directly. Confirm why the domain has been put on hold, and the necessary steps you need to take in order to clear the status.
In most situations, the best step on seeing the clientHold status placed on your domain would be to reach out to your current domain provider and confirm why it’s been placed on hold. Once this is known and the necessary steps are followed, your domain will be brought back online by the registry and DNS should begin resolving as normal.
 Reudiger Dalchow
How do I add an avatar picture to my My20i account?
The My20i avatar - the picture in the top right corner - uses Gravatar. So to display an avatar within 20i you'll need to head over to Gravatar and create one there.
My20i will automatically detect this and an avatar will display in your 20i account.
 Austin B.
What can the Migration Centre move?
As a 20i Reseller our Migration Centre gives you free and unlimited website migrations. The Migration Centre helps ease migrations from other providers. Currently, we support 6 types of migration sources:
- Migrate from cPanel
- Migrate from Plesk
- Migrate from DirectAdmin
- Migrate from Fasthosts
- Migrate from Heart Internet
- Migrate a WordPress site using FTP. This can migrate any WordPress site you have FTP details for.
The Migration Centre will copy all your website files, databases and mailboxes* over to the 20i platform. Once the website migrations are complete, we will automatically update the DNS records on our nameservers to point the website and mail records to the new hosting package.
Then you need to test the newly migrated package and update the nameservers on the domain name to point to our platform, like you'd do with any manual website transfer.
Please note the Migration Centre does not migrate domain names. These can be done quickly using our control panel before or after the website migration.
To access the Migration Centre, follow the Start a Migration icon from the homepage of My20i.
Note: *Migrating a WordPress site using FTP details will not migrate any mailboxes associated with the package.
 Lloyd Cobb
Can I CC in an email address to StackCP User mail usage emails?
Emails can be sent out to your StackCP Users warning them when they get close to hitting their mailbox quota. You can CC in a sales or business email address so that if a customer wishes to upgrade it's easy for them to know who to contact.
You can set this up by heading to Reseller Preferences > Reseller Customisation. Locate the section entitled Customer Email Options and add the address you'd like to appear to be CC'd into the Mail Quota CC Email Address field, this will usually be something like a sales@ mailbox. Once saved, mail usage emails will contain the CC'd in email address for your customers convenience.
 Austin B.
I get a 500 error from a new hosting package on Windows
Internal server errors (Error 500)
Our Windows platform connects to our central storage system using authenticated access. This can take up to 30 minutes to fully provision for new websites.
If you've recently created a Windows hosting account and receive a 500 error via the temporary URL please check back again in 30 minutes to allow setup to complete in full. You can find more information about internal server errors here: Why am I getting an internal server error?
 Lloyd Cobb
How do I change my US Reseller Hosting Tier?
Our US Reseller Hosting is available in three different tiers - Reseller 25, Reseller 100 or Reseller Unlimited. Reseller 25 and Reseller 100 are subject to usage limits - see here for more information.
How do I upgrade my Reseller Hosting to the next tier?
To upgrade your Reseller Hosting account, you would need to go here - This can be accessed by selecting Upgrade Options on the My20i homepage.
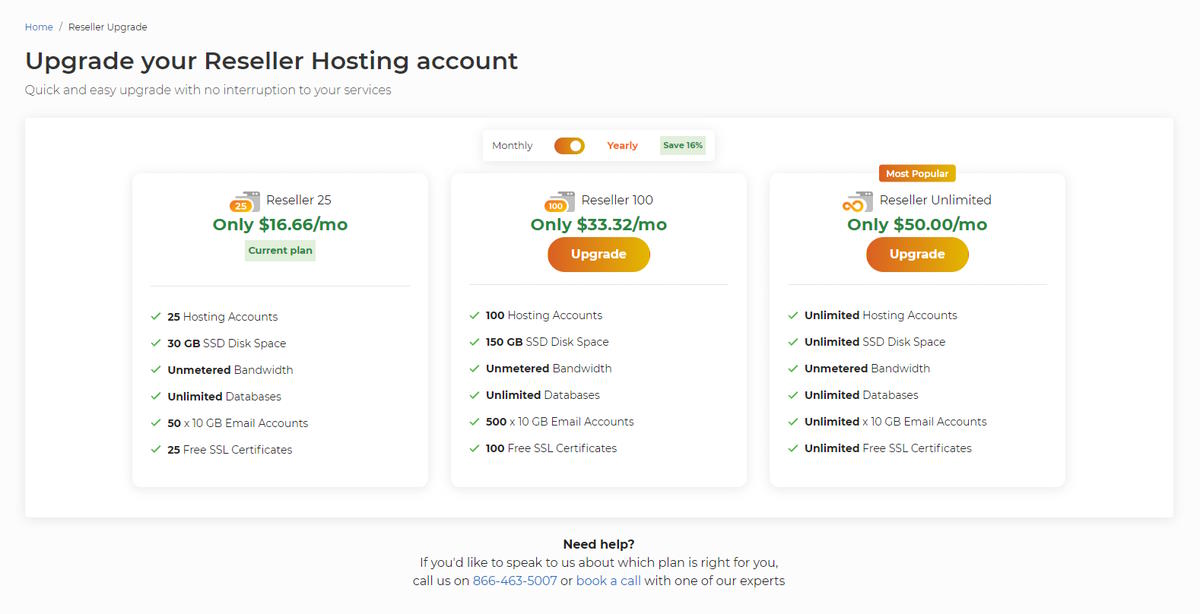
How do I downgrade my Reseller Hosting to a lower tier?
In order to downgrade your Reseller Hosting package, you would need to contact our Technical Support team via a Support Ticket. The team is available 24 hours a day, 7 days a week. A ticket can be raised from within your My20i account here.
Comparing the 3 Reseller Hosting Plans
- Reseller 25: Catering to startups and small businesses, this plan includes 25 hosting accounts, 30 GB SSD disk space, unmetered bandwidth, and 25 free SSL certificates. With a monthly cost of $19.99 after the first month, it also comprises 50 x 10 GB email accounts, complimentary malware scanning, and expert support.
- Reseller 100: Aimed at expanding businesses, this plan features 100 hosting accounts, 150 GB SSD disk space, unmetered bandwidth, and 100 free SSL certificates. Priced at $39.99/mo after the first month, it additionally provides 500 x 10 GB email accounts, complimentary malware scanning, and expert support.
- Reseller Unlimited: Crafted for established businesses and agencies, this plan grants unlimited hosting accounts, SSD disk space, bandwidth, and SSL certificates. For $59.99/mo after the initial month, it encompasses unlimited 10 GB email accounts, free malware scanning, and expert support.
See all the features and how 20i Reseller Hosting compares to our competition.
Which Reseller plan should I choose?
- Reseller 25: Perfect for startups and small businesses with a limited clientele, seeking a cost-effective yet robust reseller hosting solution.
- Reseller 100: Appropriate for growing businesses with an expanding client base, necessitating increased resources and scalability.
- Reseller Unlimited: Optimal for well-established web hosting businesses and agencies managing an established clientele, requiring flexibility and unlimited resources.
 Chris Wright
Using Email Templates
Use our Email Templates to create a fully branded and cohesive experience for your customers. Quickly and easily set up and send emails for significant events and customer-related scenarios.
It’s worth noting that while sending emails to your customers isn't mandatory, it is recommended because they can contain valuable information.
Please note, if you're using HostShop you can find HostShop specific email templates here: https://my.20i.com/reseller/hostshop/email-templates.
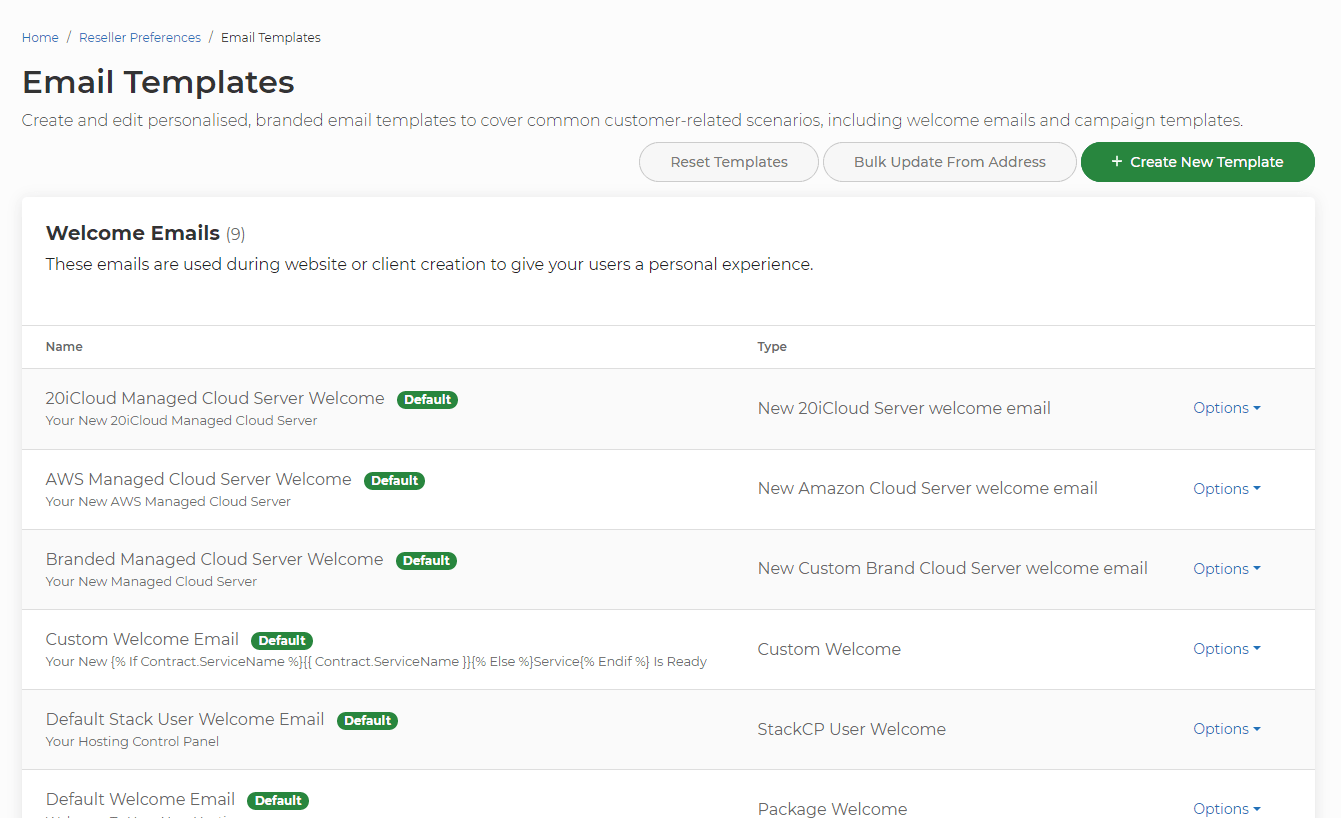
The process allows for complete customisation of the email templates, letting you add dynamic customer information like their name, username, services, and more. The email templates are organised into five distinct categories based on their purpose and the events that trigger their sending:
Welcome Email Templates
These are utilised during the creation of a website or customer account.
Package Welcome Email
You can set Welcome Emails for specific hosting package types (i.e., WordPress Unlimited) by heading to Package Types > Options > Edit > Service Setup Welcome Email. Choose the email template you want to send when a customer creates a website using the hosting package type selected.
StackCP User Welcome Email
A welcome email can be sent to a customer when they are first added from the Add a StackCP User page after selecting Save, or you can resend the welcome email by going to StackCP Users and selecting Options > Resend Welcome Email.
StackCP Ticket System Templates
These are used by the StackCP Ticket System to notify your customer of updates to their support tickets. It's important to refer to the Type to accurately determine what event causes an email to be sent.
Email Marketing Templates
These are used by the Email Marketing feature, allowing targeted emails to be sent to customers. You can create templates in order to directly market products and features to your customers.
StackCP Usage Notification Templates
These are designed to alert users when they are nearing the limit of their assigned email storage quota. You can make use of the Email Manager to set the notification limits for your mailboxes, or these mailbox limits are set by default by the hosting package type a mailbox is added to.
StackCP System Email Templates
Utilized for essential billing information and password reset emails sent to your customers.
It is advisable to use the Bulk Update From Address tool to set a 'From' address for all templates. The recommended email address to use is one associated with 20i that has valid SPF and DKIM records.
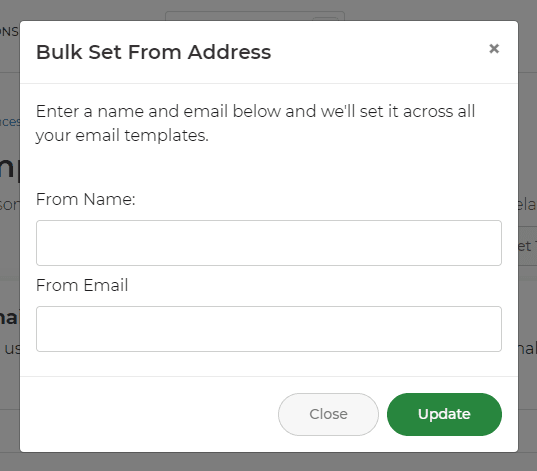
To modify an email template, you can navigate to Options > Edit.
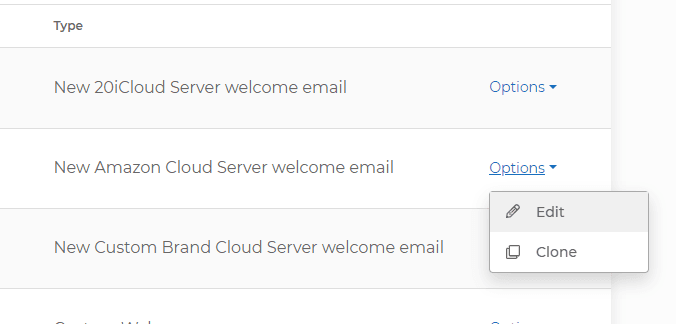
Although customization of the template and content is possible, it is generally suggested to keep the Email Type set to HTML, as this facilitates the insertion of dynamic tags. These Email Tags permit the inclusion of dynamic content such as customer names, passwords, or products, making the emails more personalized and relevant to each recipient.
 Austin B.
WordPress Manager Client Reports
If you're a Reseller or Agency who needs to share details about WordPress websites with clients, WordPress Manager Client Reports have got you covered.
These handy reports allow you to share specific details about a site by toggling on/off the information you want. Here's what you can include:
- Plugins: List of all active plugins and their versions.
- Themes: The active theme and its version.
- SSL: Whether an SSL is active on the site.
- Staging Site: Any active staging site and its URL.
- WordPress Version: The site's core WordPress version.
- Activity Logs: Full details of the activity logs from WordPress Manager.
You can find these settings within Reseller Preferences, on the Client Reports page.
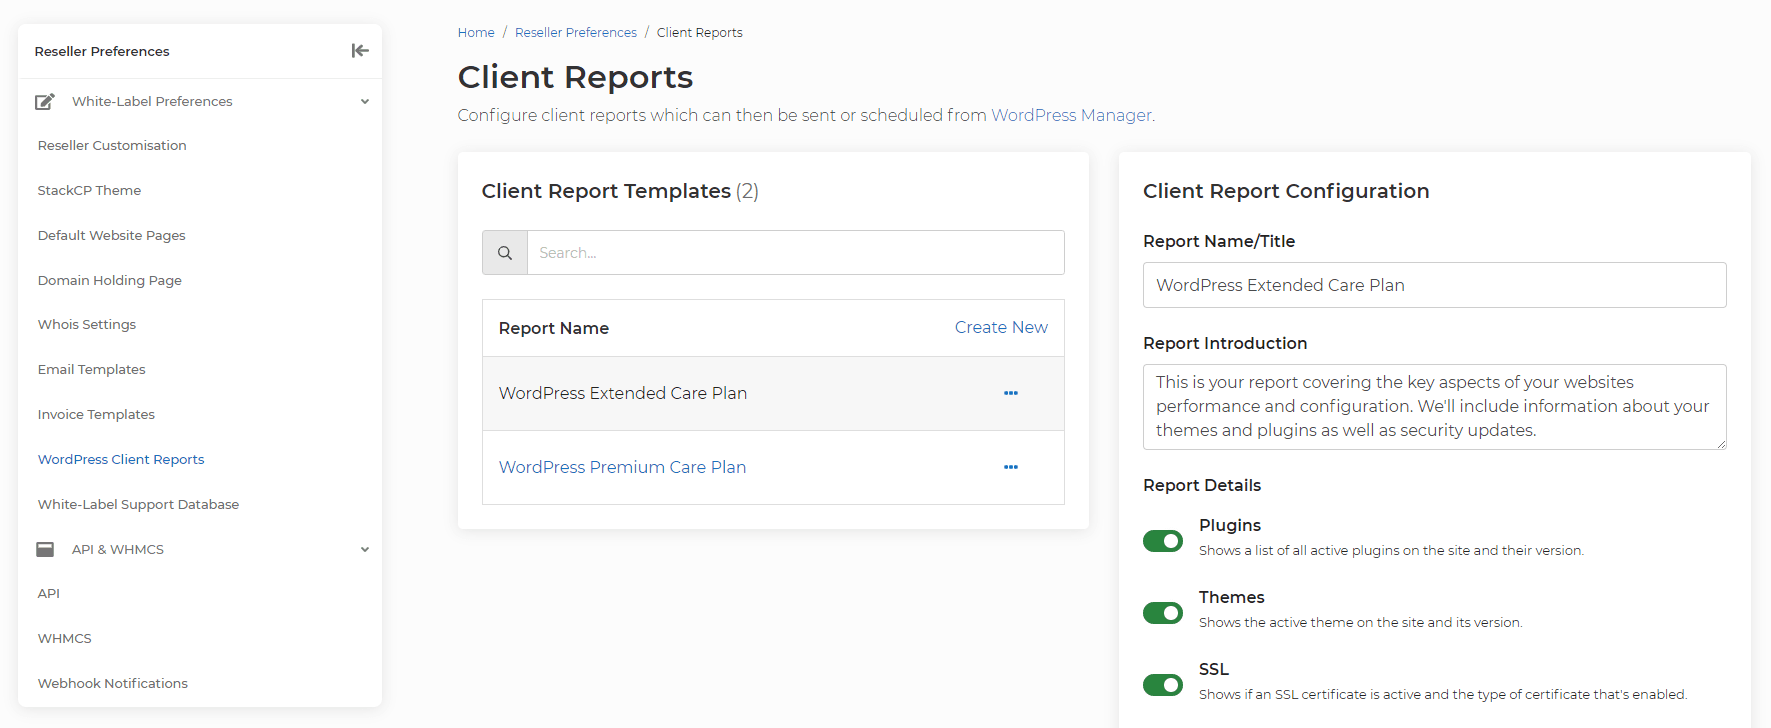
Setting up, sending, or scheduling reports is a breeze! Just follow these simple steps:
- Create a Report: Head over to the Client Reports page and set up a Client Report.
- Choose a Site: In WordPress Manager, locate the site and select Client Reports.

- Manual Send or Schedule: Reports can be manually sent or scheduled to go out at a recurring time.
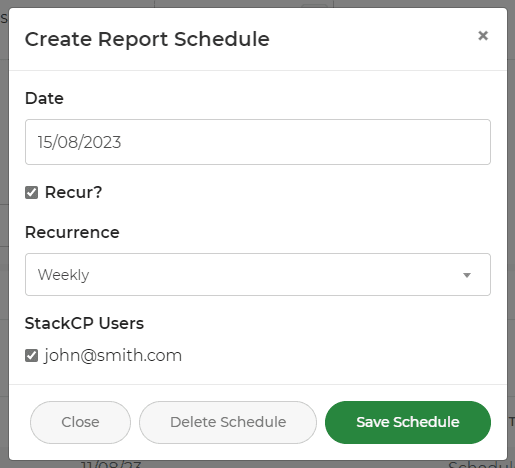
- Select a Recipient: Pick a StackCP User to receive the report (they must be assigned to the package).
Note: If you don't have a StackCP User assigned to the hosting package you can assign one by heading to StackCP Users > Options > Manage > Access & Contracts.
Email Template
The email magic happens with the WordPress Client Report template, found under StackCP System Emails. You can update it with your branding and edits but we'd recommend leaving the tags in the body as they are. They're controlled by toggles on the Client Report Configuration page.
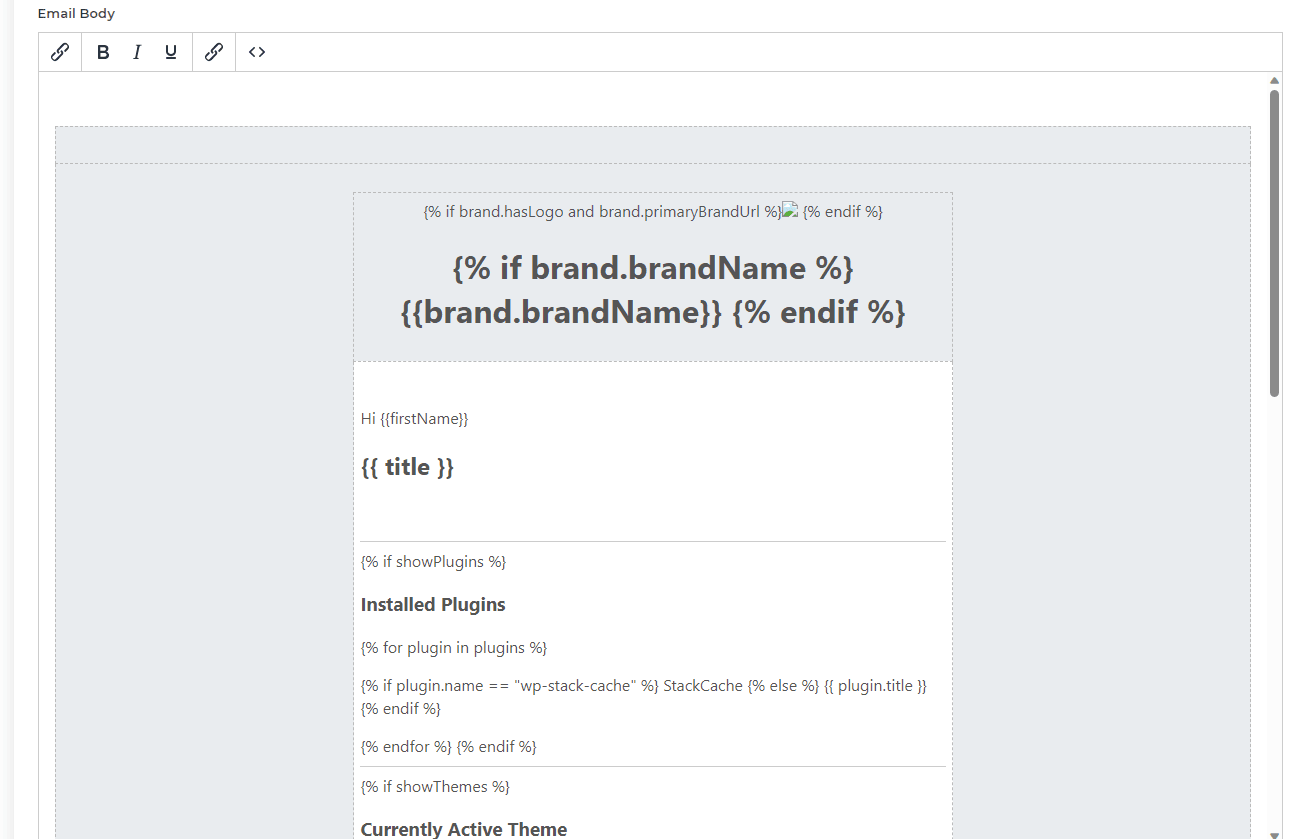
ℹ️ Hint: You could add additional information into the email template such as a link to your control panel, a link to a feedback form or any other information you might want to present to your clients.
 Austin B.
How to join the 20i Refer a Friend program
Our Refer-a-Friend program is designed to reward our loyal customers for recommending us to new ones. With this program, you and your friends can both earn £25/$25 in hosting credit when they become 20i customers and meet the eligibility criteria listed below.
You can refer as many people as you want and we don't place any limits on how much you can earn. You're free to use the credit to purchase new products or towards renewing any of your services with us.
How It Works
Accessing Your Referral Links
To get started, log in to your 20i account and navigate to My20i > Accounts > Refer a Friend.
You'll find three referral links that can take your referrals to different pages on the 20i website: the homepage, the Reseller Hosting page, and the Managed Hosting page.
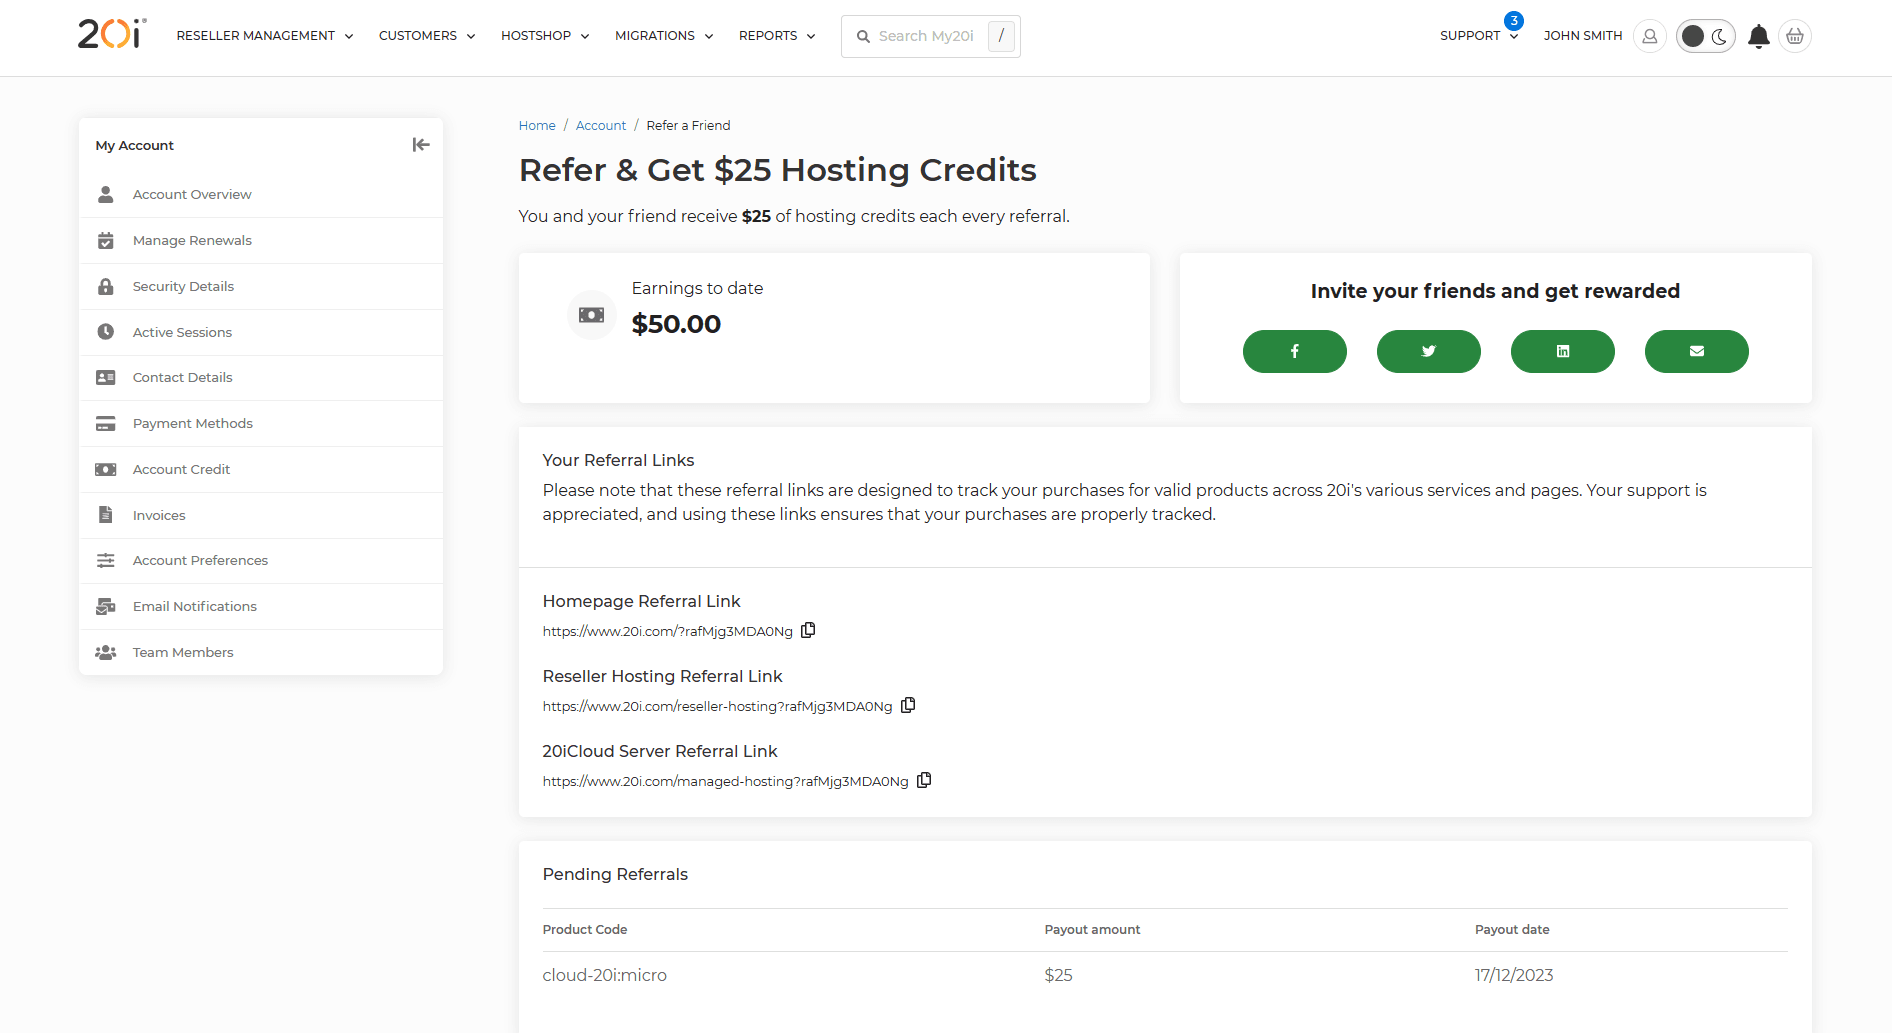
ℹ️ Note: Every link tracks all Reseller Hosting and 20iCloud Server purchases.
Share Your Referral Link
Share your unique referral link with your friends, connections, family or anyone who might be interested in our services.

Tracking the Purchase
When someone follows your referral link, their purchase will be tracked.
Both you (the referrer) and your referred friend can earn £25/$25 in hosting credit after they make a purchase.
We’ll send an email to both you and the referred customer when a purchase is made, letting you both know the 45 day countdown has started.
We’ll also send an email and a My20i notification when the £25/$25 of balance is paid out on day 45.
Payout and Notification
After the referred customer has been with 20i for 45 days following their purchase, we will initiate the payout of hosting credit to both accounts immediately.
Eligibility
To be eligible for the referral reward, the referred customer must meet the following conditions:
- Applies to Reseller Hosting and 20iCloud Managed Hosting.
- The purchase must be made through your referral link.
- The referred customer must remain with 20i for 45 days after their purchase.
- The referred customer must be new to 20i.
Our Refer-a-Friend program is a fantastic way to share the benefits of our Reseller Hosting and 20iCloud products with your network, all while earning hosting credits.
If you have any questions or need further assistance, please don't hesitate to contact our support team.
 Austin B.
Getting Started with Website Turbo
What is Website Turbo?
Website Turbo is a cutting-edge upgrade designed to significantly enhance the speed and performance of websites you host. Built with resellers in mind, this feature offers a high-markup, high-volume add-on, enabling you to maximize revenue and capitalize on the existing websites you host.
How does Website Turbo improve website performance?
Website Turbo boosts website performance in two primary ways:
20iCDN Pre-Caching: Once activated, Website Turbo begins pre-caching at all global CDN node locations available through 20iCDN. This ensures a cache-hit without the need for manual cache generation via real-world traffic, leading to super-fast page loading times at any moment.
High Frequency Compute: Websites with Website Turbo are automatically upgraded to utilize high-performance CPUs (4.2 GHz processors) to provide faster load times instantly.
What else comes with Website Turbo?
Expanded 5GB MySQL Storage: MySQL storage is instantly expanded to 5GB, providing ample room for growth for even the largest sites.
StackCP Pre-Cache Report: Optionally, you can offer your customers an exclusive Pre-Cache Report that lists all URLs on their website and indicates whether they are eligible for pre-caching, along with additional information
How do credits and volume discounts work?
Website Turbo utilizes a flexible credit system:
- Order Website Turbo Credits: Select the amount of credits you need. Unassigned credits will not be billed upon renewal.
- Assign Credits to Websites: You can assign and unassign credits to any website requiring enhanced performance at any time.
- Experience Lightning-fast Speeds: The combination of StackCDN Pre-Caching and High Frequency Compute dramatically improves website performance.
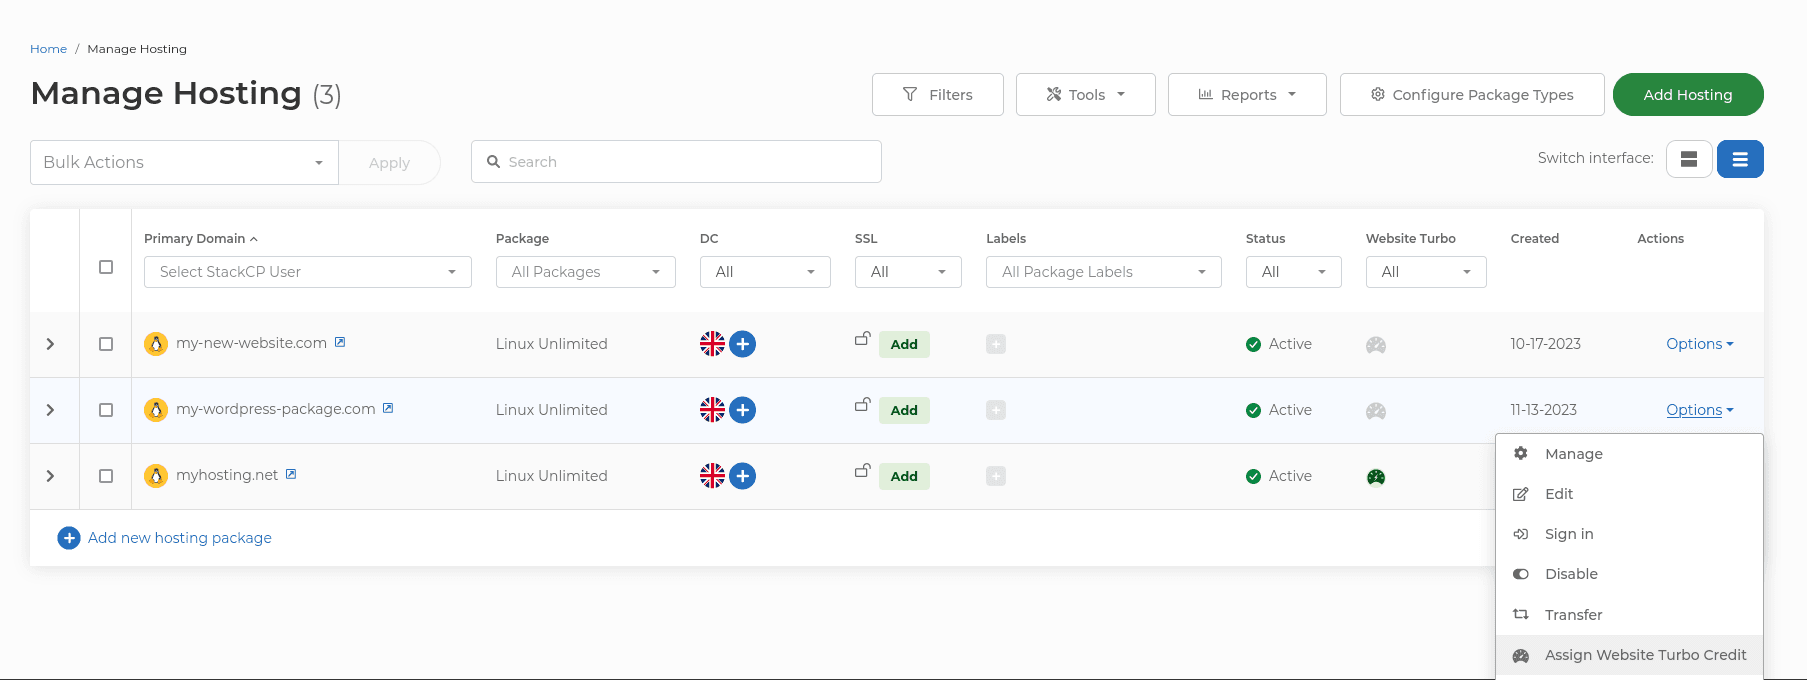
What volume discounts are available?
The more Website Turbo Credits you buy and sell, the more you save. Unlock volume discounts of up to 30% on monthly renewals. For more details on different tiers, please visit the Website Turbo page within My20i.
How does billing work?
All Website Turbo renewals occur on the 1st of each month to simplify your invoicing process. You will be billed monthly for all active Website Turbo credits.
- Pro-Rata Billing: If you add Website Turbo Credits at checkout in My20i, the price is pro-rated based on the time from purchase to the 1st of the following month. Orders placed in the final 7 days of a month will receive those days free of charge to avoid small, incremental billing.
 Austin B.
Automatically Provision Pre-Configured Sites with WordPress Blueprints

You can automatically provision a pre-configured WordPress sites through HostShop or WHMCS using WordPress Blueprints and Hosting Package Types. By assigning a WordPress Blueprint to a Hosting Package Type your pre-configured WordPress setup will be use as the template for newly created website.
With WordPress Blueprints, Hosting Resellers, Agencies and Developers can now create pre-configured templates for repeated use. This efficient solution eliminates the need to repeatedly configure themes and plugins.
For instance, if you are an agency or digital creator, you likely follow a specific deployment strategy for the plugins and themes you use in your projects, or you might want to offer specific types of hosting plans through HostShop or WHMCS.
Instead of setting up a new site from scratch each time and manually installing preferred plugins and themes, you can now do it once with WordPress Blueprints and reuse it for future installs, including websites created by your customers.
Use Cases
- WooCommerce Hosting Plans - Create a WordPress Blueprint with WooCommerce pre-installed.
- Visual Website Builder Hosting Plans - Install a popular WordPress website builder such as Divi, Elementor or WP Bakery to offer to your customers.
- SEO & Security Plugins - Pre-configure a WordPress site with relevant SEO and/or security plugins.
1. Create a WordPress Blueprint
Creating a WordPress Blueprint is simple. If you have an existing WordPress site you'd like to mark as a Blueprint then:
- Head to Manage Hosting.
- Locate the WordPress site and select Options > Enable as WordPress Blueprint
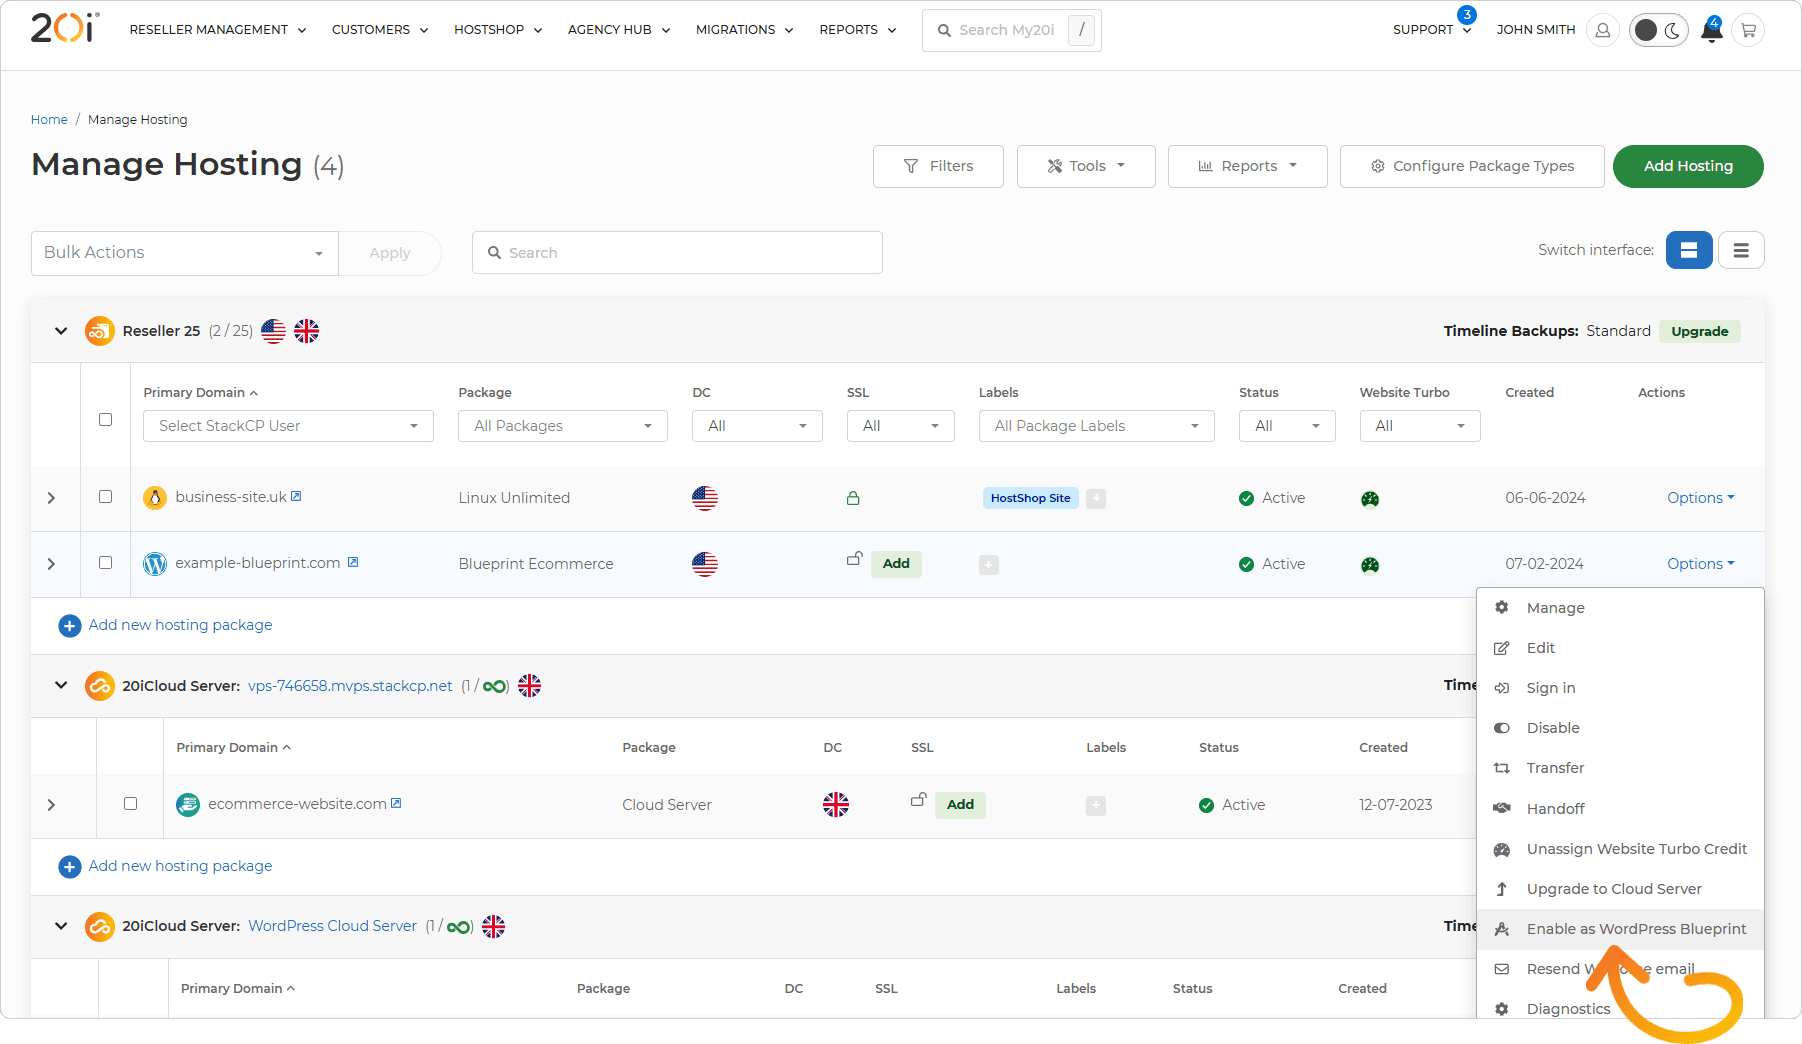
The WordPress site will need to be on our WordPress Platform to be enabled as a Blueprint - you can use the Platform Transfer tool to move an existing site to the WordPress Platform.
Ideally, you'll want to enable a package as a WordPress Blueprint when you want to use that site as a template to provision new sites from, this includes all the plugins and themes installed as well as any additional configuration done to the WordPress site - when a package is provisioned is from a WordPress Blueprint the website files and databases is cloned to the new site.
2. Connect a WordPress Blueprint to a Hosting Package Type
- Head to Hosting Package Types.
- Either create a new Hosting Package Type or Edit and existing WordPress Type.
- Locate the Create From WordPress Blueprint section near the bottom and choose the WordPress Blueprint you'd like to use.
- Save your Hosting Package Type.
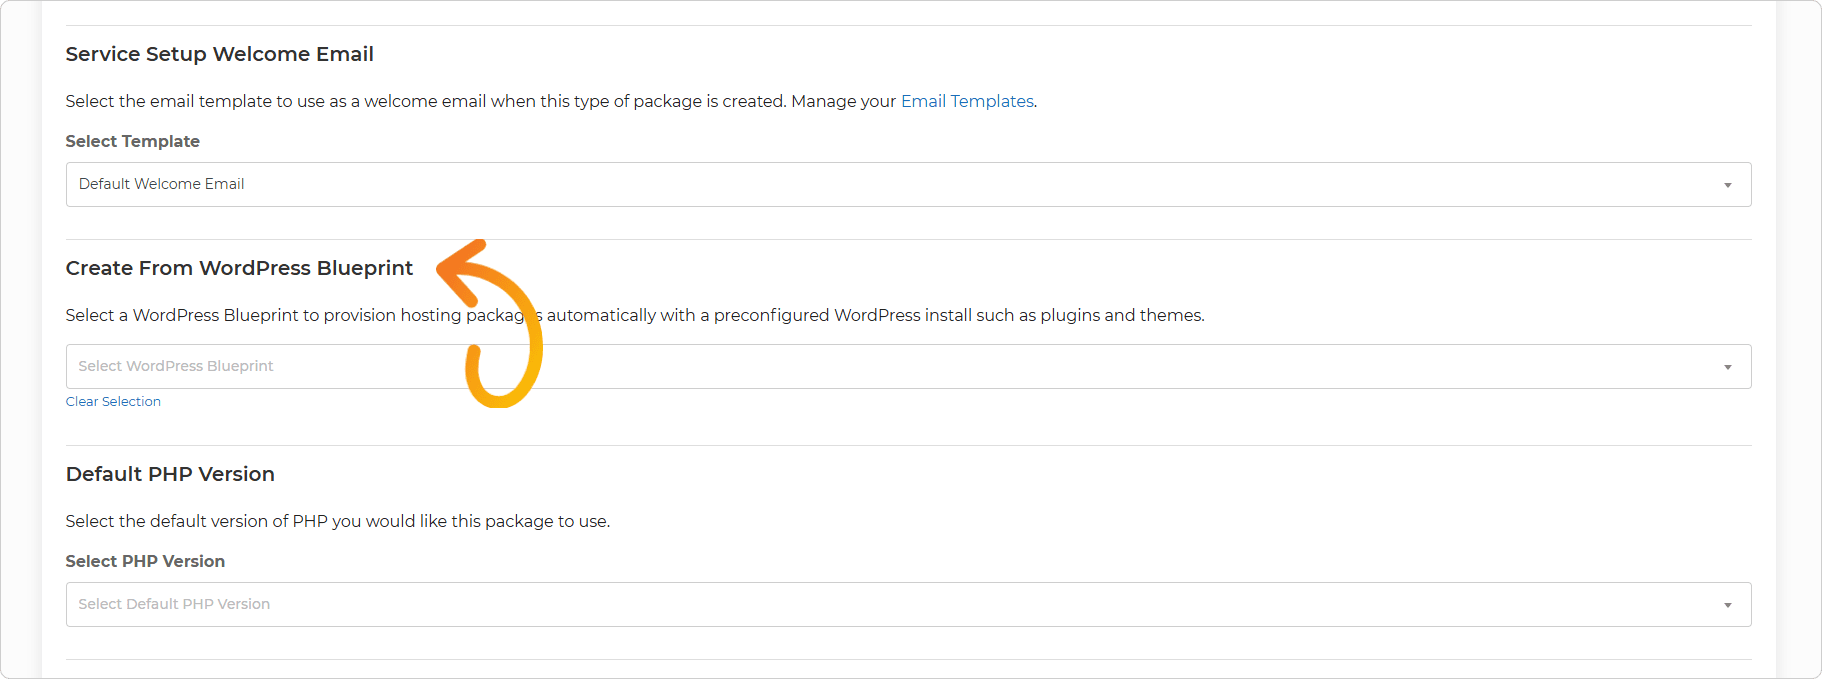
3. Add a HostShop Plan
- Head to the HostShop Product Catalogue.
- Select Hosting Products and from the Plan dropdown menu select the Hosting Package Type you've assigned a WordPress Blueprint too.
- Configure the Plan as normal by setting a price and renewal periods if required.
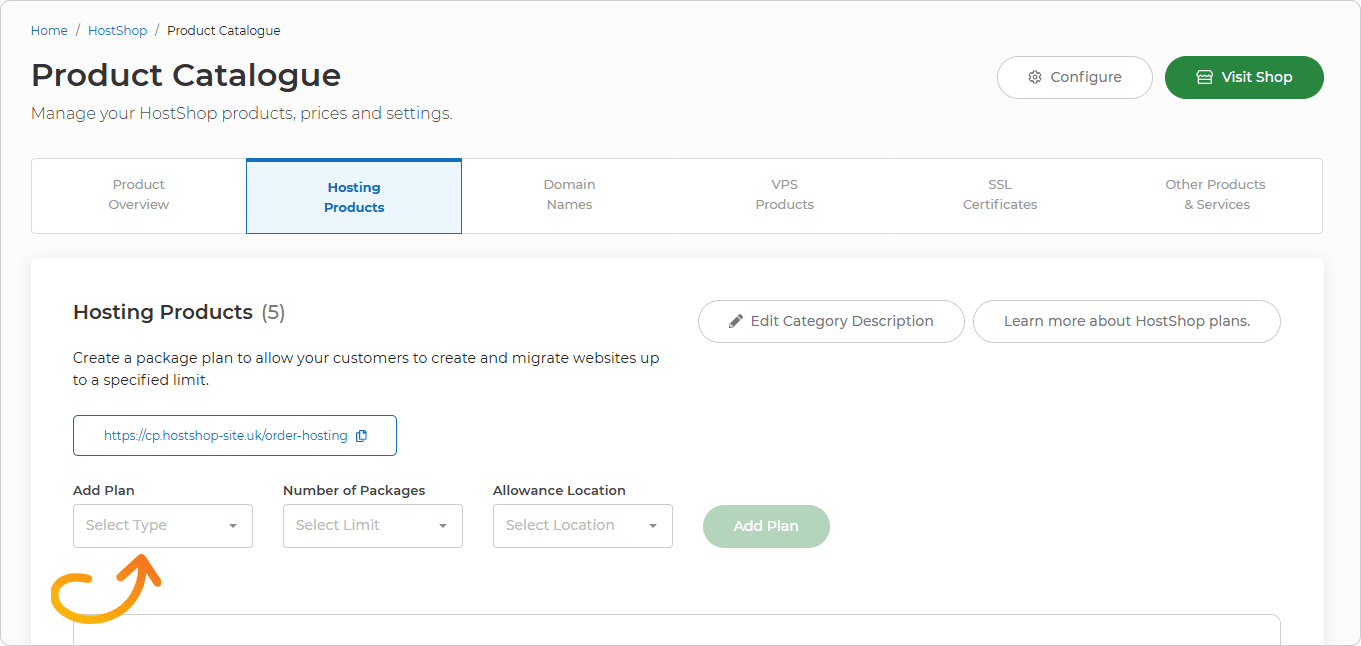
What's Next?
When a customer buys the newly created Hosting Plan any WordPress sites they add will be created from the WordPress Blueprint you assigned to the Hosting Package Type.
 Austin B.
Getting Started with Virtual Nameservers
This guide will go through the process of setting up virtual nameservers. Before following these steps you'll need to ensure that you have purchased virtual nameservers. This can be done by logging into your 20i account, hovering over Manage Services on the left-hand side of the control panel and clicking Order Virtual Nameservers.
You will also need to register or transfer a domain name into your 20i account and ensure that it’s using our nameservers. It's not possible to use a domain name that is registered elsewhere as your virtual nameservers. This is required due to the changes made to the domain and DNS to allow the Virtual Nameservers to work correctly.
Once you have a domain and have purchased Virtual Nameservers, you can set these up by hovering over Manage Reseller on the lefthand side of the control panel and clicking Manage Virtual Nameservers. This will show a page like this:
On this page, you can select the domain you wish to use in the dropdown box and then click the Configure Virtual Nameservers button to set nameservers to use that domain.
Once the domain has been set the page will update to look like this:
Once these have been set then the required changes will be made on our side for these nameservers to begin working. You will be able to update the nameservers on any domains to use these new nameservers and DNS will still be managed as normal within your 20i account.
 Corey Seymour
How to Create Hosting Package Types
As a reseller, you’ll have access to create package types which allow you to customise the limitations depending on what you want to offer to your clients.
To manage the package types within your account, you can click on the manage link under the Hosting Package Types section on the homepage. You can also click Configure Package Types under the Manage Services section within the sidebar on the left-hand side of the page.
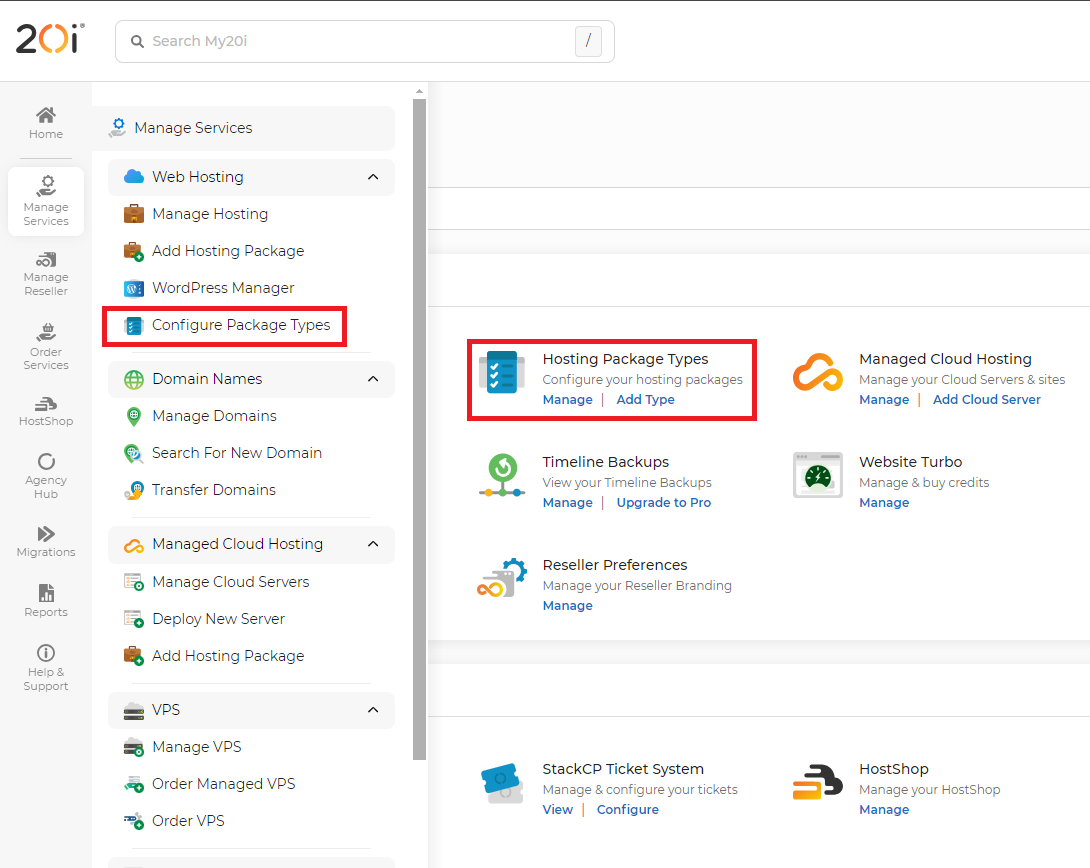
On this page, you’ll be able to see a list of package types you have created in your account. These are separated into two lists to show which are currently assigned to hosting in your account and ones that aren’t. These will also show a small summary on the limits that are set on them.
To create a new package type, click on the green Add Package Type button at the top of the page.
Here you can give the package type a name and choose the platform that it should use. If you scroll down you can choose limitations such as the amount of webspace that the package type has, to how many databases can be created on the hosting under the Package Limits section.
Further down are Package Features where you can choose what pages and features the package type will have access to. If for example, you wanted to offer a package that only has email capabilities, you can deselect all other services to prevent them from showing for your customer. You can also edit the email limits under the Package Features section.
It's also possible to assign Website Turbo to a package type so when it's created it will automatically add a Website Turbo credit to the package and provision on a Website Turbo server. This will use any available Website Turbo credits you have on your account or will purchase one automatically if none are available.

When you manage the package within your my20i control panel, you can still see all the options available. The limits will only be applied to the stackCP control panel that your own customers will use to manage the hosting.
If you have multiple welcome emails set up, you can choose which to send from the Package Welcome Email section. For a linux or Managed VPS based package type, you can also select what One-Click Installers you wish to show. You can choose to have them all show or choose to only have specific ones, you can also select one to automatically install when a hosting package is created.
Other options include setting a certain PHP version and adding an SSH key by default.
You will have mostly the same options when creating a WordPress package but will also have the option to also create the package based on a blueprint you have set up in your account. This will allow you to provision hosting packages automatically with a preconfigured WordPress install such as plugins and themes.
Once you have created the package type you will be brought back to the Package types page. You can also edit existing package types by clicking on Options and Edit.
Once the page opens you will have the same options as before so you can change these at any time. You will also have the option to set up a custom temporary URL domain so you can choose one that fits with your brand.
Once you’ve made any changes if you want to sync the changes with any existing packages using the same package type you can tick the Synchronise package type option and then click the Save Changes button.
 Corey Seymour
Enforce Two Factor Authentication on StackCP Users or Team Members
You can require your StackCP Users or Team Members to add a 2FA device to their account, improving overall account security.
StackCP
For StackCP Users, head to the StackCP Users page in My20i and select Options and 2FA Not Required to toggle the option on for StackCP Users. The next time the StackCP User logs into their account, they'll be prompted to add a 2FA device.
My20i
For My20i Team Members, head to the Team Members section in your My20i account and click the Edit icon. On the right-hand side you'll see Require 2FA Setup - select the toggle to enable this option. The next time the Team Member logs into My20i they'll be prompted to add a 2FA device.
 Austin B.
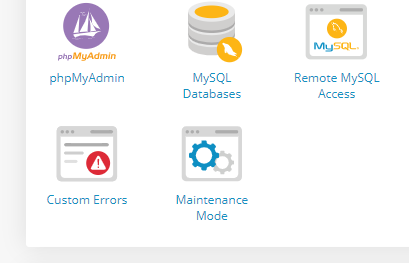


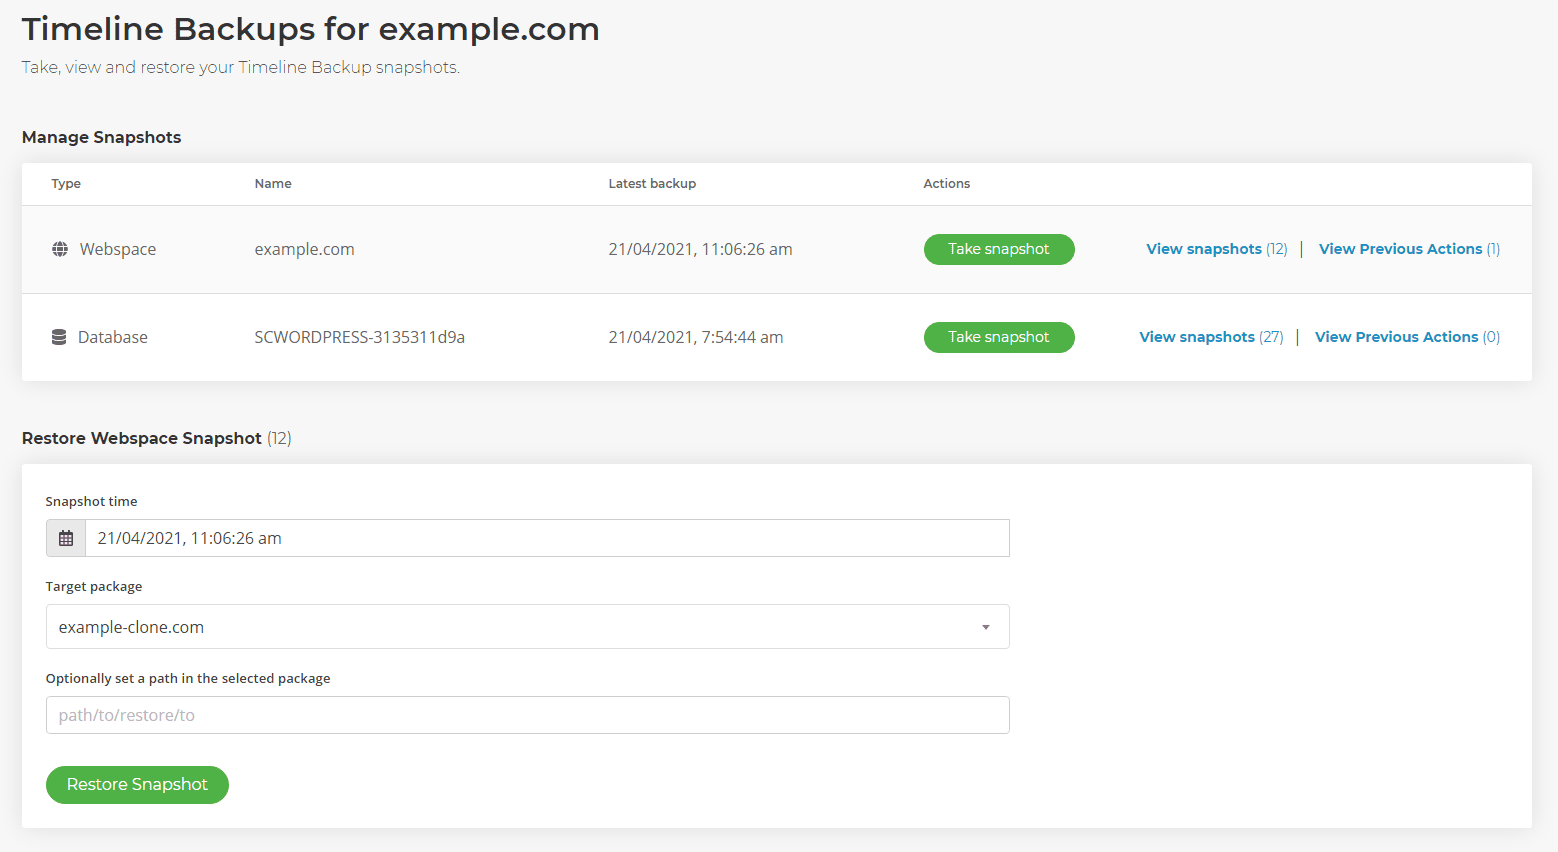
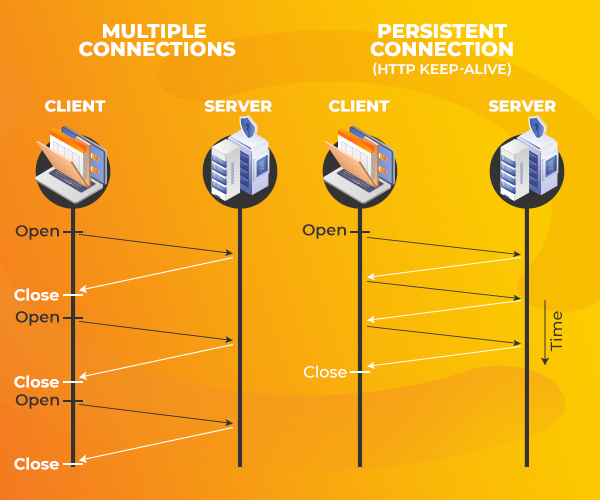


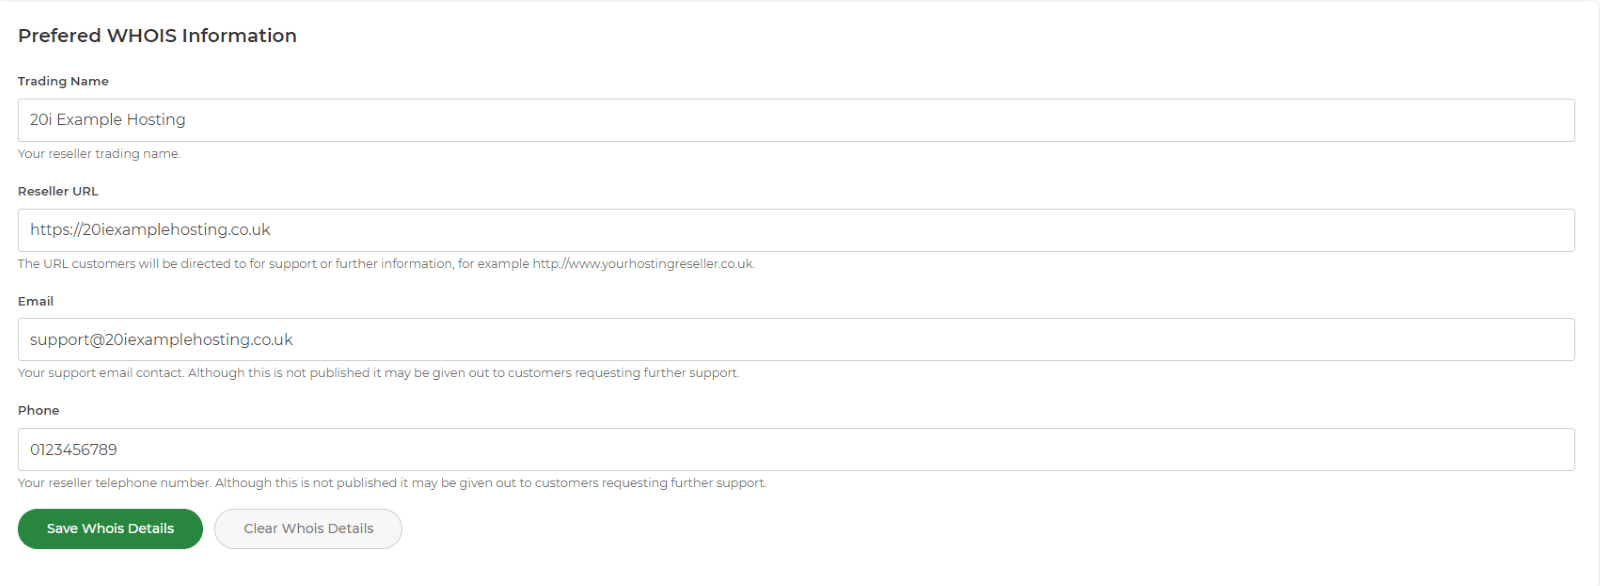
 Matthew Wright