How to Create Hosting Package Types

As a reseller, you’ll have access to create package types which allow you to customise the limitations depending on what you want to offer to your clients.
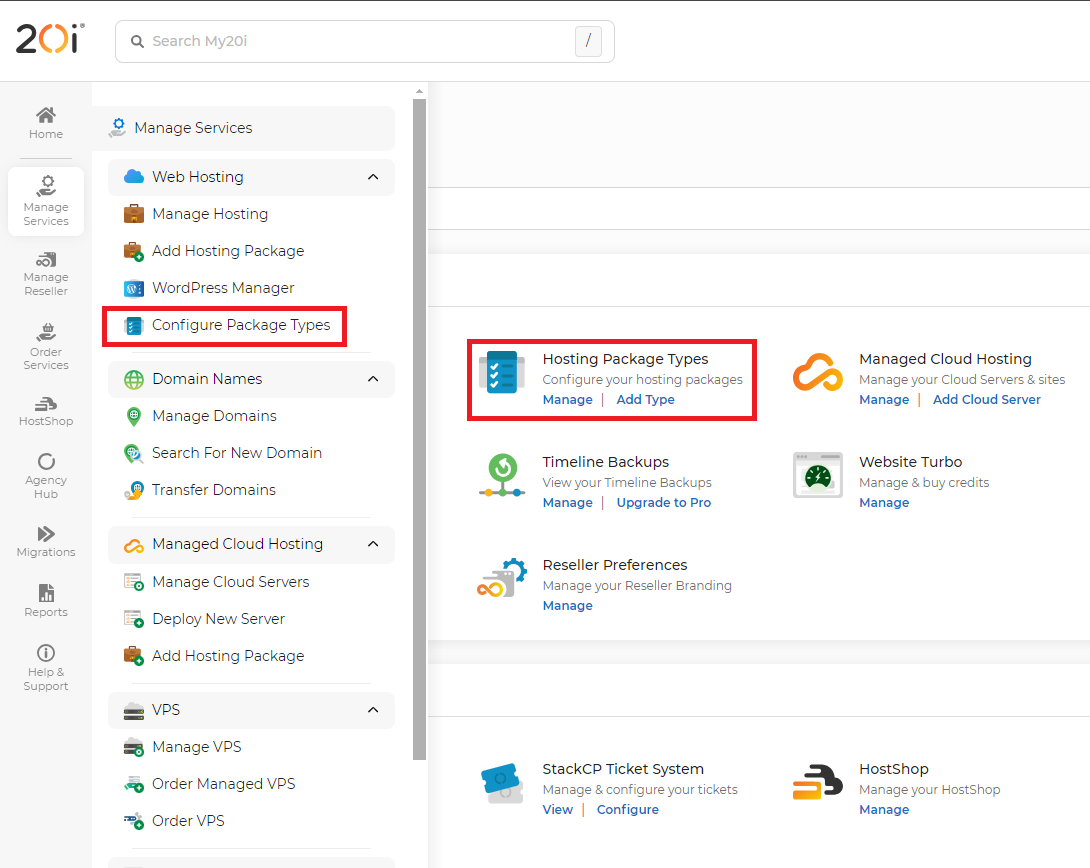
To manage the package types within your account, you can click on the manage link under the Hosting Package Types section on the homepage. You can also click Configure Package Types under the Manage Services section within the sidebar on the left-hand side of the page.
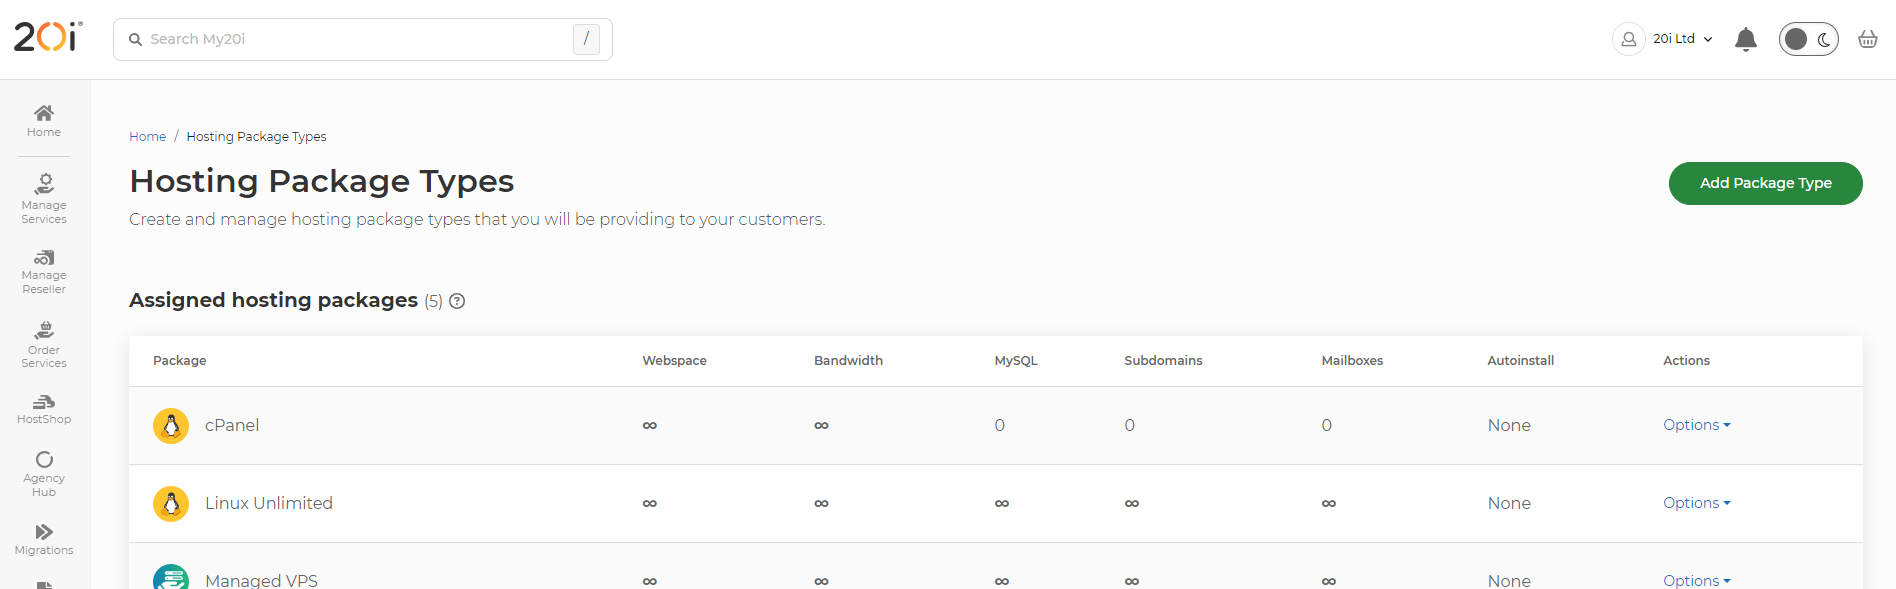
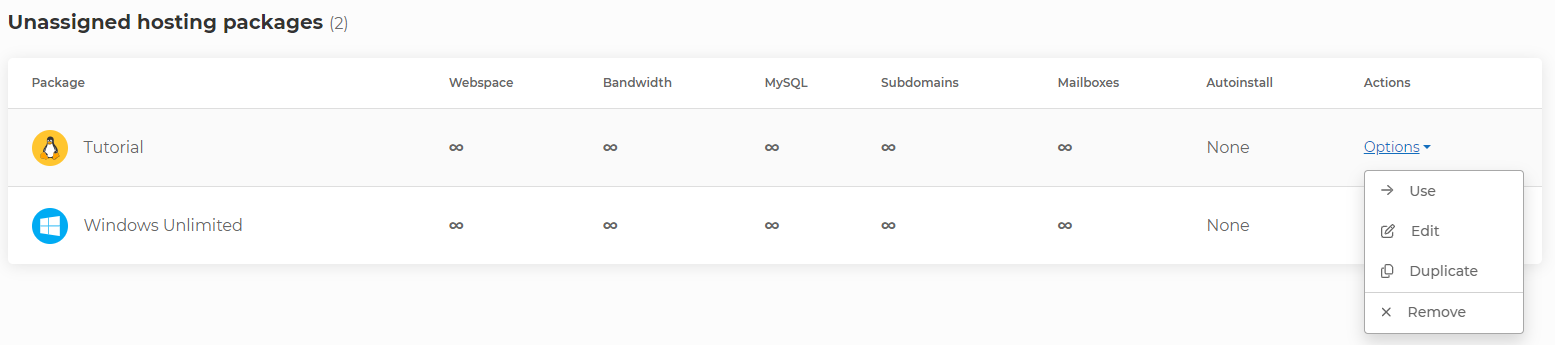
On this page, you’ll be able to see a list of package types you have created in your account. These are separated into two lists to show which are currently assigned to hosting in your account and ones that aren’t. These will also show a small summary on the limits that are set on them.
To create a new package type, click on the green Add Package Type button at the top of the page.
Here you can give the package type a name and choose the platform that it should use. If you scroll down you can choose limitations such as the amount of webspace that the package type has, to how many databases can be created on the hosting under the Package Limits section.
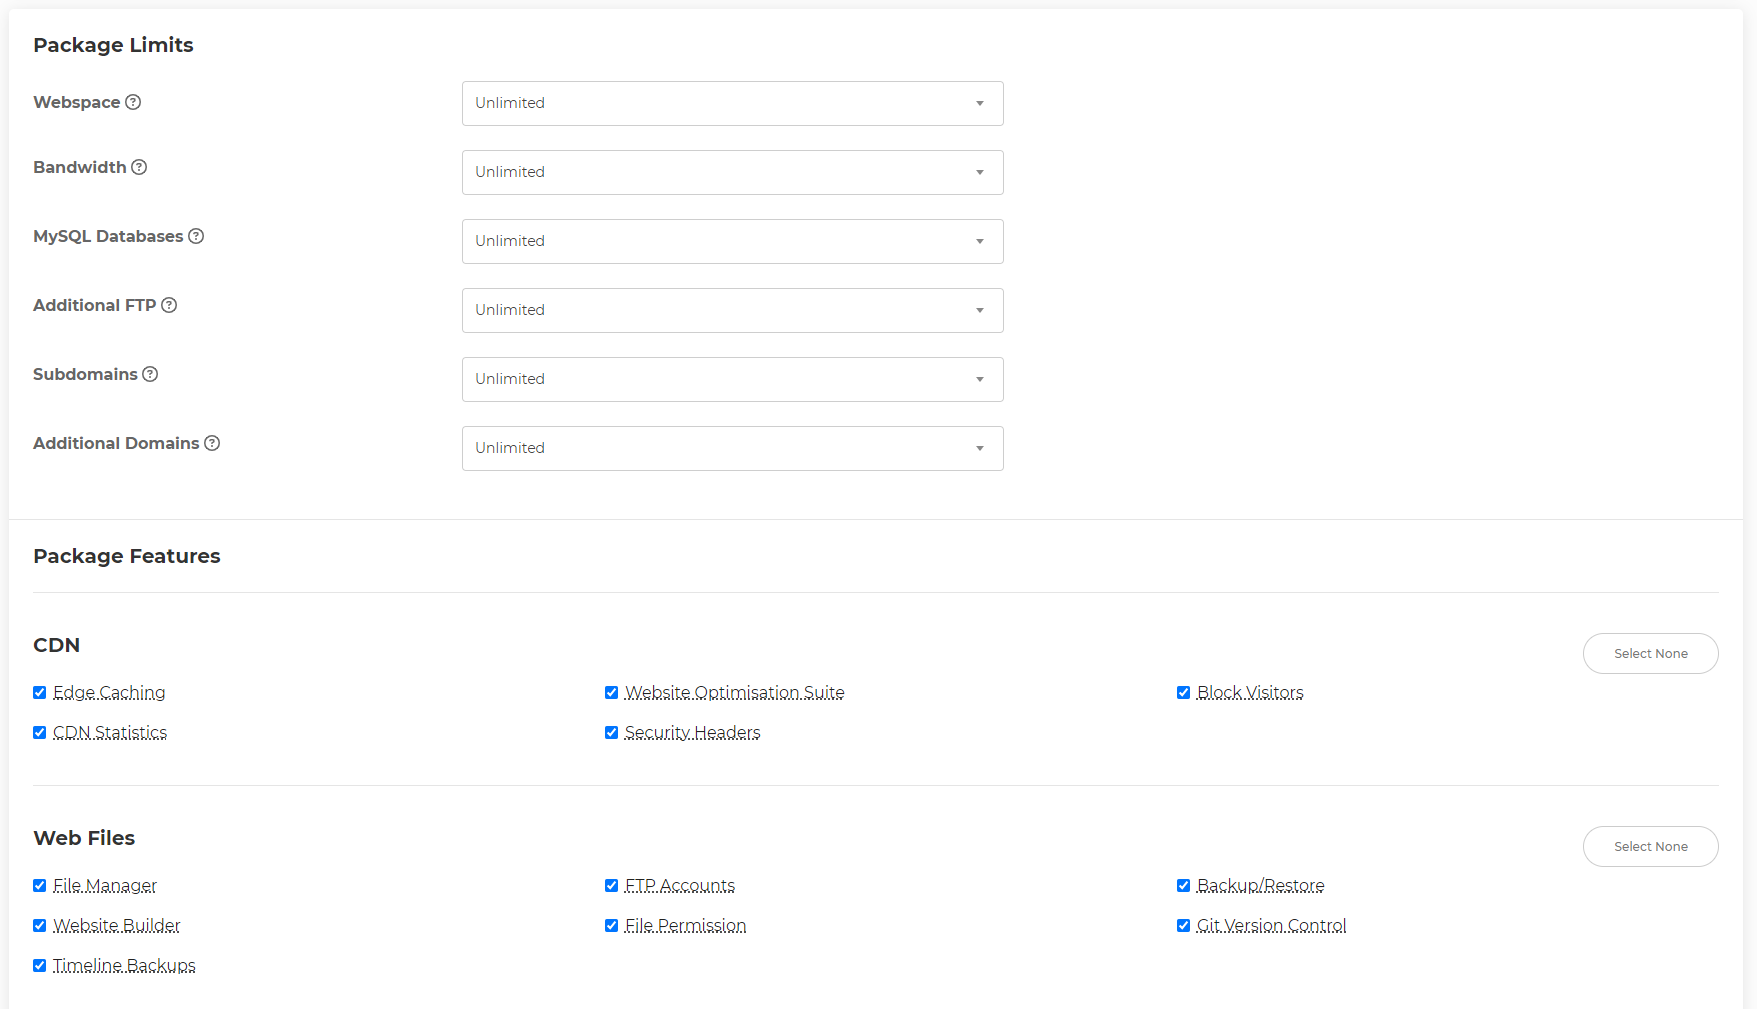
Further down are Package Features where you can choose what pages and features the package type will have access to. If for example, you wanted to offer a package that only has email capabilities, you can deselect all other services to prevent them from showing for your customer. You can also edit the email limits under the Package Features section.
It's also possible to assign Website Turbo to a package type so when it's created it will automatically add a Website Turbo credit to the package and provision on a Website Turbo server. This will use any available Website Turbo credits you have on your account or will purchase one automatically if none are available.

When you manage the package within your my20i control panel, you can still see all the options available. The limits will only be applied to the stackCP control panel that your own customers will use to manage the hosting.
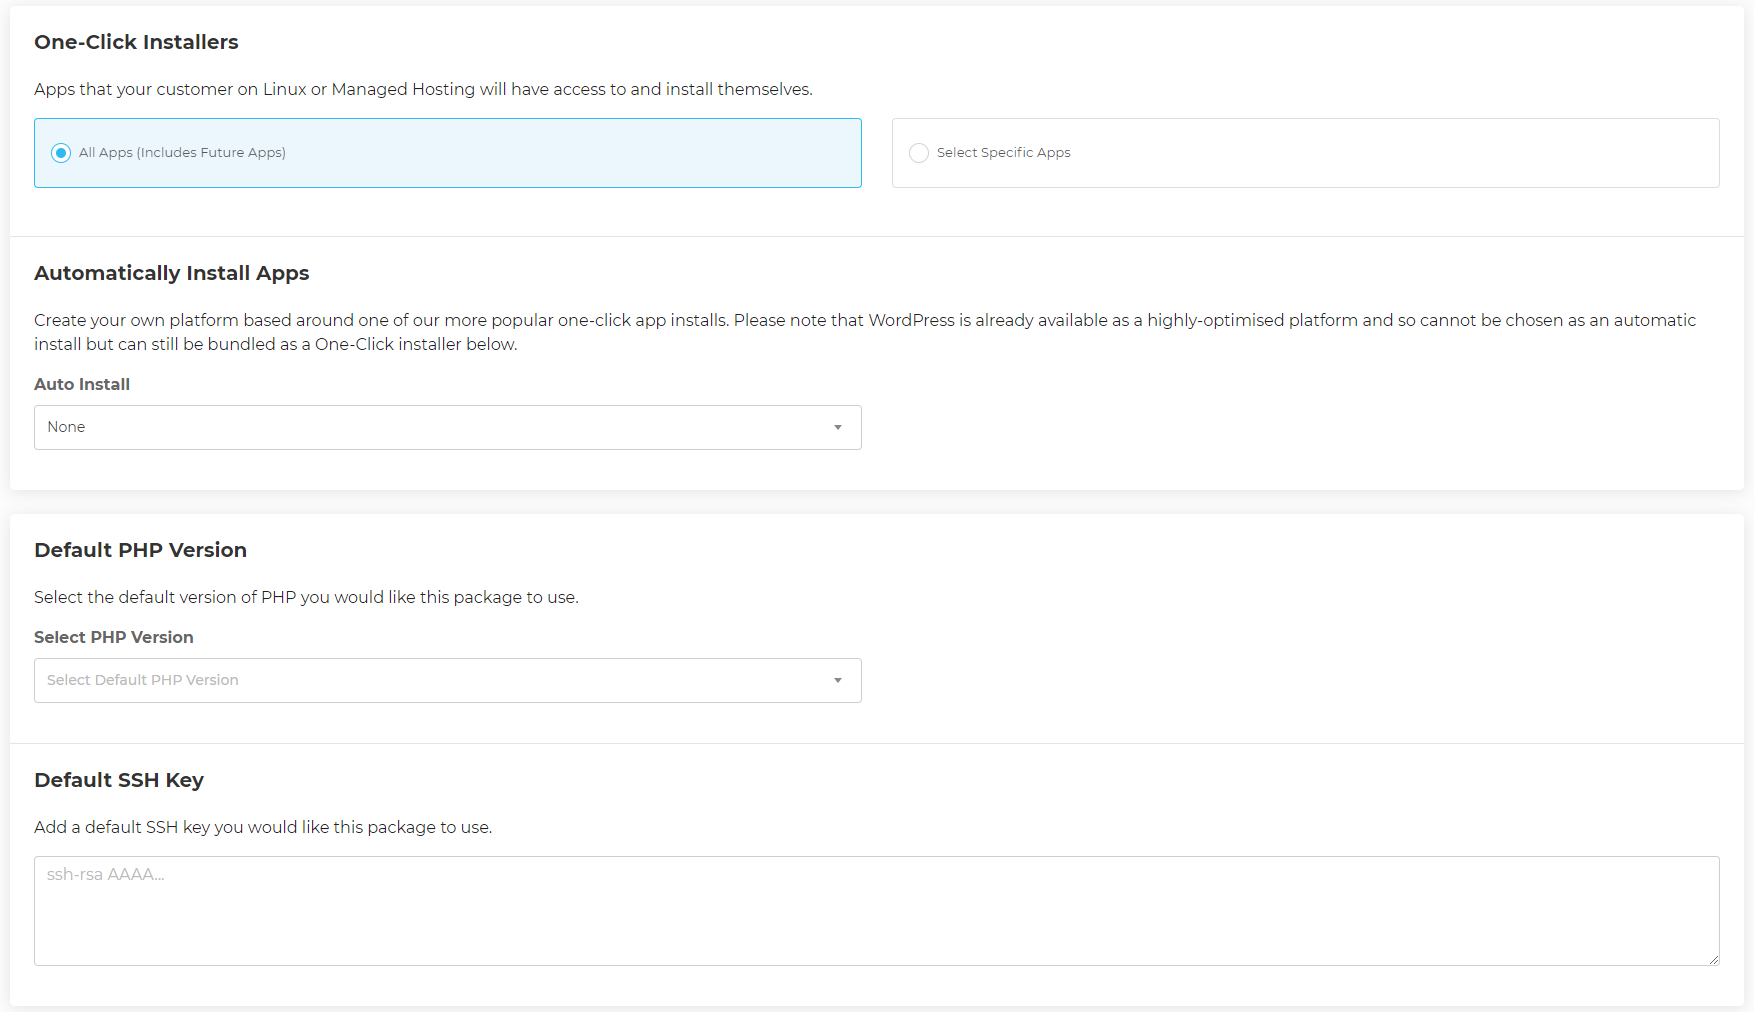
If you have multiple welcome emails set up, you can choose which to send from the Package Welcome Email section. For a linux or Managed VPS based package type, you can also select what One-Click Installers you wish to show. You can choose to have them all show or choose to only have specific ones, you can also select one to automatically install when a hosting package is created.
Other options include setting a certain PHP version and adding an SSH key by default.
You will have mostly the same options when creating a WordPress package but will also have the option to also create the package based on a blueprint you have set up in your account. This will allow you to provision hosting packages automatically with a preconfigured WordPress install such as plugins and themes.
Once you have created the package type you will be brought back to the Package types page. You can also edit existing package types by clicking on Options and Edit.
Once the page opens you will have the same options as before so you can change these at any time. You will also have the option to set up a custom temporary URL domain so you can choose one that fits with your brand.
Once you’ve made any changes if you want to sync the changes with any existing packages using the same package type you can tick the Synchronise package type option and then click the Save Changes button.