How do I restore mailbox backups with Timeline Backups Pro?

You can restore lost mailbox data using the Timeline Backups Pro tool, which can be ordered through your My20i account. With Timeline Backups Pro, you will receive 30 days of snapshots of all the email accounts on your account.
- Firstly, you’ll need to head to the Timeline Backups tool. In My20i, if you're a Reseller, this can be found under Hosting Management. If you're not a Reseller, it will be under Manage Hosting > Web Files
- Now, find the hosting package that the email account is assigned to from the list. Once you've found the relevant package, select 'Manage'.
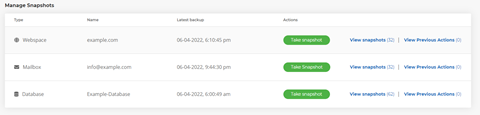
- You'll see a list of different webspace, database and mailbox snapshots. From this list, find the name of the mailbox that you’d like to restore a snapshot for and select View Snapshots.
- Select the snapshot time/date that you'd like to restore to the mailbox.
Note: By default, the restore to temporary mailbox option is selected. What this does is create a new mailbox and restore the snapshot to the new temporary mailbox instead of the original mailbox. We strongly recommend restoring to a temporary mailbox first and then using the Email Migration tool to sync the temporary mailbox to the live mailbox. By doing this, you will have a chance to check and verify that the temporary mailbox has the email contents you expect before overwriting your current live mailbox.
- Select Restore Snapshot
To then view the temporary mailbox, please navigate to Receive-Only Email Accounts within your hosting package. Once you have reviewed the contents of the temporary mailbox, and you are happy to proceed, you will need to sync the temporary mailbox to the live mailbox. You will need to set a password for the temporary mailbox, which will be required for the next step.
- Head to the Email Migration section of the hosting package and enter the relevant credentials, and the select Sync.
- Hostname - This will be imap.stackmail.com.
- Username - This will be the temporary mailbox that you are syncing.
- Password - This will be the password for the temporary mailbox you have just set.
Note: If the live mailbox has been deleted, you'll need to set up the mailbox within 20i first using the same password as currently used by the temporary mailbox.
Below, under the Current Email Migrations section, you can view the status of the migration.