How to configure calendars using CalDav on a Premium Mailbox in iOS

Our Premium Mailbox add-on comes with inbuilt Calendar functionality using CalDAV – you can synchronise these with your iOS devices to have your Calendar functionality with you wherever you go. In order to set this up once you have purchased the add-on:
- Sign into your Premium Mailbox via Premium Webmail.
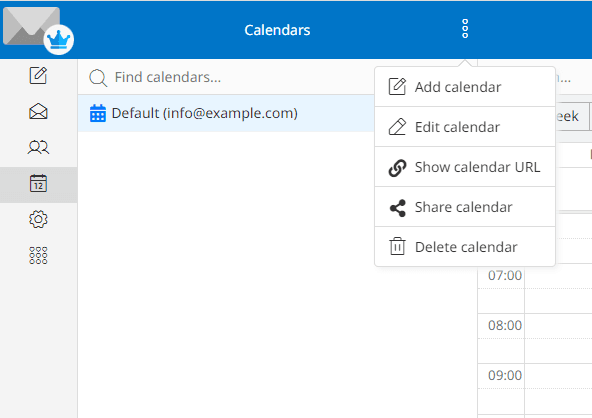
- You should see a Calendar button on the left panel. Select this to navigate to the Calendars area.
- Next to Calendars at the top there is a button consisting of three dots – select this, and then Show Calendar URL
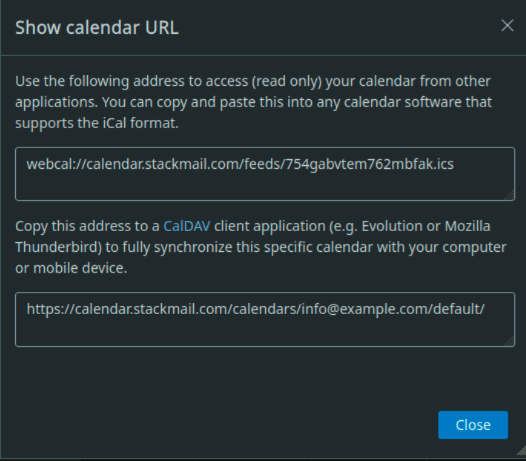
- You’ll see a display with two addresses – the bottom box contains the URL to your calendar – make a note of this.
Once you have the details you need, you should then open the Apple Mail client on your iOS device, and do the following:
- Select Settings → Calendar → Accounts.
- Under ACCOUNTS, select Add Account → Other.
- Under CALENDARS, tap Add CalDAV Account to add a calendar account.
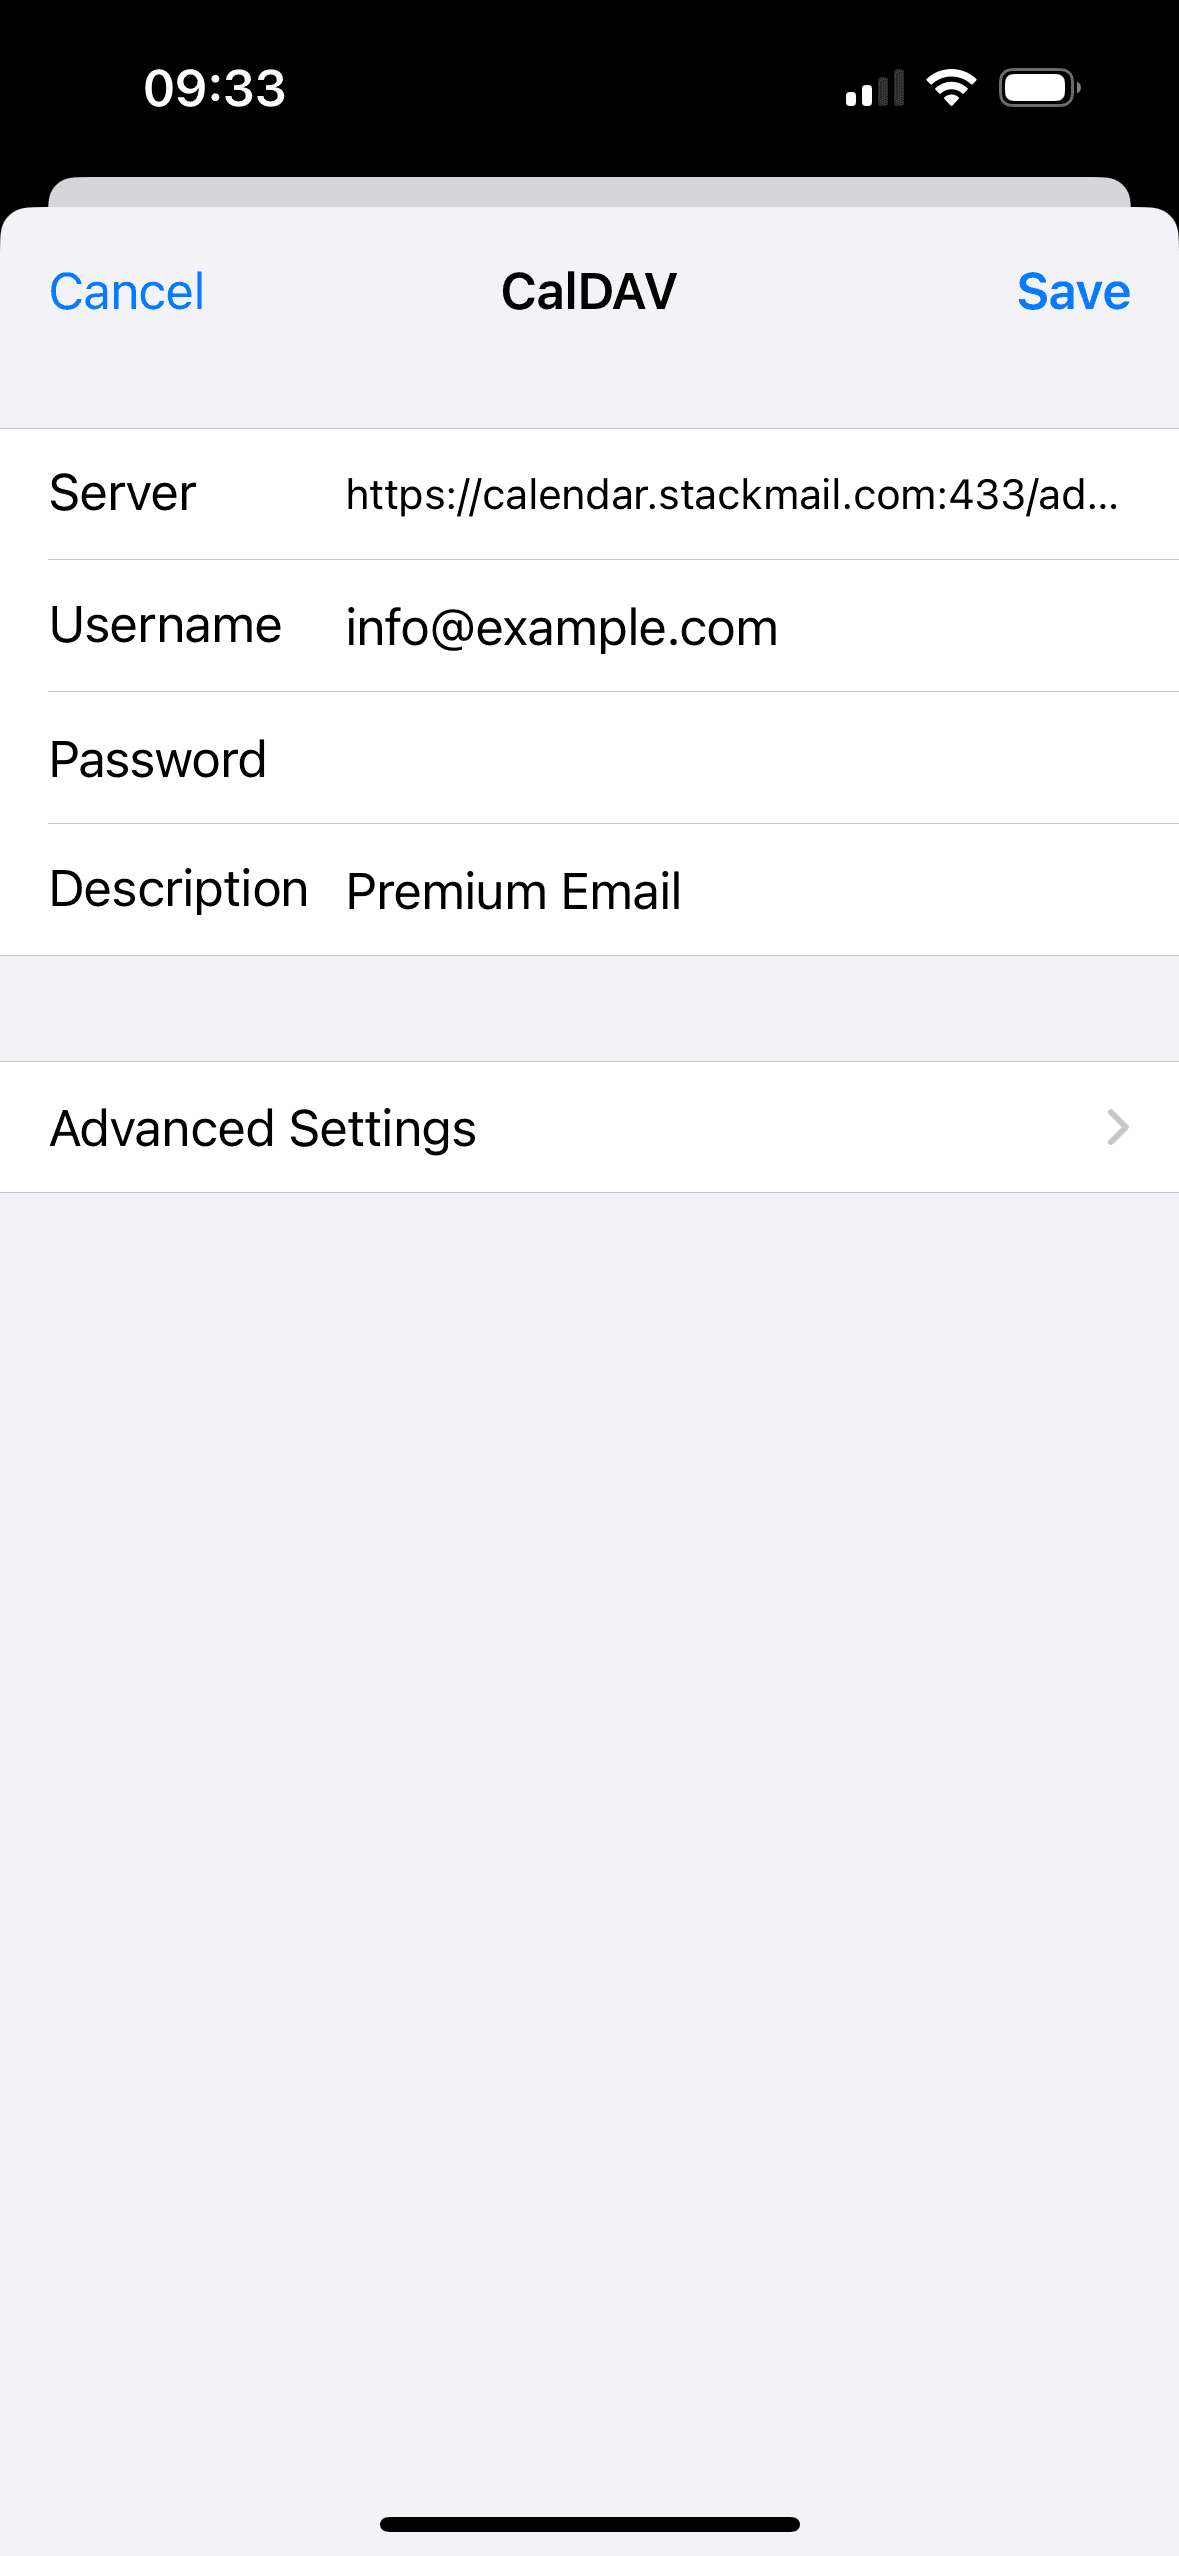
- You’ll then be presented with areas to enter your details – these are as follows:
- Server: The URL you noted from your profile.
- Username: Your email account.
- Password: Your mailbox’s password.
- Description: A name for your account ie. My Calendar.
- Select Save at the top. This should set up your calendar on your iOS device.
Please note, when using providers such as Google, Outlook or Yahoo to sync from public iCal links it could take between 12 to 24 hours to sync any new events. We have no control over calendar syncing with outside providers, there could be times where events do not sync correctly. In these cases, there is little we can do as we have no control over how outside providers sync.