Reseller Hosting: StackCP Helpdesk

The StackCP Ticket System is a fully-featured customer service & support system for you and your customers. Your customers can raise tickets from StackCP, which you’ll receive via My20i. Emails are sent to both yourself and your StackCP Users (customers) when tickets are opened and updated in order to keep both parties notified of the current status of the ticket.
Quick Start
To enable the StackCP Ticket System:
- Select Ticket System Configuration and select Enable StackCP Ticket System

Customers can then raise tickets by logging in to StackCP. They can compose their enquiry there and select Create Support Ticket to send the message. To reply to customer tickets:
- Login to My20i and head to StackCP Ticket System
- You will see the raised ticket in the ticket list view, select Options > View Ticket
- Compose your reply and select Update Ticket.
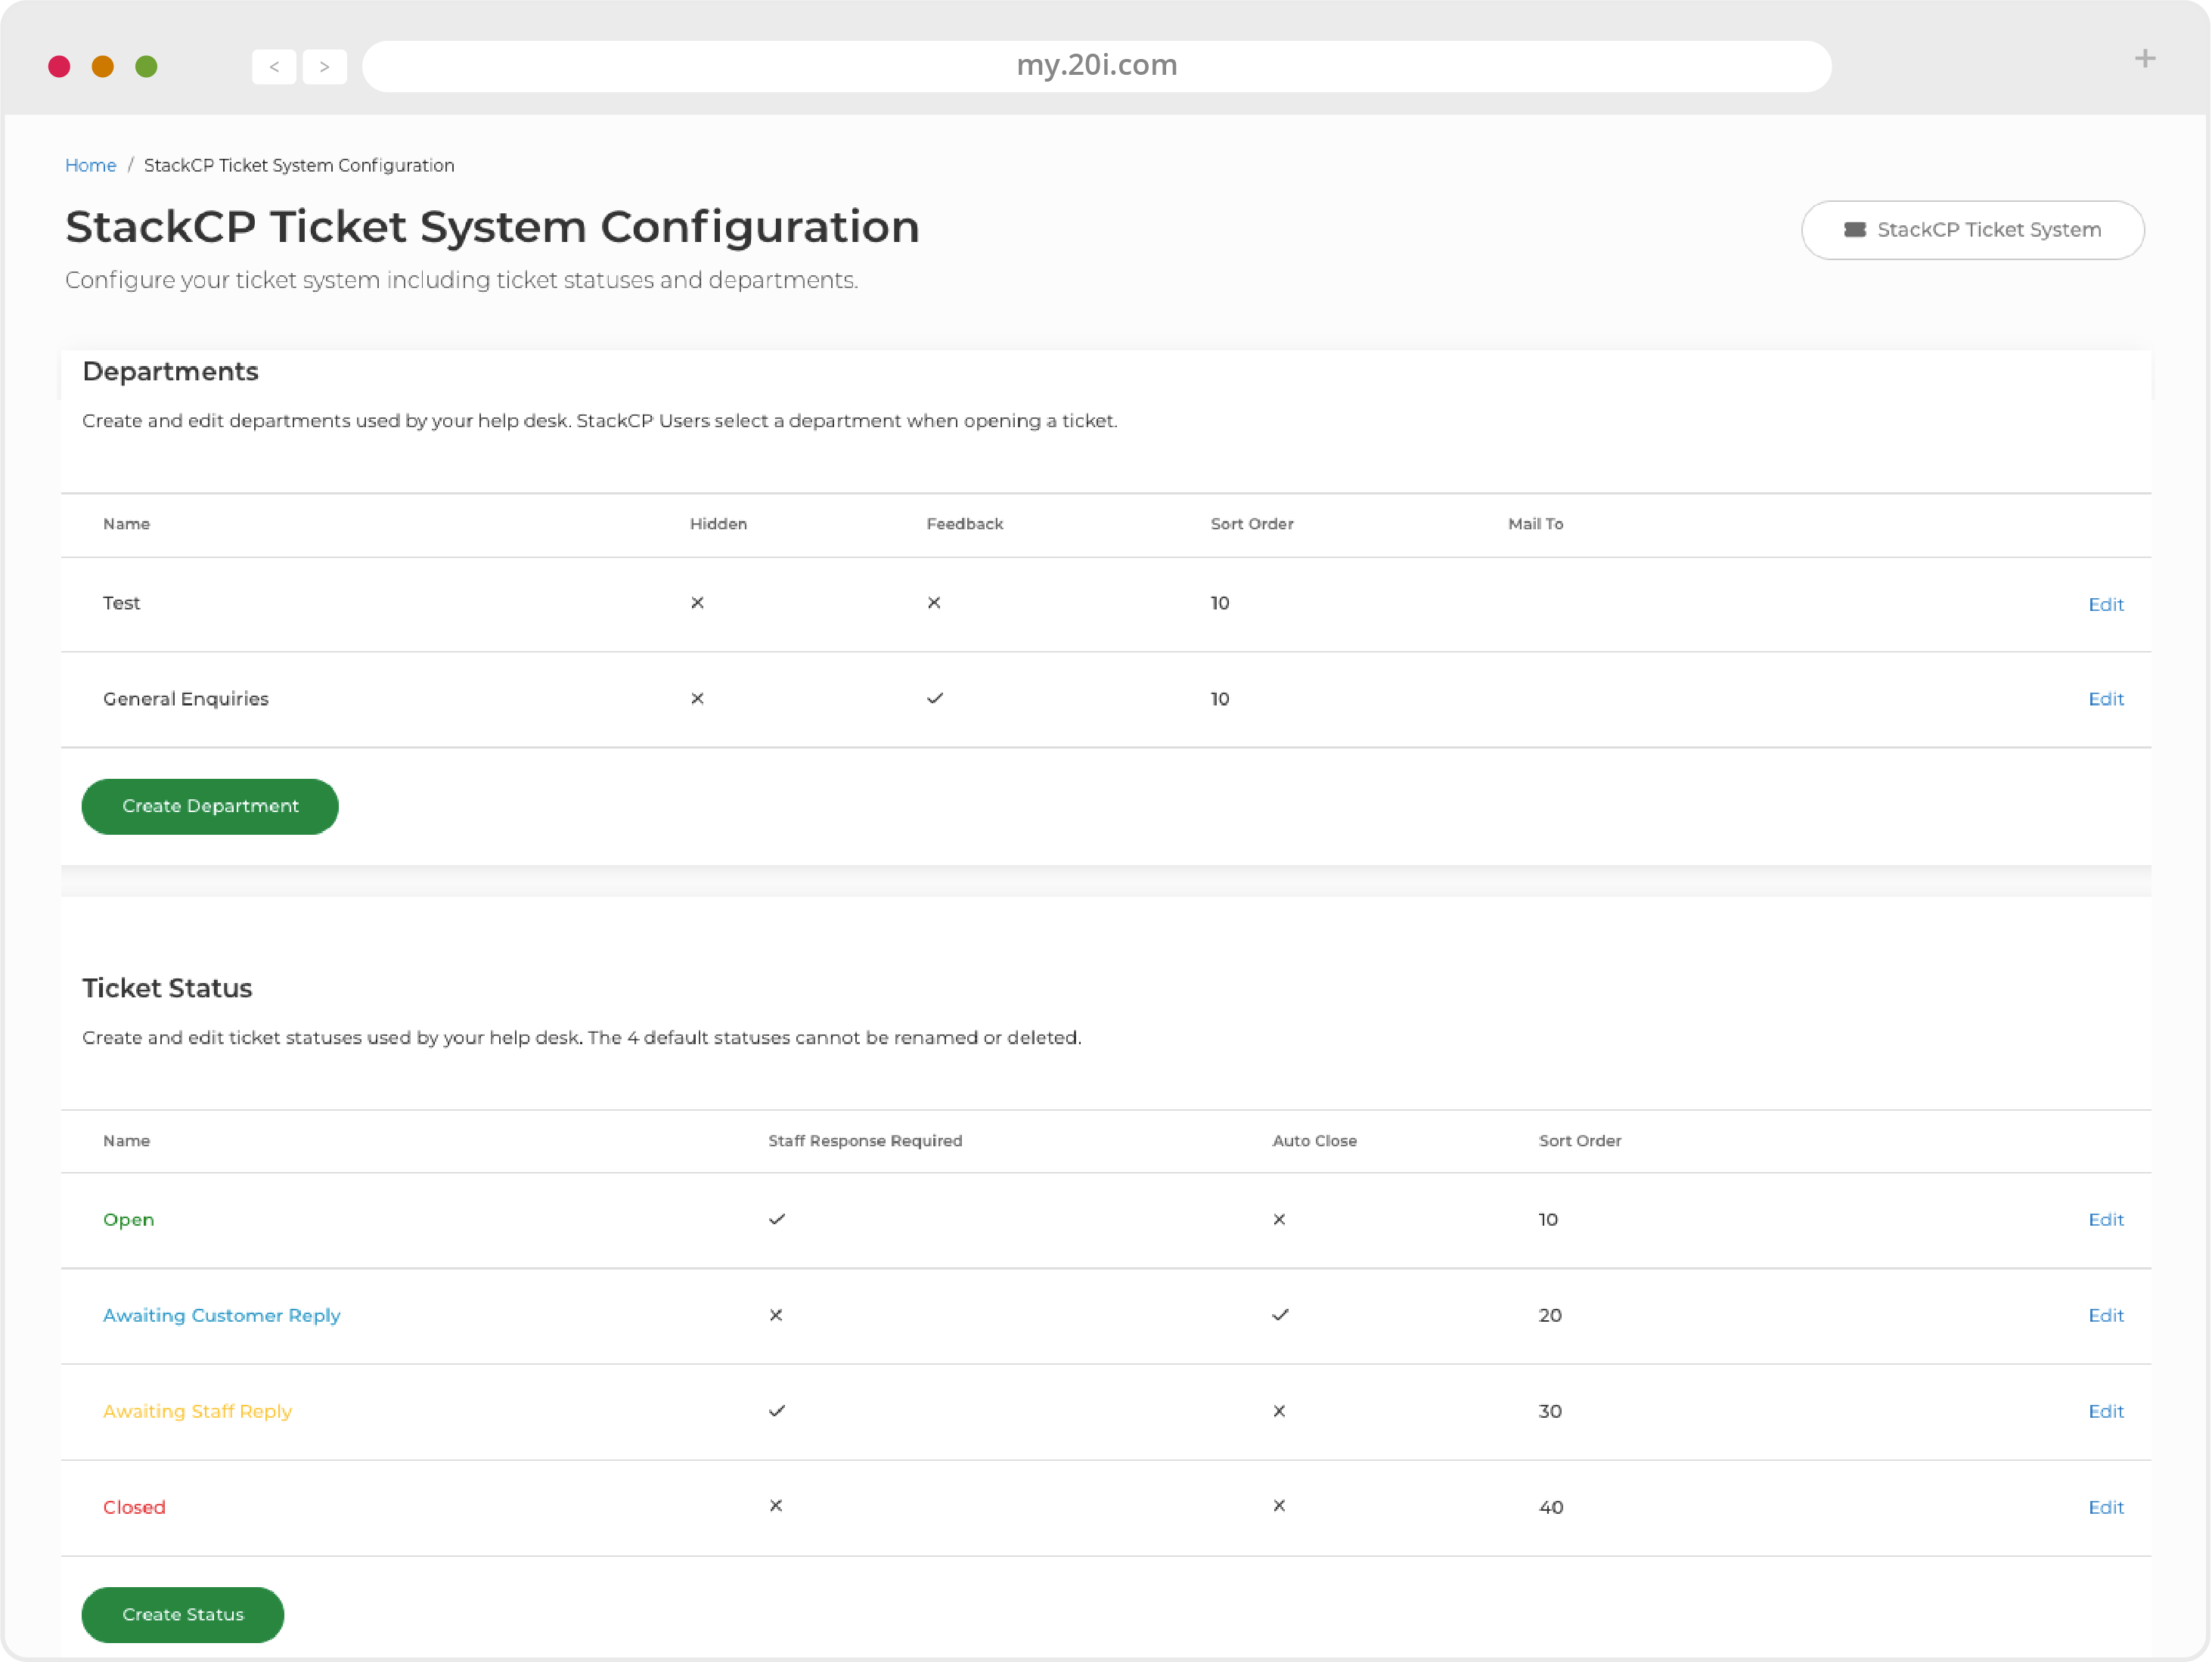
Departments
When your customer creates a ticket, they can select which Department they believe is bestto handle their request. Commonly you’d have General Enquiries, Sales and Support as departments to cover the common interactions with customers.
- To create a department, head to Ticket System Configuration and locate the Departments section
- The General Enquiries Department is there by default
- Add a new Department by selecting Create Department and give the Department a name e.g. Sales. If you want customers to be able to rate responses from this department check Accept Response Ratings. The Sort Order determines where the Department will appear in menus
- Select Save & Close
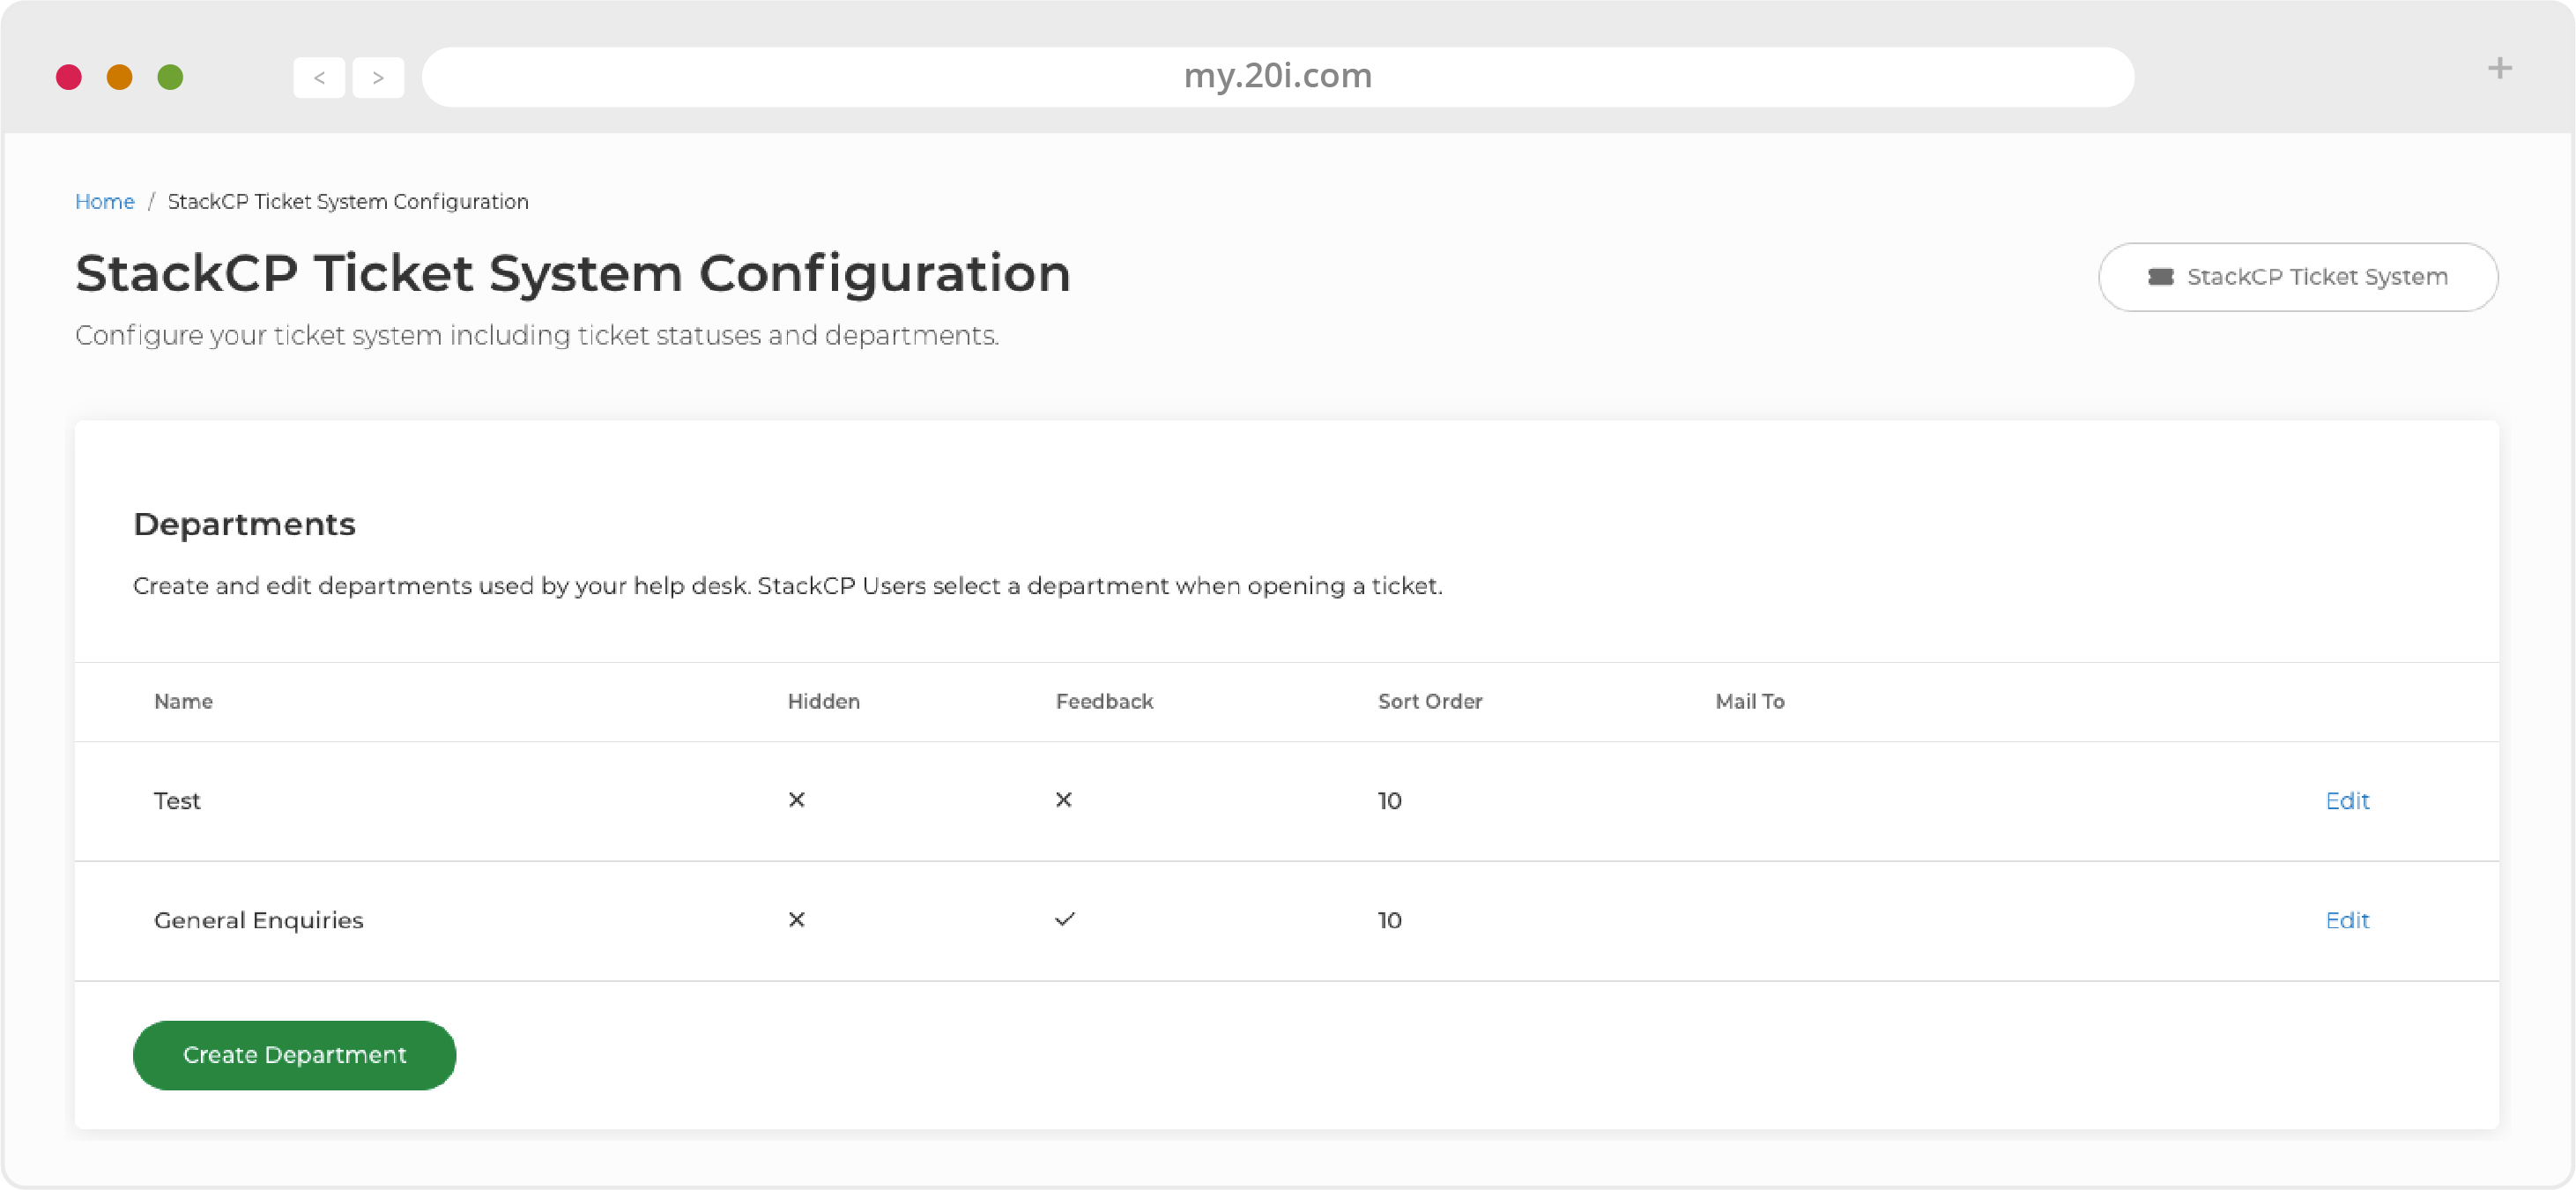
- You’ll now see your new Department in the list and customers can now select to raise tickets to this departments.
Best Practices for Departments
- Keep the number of Departments concise. This is for management purposes and for clarity when your customers are choosing a Department to raise the ticket-to
- Departments are aimed at increasing efficiency, so if you offer a specific service or product that has more specialised support, we would recommend adding a Department for it
- Departments could be used to create an escalation path for tickets, for example: a Department could be created for senior management
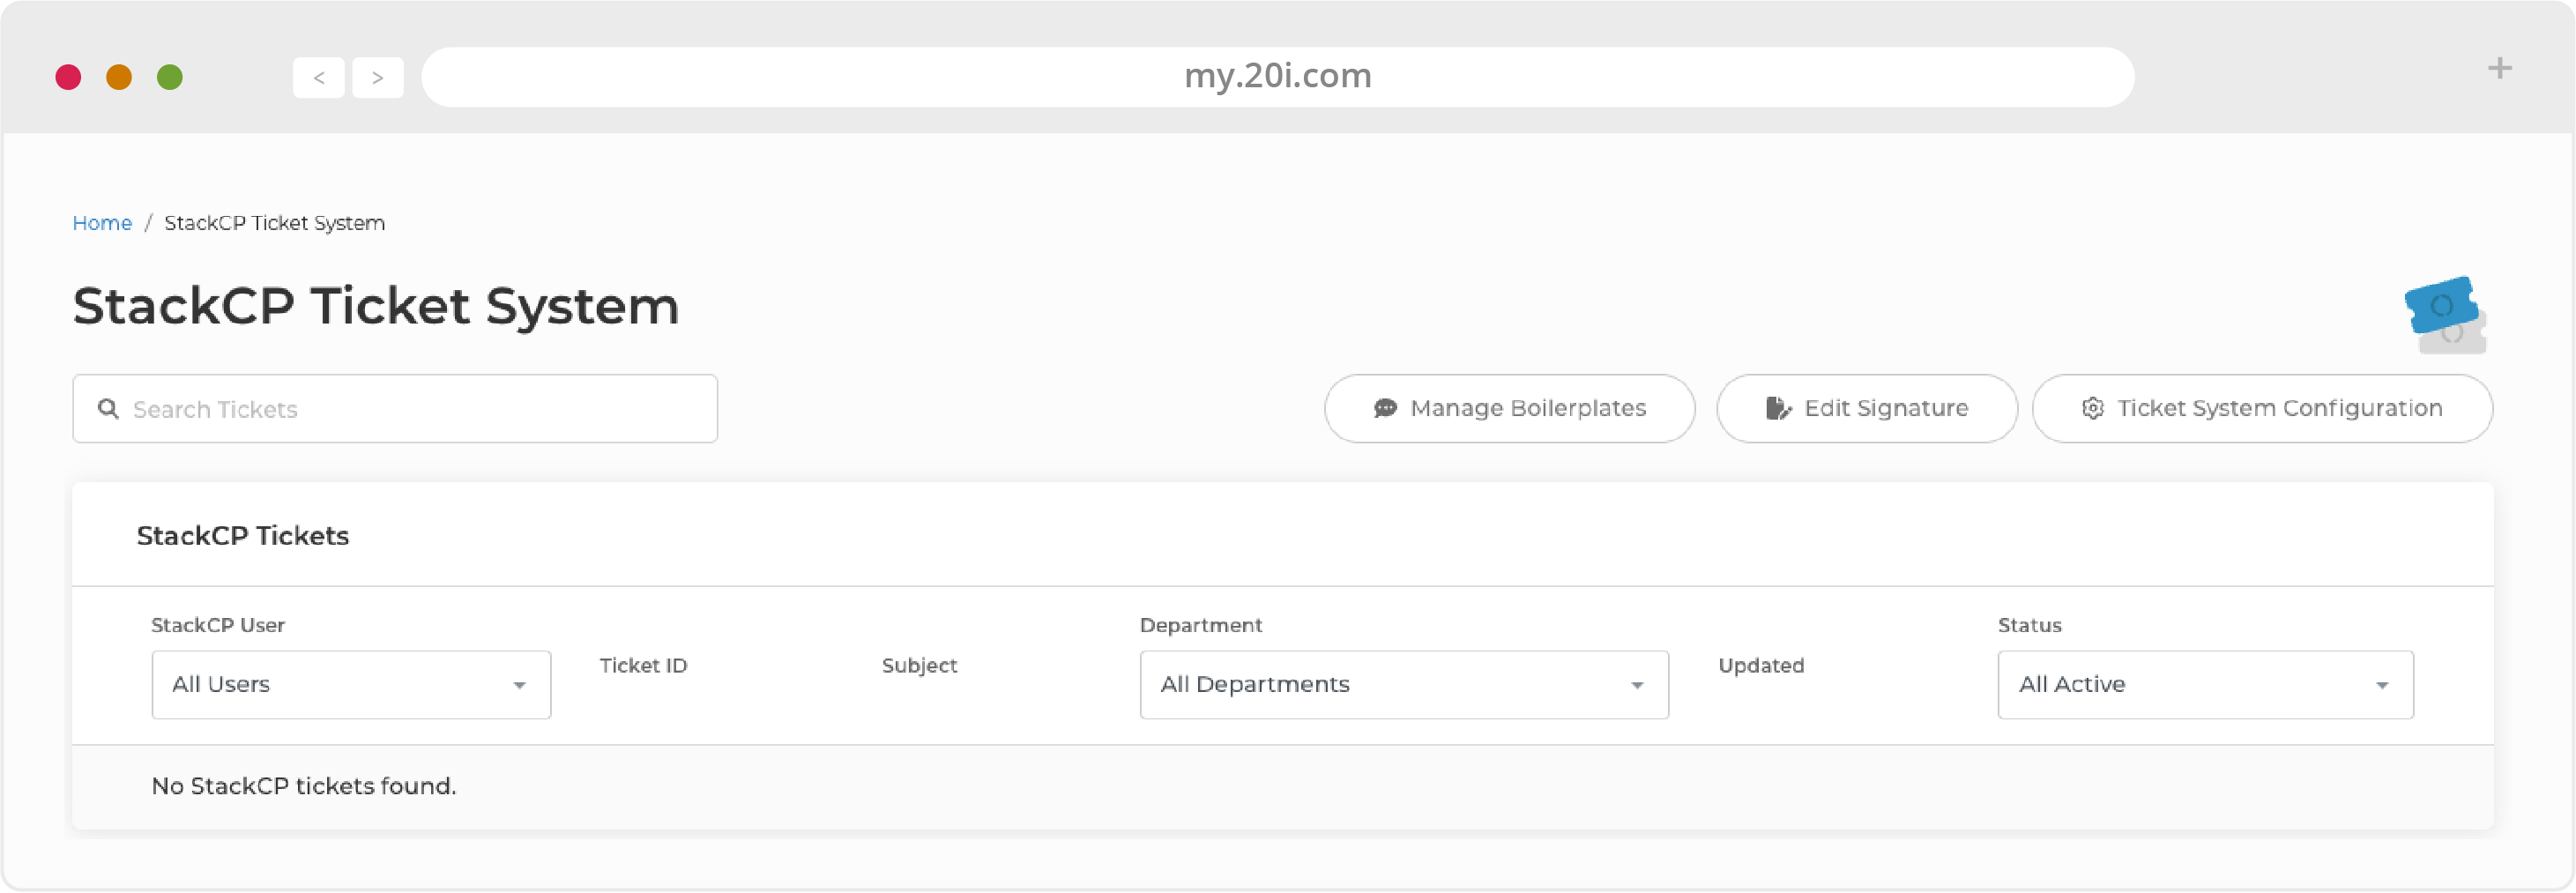
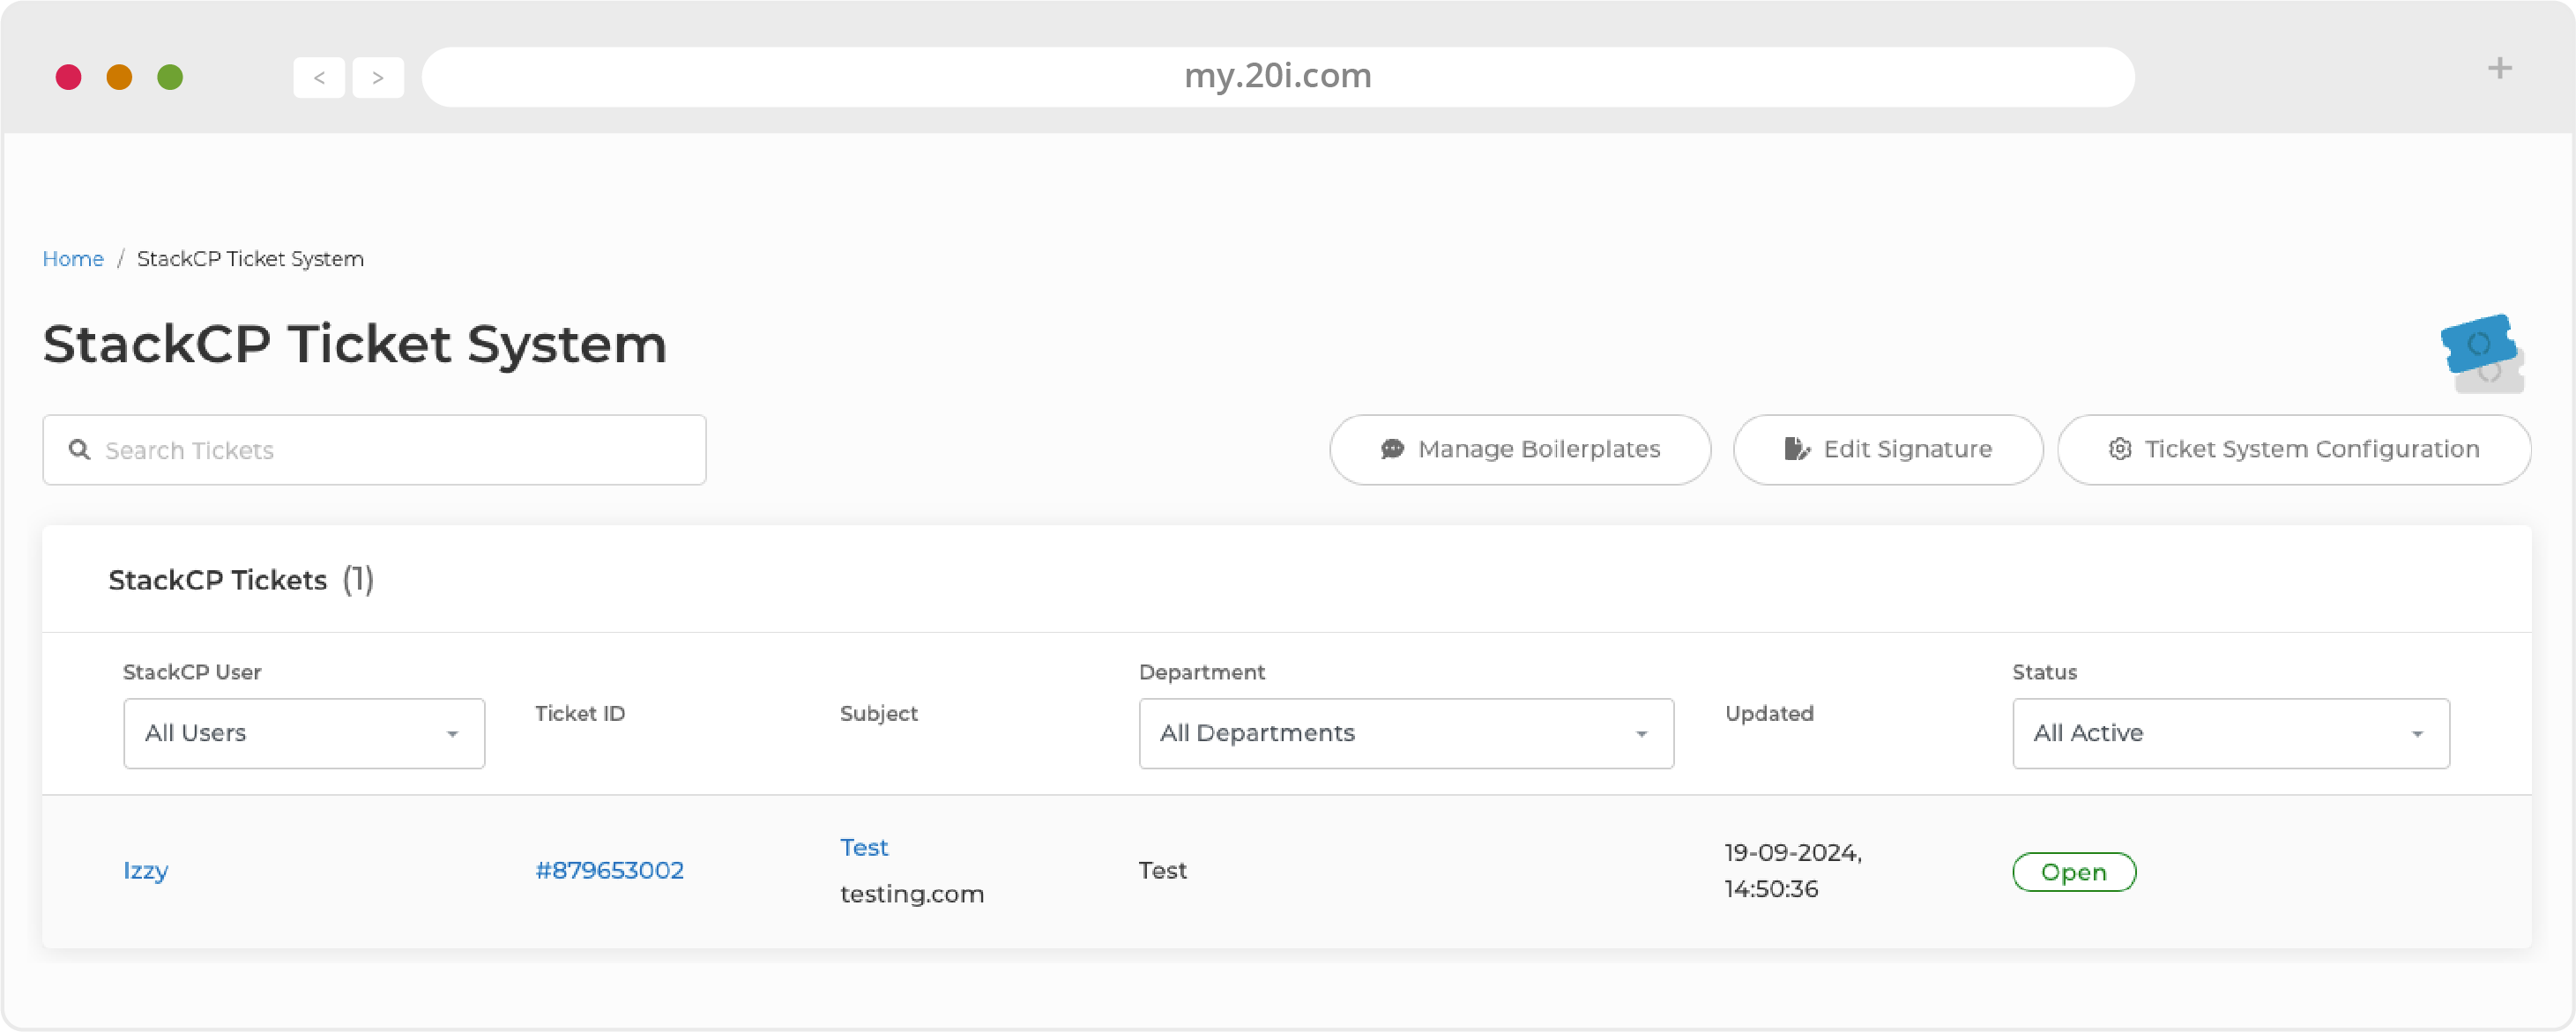
Ticket List
New and existing tickets can be viewed and managed from the StackCP Ticket System page. You can filter the current ticket queue by Status or Department by using the Filter menu. You can also search for a ticket ID or phrase within the ticket itself. Keeping track of the Ticket ID is a great way to jump to a specific ticket. When a customer raises a new ticket, it will automatically appear in the list. There’s no need to refresh the page to check for updates. From the Options menu you can do three things:
- View ticket
- Edit StackCP User
- Log in as StackCP User
The ticket list view gives you a good general idea of the volume of support requests you’re receiving. If you have support departments, it’s the primary location they’d be focused on for providing first line support.
View Tickets
To reply to a ticket, select Options > View Ticket from the ticket list. From here you can reply to the ticket, add internal notes for other staff to see, change the status of the ticket or change the department that the ticket is assigned to.
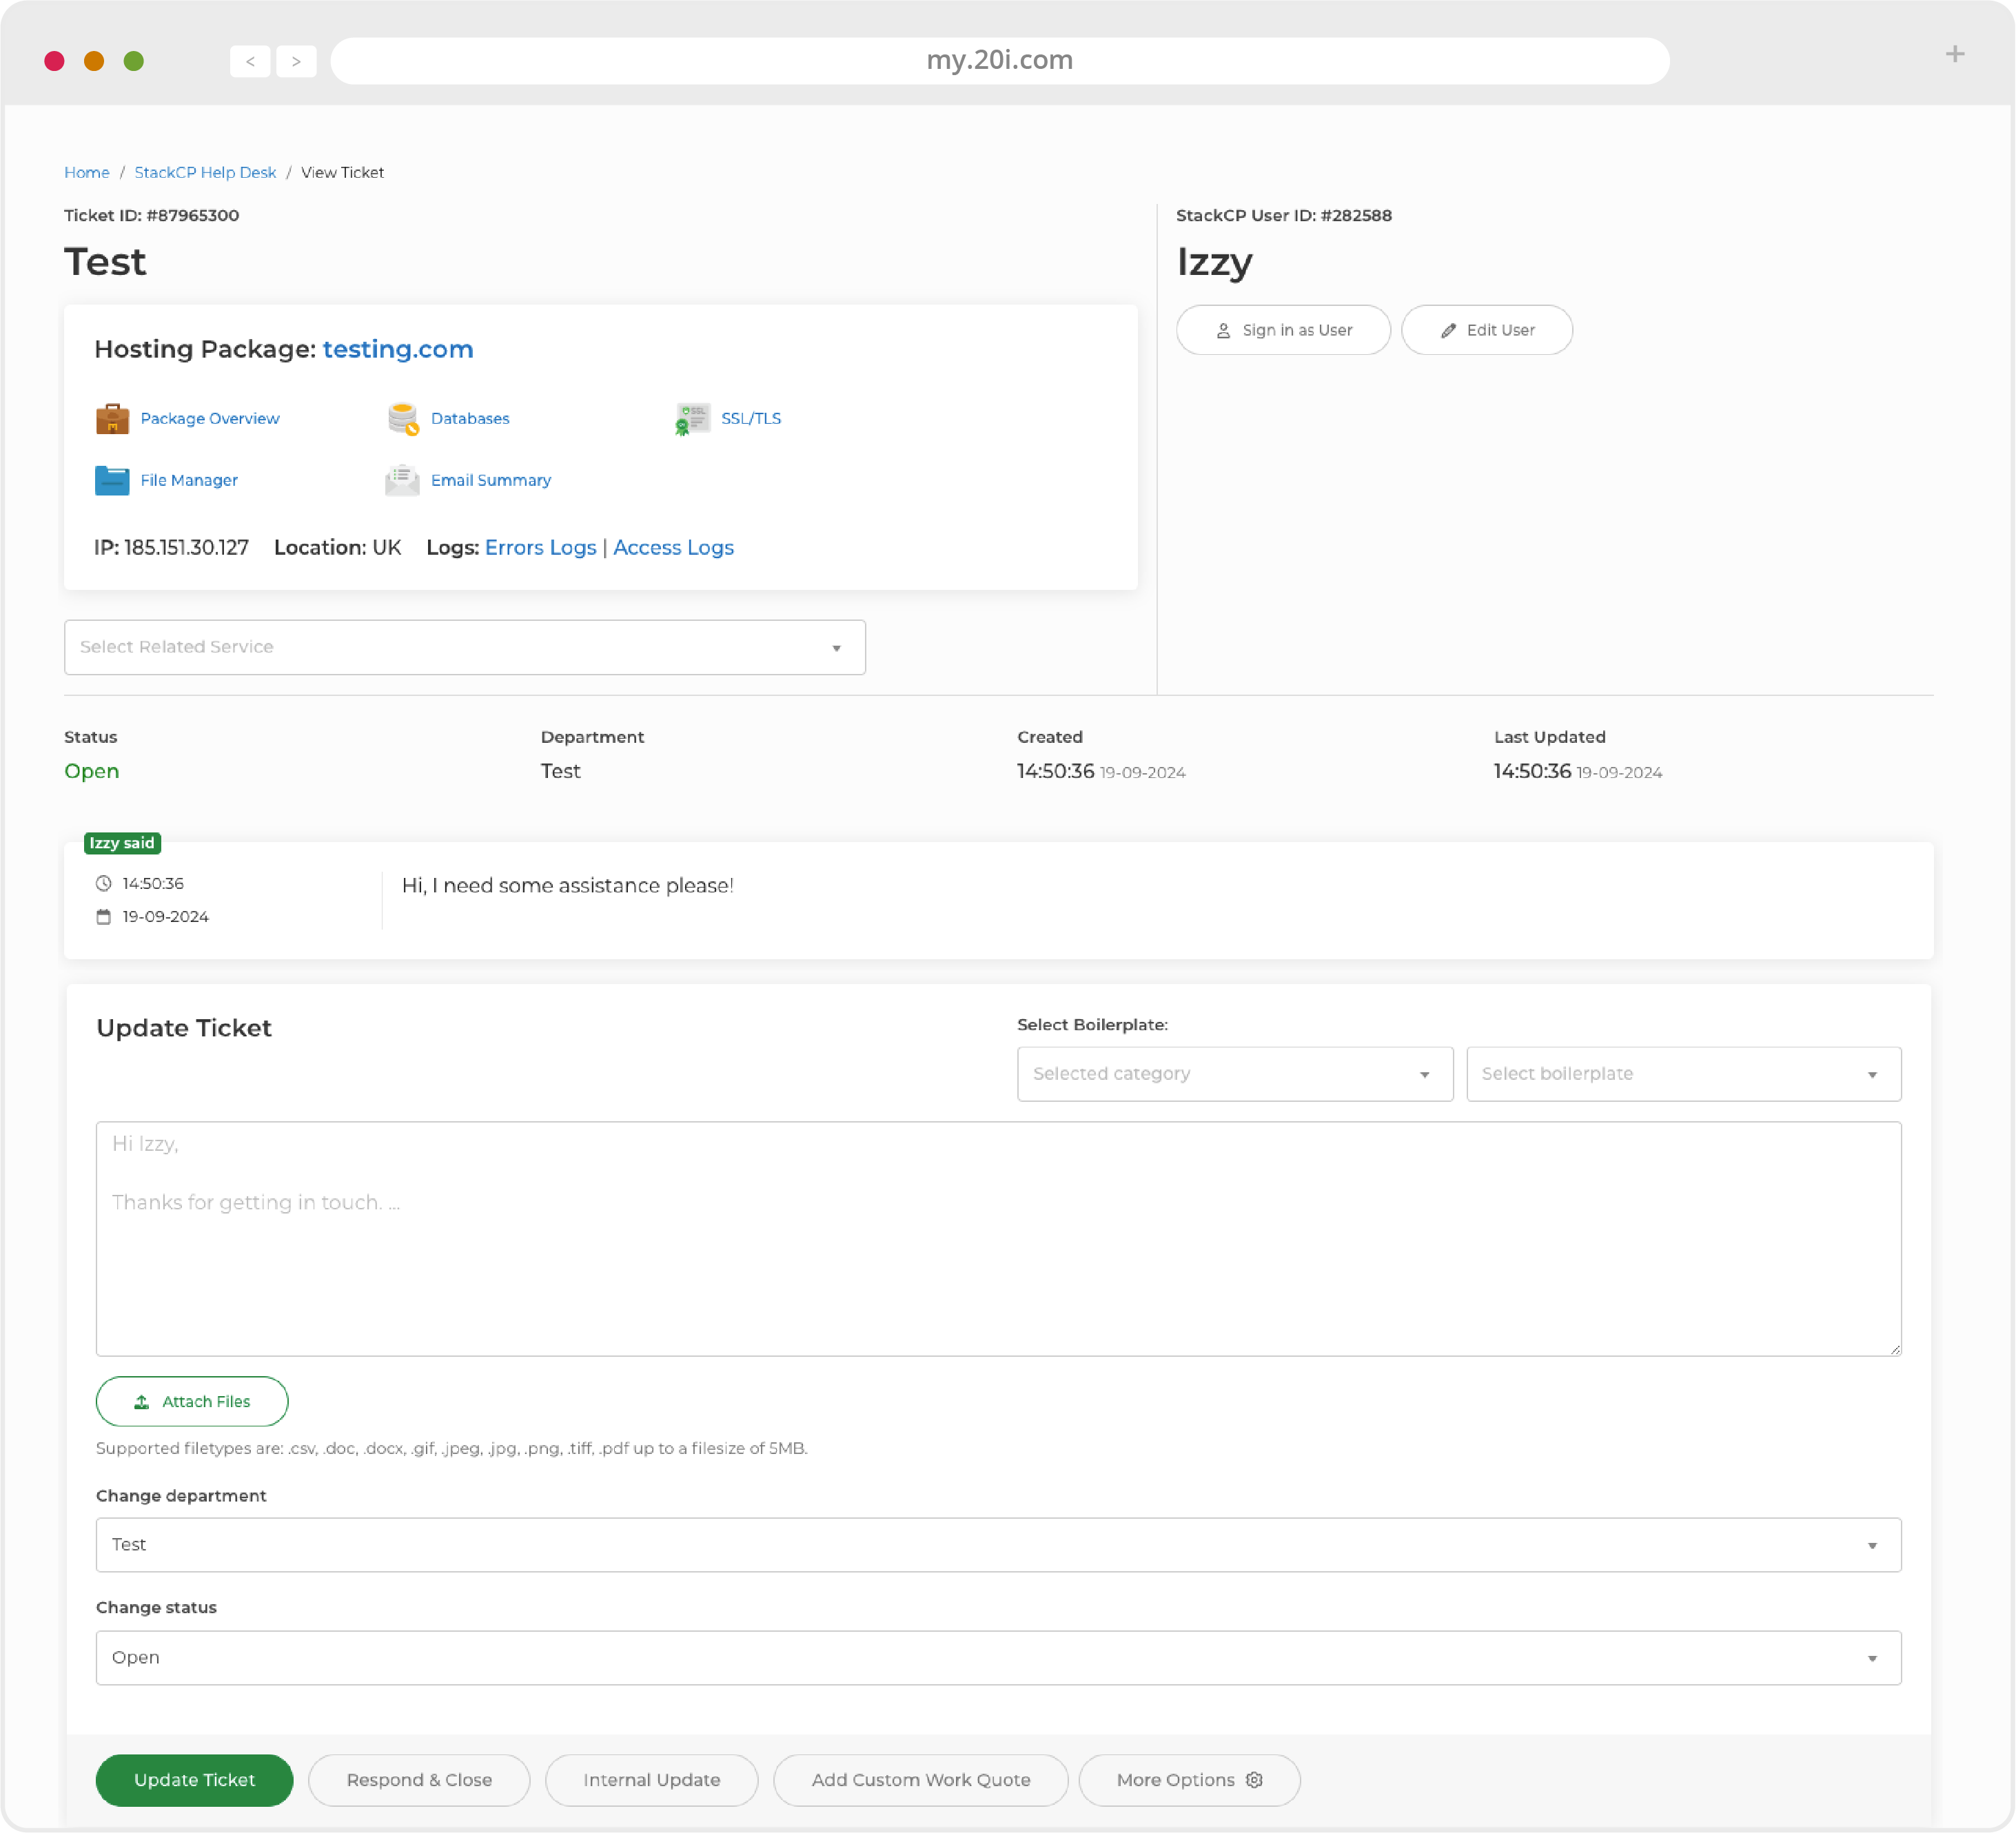
Internal notes can only be seen by your staff. This allows you to easily provide information to help with the resolution of the ticket. To reply to a ticket, enter your response within the text field, when done, select ‘Update Ticket’.

Ticket Statuses
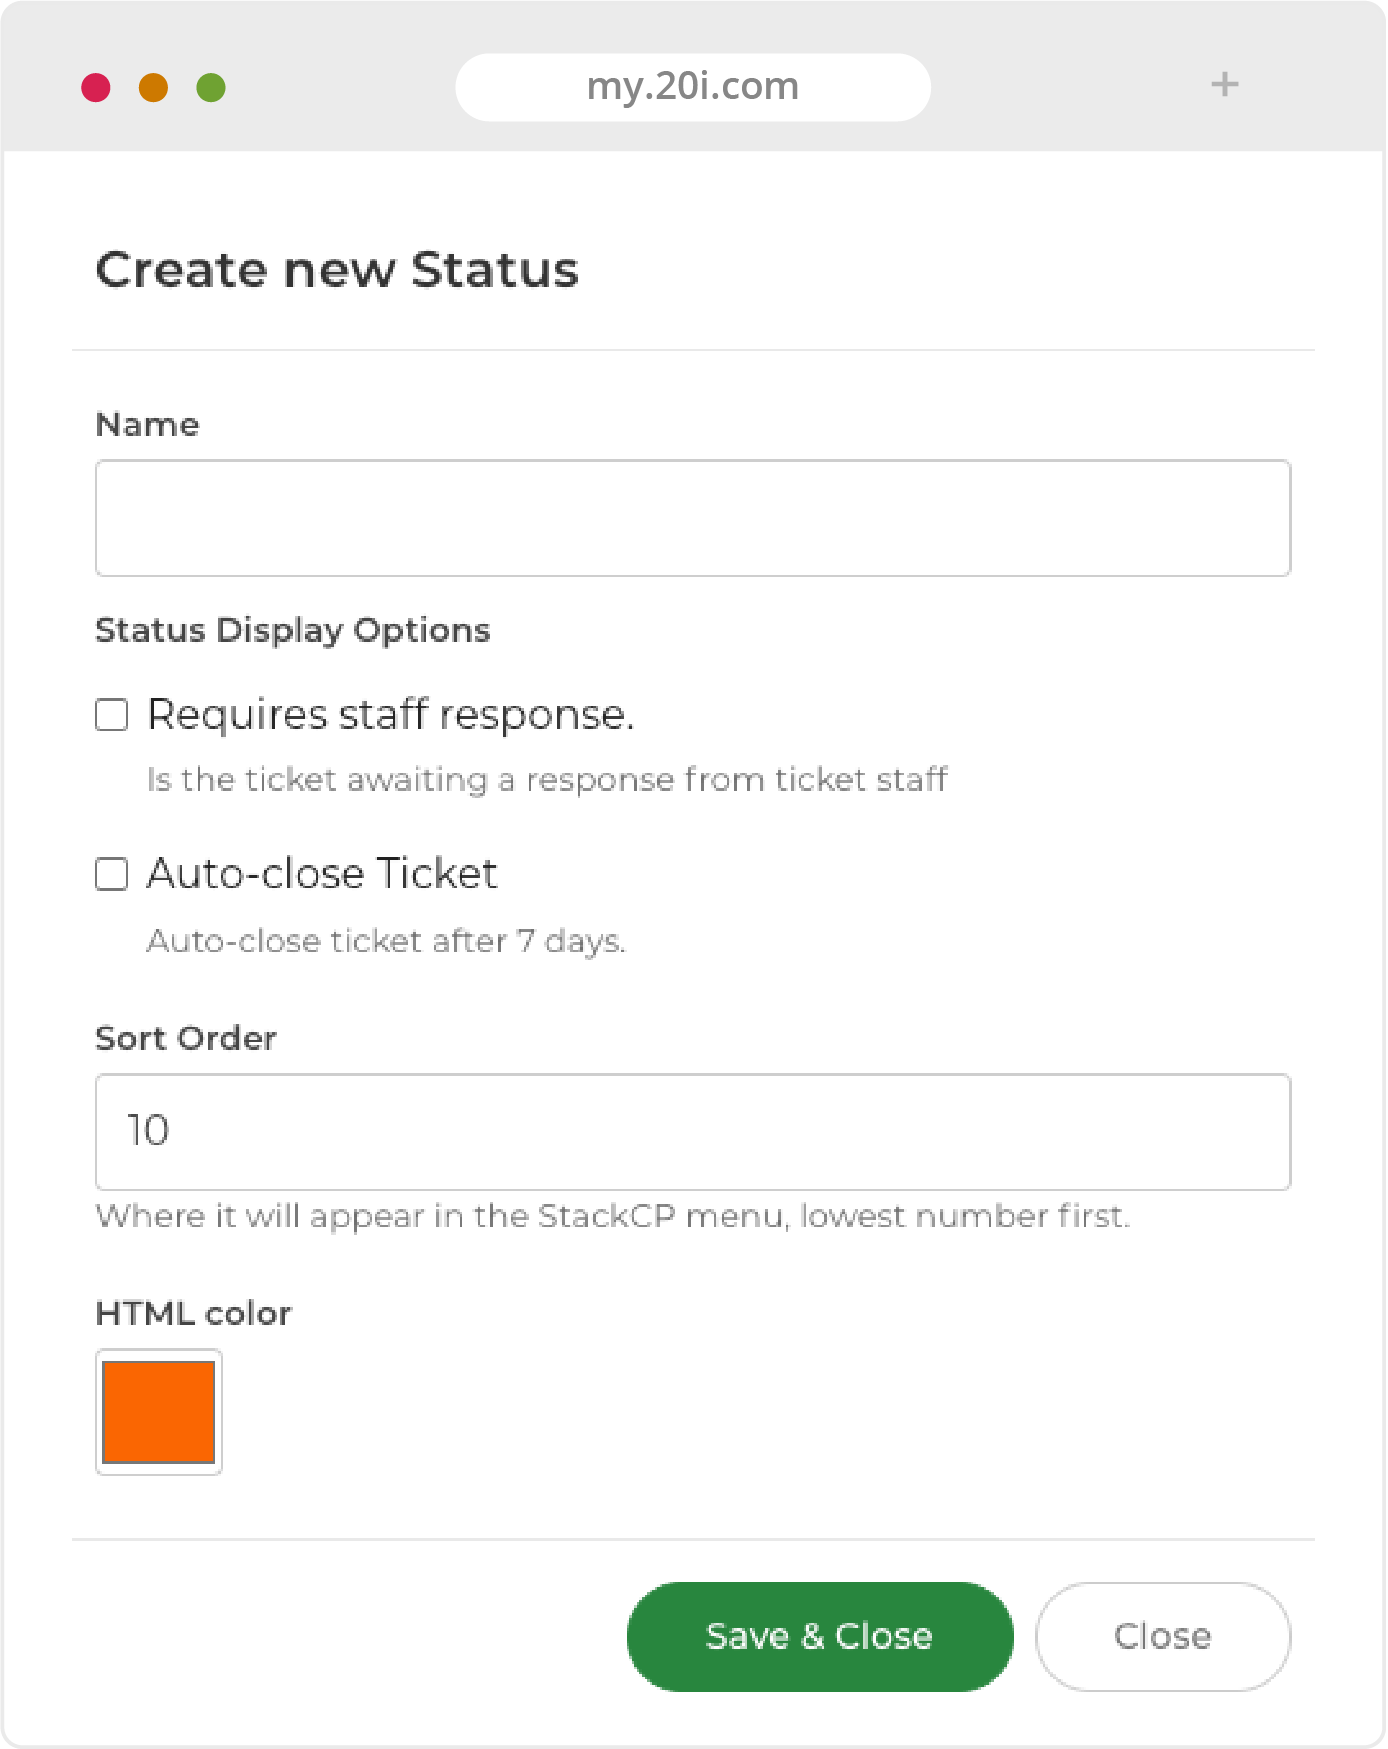
To accurately reflect the current progress a ticket is in, each update will be given a Status. By default there are 4 statuses: Open, Awaiting Customer Reply, Awaiting Staff Reply and Closed. These can’t be edited or deleted. You can also create your own status to reflect what is happening to the ticket. To create a status:
- Select Ticket System Configuration and locate the ‘Ticket Status’ section
- You’ll see the 4 default statuses; select Create Status
- The Status Name is what will show to the customer when the status has been selected
- You can then choose whether a ticket with this status requires a staff response and whether it needs to close automatically after 7 days
- Select the order you’d like the status to appear in and give it a unique colour
- Select Save & Close

Best Practices for Statuses
To keep work flow efficient, keep the number of statuses concise and accurate to reflect the work being done on the ticket
Ticket Emails
When you or your customer reply to a ticket, the other party will receive an email notifying them of the update. You can customise those email notifications by going to Email Templates in Reseller Preferences and locating the StackCP Ticket System section.
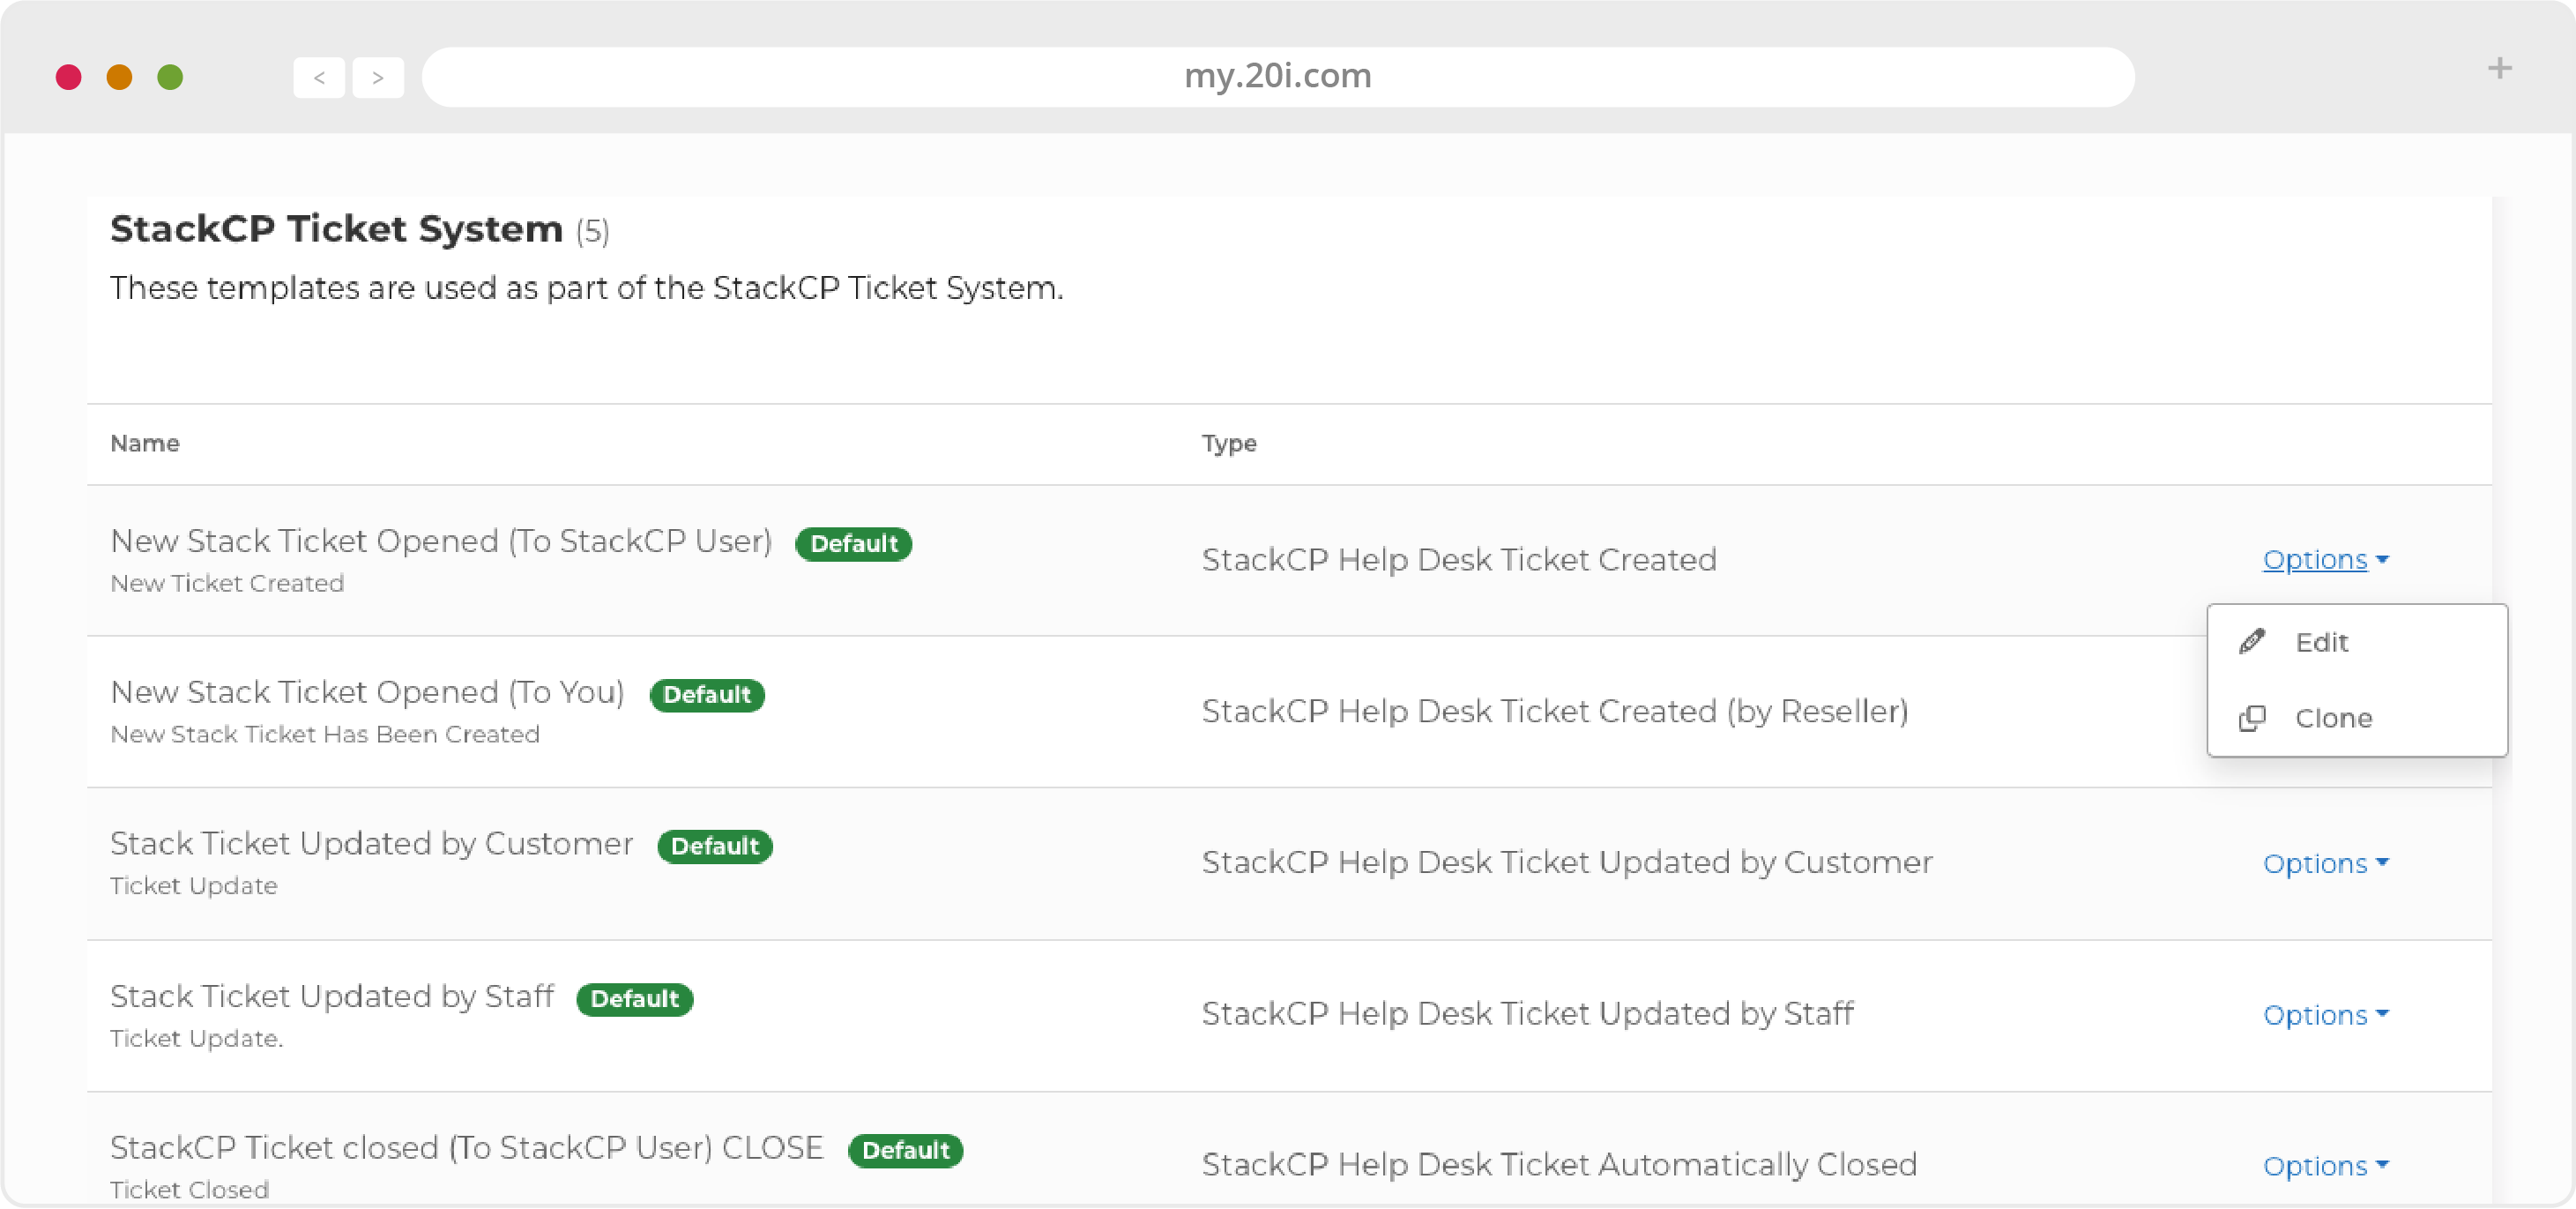
You will see the default templates: New StackCP Ticket Opened (To You), StackCP Ticket Automatically Closed (To StackCP User), StackCP Ticket Opened (To StackCP User), StackCP Ticket Updated (To StackCP User), StackCP Ticket Updated by StackCP User (To You). To customise each template, you can select Options > Edit. The default templates already ensure that your brand name is shown to your customers when a ticket is replied-to.
Ticket Ratings
To monitor how your support is received, you can allow your customers to rate your ticket responses. Ratings can be enabled on a department basis from Ticket System Configuration. Select Edit on the Department you’d like to enable ratings for, and check Accept Response Ratings box. When customers receive a response from this department, they will be able to rate it out of five stars.
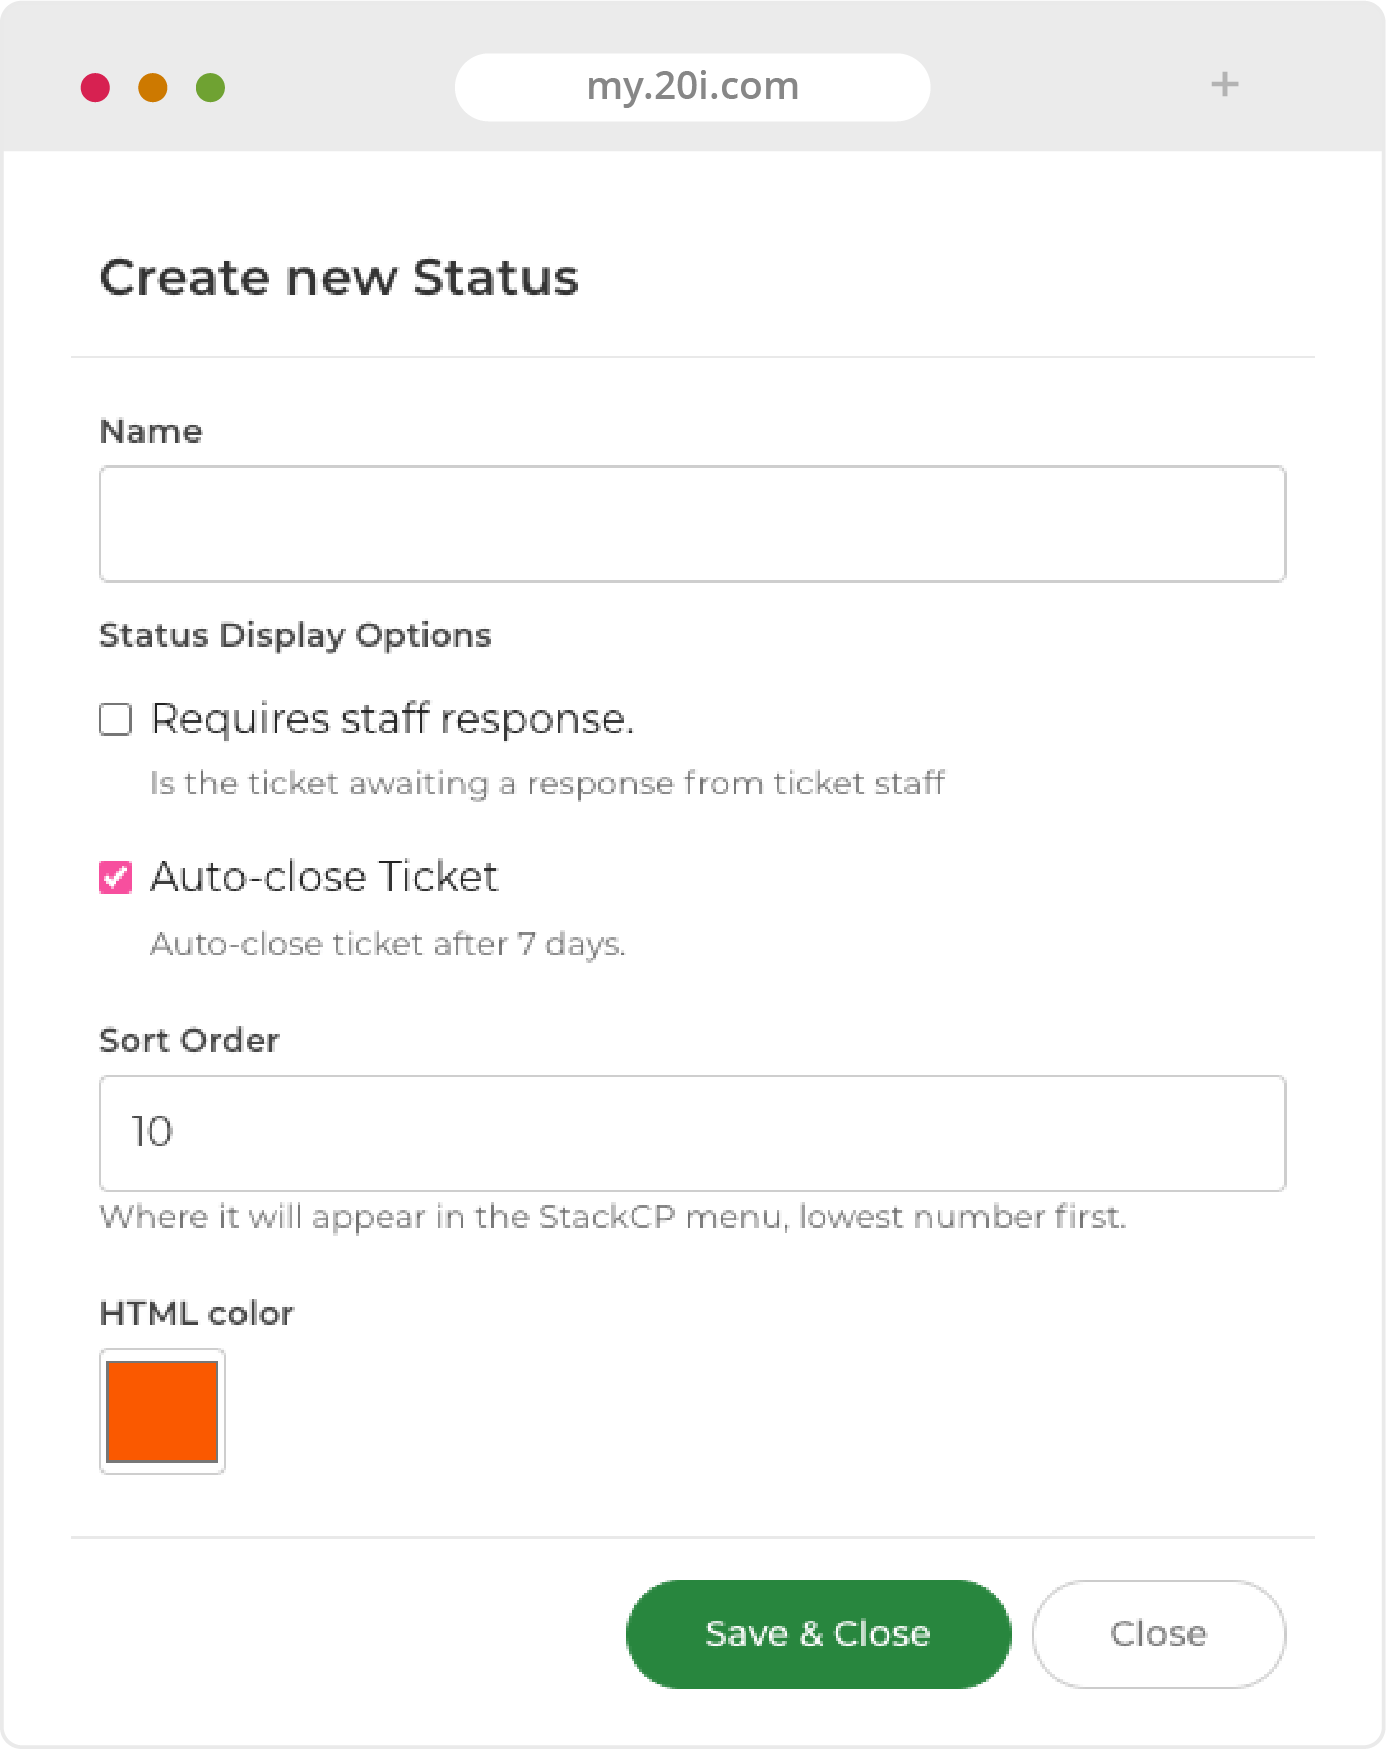
Auto-Close Tickets
Depending on a ticket’s status you may want to set it to automatically close for management purposes. To set a ticket to automatically close:
- Head to Ticket System Configuration and locate the Ticket Status section
- Select Edit on the status and check Auto-close Ticket. The ticket will then automatically close after 7 days of no action
White-Label Support Database
We also have a Support Database aimed at your customers that will cut down on the number of queries that you receive. It’s the same as 20i support database, without any reference to 20i or reseller hosting. It will appear in your customers’ control panel Help Desk menu. It’s maintained by us, so it’s always up to date. Feel free to suggest any articles that you think it would be useful to add. You have the option of replacing our generic ‘Stack’ branding with your own. This extends to all custom options: URLs, nameservers, email and FTP.
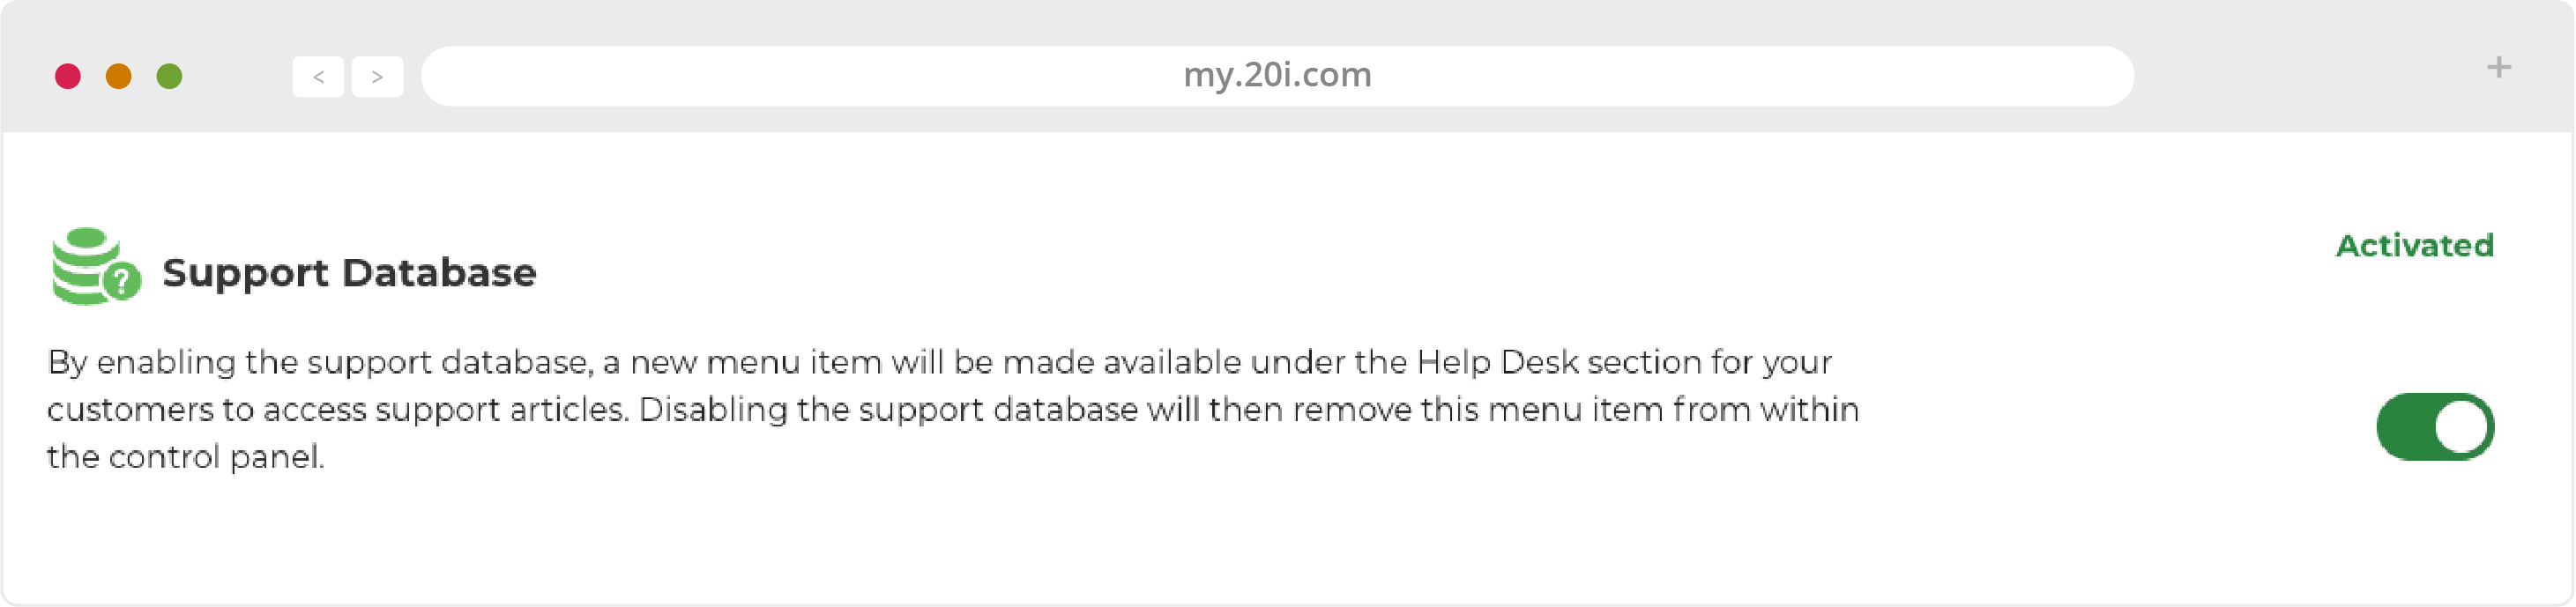
To enable the Support Database for your customers:
- Head to Reseller Preferences and select White-Label Support Database
- Use the toggle button to enable it
Once you’ve enabled it, a Preferences section appears. Here you’ll be able to customise what level of branding is shown to your customers in the support articles.
You can then also enable which Categories will be displayed to your customers. You can view the white-label support database by logging in as a StackCP User: select Options -> Sign in. You’ll now see under the Help Desk menu there’s a new link to the customer’s Support Database.
For those who’ve customised StackCP so it doesn’t have a Help Desk menu, it’s available at the URL: YourBrandOrStackCP.com/support-database.

>> Next step: Connecting with your customers