How can I set a custom status page for my reseller brand?

Should anything occur on the hosting that could lead to potential issues, such as upcoming maintenance or an issue that could be causing service downtime, it’s important to ensure that your clients are kept informed.
We provide a status page called StackStatus (https://www.stackstatus.com/) which reports all ongoing incidents and scheduled maintenance. You can configure StackStatus to show on a custom subdomain to maintain consistency with your own brand.
To do this you can:
- Set a custom domain and subdomain to display the StackStatus page.
- Add custom CSS to brand the UI of the StackStatus page.
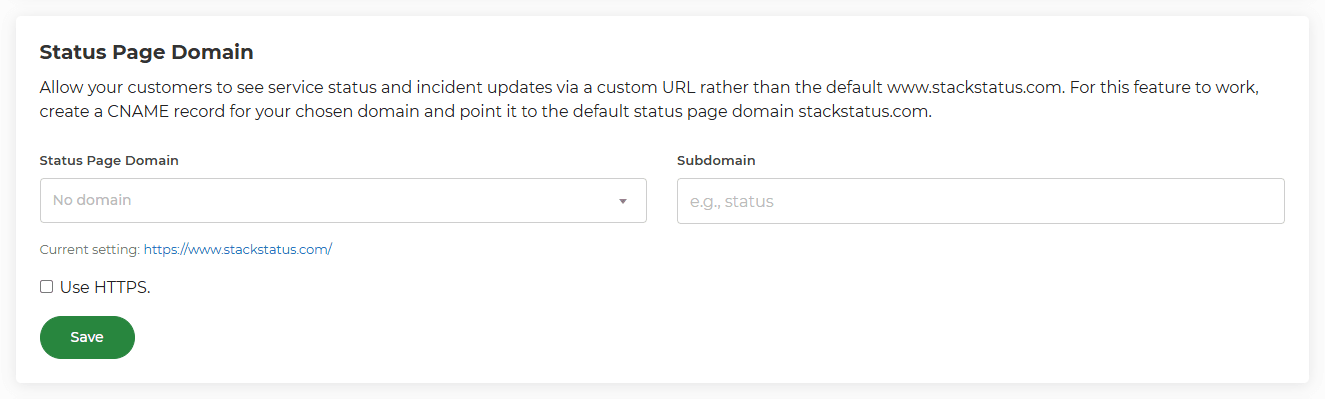
Setting Your Status Page Domain
- Head to StackCP Settings.
- Locate the Status Page Domain section.
- Choose your status page domain and a subdomain.
Please note, we'd highly recommend using a new domain name for your status page which you can route through an external DNS such as Cloudflare by pointing the nameservers to them. This ensures that your status page is redundant from 20i's own DNS. So if we experience internal issues, this ensures your status page will remain live.
As an example, you could choose something like example-status.com as the domain name, and then type www as the subdomain.
Adding DNS Records Manually
You need to ensure that you've added the correct CNAME so your custom status page works. This simply needs to be a CNAME from your custom status hostname to stackstatus.com.
Note: As an example, you could choose something like example-status.com as the domain name, and then type www as the subdomain.
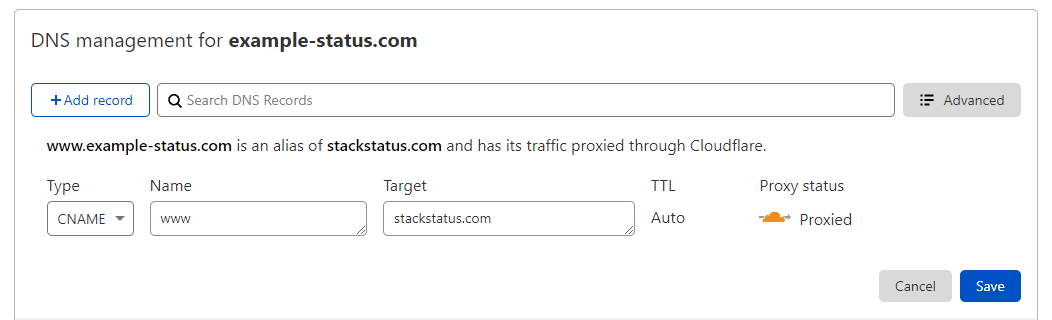
Custom DNS at Cloudflare
Log in to your Cloudflare account and select DNS, then add the CNAME record as show below, or for your chosen hostname.
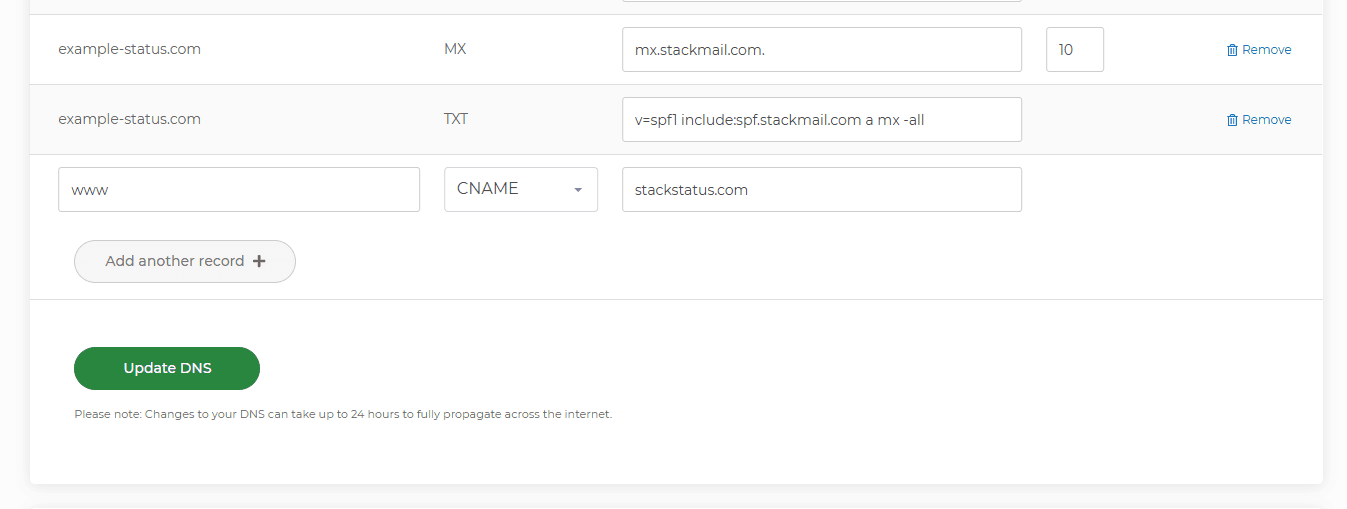
Custom DNS at 20i
Head to Manage Hosting > Options > Edit > DNS, then add the CNAME record as shown below, or for your chosen hostname.
You should then be able to head to your custom status hostname (i.e., www.example-status.com), which will then display your status page. You may need to wait a bit longer for DNS to propagate if you can't see this straight away.
You can then brand your status page!
Branding Your Custom Status Page
To add custom CSS to your status page, head to StackCP Appearance and locate the Status Page section. You'll see you have the options to make changes to the header, footer, and the CSS.