Guide to the 20i API Documentation
The 20i Reseller API is a powerful and flexible tool designed to provide you with comprehensive access to all the features and functionality of StackCP, our cutting-edge hosting control panel. By leveraging the extensive capabilities of our API, you can either create a customised hosting control panel from the ground up or seamlessly integrate external services to extend the capabilities of your existing system.
As a valuable asset for advanced web hosting resellers, the 20i API allows you to streamline the management of your hosting environment, automate repetitive tasks, and improve the overall efficiency of your operations.
Here at 20i, our API documentation is powered by Apiary. Apiary is a user-friendly platform designed to streamline the process of creating, managing, and sharing API documentation. As an end user, you'll find that Apiary's interactive console provides a seamless and intuitive way to explore and interact with the 20i Reseller API. In this brief guide, we'll walk you through the basics of navigating and utilising the Apiary console to make the most of your API experience.
Accessing the Console:
To get started, you'll first need to access the 20i API documentation on Apiary. To access 20i's API documentation, log in to your My20i account and head to Reseller Preferences > API > View Documentation.
Overview and Navigation:
Once you've accessed the Apiary console, you'll be greeted with an overview of the 20i Reseller API. This includes a brief introduction, authentication information, and a list of available endpoints.
On the left-hand side, you'll find a navigation panel that allows you to easily jump between sections of the documentation, making it simple to find the information you need. Each section available within the navigation panel covers a different service that we provide, e.g. sections covering endpoints for domain, VPS, and hosting package endpoints.
Interactive Endpoints:
Apiary's console provides a unique, interactive way to explore and test the API's endpoints. Each endpoint is presented with its respective HTTP method (GET, POST, PUT, DELETE), a brief description, and the necessary parameters.
To test an endpoint, simply click on the "Try" button next to it. This will open up a customizable request form where you can input any required parameters and view the corresponding response in real-time.
Customising Requests:
When testing an endpoint, you can input your own parameters or modify the provided examples to suit your specific use case. Simply edit the fields in the request form and click "Call Resource" to see how the API responds to your query. This is a powerful way to understand how the API works and experiment with different scenarios.
Understanding Responses:
After making a request, the console will display the API's response in a structured format. You can view the HTTP status code, response headers, and the response body, which typically contains the requested data in JSON format. This helps you understand how to interpret the API's responses and incorporate them into your own applications.
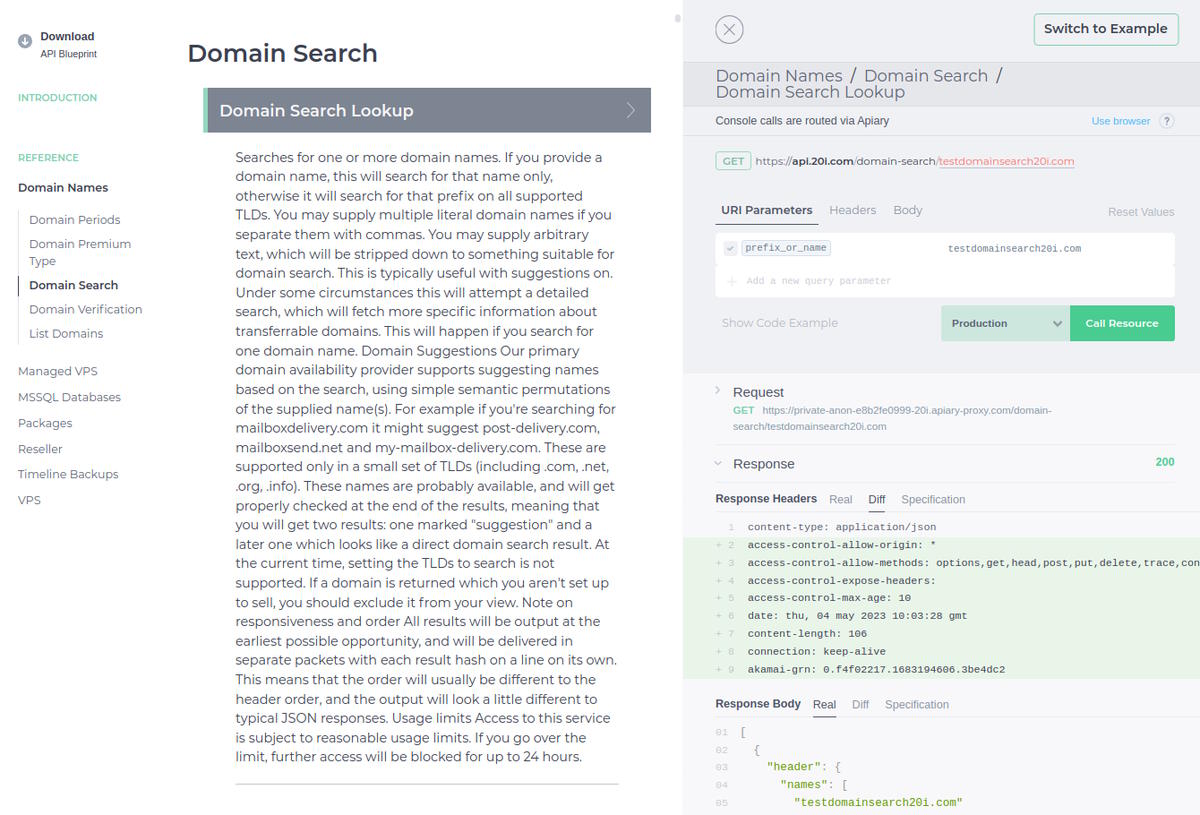
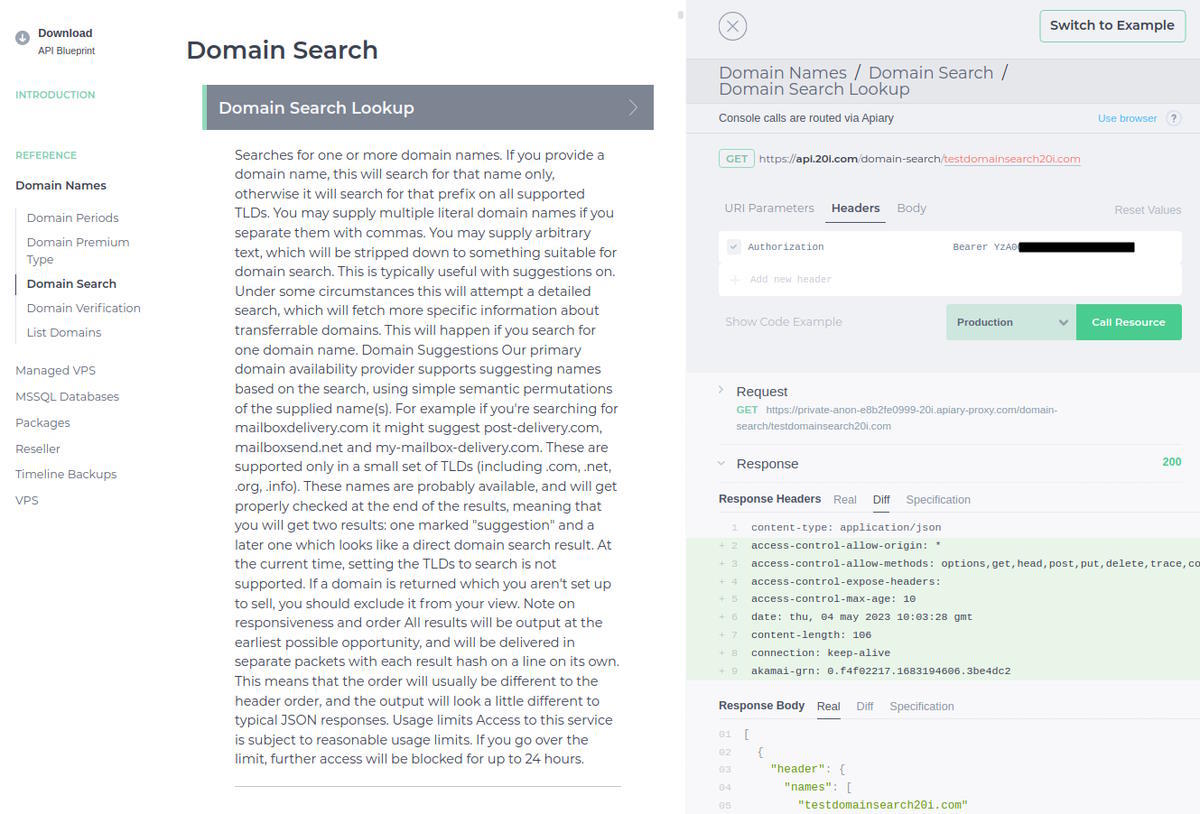
The following is an example of using the console to make a query to the domain search endpoint:


It’s extremely important to note that when making requests, your bearer token should be a base64 encoded version of your general API key. Your general API key can be found, and generated via https://my.20i.com/reseller/api.
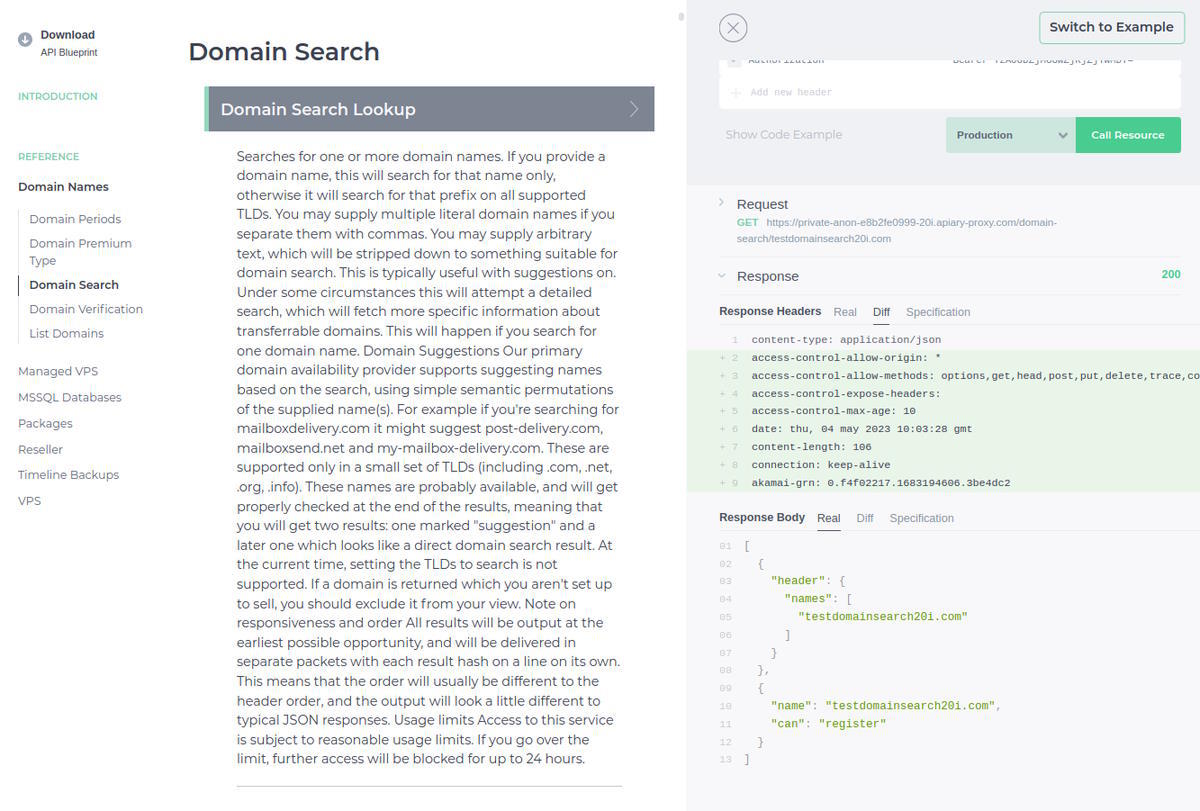
Regardless of whether the request is successful or not, you’ll be able to see the response made by our API in the response body of the console. If the API request is unsuccessful, the error code/reasoning will be denoted. If the request is successful, as it is in our example, it should look something like the following:

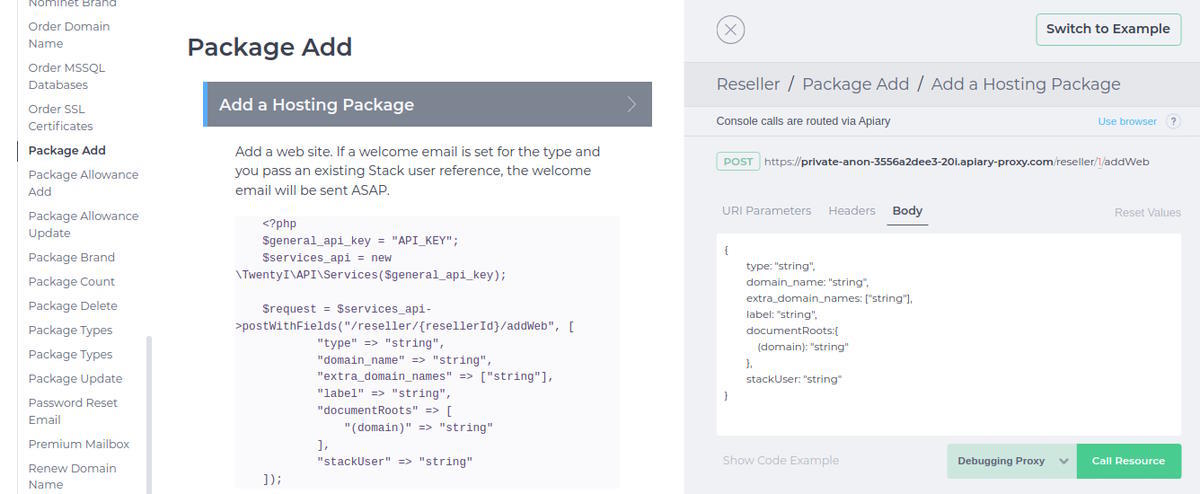
The process detailed above denotes the procedure for a GET request. The procedure for a POST request using the console is materially the same, albeit with the only difference being the use of the “Body” field. An example of making a POST request would, for example, be the creation of a hosting package. In this case, the URI parameters and headers would remain the same; the only difference is that “Body” elements need to be provided in order to send off the payload/request, as denoted below.

