How to configure calendars and contacts with Premium Mail in Outlook

Outlook does not have built-in support for CalDav or CardDav, the protocols used to sync contacts and calendars with our Premium Mailboxes.
Fortunately, there are add-ons available that can seamlessly integrate this functionality into Outlook.
One such solution is the Outlook CalDav Synchronizer, which you can conveniently download from the following link: https://caldavsynchronizer.org/de/download/
Once you install this add-on it will show in Outlook. When you open Outlook again you should see a new tab show at the top of Outlook with some new options:

You will need to click on the Synchronization Profiles in order to set up a profile for calendar and contact sync. Both will need their own profile so once you click on the Synchronization Profiles button you can click the Green plus icon at the top of the window that opens, select the Generic CalDAV/CardDAV option and click OK to create a profile where you can set up the sync.
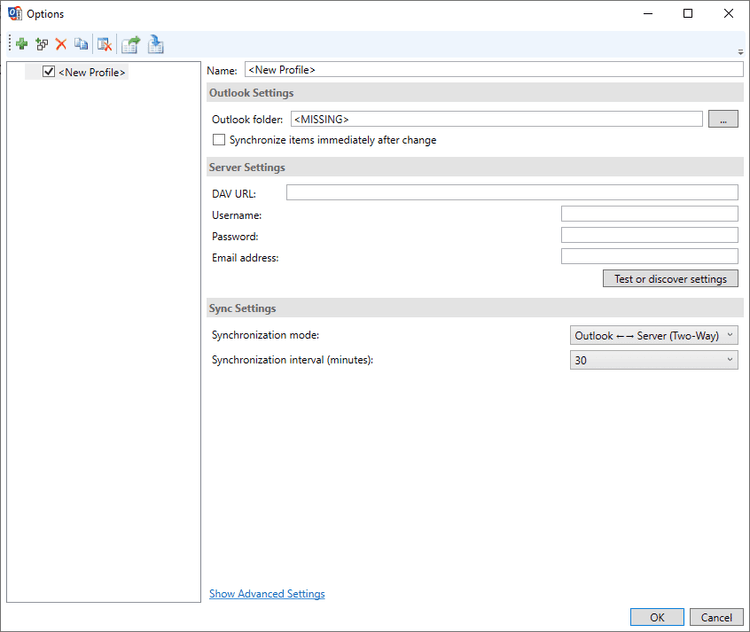
The window you should then see is something like this:
Before you can fill this in completely, you will need to get a URL from the webmail which is used to sync.
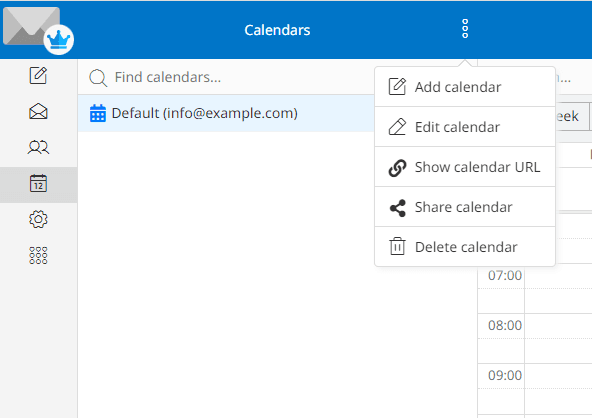
To get the URL for calendar sync, you will need to log into the webmail for the premium mailbox, go to the calendar tab on the left hand side, click the three dots at the top of the page where it says Calendars and choose the Show Calendar URL option:
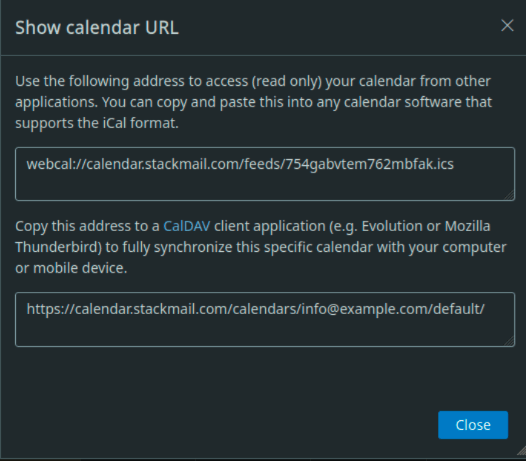
Within the window that opens, you will need to copy the second URL:
To get the URL to sync contacts, you will need to log into the webmail for the premium mailbox, click on the settings tab on the left hand side, Click CardDAV:
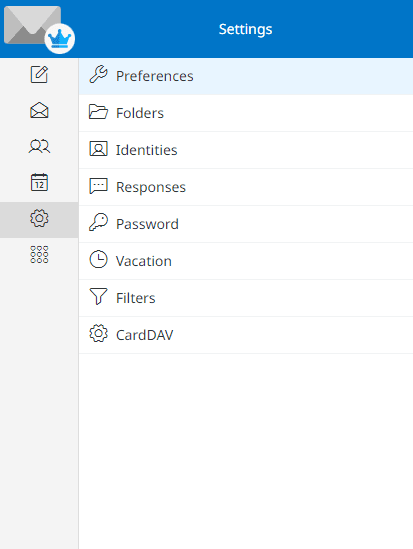
This will show the CardDav profiles, and you will need to click Default (info@example.com). This will open more options which will show on the right side of the page and you can find the URL you will need to sync contacts there.
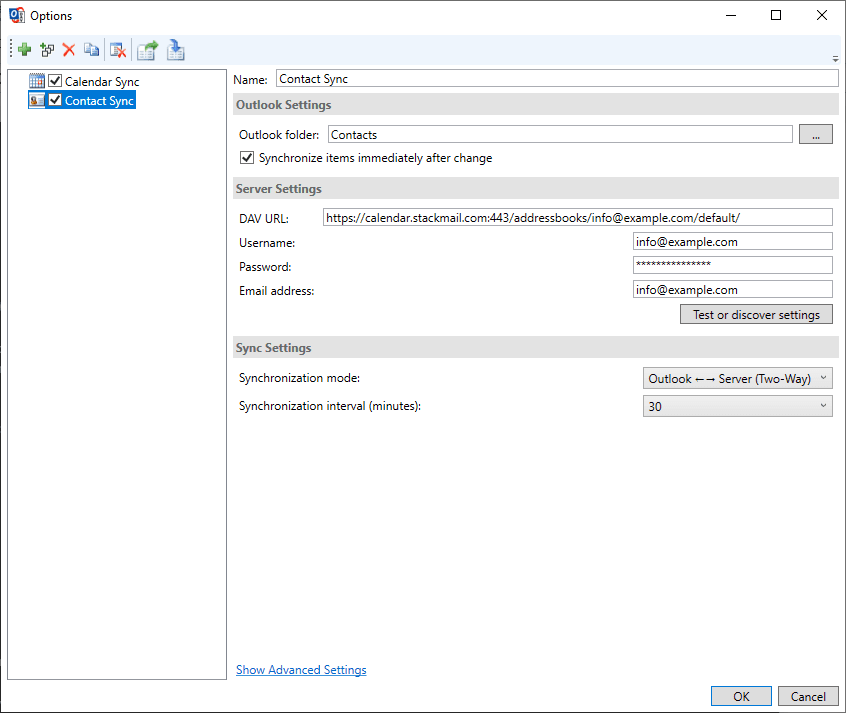
Once you have these, you can fill in all the options needed to set up the sync. Each of the options are explained below:
- Name – The name of the profile, you can name this whatever you like to identify the profile.
- Outlook Folder – This is the folder where you would like to find your synced items. The recommended is Calendar or Contacts based on what will be synced for this profile.
- DAV URL – The URL’s you should have just retrieved using the explaination just above this section.
- Username – The email address for the premium mailbox you are setting this up for.
- Password – The password for the premium mailbox you are setting this up for.
- Email address - The email address for the premium mailbox you are setting this up for.
Once these have been added you can click the Test or discover settings button to ensure the connection is successful and will be able to sync with the calendar or contacts. There are also a couple other options to choose in relation to how the sync should work:
- Synchronization Mode – How this should sync with Outlook. The recommended will be Two Way since this will sync the calendar and contacts between both the server and Outlook. This means that any change made within webmail will also show within Outlook and vice versa.
- Synchronization Interval - How often the add-on will attempt to sync any changes.
Once you have filled all this in, it should look something like this for Calendar sync:

And like this for Contact sync:
Once these are set up, they should sync in the intervals you have set on the settings above. You can also click the synchronize now option under the CalDav Synchronizer tab to sync manually.
Please note, when using providers such as Google, Outlook or Yahoo to sync from public iCal links it could take between 12 to 24 hours to sync any new events. We have no control over calendar syncing with outside providers, there could be times where events do not sync correctly. In these cases, there is little we can do as we have no control over how outside providers sync.