Managed Cloud Hosting: Manage Your Cloud Hosting

On the My20i home screen you’ll be presented with your chosen Managed Cloud Hosting server
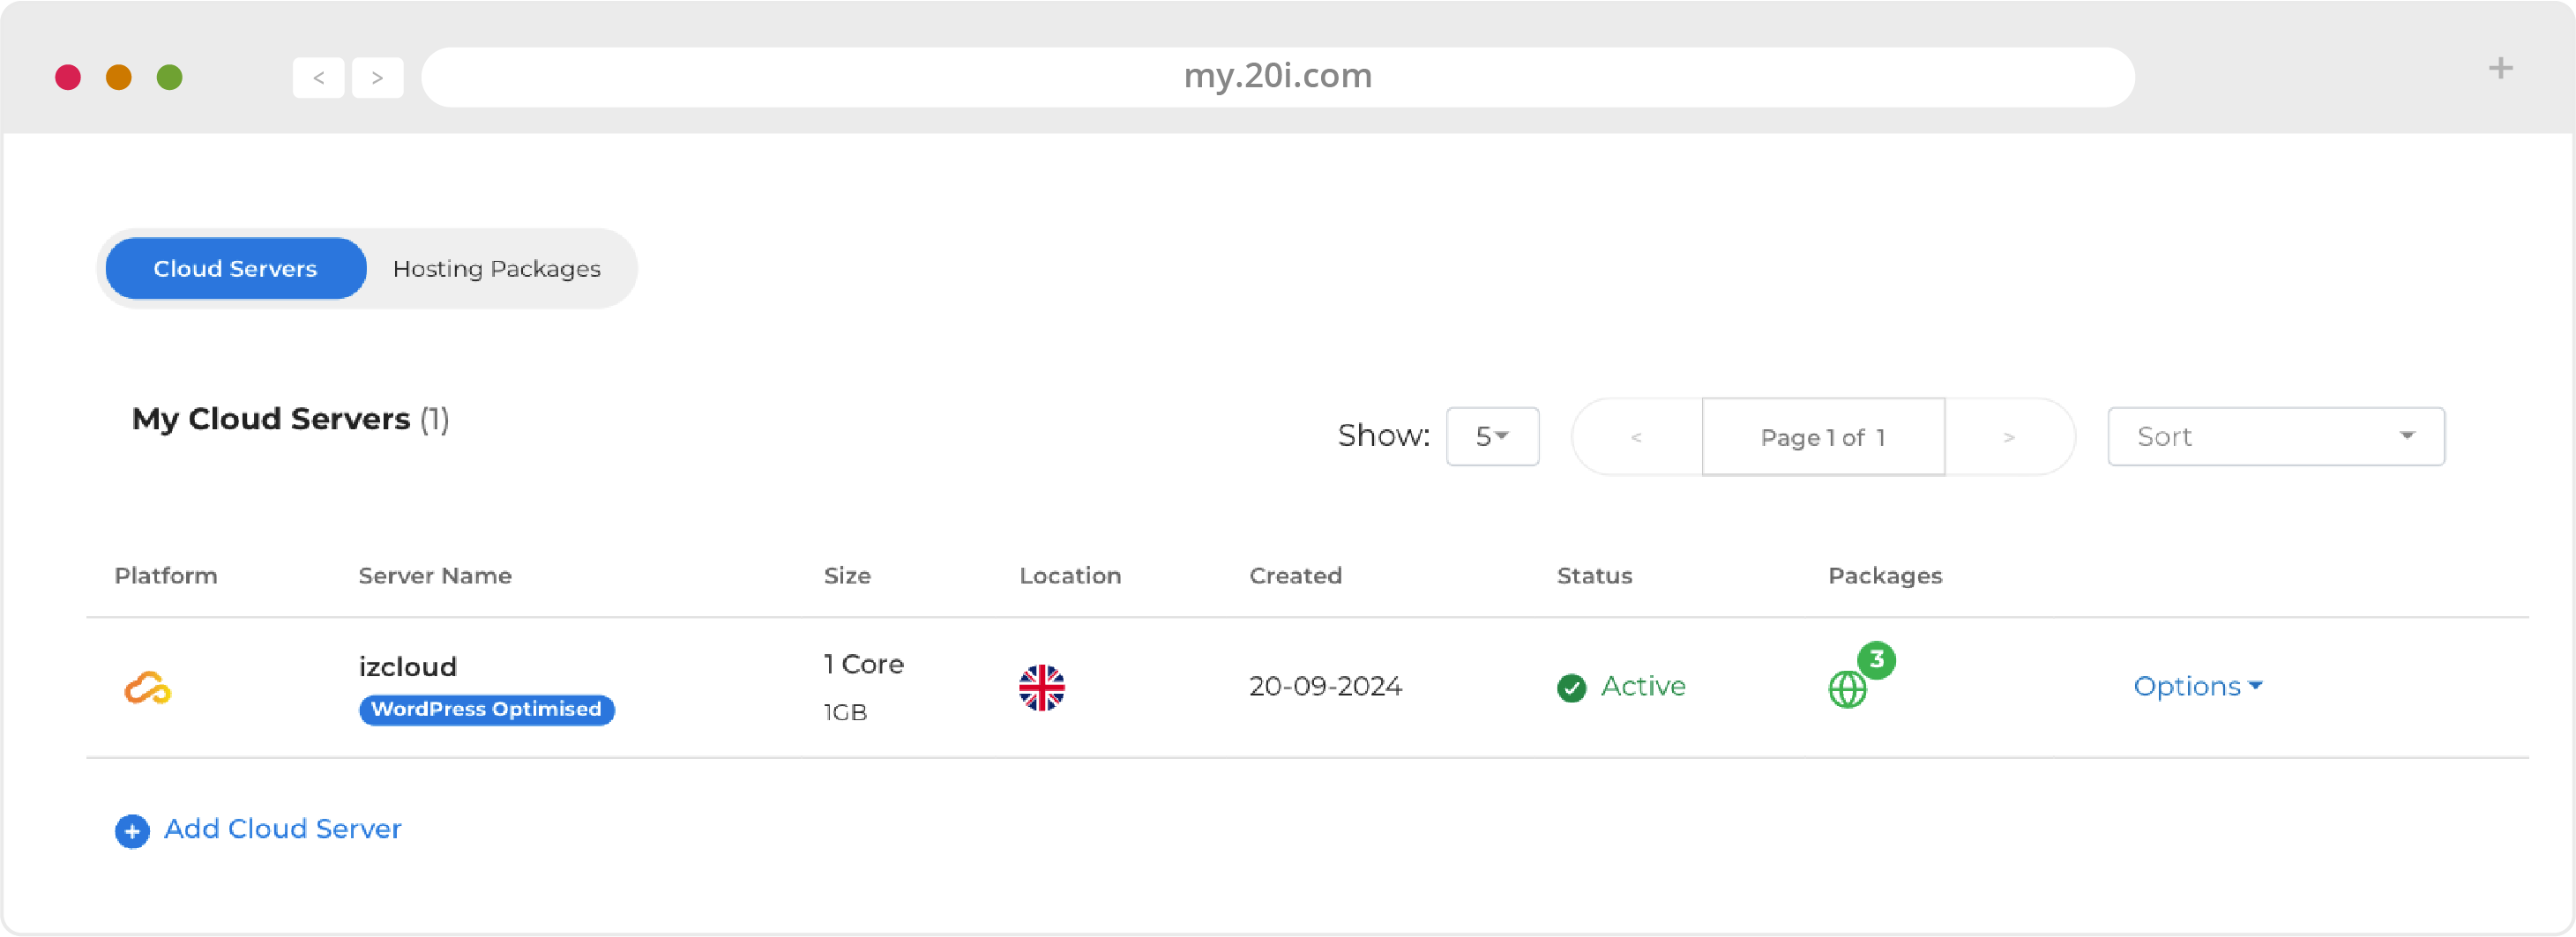
You can find all the information you need about your server by selecting it. You’ll then be presented with an Overview of your server, and a menu on the left hand side, covered below.
For convenient management of Hosting Packages for individual websites from the home screen, you can use the toggle switch to show the Packages.
This Manage Server Overview will show:
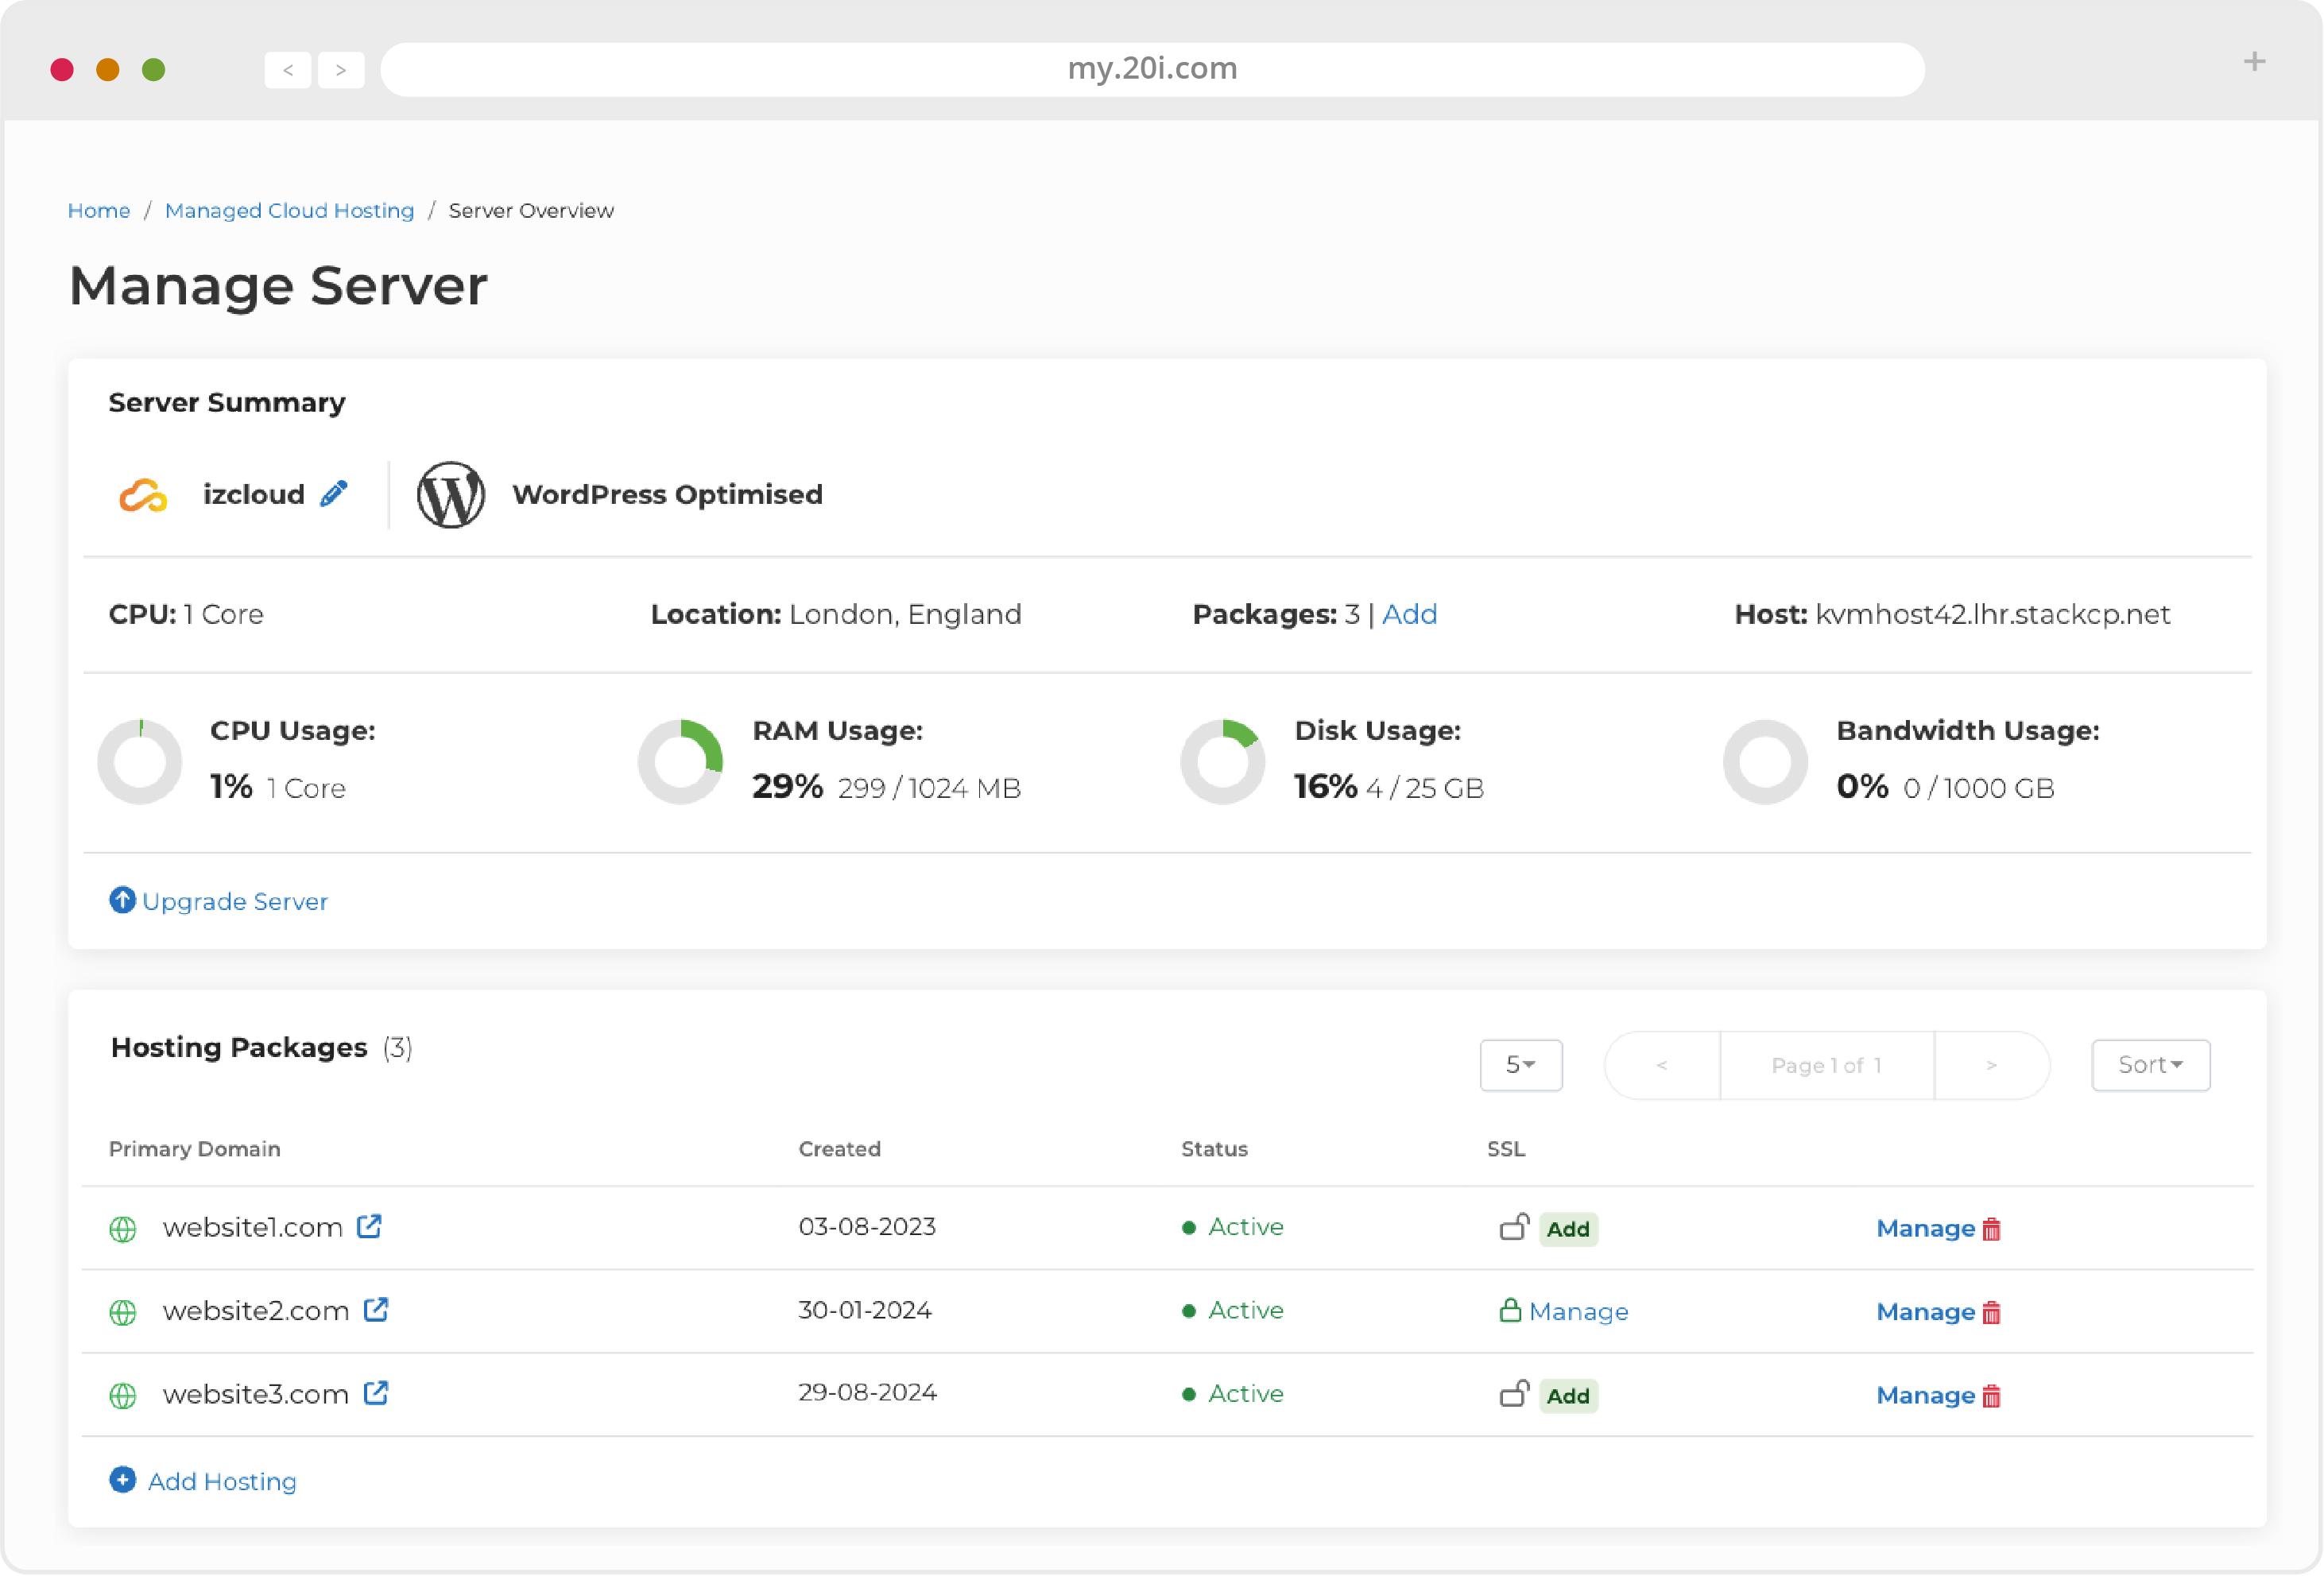
- The name of the Managed Cloud Hosting server, and whether it’s based on 20iCloud, AWS or GCP
- What type of server it is (e.g., WordPress Optimised or Magento Optimised)
- A summary of its number of cores, location, packages and KVM (kernel-based virtual machine) host information
- A summary of resource usage (CPU, RAM, storage and bandwidth)
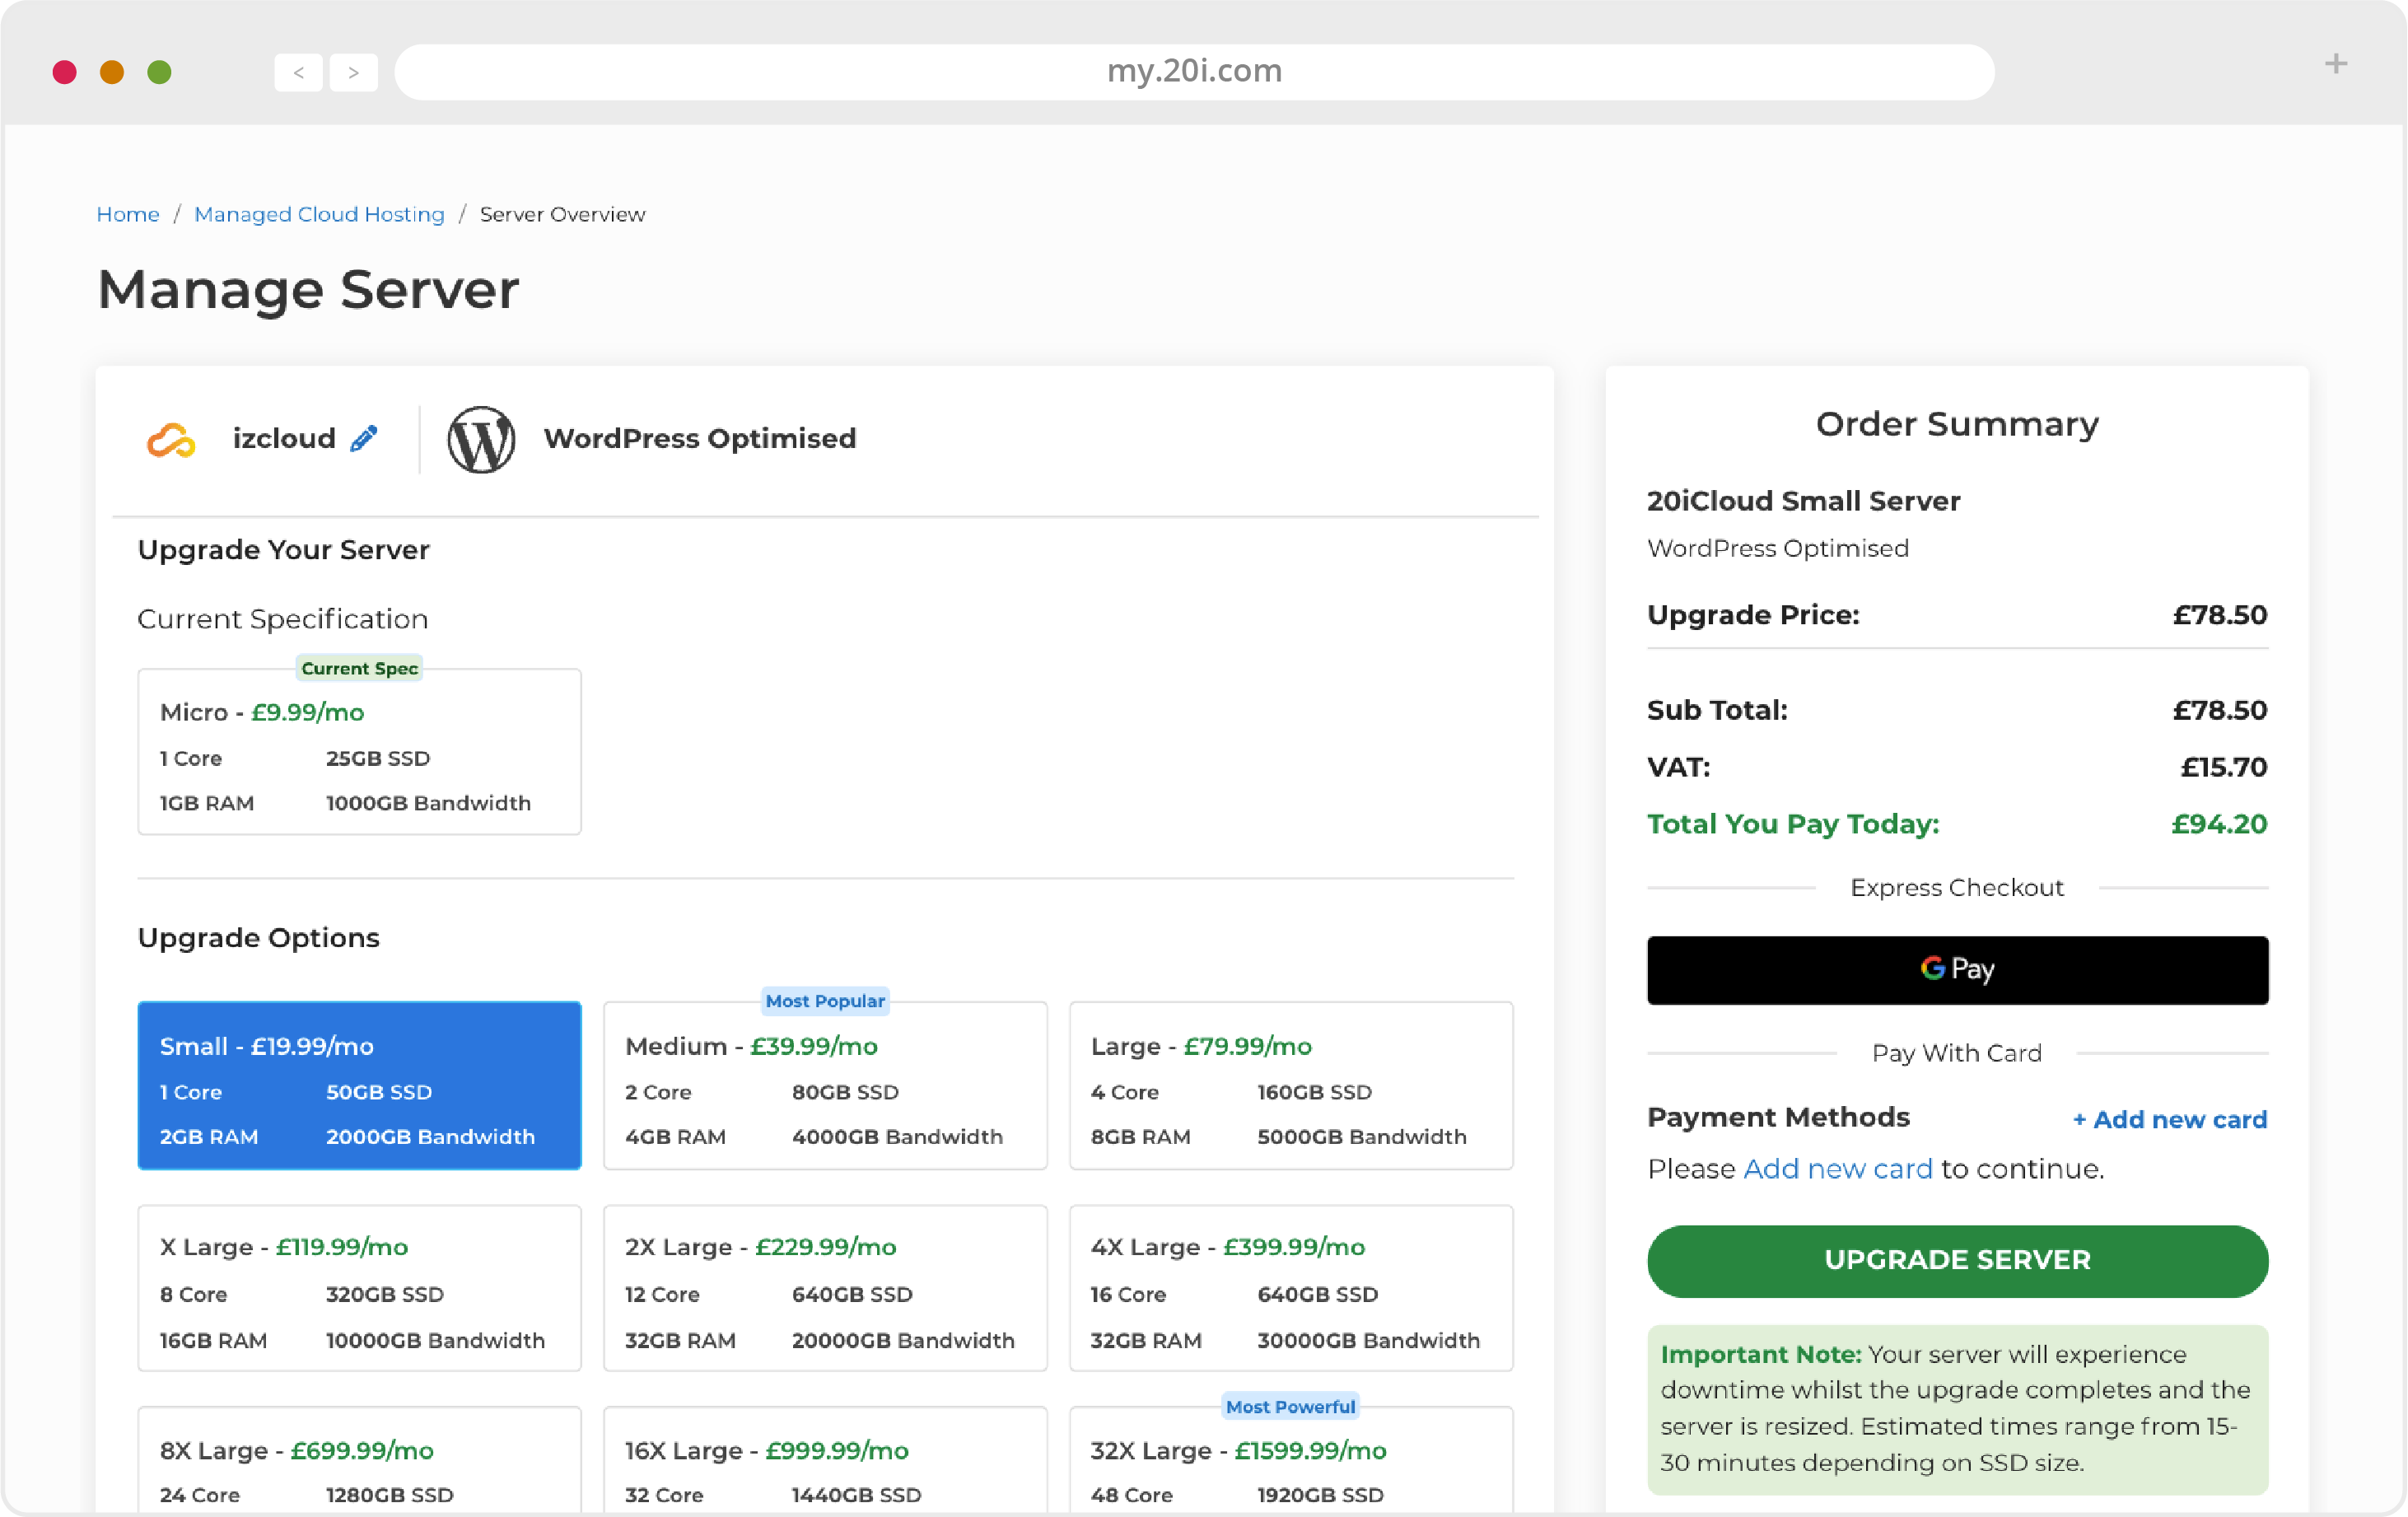
- An option to upgrade the server, which will lead to a screen where you can choose your specs
Below this will be your Hosting Packages menu. Here, you will be able to see the domain names of individual websites on your Managed Cloud Hosting.
Other information includes:
- Creation date
- Whether they are active or inactive
- SSL Certificate Status (an open padlock indicates that an SSL hasn't been applied)
- Options to manage or delete the hosting package
You can Add Hosting using the button below. This will be where web space for individual websites is created. They’re referred-to as ‘Hosting Packages’.
To create a new Hosting Package, select ‘Add Hosting’ and enter the domain name (e.g. 20i. com, not https://www.20i.com) for that package.
Once created, you will be able to ‘Manage’ all aspects of that individual Hosting Package. You can also click on the domain name to go direct to the home page of the website.
Usage Graphs
Here, you’ll be able to see detailed graphs of resource usage over time: disk usage, load average, CPU usage, memory usage, network usage, and disk I/O. You can choose intervals of 24 hours, 30 days and the last 12 months.
You can monitor these stats to ensure that your website(s) are receiving enough resources.

Upgrades
As your website grows, you can upgrade your Manage Cloud Hosting. Choose the new size of server, make payment, and your server will be resized. Note that there will be downtime while the upgrade completes.
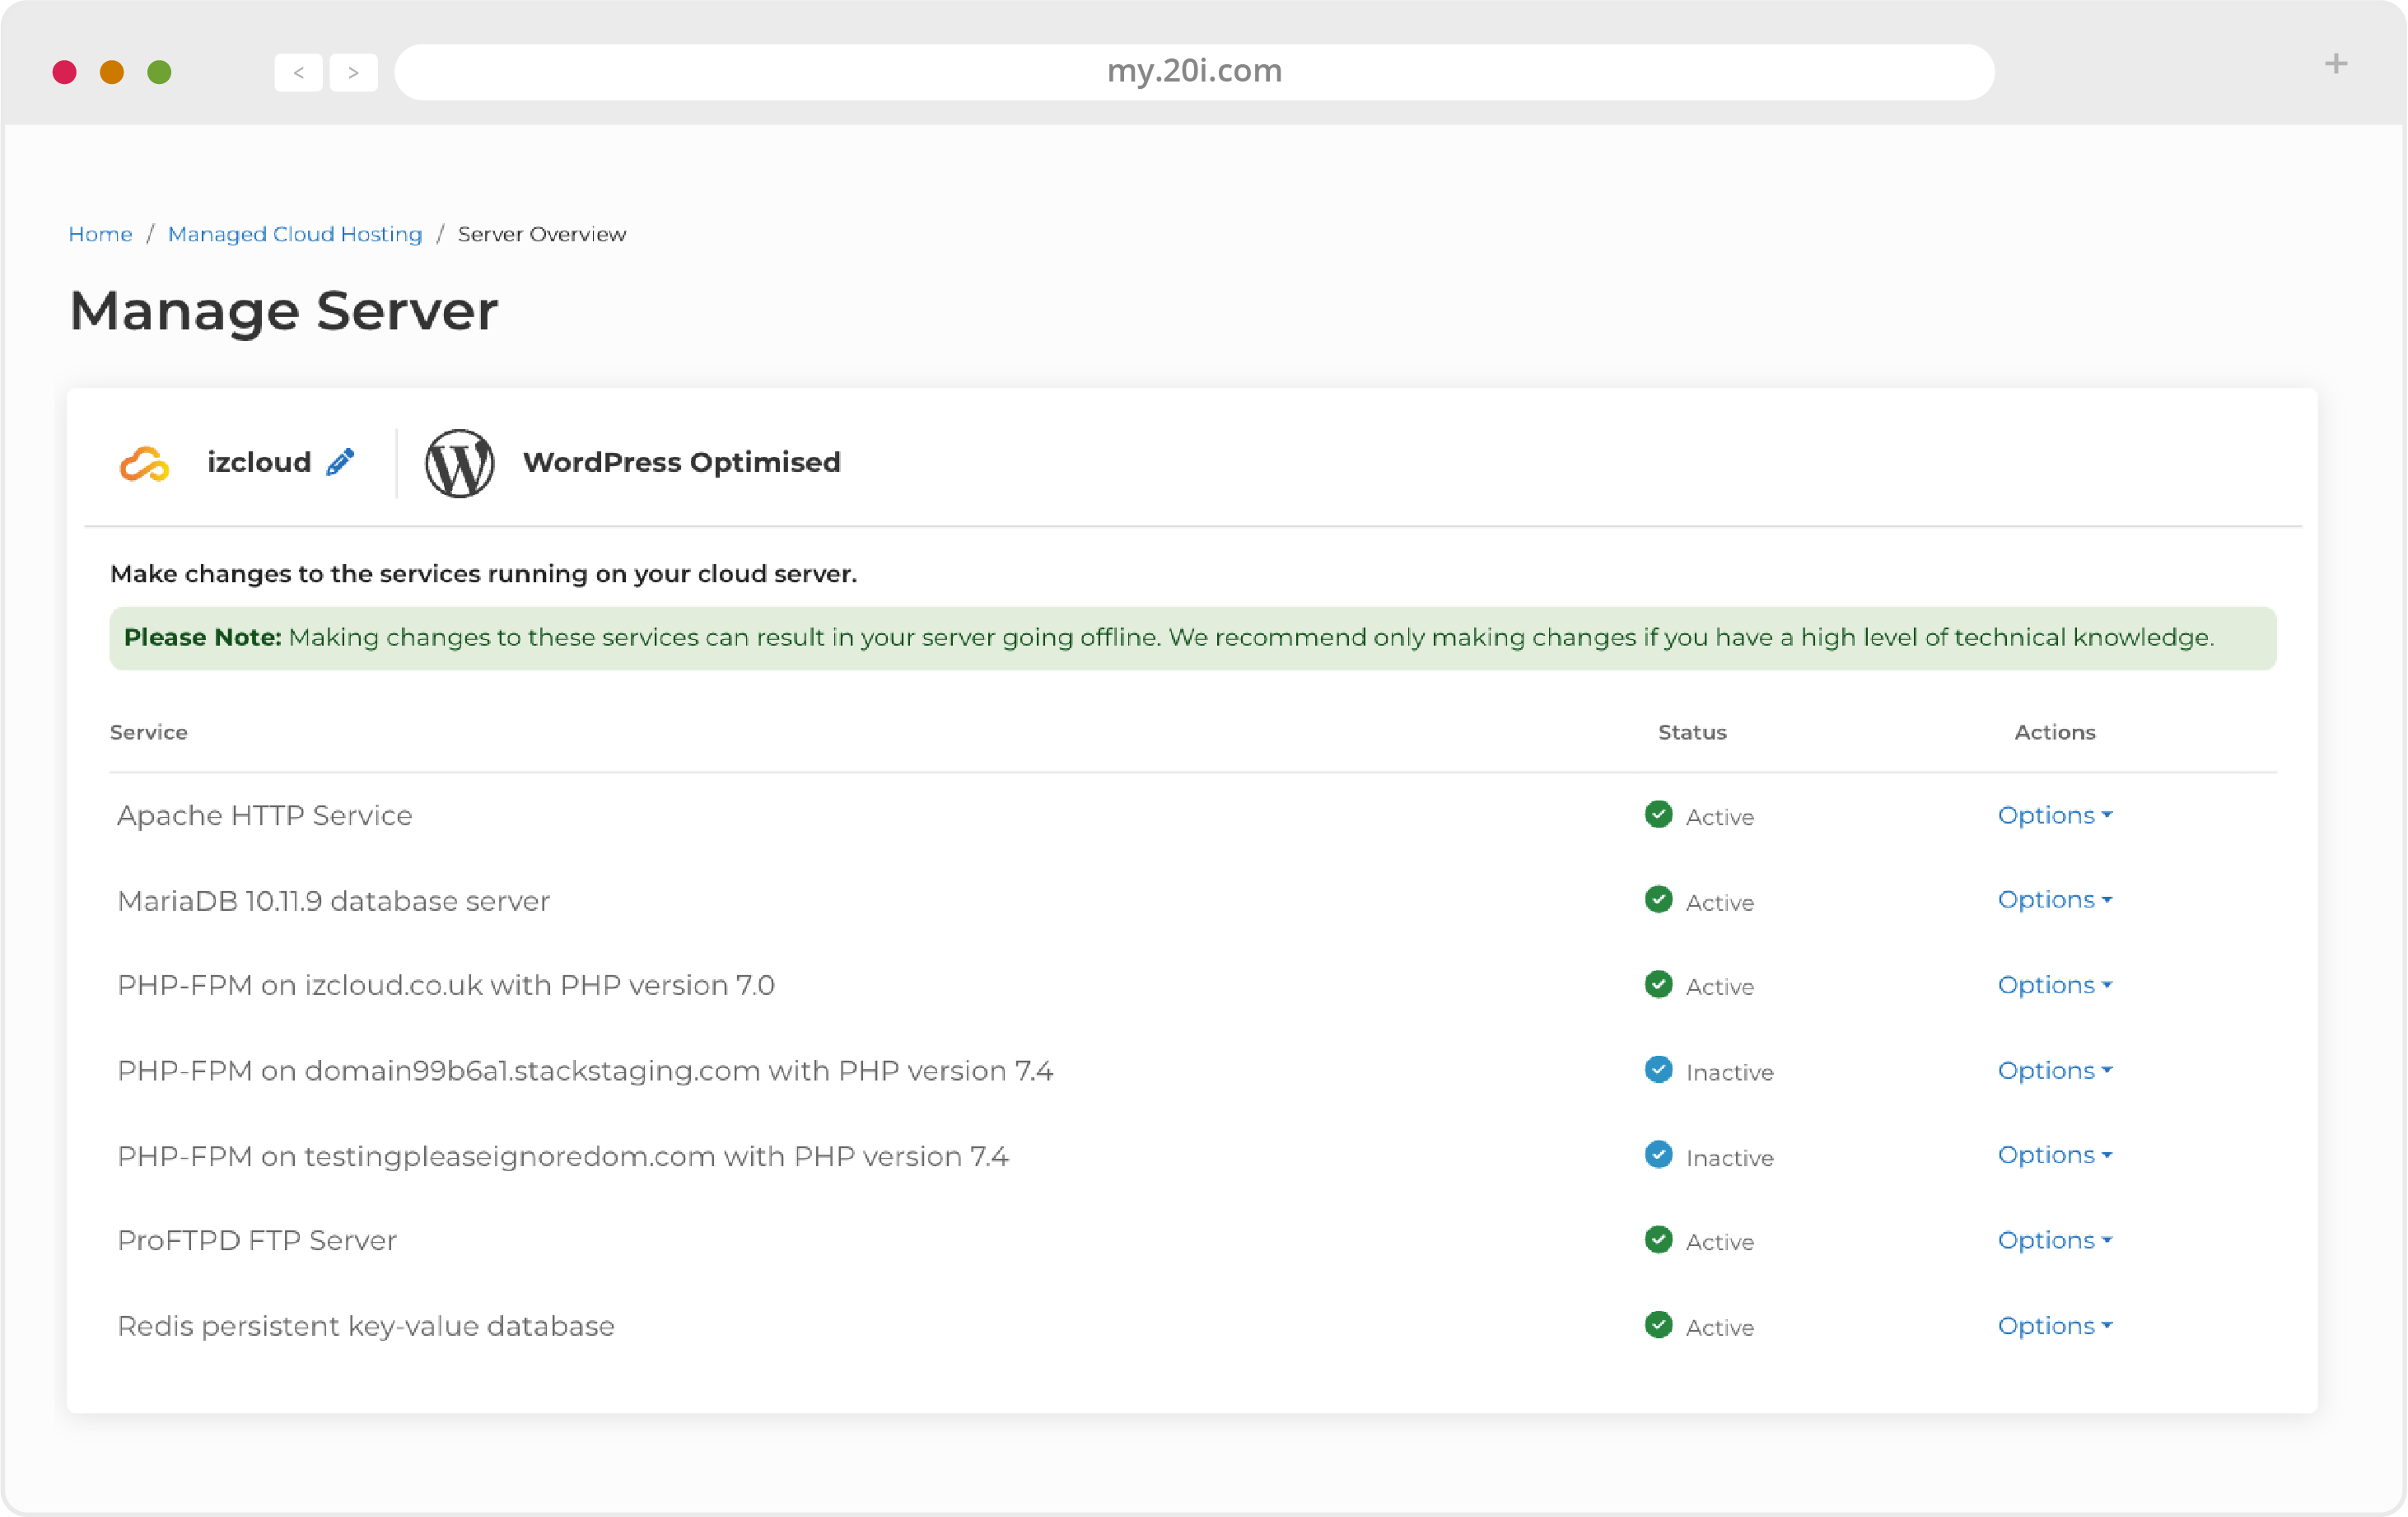
Manage Services
On this page, you can make changes to the services running on your cloud server. Making changes to these services can result in your server going offline. Only make changes if you know what you’re doing, and feel free to contact our Support Team if you have any queries.
Settings
This is where software like NodeJS, Redis, Python, Django and similar software can be managed.

WordPress or Magento Optimisation
You can make your Managed Cloud Hosting optimised for WordPress or Magento when ordering, meaning that preconfigured software and tools are available to you.
Please note: this will have to be carried out on a new Managed Cloud Hosting server, that doesn’t already have hosting packages installed.
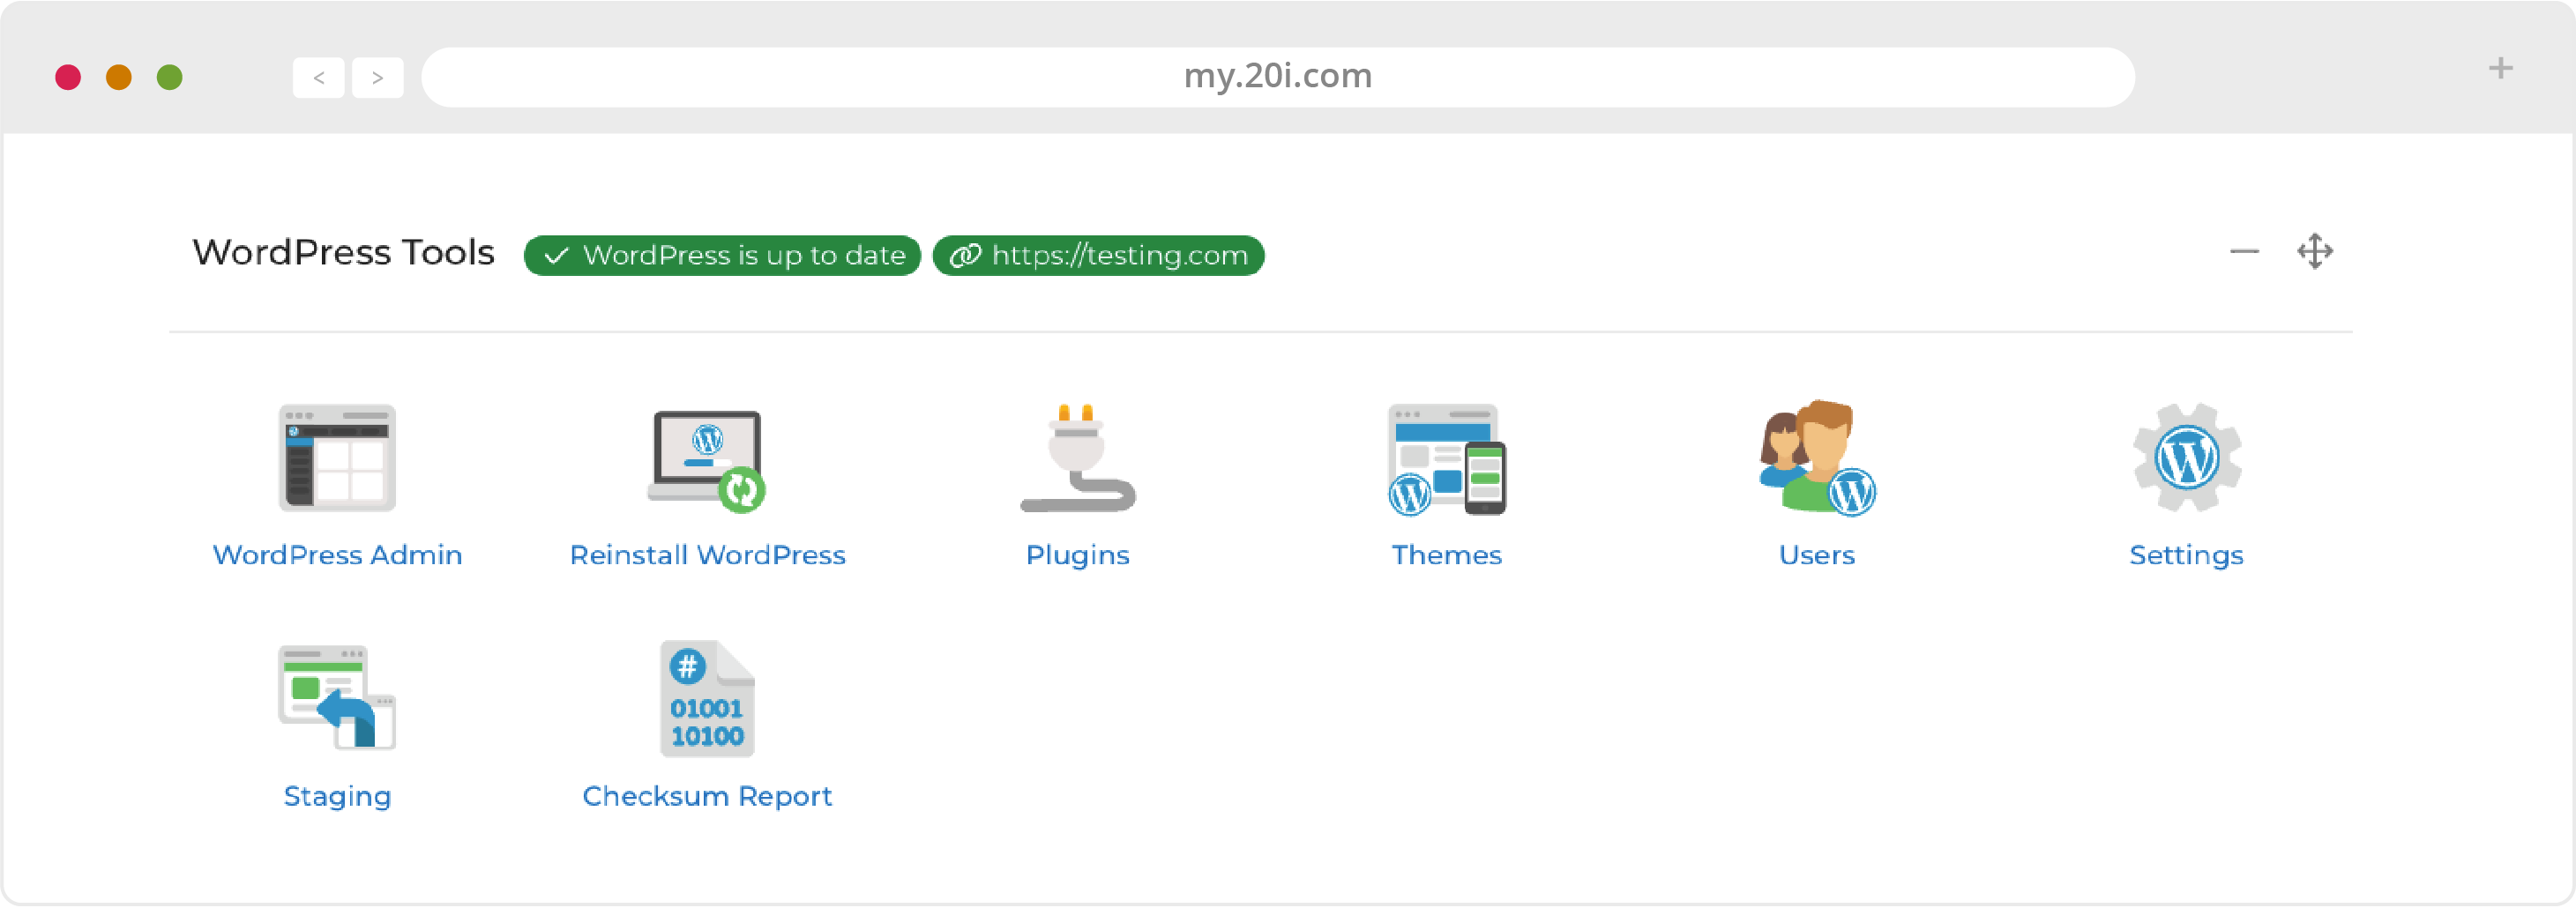
For Magento, the server is preconfigured with Redis and ElasticSearch: ready for the latest version. For WordPress, it means full access to WordPress Tools, 20i WordPress Manager, and Stackcache. You can manage users, plugins and themes, create staging sites, do a WordPress Checksum report and much more, all from within My20i. All new packages that you create will come with WordPress installed.
It’s a great way to get even better performance on our Managed Cloud Hosting.
>> Next step: Migrating Your Site