Getting Started with your Agency Hub

20i Agency Hub is a powerful interface for Agencies to manage billing, cloud servers, clients and projects all from a single, intuitive dashboard. The experience is tailored for the needs of web designers and developers to help manage workflows and deliver better results for your clients.
Agency Hub is built around 3 core concepts:
- Billing & Invoicing. We’ve partnered with Stripe to enable you to connect your Stripe account using the Stripe API to integrate your existing billing process.
- Cloud Servers & Websites. Leverage 20i’s Cloud Server infrastructure to quickly host your customers websites or applications.
- Clients & Projects. Integrated project management makes it easier to keep track of client communications and deliver work on time.
Did we mention Agency Hub is completely free? Agency Hub sits on top of 20i’s world-class server platform. Read more about the 20i managed cloud server platform and the benefits here.
Setting up Agency Hub
You’ll need to have a Stripe account to use Agency Hub as we leverage their powerful billing platform to make client invoicing a breeze.
To set up Agency Hub:
- Log into the My20i control panel.
- Head to Agency Hub in the top navigation bar and select Get Started.
- You’ll be prompted to enter your Stripe API Keys which you’ll find from within your Stripe Dashboard.
You’ll then be redirected to the Agency Hub Overview page.
Your Agency Hub Overview
From the Overview page you can easily see an overview of key stats, such as your daily, monthly and yearly revenue, as well as the new clients you’ve onboarded.
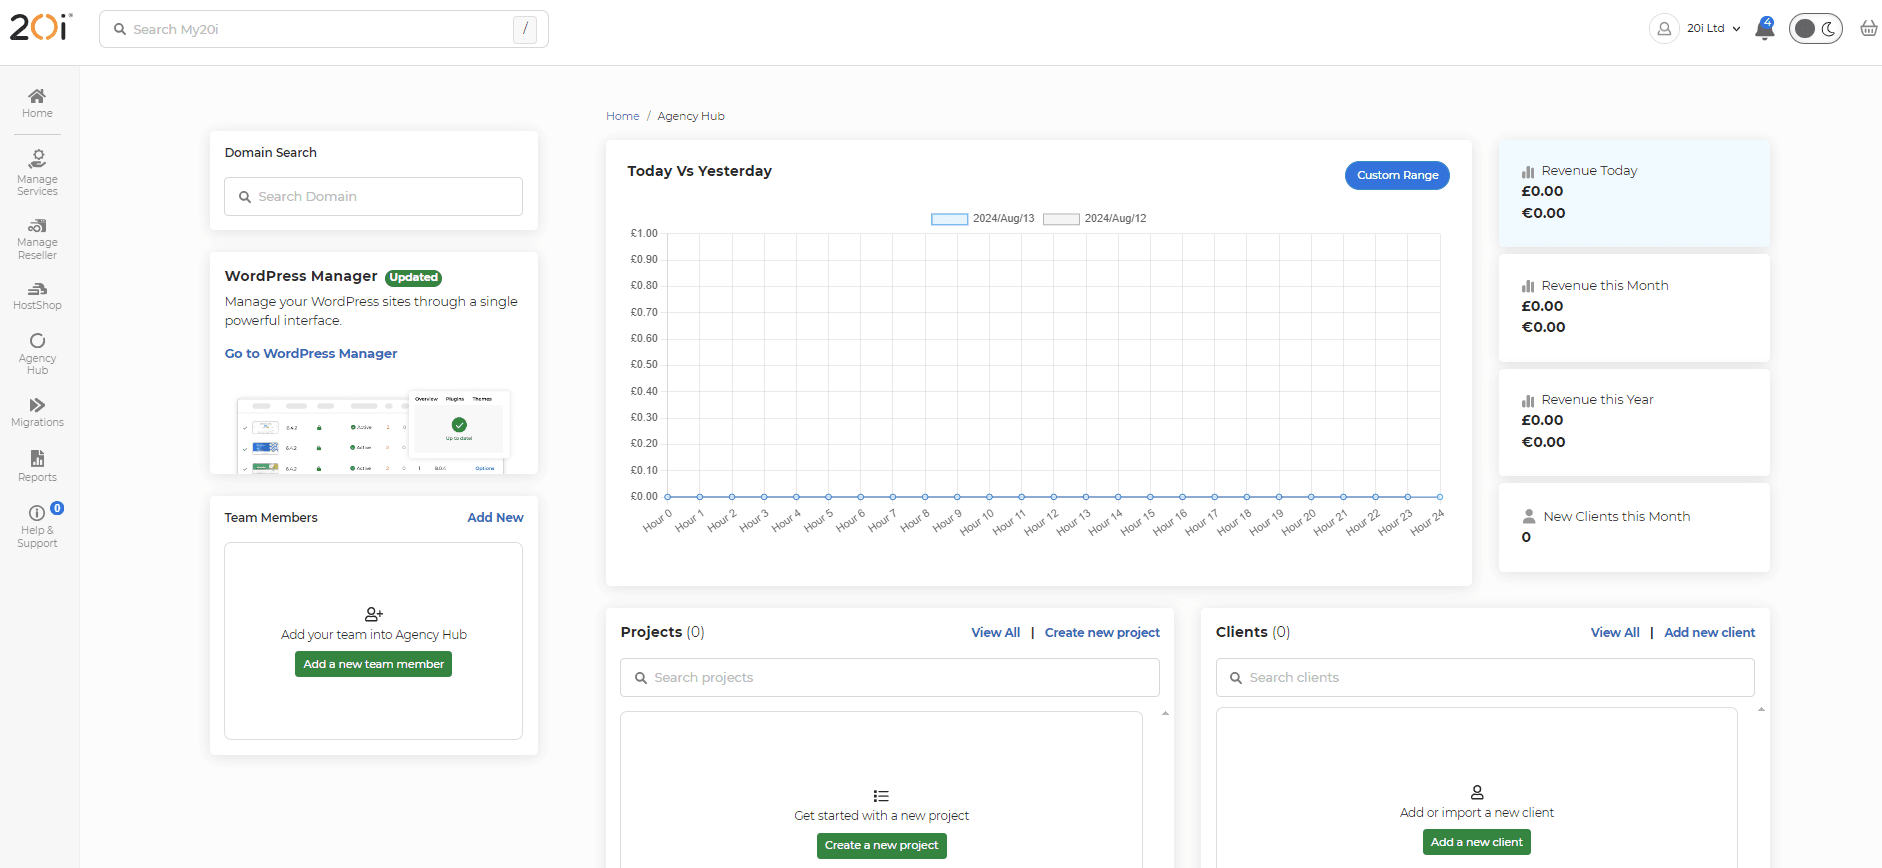
The predefined stats (such as Revenue Today, Revenue this Month and Revenue this Year) are automatically compared with the previous time period, so you'll see yesterday's revenue if you select Revenue Today allowing you to compare time periods. You can also select a custom range, for example if you want to compare the current week (Monday to Friday) to the same week last year you can use the Custom Range option. Simply select the time period you want to see, and then select 'Same period last year' and press Show - the graph will update to show you the updated data.
You can also easily access your Projects, Clients, Team Members, Websites and Cloud Servers all from the overview.
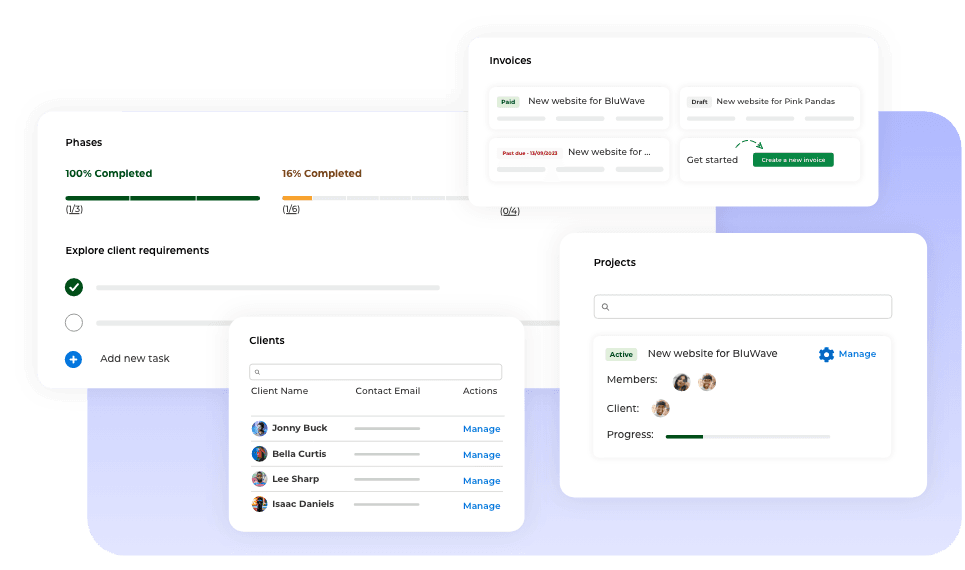
Agency Hub Clients & Projects
Setting up clients
Agency Hub clients are your customers and are mapped to the customers you have set up in Stripe to keep billing information in sync. If you’re setting up Agency Hub from scratch you won’t have any clients set up, so you can either:
- Import from Stripe. Because you’ve connected your Stripe account you can simply select which customers you want to add into Agency Hub.
- Add new Clients. You can add brand new clients directly from Agency Hub, this will also add the client into Stripe so they can be billed seamlessly when you’re ready.
Please note, if you add a client that already exists in Stripe, we’ll simply map the customer in Agency Hub to the existing Stripe customer, you won’t have duplicate customers appear in Stripe.
Please note, when you delete a client from Agency Hub, we don’t delete the customer from within Stripe.
Using projects
Agency Hub Projects are an integrated way to manage your workflow. To get started, head to Projects and choose Create Project.
A brand-new project will be created for you. You can then update the project details such as the name, description, the client this project is for and the cloud server being used for this project to keep your work organized.
Phases
Phases are a stage in your projects life cycle that involves a set of activities that must be completed before moving onto the next phase. The number of phases can very depending on your own project, but many web development projects follow a similar structure, here’s an example:
- Information gathering: This phase involves gathering information about the project’s goals, target audience, and requirements.
- Planning: In this phase, the project team creates a plan that outlines the project’s scope, timeline, and budget.
- Design: During this phase, the project team creates a design for the website, including the layout, color scheme, and typography.
- Content creation: In this phase, the project team creates content for the website, such as text, images, and videos.
- Development: This phase involves building the website using programming languages such as HTML, CSS, and JavaScript.
- Testing: During this phase, the project team tests the website to ensure that it is functioning correctly and meets the project’s requirements.
- Deployment: In this final phase, the website is launched and made available to the public.
You can set deadlines for each project to help keep your project on track.
Team Members
You can add Team Members to your main 20i account, allow you to delegate access to projects for your staff or colleagues.
To do this, you’ll need to add a Team Member.
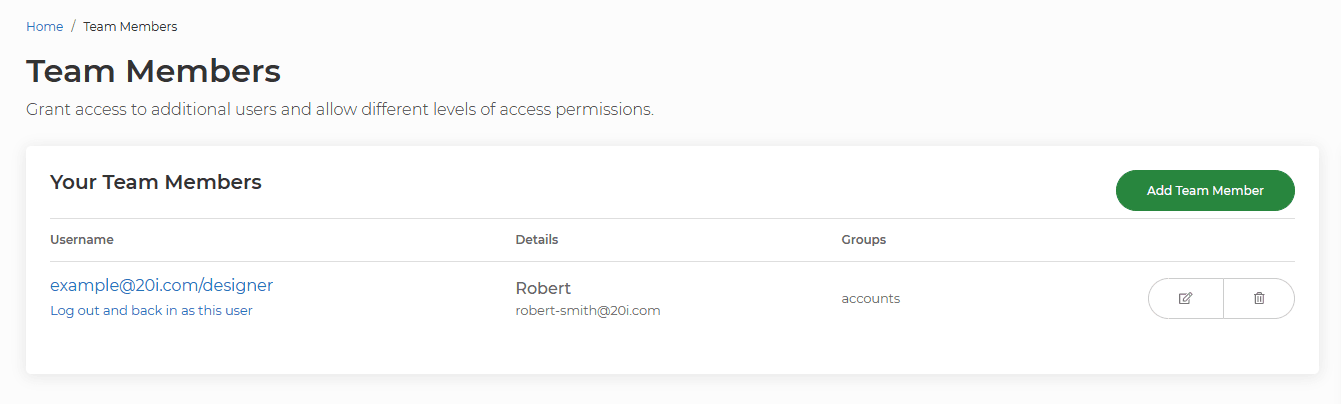
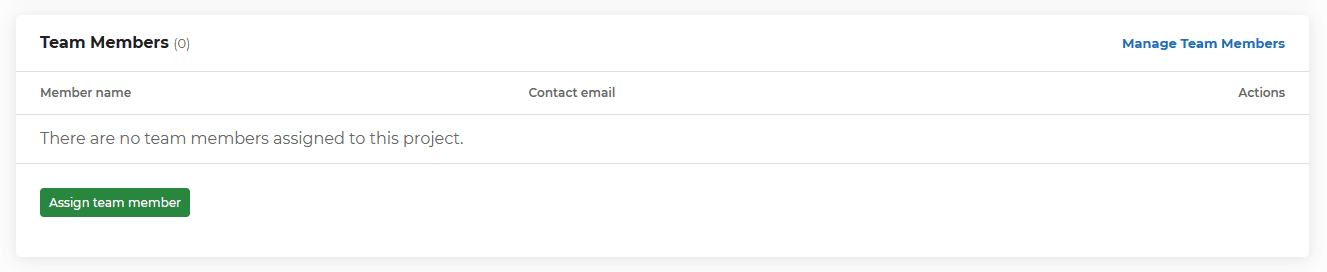
Once you’ve done this they’ll have their own login details allowing them to login into My20i. You’ll need to delegate them access to the projects you want them to have access to, which you can do by:
- Heading to the project you want to give them access to.
- Selecting Add Team Member and choosing the member you want to give access to.
You can remove access at any time. For more information about Team Members and their permissions please see the article here.
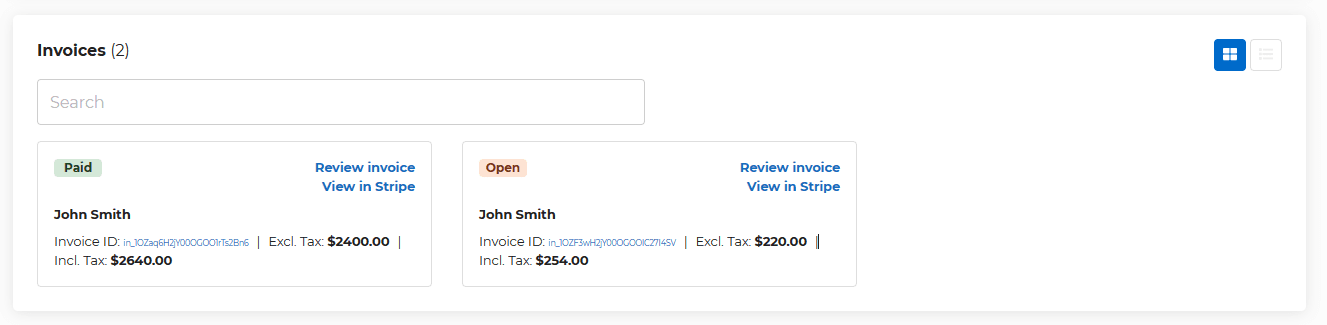
Invoices
If you’ve assigned a client to your project, you’ll see any invoices you’ve send to the customer at the bottom of the project overview page, so you always know what they’ve paid and if there are any outstanding invoices.
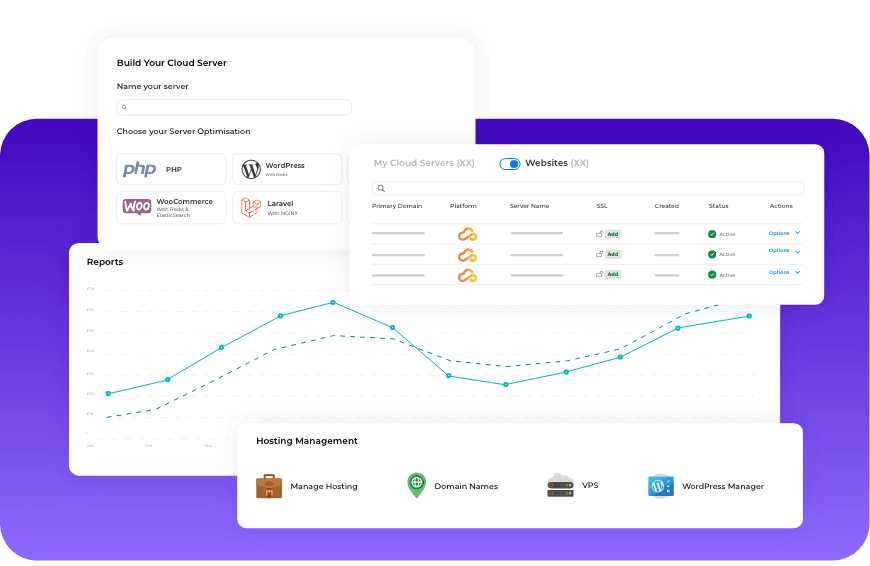
Cloud Servers & Websites
Agency Hub is designed to work in parallel with 20i’s industry leading Managed Cloud Servers. Deploying sites on cloud servers at 20i’s couldn’t be easier, and you get the choice of infrastructure provider, you can choose between 20iCloud, AWS or GCP (or a combination of them all based on client requirements).
To deploy a new cloud server:
- Head to Add Cloud Server.
- Configure the server based on your clients' requirements.
- Select Deploy Cloud Server.
To add a new site to your cloud server:
- Head to Agency Hub Overview
- Toggle to Hosting Packages on the Cloud Servers section.
- Select Add Hosting and type or choose the domain.
You can then manage your website or application by selecting Manage.
Billing & Invoicing
Invoicing is at the heart of Agency Hub and because we’ve partnered with Stripe it’s easier than ever to get paid. You can either create invoices through Agency Hub, or if through Stripe – because Agency Hub is directly connected with your Stripe account invoices will stay in sync.
To create a new invoice through Agency Hub:
- Head to Invoices.
- Select Add New Invoice.
- Enter the details of your invoice and select either Schedule Invoice or Autocharge Customer.
- Now select Review Invoice.
You’ll be taken to the final step to review the invoice you’ve created, you can then either send the invoice to the customer, or autocharge a payment method you have on file.