How to point your 20i domain to Wix
Wix is a popular website-building platform that allows users to create professional-looking websites without needing extensive technical skills or coding knowledge. It offers a drag-and-drop interface, customisable templates, and a wide range of features, including e-commerce capabilities, SEO tools, and mobile optimisation. If your domain name is registered with 20i, you may wish to use that domain to point to your website that is hosted at Wix. This guide will walk you through the steps to connect your domain name to your Wix website, helping you establish a unique online presence.
1. Go to the dashboard of your Wix account
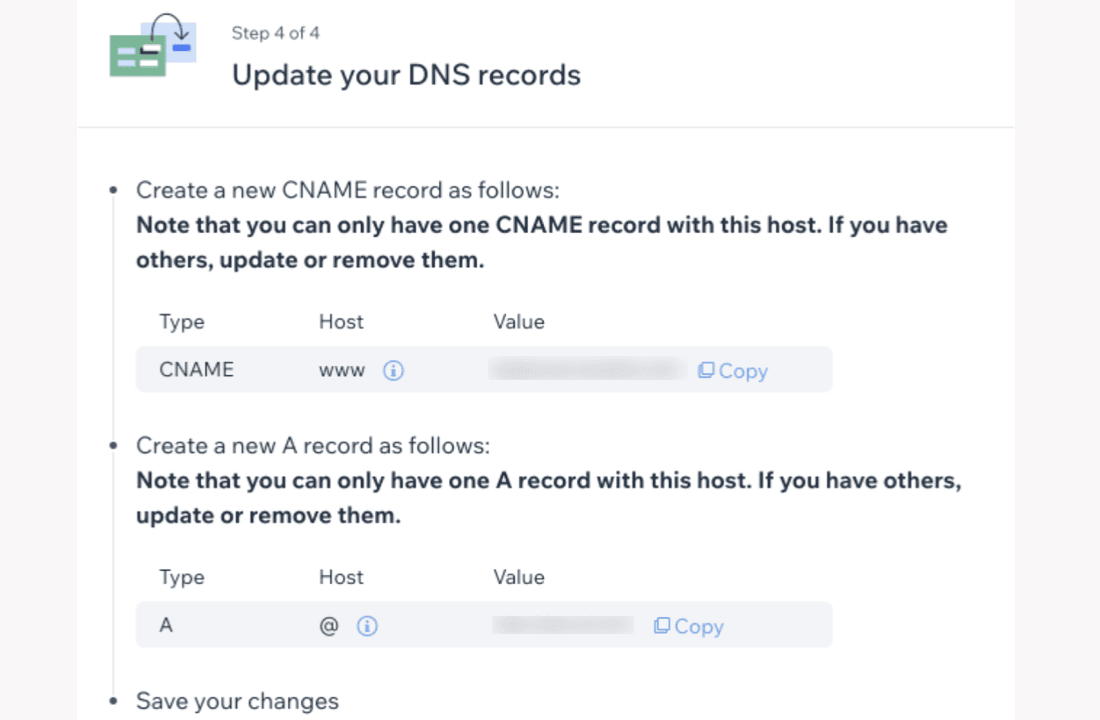
Use the Wix guide to connect to your domain and get your unique DNS record values
Open the DNS specifications as you will need them for later. The page should look as shown below.

2. Login to My20i
3. Locate the package or domain you wish to use as your Wix domain via either Manage Hosting or Manage Domains - next to the package/domain name, select Options > Manage
4. Under the Domain Names section, select Manage DNS
5. Add the necessary DNS to your DNS area using the text fields and drop-down boxes present. Wix recommends the necessary DNS changes:
A CNAME record for www. Pointing to the domain under the value section of the CNAME record of the DNS records you pulled up earlier over on Wix's Dashboard.
An A record pointing to the Wix IP address under ‘Value’ for the A record in Your Wix Settings
It should look something like this:

Please note: You will need to remove any default A/AAAA records that will point the domain back to 20i. These will likely be IP addresses in the 185.151.30.XX range.
