
Laravel Cloud Hosting Questions
Change your Laravel .ENV file configuration through the control panel

The Laravel .env file is a configuration file that contains environmental variables for your Laravel application. These variables are used to store sensitive data such as database credentials, API keys, and other important configuration settings that your application needs to run properly.
The .env file is located in the root directory of your Laravel project and is loaded automatically by Laravel when the application boots up. This file contains a list of key-value pairs, where the keys are the names of the environmental variables, and the values are their corresponding values.
Using the ENV Configuration Tool
If you've deployed a Laravel-optimised Managed Cloud Server then you can quickly and easily add or change existing Laravel environment variables using the ENV Configuration tool within the 20i control panel.
To use the ENV Configuration tool:
- Head to your Hosting Packages and select Options > Manage on the package you need to manage
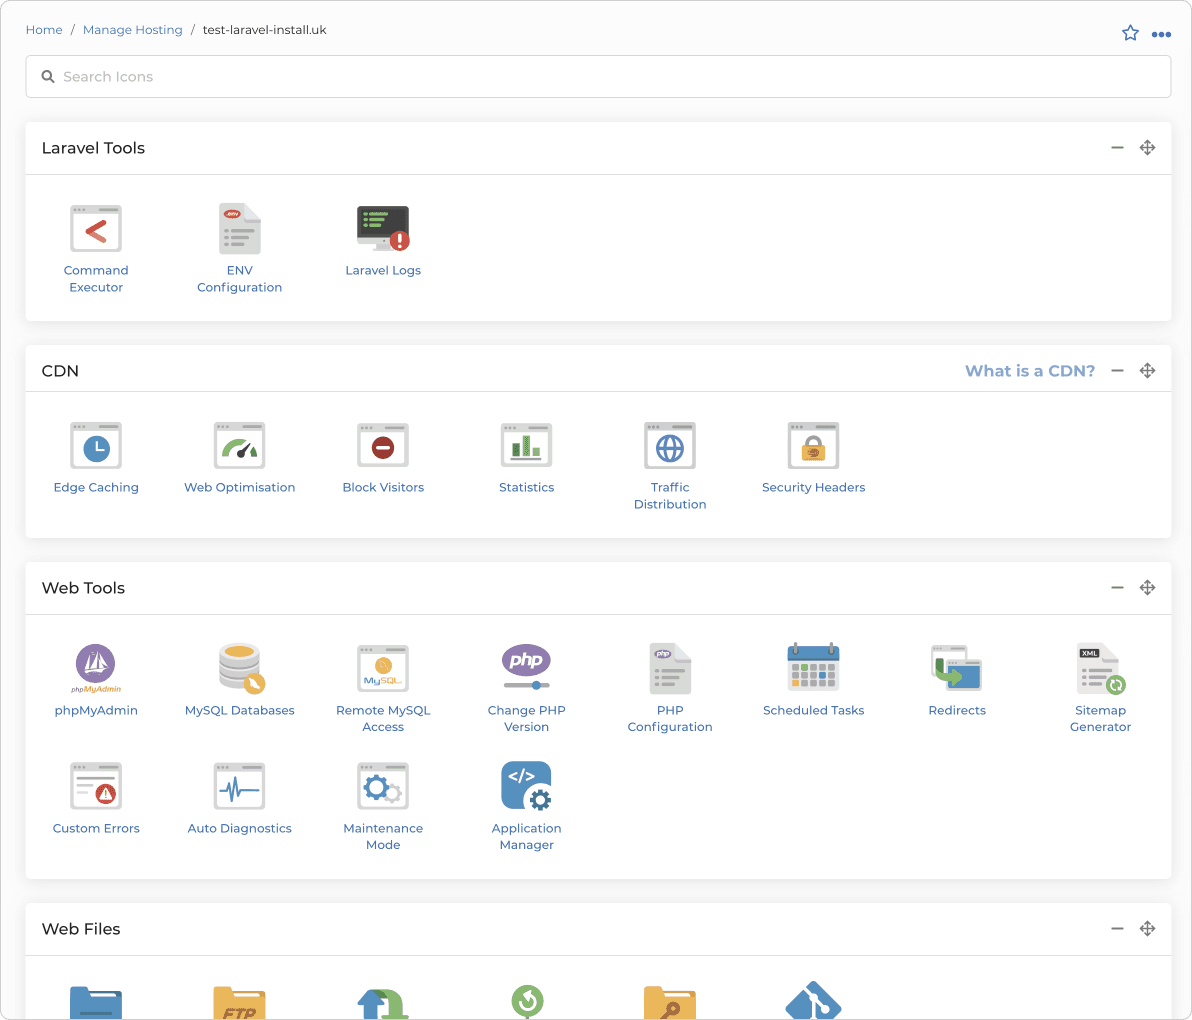
- Select ENV Configuration from the Laravel Tools section
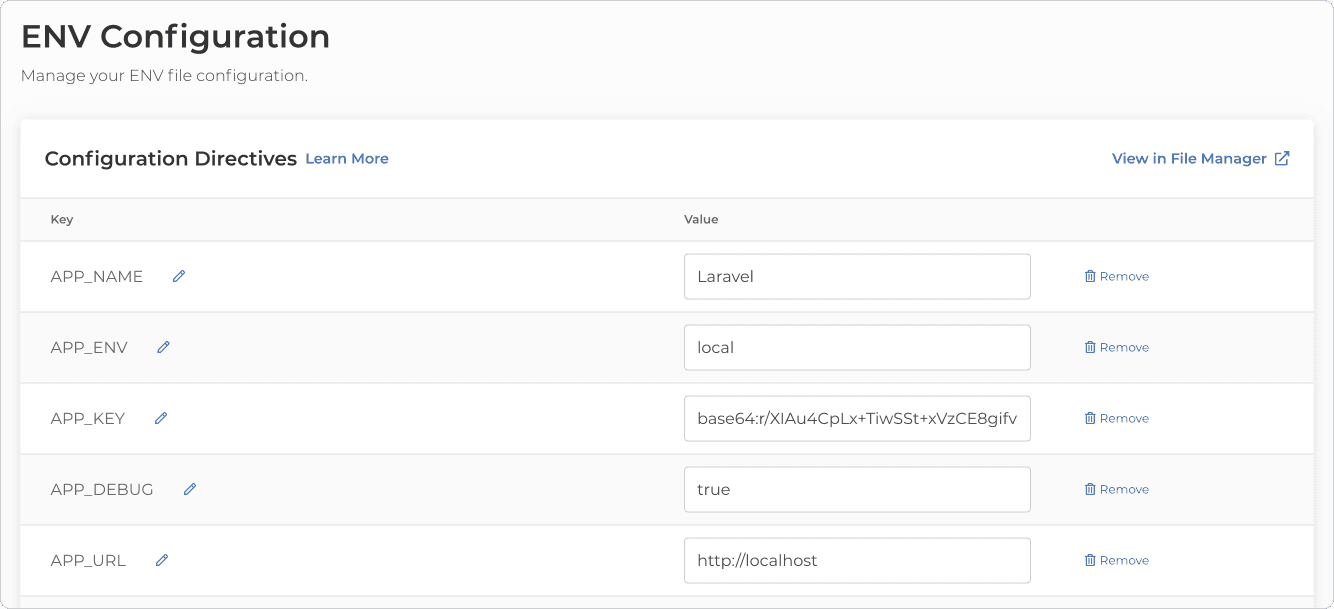
If you've just deployed a new application then you'll see all the default environment variables pre-populated in the table view. If you want to adjust any variables, for example 'APP_DEBUG', then you can simply edit the right-hand side column with the option you want and the proceed to select Update ENV Configuration to save your changes.
If you want to edit the ENV file directly through File Manager, then there's a quick link to take you directly to the file at the top-right of the page, select View in File Manager to go directly to the source file which is usully found within your applications home directory.
You can also add new variables to your file by inputting the variable you want to add in the text field at the bottom-left of the table, then inputting the variable in the text field to the right. Then Update ENV Configuration will add the new variable to the table/file.
Austin B.Checking your Laravel error logs through the control panel

Like any software, Laravel applications may encounter errors during their operation. Laravel error logs are a record of these errors, which are generated by Laravel's built-in error handling system.
When an error occurs in a Laravel application, the error is logged to a file in the application's storage directory. By default, Laravel uses the Monolog library for logging, which allows for flexible logging configurations and can log to multiple destinations, including files, email, databases, and more.
Laravel error logs contain information about the type of error, the location in the code where the error occurred, and any other relevant details, such as the values of variables at the time of the error. This information can be invaluable for troubleshooting and resolving issues in a Laravel application.
Developers can view Laravel error logs by accessing the log files directly, or by using a tool like the Laravel Logs, which provides a web interface for viewing and searching log files.
There are many types of errors that can be logged in Laravel, depending on the nature of the application and the code that is running. Here are some examples of common errors that might appear in Laravel error logs:
- Syntax errors: these occur when there is an error in the syntax of the PHP code, such as a missing semicolon or a typo in a variable name
- Database errors: when there is an error with the database connection or a problem with the SQL queries being executed, such as a table that doesn't exist or a query that has invalid syntax
- Server errors: when there is an issue with the server environment, such as a misconfigured web server or insufficient server resources
- Application logic errors: when there is a problem with the logic of the application code, such as a function that is not returning the expected result or a conditional statement that is not behaving as expected
- Security errors: when there is a security vulnerability in the application, such as a cross-site scripting (XSS) or SQL injection attack, or when there is an attempt to access a resource that the user is not authorized to access
Laravel error logs can help developers identify and resolve these types of errors, improving the stability and security of their applications.
Austin B.How To Host Your Live Laravel Application with 20iCloud

Contents
- Introduction
- Prerequisites
- Step 1 - Create an Empty Hosting Package
- Step 2 - Connect your GitHub Account
- Step 3 - Select and Clone your Repository
- Step 4 - Getting your Laravel Application Live
- Step 5 - SSL, DNS, Email & More
Introduction
Laravel is an open-source PHP framework that provides a set of tools and resources to build modern PHP applications, and not coincidentally, it's also the most starred PHP framework on GitHub! Laravel has been crafted by a collaborative community to provide a seamless and elegant developer experience, and so, it deserves a hosting experience to match!
APP_ENV=production APP_KEY=base64:... APP_DEBUG=false APP_URL=https://yourdomain.com DB_CONNECTION=mysql DB_HOST=127.0.0.1 DB_PORT=3306 DB_DATABASE=your_database DB_USERNAME=your_username DB_PASSWORD=your_password CACHE_DRIVER=redis QUEUE_CONNECTION=database SESSION_DRIVER=file SESSION_LIFETIME=120To generate a .env file using the command executor in the 20i Laravel tools, you can run the following command:
cp .env.example .envYou can then use the 20i Env Configuration to update the .env file to set appropriate values for your environment.
2. Install Dependencies
Once your environment variables are set, use the 20i Command Executor (or SSH into your server) and run the following command to install all required PHP dependencies:
composer install --no-dev --optimize-autoloaderThis ensures that only production dependencies are installed, and the autoloader is optimized for faster performance.
3. Build Assets for Production
If your application uses frontend assets like JavaScript or CSS, you need to compile and minify them for production. This is usually done using tools like Laravel Mix:
npm ci
npm run productionThese commands install the necessary Node.js dependencies and compile the assets.
4. Cache Configuration Files
To boost your application's performance, cache the configuration and route files:
php artisan config:cache
php artisan route:cache
php artisan view:cacheThese commands compile your configuration, routes, and views into single files to reduce the number of file system accesses.
5. Run Database Migrations
Ensure your database is up to date with the latest schema by running the migrations:
php artisan migrate --forceThe --force flag is necessary to run migrations in a production environment.
6. Restart Services
Finally, restart the necessary services to apply the changes:
php artisan queue:restartBy following these steps, your Laravel application should be well-configured for a production environment on your 20iCloud server.
Step 5 - SSL, DNS, Email & More
20iCloud Servers are perfect for hosting your live Laravel applications and come with all the tools you need to make your live application.
1. Apply the Free SSL
Head to the SSL/TLS Certificates section and select Enable to install a free Wildcard Let's Encrypt SSL.
2. Ensure DNS is Correct
You can manage your DNS through the Manage DNS section. The A Records are already configured to serve traffic to your application, ensure your nameservers are pointing to 20i's nameservers.
3. Set Up Email Accounts
20iCloud Servers come with Unlimited 10GB Mailboxes. Head to Email Accounts and add any mailboxes that you need.