How to manually migrate from Heart Internet

In February 2023, Heart Internet discontinued support for its API and as our automated Heart Internet migration tool worked using their API this can no longer be used unless you already have an existing Heart API connection/key.
In this guide we will go through how to manually backup files and databases within Heart Internet and restore them within 20i Hosting.
If you have any WordPress website hosted with Heart Internet, you can still use our WordPress migration tool to migrate the website over. If you have any websites that aren't compatible with any of our other automated migration tools then the website will likely need to be moved manually.
All the methods that are mentioned in this guide are accessible from the eXtend Control panel for the hosting within Heart Internet. To access the eXtend Control panel as a reseller you will need to log into your Heart Internet account, Click on Reseller Control Centre, Click the Manage Hosting Accounts icon and then click the Superuser link next to the hosting package that you would like to Migrate.
Using the Backup/Restore tool
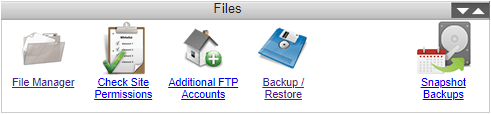
Heart Internet have a tool that will allow you to backup files from the hosting package into a zip file. This tool is called Backup/Restore and can be found under the files section within the eXtend control panel:
When you click the Backup/Restore icon this will take you to a new page and the section where you can take a backup of the files is called Full Backup and will show like this:

This provides two options to backup the website files. The Create Full Backup button will backup all files within the hosting. You can also select a specific directory in the dropdown under Partial Backup and then click the Create Partial Backup button which will only zip up the directory selected. You could use this option if you just wanted to backup just the public_html, for example, otherwise the Create Full Backup option will work fine.
If your website is quite large, we would recommend using the FTP method below as the above backup tool will likely take some time to backup a larger number of files.
Using FTP
You can also use FTP to grab a copy of the files. Heart Internet works in the same way as 20i with how FTP works as you will also need to unlock FTP before connecting. While on the eXtend control panel the FTP lock and information will show on the right hand side of the page. The FTP lock will show like this:
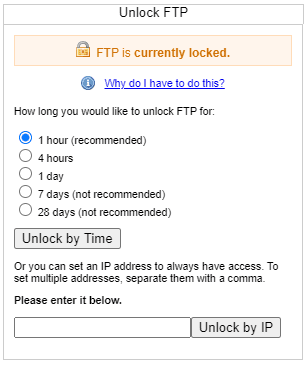
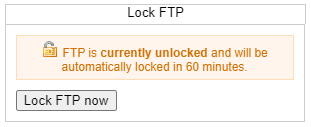
You can opt to unlock FTP by a certain amount of time or by an IP address. Once you click one of the unlock buttons the status should change to show that FTP is unlocked like this:
Once unlocked you should be able to use the FTP login information to connect to FTP using any FTP client. You can find the FTP details further down the right hand side of the eXtend control panel which will show something like this:
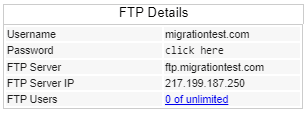
We suggest using the FTP server IP as the hostname along with the username and password which should allow you to connect to FTP in your chosen FTP client. Once connected you can copy the files from the hosting onto your own PC so that you can then upload the files onto the 20i hosting using one of the following steps.
Once you have backed up the files you can upload these to hosting at 20i. You will need to have hosting on our end first by going to the My20i control panel, going to the Manage Hosting page and then clicking the Add Hosting button. Once the hosting has been created you can manage the hosting from the Manage Hosting page by clicking the Options link then Manage option next to the hosting you are trying to migrate.
When managing the hosting with 20I you can use the File Manager to upload any files, more information about using the 20i file manager can be found here.
You can also use FTP as well and you can find more information on how to connect to FTP here.
The next steps will be to backup any databases you might have on the Heart Internet hosting. There are again a couple methods you can use to do this and both again can be done from within the eXtend control panel.
Using the Database Backup tool
Any databases that you have set up on hosting with Heart Internet will show on the MariaDB Databases page which you can find under the Web Tools section within the eXtend control panel:

Clicking the Backup button under the Utilities column should start to download a SQL file within your browser which you can then use on our side to restore the database.
Using phpMyAdmin to create a database backup
The other option is logging into phpMyAdmin and directly taking a backup of the database. If you click the Manage option next to the database this should take you to the phpMyAdmin login page:
Here you will need to enter the username and password for the database that shows on the MariaDB Databases page in the last section. Once logged in, you will need to click on the database name on the left hand side and then click the Export tab at the top of the page:
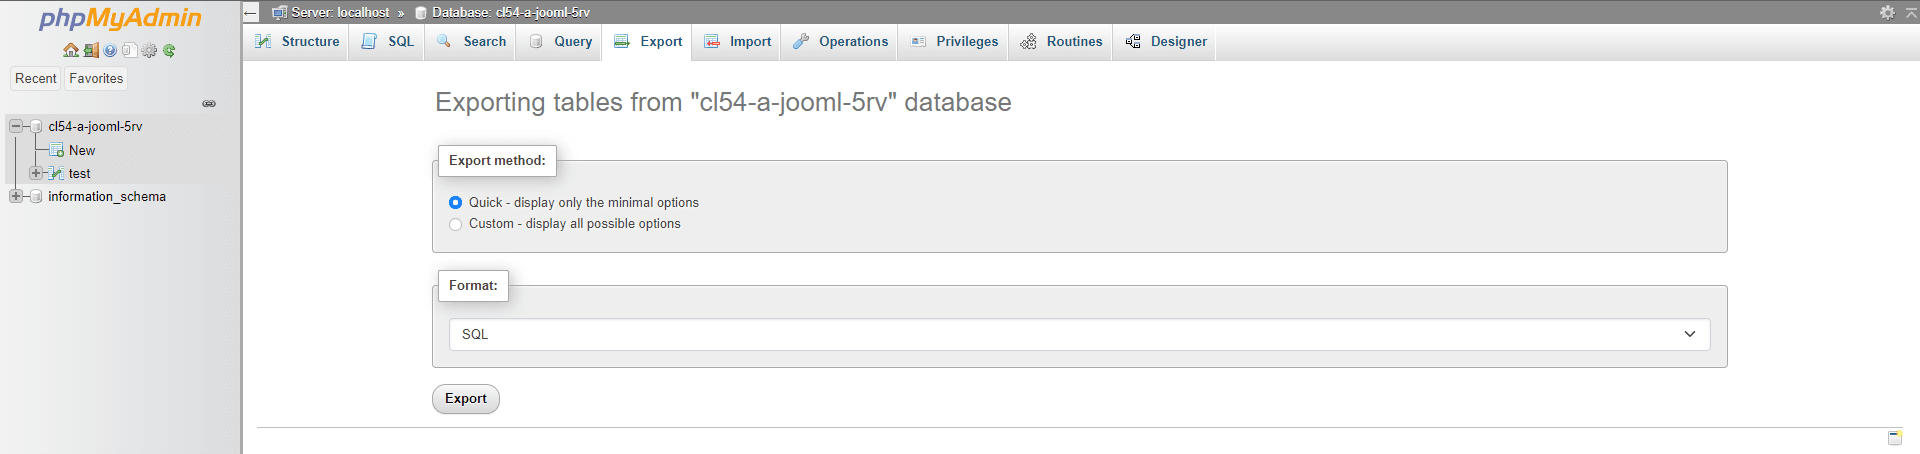
All you need to do on this page is click Export which should begin to download a copy of your database within your browser.
Once you have the backup you will need to create a new database within the 20i hosting which you can do by following these steps:
1. Log in to My20i and select Manage Hosting.
2. Choose Manage next to the hosting package you wish to create a MySQL database for.
3. Under Web Tools, select MySQL Databases.
4. Under Add a new MySQL Database, choose a name for your database. Database names must be between 6 and 20 characters long, and we automatically add a suffix to avoid name collisions with other users.
5. Once you have chosen a name, click Create Database. Your new MySQL database will automatically appear in the Manage MySQL Databases section underneath.
Once the database has been created you can click on Options and then Sign In to manage the database within phpMyAdmin. Once signed in you can do the same as when you took a backup but instead click Import at the top of the phpMyAdmin page, click Choose File, select the file on your PC and then click Go. This will likely take a little time to import but once complete.
Once this is completed, you will likely need to update the database credentials within the website configuration file which depends on the software the website uses and some of the common ones are:
WordPress: wp-config.php
Joomla: configuration.php
Drupal: sites/default/settings.php
Magento: app/etc/local.xml
All the information you need to update the database configuration can be found on the MySQL databases page where you created the database within 20i and you can update the files within our File Manager.
Email Migration
If you have mailboxes that you also need to move away from Heart Internet, you can move these using our Email Migration tool. More information about this tool can be found here.
If your domain is still pointing fully towards Heart Internet then you should be able to use mail.yourdomain.com, where yourdomain.com is the domain that you are migrating, and the username and password will be the email address and password for the mailbox with Heart Internet. If all that matches, our tool should be able to connect to the mailbox with Heart and then sync emails over to the mailbox you created with ourselves.
If you have changed the DNS for your domain, the mail.yourdomain.com subdomain might not work for you. Heart Internet set this subdomain to point to their mail servers which allow you to connect to the mailbox. If you have changed the nameservers on the domain then you should still be able to complete a mail migration however you will need to find the IP address that this subdomain pointed to.
If you log into the Heart Internet Reseller Control Centre and go back to the Manage Hosting Accounts page, you can click the Domain CP link to manage the domain. This should show a DNS Management icon which you can click to find the DNS settings with Heart. Under the A/AAAA/CNAME Records section you want to look for the mail record like below:
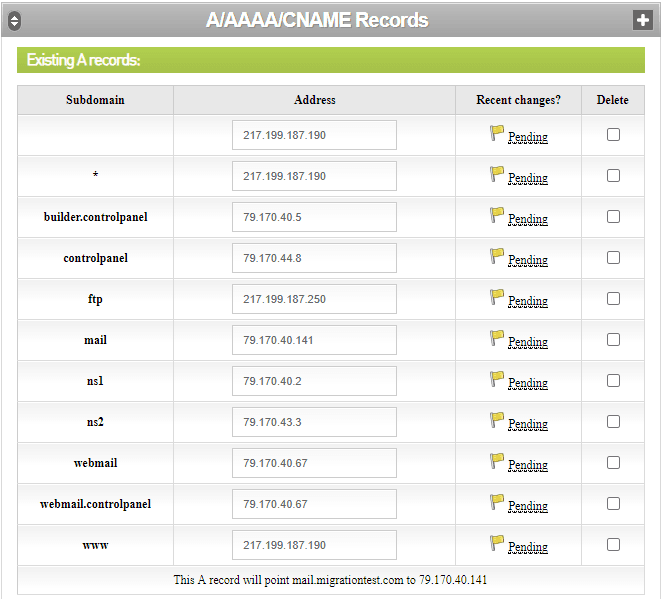
In this example, you can see that the mail A record shows as being 79.170.40.141 so that IP address could be used as the Host on the Mail Migration page to migrate mail from Heart to 20i.