Migrations and Transfers – Migrating to 20i using the Migration Centre Questions
Why could my WordPress migration fail?
The following conditions should be met for the WordPress FTP migration tool to migrate a site. These conditions are usually met by default, unless you've made changes to your WordPress installation.
What to do if a WordPress migration has failed
If your migration fails, adjustments may need to be made to allow the migration tool to work correctly:
- The migration tool looks for the directory with the wp-config.php configuration file. If you’ve manually moved the wp-config.php file to another directory (sometimes done for security) then you’d need to move it to be with the rest of the core WordPress files.
- File and directory permissions should be consistent with WordPress best practice, i.e. directories set to 755 and files set to 644.
- Our IPs used for the FTP migration tool should not be blocked: 185.146.165.4 & 45.8.227.14. If you use a web application firewall (WAF) ensure these IPs are whitelisted.
- Ensure the website's domain name points to the correct web host. If the nameservers for the domain name don’t point to the right host then the migration will fail.
If you’re having trouble diagnosing what’s wrong, please feel free to contact support within your account from the support area.
 Austin B.
How do I migrate from cPanel and WHM?
Migrating from a cPanel / WHM host to 20i's scalable platform is quick and easy using our Migration Centre.
Note: The Migration Centre will copy mailbox passwords automatically from WHM.
To Get Started:
- Log in to My20i
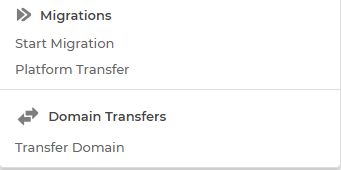
- Click on Migrations in the left navigation panel
- Click Start Migration
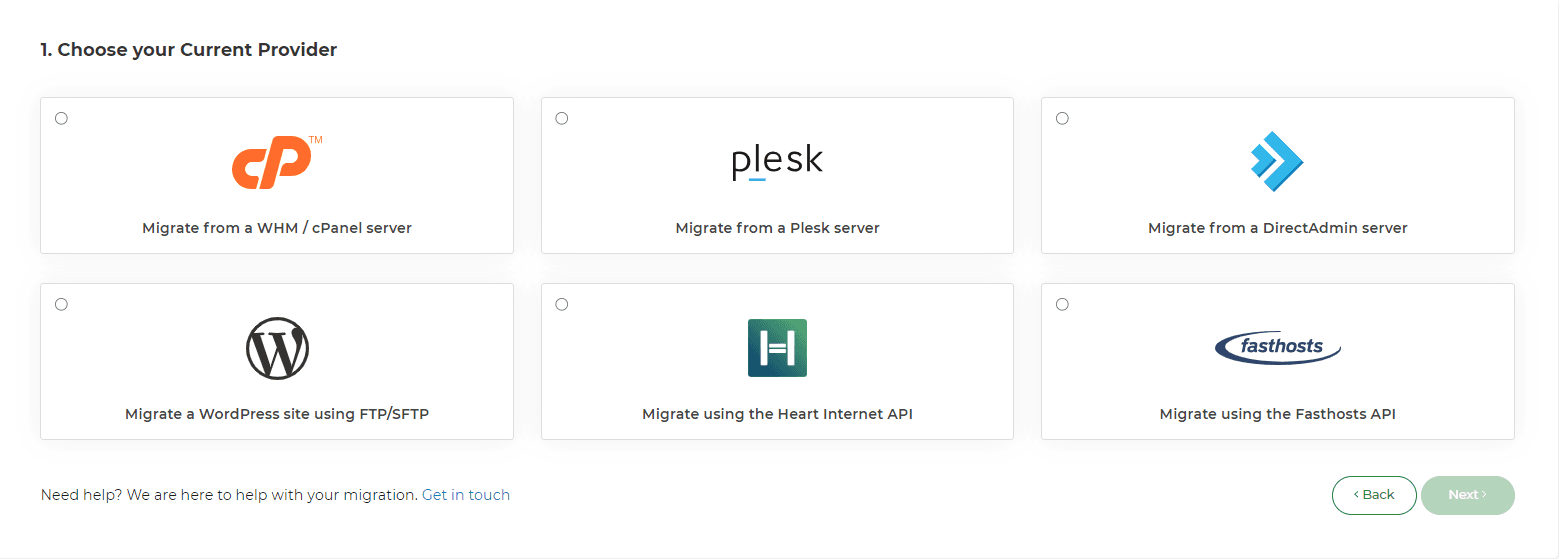
4. Choose WHM/cPanel from the list and click Next.
5. Enter the required credentials: hostname, username and the password for cPanel/WHM, and click Next.
6. Go to Migrations Overview in My20i at any time to see the status of your migration. You’ll be notified when it’s successfully completed.

7. Once the migration status has been updated to 'Complete' you can head to Manage Hosting to view the website and emails.
DNS Records
Note: The Migration Centre does not transfer DNS records.
By default, DNS records will be configured so that they point all services to 20i's services, such as mail and FTP. For example, if you are using Office365 or Gmail you'll want to remove our standard MX records and ensure the Office365/Gmail DNS records have been added before you continue, to avoid any interruption to your mail service.
After migrating your websites, databases, and email, the final step is to update your domain names. You can either transfer your domain name to 20i or leave it with its current registrar and simply point the name servers to your 20i hosting.
If you intend to use our free SSL certificates, the nameservers will need to be transferred to 20i's nameservers, which is a requirement by the certificate-issuing authority.
Transferring Domain Names
To transfer your own or your customers’ domain names to 20i, head to Transfer a Domain from the Migration Centre section of your 20i control panel. Enter the domain name(s) you want to transfer, confirm them, and then check out.
You can see the progress of your domain transfers from Migration Centre > Pending Domain Transfers. Please note that DNS propagation typically takes an hour but can take anywhere up to 24 hours as a global update is rolled out, so it may be a while before your domain resolves after the nameservers have been updated.
Updating Nameservers
If you’d prefer to update your nameservers with your current domain registrar (meaning you have your non-20i domain pointing to your 20i hosting) instead of transferring your domain to 20i, you will need to log in to your domain registrar’s control panel and update the nameservers to the following:
• ns1.stackdns.com • ns2.stackdns.com • ns3.stackdns.com • ns4.stackdns.com
If your registrar doesn’t support 4 nameservers, simply add as many as it will support. It can take up to 48 hours for nameserver changes to propagate across the web, but in the vast majority of cases, it will be completed much faster.
Congratulations, you’ve successfully migrated to 20i!
Important: You can never have too many backups! Before you delete any data with your old hosting company, please back it up on a separate physical device and/or have a copy in cloud storage. You can also download your data at any time via My20i, or purchase our Timeline Backups service for automatic daily backups.
 Austin B.
How do I migrate from Heart Internet?
Migrating from Heart Internet to 20i's scalable platform is quick and easy using our Migration Centre.
- Log in to My20i
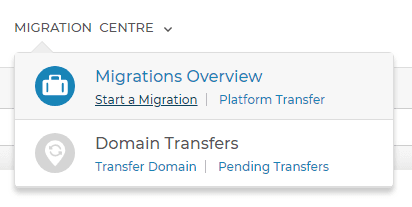
- Select Start a Migration.
- Choose Heart Internet from the list and click Next.

- Enter the required credentials: API Username and Password.
- Select Next Step.

- You'll be shown a list of all your hosting packages within Heart Internet. Select those which you want to bring across and select Migrate.
- Go to Migrations Overview in My20i at any time to see the status of your migration. You’ll be notified when it’s successfully completed.
- Once the migration status has been updated to 'Complete' you can head to Manage Hosting to view the website and emails.
Mailboxes
Heart Internet has prevented their Resellers from changing passwords to all mailboxes through the Reseller Control Centre. This means that the Migration Centre is now unable to fetch mailboxes and their respective passwords. We've updated the Email Migration tool to make the migration as easy as possible. To enter the mailbox passwords to migrate the mailbox data across head to:
Manage Hosting -> Manage -> Email Migration
The mailboxes will be queued, and just require the password to start the migration.
DNS Record
By default, DNS records will be configured so that they point all services to 20i's services, such as mail and FTP. For example, if you are using Office365 or Gmail you'll want to remove our standard MX records and ensure the Office365/Gmail DNS records have been added before you continue, to avoid any interruption to your mail service.
After migrating your websites, databases, and email, the final step is to update your domain names. You can either transfer your domain name to 20i or leave it with its current registrar and simply point the name servers to your 20i hosting.
If you’re intending to use our free SSL certificates, the domain name(s) will need to be transferred to 20i as a security measure required by the certificate-issuing authority.
To transfer your own or your customers’ domain names to 20i, head to Transfer a Domain from the Migration Centre section of your 20i control panel. Enter the domain name(s) you want to transfer, confirm them, and then check out.
You can see the progress of your domain transfers from Migration Centre > Pending Domain Transfers. Please note that DNS propagation typically takes an hour but can take anywhere up to 24 hours as a global update is rolled out, so it may be a while before your domain resolves after the nameservers have been updated.
Updating Nameservers
If you’d prefer to update your nameservers with your current domain registrar (meaning you have your non-20i domain pointing to your 20i hosting) instead of transferring your domain to 20i, you will need to log in to your domain registrar’s control panel and update the nameservers to the following:
• ns1.stackdns.com • ns2.stackdns.com • ns3.stackdns.com • ns4.stackdns.com
If your registrar doesn’t support 4 nameservers, simply add as many as it will support. It can take up to 48 hours for nameserver changes to propagate across the web, but in the vast majority of cases, it will be completed much faster.
Congratulations, you’ve successfully migrated to 20i!
Important: You can never have too many backups! Before you delete any data with your old hosting company, please back it up on a separate physical device and/or have a copy in cloud storage. You can also download your data at any time via My20i, or purchase our Timeline Backups service for automatic daily backups.
 Austin B.
What is the 20i Migration Centre? An overview.
The 20i Migration Centre automates migrations from most hosts, allowing you to move your websites and email in just a couple of clicks. It’s completely free to use, there’s no website or email downtime, and no risk of data loss.
Using the Migration Centre, you can:
- Automatically move your websites, MySQL databases, and email to 20i
- Preserve all folders, files, scripts, emails, and other data exactly as-is
- Choose which packages to move and when, giving you fine control over what you migrate and allowing you to move websites in batches
- Transfer any WordPress websites by supplying FTP details
- Avoid any risk of data loss and downtime
- Free up your time: your migrations complete automatically in the background, and you'll get an email when they're done
To ensure you have full control over your websites and settings at all times, the Migration Centre does not move domain names. You can transfer in domains following your migration or update your DNS accordingly, both of which are covered in our Migration Guide.
There are no limits on how many times you can use the Migration Centre and no limits on how many websites, databases, or mailboxes you can move across. Please ensure you leave a good amount of time to migrate data if your current hosting package with another provider is due to expire or renew soon.
The Migration Centre is designed to be as easy to use as possible, but you can also download our Migration Guide or read this support article: How do I migrate websites, MySQL databases, and standard mailboxes to 20i using the Migration Centre?
Here's a quick demo:
 Austin B.
How do I use the 20i Migration Centre?
Migrating to 20i is easy! The Migration Centre moves your site's files, database and emails to 20i automatically. To get started:
- Log in to My20i.
- Head to Migrations > Start a Migration.
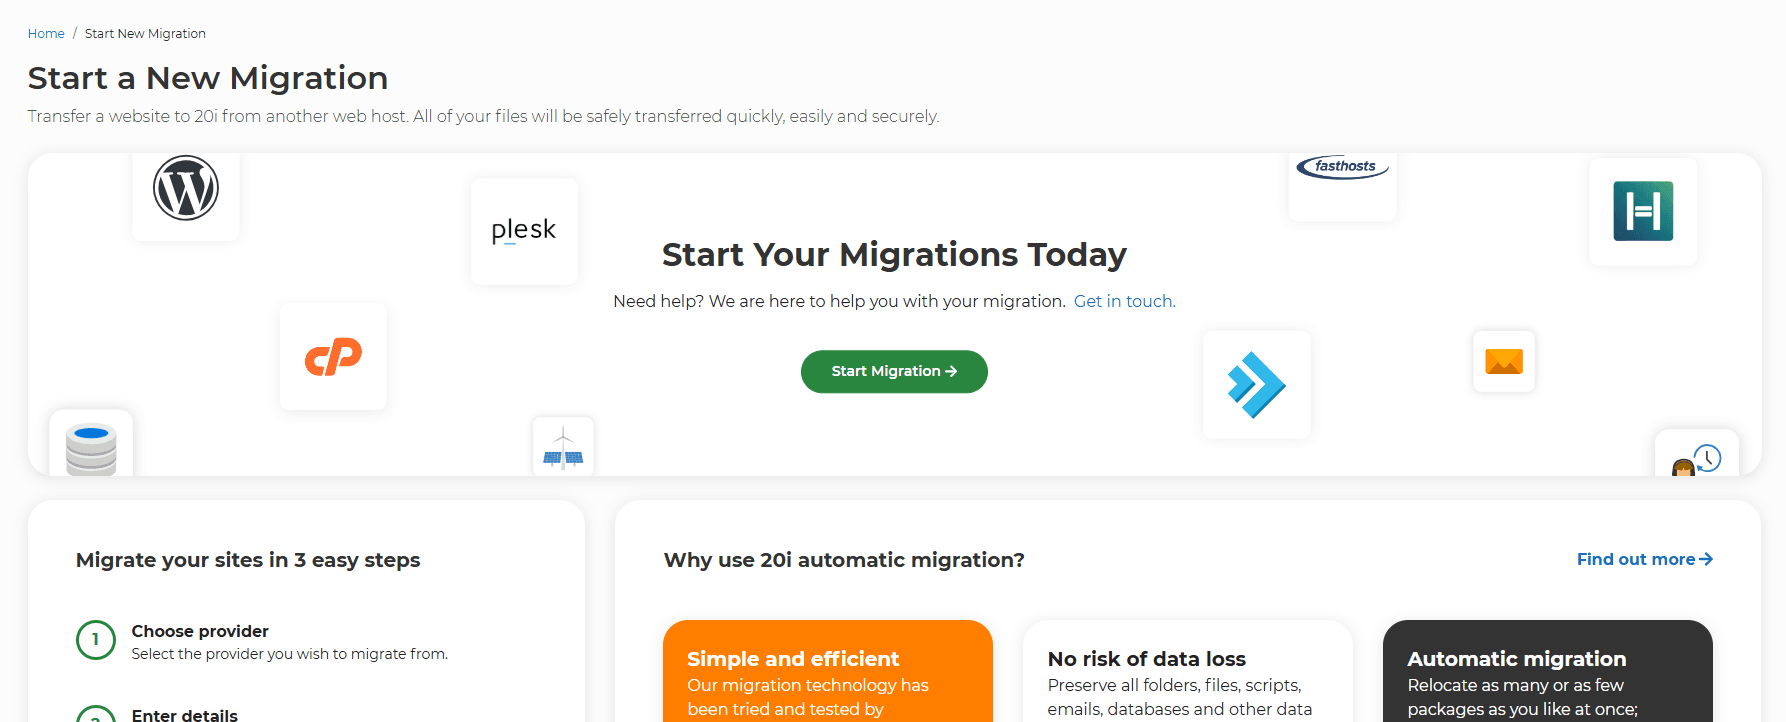
- Select Start Migration.
- Choose the type of migration your need.
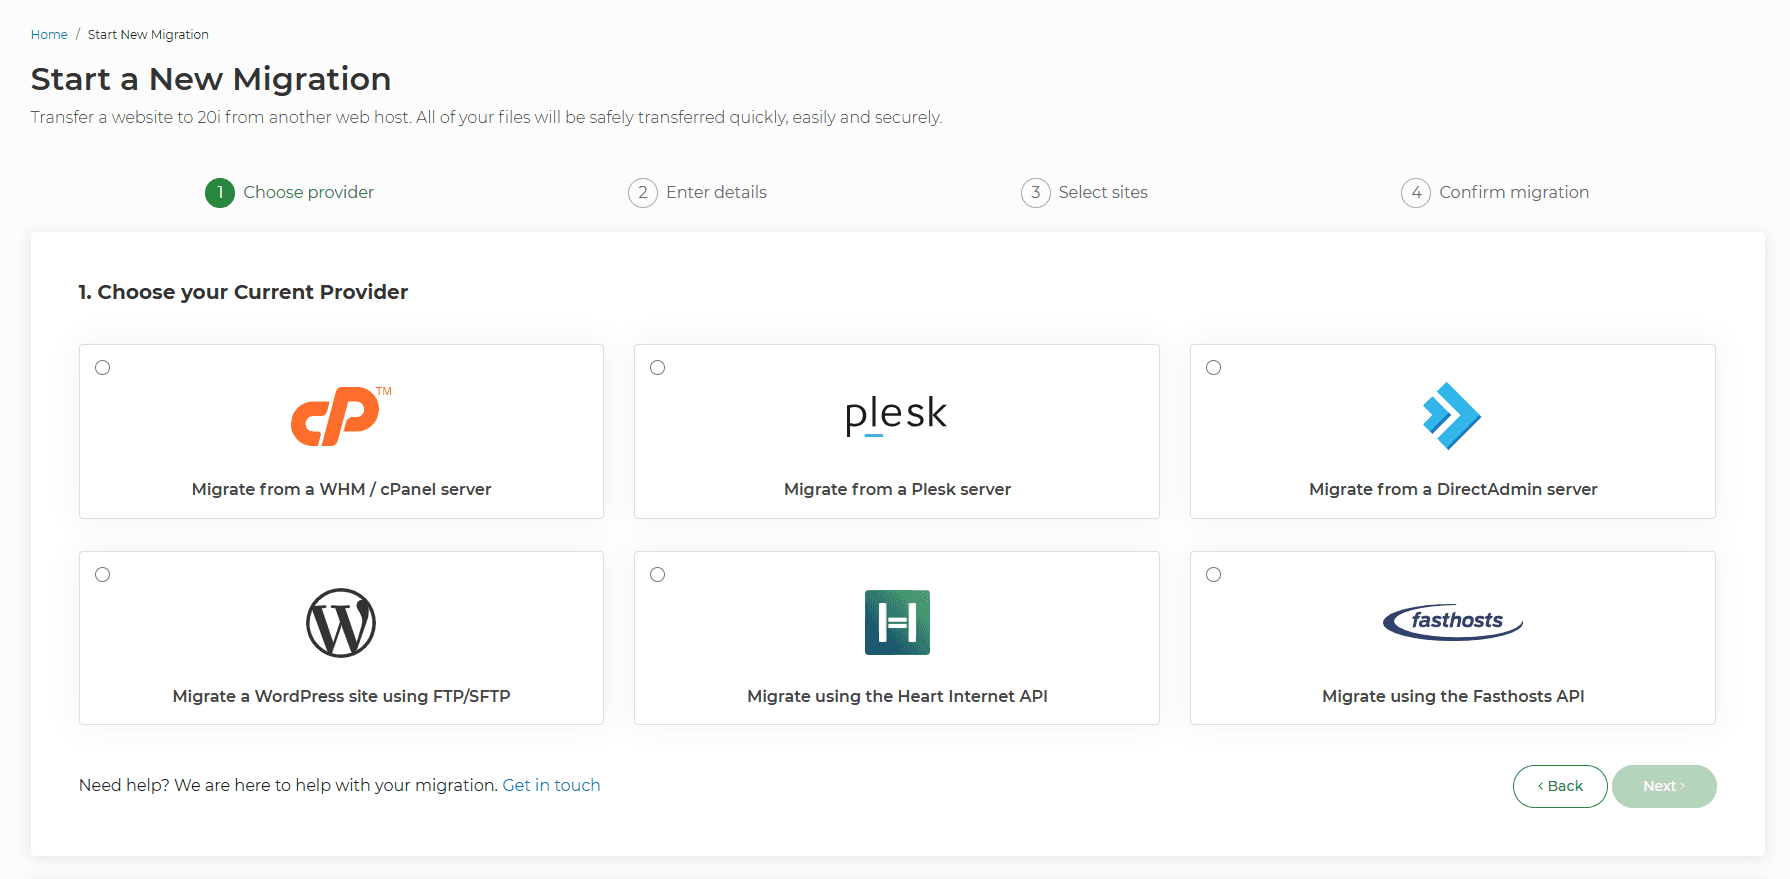
- Enter the required credentials.
- Select the sites you want to migrate from the list and select Next.
Head to Migrations Overview in My20i at any time to see the status of your migration. You’ll be notified when it’s successfully completed.
Automatically Migrate from cPanel to 20i
Automatically Migrate a WordPress Website to 20i
Note: The Migration Centre does not transfer DNS records.
By default, DNS records will be configured so that they point all services to 20i's services, such as mail and FTP. For example, if you are using Office365 or Gmail you'll want to remove our standard MX records and ensure the Office365/Gmail DNS records have been added before you continue, to avoid any interruption to your mail service.
After migrating your websites, databases, and email, the final step is to update your domain names. You can either transfer your domain name to 20i or leave it with its current registrar and simply point the name servers to your 20i hosting.
To transfer your own or your customers’ domain names to 20i, head to Transfer a Domain from the Migration Centre section of your 20i control panel. Enter the domain name(s) you want to transfer, confirm them, and then check out.
You can see the progress of your domain transfers from Migration Centre > Pending Domain Transfers. Please note that DNS propagation typically takes an hour but can take anywhere up to 24 hours as a global update is rolled out, so it may be a while before your domain resolves after the nameservers have been updated.
Updating Nameservers
If you’d prefer to update your nameservers with your current domain registrar (meaning you have your non-20i domain pointing to your 20i hosting) instead of transferring your domain to 20i, you will need to log in to your domain registrar’s control panel and update the nameservers to the following:
• ns1.stackdns.com • ns2.stackdns.com • ns3.stackdns.com • ns4.stackdns.com
If your registrar doesn’t support 4 nameservers, simply add as many as it will support. It can take up to 48 hours for nameserver changes to propagate across the web, but in the vast majority of cases, it will be completed much faster.
Congratulations, you’ve successfully migrated to 20i!
Important: You can never have too many backups! Before you delete any data with your old hosting company, please back it up on a separate physical device and/or have a copy in cloud storage. You can also download your data at any time via My20i, or purchase our Timeline Backups service for automatic daily backups.
How long does it take to migrate a website using the 20i Migration Centre?
Time of a website migration:
The length of time it takes to move a website and its associated mailboxes depends on the amount of data being transferred and the complexity of the website. Some migrations can take up to three hours, although the average time to migrate is 30 minutes.
While a migration is in progress, you’re free to close the tab and carry on with whatever you need to do; the migration will complete independently.
There is no diffrence in time whether you are on a reseller hosting plan, managed hosting in the 20i Cloud, with AWS or GCP or on any other hosting plan we offer.
Get notified when your website migration is complete
You’ll receive an email informing you when the migration is complete - but you can disable this if you like in Migrations Overview. You can check the migration status at any point by going to ‘Migrations Overview’ in My20i and viewing the ‘Current Migrations’ and ‘Completed Migrations’ panes.
The Migration Centre uses an intelligent queuing system to move data to our platforms, so in particularly busy periods there may be a small wait before your migration is initiated. This is aimed at optimising server performance.
 Austin B.
Which platform will my website be migrated to?
All 20i customers on our WordPress, Web, Reseller or Managed Hosting have access to our Migration Centre.
It intelligently detects whether your website uses Linux or Windows, and automatically migrates it to the correct platform.
For our Reseller Hosting customers, we have 3 platforms: Linux, WordPress Optimised and Windows.
You can move between all of them using the 'Platform Transfer' tool in My20i.
Migrating to the WordPress optmised hosting platform:
Before performing a migration to the WordPress platform, please note the following conditions:
- WordPress must be installed in the website root - inside the "public_html" folder
- The WordPress install (including all plugins and themes) must be PHP 7 compatible
- The webspace must not contain any software or code that does not belong to WordPress
- Any subdomains or additional domains must be pointing to the same WordPress install - configured as a WordPress Network (Multisite).
A Platform Transfer will also cause the DNS records on our nameservers to be reset to ensure the package points towards 20i services. You'll need to reconfigure any external DNS records after the Platform Transfer completes.
 Austin B.
What does each Migration Status mean?
When you first start a website migration to 20i, you'll see it enters the system with a default status of 'queued'. We've laid out the 3 key states of a migration to 20i below:
Migration Queued
Your site migration is now in a queue to be picked up by our automated system. To help stay within any rate limits and avoid high load averages on the servers we are migrating from, we only carry out a limited number of website migrations from any single host at once. The average queue time is as little as 5 minutes but during busy periods, migrations can experience extended queue times. There's nothing further you need to do at this stage, and the interface will update as soon as the migration begins.
Migration In Progress
Your migration is now in progress. We start by collecting a backup of your website from the previous host. Once that's done, we extract and import the backup into the 20i platform. The time taken at this stage can vary hugely based on the amount of data there is to transfer. It's dependent on factors such as the size of your website, the number of files, the number of email accounts and the size of the mailboxes. The average website takes around 1 hour to import. During this time, a more detailed status of the migration will be displayed in the interface.
You’ll receive an email informing you when the migration is complete by default; this can be deactivated in the Migrations Overview.
Migration Completed
At this point, the system has successfully imported your website's data to 20i and you can manage the package via "Manage Hosting". To test the site, we provide a temporary URL that will be visible down the right hand side of the control panel, or for a more complete test you can Modify your hosts file. This allows you to override the domain name at your PC, so you can visit your domain at 20i while the rest of the internet still reaches the current website.
Once tested, you can change the nameservers of the domain and (optionally) Transfer the Domain in.
 Lloyd Cobb
How do I migrate a WordPress site automatically?
Migrating a Wordpress website to 20i's scalable platform is quick and easy using our Migration Centre.
To Get Started:
- Log in to My20i
- Click on Migrations in the left navigation panel
- Click Start Migration

4. Choose WordPress from the list and click Next.

5. Enter the required credentials: hostname, domain, username and password for FTP, and click Next.
6. Go to Migrations Overview in My20i at any time to see the status of your migration. You’ll be notified when it’s successfully completed.

7. Once the migration status has been updated to 'Complete' you can head to Manage Hosting to view the website.
Note: This will only migrate the website to 20i. If you have emails to move as well, you can use our Email Migration tool once the migration has completed.
DNS Records
Note: The Migration Centre does not transfer DNS records.
By default, DNS records will be configured so that they point all services to 20i's services, such as mail and FTP. For example, if you are using Office365 or Gmail you'll want to remove our standard MX records and ensure the Office365/Gmail DNS records have been added before you continue, to avoid any interruption to your mail service.
After migrating your websites, databases, and email, the final step is to update your domain names. You can either transfer your domain name to 20i or leave it with its current registrar and simply point the name servers to your 20i hosting.
If you intend to use our free SSL certificates, the nameservers must be transferred to 20i as a security measure required by the certificate-issuing authority.
Transferring Domain Names
To transfer your own or your customers’ domain names to 20i, head to Transfer a Domain from the Migration Centre section of your 20i control panel. Enter the domain name(s) you want to transfer, confirm them, and then check out.
You can see the progress of your domain transfers from Migration Centre > Pending Domain Transfers. Please note that DNS propagation typically takes an hour but can take anywhere up to 24 hours as a global update is rolled out, so it may be a while before your domain resolves after the nameservers have been updated.
Updating Nameservers
If you’d prefer to update your nameservers with your current domain registrar (meaning you have your non-20i domain pointing to your 20i hosting) instead of transferring your domain to 20i, you will need to log in to your domain registrar’s control panel and update the nameservers to the following:
• ns1.stackdns.com • ns2.stackdns.com • ns3.stackdns.com • ns4.stackdns.com
If your registrar doesn’t support 4 nameservers, simply add as many as it will support. It can take up to 48 hours for nameserver changes to propagate across the web, but in the vast majority of cases, it will be completed much faster.
Congratulations, you’ve successfully migrated to 20i!
Important: You can never have too many backups! Before you delete any data with your old hosting company, please back it up on a separate physical device and/or have a copy in cloud storage. You can also download your data at any time via My20i, or purchase our Timeline Backups service for automatic daily backups.
 Austin B.
How do I migrate my websites to 20i from DirectAdmin?
Migrating from a Direct Admin server to 20i's hosting platform is simple and quick task using the 20i Migration Center
Here's a quick video to explain the process:
Please note there are a few things that need to be done on the Direct Admin server before you start the Migration:
The package being migrated has to have space for one additional FTP user to be created - the default is for packages to have 1 FTP user already created, with a limit of 1 - this limit needs to be increased to at least 2, as the migration process creates a temporary FTP user to pull the backup
Also, if you are using the latest version of Direct Admin, the FTP service will need to be configured on the server manually. This will need to be done via the Server Admin as it doesn't come as a standard part of the Direct Admin installation.
To Get Started:
- Log in to My20i
- Click on Migrations in the side navigation panel
- Click Start Migration

4. Choose Direct Admin from the list and click next

5. Enter the required credentials: hostname, username and the password for Direct Admin, and click Next.
6. Go to Migrations Overview in My20i at any time to see the status of your migration. You’ll be notified when it’s successfully completed.

7. Once the migration status has been updated to 'Complete' you can head to Manage Hosting to view the website and emails.
DNS Records
Note: The Migration Centre does not transfer DNS records.
By default, DNS records will be configured so that they point all services to 20i's services, such as mail and FTP. For example, if you are using Office365 or Gmail you'll want to remove our standard MX records and ensure the Office365/Gmail DNS records have been added before you continue, to avoid any interruption to your mail service.
After migrating your websites, databases, and email, the final step is to update your domain names. You can either transfer your domain name to 20i or leave it with its current registrar and simply point the name servers to your 20i hosting.
If you’re intending to use our free SSL certificates, the domain name(s) will need to be using 20i nameservers.
Transferring Domain Names
To transfer your own or your customers’ domain names to 20i, head to Transfer a Domain from the Migration Centre section of your 20i control panel. Enter the domain name(s) you want to transfer, confirm them, and then check out.
You can see the progress of your domain transfers from Migration Centre > Pending Domain Transfers. Please note that DNS propagation typically takes an hour but can take anywhere up to 24 hours as a global update is rolled out, so it may be a while before your domain resolves after the nameservers have been updated.
Updating Nameservers
If you’d prefer to update your nameservers with your current domain registrar (meaning you have your non-20i domain pointing to your 20i hosting) instead of transferring your domain to 20i, you will need to log in to your domain registrar’s control panel and update the nameservers to the following:
• ns1.stackdns.com
• ns2.stackdns.com
• ns3.stackdns.com
• ns4.stackdns.com
If your registrar doesn’t support 4 nameservers, simply add as many as it will support. It can take up to 48 hours for nameserver changes to propagate across the web, but in the vast majority of cases, it will be completed much faster.
Congratulations, you’ve successfully migrated to 20i!
Important: You can never have too many backups! Before you delete any data with your old hosting company, please back it up on a separate physical device and/or have a copy in cloud storage. You can also download your data at any time via My20i, or purchase our Timeline Backups service for automatic daily backups.
 Ben Gayson
How do I migrate my websites to 20i from Plesk?
Migrating from a Plesk server to 20i's hosting platform is a simple and quick task using the 20i Migration Centre. This guide will outline all of the steps required to get your site up and running.
To Get Started:
- Log in to My20i
- Click on Migrations in the side navigation panel
- Click Start Migration

4. Choose Migrate from a Plesk server from the list and click next

5. Enter the required credentials: hostname, username and the password for Plesk, and click Next.
6. Go to Migrations Overview in My20i at any time to see the status of your migration. You’ll be notified when it’s successfully completed.

7. Once the migration status has been updated to 'Complete' you can head to Manage Hosting to view the website and emails.
DNS Records
Note: The Migration Centre does not transfer DNS records.
By default, DNS records will be configured so that they point all services to 20i's services, such as mail and FTP. For example, if you are using Office365 or Gmail you'll want to remove our standard MX records and ensure the Office365/Gmail DNS records have been added before you continue, to avoid any interruption to your mail service.
After migrating your websites, databases, and email, the final step is to update your domain names. You can either transfer your domain name to 20i or leave it with its current registrar and simply point the name servers to your 20i hosting.
If you’re intending to use our free SSL certificates, the domain name(s) will need to be transferred to 20i as a security measure required by the certificate-issuing authority.
Transferring Domain Names
To transfer your own or your customers’ domain names to 20i, head to Transfer a Domain from the Migration Centre section of your 20i control panel. Enter the domain name(s) you want to transfer, confirm them, and then check out.
You can see the progress of your domain transfers from Migration Centre > Pending Domain Transfers. Please note that DNS propagation typically takes an hour but can take anywhere up to 24 hours as a global update is rolled out, so it may be a while before your domain resolves after the nameservers have been updated.
Updating Nameservers
If you’d prefer to update your nameservers with your current domain registrar (meaning you have your non-20i domain pointing to your 20i hosting) instead of transferring your domain to 20i, you will need to log in to your domain registrar’s control panel and update the nameservers to the following:
• ns1.stackdns.com • ns2.stackdns.com • ns3.stackdns.com • ns4.stackdns.com
If your registrar doesn’t support 4 nameservers, simply add as many as it will support. It can take up to 48 hours for nameserver changes to propagate across the web, but in the vast majority of cases, it will be completed much faster.
Congratulations, you’ve successfully migrated to 20i!
Important: You can never have too many backups! Before you delete any data with your old hosting company, please back it up on a separate physical device and/or have a copy in cloud storage. You can also download your data at any time via My20i, or purchase our Timeline Backups service for automatic daily backups.
 Ben Gayson
 Harry Leverton