HostShop – Customer Management Questions
HostShop customer management support: helpful articles on how to look after your web hosting and domain customers in HostShop.
When do my customers get billed?
You’re in total control! You can set how and when you’d like your customers to be billed for the services you’re providing. You can view all currently active billing and contracts from the Customer Contracts page.
There are two main scenarios that could occur:
1. Your customer signs up automatically from your control panel.
If this is the case, then the date at which the customer would be billed is the date of purchase, then subsequently at the date of the renewal period which they’ve selected (i.e. monthly, yearly etc.).
2. You want to assign a billing contract to an existing customer.
If you have an existing customer and you need to assign them a billing contract, then you can set this up manually for them (to then bill the customer automatically).
To do so, head to:
Manage Reseller > StackCP Users
You’ll need to have your customer set up as a StackCP User. Create the customer manually if you need-to. Once they’ve been created, make sure you assign them their services by going to:
Manage Reseller > StackCP Users > Options > Manage
Under the Access & Contracts section, select + Add Access and add the hosting package, domain or VPS you want this customer to be able to manage. Once the service has been added (with the exception of Hosting Packages), select:
Add Service To A Plan
You will the see a drop-down menu allowing you to select the Price/Payment plan for the service. This is pulled directly from what you have setup in your Product Catalogue.
Select the Price/Payment plan you want to assign, then select when you want the service to expire and require renewal. If you want the service to renew 'today' then simply select today's date and the customer will be billed today. However, you’ll most likely want to set up billing to match the arrangement you currently have with your customer.
For hosting packages you'll need to add them to a plan. If you don't already have a plan you will need to first click on Add Plan at the bottom of the Access & Contracts section. Select the plan you wish to add.
Then on the plan select Manage > Manage Packages. You can then select the packages you wish to add to the plan.
 Austin B.
How do I view StackCP Users that don't have an assigned contract?
If you’re using HostShop you’ll want to ensure your StackCP Users have an assigned service and have a contract assigned to that service. It's to make sure that you’re paid for the service you’re providing.
It’s easy to identify which StackCP Users don’t have a contract using the Assigned Services report.
To find this, head to Hostshop > Assigned Services
You’ll be shown a list of all your StackCP Users that have assigned services, but who don’t have a contract associated with those services. You can then add the relevant contract to the service and StackCP User.
- Select Add Contract
- Select the StackCP User the contract will be assigned-to
- Choose the relevant contract you want to add (configured from your Product Catalogue)
- Choose the expiry date. Select today's date to start the billing right away.
- Select Add Contract
The StackCP User will now have a contract assigned aginst their service.
 Austin B.
How do I set a specific address only for customer invoices?
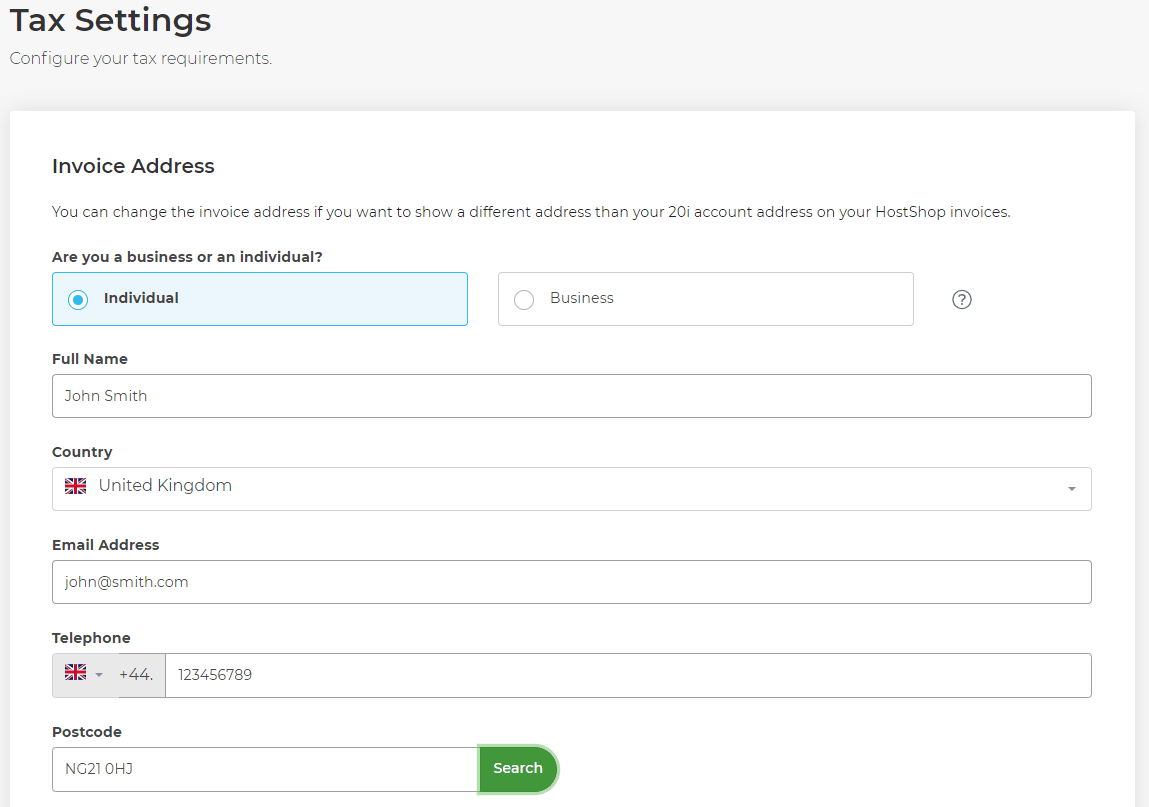
In some situations, you may wish to display a different address to what is set in your My20i account on your invoices – it’s possible to update this from HostShop.
First, head to Hostshop > Tax Settings. You’ll see your current address set under the Invoice Address section – if you wish to alter this, select Edit Invoice Contact.
Once you’re happy with the edits you’ve made, select Update Details – new invoices generated from this point will now show the contact information you’ve added.
 Dominic Elford
How do I create custom work quotes?
In HostShop you can send your customers Custom Work Quotes for 'one-off' payments or quotes for services you’re providing. They might be used for services that you don't want as a selectable product in your shop, but you do want your customer to make payment for using HostShop.
You can add a Custom Work Quote for an individual StackCP User by going to:
Manage Reseller > Manage StackCP Users > Options > Manage
Available towards the bottom of the StackCP User’s card is a subsection labelled Custom Work Quotes.

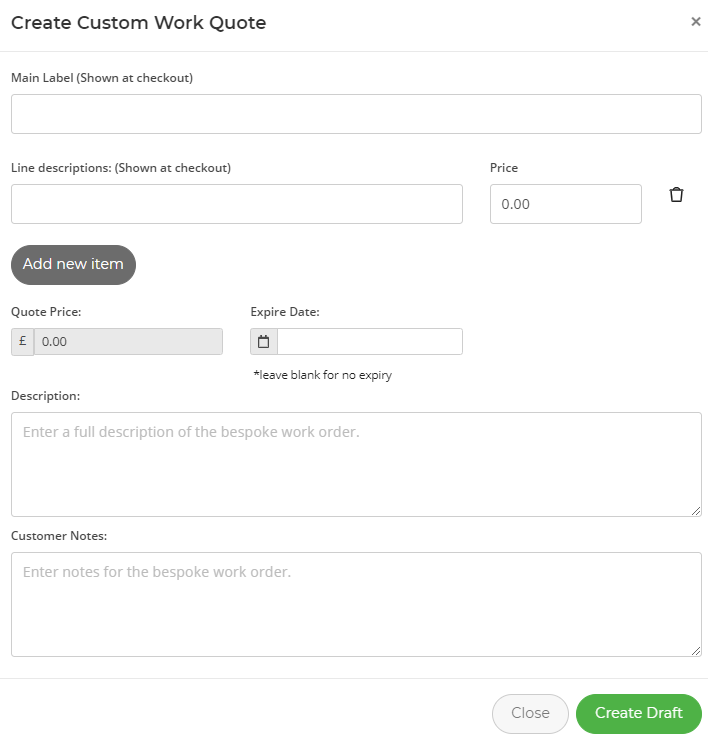
Select Create Quote. You’ll then be presented with a form to fill out with the information for the custom work, including a Mail Label and Line Descriptions for additional information which the client will see at their checkout. Once all the details are filled out, select Create Draft. The expiry date is the date at which the custom work quote will no longer be able to be purchased by the StackCP User.
Once you've created the draft quote, you'll be able to select Options > Edit. From here you then select Send Quote. This will send the quote to the StackCP User's email address. They'll then be able to select View Quote and Checkout directly from the email which will take them to their control panel.
The email that is sent is the email template called: HostShop: Custom Work Quote - customer. This can be modified in Email Templates.
Note: If you haven't already done so, you'll need to change the From Address of the template above to be the email address of your choice, select Options > Edit on the template above to change the From Address.
The customer will also receive a pop-up notification when they log into their control panel with a link to their custom work quotes.
 Dominic Elford
How do I manage fraudulent orders within HostShop?
To ensure the payments and orders you receive are legitimate, HostShop has an inbuilt fraud management system which will detect – based on certain factors – whether an order that is placed by a customer is abusive or potentially fraudulent.
If the order meets the required criteria for it to be flagged as abusive, it can be managed within the fraud checking facility available in Pending Orders.
To check this:
- Login to My20i
- Head to Hostshop > Pending Orders
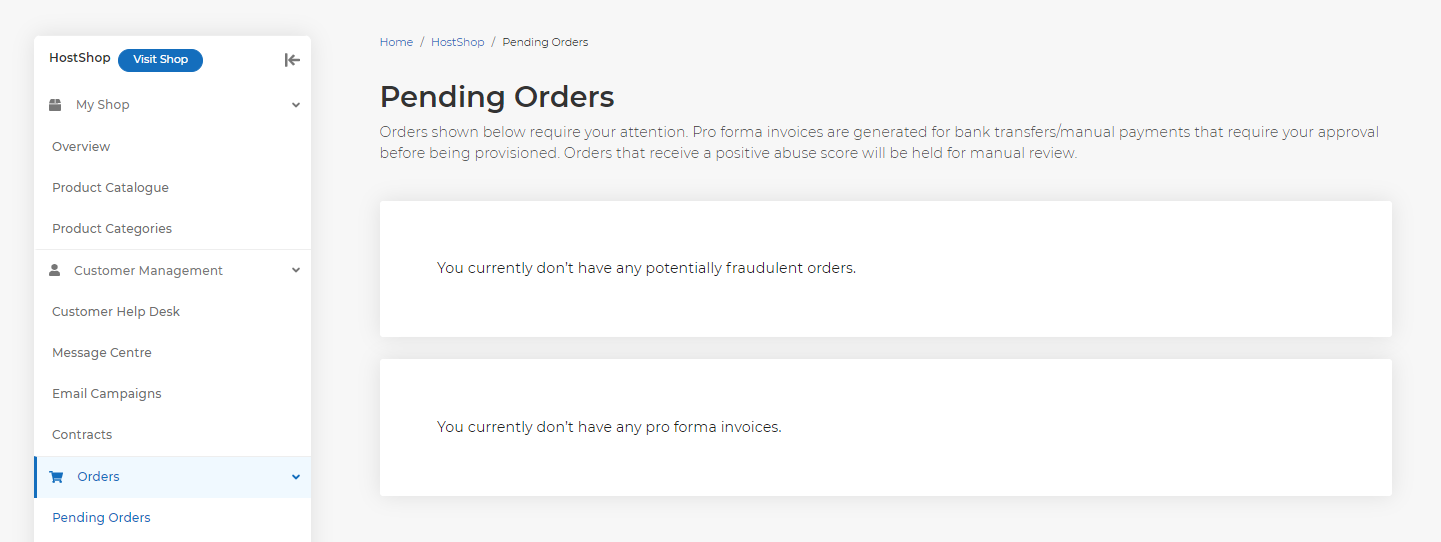
If you have any potentially fraudulent orders they’ll appear here. If you receive a fraudulent order you’ll be emailed to let you know as well.
To manage a fraudulent order, select View to see why the order has been flagged.
VPS are automatically flagged because VPSs are commonly used for abusive purposes.
We have three options:
- Complete Order - you can select this is you believe the order is from a genuine source
- Drop Order - select this is if the order looks genuine, but the customer has decided they don’t want to proceed
- Reject Order - select this if the order looks abusive. This means future orders by the same customer are more likely to be rejected.
 Dominic Elford
How do I resend a customer's email address verification email?
If a customer is trying to sign up and claims they haven't received an email verification notification then you can resend it for them.
You'll need to log in as the StackCP User, so head to:
Manage Reseller > Manage StackCP Users
Locate the customer trying to sign up by their email address and select:
Options > Sign in
You should then be prompted with the Not got the email? Resend. Select this and the email address verification email will be resent to them.
The email is sent from the email address you’ve specified in your email address email template setup via the Email Templates page.
 Dominic Elford
How do I manage my customers?
A core part of your business when using 20i HostShop will be managing new and existing customers.
When your customers sign up to your service from your control panel they’re automatically created as StackCP Users. This allows you to manage all aspects of their experience and service from within My20i.
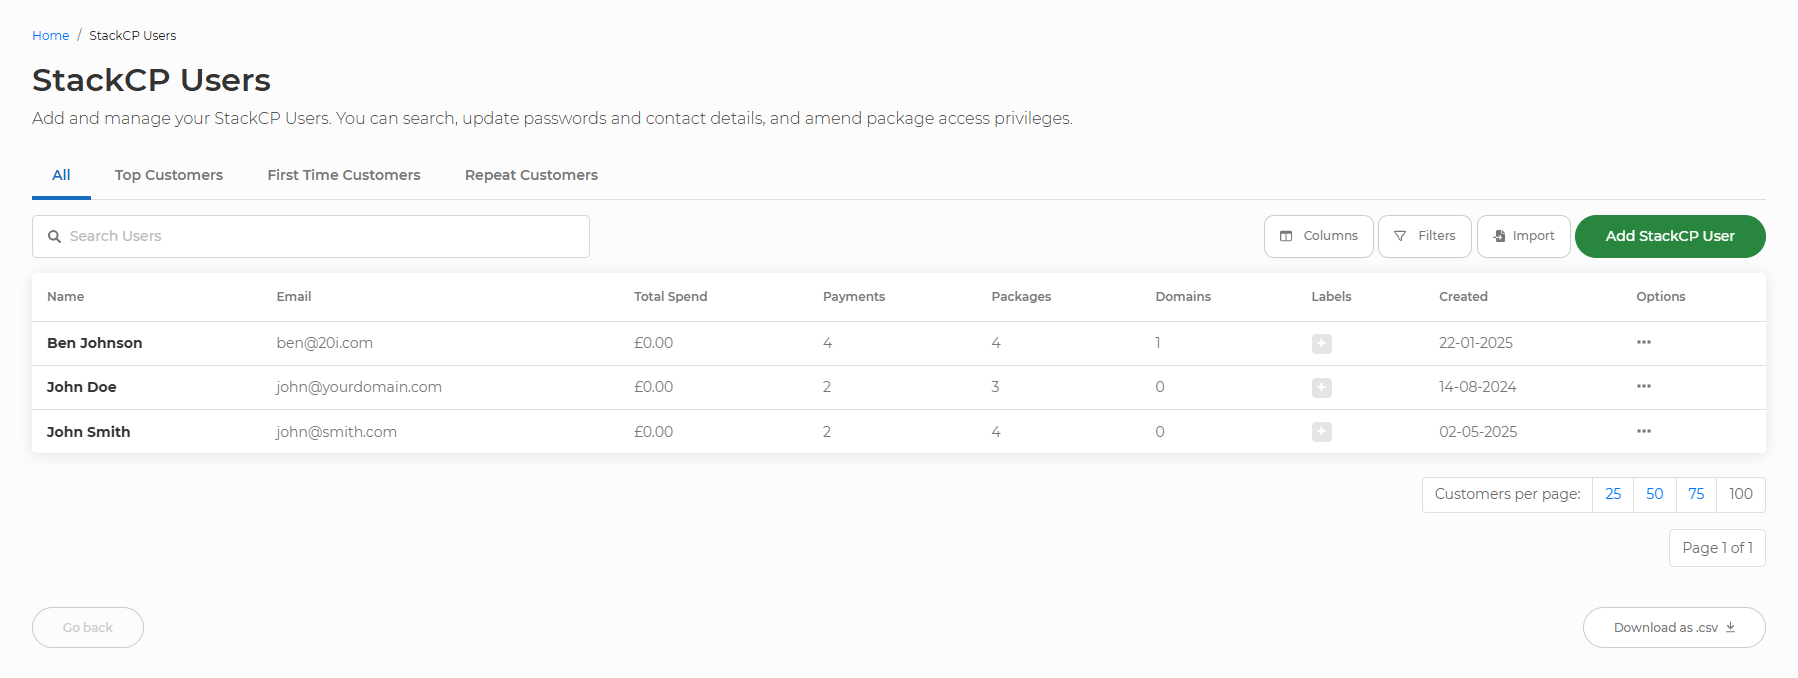
To manage your customers head to My20i > Manage Reseller > Manage StackCP Users
Here you’ll see a list of all your current customers with their name and email address. You can search for a specific user using the search bar or add a new user manually by selecting Add StackCP User.
To manage the customer, select Options > Manage and you’ll be taken to the StackCP User Card that contains information about your customer. You’ll find a range of options for you to manage:
Contact Details
These contact details are what your customer has set from within the Contact Details section of their account. It’s important that these details are accurate - so if they look invalid then it’s reasonable to request the customer ensures they’re accurate.
You have the option to Edit User Details should you need to update them on behalf of your customer.
Security
If your customer is using 2FA for their account login then their authentication device will be shown here.
Should your customer lose their authentication device (meaning they can’t access their account), we’d recommend asking them their security questions and then removing the device by selecting Delete next to the device in question. This will then allow the customer to log in using only their username and password as normal.
Access & Contracts
You’ll be shown a list of the services your customer has purchased from you. This could include hosting packages, domain names, SSL certificates, malware scanning or any other service you offer. On the right, you can Manage, Add Service to Plan or Remove Access. More information about adding contracts can be found here: Adding Contracts to Services.
If you'd like to assign an existing hosting package or domain name to the customer then you can select the service from the drop-down menu and select Add Access.
Payment Methods
Here you’ll see any payment methods your customer has added such as cards and direct debits.
Balance and Affiliate
Here you can see any balance the user has in their HostShop account with you.
Invoices and Custom Work Quotes
Here you can create custom work quotes. These allow you to charge the customer for work or one off items that aren't products available in the shop. For more information on this please see: Custom Work Quotes.
Here you can also see any invoices your customer has received
Tickets & Email Notifications
Here you’ll see all support tickets between you and your customers. You can quickly jump to the StackCP Help Desk by selecting View Ticket.
Master FTP Access
Master FTP allows the user to connect to all their hosting packages using a single FTP login, rather than individual ones for each hosting package. More information about Master FTP can be found here: How do I use Master FTP.
 Dominic Elford
How do customers sign up to HostShop?
A simple but important question!
With HostShop it’s very easy for leads to sign up and become paying customers with their own accounts to manage their services from.
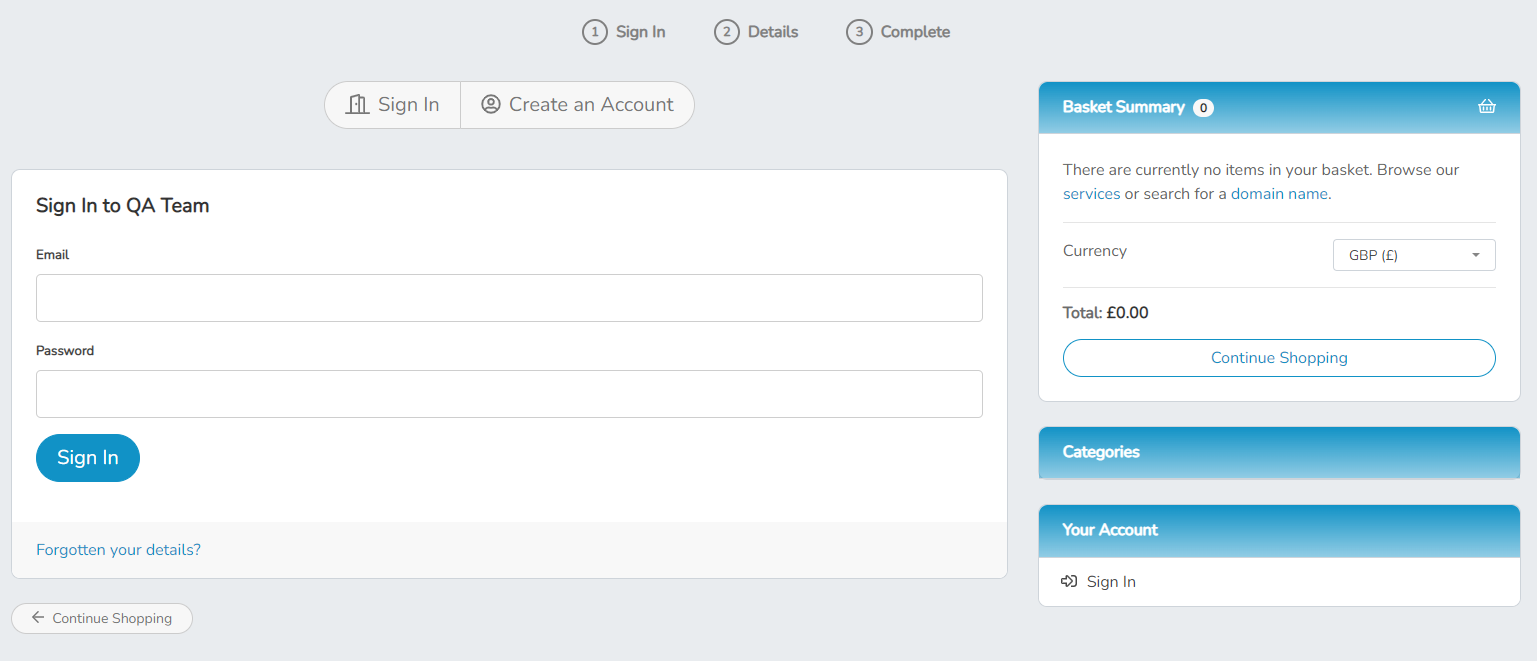
When they visit your shop and select to buy a product, they’ll be prompted to either Sign In or Create an Account.
When creating a new account, they’ll need to verify their email, then enter their contact details and add security questions. The process is:
Sign Up > Receive Verification Email > Complete Registration (Contact/Security Details) > Full Account Access
The customer can now proceed to make their purchase!
 Dominic Elford
How does the Renewal Sequence work?
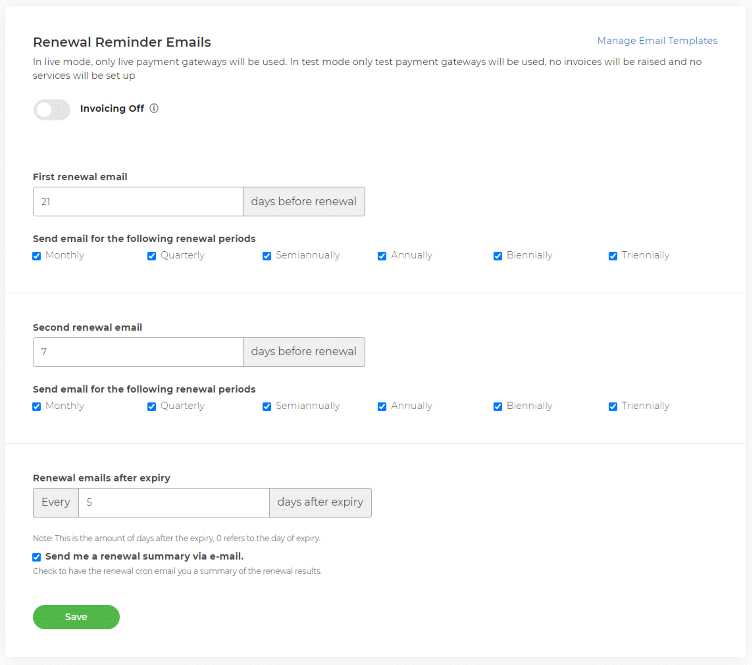
On the Renewal Sequence page you can manage the automated emails and actions that are triggered on renewal/expiry day of a service and the following days and weeks after the expiry. A default sequence is already in place for all services, but this is where you can make changes.
You can access the Renewal Sequence by going to My20i > Hostshop > Renewal Sequence
Renewal Reminder Emails
This the first section of the Renewal Sequence. Here you can set how many days before a renewal is due that a reminder is sent to the customer by email. There are two renewal reminder emails that are sent by default before each renewal. You can edit the content of these emails in the email templates section of My20i here.
At the top of this section you can also use the Invoicing On/Off toggle to control whether a payable invoice is sent to your customers at the same time as their renewal reminder emails allowing them to pay their renewal early.
Expiry Actions
The rest of the page is used to set what happens on the day of expiry for a service and in the following days, assuming the service is not renewed.
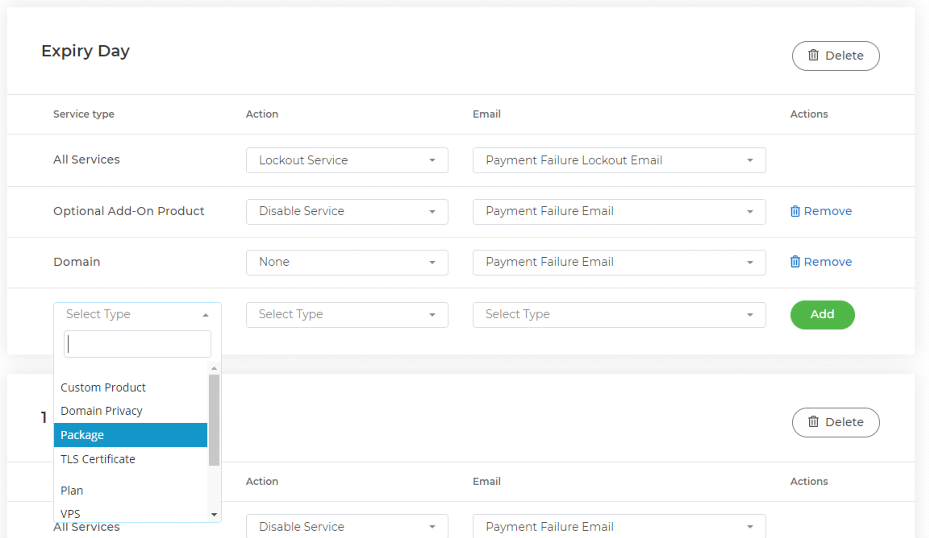
In this section you can set the actions taken for services and what emails are sent to your customers. There are default days preset here but if you scroll down to the bottom you can add add actions and email reminders to anything up to 60 days after the expiry of a service.
To do this, scroll down to the Add a Renewal Day to Schedule section, select a day from the dropdown and then select Add Day to Schedule.
When selecting what happens after the expiry of a service you can first select what types of services you want the following actions to effect.
Then you can select what actions you wish to be taken.
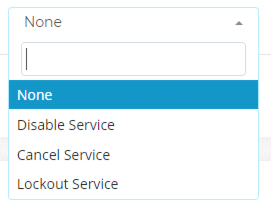
The options as you can see above are:
Disable Service - this will disable the overdue service
Cancel Service - this will cancel the overdue service
Lockout Service - this will lock the user out from their HostShop account until the overdue service is paid for.
Lastly you can select what emails you want to send. The emails' content can be edited in the Email Templates section of My20i.
 Dominic Elford
How do StackCP Users pay with balance in HostShop?
Before StackCP Users can pay with balance in HostShop you will need to either add balance as a product they can purchase or they will need to earn balance as commission from the affiliate system. You can find more information on these topics here:
Once a StackCP User has some account credit they can select it as the payment gateway at the checkout.
 Dominic Elford
How to sign up a customer manually in HostShop
One of the many benefits to 20i HostShop is the ability for your customers to sign up automatically without needing your manual intervention.
However, there may be times when your potential customer can’t sign up themselves online. So to avoid a missed opportunity you can sign them up manually.
To do this, head to:
Manage Reseller -> Manage StackCP Users
You’ll need to add a new StackCP User which will represent your customer.
To do so just select Add StackCP User. Enter their full details as accurately as possible. It’s important this information is valid because these details will be used for fraud prevention, and also so you can register domain names easily for this customer.
That’s all there is to it! You can now provide them with the email address and password for this user and they can use those details to log in to your custom control panel URL. (Forgotten what that is? Head to Your Brand and check under the Control Panel URLs section to find out).
 Austin B.
What are StackCP Users in HostShop?
A StackCP User is the account you create to give your customers access to manage their hosting and via StackCP - your customer's control panel.
Creating a StackCP User creates a username and password that you casn give your customer. This will enable them to log in to stackcp.com to manage their services. There is a guide on how to create a StackCP User here.
In the context of HostShop, they could be your paying customers who are receiving a service from you. When a new lead signs up from your shop, they’ll become your customer and a StackCP User will be created automatically and added to the list on the StackCP Users page.
 Austin B.