Email Hosting – Webmail Questions
Webmail support articles: if you want to use Stackmail - 20i's webmail service - here's some frequently asked questions answered.
What is the Stackmail Customer Login URL?
If you need to log in to Stackmail - 20i's free webmail available with all hosting packages - the URL they need is www.Stackmail.com.
If you have a reseller hosting account, you can change this URL to your own preferred brand in Reseller Customisation in your 20i account.
Frequently Asked Questions
Can I have an SSL on my branded webmail URL?
Yes, you can now add an SSL to your branded webmail URL. To do this, head to Reseller Preferences >> My Brand and scroll down to the webmail section. You'll see below where you've added your subdomain and webmail domain the ability to select SSL. This will add an SSL to your branded webmail URL.
Note: You'll only be able to add an SSL if you've select your 'Brand Domain', selecting (All Domains) won't offer the SSL option due to Let's Encrypt rate limiting rules.
What CNAMEs can I use to point webmail to my own brand?
Using the tool within My Brand adds the relevant CNAMEs for you so there's no need to add these manually. A branded webmail URL will be given the CNAME:
webmail.example.com -> CNAME -> stackmail.com
A branded URL with an SSL applied to it will be given the CNAME:
webmail.example.com -> CNAME -> webmail.stackcp.com
 Austin B.
How do I create an email signature in 20i webmail?
To create an HTML or plain text email signature that will be appended to all emails:
- Select Settings
- In the left column, select Identities
- In the next column along to the right, click on the email address for which you want you create or edit a signature
- Fill in signature details as necessary
How do I customise the 20i webmail login page?
As part of our White-Label Reseller Hosting you can customise the webmail (Stackmail) login page using HTML and CSS directly via the 20i control panel.
Here are some example CSS below to help you get started!
To add the code:
- Login to My20i.
- Head to Reseller Preferences -> StackCP Theme -> Locate the Webmail Login Page section near the bottom.
- The examples below will need to be entered in to the CSS field.
Note: Ensure you've loaded in the default HTML which is required for the CSS changes to be picked up.
Changing the StackCP Login Logo and Adding Branding
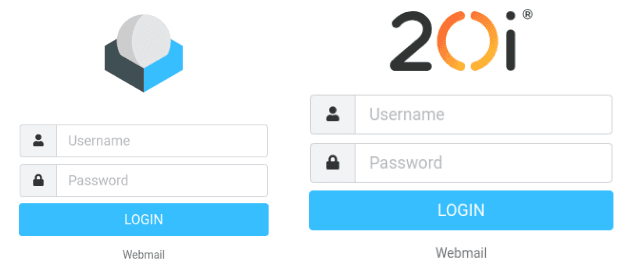
Should you wish to change the branding and logo on your Webmail form, you’ll need to modify the default HTML. On line 58 within the default HTML, you should see the following lines:
<div id="layout-content" class="selected no-navbar" role="main">
<img src="skins/elastic/images/logo.svg?s=1582888499" id="logo" alt="Logo">
<form id="login-form" name="login-form" method="post" class="propform" action="./?_task=login">
This is the HTML that adds the logo and form to the page – to alter the logo, simply change the src part of this line:
<img src="skins/elastic/images/logo.svg?s=1582888499" id="logo" alt="Logo">To the URL of the image you wish to use. For example:
<img src="https://mydomain.com/images/my-logo.svg" id="logo" alt="Logo">Note: The default size for the default webmail logo is 150x150.
In our example we've replaced the default webmail image with our business logo.

Altering the StackCP Login Form
If we wish to change the look of the form itself, we can use the following CSS:
#login-form {
background-color:#eee;
border-radius:10px;
padding:10px;
max-width: 400px;
}
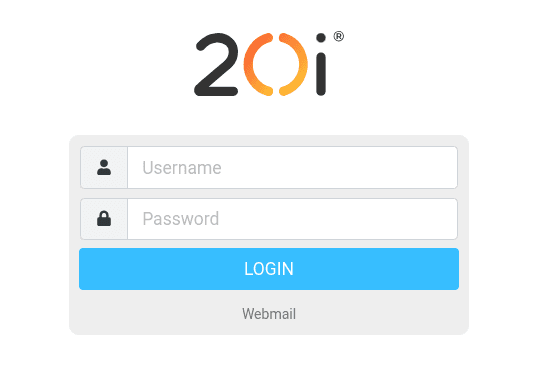
The #login-form section here adds a faint grey background colour to the form, adds some padding to better space the border away from the form entry fields, rounds the corners and increases the size. Modify these values to suit your preferences as needed. As is, this results in the following look:

Updating the StackCP Button and Form colours
Next, let’s modify the login button, and make some changes to the input fields to match the rest of the form. We can do this with the following CSS:
#rcmloginsubmit {
width:150px !important;
border-radius:20px;
background-color:#f7921e;
border:0;
}

#rcmloginsubmit:hover {
background-color:#dd7a08;
}

.form-control:focus {
border-color: #f7921e;
box-shadow: 0 0 0 0.2rem rgb(255,118,0,.25);
}
The #rcmloginsubmit selector handles the login button here – through this, we modify the size of the button, round the corners and change the colour. Update the hex value for the colour and the size values as per your preferences.
The #rcmloginsubmit:hover section handles the colour of the button when your mouse hovers over it – feel free to change the hex value to whichever colour you prefer.
Lastly, the section .form-control:focus controls the colour of the border around the form entry fields when the user has selected it.
This adds a glow that helps users see what section they’re currently inputting data to. Update the hex value to the colour you want for the border, and fill in the rgb values to match the shades you need for your glow colour.
Tools are available online to covert hex codes to RGB values, if required. The ‘.25’ refers to the level of transparency for the highlight (In a range from 0 to 1, in decimals), so if you wish to make this fainter you may wish to reduce it to ‘.1’.
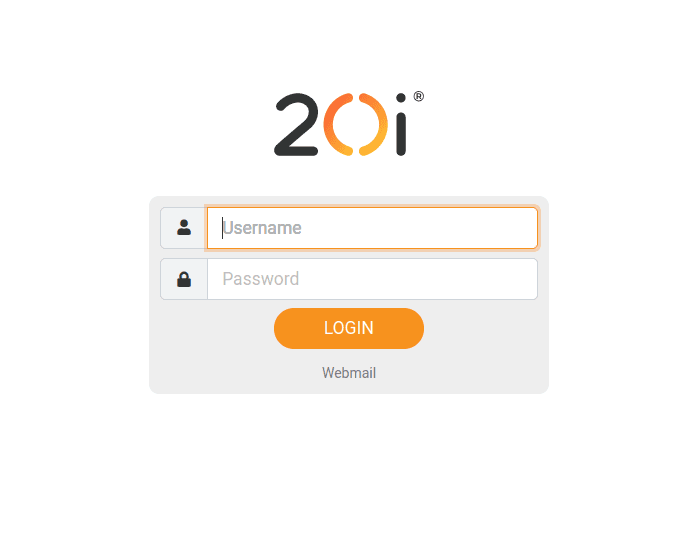
To follow on from our example above, you can see how the above CSS has updated the colours of the 'Login' fields and 'Login' button.

 Ruth Turner
Will installing the Roundcube One-Click affect current emails?
No.
The Roundcube one-click install provides a separate installation of Roundcube for you to manage, send and receive emails. This won't affect the standard stackmail.com webmail application.
As third party software, we can't help with the customisation of this software, but it can be used to create a more bespoke webmail client.
Our one-click install for Roundcube is available with our Web Hosting and VPS.
 Austin B.
How to access Stackmail
Webmail is an email service that allows users to access and manage their email accounts through a web browser, rather than using dedicated email client software installed on a computer or mobile device.
Any mailbox you create within 20i can be accessed using webmail which we call Stackmail. Webmail can be accessed in various ways, such as directly logging in or using the options within the hosting control panel to directly log into your webmail.
Using Single Sign On to log into webmail
There are a couple ways to directly log into a mailbox using single sign on. They can both be found on the Manage Hosting page.
Both options will show under the Email section:
![]()
The Email accounts page will show a list of all the created mailboxes for the hosting package you are managing.
When you click Options > Webmail this will automatically log you in to webmail for that mailbox.
There is also a webmail page under the email section. This will show a page with the mailboxes, but just has one link which will log you in to the webmail for the mailbox:
Directly logging into a mailbox
It is also possible to log into webmail directly by going to stackmail.com and using your email address and password to login.
If needed, you can change the mailbox password within the my20i control panel. This can be changed from Email accounts page on the hosting control panel. There is an option next to each mailbox for a new password to be typed and saved. Once saved that password will work immediately.
- The webmail URL can also be customised to fit your own reseller brand which is explained in this article: How do I set my custom webmail URL?
- It is also possible to customise the look of the webmail login page which is explained here: How do I customise the 20i webmail login page?
StackCP users can also use all of the above methods to log into webmail provided the package type for the hosting has the necessary permissions.
Webmail interface
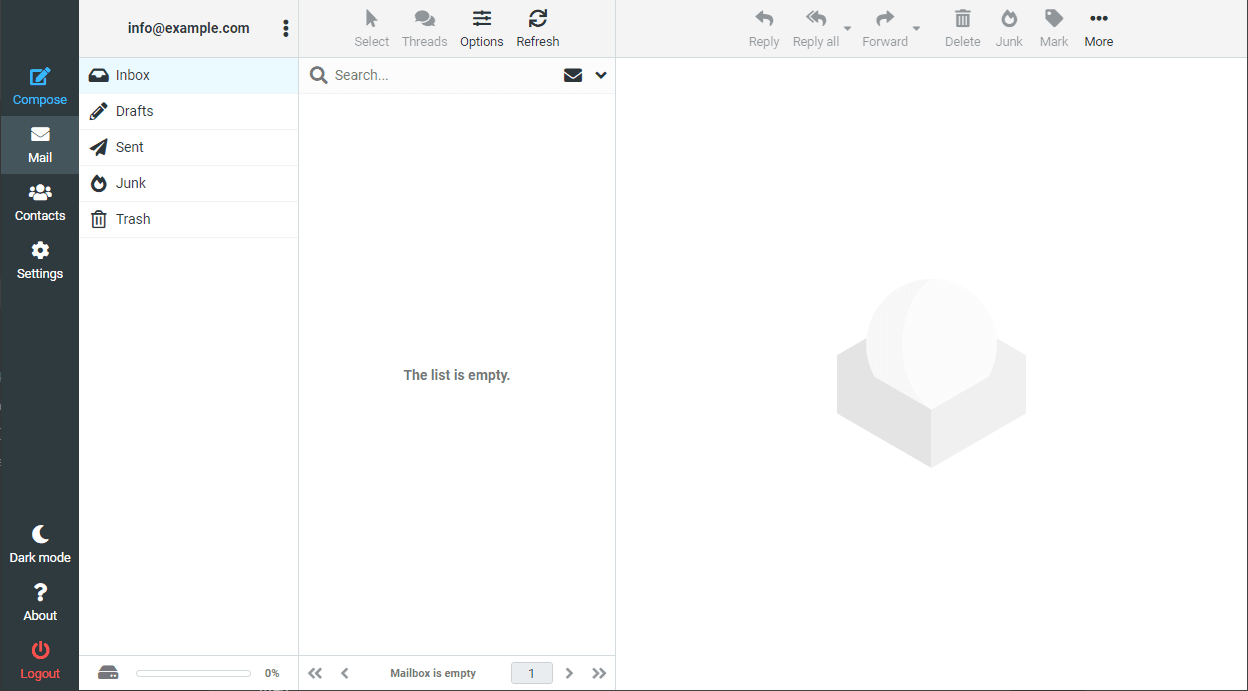
Once you have logged into webmail you will see this page:

Webmail will always show the mail tab first. This is where you can manage emails.
You can navigate the folders in the list on the left hand side, see the emails in the middle column and once you click on an email it will show the content on the right hand side.
There are other options on the left hand side such as compose which will open a page to compose a new email.
The contacts tab will show a list of the contacts saved for the mailbox.
The settings tab will allow you to change some of the settings for the mailbox as well as adding a signature, adding an autoresponder or changing the mailbox password.
The other options at the bottom will allow you to change between light and dark themes, check information about webmail and logout of webmail.
 Corey Seymour
 Jordan Graves