HostShop – Preferences Questions
HostShop preferences support: here's where you can find out how to manage and customise the HostShop Reseller tool to suit your needs.
How do I add multicurrency support in HostShop?
To add multicurrency support to your HostShop you first need to go to the Currencies page.
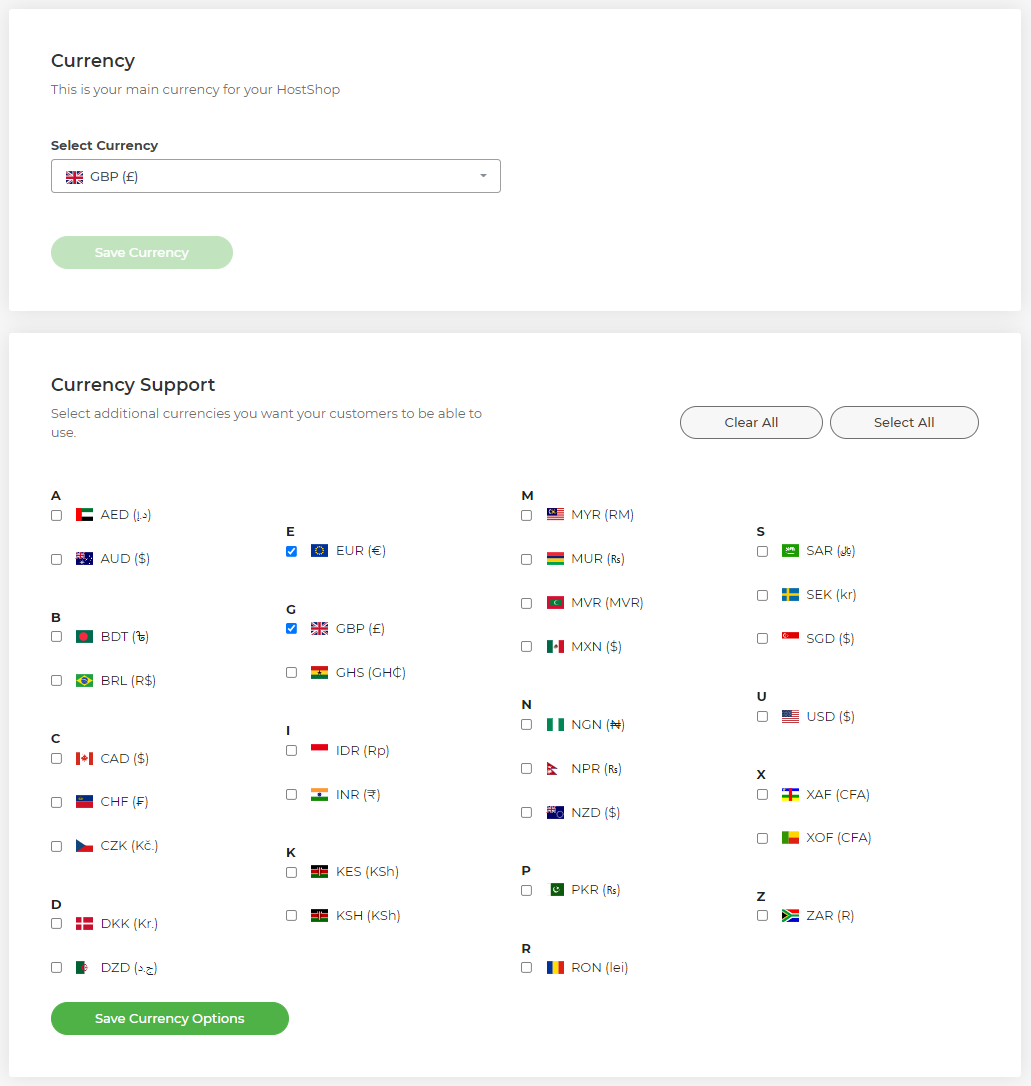
Here you can select the main currency for your shop. This will be the currency prices that are shown by default and you'll set your prices in this currency. The prices of products in other currencies will then be calculated based off the current exchange rate with the main currency.

Once the main currency is selected you can then select any other currencies you wish to support below that.

Any currencies selected will then display at the checkout for StackCP users the first time they make a purchase from the shop. They will then be able to make a choice of what currency they want to use at the checkout.

Note: Once a StackCP User has selected a currency this cannot be changed.
 Arron C
How do I edit my HostShop presales template?
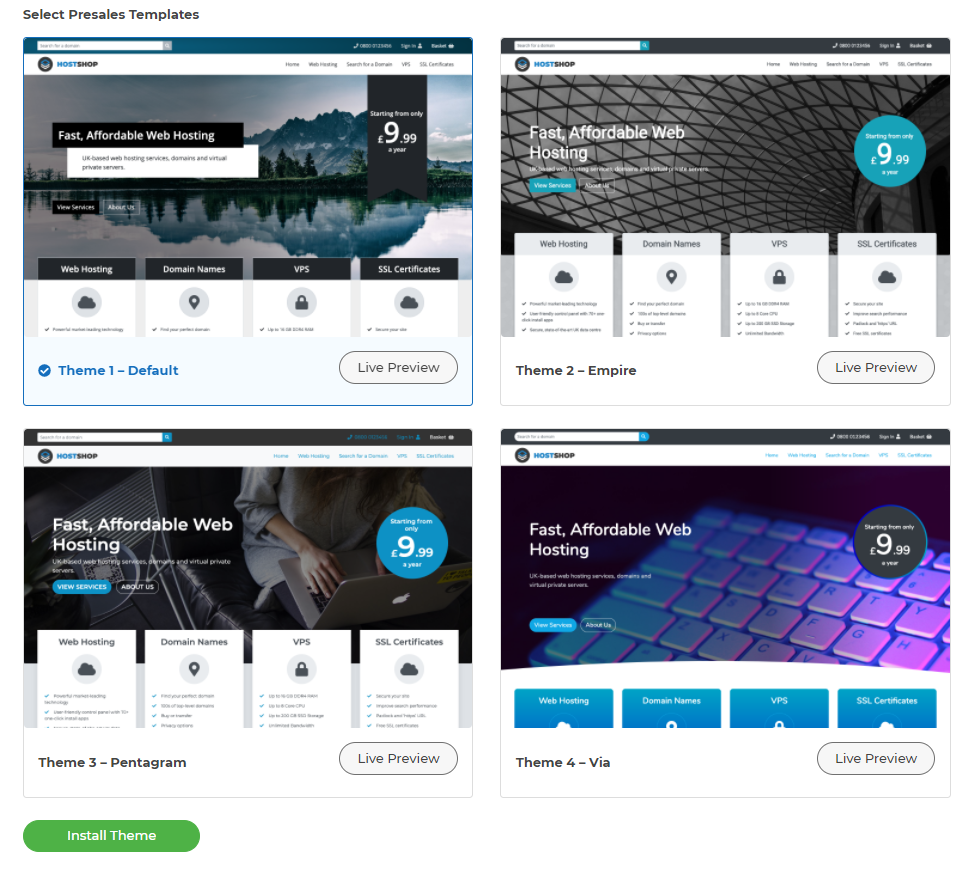
With HostShop we offer the ability to quickly and easily install one of our reseller website templates. They're aimed at a reseller of web hosting who does not currently have their own website and would like a head start.
The reseller hosting website templates are static HTML themes which you can customise to showcase the products you’ve set up within HostShop. They're managed from the Free Resources section in My20i. As they're static themes, data is not pulled in automatically from HostShop. So, to adjust the appearance, you’ll just need to edit the HTML and/or CSS of the template.
Note: We can’t provide development or coding support for presales templates, but we offer an example below.
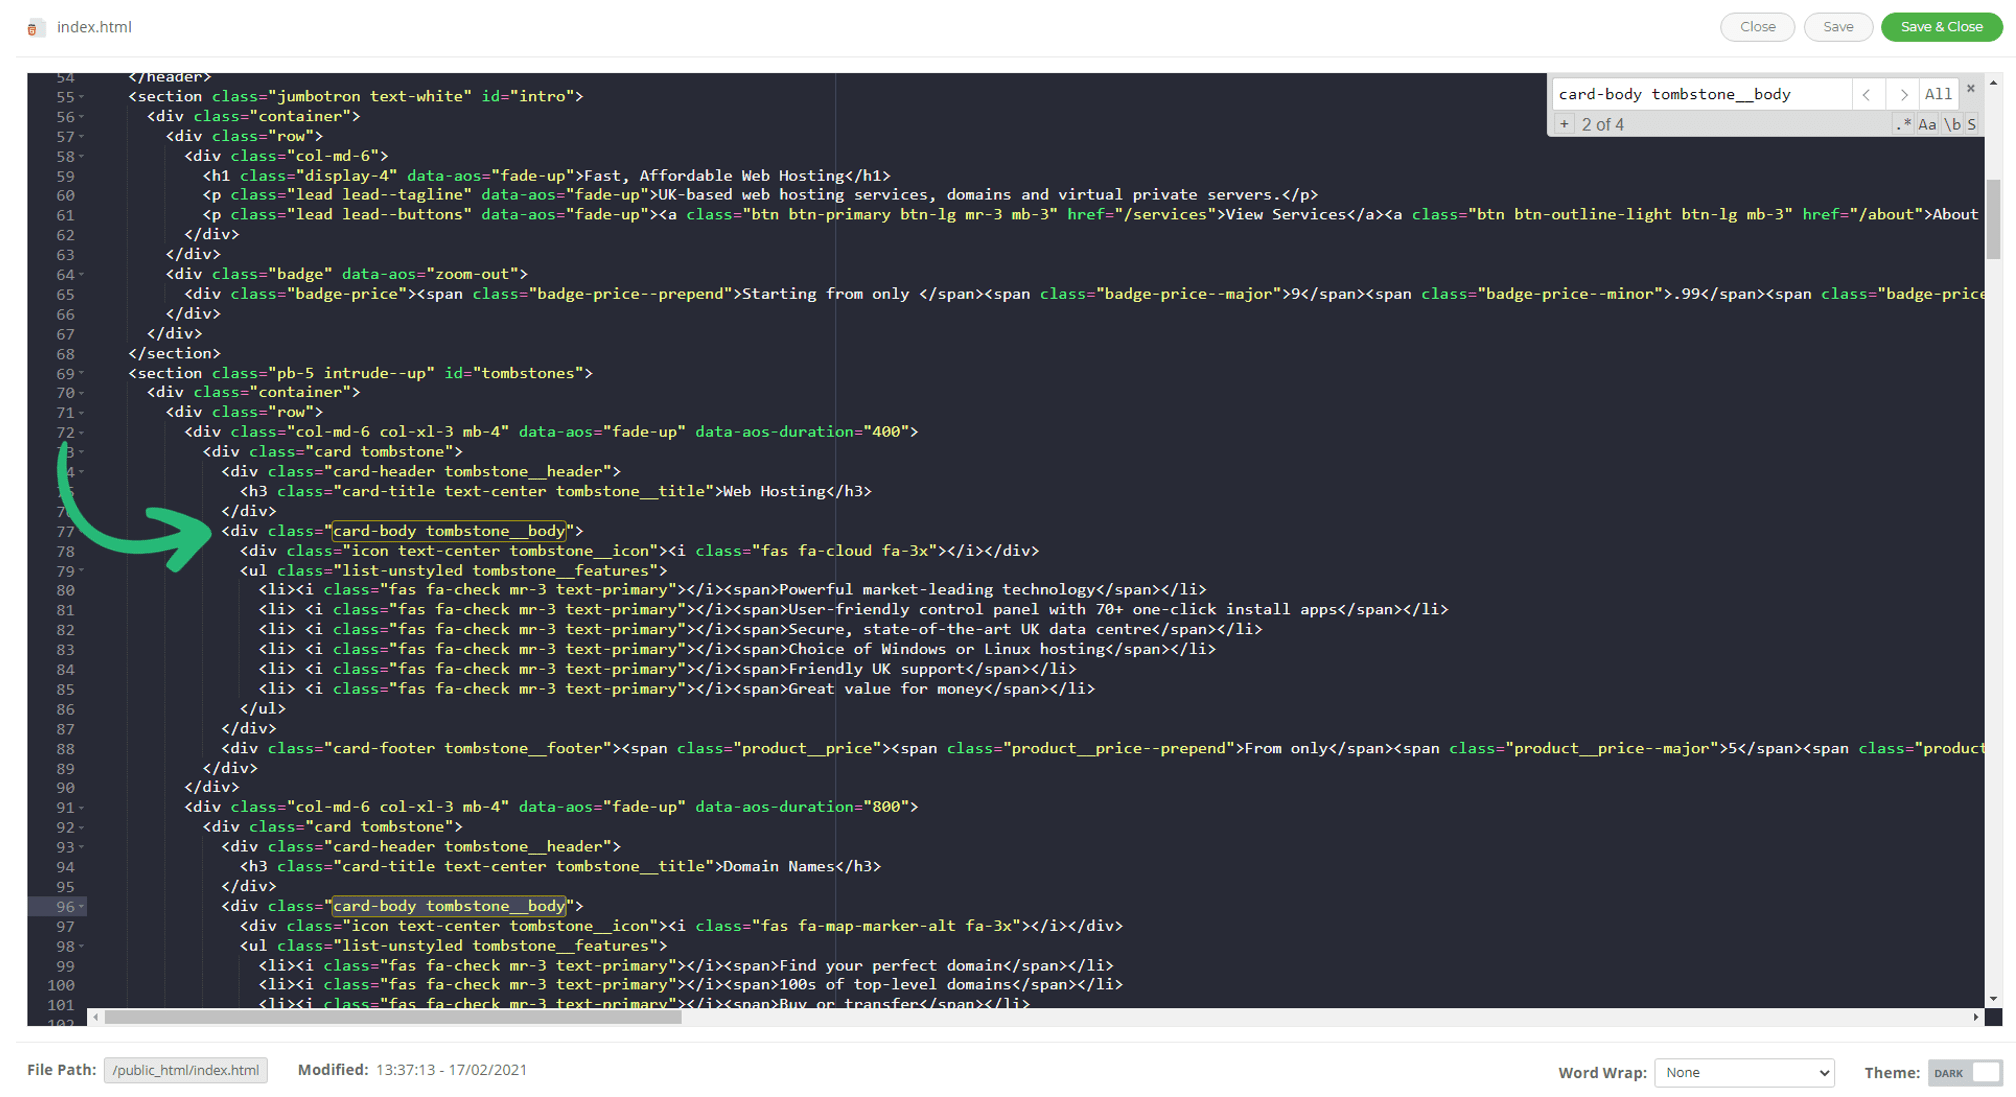
To edit your chosen template, connect via either File Manager or FTP. To change any information on the front page of a template, head to the public_html directory and edit the index.html. All other directories you see will relate to the different pages of the presales template.
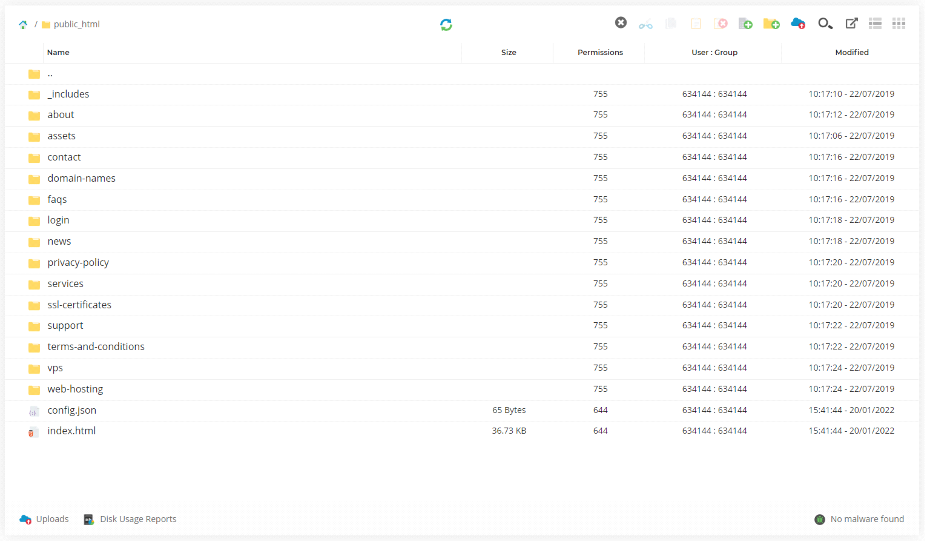
For example, if you wanted to edit the Web Hosting panel, you’d want to locate the following div class within the index.html file in public_html:
div class="card-body tombstone__body"
Within this div class, you can update the details that show in the Web Hosting panel.
If you need further assistance, we’d recommend contacting a web developer or using a CMS such as WordPress to create a sales site.
 Dominic Elford
Why won't my VAT number validate within HostShop?
We use the automated VIES VAT number validation system to automatically verify VAT numbers entered in to our system.
We recommend verifying that the company name registered with the European Commission matches your 20i account exactly. You can do that by comparing the differences:
- Enter your VAT number online at http://ec.europa.eu/taxation_customs/vies/ - without spaces - and note the "Name" field.
- Check your company name through My20i at Contact Details. If you have a different Trading Name set, this will be used for comparison.
While case sensitivity doesn't matter, minor differences do. For example, "Ltd" vs "Limited" would cause a verification failure.
If you're unable to verify the number online, it will be the same for our automatic system so in most instances it's just a case of trying again later.
If you see !! or || when checking your VAT number against VIES you can safely omit anything after those characters when entering your company number into the contact details section at 20i, this will still pass their validation checks.
 Austin B.
How do I change the currency in HostShop?
In HostShop you can change to your local currency. We currently support over 20 currencies, but please let us know if you need yours added.
To do this:
- Log in to My20i
- Head to HostShop on the side navigation.
- Select Payments and then Currencies
From here, you can select your main currency from the dropdown menu, then select Save Currency.
You can also select Additional Currencies that are available for your customers' use by selecting the corresponding currencies using the checkboxes and then select Save Currency Options.
 Dominic Elford
Can I add discount codes in HostShop?
Yes, you can add various discount codes in HostShop by going to the Discount Codes page.
To create a new discount code you click the button labelled + New Discount Code.
When creating a code you need to fill in the required fields marked with an asterisk (*). These are, the discount code name, description, start date, discount amount and the products the code can be applied to. If one of these fields is not filled out you will not be able to save the code.
There are a number of additional options available to add to a discount code. These can be found under the Advanced Options drop down.
Once discount codes have been created they can be edited and deleted from the Discount Codes page.
 Dominic Elford
How do I integrate HostShop with my current website?
HostShop is designed so that you can easily add the shop your current sales site. You do this by linking to the relevant HostShop URL from your live sales site.
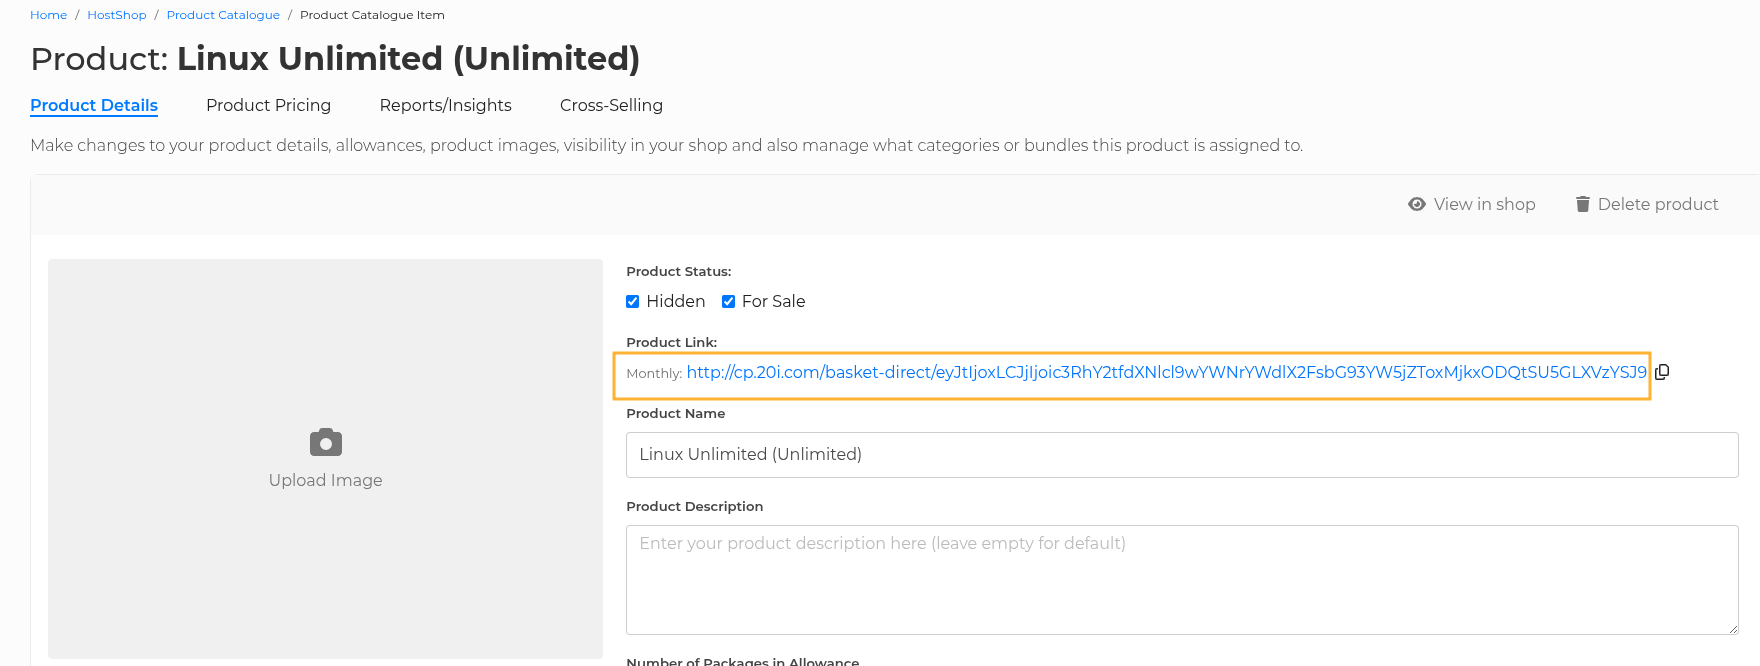
We display the URLs you’d need to link-to on the Product Catalogue page.
For each product, there’s a Product Link. When linked-to from an ‘Order Now’ or ‘Buy Now’-style button on your site, it will get the customer to the right page to complete their order.
Integrating a domain availability checker
If you have a domain availability checker already embedded on your website, you can link this to automatically search the HostShop one by:
- Change the form action URL to: https://cp.example.com/domain-search?domain=mydomainsearch
- Change the request type to GET (if possible)
Then the domain availability checker will link to your HostShop availability checker. It will be pre-filled with the domain that's already been searched for.
 Dominic Elford
How do I offer hidden products, purchasable only via a direct link?
If you wish to make a product purchasable only via a direct link rather than being publicly accessible via the shop, you can set a product to Hidden. This will prevent it from showing on your HostShop order page when users and customers view your shop. The generated link provided in your Product Catalogue will still work as normal, allowing you to still offer these products directly to specific clients as required.
To make a product hidden, head to your Product Catalogue within My20i by going to Customers > Product Catalogue. On the product or service you wish to hide, select the Hidden checkbox, but make sure the For Sale checkbox is selected as normal.
When selected, this product now will no longer appear in your HostShop, but you will be able to send customers the Product Link to buy the product directly.
 Dominic Elford
How do I use the 20i Invoice Designer?
If you're using HostShop and are sending invoices to customers you can use 20i's in-house Invoice Designer.
It allows the creation of create bespoke, branded invoices for your web hosting business. You can use dynamic tags to display content specific to your customers and customise every element of the invoice.
To access the invoice designer, head to Hostshop> Invoices > Invoice Designer.
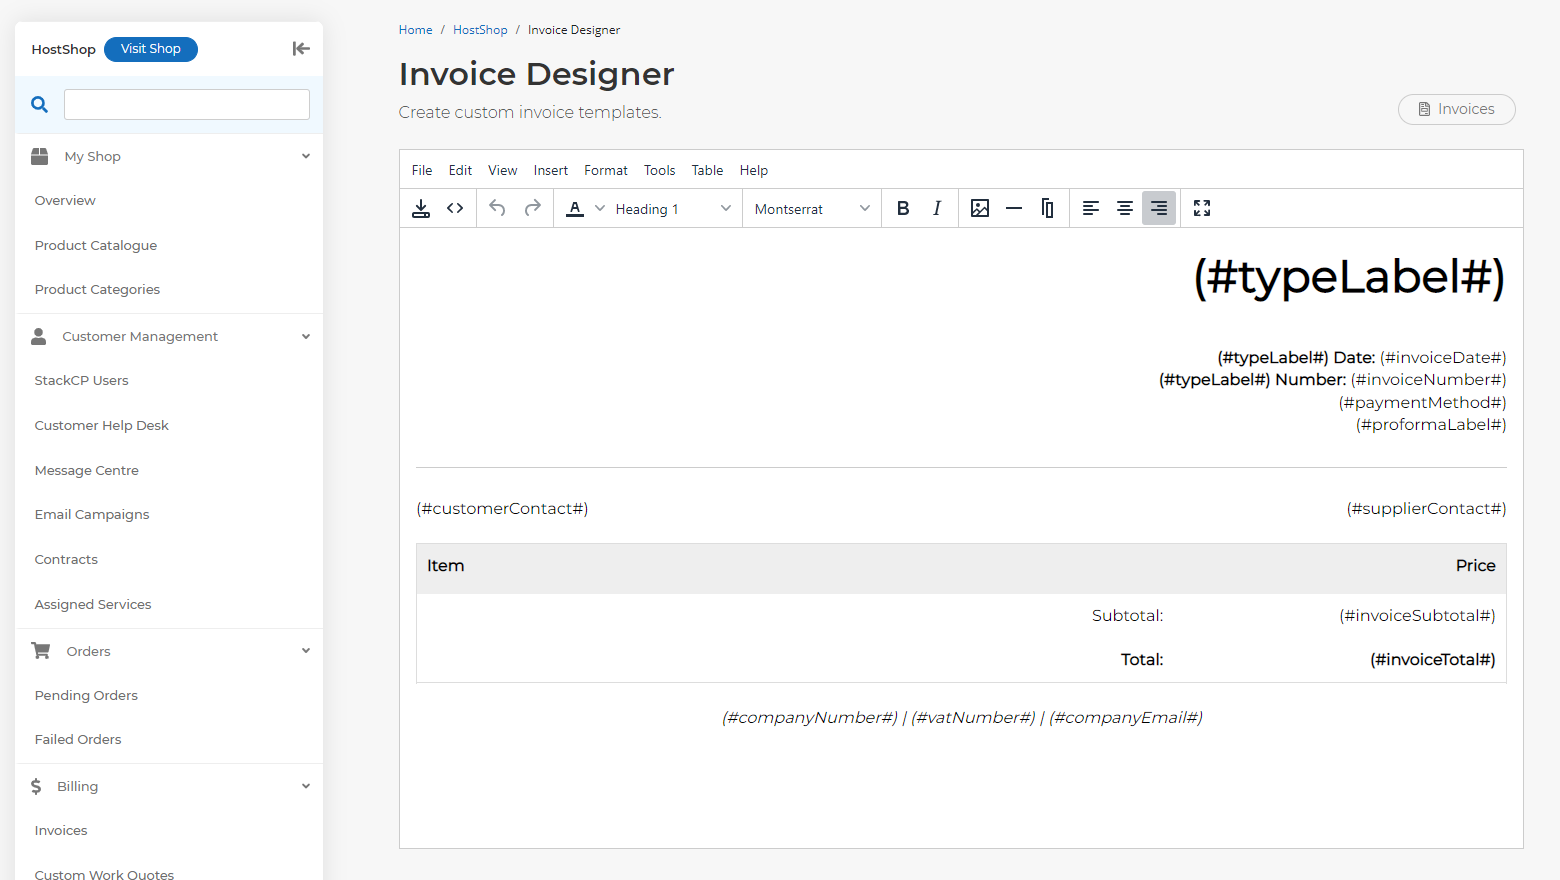
You can view the available dynamic tags by selecting the Help menu.
Every element of the invoices is customisable. So when you're done editing, select the Save icon to ensure your design is used.
 Dominic Elford
How to add custom categories to HostShop?
By default your HostShop will have six product categories. These are:
- Web Hosting
- Managed Cloud Hosting
- Domain Names
- Additional Products & Services
- SSL Certificates
- Virtual Private Servers
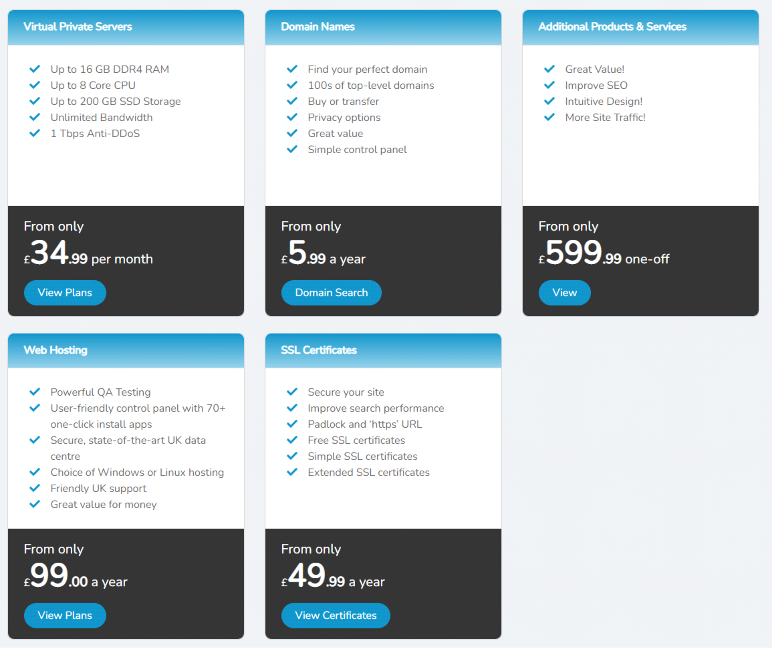
As well as these categories, HostShop gives you the full flexibility to create custom categories, to better suit your business' product range.
To add a new category:
- Go to My20i > HostShop
- Visit Product Catalogue
- Click Add New > Category
When adding a category you need to configure the following:
Visible - This determines whether the category shows in your shop. Normally, you would want to ensure this is visable.
Category Name - the name the category will be known by
Description - the description of the category shown in the shop
Products - The products that are to be in the category.
Link Text - this is the text shown on the button users click to go to the category
Sidebar Icon - here you can set a FontAwesome class to be used as an icon for the category. You can find a list of available icons here.

 Chris Wright
How do I change the HostShop tax (VAT) rate?
If your business is not based in the EU then we don’t know what your tax (VAT) rules are, however you can manually add your own VAT rate by:
- Logging into My20i.
- Head to Hostshop > Tax Settings.
From here, you can adjust your VAT to the rate that’s applicable to your country.
 Dominic Elford
HostShop and VAT
If you're a UK business and are Value-Added Tax (VAT) registered, then you can enter your VAT number on the Tax Settings page. This will ensure we add VAT to the HostShop basket when your customers add products.

If you are not VAT-registered, then please be aware that the prices of the domains listed do not include VAT.
This means that the markup suggested does not include the VAT we charge you on the domain.
We show these prices excluding VAT because generally you’ll be a VAT-registered business and it’s standard business-to-business pricing practice to not include VAT (as it can be claimed back if you’re VAT registered).
 Dominic Elford
How do I set up HostShop URLs?
To set up the main HostShop URLs you need to decide on two things - what your brand domain will be, and what subdomain you’d like your HostShop to appear on.
Your brand domain will generally be where your sales or front-end website is, for example: example-hosting.com
The HostShop subdomain will be where your customers can buy and checkout with products, as well as manage their current packages and services - for example: my.example-hosting.com
You can set these two options in Reseller Customisation using the Control Panel URLs area. The Brand Domain will be the main branded domain of your site, and the Control Panel / Hostshop subsection will define what subdomain your HostShop displays on.

Note: After setting your brand name and HostShop subdomain you’ll want to make sure you add a payment gateway so you can open your shop.
 Dominic Elford
How do I set up PayPal as a payment gateway?
As a hosting reseller, you need to be able to receive money from your customers. To do this you’ll need to set up a payment gateway. PayPal is the most commonly-used payment gateway, so if you’re looking to get started then we’d recommend adding PayPal first.
To setup PayPal as a HostShop payment gateway:
Log in to My20i
Select Payment Gateways from the navigation menu on the left-hand side.
From the Add a Payment Gateway section, select PayPal.
Note: Your PayPal account must be Business Account. It’s simple to upgrade if you need to, please refer to the guide here.
To get these details:
Log in to the PayPal Developer area with your normal PayPal login details.
Head to the PayPal Apps & Credential section if you're not already taken there.
Make sure you're in the Live section as this is required to configure a live payment gateway.
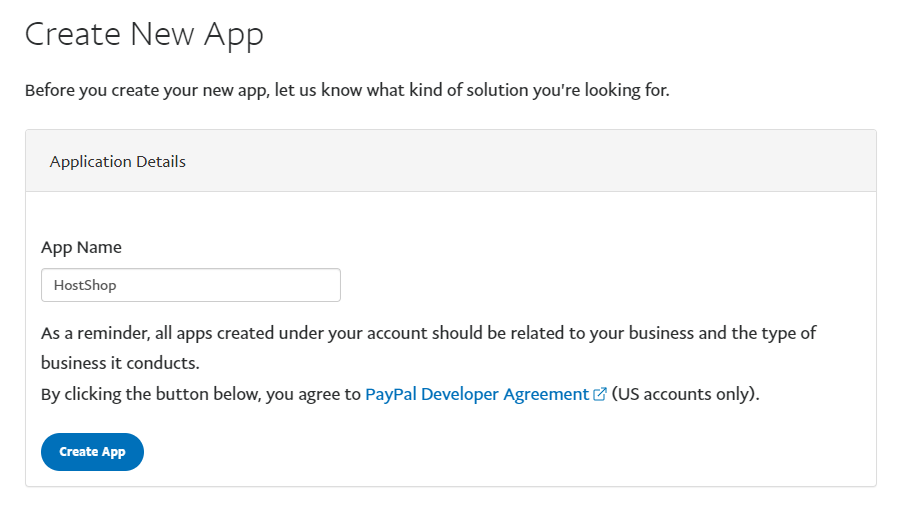
Select Create App.
Give your app a name. In our example we've called ours HostShop.
Select Create App.
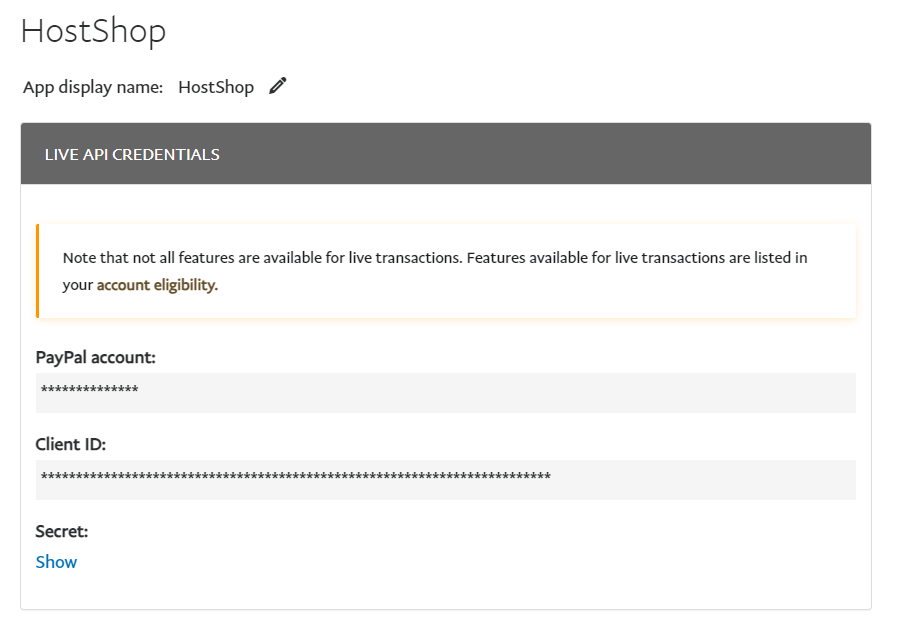
You'll now see your Client ID and the Secret required to set up the payment gateway. Select Show to Secret Key.
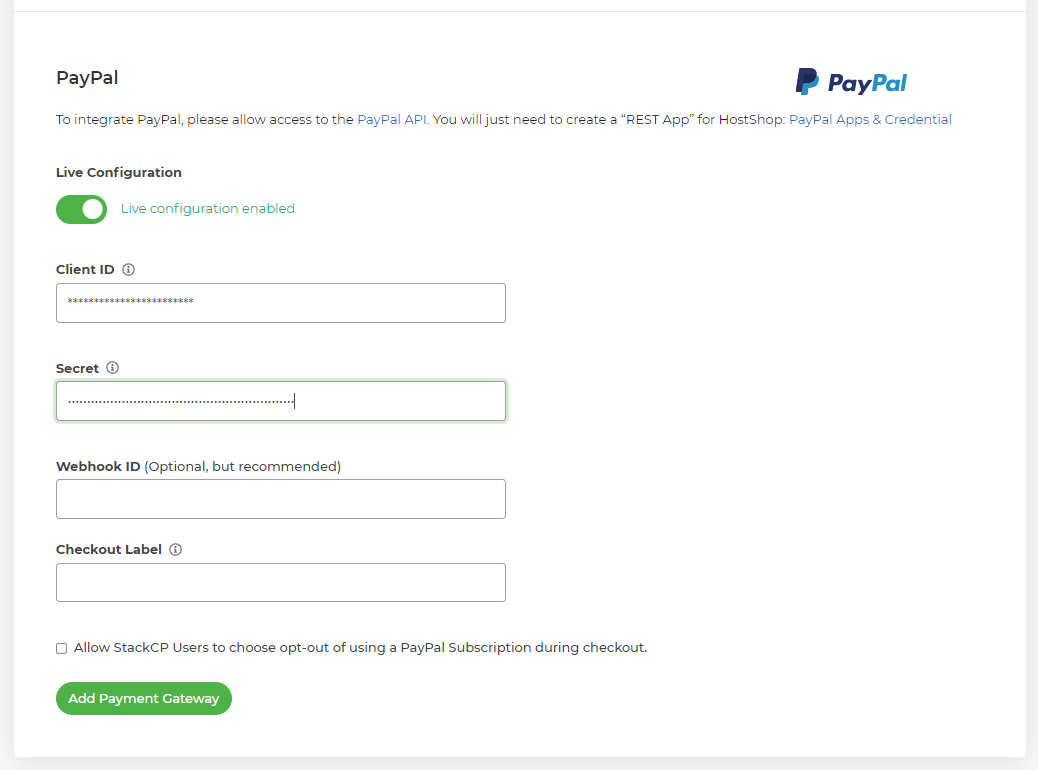
Copy the Client ID and Secret into their respective fields within 20i.
Select Add Payment Gateway.
PayPal will now be set up and enabled. This means that when customers head to your shop, they'll be able to select PayPal as a payment method from the basket to pay for your services.
 Dominic Elford
How does the Renewal Sequence work?
On the Renewal Sequence page you can manage the automated emails and actions that are triggered on renewal/expiry day of a service and the following days and weeks after the expiry. A default sequence is already in place for all services, but this is where you can make changes.
You can access the Renewal Sequence by going to My20i > Hostshop > Renewal Sequence
Renewal Reminder Emails
This the first section of the Renewal Sequence. Here you can set how many days before a renewal is due that a reminder is sent to the customer by email. There are two renewal reminder emails that are sent by default before each renewal. You can edit the content of these emails in the email templates section of My20i here.
At the top of this section you can also use the Invoicing On/Off toggle to control whether a payable invoice is sent to your customers at the same time as their renewal reminder emails allowing them to pay their renewal early.
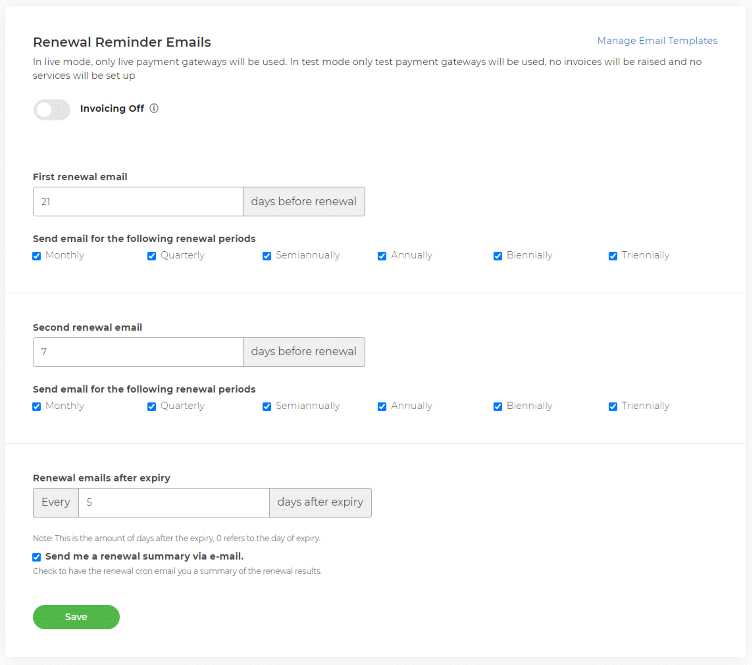
Expiry Actions
The rest of the page is used to set what happens on the day of expiry for a service and in the following days, assuming the service is not renewed.
In this section you can set the actions taken for services and what emails are sent to your customers. There are default days preset here but if you scroll down to the bottom you can add add actions and email reminders to anything up to 60 days after the expiry of a service.
To do this, scroll down to the Add a Renewal Day to Schedule section, select a day from the dropdown and then select Add Day to Schedule.
When selecting what happens after the expiry of a service you can first select what types of services you want the following actions to effect.
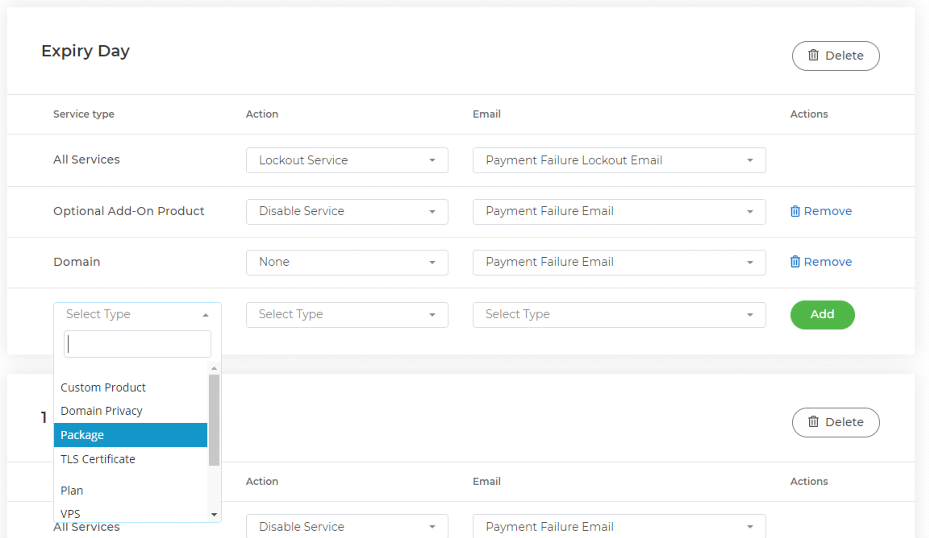
Then you can select what actions you wish to be taken.
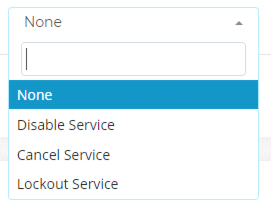
The options as you can see above are:
Disable Service - this will disable the overdue service
Cancel Service - this will cancel the overdue service
Lockout Service - this will lock the user out from their HostShop account until the overdue service is paid for.
Lastly you can select what emails you want to send. The emails' content can be edited in the Email Templates section of My20i.
 Dominic Elford
How do I setup Stripe as a payment gateway?
Stripe is a well-regarded payment gateway provider you can use to take credit and debit card payments from your customers. It’s very easy to set up and link with 20i HostShop.
In order to set up Stripe as a payment gateway:
- Log in to My20i
- Head to the Payment Gateways section and select Stripe from the list of payment gateways.
Now head to your Stripe account and go to the Developers section: https://dashboard.stripe.com/apikeys
Note: You’ll need to make sure your Stripe account has been activated, follow the guide here to see how to do that.
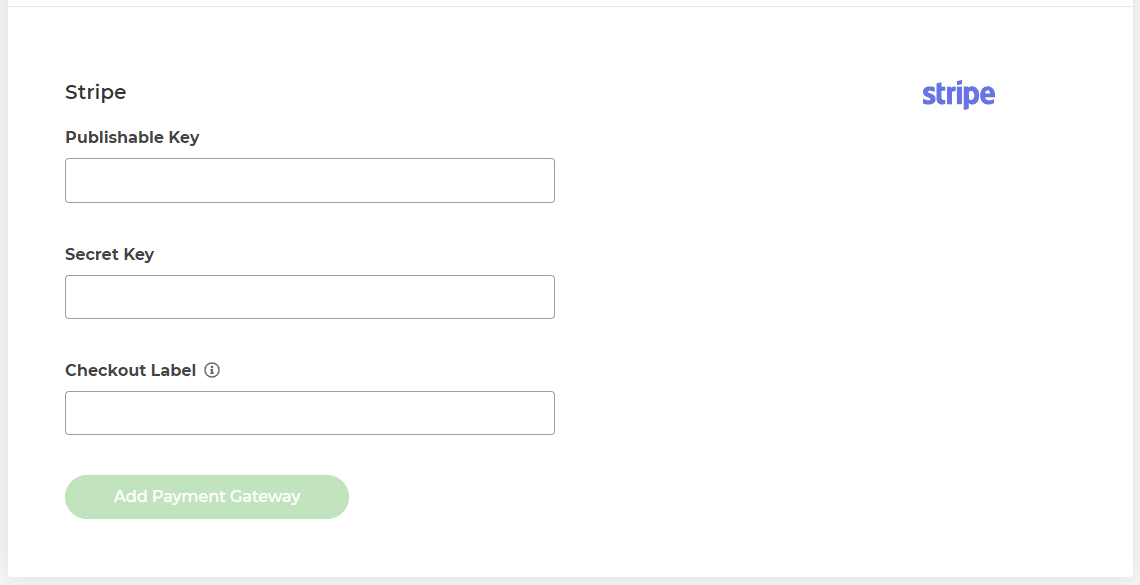
From here, you’ll need your Publishable Key and Secret Key. Copy each key into the relevant field within My20i.
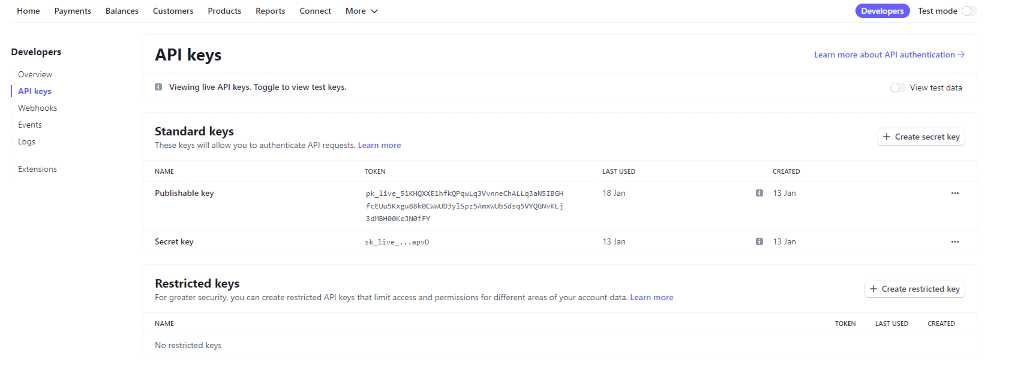
Once done, select Add Payment Gateway.
You'll now be able to accept credit and debit card payments from your customers.
 Dominic Elford
How do I set a specific address only for customer invoices?
In some situations, you may wish to display a different address to what is set in your My20i account on your invoices – it’s possible to update this from HostShop.
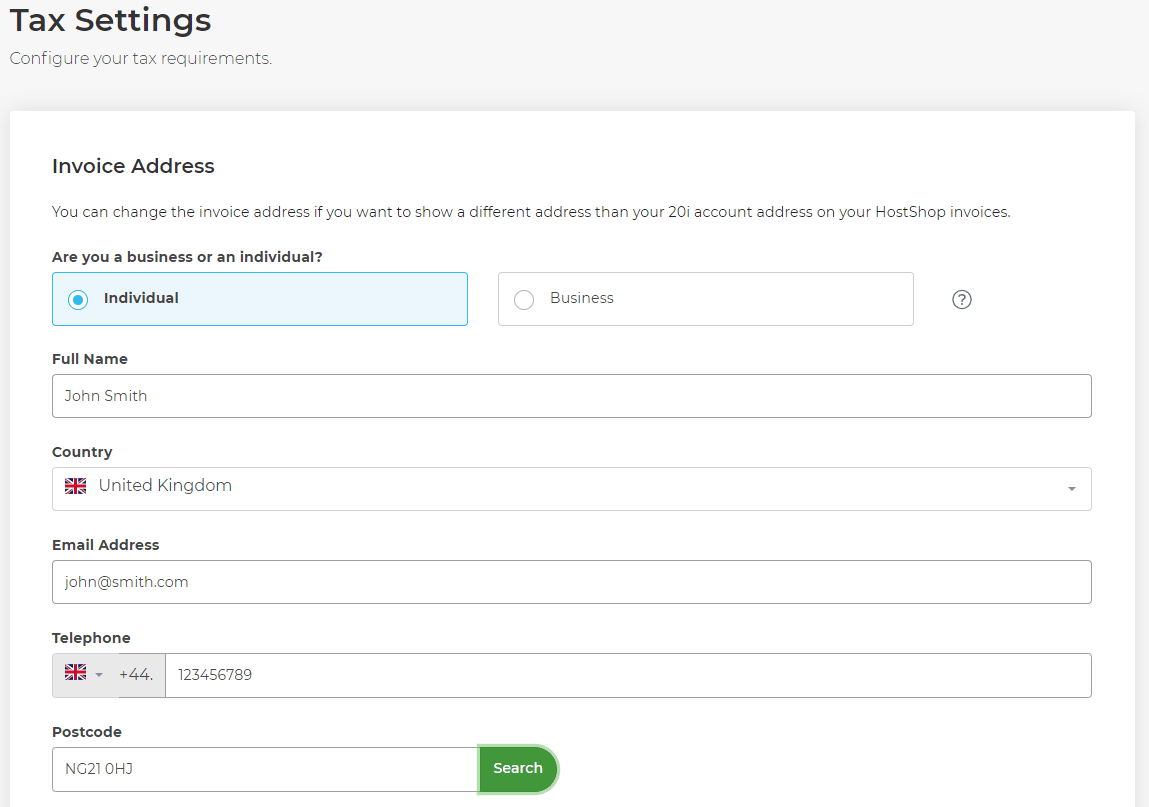
First, head to Hostshop > Tax Settings. You’ll see your current address set under the Invoice Address section – if you wish to alter this, select Edit Invoice Contact.
Once you’re happy with the edits you’ve made, select Update Details – new invoices generated from this point will now show the contact information you’ve added.
 Dominic Elford